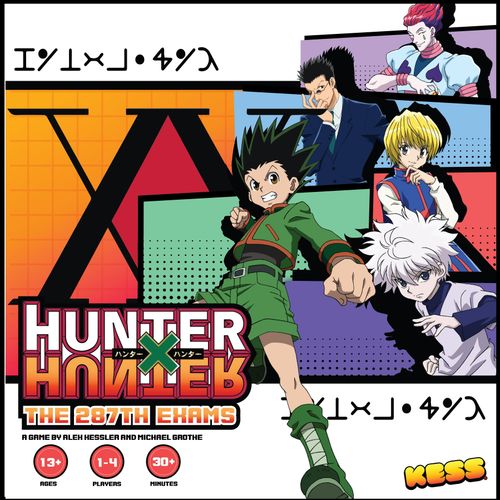
Hunter X Hunter: The 287th Exams
Hunter X Hunter: The 287th Exams Rulebook
Table of Contents
Table of Contents
Components
- 5 Character Dashboards
- 45 Enemy Cards
- 30 Final Exam Cards
- 9 Examiner Cards
- 5 Character Standees
- 4 Damage Cards
- 4 Hunter License Cards
- 1 Start Player Token
- 20 Purple Dice
- 20 Green Dice
- 14 Red Dice
- 20 Red Wound Cubes
- 3 types of Reflex Tokens
- Reroll Tokens
- 25 Skill Cards
- 5 Helper Cards
- 1 Dice Bag
Set-Up
Before we begin the exams, follow the set up in this order:
-
Each player picks a character and takes the corresponding dashboard, Character Standee, Skill Cards, and starting dice depicted on their dashboard.
For example: Gon's dashboard says to take 3 Strength Dice, 2 Insight Dice, 1 Spirit Die, and 1 random die from the bag. Gon pulls an additional Spirit Die as his random die and he is ready to go!
-
Take all the Enemy Cards and remove any cards for more players than you are playing with. The player count symbol can be found in the lower right hand corner of the Enemy Card. Return those cards to the box.
-
Separate the remaining Enemy Cards into the five different colors. Each of these colors represents enemies encountered in the five Hunter Exams. Set the shuffled pink enemies to one side of the play area. This is the starting Enemy Deck.
-
Create the Enemy Reserve Deck by shuffling the remaining colors separately and stacking them in the following order: white (bottom), red, purple, blue (top). These Enemy Cards make up the Enemy Reserve Deck and will be added to the Enemy Deck during play as the players progress through the exams.
-
Place Enemy Cards from the top of the Enemy Deck out in a row so that there are one more than the number of players out (e.g. five cards for a four player game, four cards for a three player game, etc).
-
Each player chooses a die from their starting pool and places it on one of the slots on their Dashboard Abilities (see Dashboard Abilities).
-
Shuffle the Examiner Deck and place it near the play area. Reveal the top card of the Examiner Deck to be the Examiner for the first round (see Examiner Deck).
-
The youngest player takes the Hunter's Mark and goes first.
Layout
Example Setup (as shown on the layout page)
- Grab Skills, Dashboard, Standee, and Dice
- Remove extra Enemy Cards
- Create Enemy Deck
- Create Enemy Reserve Deck
- Deal Enemy Cards
- Choose Dashboard Ability
- Deal out Examiner
- Youngest gets Hunter's Mark
The layout diagram labels the Enemy Deck, Enemy Deck Discard Pile, Experience Pile (enemies you've eliminated), Examiner Deck, Enemy Reserve Deck, Wound Cubes, Damaged Dice, Active Dice (placed on your dashboard), and the Starting Player Mark. Character skill cards start locked and vertical, and are turned horizontal when unlocked.
Objective
The goal of the game is to make your way through the Exams, getting stronger so that you can pass the Final Exam and get your Hunter License! Players will run into other hostile examinees, who they must defeat to improve their skills. As enemies are defeated, players progress through the five exams and the trials they face become more difficult.
At the end of the game, each player will have to win against their final opponent. If they do, they obtain their Hunter License!
If the majority of players have received their Hunter License by defeating their final opponent, the group wins!
For an extreme test of skill and teamwork, all players must earn their License to win.
Steps of a Round
The steps of a round are as follows:
- Each player places their standee on an available Enemy Card in turn order. The player with the Hunter's Mark goes first, with the turn order moving clockwise.
- Each player rolls any number of their dice simultaneously.
- Each player spends Reroll Tokens, Reflex Tokens, and uses their Skills and Abilities to modify their die roll and claim rewards from a Challenge on their Enemy Card.
- If your roll is too low to claim any rewards on the chosen Enemy Card, you fail the Challenge and receive no rewards.
- Play continues to the left, with the Hunter's Mark being passed to the next player.
Dice
Dice are used to either defeat Enemy Cards or to power up your Dashboard Abilities. There are three types of dice:
- STRENGTH - Green dice. Used to defeat any green or white Challenge on an Enemy Card.
- INSIGHT - Purple dice. Used to defeat any purple or white Challenge on an Enemy Card.
- SPIRIT - Red dice. Used to defeat any Challenge on an Enemy Card.
When a player uses a die, they remove it from their dice pool and it becomes damaged. Players cannot use damaged dice until they are healed (see Rewards) or they completely run out of dice (see Wounds).
Each Challenge has a color and a number. To defeat a Challenge, the dice used must match the color and match or exceed the number shown. Any die or combination of dice may be used on a Challenge with a white die.
Reminder: Spirit Dice may be played as any color, but only Spirit Dice may be played on a Spirit Challenge. The reminder's diagram shows a Spirit (red) die used on a green 5 Challenge (checked), a Spirit die used on a red 2 Challenge (checked), and a Strength (green) die used on a red 3 Challenge (crossed out).
Enemy Cards
Enemy Cards have Challenges on them represented by one or more numbers and colored dice with rewards for each. Enemy Cards also have a Final Exam Condition (see Final Exam) on them to add a twist to the final battle with the players if they make it that far!
The Enemy Card diagram is labelled: Exam, Experience Value, Challenges, Rewards, Enemy Examinee, Final Exam Condition, and Player Count.
Choosing and Resolving a Challenge
- Each player takes turns choosing an available Enemy Card to roll against. Enemy Cards that other players have already played on this round may not be chosen. The player with the Hunter's Mark chooses their Enemy first, proceeding clockwise.
- Simultaneously, each player rolls any number of dice of any color or combination of colors from their pool of Active Dice or dice on dashboard abilities to try and match or exceed the challenge numbers on their Enemy Card.
- Players may spend Reroll Tokens to reroll one of their rolled dice. Players may repeat this process any number of times as long as they have Reroll Tokens to spend.
- If players have skills or abilities that change the value of their dice or their allies' dice, they may use them.
- Example: Gon's skill "If you roll exactly one die, double the result" turns a single die showing 6 into 12.
- Players may spend any number of Reflex Tokens matching the type of one of their rolled dice to increase that die's value by one for each token spent. Examiners or character skills or abilities may also change the value of a given Reflex Token.
- Each player may add any number of their rolled dice together and compare the total value(s) to the Challenges on their Enemy Card. When adding dice together, they may only be used on a Challenge in which all the dice could be used.
Example: Gon's dice roll a Spirit die showing 2 and a Strength die showing 3. Gon wants to hit the 7 Strength Challenge, so he spends 2 Strength Reflex Tokens on the Strength die and adds the Spirit die to it, making his total 7.
After rolling, each player picks a Challenge on their card that their dice match or exceed and take the rewards. If a player is unable to defeat any of the Challenges on the card they selected, then they get no rewards.
Reminder: Some of the later Enemy Cards have Challenges with multiple numbers. Players may add dice together to defeat each number, but each number must be defeated separately by one or more dice.
The Challenge icons are: Insight (purple eye hexagon), Strength (green fist hexagon), and Spirit (red flame hexagon).
End of the Round
Once each player has collected their rewards, the round is over! To begin the next round:
- Each player takes their Character Standee back.
- Any Enemy Cards still in play are put in the Enemy Deck discard pile.
- Deal out Enemy Cards from the Enemy Deck until there are one more than the number of players.
- The Hunter Mark rotates to the next player in turn order. That player will be the start player for the next round.
If there are no cards left in the Enemy Deck to deal out:
- Count the number of cards in the Enemy Deck discard pile and add cards from the Enemy Reserve deck until there are the same number of cards as in the starting Enemy Deck (15 for four players, 12 for three players, 9 for two players, 6 for one player).
- Shuffle the Enemy Deck discard pile and the added cards from the Enemy Reserve deck to create a new Enemy Deck.
- Reveal a new Examiner from the Examiner Deck to replace the current one and begin play for the next round.
- Deal out Enemy Cards into a row and rotate the Hunter's Mark to the next player as normal.
Example of a Turn
Example: Gon chooses a card by putting his standee on it. Then he rolls a Spirit and a Strength die.
The Spirit die rolls a 2 and the Strength die rolls a 3. Gon wants to hit the 7 Strength Challenge, so he spends 2 Strength Reflex Tokens on the Strength die and adds the Spirit die to it, making his total a 7!
Gon then collects his reward of 3 Insight Tokens and Eliminates the card.
Examiner Deck
Examiners change up the rules of the exam to keep examinees on their toes. At the start of the game, deal out an Examiner Card. Each time you shuffle the Enemy deck and add new examinees to it, deal out a new Examiner to replace the old one.
The Examiner Deck has nine Examiner Cards. Each card's rule is printed below:
- If a player rolls a 3 or a 4, reroll that die.
- If a player rolls a 6 or a 1, reroll that die.
- When a player uses a Reroll Token, they reroll all their rolled dice.
- All Strength Dice get -1, all Strength Reflex Tokens get +1.
- All Insight Dice get -1, all Insight Reflex Tokens get +1.
- All Spirit Dice get -1, all Spirit Reflex Tokens get +1.
- All Reflex Tokens may be used as though they were any type. All dice get -1 to their result.
- All Dice get +1 to their result for each wound the player rolling it has taken this game. Players may not use reflex tokens.
- Players may not heal except by taking a wound.
Wounds
At the beginning of a player's turn, they may choose to take a wound and refresh all their dice. The player takes all damaged dice, returns them to their dice pool undamaged, and may place one of them on a Dashboard Ability. Then they take a Wound Cube and put it onto one of the wound slots on their dashboard. You may only choose a wound slot that you can pay the penalty for, unless there are no others available. If a player runs out of dice, they immediately take a wound and refresh their dice.
The wound penalties are:
- Lose two Reroll Tokens
- Take a "-2 Experience" Card
- Lose three Reflex Tokens (any type or combination of types)
- Damage two dice
If a player gets four wounds, they are out of the game! The other players may continue playing if they choose, as long as the majority of players are still in the game.
Reminder: The -2 Experience Card goes in your Experience Pile and counts as -2 experience. You keep any skills you've unlocked, but you'll have farther to go before unlocking future skills!
Dashboard Abilities
At the start of the game and each time a player refreshes their dice from taking a wound, they may also pick one additional die to use on a Dashboard Ability. As long as a Dashboard Ability has a dice slotted in it, its effect is active. Players may roll the dice that are slotted into their abilities, but if they do, they lose the effect.
Note: Gon has Dashboard Abilities with two slots. These abilities apply to each die placed and can apply to the same type twice!
The Dashboard Ability slots shown on Gon's dashboard read:
- Slot 1: "+1 to Reflex Tokens of this type"
- Slot 2: "When you roll this die add +1 for every other dice on your dashboard to any player's dice of the matching color"
- Slot 3: "Once per turn, you may increase the result of any player's die for each of these colors by 1"
Reminder: Many Dashboard Abilities will care about the type of die used, so make sure to use the right one!
Enemy Reserve Deck
As players progress through the exams, more challenging enemies will begin to appear! Whenever a reward contains the Eliminate symbol (see Rewards), that enemy is Eliminated. Take the card and place it near you as your Experience Pile. Eliminated Enemies are how you get experience and unlock your character's skills! Whenever the Enemy Deck runs out, add more enemies from the Enemy Reserve deck (see End of the Round).
Reminder: When the Enemy Deck runs out and needs to be shuffled, add cards from the Enemy Reserve Deck until the Enemy Deck has the number it started with (15 for a 4 player game, 12 for a 3 player game, 9 for a 2 player game, and 6 for a solo game). Then shuffle them to create a new Enemy Deck.
Rewards
Along the way, players will be able to collect rewards defeating Enemy Cards or from their Skill Cards.
One-Time Rewards
- Reflex Token: Get a Reflex Token. Spend to add one to one of your rolled dice of a matching color. If you get a white Reflex Token reward, you may choose which Reflex Token you receive. Some skills or abilities may change the amount added by a given type of Reflex Token.
- Reroll Token: Gain a Reroll Token. Spend to reroll any rolled die.
- Heal: A moment to rest! Heal as many dice as shown on the Health reward space. Take that many non-Spirit Dice from among your damaged dice and return them to your undamaged dice pool. Spirit Dice may not be healed in this way.
- Damage: Damage one of your undamaged dice.
- Add a Random Die: Grab a random die from the bag and add it to your dice pool damaged.
- Add a Specific Die: Look through the bag for the corresponding die and add it to your dice pool damaged.
- Train: You may pay the shown number of Reflex Tokens once to get a random die from the bag and add it to your dice pool damaged. Any combination of Reflex Tokens may be used.
- Eliminate: Take the card you defeated and add it to your Experience Pile. Then add a card from the Enemy Reserve Deck to the general discard pile.
Persistent Rewards
- Plus or Minus Die: When you roll dice of the corresponding type, add or subtract the amount shown.
- Plus or Minus Reflex Token: When you spend a reflex token of the corresponding type, add or subtract the amount shown.
Skills
Each character has Skill Cards that they gain access to as they gain experience.
When a player has enough experience from Eliminated Enemies in their Experience Pile to match or exceed the number shown on the side of their Skill Card, they gain access to that skill. Some skills will give a passive benefit, but some will give immediate rewards!
Reminder: To easily keep track of which skills you have access to, keep them sideways until you have enough experience!
Example: Gon's skill "Whenever you roll a six, you may put a die from your pool onto an empty dashboard ability" is shown locked (vertical) until unlocked, then turned horizontal.
Final Exam
Once there are no more cards in the Enemy Reserve Deck, the Enemy Deck will get smaller each time an Enemy is eliminated. At the end of a round, if there are less than 10 cards total in the deck, the Final Exam begins:
- Discard the current Examiner.
- Shuffle the remaining Enemy Cards and deal one each player. During a player's Final Exam, the Enemy dealt to the player will change up the rules of the fight with their Final Exam Condition in the lower right corner. See the Final Exam Conditions section below for reference.
- Deal each player a card from the Final Exam Deck face-up.
- Simultaneously, each player rolls any number of dice and uses Reroll Tokens, Reflex Tokens, skills, and abilities to meet or exceed one of the challenges on their Final Exam Card, keeping in mind their Final Exam Conditions.
- If a player is unable to defeat either challenge on a Final Exam Card, they take one wound. During the Final Exam, players may also choose to take a wound to refresh their dice as usual.
- Repeat steps 3-5 until each player has challenged five Final Exam Cards.
- If a player gets four wounds during the Final Exam, they are out!
- Each player who is able to defeat all five of their Final Exam Cards gets their Hunter License. If the majority of players have received their Hunter License, the group wins! For an extreme test of skill and teamwork, all players must earn their License to win.
Final Exam Conditions
Note: the Final Exam text above places the Final Exam Condition in the lower right corner of the Enemy Card, while the Enemy Card diagram on the Enemy Cards page labels it in the lower left corner. Both are as printed.
The Final Exam Conditions table lists the following conditions (the icons are shown with each):
- Dice of this color get +1. (Icons: green, red, white and purple dice, each with +1.)
- Dice of this color get -1. (Icons: green, red, white and purple dice, each with -1.)
- Ignore dice of this color that roll this number. (Icons: green 5, red 3 and purple 3, each crossed out.)
- Before the battle begins, discard two Reflex Tokens of this type. (Icons: red, green, purple and white Reflex Tokens, each -2.)
- Before the battle begins, discard three Reroll Tokens.
- You cannot use Reroll Tokens.
- Spirit Dice cannot be used in place of this dice color.
- You cannot use Reflex Tokens.
- Before the battle begins, take this much damage. (Icon: two broken hearts.)
- You cannot heal.
FAQ
Have more questions? Find us at kessentertainment.co/hunter-hunter
Q: When we are finishing out the round where the final Enemy Card is Eliminated and no more can be Eliminated, can I still get the effects of a skill that gives me additional rewards for Eliminating an enemy?
A: Yes! If you claim the reward that would normally Eliminate an enemy, you get any other rewards associated with Eliminating an enemy, even if the card cannot be removed from play and put into your Experience Pile.
Q: Since Spirit Dice can be used on any challenge, can Spirit Reflex Tokens be used on any die?
A: No, Spirit Reflex Tokens can only be used on Spirit Dice.