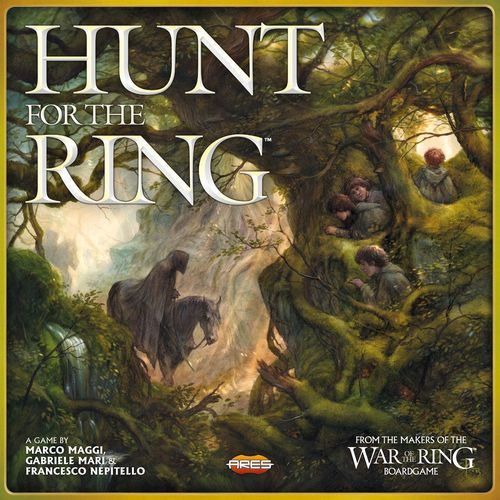
Hunt for the Ring
Hunt for the Ring Rulebook
Table of Contents
Table of Contents
- Component List
- Corruption
- The Game Board
- Part 1: Three is Company
- Setting Up the Game
- Balancing the Game
- How to Play
- Day Sequence (Part 1)
- The Ring–bearer's Turn
- The Nightfall Turn
- Key Concepts
- Using Ally Cards to Move
- Movement and the Nazgûl
- Playing One Ally Card
- Company Log Tokens
- Spending One Fellowship Token
- Company Cards
- The Ringwraiths' Turn
- Spending an Action Die
- Performing a Search
- Performing a Perception
- Performing a Hunt
- Sorcery Cards
- Information Tokens and Black Riders' Powers
- Encountering the Nazgûl
- Refresh Step
- End of Part 1
- Storing the Game After Part 1
- Part 2: Flight to the Ford
- Playing Hunt for the Ring with War of the Ring
- Glossary
Component List
- Rulebook
- Game Board (double–sided)
- 7 Plastic figures (Frodo, 4 Nazgûl, Gandalf the Grey, Lord of the Nazgûl)
- Ring–bearer's screen
- Journey log cardboard sleeve (double–sided)
- 36 Journey cards (two decks of 18 cards each)
- 22 Sorcery cards
- 44 Ally cards (two decks of 22 cards each, one for Part 1 and one for Part 2)
- 5 Company cards
- 5 Ringwraith reference cards
- Gandalf the Grey reference card
- The Black Riders reference card
- 7 Ringwraiths Action dice (6 standard Action dice plus 1 special Lord of the Nazgûl Action die)
- "Letter from Gandalf" envelope
- 90 Tiles and Tokens
Corruption
Corruption is a key concept in the game, as the game is won or lost based on Frodo's Corruption. During the game, Frodo accumulates Corruption points, representing the increasing burden of carrying the One Ring in the face of the relentless hunt of the Ringwraiths. Corruption can increase because of a Nazgûl encounter, as an effect of weariness due to moving during the night, or because of Sorcery cards.
Corruption is kept track of using the Corruption marker placed on the Corruption track, on the right side of the board. When Frodo gains Corruption, the Corruption marker is advanced, one step for each Corruption point gained.
As indicated by the victory conditions of each part of the game, there is a maximum amount of Corruption that Frodo can accumulate before the Ring–bearer player loses the game. If the Corruption marker reaches or surpasses this threshold, Frodo is corrupted and all the Ringwraith players win the game.
The Game Board
The board features a Movement track, a Corruption track, a Turn track, section labels (numbered with roman numerals I–VI), and area labels (lettered A–D).
Locations on the board are marked as follows:
- Normal location — a numbered circled space.
- Ally location — a circled space marked with a name in a scroll.
- Dark location — a circled space with a red background and black frame.
- Exit location — a lettered space with a shield frame, located on the right–hand side of each board.
- Frodo's starting location — a circled space with a blue background and gem–studded frame.
- Nazgûl starting location — a circled space marked with an Eye.
Other symbols on the board are:
- Dot — a small diamond–shaped space, without a number.
- Path — a thin brown line connecting spaces on the board.
- Road — a thick white line connecting spaces on the board.
- Area border and Section border — the dividing lines separating the board's areas and sections.
Part 1: Three is Company
"A sudden unreasoning fear of discovery laid hold of Frodo, and he thought of his Ring. He hardly dared to breathe, and yet the desire to get it out of his pocket became so strong that he began slowly to move his hand. He felt that he had only to slip it on, and then he would be safe." — The Fellowship of the Ring, Book I, Chapter 3: Three is Company
Before playing Part 1, you should set aside some of the components only needed when playing Part 2:
- the Corruption tiles for Part 2 (grey);
- the two decks of Journey cards;
- the deck of Part 2 Ally cards (orange card back);
- everything concerning Gandalf (reference card, figure, and Gandalf's deed tokens);
- everything concerning the Lord of the Nazgûl (reference card, figure, and action die);
- Strider's Company card.
All the other components can be used during Part 1.
Setting Up the Game
Before each game, choose the player who will be playing as the Ring–bearer player, and the Ringwraith player(s), who will control the Nazgûl. If there is more than one Ringwraith player, divide the Nazgûl among them in any way you see fit, giving at least one Nazgûl to each player. Then, place the board, showing the Part 1 side, in the center of the table.
Ring–bearer Player
- Take the Ring–bearer's screen and place it in front of you, with the image of the Part 1 game board vertically in front of you. Then, take one blank sheet of paper, fold it to size, insert it into the Journey log, and place it at the bottom of the screen, with the Part 1 side up.
- Set aside three Fellowship tokens, to form the Fellowship pool, and place them on the appropriate space on the Journey log.
- Draw randomly one Frodo's starting location token and look at it secretly. Record Frodo's starting location placing the token behind the screen, on the appropriate space of the Journey log; return the other tokens to the game box.
- Take the Company cards Frodo Baggins, Samwise Gamgee and Peregrin Took and place them in front of you, with their ability visible. Set the Meriadoc Brandybuck Company card aside for the moment.
- Shuffle the Ally card deck for Part 1 (green card back), then draw three cards to form your starting hand.
- Place the Turn marker on the leftmost Daylight box on the Turn track, Ring side facing up.
- Place the Corruption marker on the box labeled '0' of the Corruption track.
- Place the Frodo figure on the box labeled '0' of the Movement track.
- Draw randomly five Information tokens and look at them secretly. Then, choose one token and give it to the Ringwraith players. Keep the remaining four tokens behind the screen, on the appropriate space on the Journey log. Return the remaining tokens to the box, without showing them to the Ringwraith players.
Ringwraith Player(s)
- Take the Nazgûl figures and the corresponding Ringwraith cards and divide them among the players. Players controlling two or more Nazgûl must now arrange their Ringwraith cards in the order that they want them to act during the game.
- Take the Black Riders reference card and place it in plain view of all players. Place the Information token received by the Ring–bearer player on the card, unlocking the first ability.
- Take the Ringwraith log tokens and place them in easy reach of all Ringwraith players.
- Shuffle the Sorcery card deck. Then, each Ringwraith player draws one Sorcery card to form his starting hand (only one card per player, regardless of the number of Nazgûl he controls). During the game, each Ringwraith player holds a separate hand of Sorcery cards.
- Place the standard Corruption tiles for Part 1 (beige color) in an opaque container or a stack. Keep the two red special Corruption tiles within reach, but don't shuffle them with the other ones.
- Give the Lead player token to one Ringwraith player chosen at random (if there is a single Ringwraith player, he takes the token). Then, starting with the lead player, all Ringwraith players place their Nazgûl figures on the board, each in a different location among the six available Nazgûl starting locations.
- The lead player takes the six Ringwraith Action dice (forming the Ringwraith action dice pool) and rolls them. The Ring–bearer player receives from the Fellowship pool one Fellowship token for each Shadow result rolled on the dice and places it on Frodo's Company card.
Balancing the Game
Hidden movement games like Hunt for the Ring are easy to play, but they are difficult to master. A player with more experience may easily win against less experienced opponents, making the game appear unbalanced in favor of one side. Should you experience a similar situation, feel free to apply the following adjustments, aimed to find the perfect balance for your group of players.
Frodo is Unstoppable!
If, in your games, Frodo succeeds in reaching Rivendell with excessive ease, during the setup of Part 1 — when the Ring–bearer player is instructed to choose one Information token and give it to the Ringwraith players — he must give them two tokens instead (choosing them among the five tokens drawn randomly, thus keeping only three of them instead of four).
The Nazgûl are Terrible!
If the Ringwraiths seem too powerful, and Frodo is easily corrupted, the Ring–bearer player should give them no Information tokens at all, keeping all five. If you want to give further help to the Ring–bearer player, you may also set the initial pool of Fellowship tokens to four (instead of three).
How to Play
Gameplay is divided into Days. Each Day represents one day of travel and is divided into three turns: two Daylight turns and one Nightfall turn. Use the Turn marker to keep track of which turn is being played. When a Nightfall turn is over, a Refresh step is played out, then a new Day begins.
During each turn, the Ring–bearer player goes first. Then, the Ringwraith players take their turns in order, starting with the lead player and then proceeding clockwise around the table. Ringwraith players controlling two or more Nazgûl take a turn for every Nazgûl under their control, in the order chosen during setup.
If there is more than one Ringwraith player, they are free to talk and cooperate to create a common strategy, but they cannot show their cards, nor can they exchange secret information (the Ring–bearer player must always be able to hear what they say).
Day Sequence (Part 1)
Each Day is composed of two Daylight turns and one Nightfall turn, and ends with a Refresh step.
Daylight Turn 1
(Frodo's Company card's first ability may apply here.)
- Ring–bearer's turn (Frodo must move). (Meriadoc's Company card's first ability may apply here.)
- Ringwraiths' turn — one turn for each Nazgûl.
- Nazgûl encounter (if Frodo was successfully hunted).
- Advance the Turn marker.
Daylight Turn 2
Repeat steps 1–4 above.
Nightfall Turn
- Ring–bearer's turn (Frodo may move or rest). (Samwise's and Meriadoc's Company cards' first abilities may apply here.)
- Ringwraiths' turn — one turn for each Nazgûl.
- Nazgûl encounter (if Frodo was successfully hunted).
- Reset the Turn marker to turn 1.
Refresh Step
- The Ring–bearer player draws one Ally card. (Peregrin's Company card's first ability may apply here.)
- If there is more than one Ringwraith player, the current lead player gives the Lead player token to the Ringwraith player to his left.
- The lead player draws one Sorcery card and rolls the Action dice.
- The Ring–bearer player receives one Fellowship token for each Shadow result rolled.
The Ring–bearer's Turn
Each turn, the Ring–bearer player can take each of the following actions once, in any order:
- Move Frodo (or rest).
- Play one Ally card.
- Spend one Fellowship token to draw an Ally card.
During the two Daylight turns of a Day, Frodo must move. During a Nightfall turn, Frodo may either move or rest (see "The Nightfall Turn" below).
Moving Frodo
The Ring–bearer player looks at Frodo's current position — marked on the Journey log — and decides his next move. (To avoid giving too much away to his adversaries, the Ring–bearer player may look at the map on the back of the screen instead of at the board.)
When his choice is done, the Ring–bearer player records the move by writing it with a pencil on the next empty space of the Journey log; the Frodo figure is advanced one step on the Movement track, to match the number of the space just filled.
- The new entry on the Journey log can be either a dot, or the number of a location. To record a dot, the Ring–bearer player draws a small circle in the next empty space on the Journey log; to record a location, he writes the relevant number.
Moving to a Location
Entering a numbered location on the Journey log indicates that Frodo has reached a specific place. The last numbered entry on the Journey log is called Frodo's last location. The Ring–bearer player can mark a location as Frodo's new move if the location is connected to Frodo's last location, and if the location is within reach (see "Key Concepts" below). This location can be one he has moved to before, and thus already appears on the Journey log, including his last location.
Moving to a Dot
Entering a dot indicates that Frodo is somewhere in the Wild, between his last location and the next one: his last location is still considered to be the numbered location that was recorded last on the Journey log.
Note: The Ring–bearer player can always mark a dot as Frodo's new move — keeping him in the Wild — regardless of which one his last location is, and of how many dots in a row he already marked on the Journey log.
The Nightfall Turn
During the Nightfall turn, Frodo can either move or rest.
Moving. If the Ring–bearer player chooses to move, Frodo gains one Corruption: advance the Corruption marker one step on the Corruption track. Then, the Ring–bearer player records his move normally. Additionally, the Turn marker is flipped to show the Eye side, to remind the Ringwraith players that for the length of the Nightfall turn they will have a free Hunt instead of a Search (see "Performing a Hunt" below). Flip the Turn marker back to the Ring side at the end of the Nightfall turn.
Resting. If the Ring–bearer player chooses to rest, nothing is recorded on the Journey log; the Frodo figure is not advanced on the Movement track, Frodo's Corruption does not increase, and the Turn marker remains on the Ring side.
Key Concepts
Adjacent
Any two spaces on the board (dots or locations) are considered adjacent if they are directly joined by a path or road, and thus within one step of movement from each other.
Example: Location 31 is adjacent to 33, and to the dot to its left.
Connected
Any two spaces on the board (dots or locations) are considered connected if they are adjacent to one another or are separated only by dots. A location is also considered to be connected to itself.
Example: Location 37 is connected to itself, to locations 33, 35, 38 and 39, and to the dot to its left.
Within Reach
A location is considered within reach if it is adjacent to Frodo's last location, or, if it is connected to Frodo's last location by a number of dots equal to, or less than, the number of dots marked on the Journey log after the last location.
Example: If Frodo's last location is 31, and the Ring–bearer player has one dot entered on the log, location 26, 32 and 33 are all within reach. If he has two dots entered, locations 27 and 29 are also within reach.
Frodo's Movement Examples
Example (1): Frodo started in location 1 (Bag End). He has moved three times already — twice marking a dot on the log, the third time moving to location 10. The last entry on the Journey log — location 10 — is Frodo's last location. As his new move, the Ring–bearer player may choose between entering a dot; location 11; or location 9 (both locations are adjacent to location 10). The Ring–bearer player chooses to enter a dot. Frodo is now in the Wild. Location 10 is still considered to be Frodo's last location while Frodo is in the Wild.
Example (2): As his next move, the Ring–bearer player may choose again to enter a dot, or to enter any location within reach. Considering one dot is already marked, locations 'within reach' are 9, 11, 19, 20 — or 10 itself. Frodo chooses to move to location 19. This is how Frodo's Journey log appears now: location 19 is now Frodo's last location.
Example (3): The Ring–bearer moves again, and chooses to move directly to location 22, an adjacent space (an adjacent space is always considered connected and within reach).
Using Ally Cards to Move
The Frodo Baggins Company card and some Ally cards (for example, Tom Bombadil) allow the Ring–bearer player to move Frodo. Such moves can be in addition to a normal move, and can also be executed at Nightfall, without gaining Corruption nor flipping the Turn marker. For each such move, Frodo's figure is advanced one step on the Movement track, as usual, and the move is entered on the Journey log.
Movement and the Nazgûl
When moving, Frodo is unaffected by the position of any Nazgûl figures on the board (the Nazgûl do not block or otherwise influence Frodo's movement, except as a consequence of a Nazgûl encounter, see "Encountering the Nazgûl" below).
Playing One Ally Card
Ally cards represent favorable events and characters that the Ring–bearer player may use to hinder the Ringwraiths.
Drawing Ally Cards
The Ring–bearer player receives three Ally cards during setup, and draws one Ally card during each Refresh step. The Ring–bearer player may have a maximum of five Ally cards in hand at any time; when this hand limit is exceeded, the player must immediately discard down to 5 cards, choosing which cards to discard.
Playing Ally Cards
During his turn, the Ring–bearer player can play from his hand a maximum of one Ally card, before and/or after he has resolved Frodo's move or rest action for the turn. Played Ally cards are placed in a discard pile. When an Ally deck is exhausted, the cards are not reshuffled — no more Ally cards for that part are available to the Ring–bearer player.
- A text in bold at the top of the card (normally starting with "Play…" or "Play if…") indicates the card has a pre–requisite: the indicated condition must be true to play the card.
- Some cards show two effects (indicated with an "or"). When the Ring–bearer player plays one such card, he must choose only one of the two effects.
- The actions indicated by an Ally card are mandatory. If the effects of the card cannot be fully applied, the card can still be played, and its effects are applied to the maximum possible extent.
Out of Turn Cards
Some Ally cards are marked as Out of Turn. These cards can be played only during the individual turns of the Nazgûl. The Ring–bearer player may play any number of out of turn Ally cards.
When using such a card to cancel the effect of a Nazgûl action, the Ring–bearer player may wait until the Ringwraith player declares the specific effect (the area of a Perception, for example) before deciding whether to cancel it.
Ally Tokens
Some Ally cards allow the Ring–bearer player to put in play tokens representing allies and friends of the Ring–bearer. These tokens are placed on locations, and can move from one location to another as an effect of some Ally cards.
Ally tokens limit the capabilities and movement of the Nazgûl:
- A Nazgûl cannot enter, or move through, a location containing an Ally token.
- Sorcery cards allowing a Search or a Hunt cannot target a location containing an Ally token (Perception is unaffected).
When brought into play, Ally tokens must be placed in a location not containing a Nazgûl or another Ally token. When moved (playing a pertinent Ally card), a token can be moved from its location directly to any other connected location, if the destination does not contain a Nazgûl or another Ally token. Ally tokens can move through dots containing Nazgûl.
There can be a maximum of eight Ally tokens in play at the same time. The Ring–bearer player is free to remove Ally tokens anywhere on the board when an Ally card allows him to place an Ally and no token is available.
When removed by a Nazgûl spending a Sword die result (see "Spending an Action Die" below), an Ally token is placed back among the available components.
Company Log Tokens
The four Company log tokens are used by the Ring–bearer player to mark an area, section or location targeted by an Ally card effect requiring an identification. The Ring–bearer player simply places a log token on the required space, as a reminder of the effect of the card, and removes it when the effect expires.
Spending One Fellowship Token
During his turn, the Ring–bearer player can spend a maximum of one Fellowship token to draw one Ally card, removing it from Frodo's Company card and placing it back in the Fellowship pool.
Additional Fellowship tokens can be spent in conjunction with the play of a Company or Ally cards to achieve the specified effect, as indicated by the card itself. This spending does not count against the limit of one per turn.
The Fellowship Pool
In a standard game, there are three Fellowship tokens available at the beginning of a game, forming the Fellowship pool: this means the Ring–bearer player may normally have a maximum of three tokens in play at the same time. The size of the pool may change during the game: in Part 1, one Fellowship token can be removed permanently from the pool when using Frodo's Company card special ability, thus reducing the maximum number of tokens available. Other ways to reduce the Fellowship pool will be added during Part 2.
Receiving Fellowship Tokens
When the Lead player rolls the Action dice during each Refresh step of a Day (and at the start of a Part), the Ring–bearer player receives one Fellowship token for each Shadow result rolled. Additional Fellowship tokens may be received as an effect of an Ally card and Frodo's Company card ability.
- The Ring–bearer player may never have more Fellowship tokens in play than those in the Fellowship pool.
- Unspent Fellowship tokens are kept from Day to Day.
Company Cards
Company cards grant the Ring–bearer player additional abilities, and they may have an effect outside the normal turn sequence. The top part of each card gives an ability which is always present if the card has not been flipped. The bottom part of each card shows a second ability which can be used once — the card is then flipped to show the character portrait, and its abilities are not available anymore.
- Frodo Baggins — Frodo's Resolve: At the start of each Day, take one Fellowship token if you have fewer than two Fellowship tokens. (Flip) After moving, flip this card to move again. Reduce the Fellowship pool by 1 token.
- Samwise Gamgee — Sam's Faith: If you rest during a Nightfall turn, reduce Frodo's Corruption by 1 point. (Flip) Flip this card to cancel the effects of a drawn Corruption tile. Return the chosen tile to the Hunt pool.
- Peregrin Took — Pippin's Heart: During the Refresh step, draw two Ally cards instead of one. (Flip) Flip this card to cancel the effects of a drawn Corruption tile. Return the chosen tile to the Hunt pool.
- Meriadoc Brandybuck — Merry's Help: During your turn, play up to two Ally cards from your hand instead of one. (Flip) Flip this card to cancel the effects of a drawn Corruption tile. Return the chosen tile to the Hunt pool.
- Strider — Strider's Skill: If you change course after a Nazgûl Encounter, draw two new Journey cards from the same deck instead of one. Keep one and discard the other. (Flip) Flip this card to cancel the effects of a drawn Corruption tile. Return the chosen tile to the Hunt pool.
The Ringwraiths' Turn
After the Ring–bearer player completes his turn, the Ringwraith players take actions in clockwise order, activating the four Nazgûl, one after the other, starting with the Lead player. As stated before, if a player controls more than one Nazgûl, he activates them in the order set at the start of the game.
- In each turn, the active Nazgûl may both move and take one action (in any order — movement and action, or action and movement).
- The action may either require spending an Action die to do something (see "Spending an Action Die" below) or it can be a free action.
- Normally, the only free action available is a Search, if the active Nazgûl is in a location (see "Performing a Search" below). However, during a Nightfall turn, when the Turn marker is flipped to its Eye side (that is, when the Ring–bearer player chose to move), the active Nazgûl performs a Hunt if in a location (see "Performing a Hunt" below) instead of a Search.
Moving the Nazgûl
When moving, a Nazgûl figure advances on the board to an adjacent space (dot or location). A Nazgûl moves faster, when one of the following conditions apply:
- Road movement. A Nazgûl may move up to three spaces, if the movement is entirely performed along a road (both in a Daylight or Nightfall turn).
- Nightfall movement. During a Nightfall turn only, a Nazgûl may move up to two spaces if the movement is performed along a path, or along a combination of path and road.
Moving is never mandatory: for example, a Nazgûl might choose not to move at all, just performing a Search or spend an Action die where it stands; or he may choose to do nothing at all.
Nazgûl Movement Examples
During the first Daylight turn, the blue Nazgûl moves one step, from location 48 to the adjacent dot along the path going to the left. He might have moved to location 47 instead.
The green Nazgûl, starting the game in location 49, decides to take advantage of road movement — he might reach location 48 (dot–dot–48) or location 46 (dot–dot–46). He decides to move to 46.
At Nightfall (third turn), the green Nazgûl is in location 34. He might continue to move along the road (up to three spaces away, for example dot–30–dot); but it is Nightfall, so he may choose to move two steps, taking advantage of the darkness. He decides to move to Quarry (dot–23).
Movement Limitations
A Nazgûl cannot ever move into or through an Exit location. Additionally, Nazgûl cannot enter, or move through, any location containing an Ally token.
Nazgûl figures do not block or hinder the movement of another Nazgûl; more than one Nazgûl can occupy the same space (replace the figures with the corresponding Nazgûl tokens when there is not enough space for multiple figures).
Spending an Action Die
The Ringwraith player may spend a die result from the Ringwraith Action pool to take an action. An Action die can be spent before or after the player has moved the active Nazgûl, instead of doing a free action (Search or Hunt at Nightfall).
Dice thus spent will not be available again until the next Refresh step, so the Ringwraith players must agree between themselves how to spend the dice, considering that there are six dice to spend, but 12 Nazgûl turns in a day.
Each Ringwraith Action die shows the following icons: Ring (x2), Sword (x2), Sorcery, and Shadow.
- Spend a Ring die result to perform a Perception in the area where the active Nazgûl is located, or perform a Perception in the section where the active Nazgûl is located.
- Spend a Sword die result to perform a Hunt in the location occupied by the active Nazgûl, or remove an Ally token from a location adjacent to the active Nazgûl.
- Spend a Sorcery die result to draw one Sorcery card, or play one Sorcery card.
- Spend a Shadow die result as if it were a Ring, Sword, or Sorcery result, at player's choice. (Note: the small "Gandalf" icon in the center of the die is a reminder that the Ring–bearer player receives one Fellowship token for each Shadow result rolled — see "Receiving Fellowship Tokens" above.)
Example: It is the first Daylight turn, and the Ringwraith players just rolled their action dice: the available results are Ring, Ring, Ring, Sword, Sorcery, Shadow.
The lead player (blue) starts to play: he decides not to use a die. He performs a free Search in location 48, then moves away to the adjacent dot.
Next, the player of the green Nazgûl moves, using road movement, from 49 to 46. He then spends a Ring die result to do a Perception in section III, and removes that die from the pool.
Then, the player of the red Nazgûl uses a Sorcery die to draw a Sorcery card, then moves his figure.
Last, the player of the purple Nazgûl moves his figure, and does not do anything else.
The turn is over with four dice remaining in the pool (Ring, Ring, Sword, Shadow), which will be available during the next Daylight turn and the Nightfall turn.
Performing a Search
A Search can be done as a free action by the active Ringwraith player — before or after he moves the active Nazgûl — if the active Nazgûl is in a location and the player chooses not to spend an Action die.
A Search can also be possible as an effect of a Sorcery card.
When performing a Search, the Ringwraith player asks the Ring–bearer player if the location currently occupied by the active Nazgûl is featured on Frodo's Journey log at least once. The Ring–bearer player must answer truthfully, with a simple "yes" or "no," after checking if the location appears on Frodo's Journey log.
- If the answer is "yes," the Search is successful: place a Track token on the searched location, "eye" side up. The Ring–bearer player is not required to reveal if the searched location is Frodo's last location or not. If the answer is "no," the Search failed.
- A Search cannot be performed on any of Frodo's starting locations.
- It is not possible to make a Search in a location already containing a Track token (while a Hunt is allowed — see "Performing a Hunt" below).
Example: Frodo started in location 1 (which cannot be searched). After six moves, he moved through locations 10, 19, 22. A Search in any of these three locations would give "yes" as result, and a track token would be placed in the appropriate place; a Search in any other location would give "no" as result.
Performing a Perception
A Perception can be performed by the active Ringwraith player by spending a Ring die result. The game board is divided into sections (marked with roman numerals), each further divided into areas (marked with a letter). The player must choose if the Perception is aimed at the area or the section where the active Nazgûl is located.
A Perception can also be possible as an effect of a Sorcery card.
When performing a Perception, the active Ringwraith player asks the Ring–bearer player whether Frodo's last location (the last number entered on the Journey log) is inside the targeted area or section (the Ringwraith player points to the area or section, or refers to its coordinates). The Ring–bearer player must answer truthfully with a "yes" or a "no", checking Frodo's position as marked on the Journey log.
If the answer is "yes", place a Ringwraith log token on the appropriate area or section, as a reminder (see "Ringwraith Log Tokens" below).
Example: Frodo's last location is 22, in section II, area II•A (the dot does not count; the last numbered entry is relevant).
- A Nazgûl in location 31 performs a Perception targeted at section II. The result is "yes."
- A Nazgûl in location 31 performs a Perception targeted at area II•B. The result is "no."
- A Nazgûl in location 24 performs a Perception targeted at area II•A. The result is "yes."
Performing a Hunt
A Hunt can be performed by the active Ringwraith player by spending a Sword die result. To hunt, the active Nazgûl must be in a location (including one of Frodo's starting locations).
By Nightfall (if Frodo chose to move flipping the turn marker to the Eye side) a Nazgûl can perform a Hunt — instead of a Search — as a free action, without spending an Action die. A Hunt can also be possible as an effect of a Sorcery card.
A Hunt is similar to a Search, but more powerful. When performing a Hunt, the Ringwraith player asks the Ring–bearer player if the location currently occupied by the active Nazgûl is featured on Frodo's Journey log at least once. The Ring–bearer player must answer truthfully, with a simple "yes" or a "no," after checking if the location appears on Frodo's Journey log.
- If the answer is "yes", the Hunt is successful: place a Track token on the hunted location, "sword" side up. If the answer is "no", the Hunt failed.
- If the Hunt is successful and the hunted location is also Frodo's last location, the Ring–bearer player must declare "Frodo is here." When all Ringwraith players are done taking their actions for the turn, a Nazgûl Encounter ensues (see "Encountering the Nazgûl" below).
Example: Frodo's last location is 22 (the dots do not count; only the last numbered entry is relevant).
- A Nazgûl in location 19 performs a Hunt. The result is "yes", but as this is not Frodo's last location, there is not a Nazgûl Encounter. A Track token is placed in location 19.
- A Nazgûl in location 22 performs a Hunt. The result is "yes, Frodo is here", as this is Frodo's last location. A Track token is placed in location 22, and a Nazgûl Encounter will ensue at the end of the turn.
Track Tokens
Track tokens are placed on the board to mark a location where a Search or a Hunt was successful. When this happens, the token is placed on the appropriate side ("eye" for a Search, "sword" for a Hunt).
- A location containing a Track token cannot be chosen to perform a Search.
- A location containing a Track token can be selected to perform a Hunt. If the location is Frodo's last location, there will be an Encounter with the Nazgûl (see "Encountering the Nazgûl" below).
- Track tokens do not hinder movement. Frodo can always enter a location that appeared previously on the Journey log, even if it now contains a Track token.
Track tokens remain on the board until the end of Part 1.
Ringwraith Log Tokens
The Ringwraith players are not allowed to take notes during the game, but they may use the Ringwraith log tokens as reminders, in any way they see fit.
For example, a log token could be placed on the board on its Ring side to mark an area that was successfully scanned with a Perception, while another token showing one gem is placed on the Movement track to mark the move corresponding to that Perception result. Or, the Ringwraiths could use one or more Crown tokens to mark possible destinations of Frodo, considering the number of moves he has taken since the last time he was detected.
Sorcery Cards
Sorcery cards represent the dark enchantments of the Nazgûl and the activities of their spies and minions. Each Ringwraith player holds a separate hand of Sorcery cards. The players cannot show their hands to each other, and any communication concerning their cards must be audible by the Ring–bearer player.
Each Ringwraith player can have a maximum of five Sorcery cards in hand, regardless of the number of Nazgûl under the player's control. If this hand limit is exceeded, the Ringwraith player must immediately discard down to five cards, choosing which cards to discard.
Drawing Sorcery Cards
The lead player draws one Sorcery card during setup, and during the Refresh step of each Day. The active Ringwraith player can draw one card from the Sorcery deck by spending a Sorcery die result.
Playing Sorcery Cards
The active Ringwraith player can play one Sorcery card from his hand by spending a Sorcery die result. Follow the text on a played Sorcery card closely to apply its effects.
- A text in bold at the top of the card (normally starting with "Play…" or "Play if…") indicates the card has a pre–requisite: the indicated condition must be true to play the card.
- Some cards show two effects (indicated with an "or"). When a Ringwraith player plays one such card, he must choose only one of the two effects.
- The actions indicated by a Sorcery card are mandatory. If the effects of the card cannot be fully applied, the card can still be played, and its effects are applied to the maximum possible extent.
- Some effects are indicated as "Part 2" — ignore these effects during Part 1.
Played Sorcery cards are placed in a discard pile. When the Sorcery deck is exhausted, the cards in the discard pile are shuffled to form a new Sorcery deck.
Example (Captain of the Nine): Part 2 — Replace the active Nazgûl with The Lord of the Nazgûl. — or — Any Part — Add a special Corruption tile to the Hunt pool.
Example (No Hope of Escape): Play during a Nightfall turn. Move the active Nazgûl to a connected location. — or — Move all Nazgûl one step (starting with the active Nazgûl).
Dark Locations and Sorcery
Dark locations represent evil places, advantageous to the Ringwraiths. When a Nazgûl is in a Dark location, the Ringwraith player may spend any Action die result as if it were a Sorcery result (that is, any Action die can be used to draw or play a Sorcery card).
Information Tokens and Black Riders' Powers
During their incursion into the Shire, the Nazgûl seek information about "Baggins." This is represented in the game by Information tokens.
During Part 1, the Ringwraith players may find Information tokens and accumulate them to enhance the capabilities of the Nazgûl, representing their increasing haste and need for urgency.
For each Information token collected by the Ringwraith players, one new special ability is unlocked, as indicated by the Black Riders card. Remember that one Information token is available to the Ringwraiths at setup, so the first ability is already unlocked at the start of the game (this may change depending how you balance the game, see "Balancing the Game" above).
Finding Information
The 12 Information tokens all show a number, each corresponding to a different Ally location on the Part 1 board.
When a Ringwraith player performs a Search or a Hunt in such a location, the Ring–bearer player must check if its number appears among the Information tokens drawn during setup and hidden behind the screen.
If it is so, in addition to communicating the normal result of the Search or Hunt action, the Ring–bearer player must reveal the token and place it on the next available space on the Black Riders reference card (whether the Search or Hunt was successful or not), immediately unlocking a new ability.
Mostly, Black Riders abilities grant to the Ringwraith players additional uses for their Action dice. The active Nazgûl can use one of these abilities instead of the normal use of an Action die (and instead of a free Search or Hunt). These abilities are cumulative: for example, if the Ringwraith players collected three tokens, they have the first three abilities available to choose from.
- 1 token: Spend 1 Action die result of your choice to move 1 additional step.
- 2 tokens: Spend 2 Action die results of your choice to perform a Hunt or a Perception.
- 3 tokens: Spend 1 Sword result to move 1 additional step and then perform a Search.
- 4 tokens: Spend 1 Ring result to move 2 additional steps.
- 5 tokens: Start Part 2 with the Lord of the Nazgûl already in play.
Hiding Information
To prevent the Nazgûl collecting Information, the Ring–bearer player can get Frodo to journey to the Ally locations featured on the Information tokens he still has behind the screen.
If the Ring–bearer player marks, on Frodo's Journey log, the number of an Ally location on one of the Information tokens still in his possession, that token cannot be collected anymore by the Ringwraith player. The Ring–bearer player secretly flips the Information token to show its back, as a reminder it is not considered to be in play anymore: Ringwraiths will not be able to find information in that location for the rest of the game.
Encountering the Nazgûl
As described in "Performing a Hunt" above, if Frodo is found by a successful Hunt, a Nazgûl Encounter is resolved at the end of the turn (after all Nazgûl have had a chance to take their turns).
The Hunt Pool
The Hunt pool is the set of Corruption tiles in play, and it is used to represent the effect of encounters between the Ring–bearer and the Nazgûl. These tiles are placed in an opaque container (such as a cup or bag) at the beginning of a game, as tiles must be drawn randomly from it each time a Hunt is successful.
At the start of Part 1, the Hunt pool is composed solely by the regular Corruption tiles for Part 1 (beige color). Up to two special Corruption (red color) tiles can be put into play by the Ringwraith players during the game, by playing the two corresponding Sorcery cards.
Resolving an Encounter
To resolve the Nazgûl Encounter, the Ring–bearer player goes through the following steps:
- Draw Corruption tiles.
- Use Company cards.
- Receive Corruption.
- Aftermath.
1. Drawing Corruption Tiles
All Nazgûl in the hunted location or adjacent to it (both in a dot or a location) are involved in the Encounter. The Ring–bearer player must draw one Corruption tile for each Nazgûl involved in the Encounter.
Nazgûl Encounter Example: Frodo has been found by the Green Nazgûl with a Hunt in location 23. After all the Nazgûl completed their turns, one of them (the Green one) is in location 23, and two are adjacent (the Purple one in location 21, the Red one on the dot to the right of 23). The Blue Nazgûl, in location 19, is too far away (19 is connected to 23, but not adjacent). A total of three Nazgûl are involved in the Encounter, and three Corruption tiles are drawn.
2. Using Company Cards
Several Company cards feature a special ability allowing the Ring–bearer player to choose one Corruption tile among those drawn, and cancel its effects, thus reducing the damage of the Hunt.
When all tiles have been drawn, the Ring–bearer player may flip a maximum of one Company card to use its ability. The chosen tile is returned to the Hunt pool without effect.
Special Corruption tiles cannot be cancelled in this way.
3. Receiving Corruption
After the tiles have all been drawn — and one, possibly, cancelled — Frodo's Corruption increases for each remaining tile left, if any, as follows:
- If a tile is numbered, Frodo receives Corruption points equal to its value; then, the tile is discarded (it is out of the game).
- If one Eye tile is drawn, Frodo receives one Corruption point, plus as many Corruption points as the number of Eye tiles already next to the Corruption track, if any; then, place the Eye tile next to the Corruption track.
- If more than one Eye tile is drawn, apply the tiles one by one: Frodo gains Corruption for the first Eye tile, and then it is placed next to the Corruption track; then, the Corruption gain for the second Eye tile is applied, and the tile is placed on the Corruption track, and so on.
Nazgûl Encounter Example: The Encounter involves three Nazgûl, so the Ring–bearer player draws three Corruption tiles: a "3" and two Eye tiles. The Ring–bearer player has not drawn any Eye tiles yet, and decides to flip Samwise's Company card to cancel the "3" Corruption tile and returns it back into the Hunt pool. Then, the two Eye tiles are applied: because of the first Eye tile, Frodo receives 1 Corruption and then the tile is placed next to the Corruption track; therefore, the second Eye tile is worth 2 Corruption (1 for the tile itself, 1 for the other Eye tile already next to the Corruption track). The second tile is added to the Corruption track. Frodo suffered a total of 3 Corruption, and the Corruption track is adjusted accordingly.
4. Aftermath
Corruption tiles drawn during an Encounter, and not cancelled, are out of play. If Frodo's Corruption is less than 12, then the Ring–bearer player performs an Escape (see below), then play resumes normally, with the next turn of the Ring–bearer player.
If the Corruption is 12 or more, the Ring–bearer player loses the game (see "End of Part 1" below).
Escape
The Ring–bearer player must choose between:
- moving Frodo to a new numbered location; or
- not moving Frodo at all.
This choice is made secretly, without revealing anything to the Ringwraith players.
If Frodo moves, the Ring–bearer player moves Frodo to a location within reach that is connected to his last location (Frodo cannot 'jump' over a location).
- When determining whether the connected location is within reach, any dots marked on the Journey log can be counted, as well as two additional "bonus" dots for the escape move.
- The number of the chosen location is entered on the next empty box on the Journey log, to the right of the last recorded move.
- The new location cannot be an Exit location.
If Frodo does not move, the Ring–bearer player marks with a slash the next empty space on the Journey log, to the right of the last recorded move. Frodo is considered to be where he was on the previous move.
In both cases, Frodo's figure is advanced by one step on the Movement track (regardless if he moved 1 or more steps, or if he did not move at all).
Nazgûl Encounter Example (Aftermath): Frodo was found by a Hunt in location 23, with two dots marked on the Journey log.
Example 1: To escape, the Ring–bearer player chooses to move. The Ring–bearer player might decide to move to several connected locations: any connected location within four steps from location 23 — as he has two dots already marked on the log, and he can move further up to two steps away. For example, he might move to 33, 36, 45, 46, or even back to 23 or 19. He could not choose, for example, location 38: it is only three steps away, but not connected to 23. He selects to go to location 46 — he wants Frodo to reach Bree as soon as possible, and he thinks it's the safest bet. Location 46 is added to the log, and Frodo's figure advances on the Movement track.
Example 2: To escape, the Ring–bearer player chooses not to move. The Ring–bearer player chooses not to move, to mislead the Ringwraith players, by not choosing the most predictable movement. In this case, he would just add a slash on the log, and advance Frodo's figure on the Movement track. Frodo would still be in the wild, with 2 dots marked on the log, and he would still have many options available for his next movement — while leaving the Ringwraiths in the dark about his whereabouts.
Refresh Step
When a Nightfall turn is over, a Refresh step is played through.
- The Ring–bearer player draws one Ally card.
- When not playing a 2–player game, the Lead player token is passed to the Ringwraith player to the left of the previous owner.
- Then, the lead player draws one Sorcery card and rolls all the Action dice — the dice used in the previous turn, as well as any unused ones.
- The Ring–bearer player receives one Fellowship token for each Shadow die result rolled.
A new Day of the game now begins.
Example: Frodo is on the last step of the Movement track and the last entries in the Journey log are 53/•. The closest Exit location, "C," is two steps away: the Ring–bearer player draws two Corruption tiles.
End of Part 1
Part 1 ends when one of the following situations applies:
Frodo Arrives at Destination
If Frodo reaches an exit location in 16 or less moves he must immediately declare it: Frodo reached Bree safely and Part 1 is over.
Frodo Must Be Rescued
As soon as the marker on the Movement track reaches step 16 (either because of a movement, or due to an escape) and Frodo did not reach an exit location, Part 1 is immediately over (the Ringwraiths do not get to play their turns).
When this happens, the Ring–bearer player must count the number of moves that Frodo would need to reach the closest exit location, and proceeds to draw an equal number of Corruption tiles, raising Frodo's Corruption level accordingly:
- For each numerical or Eye tile, increase Frodo's Corruption normally;
- The Ring–bearer player may flip one Company card to cancel one Corruption tile, just as during a Nazgûl encounter.
Frodo Is Corrupted
Should the Corruption level of Frodo reach step 12 of the track at any time (including during a rescue, see above), the Ring–bearer is lost to the Shadow and the Ringwraith players win instantly (without playing Part 2).
Storing the Game After Part 1
Should you wish to play Part 2 in a separate gaming session, you must now store the game appropriately, using the Letter from Gandalf envelope. Place inside the envelope the following materials:
- Unspent Fellowship tokens;
- Company cards not flipped;
- the Ring–bearer player's hand of Ally cards;
- all the Sorcery cards in the hands of the Ringwraith players. (Place the remaining Sorcery cards back into the box, keeping the draw deck separate from the discard pile);
- Information tokens found by the Ringwraiths;
- discarded Corruption tiles;
- special Corruption tiles that were put in play;
- any Eye tiles in possession of the Ring–bearer player (including the "Fear of the Barrow–wights" Sorcery card, if played).
Then, place all the remaining components back into the box. Finally, record on Frodo's Journey log the amount of Corruption he accumulated by the end of Part 1.
When you are ready to start playing Part 2, take out all the materials stored in the Letter from Gandalf envelope, then follow the setup instructions for Part 2.
Part 2: Flight to the Ford
"There was still an echo as of following feet in the cutting behind them; a rushing noise as if a wind were rising and pouring through the branches of the pines. One moment Glorfindel turned and listened, then he sprang forward with a loud cry. 'Fly!' he called. 'Fly! The enemy is upon us!'" — The Fellowship of the Ring, Book I, Chapter 12: Flight to the Ford
If Frodo was not defeated at the end of Part 1, the game continues with Part 2.
Playing Part 2 requires all the game components that were set aside before playing Part 1:
- the Corruption tiles for Part 2 (grey);
- the two decks of Journey cards;
- the deck of Part 2 Ally cards (orange card back);
- everything concerning Gandalf (reference card, figure, and Gandalf's deed tokens);
- everything concerning the Lord of the Nazgûl (reference card, figure, and action die);
- Strider's Company card.
The following components are not required any more, and can be set aside:
- the deck of Part 1 Ally cards (green card back);
- Information tokens (except those collected by the Ringwraith players);
- Frodo's Starting location tokens;
- discarded Corruption tiles;
- flipped Company cards.
Setting Up the Game
If you played Part 1 as a separate game session, open the Letter from Gandalf envelope and distribute to the respective players all the components that were stored inside it at the end of Part 1. If you are playing Part 2 immediately after completing Part 1, each player simply keeps these components at hand.
All the players assume the same roles they assumed during Part 1. Place the board to show the Part 2 side in the center of the playing area.
Secrecy and Sorcery
The only materials that are stored in the Letter from Gandalf envelope that require some discretion during setup are the Sorcery cards that were left in the hands of the Ringwraith players at the end of Part 1. For this reason, we suggest that those cards should be taken out of the envelope by a Ringwraith player.
Ring–bearer Player
- Take the Ring–bearer's screen and place it in front of you, with the image of Part 2 game board vertically in front of you. Then, take one blank sheet of paper, fold it to size, and insert it into the Journey log and place it at the bottom of the screen, with the Part 2 side up.
- Take the Company cards you had at the end of Part 1; add the Strider and Meriadoc Brandybuck cards (unless Meriadoc entered play already during Part 1), with their ability visible.
- Take the Gandalf reference card.
- Take the Fellowship tokens you had at the end of Part 1 and place them on Frodo's card. Then, prepare the Fellowship pool for Part 2 by taking the appropriate amount of Fellowship tokens (three if Frodo is not flipped, or two if Frodo is flipped, less the tokens on Frodo's card) and placing them on the appropriate space of the Journey log.
- Separate the Journey cards by type, looking at their front (shorter or longer journey), and shuffle separately the two resulting decks. Then, draw one card from each deck, look at the cards and choose one to keep as your current Journey card. Put the other card back into its deck. Keep close at hand the deck corresponding to the card you have chosen, and place the other deck of Journey cards back into the box (without revealing it). Finally, place your Journey card behind the screen, on the appropriate space of the Journey log.
- Shuffle the Ally card deck for Part 2 (orange card frame); then, discard the Ally cards you had at the end of Part 1, drawing an equal number of cards from the new deck.
- Place the Turn marker on the leftmost Daylight box of the Turn track, Ring side facing up.
- Place the Corruption marker on the Corruption track, in the box matching Frodo's Corruption at the end of Part 1 (recorded on the Part 1 Journey log). Place any Eye Corruption tiles in possession of the Ring–bearer player (including the "Fear of the Barrow–wights" Sorcery card, if played) next to the Corruption track.
- Place the Frodo figure on the box labeled '0' of the Movement track.
- Draw randomly four Gandalf's deed tokens and look at them secretly. Then, choose one token and place it on the appropriate box in the Journey log — this is Gandalf's starting location. Keep the other three drawn tokens behind the screen, on the appropriate space on the Journey log. Set aside the remaining tokens, without showing them to the Ringwraith players.
Ringwraith Player(s)
- Take the 4 Nazgûl figures and the corresponding Ringwraith cards and divide them among the players. Players controlling two or more Nazgûl must now arrange their Ringwraith cards in the order that they want them to act during the game.
- Take the Black Riders reference card and place it in plain view of all players. Place on the card the Information tokens collected by the Ringwraith players during Part 1.
- Take the six Ringwraith log tokens and place them in easy reach of all Ringwraith players.
- Take the Sorcery deck and Sorcery discard pile from the box, returning them to play as they were at the end of Part 1.
- Take the Sorcery cards you had in hand at the end of Part 1. You may redistribute them among the Ringwraith players as you see fit, possibly giving the same number of cards to each player.
- Form the Hunt pool, adding to the Corruption tiles not drawn during Part 1 the three Corruption tiles for Part 2 (grey), along with any special tiles that were brought into play during Part 1. Do not put back in the pool the Corruption tiles that were discarded during Part 1.
- Give the Lead player token to one Ringwraith player chosen at random (if there is a single Ringwraith player, he takes the token). Place the Ringwraith cards following the instructions for Part 1, to set their playing order. Keep the figure, card and special die for The Lord of the Nazgûl close at hand.
- Starting with the lead player, all Ringwraith players place their Nazgûl figures on the board, in either of the two available starting locations (location 28 and location 33). Two Nazgûl must be placed in each location. If the fifth ability on the Black Riders reference card is unlocked, the Lord of the Nazgûl replaces the Nazgûl (or one of the Nazgûl) of the lead player.
- The lead player takes the six Ringwraith action dice and rolls them. The Ring–bearer player receives from the Fellowship pool one Fellowship token for each Shadow result rolled on the dice and places it on Frodo's Company card.
How to Play
There are two important differences between Part 1 and Part 2.
During Part 2, the Ring–bearer player moves Gandalf secretly — using the Journey log — in a similar way to how he did with Frodo during Part 1. Gandalf will move around, to protect Frodo and his companions, encourage them through his deeds, and mislead the Ringwraiths.
Meanwhile, Frodo is being led to Rivendell by Strider: the route he will follow is not under the direct control of the Ring–bearer player, but it is a fixed itinerary shown on the current Journey card. The Ring–bearer player does not choose nor record the movement of Frodo on the Journey log, but keeps track of his position using the Movement track and the Journey card.
The Ringwraith players will try to stop Frodo, similarly to what they did during Part 1. This time, however, they have on their side the presence of the powerful Lord of the Nazgûl. The Lord of the Nazgûl is not controlled by just one of the players, but may enter the game replacing one of the other Nazgûl. At the same time, their search will be hindered and misled by the actions of Gandalf, and they must take the presence of the Wizard into proper consideration.
The Ring–bearer's Turn
Moving Frodo
At the start of each Daylight turn, the Ring–bearer player advances Frodo's figure on the Movement track by one step. At the start of a Nightfall turn, the Ring–bearer player may decide if Frodo moves (and advances one step) or rests, exactly like during Part 1.
The destination of Frodo's movement, however, is not decided by the Ring–bearer player. The destination of each movement is determined by the Journey card, and Frodo's position can be discerned, at any time, simply by matching where Frodo's figure is on the Movement track with the appropriate row of his Journey card: the column on the left of the card corresponds to the occupied position on the track, while the column on the right shows where Frodo is on the board.
When Frodo's figure on the Movement track moves onto the last step indicated by the Journey card (14 for a shorter itinerary, 16 for a longer one), Frodo has reached one of the Exit locations leading to Rivendell, and the game is immediately over.
Example: If this is the current Journey card in play, and Frodo's figure is on step 7 of the Movement track, Frodo is in location 27 (The Last Bridge). (Previously, he moved through locations 2, 10, and 23.) His next move will automatically be a dot. When Frodo's figure moves onto step 14, the Ring–bearer exits from Exit location A, and the game ends — unless the Nazgûl got him first!
Balancing the Game: Shelters. If you find winning the game is too difficult for the Ring–bearer player, you may optionally include this rule in your game. The longer Journey cards offer a second advantage in addition to a higher resilience to Corruption: on each Journey card, one or more Ally locations are marked with a round dot to the right of the name of the location, indicating they are shelters. Unbeknownst to the Ringwraith players, if Frodo's last location is marked as a shelter, then the Nazgûl can find Frodo only by performing a Hunt (a Search always fails). If the sheltered location is not Frodo's last location, then a Search succeeds in finding Frodo's passage and a Track token is placed normally.
Gandalf the Grey
During Part 2, the Ring–bearer player records Gandalf's moves secretly, using the Journey log. There are two important differences between his and Frodo's movement, however:
- Gandalf moves every turn — Daylight or Nightfall.
- Gandalf moves directly from his current location to any connected location (the dots between the two locations, if any, do not affect his movement).
There are several other important rules to note regarding Gandalf, explained in this and the next section.
Gandalf Leaves No Tracks
Even though each movement of Gandalf is recorded on the Journey log normally, the Nazgûl can only detect him in Gandalf's last location.
All the previous entries are ignored for any Hunt purposes, and a Search can never detect him (see "Frodo, Gandalf and the Nazgûl" below).
Gandalf's and Frodo's Movement Example: Gandalf started in location 8 (Weather Hills). To mislead the Nazgûl, the Ring–bearer player wants to keep him close to Frodo, but not in the same area. The Journey card gets Frodo to move across the northern portion of the board (from 1 to 7, then to 8, then to 19), so he would like Gandalf to go south and move across the middle portion of the board. However, he also wants Gandalf to journey to Weathertop (location 18), as it matches one of the Gandalf's deed token he has drawn.
In the first turn, Gandalf moves to location 7, while Strider takes Frodo through the woods between 1 and 7.
In the second turn, Gandalf moves to location 10, and Frodo reaches location 7.
In the third turn, night falls, and Frodo rests (Frodo's figure remains on step 2 of the Movement track), while Gandalf rides forward to location 18. He then reveals he has a Gandalf's deed token matching this location number, and places it close to the Corruption track, as a reminder that Frodo's resistance to Corruption is increased by 1 (from 14 to 15).
If, at some later moment, the Nazgûl search location 7, they will find Frodo's tracks, but not Gandalf's tracks — a Search cannot detect Gandalf.
Revealing Gandalf
The Ring–bearer player may reveal Gandalf if, after moving, the Wizard is in a location containing one or more Nazgûl. To do so, the Ring–bearer player spends one Fellowship token and permanently removes it from the game (reducing the Fellowship pool by one), then places Gandalf's figure on the board, on the location corresponding to his last location.
Then, the Ring–bearer player:
- Moves all Nazgûl in the location occupied by Gandalf up to 2 steps away (together or separately).
- Discards one standard Action die from the Ringwraith Action pool (Ring–bearer player's choice but not the Lord of the Nazgûl Action die). The die will be added to the pool again, during the next Refresh phase.
Gandalf Hides Again
In the Ringwraith turn after Gandalf's figure is placed on the board, no Nazgûl can enter, or move through, the location it occupies. Moreover, the location cannot be targeted by any Search or Hunt (performed playing a Sorcery card, for example).
When all the Ringwraiths are done with their turns, Gandalf's figure is removed from the board.
Then, the Ring–bearer player draws two new Gandalf's deed tokens and chooses one, recording the corresponding location on the next empty box on the Journey log. The chosen token is then removed from play, while the other is placed back among the available Gandalf's deed tokens.
Completing Gandalf's Deeds and Corruption
If Gandalf is in a location corresponding to one of the Gandalf's deed tokens still behind the Ring–bearer's screen, the Ring–bearer player may reveal that token and place it close to the Corruption track, face up: Gandalf has completed one of his deeds, with a show of power that lifts the spirits of the Ring–bearer and intimidates the Nazgûl.
Completing a deed requires that Gandalf's location is announced to the Ringwraith players; however, Gandalf is not "revealed" as explained above — his figure is not placed on the board, and the Nazgûl are not chased away from that location.
The maximum Corruption that Frodo can withstand is raised by one for each deed completed by Gandalf.
The Ring–bearer player may further increase Frodo's resistance to Corruption by moving Gandalf to Rivendell. If, at any time during the game, Gandalf reaches Rivendell (that is, any Exit location), the Ring–bearer player may announce it, placing Gandalf's figure in Rivendell. From that moment on, Gandalf is out of play, and the maximum amount of Corruption that Frodo can withstand is raised by one.
The Ringwraiths' Turn
The Ringwraith players play their turn following the same rules as in Part 1. However, their search for the location of Frodo is strongly influenced by the presence of Gandalf. They may also receive support from the Lord of the Nazgûl, which may temporarily replace one of the "normal" Nazgûl.
Frodo, Gandalf and the Nazgûl
Frodo's and Gandalf's secret positions can be detected or discovered by the Ringwraiths, using their actions.
However, looking for Frodo is not the same as trying to locate the Grey Wizard, and the Ring–bearer player can exploit this to his advantage, maneuvering Gandalf to hinder or confuse the Ringwraith players. The following rules explain how the presence or the passage of Frodo and Gandalf are perceived by the pursuing Ringwraiths during Part 2.
The Journey Card
The Journey card is used to determine Frodo's position in Part 2, in a similar way to the Journey log during Part 1. Frodo's position can be determined, at any time, simply by matching where Frodo's figure is on the Movement track with the appropriate row of the Journey card. Any location above that row is considered to have been moved through. On the other hand, any location on the Journey card below that row has not been moved through yet, and it is not considered to be "featured on Frodo's Journey Log" for the purposes of a Search, a Hunt, or any other game effect.
Perception
Gandalf's presence confuses the senses of the Nazgûl. When a Ringwraith player performs a Perception, if the last location of Frodo, Gandalf, or both is inside the target area or section, the Ring–bearer player answers with a simple "yes" (in other words, the Ring–bearer player does not have to specify who has been perceived — the answer is the same if one of them, or both, are in the target area or section).
Note: A Perception done using the special result on the Lord of the Nazgûl die (see "The Lord of the Nazgûl Die" below) is an exception to this rule.
Search
A Search performed in a location featured on Frodo's current Journey card successfully locates him (the Ring–bearer player answers with a "yes"), similarly to what happened with Frodo's locations marked on the Journey log during Part 1.
Gandalf does not leave tracks, and he cannot ever be located by a Search: searching a location featured on his Journey log always results in a "no" answer (including his last location).
Hunt
A Hunt performed in a location featured on Frodo's current Journey card is resolved normally and, if it is the last location, a Nazgûl Encounter ensues (see "Encountering the Nazgûl" below).
A Hunt succeeds in locating Gandalf only if it is performed in his last location (all other entries in the Journey log are ignored). When this happens, the Grey Wizard is found and forced to flee:
- The Ring–bearer player declares that Gandalf has been found. Then, he draws one new Gandalf's deed token, entering its number on the next empty space on the Journey log as Gandalf's new location, then discards it without showing it.
Special Cases
- If a Search is performed in a location appearing both on Frodo's current Journey card and on Gandalf's Journey log, a Track token is placed to mark the passage of Frodo (the Wizard is not discerned in any way).
- If a Hunt is performed in Gandalf's last location, and the same location appears on Frodo's Journey card, the Wizard is found and forced to flee, and a Track token is placed to mark the passage of Frodo.
- If Gandalf is found by a Hunt in a location that corresponds also to Frodo's last location, the Wizard is forced to flee, a Track token is placed, and a Nazgûl Encounter begins.
The Lord of the Nazgûl
The Lord of the Nazgûl enters play if one of the Captain of the Nine Sorcery cards is played, or starts in play if the last ability on the Black Riders card was unlocked during Part 1. When the Lord of the Nazgûl is in play, add the special Lord of the Nazgûl Action die to the Ringwraiths Action pool: it will be rolled together with the other Action dice in the next Refresh phase.
Note: The Lord of the Nazgûl is considered a Nazgûl for the purposes of card effects, and of any rule not explicitly modified here.
Bringing the Lord of the Nazgûl into Play
If the Lord of the Nazgûl enters play using a card, the player playing it replaces the currently active Nazgûl with the Lord of the Nazgûl, swapping their figures and placing the corresponding character card on top of that of the replaced Nazgûl.
If the Lord of the Nazgûl enters play during setup of Part 2 (due to the fifth ability on the Black Riders reference card), he replaces the Nazgûl of the Lead player (or one of his Nazgûl, if he controls more than one).
Using the Lord of the Nazgûl
On each given turn, the Lord of the Nazgûl may move and take one of the following actions (as usual, before or after moving):
- Spend an Action die; or
- Perform a Hunt (if in a location).
For the Lord of the Nazgûl, performing a Hunt does not require the spending of an Action die.
The Lord of the Nazgûl and the Hunt
If the Lord of the Nazgûl is involved in a Nazgûl Encounter, apply the following rules:
- The Ring–bearer player draws two Corruption tiles due to his presence, instead of one;
- At the end of the Encounter, the Lord of the Nazgûl leaves play: replace him with the corresponding Nazgûl.
The Lord of the Nazgûl Die
Once added to the Action dice pool, this special die is rolled along with the other Action dice and can be used by any Ringwraith player (not just by the player controlling the Lord of the Nazgûl).
Differently from the other dice, though, once rolled, its result and corresponding effects cannot be cancelled, modified nor rolled again. (For example, the die result cannot be discarded by Gandalf when revealed.)
Should the Lord of the Nazgûl leave play, the Lord of the Nazgûl die is removed from the pool at the end of the current Day.
The Lord of the Nazgûl Die shows three normal icons (Ring, Sword, Sorcery) plus three special results: Morgul Ring, Morgul Shadow, Seek. These special results work as follows:
- Spend a Morgul Ring die result to perform a Perception in the area where the active Nazgûl is located, or perform a Perception in the section where the active Nazgûl is located. If the Perception is successful, the Ring–bearer player must specify who is inside the area or the section: Frodo, Gandalf, or both.
- Spend a Seek die result to move all Nazgûl 1 step (starting with the active Nazgûl).
- Spend a Morgul Shadow die result as if it were a Ring, Sword, or Sorcery result, at player's choice. Differently from a normal Shadow die result, the Ring–bearer player does not receive one Fellowship token when this result is rolled.
Encountering the Nazgûl (Part 2)
As described in "Frodo, Gandalf and the Nazgûl" above, if Frodo is found by a successful Hunt, a Nazgûl Encounter is resolved at the end of the turn, after all Nazgûl have had a chance to move and act. There is an important difference in the way Frodo's escape works between Part 1 and Part 2.
Escape
When Frodo escapes at the end of the Encounter, the Ring–bearer player must choose between:
- Moving Frodo's figure one step back on the Movement track, and replacing the current Journey card with a new one (see "Changing Course" below); or
- Keeping the current Journey card (and position) to resume playing normally — this is normally a good option only if Frodo is about to reach an Exit location.
This choice is made openly, declaring it to the Ringwraith players.
Changing Course
Should the Ring–bearer player choose to change the current Journey card with a new one:
- Frodo's figure is moved back one step on the Movement track.
- All Track tokens placed on the board are discarded.
- The Ring–bearer player discards the old Journey card and secretly draws a new card from the same deck (same length of journey).
Note: If Strider's Company card has not been flipped, his ability may be used at this step.
The selected card is now Frodo's current Journey card. The new position of Frodo is determined normally, simply by matching where Frodo's figure is on the Movement track with the appropriate row of the Journey card.
End of Part 2
Part 2 ends when one of the following situations applies:
Frodo Reaches Rivendell
If the Frodo figure reaches the step of the track (14 or 16) corresponding to the last entry of the current Journey card, the game is immediately over: Frodo is safe and the Ring–bearer player wins.
Frodo Is Corrupted
If Frodo's Corruption level reaches or exceeds the current Corruption threshold (determined by the Journey card, plus one for each completed Gandalf's deed, plus one if Gandalf is in Rivendell), the game is immediately over: Frodo has been enslaved by the will of the One Ring, and the Ringwraith players win.
Playing Hunt for the Ring with War of the Ring
Our War of the Ring board game features the journey of the Fellowship of the Ring from Rivendell to Mount Doom, and Hunt for the Ring may be considered the prologue to it.
If you own a copy of War of the Ring, you may decide that the outcome of your Hunt for the Ring game has a consequence on your next War of the Ring game, effectively linking the two game experiences in one grand re–playing of the entire The Lord of the Rings saga.
The rules presented here allow you to do just this, assuming that, even in the case Hunt for the Ring ends with a defeat for the Ring–bearer, Frodo is somehow rescued by Elrond and brought to Rivendell — but his recovery may take longer than it did in the novel, giving an advantage to the Shadow. On the contrary, if the outcome of Hunt is more advantageous to the Free Peoples than the one in the novel, the Free Peoples player will have an advantage. This advantage is handled by the use of Action tokens.
Receiving Action Tokens
Depending on the ending of your Hunt for the Ring game, players receive Action tokens during the setup of War of the Ring, as follows:
- Frodo is Corrupted during Part 1, or before step 8 of Movement track in Part 2: Shadow: 2 tokens.
- Frodo is Corrupted during Part 2, at step 8 or later of Movement track: Shadow: 1 token.
- Frodo has reached Rivendell with no Company cards: Shadow and Free Peoples: 1 token each.
- Frodo has reached Rivendell with 1 or 2 Company cards: Free Peoples: 1 token.
- Frodo has reached Rivendell with 3 or more Company cards: Free Peoples: 2 tokens.
When a player receives only one token, he may choose which one to take.
Playing with Lords of Middle–earth
If you play War of the Ring with the Lords of Middle–earth expansion, these tokens are in addition to any Action tokens the Shadow player receives when the Free Peoples player starts the game with companions outside the Fellowship (as indicated by the Council of Elrond optional rules).
Action Tokens
Hunt for the Ring includes four Action tokens: two for the Free Peoples player, two for the Shadow player. A player may use one Action token during Action resolution, in place of using an Action die result.
- Each Action token can only be used once during the game and can only be used for its specific effect.
- Only one Action token can be used in a turn.
- Action tokens are not counted among the number of actions available to the player for the purpose of deciding if he can pass an action.
- An Action token cannot be used as "Any Action Die result" (to activate an Event card or Character ability with such a wording) and cannot be modified by an Elven Ring.
- In a multi–player game, either Free Peoples player may use a Free Peoples Action token, and either Shadow player may use a Shadow Action token.
The Shadow Action tokens have the following effects:
- Move Nazgûl and Minions (same as the option allowed by a Shadow Character die result).
- Advance a Shadow Nation on the Political Track (same as the option allowed by a Shadow Muster die result).
The Free Peoples Action tokens have the following effects:
- Draw one Event card (same as the option allowed by a Free Peoples Event die result).
- Advance a Free Peoples Nation on the Political Track (same as the option allowed by a Free Peoples Muster die result).
Glossary
- Action Dice: The special dice used by the Ringwraith players, optionally used during a Nazgûl turn to take an action.
- Action Dice Pool: The set of action dice available to the Ringwraith players in a turn.
- Adjacent: Two spaces are adjacent if they are joined by a path or road, and thus within one movement step from each other.
- Ally Card: A card used by the Ring–bearer player (normally once a turn at most) to help Frodo. There are two different Ally card decks, used in Part 1 and Part 2 respectively.
- Ally Location: Circled space marked with a name in a scroll.
- Ally Token: A token used to mark the location of an Ally. Blocks the movement of the Nazgûl.
- Area: Each board is divided into 10 areas, divided among its 3 sections (I, II, III). Each area within a section is identified by a letter (A, B, C, D). An area is identified by a number (its section) and its specific letter (for example, area II•B).
- Black Rider Reference Card: Special card indicating additional abilities gained by the Ringwraith players.
- Company Card: A card representing Frodo or one of his companions. It has two abilities: one is valid until the card is flipped, the other may be used once, then the card is flipped and both abilities are lost.
- Company Log Token: Token used to mark the effect of certain Ally cards, as a reminder.
- Any two spaces (dots or locations) are connected if they are adjacent or separated only by dots (a location is considered always connected to itself).