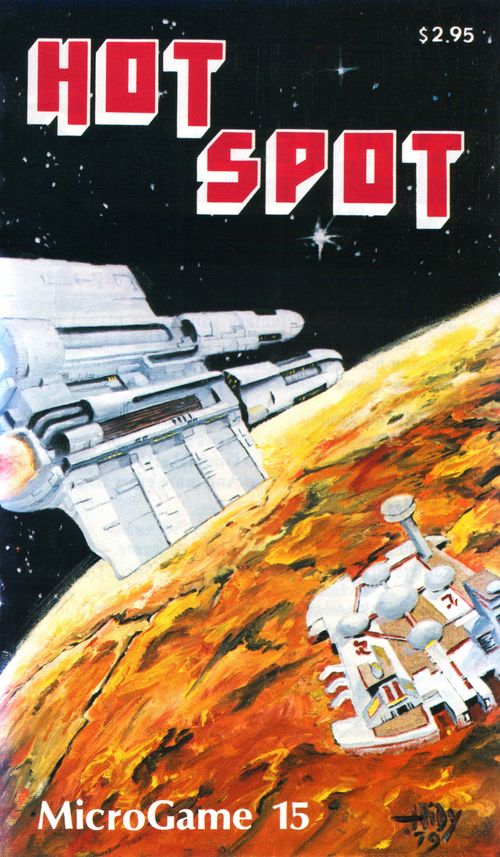
Hot Spot
Hot Spot Rulebook
Table of Contents
Table of Contents
- 1.0 Introduction
- 2.0 Game Components
- 3.0 Preparation for Play
- 4.0 Game-Turn Sequence
- 5.0 Victory Conditions
- 6.0 Crustal Movement
- 7.0 Collisions
- 8.0 Regular Movement
- 9.0 Stacking
- 10.0 Infantry Breakdowns
- 11.0 Overruns and Close Infantry Assaults
- 12.0 Combat
- 13.0 Hovercraft Second Movement
- 14.0 Crustal Damage and Break-up
- 15.0 Technocrat Engineer Squads
- 16.0 Chart and Tables
- Unit Descriptions
1.0 Introduction
In the far future where battlewarps range in the void of space and robotic warriors lie waste to entire continents, war had become a massive undertaking. Humans concentrated on formations no smaller than millions, while computers dealt with the immediate and tactical situations. That is why the Technocrat raid on Chiros remains a fascinating anachronism — man-to-man combat in the age of super technology.
The Technocrat rebellion began on the world GERSHWYN, home of the Confederation Eighth Fleet. The Technocrats were mostly scientists and technicians who rebelled against the strict discipline of the Confederation autocracy. The Eighth Fleet rallied to the revolution, as did portions of the Second and Fourteenth Fleets at Doka and Por Bello. The Confederation was swift to retaliate. The Confederation Grand Fleet met the rebels' forces in the vicinity of Infulgar. Smashed by mere numbers alone, the Technocrats fought a delaying action as they evacuated families and sympathizers from the nearest worlds. A combined fleet of battlewarps and civilian transports, fueled at the captured Confederation depot, fled into the starry wastes for unknown space beyond the Periphery where a new world might be colonized in the spirit of freedom and libertarianism.
But the Technocrat fleet could not carry enough fuel to complete their exodus. Somewhere, somehow, more fuel would need to be found.
Chiros was the major fuel depot in the Jadreke sector of the Confederacy. Centuries before it had been invaluable in the actions against the Valdurian Incursion. The high gravity world was entirely made up of molten rock. Work stations were located on manmade structures known as crustals which were built to withstand the heat and gravity. A main crustal was secured magnetically into place. It held the refineries and storage holds. Smaller, mobile crustals retrieved and stored the fuel as it upwelled from beneath the surface.
HOT SPOT simulates the Technocrat assault on Chiros. The defending Ziegler Corporation forces consist of infantry and hovercraft, while the attacking Technocrat forces consist of heavy beamers, crawlers, infantry, and engineers. The Ziegler units are less powerful than the Technocrat units, but more numerous. The Ziegler Corporation has the advantage of controlling the movement of the crustals that float through the molten rock. The Technocrat have attack platforms that also can move through the molten rock, but these only last for four turns.
2.0 Game Components
2.1 Map. The speckled hexes in the center represent Central Crustal. The unmarked hexes represent molten rock.
2.2 Unit Counters. Counters are provided for ground forces, crustals, attack platforms, and neutralization.
2.2.1 Ground Units. The counter diagram is labeled as follows: Attack Strength (upper left corner), Defense Strength (upper right corner), Unit Types Diagrams (the picture in the center of the counter), and Movement Allowance (the "m" number in the lower right corner).
The dark units with white lettering are Technocrat units, while the white units with the dark lettering are the Ziegler units.
2.2.2 Crustals. The light hexagon-configuration counters represent the mobile crustals. Each crustal has a letter for identification purposes and a number indicating its damage rating. A crustal can be one of four types: 1-hex, 2-hex, Triangular 3-hex, or Long 3-hex. Two-hex and Long 3-hex crustals have one end darkened to indicate their front end.
2.2.3 Attack Platforms. The dark hexagon-shaped counters represent Technocrat attack platforms. Each attack platform has an outline number for identification purposes, and a "2" indicating its damage rating.
2.2.4 Neutralization Markers. Square counters with an "N" indicate that a crustal is neutralized.
2.3 Additional Materials. Players will need to supply pencils, paper, and a die.
3.0 Preparation for Play
3.1 Side Selection. One player commands the Technocrat invasion force, while the other player controls the Ziegler Corporation defense forces.
3.2 Ziegler Set-up. The Ziegler player begins with 18 hexes of crustals (not counting Central Crustal) of any types, 42 attack factors of infantry, and 6 hovercraft units. Crustals are placed in any molten hexes. Infantry and hovercraft are then placed on Central Crustal and the mobile crustals.
3.3 Technocrat Set-up. The Technocrat player begins with 5 attack platforms, 24 attack factors of infantry, 3 engineer squads, 6 crawlers, and 2 heavy beamers. The ground units are divided among the attack platforms. After the Ziegler player has finished setting up, the attack platforms are placed in molten hexes on the perimeter of the map.
4.0 Game-Turn Sequence
Each turn consists of the following phases, which must be done in order:
- A. Ziegler Crustal Movement: The Ziegler player may move his crustals. If collisions occur, damage is determined.
- B. Ziegler Regular Movement: The Ziegler player may move his infantry and hovercraft. If overstacking occurs, crustal damage is determined.
- C. Ziegler Combat: Combat occurs between Ziegler and Technocrat units in the same hex.
- D. Ziegler Second Movement: Ziegler hovercraft may move again. If overstacking occurs, crustal damage is determined.
- E. Technocrat Crustal and Attack Platform Movement: The Technocrat player may move crustals that he has taken control of and also his attack platforms. If collisions occur between crustals, damage is rolled for.
- F. Technocrat Regular Movement: The Technocrat player may move his ground units. If overstacking occurs, damage is rolled for.
- G. Technocrat Combat: Combat occurs between Technocrat and Ziegler units in the same hex.
- H. Crustal Control: Technocrat engineers may attempt to take control of Ziegler crustals. Crustals and attack platforms may break up.
5.0 Victory Conditions
The Technocrat player wins when an engineer squad takes control of Central Crustal. The Ziegler player wins by eliminating all Technocrat engineers or otherwise making a Technocrat victory impossible. The game continues until one of the players meets his victory condition. However, either player may concede at any time.
6.0 Crustal Movement
6.1 General. This section of rules applies only to crustals and attack platforms, not to infantry, hovercraft, engineers, crawlers, or heavy beamers. (See 8.0 for regular movement rules.) This section also does not apply to Central Crustal, which cannot move.
6.2 Terrain. Crustals and attack platforms may move in and through any molten hex of the map. Only one crustal or attack platform is allowed per hex.
6.3 One-Hex-Crustal Movement. A one-hex crustal may move up to three hexes each turn in any direction or combination of directions.
6.4 Two-Hex-Crustal Movement. A two-hex crustal has a front end marked on its counter. In a turn, a two-hex crustal may (a) move two hexes in a straight line in the forward direction, or (b) move its front hex one hex in the forward direction and swing its rear hex into one of the two molten hexes which are adjacent to both the new front hex and the old front hex. It may not move one hex without turning.
6.5 Triangular-Three-Hex-Crustal Movement. The triangular-three-hex crustal, in one turn, may (a) move one hex in any direction while keeping its three hexes in the same position relative to each other, or (b) rotate 120 degrees.
6.6 Long-Three-Hex-Crustal Movement. The long-three-hex crustal, like the two-hex crustal, has a front end. In a turn, a long-three-hex crustal may (a) move two hexes in a straight line in the forward direction, or (b) rotate 60 degrees, such that the center hex remains in place and each of the other two hexes move one hex. It may not move one hex forward.
6.7 Attack Platforms. Attack platforms may move up to four hexes each turn, in any direction or combination of directions.
6.8 Non-movement. A crustal is never forced to move. A player may move some, none, or all of his crustals and attack platforms each turn. Also, crustals may not enter or attempt to enter molten hexes occupied by other crustals. A crustal may not move if all hexes that it could legally enter are occupied. (See also Collisions, rule 7.0).
6.9 Leaving the Map. Attack platforms and crustals that entirely leave the map are out of play for the rest of the game. Crustals that are partially off the map automatically break up during the next Crustal Control phase.
6.10 First Turn. On the first turn of the game, one-hex crustals may only move one hex. Attack platforms and other crustals may move normally.
7.0 Collisions
7.1 Zones of Contact. Each crustal, including Central Crustal, and each attack platform exerts a Zone of Contact into each adjacent molten hex. If another crustal or attack platform enters one of those hexes, a collision has occured.
7.2 Number of Collisions. One collision is considered to have occured for every hex in which a crustal or attack platform has moved adjacent to another crustal or attack platform, or to more than one crustal or attack platform. If no movement occured, no collisions occur. (See examples, 7.6)
7.3 Loss of Motion. As soon as a collision has occured, all movement for the moving crustal is ended for that crustal movement phase. Unused movement is lost. Two-hex and long-three-hex crustals may move only one hex forward if they collide on the first hex, even though they must ordinarily move two hexes forward (see 6.0). Two-hex crustals may turn when they move one hex and collide, although they do not have to.
7.4 Damage. In every collision, a die is rolled for each crustal involved to see if it is damaged. See 14.0.
7.5 Exceptions. Attack platforms may move adjacent to other attack platforms without collision. The Central Crustal never receives damage from collisions, although crustals or attack platforms which collide with it may be damaged.
7.6 Examples. The examples below are illustrated with diagrams in the printed rulebook (labeled "Zone of Contact hexes" in the diagram key).
- The attack platform is moving towards the 2-hex crustal (see arrow). It enters the Zone of Contact of the crustal. A collision occurs. The attack platform may no longer move in that turn--it cannot use the remaining two hexes it would normally move. The Technocrat player, whose attack platform collided with the 2-Hex crustal, makes one roll on the Crustal Damage Chart. The Ziegler player, who owns this crustal, also makes one roll on the Crustal Damage Chart. Neither player need tell the other if damage has occured.
- The Long 3-Hex crustal, which has been taken over by the Technocrat player, is being run into by a 3-Hex Ziegler crustal. Two collisions occur--one for each hex of the Zone of Contact which the 3-Hex Crustal has entered. Both players must make TWO rolls for damage on the Crustal Damage Chart.
- This 2-Hex Crustal is moving one hex and making a turn. As it turns, its rear hex enters the Zone of Contact of a nearby 1-Hex crustal. In this case, both crustals belong to the Ziegler player. He must make one roll on the Crustal Damage Chart for each crustal.
- Attack platforms cannot collide with each other. A.P. I can therefore move through hexes adjacent to A.P.V. without stopping and without receiving damage. If A.P. I were instead a 1-Hex crustal, there would be a collision.
- This 1-Hex Crustal is moving into a hex which is in two Zones of Contact: both of the two 2-Hex crustals. There are two collisions for the 1-Hex crustal, and two rolls must be made for it on the Crustal Damage Chart. Both of the 2-Hex crustals make one roll on the Chart.
- The two crustals shown collided in a previous movement phase. The one crustal is moving forward. It can only move the one hex before it enters a hex of the Zone of Contact of the other crustal. The crustal, because of the collision, cannot move forward another hex or, if it was turning, it cannot complete the turn by swinging the rear hex into the clear hex. When rolling for damage for that crustal, its player makes one roll on the Crustal's Zone of Contact which was entered in the movement. This is in spite of the fact that the crustal will actually be sitting in two of the other crustal's Zone of Contact hexes--only one was entered in this movement. If the crustal had not moved, no further collisions would have occured.
8.0 Regular Movement
8.1 General. Each infantry, hovercraft, crawler, heavy beamer, or engineer unit has a movement allowance printed on the counter. During a regular movement phase, a unit may move through a number of consecutive hexes equal to or less than its movement allowance. EXAMPLE: A crawler, which has a movement allowance of 3, may move up to 3 hexes each turn. Units are not required to move in every turn, and do not have to move their entire movement allowance. Unused movement cannot be saved for next turn.
8.2 Terrain. Units covered in this rules section must move on top of crustals, attack platforms, or the Central Crustal. Units moved directly into molten hexes are destroyed.
8.3 Enemy Units. When a unit enters a hex containing enemy units, an attack is initiated. The friendly units lose the rest of their movement for that turn. Combat is resolved in the combat phase. EXCEPTION: Overruns, see rule 10.0 [as printed; the Overruns rules are 11.0 in this text].
9.0 Stacking
9.1 Crustals. A single player may not have more than nine units in one hex of a crustal. The total of counters in one hex of a crustal, from both players, may not exceed twelve.
9.2 Attack Platforms. No more than nine units of either or both sides may be placed on an attack platform.
9.3 Stress. If more than six units are in one crustal hex or on one attack platform at the end of a regular movement phase or because of retreats (see 12.5), the crustal may be damaged. See 14.2.
9.4 Central Crustal. The crustal stacking limit (see 9.1) applies to Central Crustal. However, Central Crustal never suffers damage because of overstacking.
9.5 Reconnaissance. A player may not examine his opponent's stacks (and thus will only be able to see the top unit in that hex) until he has a unit in that hex to attack it.
10.0 Infantry Breakdowns
Infantry units of each side come in three sizes: one squad, two squads, or three squads. Each Ziegler infantry squad has attack and defense factors of two. Thus, a two-squad unit is worth either three or six. However, each infantry counter counts as one unit for purposes of stacking, regardless of how many squads it represents. Two- and three-squad units may break down into several smaller units and small units may combine into larger ones at any point during the owning player's regular movement phase. Two- and three-squad units may also break down as a result of casualties (see 12.5.2).
11.0 Overruns and Close Infantry Assaults
11.1 Overruns. Technocrat crawlers and heavy beamers may move through hexes which contain only Ziegler infantry without stopping. An attack is not initiated if the Technocrat units leave the hex that turn. The infantry is not eliminated.
11.2 Close Infantry Assaults. Ziegler infantry units which are being overrun by Technocrat units have the option of conducting Close Infantry Assaults. These are conducted during the Technocrat movement phase. The Ziegler player may roll one die for every overrunning unit as it moves through the hex, regardless of the number of defending infantry, and consults the Close Infantry Assault Chart.
12.0 Combat
12.1 General. Combat must be initiated when friendly units enter hexes containing enemy units. (EXCEPTION: Overruns, see 11.1). Combat is resolved in the combat phase following that movement phase.
12.2 Attack Factors. The attack factor is printed in the upper left corner of the counters. If a counter has no number printed on it, it may not attack and may not move into hexes containing enemy counters, even if accompanied by friendly units.
12.3 Defense Factors. The defense factor is printed in the upper right corner of the counters. If a counter has no printed defense factor, it is automatically eliminated by any enemy attack if it is not stacked with a friendly unit. Such units do not add anything to the defense of friendly units in their hex, but are eliminated if all of these friendly units are eliminated.
12.4 Procedure. The attacking player totals the attack factors of his units in the contested hex. The defending player totals the defense factors of his units in that same hex. Then an odds ratio is computed by dividing the total attack factors by the total defense factor. This ratio is rounded off in the defender's favor to one of the simplified odds ratios shown on the Combat Results Table.
EXAMPLES: A Technocrat heavy beamer (attack factor of 4) attacking a one-squad Ziegler infantry unit (defense factor of 1) is a 4-1 attack. A heavy beamer attacking a two-squad Ziegler infantry is 4-2 or 2-1. A heavy beamer, a crawler, and a two-squad Technocrat infantry (total attack factor of 11) attacking a three-squad Ziegler infantry unit (defense factor of 3) is 11-3, which rounds off in the defender's favor to 3-1.
After determination of the odds ratio, a die is rolled. The corresponding line of the proper column of the Combat Results Table is consulted, and the results are applied.
12.5 Combat Results.
- 12.5.1 "No Effect": The attack has failed. Attacking units must retreat (see 12.6).
- 12.5.2 "C": The defender must lose one infantry squad (one Ziegler or two Technocrat attack factors; see 10.0). Non-infantry units are unaffected. If the defender has not been eliminated, the attacking units must retreat (see 12.6).
- 12.5.3 "X": All defending units are eliminated. Attacking units remain in the hex.
12.6 Retreat. When attacking units are not able to eliminate all defending units in the hex, the attacking units must retreat. Retreats are done immediately after that combat has been resolved. Retreating units move one hex in the direction from which they attacked. Retreats may not be made into hexes containing enemy units. If more than nine units are in a hex after retreating, the owning player must eliminate the excess units from among the retreating units. If more than six units are in a hex, crustal damage must be rolled for. (See 14.2).
12.7 Attack Order. The attacking player may resolve the attacks in any order he wishes.
13.0 Hovercraft Second Movement
13.1 Second Movement. After the Ziegler player has completed his combat phase, he may move his hovercraft a second time. Hovercraft may move in both of the Ziegler player's movement phases. Hovercraft movement in the second movement phase is limited to three hexes.
13.2 Stress. If hovercraft movement results in more than six units in a crustal hex, damage must be rolled for (see 14.2). However, if this hex was already rolled for during regular movement, it is not rolled for again.
13.3 Attacking. Hovercraft may not enter hexes containing enemy units other than Technocrat engineer squads (see 12.3) during their second movement.
14.0 Crustal Damage and Break-up
14.1 Crustal Damage. Each player must use scratch paper to keep track of the damage sustained by the crustals or attack platforms under his control. Crustals and attack platforms will break-up when they have sustained too much damage.
14.2 Stress. Stress occurs when more than six counters are located in a crustal hex or on an attack platform. The player who owns the crustal or attack platform must immediately roll one die. If a "one" is rolled, he must mark in his record for that crustal or attack platform that one point of damage has occured. The die roll is secret, so that only the player who controls a crustal or attack platform knows if it has received damage.
14.3 Collisions. When collisions occur (see 7.0), each crustal or attack platform involved may have sustained damage. A die is immediately rolled for each collision hex for each crustal and attack platform. If a "one" is rolled, that crustal or attack platform has taken one point of damage. The die roll is secret, so that only the owner knows if the crustal has sustained damage.
14.4 Ziegler Power Range. When one or more hexes of a crustal are off the map, the crustal will automatically break up in the next Crustal Control phase.
14.5 Attack Platform Time Limit. All attack platforms which have not already broken up will automatically break up during the Crustal Control phase of the fourth turn.
14.6 Break-up. When a crustal or attack platform has received damage equal to its damage rating, it must break up. Break-up also occurs for other reasons (see 14.3 and 14.4). All break-ups occur in the Crustal Control phase. The crustal or attack platform and all units on it are eliminated from the game.
14.7 Central Crustal. Central Crustal never receives damage, and so no damage record need be kept for it.
15.0 Technocrat Engineer Squads
15.1 Combat. The engineer squads have attack and defense factors of zero. See 12.2 and 12.3.
15.2 Taking Control of Crustals. The Technocrat player may use engineer squads to assume control of a Ziegler crustal during the Crustal Control phase. No Ziegler combat units may be on the crustal. The Technocrat rolls one die for every engineer squad on the crustal. If a "one" or "two" is rolled, the crustal is under Technocrat control. The Ziegler player must tell the Technocrat player how much damage the crustal has received. The Technocrat player keeps track of that crustal's damage while he controls it.
15.3 Sustaining Control. The Technocrat player continues to control a crustal as long as an engineer squad is on it. If, during a Crustal Control phase, no engineers are on the crustal, control reverts to the Ziegler player. If control changes hands, the Technocrat player must tell the Ziegler player how much damage the crustal has received and the Ziegler player is again in charge of monitoring damage to that crustal. The Technocrat player may regain control in the same way that he got control of the crustal the first time.
15.4 Neutralization. In any Crustal Control phase after the Technocrat player has won control of a crustal, he may attempt to use an engineer squad to neutralize the crustal. This attempt may be made regardless of the number of Ziegler units on the crustal, as long as an engineer squad is present. One die is rolled for each squad. If a "one" or "two" is rolled, the crustal is neutralized. A neutralized crustal cannot move. The Technocrat player keeps track of damage. The Ziegler player may not regain control of a crustal once it has been neutralized.
15.5 Central Crustal. Control of Central Crustal is determined exactly as control is for any crustal. The Technocrat player wins if he gains control of Central Crustal.
16.0 Chart and Tables
Combat Results Table
Attacker Strength / Defender Strength Ratio
| Die Roll | 1:3 | 1:2 | 1:1 | 2:1 | 3:1 | 4:1 |
|---|---|---|---|---|---|---|
| 1 | NE | NE | NE | NE | C | C |
| 2 | NE | NE | NE | C | C | X |
| 3 | NE | NE | C | C | X | X |
| 4 | NE | NE | C |
Explanation of symbols:
- "NE" — No effect
- "C" — Casualties
- "X" — Eliminated
Attacks at worse than 1:3 are considered 1:3; attacks at better than 4:1 are considered to be 4:1.
Close Infantry Assault Table
| Die Roll | Result |
|---|---|
| 1 | Ziegler infantry loses 1 attack factor |
| 2, 3, 4 | No Effect |
| 5, 6 | Overrunning counter eliminated |
Crustal Damage Chart
| Die Roll | Result |
|---|---|
| 1 | One point of damage |
| 2, 3, 4, 5, 6 | No damage |
Crustal Control Chart
| Die Roll | Result |
|---|---|
| 1, 2 | Attempt was successful |
| 3, 4, 5, 6 | Attempt was not successful |
Unit Descriptions
The printed rulebook describes each unit type as follows.
- Ziegler Infantry — Each attack factor comprises 20 men. They are hired mercenaries, equipped with lightweight environment suits. Weapons are limited to small arms and portable beamers.
- Technocrat Infantry — Each attack factor comprises 10 men. These are elite fighting men. The Technocrat infantry is equipped as the Ziegler force is except for clothing--the Technocrats are suited in bulky jury-rigged protection suits.
- Ziegler Hovercraft — Each counter represents a trio of light hovercraft. Armament consists of machine guns and light beamers.
- Technocrat Crawlers — The Technocrat crawlers are robotic all-terrain vehicles. They travel on tracks, and are built low to the ground to escape fire. Armament is machine guns, portable beamers and automatic rifles. The crawlers are standard battlefield equipment with modifications for the usual terrain and environment of Chiros. Each counter represents two crawlers.
- Technocrat Heavy Beamers — The Technocrat Heavy Beamer is a modified version of the traditional light assault tank. Most armor has been stripped as a concession to weight. Two heavy beamers have been mounted in the turret to replace the normal guns, since the heavy beamers are recoilless. Machine guns are mounted on the sides. Humans are required to supplement the abilities of the onboard computer, which has not been completely reprogrammed for the modifications. Each counter represents one Heavy Beamer.
- Technocrat Engineer Squads — An engineer squad consists of ten men, along with two all-terrain vehicles. The vehicles contain equipment and detecting devices to locate the crustal control centers, which are below the surface of the crustals.