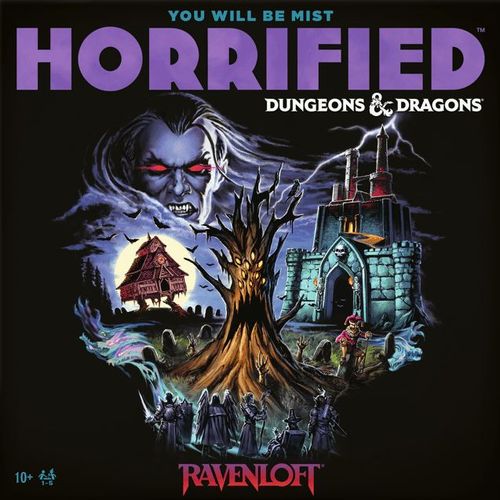
Horrified: Dungeons & Dragons – Ravenloft
Horrified: Dungeons & Dragons – Ravenloft Rulebook
Table of Contents
Table of Contents
- Components
- Objective
- Monster Setup
- Player Setup
- Playing the Game
- Using the 20-Sided Die (d20)
- Hero Phase
- Villagers
- Perk Cards
- Hero Phase Example
- Items
- Monster Color Symbols
- Monster Phase
- How Monsters Attack
- Monster Phase Example
- Reading the Dice
- Ending the Game
- The Monsters
- Individual Monsters
- Combining Horrified Games
Components
- 1 Gameboard
- 5 Hero Standees (insert into matching-colored bases)
- 10 Villager Standees (insert into clear bases)
- 3 Twig Blight Standees (insert into clear bases)
- 60 Item Tokens
- 5 Monster Mats
- 4 Monster Figures
- 5 Hero Tiles
- 1 Terror Marker
- 1 Frenzy Marker
- 1 Horrified Haversack
- 3 Monster Dice
- 1 20-sided Die (d20)
- 30 Monster Cards
- 20 Perk Cards
- 5 Reference Cards
- 25 Monster Tokens:
- Strahd: 6 Tarokka Cards, 1 Heart of Sorrow, 3 Relic Tokens
- Baba Lysaga: 5 Hut Tokens, 1 Gem
- Gulthias Tree: 9 Root Tokens
Objective
Horrified: Dungeons & Dragons Ravenloft is a cooperative game. All players win or lose together. The players win if they defeat all the Monsters on the gameboard. Each Monster is defeated in a unique way, which can be found on its Monster mat. More details about each Monster can also be found starting on page 10.
The players lose if the Terror Level reaches its maximum (the Monsters overrun the town!) OR the Monster deck is empty (the Heroes have run out of time!).
Monster Setup
- Set out the gameboard and familiarize yourself with the locations in Ravenloft's Domain of Barovia.
- Put the Terror Marker into a clear base and place it on 0 on the Terror Level Track on the top of the gameboard.
- Put the ten Villager standees into clear bases and put them next to the gameboard.
- Shuffle the Monster cards and put them in a facedown pile next to the gameboard.
- Decide which Monsters to play against. Place the corresponding Monster mats next to the board in Frenzy Order from lowest to highest.
- Follow the setup instructions for each Monster you're using. Individual Monster instructions can be found starting on page 10 and on the back of the Monster mats. Return all unused Monster mats, figures, and tokens to the box.
- Put the Frenzy Marker into a clear base and place it on the Monster mat with the lowest Frenzy Order number.
Monster Difficulty
If this is your first Horrified: Dungeons & Dragons Ravenloft game, we recommend playing against Baba Lysaga and the Carrionette. If you have played Horrified before or are more experienced, we recommend Strahd (he requires more arduous challenges to be defeated!) and a second Monster. For the experts out there, try playing against all four Monsters!
Example Setup of 3-Player Game with Baba Lysaga and the Carrionette
The rulebook shows an example setup diagram for a 3-player game with Baba Lysaga and the Carrionette. It labels the Terror Marker, the Terror Level Track, the Horrified Haversack, the Perk deck, the Monster deck, the Villagers, the Monster mats, the Frenzy Marker, the Monster dice, the 20-sided die (d20), the Player 1, Player 2 and Player 3 areas (each with a Hero tile, a reference card and a Perk card), and the gameboard with Villagers, Heroes and Monsters placed on their starting locations.
Player Setup
- Each player chooses the Hero they want to play and takes the corresponding Hero tile and standee and a reference card. Return any unused Hero tiles, Hero standees, and reference cards to the box.
- Place the Hero standees at the starting locations indicated on the front of their Hero tiles (start with this side up).
- Shuffle the Perk cards and deal one to each player. Place the remaining Perk cards in a facedown pile next to the gameboard.
- Put the sixty Item tokens in the Horrified Haversack and shake it up. Draw twelve Item tokens and put them at the locations indicated on the Items. Put the Horrified Haversack next to the gameboard.
Playing the Game
Roll the 20-sided die (d20). The player with the highest result is the first player (reroll ties). Play proceeds clockwise around the table.
Each turn consists of two parts: the Hero Phase and the Monster Phase.
- Hero Phase: Take up to the number of actions indicated on your Hero tile. In addition, ANY player may play any number of Perk cards.
- Monster Phase: Draw a card from the Monster deck and resolve it.
Using the 20-Sided Die (d20)
- The & symbol on the die equals 20.
- During the Hero Phase, any die roll result of 20 or higher (even if boosted by a Perk card) gains the active Hero a new Perk card.
- During the Monster Phase, no Perk cards are awarded for results of 20.
- A roll of 1 is always a critical failure and results in no effect - although a Perk card may adjust that value.
Hero Phase
During the Hero Phase, you can perform up to the number of actions indicated on your tile. You may perform the actions in any order and take the same action multiple times. In addition, any player may play any number of Perk cards during any other player's Hero Phase.
Hero tile diagram labels: Actions, Hero's Name, Starting Location, Special Action, and Dark Gift (on the back of the tile). The example is The Sorcerer, with 4 actions and a starting location of Tser Falls. Its special action is "Roll the d20": 1 - No effect; 2-5 - Place an Item from the Haversack; 6-19 - Move a Monster one location; 20 - Choose a Hero to draw two Items from the Haversack and gain a Perk card. The back of the tile (after accepting the Dark Gift) reads: 1-5 - No effect; 6-19 - Move a Monster one location; 20 - Choose a Hero to draw two Items from the Haversack and gain a Perk card. Dark Gift: "Yog, the Invincible" - Ignore the first hit you would take each turn. When a Villager dies, raise the Terror Level two times total.
Actions
Move: Move your Hero along the path to an adjacent location. When you move, any number of Villagers at your location may move with you. If you are instructed to place a Hero in a location, they do not follow the path. Instead place them directly in that new location. You may move into or out of a location with a Monster, but if you end your turn in the same location as a Monster, you may be more vulnerable to attacks during the Monster Phase.
Guide: Move one Villager from your Hero's location to an adjacent location, OR move one Villager from an adjacent location to your Hero's location.
Pick Up: Take any number of Items from your Hero's location. Once picked up, keep your Items in front of you. Note: It's a good idea to pick up Items on your first turn. You will need them to advance challenges and defeat Monsters. They also can be used to defend against Monster attacks.
Share: All Heroes at the same location as your Hero may exchange any number of Items with each other. The sharing does not require a one-to-one trade, and your Hero does not need to be involved in the trade.
Advance: Use one or more of your Items to advance a Monster's challenge (shown on its Monster mat). For more details on individual Monsters, see page 10.
Defeat: Use one or more of your Items to defeat a Monster. You must complete a Monster's challenge before you can take the Defeat action against a Monster. When a Monster is defeated, move the Terror Level down one space, buying you more time. For more details on individual Monsters, see page 10.
Special Action: Use the special action printed on your Hero tile. The special action of Heroes in Horrified: Dungeons & Dragons Ravenloft is to roll a d20 and then do what is indicated on their Hero tile. You take the action indicated immediately after rolling the die and before you begin your next action. On your next action, you may take your special action again.
Effects Activated during the Monster Phase
The Paladin has effects that last for the rest of the Hero Phase, and multiple effects can add together ("Add 4" and "Add 4" would become +8 to rolls on Advance and Defeat actions for the rest of the Hero Phase). These bonuses are lost at the end of the Hero Phase they are earned.
The Ranger and the Warlock have effects that take place during the Monster Phase of their turn. These effects are lost at the end of the Monster Phase on the turn they were earned.
Dark Gifts
Ravenloft's Heroes have been offered Dark Gifts by the vestiges of dead gods locked away in the Amber Temple.
Each of these Gifts is both a boon and a curse- but only should the Hero accept it.
At any time on any player's turn (even before an effect resolves), you may accept your Dark Gift. When you do, flip over your Hero tile. You will find your monstrous new appearance, updated special action, and the effect of your Gift. This transformation is permanent, and there is no way of undoing it. Accepting your Dark Gift and using its effects do not cost actions.
Villagers
During the Monster Phase, Villagers may be placed on the gameboard at their starting locations indicated on the Monster card. Each Villager is trying to reach a specific safe location as shown on their standee. Move and Guide actions can be used to usher them to their safe locations. When a Villager reaches their safe location, the active player removes that Villager from the board and draws a Perk card.
The Villager standee diagram labels the Villager's name (for example, Mad Mage of Mount Baratok) and its safe location (for example, Mount Baratok).
Perk Cards
Each player starts the game with one Perk card. Players can earn additional Perk cards during gameplay, usually by getting a Villager to their safe location or having a d20 result of 20 or higher. Perk cards may be played on any player's turn during the Hero Phase. It's a good idea to discuss your Perk cards and when to play them with the other players. Once you play a Perk card, discard it face up. Playing a Perk card does not require an action.
Hero Phase Example
It's Beau's turn and she's playing as the Druid. She may take 4 actions as noted on her Hero tile. After some discussion with the other players, Beau decides to do the following during her Hero Phase:
Action 1: Beau uses a Move action to move the Druid to the Gates of Barovia. She moved from a location with the Villager Bildrath and decides to move him with her.
Action 2: Beau then uses a Pick Up action and picks up the three Items in her location.
Action 3: She uses the Guide action to send Bildrath one location away to Tser Falls. Now at his safe location, Bildrath is removed from the board and Beau gains a Perk card.
Action 4: Beau wants to use her new Items to help defeat the Carrionette in the adjacent location, but moving into its location with her final action would put her at risk.
Instead, Beau decides to roll the d20 for her special action, hoping to get a 6-19 to take a distanced Advance action on the Carrionette. She rolls, but she gets a 1- it's a critical failure and nothing happens.
Sam decides to play his Perk card, Tatyana, which gives the current player (Beau) two additional actions.
Actions 5 and 6: Beau takes two more special actions, this time rolling 13 and 18. With each result, she takes an Advance action against the Carrionette, swapping her Items out for its spare parts. The players are now much closer to defeating the Carrionette!
Beau confirms no other players want to use their Perk cards at this time. She ends her turn and proceeds to the Monster Phase.
Items
Items are used to advance Monster challenges, defeat Monsters, and defend yourself against Monster attacks. Each Item has a name, location, Strength value, and Type indicator. The location indicates where the Item will be placed on the gameboard when it is drawn from the Horrified Haversack. The color and shape around the Strength value indicates the Type of Item: Weapon (red hexagon), Magical (blue circle), or Mundane (yellow square). The Type of an Item will be important in performing certain actions. After you use an Item, place it in a discard pile next to the gameboard unless instructed otherwise. When the Horrified Haversack is empty, refill it with all the Item tokens in the Item discard pile.
The Item diagram shows an Item's name (Thighbone), Type, Strength (6) and location (1: Abbey of Saint Markovia). Red hexagon items are Weapons, blue circle items are Magical and yellow square items are Mundane. Examples shown are Whip (Strength 2, Dining Hall), Rod (Strength 3, Svalich Woods) and Broom (Strength 1, Ruins of Berez).
Icon key (printed beside the Item diagram): "Any token" is shown as one Weapon (red hexagon), one Magical (blue circle) and one Mundane (yellow square) token; "Single Type tokens" is shown as two red hexagons.
When an Advance action calls for "a" certain Type of Item, only one Item is needed. The single-type icon (two red hexagons) requires at least one Item to be discarded, but as many Items of the corresponding Type can be discarded along with it.
Monster Color Symbols
- Chest / Yellow
- Sword / Orange
- Wand / Purple
- Skull / Blue
- Hat / Brown
- Spellbook / Teal
- Potion / Green
- Shield / Red
Monster Phase
During the Monster Phase, the active player draws a card from the top of the Monster deck and resolves the three parts of the card, from top to bottom. After resolving the card, put it in the discard pile face up.
- Items: Draw the number of Items listed on the top right of the Monster card from the Horrified Haversack. Place each Item on the gameboard at the location indicated on the Item. If the Horrified Haversack is empty, put all the discarded Item tokens back in the Horrified Haversack, shake it up and continue drawing.
- Event: Read the Event out loud and do what it says. If the Event indicates a Color symbol for a Monster that is not in your game, ignore the Event and continue to the Monster Attack.
- Monster Attack: Follow the instructions for the Monster Attack shown on the bottom of the Monster card.
Example Monster card "Ambush!" (Items: 2). Event: "Move each Monster, Hero, and Citizen in a location next to a Skull Monster to that Monster's location." (The card prints "Citizen" here.) The Monster Attack line at the bottom of the card is labeled Color symbols, Locations moved and Monster dice.
Note: If an Event or Monster Attack applies to multiple Monsters or locations, the active player decides the order in which those Monsters resolve the actions.
Monster dice: the Monster Attack line shows a Color symbol, the number of Locations moved and the Monster dice figure.
How Monsters Attack
When reading the Monster Attack line of the Monster card, start with the leftmost icon to see which Monster will act first: either a Frenzy Monster or any Monsters with the matching Color symbol. If an Event or Monster Attack applies to multiple Monsters or locations in the game, the active player decides the order in which those Monsters resolve their actions.
If a Color symbol is not shown on any Monster mat in your game, ignore that symbol. No Monster will act.
Example: the Monster Attack line of the Ambush! card begins with the Frenzy icon, followed by a Sword (orange) Color symbol.
If the Frenzy symbol is shown, the Monster with the Frenzy Marker will move and attack. This might result in the same Monster moving and attacking twice in one turn. Complete the movement and attack for one Monster before moving on to the next Monster.
Once you have determined if you have a Monster that will move and attack you, follow the order on the Monster card.
First, move the Monster the number of locations indicated on the Monster Attack line. The Monster will always move toward the closest character (Hero or Villager). If there are multiple characters equally close, the Monster moves toward a Hero rather than a Villager. If there are multiple Heroes equally close, the active player chooses which one the Monster will move toward. If the Monster moves to a location with a character in it, it stops moving. If the Monster starts on a location with a character, that Monster will not move. If there are no characters to move toward on the board, the Monster will not move.
Special Gulthias Tree Movement: When a Color symbol for the Gulthias Tree is shown, it will never move and it will only attack if a character is in its location. However, for each of this Monster's symbols on the Monster card (including the Frenzy symbol if the Gulthias Tree is frenzied), one of its Twig Blights will move and attack, too. Which Blight moves and attacks is chosen by the active player, but they cannot choose the same Blight multiple times in the same turn. Monster card events that care about Monsters with certain Color symbols do not apply to Twig Blights.
Note: When you are instructed to move a Monster, Hero, or Villager toward a location or other character, you must move them along the shortest path possible. If there are multiple shortest paths, the active player decides which path to take. Once they reach their goal, they stop moving.
Next, attack one of the characters at the Monster's location by rolling the number of Monster dice indicated. If there is no character at the Monster's location, it will not attack. If multiple characters are at a Monster's location, the Monster will always choose to attack a Hero rather than a Villager. The active player chooses who to attack if more than one Hero is in the location.
Remember to apply any special action effects from the Hero Phase for the Ranger or the Warlock (see Special Action, page 5).
Monster Phase Example
Beau continues her turn and moves to the Monster Phase. She reveals the top Monster card: Far Worse Things Than Death.
- Items: The card indicates to place 1 Item token, so Beau draws an Item from the Horrified Haversack. It's a Mask, and she places it in Van Richten's Tower, as indicated.
- Event: Far Worse Things Than Death specifically targets Monsters with a Wand (purple) symbol. Since the group has Baba Lysaga and the Carrionette left to defeat, and neither has that symbol, the Event is ignored.
- Monster Strike: The players luck out that the Frenzy Monster is ignored this round, otherwise the currently frenzied Carrionette would attack! Unfortunately, the next symbol is the Spellbook symbol, and both Monsters have that symbol. They each will move one location and get to attack with two dice, if possible.
- Beau has a big choice since both Monsters will move. Beau decides to move Baba Lysaga first. It's technically two locations from both her own Hero, the Druid, and two locations from Joel's Paladin. Beau decides to move Baba Lysaga toward the Paladin- Joel has plenty of Items and can prepare to defeat her. Baba Lysaga has no one to attack in her location, so she ends her turn.
- The Carrionette is one location away from Sam's Sorcerer in Van Richten's Tower. Beau has no choice but to move it to that location. Beau then rolls two Monster dice as indicated on the Monster card. She rolls a HIT and the POW symbol- yikes! She performs the POW symbol first and draws and discards an Item from the Haversack. It's a Club with a Strength of 5, so Sam must discard all of his Items with a matching Strength. That discarded Sam's last Item, so the next die, the HIT die, will damage the Sorcerer. Sam removes the Sorcerer from the gameboard until his next turn when he will reappear in the Gates of Barovia. Beau then moves the Terror Marker up one space to 5 and her turn is over. It is now Joel's turn.
Reading the Dice
If a POW symbol is rolled, you must resolve that Monster's Power first. Then, determine if the target of the attack is still in the location with the Monster. If so, any HIT symbols apply to that Hero. If not, there are no hits dealt.
Heroes may defend themselves from a Monster's attack by discarding one Item for each HIT symbol rolled. If the Hero does not have enough Items or doesn't want to discard Items, they are defeated.
If a Hero is defeated, remove the Hero from the gameboard and move the Terror Marker up one space on the Terror Level Track. At the start of the player's next turn, they place their Hero at the Gates of Barovia and take their turn as normal, with their full number of actions. Heroes do not lose any of their Perk cards or Items when defeated.
Villagers are immediately defeated when hit by a Monster. Remove the Villager from the board and move the Terror Marker up one space on the Terror Level Track. Heroes cannot discard Items to save Villagers.
- POW symbol: The Monster's Power is activated once for each POW symbol rolled.
- HIT symbol: The character is hit once for each HIT symbol rolled.
- Blank: The Monster misses. This roll has no effect.
Ending the Game
The game can end in one of three ways.
Heroes win! If you defeat all the Monsters in play, you win! Thanks to your heroics, Barovia can finally have peace, if even for a moment. Perhaps now the mists will return you home...
Terror! If the Terror Level reaches the maximum, you lose. Everyone is too Horrified to continue, and Barovia is relinquished to the Monsters.
Out of time! If the Monster deck is empty when you are required to draw a card, the game ends, and you lose. You've taken too long to save the Domain, and the Villagers have all resigned to their fates.
The Monsters
Frenzied Monsters
The Monsters are agitated by your efforts to defeat them, and one Monster will always be frenzied. At the beginning of the game, the Frenzy Marker starts on the Monster mat with the lowest Frenzy Order. When the Frenzy symbol appears on a Monster card, the frenzied Monster moves and attacks, which might result in the same Monster moving and attacking twice in one turn. Some Events will direct you to place the Frenzy Marker on the next Monster. When this happens, place it on the Monster mat with the next-highest Frenzy Order. If there is no Monster with a higher Frenzy Order, place the Frenzy Marker on the Monster with the lowest Frenzy Order. If no other Monsters remain in the game, the Frenzy Marker does not move.
Defeated by a Hero
When a Monster is defeated, it is removed from the gameboard. Move the Terror Track down one space. For the rest of the game, ignore all Events and Monster attacks that refer to the defeated Monster. If the Monster had the Frenzy Marker, place the marker on the next Monster, according to the Frenzied Monsters rules. Place any Items on the Monster mat in the discard pile and return all of the Monster's components to the box.
Solo Play
When only one Hero tries to save the Domain of Barovia, the Villagers doubt your ability to do the job. Start the game with the Terror Marker set to Terror Level 3.
Individual Monsters
On the Monster pages, Item Types are shown as icons: a red hexagon is a Weapon, a blue circle is Magical and a yellow square is Mundane. Where the icon is a pair of the same shape (two red hexagons, two purple circles, two yellow squares), it is a single-type token as described under Items. Monster icons after each name are that Monster's Color symbols. Frenzy is the Monster's Frenzy Order value.
Carrionette
Complexity: Low | Frenzy: 1 | Color symbols: Chest (yellow), Spellbook (teal), Potion (green)
Objective: Swap out the Carrionette's spare parts and defeat it for good!
Power: Silver Needle: Before damage is dealt, draw and discard an Item. Each Hero in the Carrionette's location discards all Items with the discarded Item's Strength.
Step 1: Advance: Replace the Spare Parts: At the Carrionette's location, place an Item on a spare part on its Monster mat. Roll the d20, adding 5 if the placed Item matches the part's Type or Strength, or 10 if it matches both. If the result is 15 or higher, keep the Item there- you've successfully swapped it for a spare part! Otherwise, you were caught- discard the Item.
Step 2: Defeat: Disassemble: Once all the spare parts have been swapped out, you may attempt to disassemble the Carrionette once and for all. In its space, discard Weapon Items, roll the d20, and add the Strength of the discarded Items. If the result is 15 or more, the Carrionette is defeated!
Carrionette Notes:
- Items used to swap out for spare parts don't need to match either the Type or Strength of the targeted spare part. However, the more it matches, the more you can add to your roll!
Gulthias Tree
Complexity: High | Frenzy: 6 | Color symbols: Skull (blue), Hat (brown), Potion (green)
Objective: Dig out the Tree's undead Roots, then chop it down!
Power: Necrosynthesis: Roll the d20 for each defeated Twig Blight. Return those Blights to the gameboard at those locations.
Step 1: Advance: Prune the Blights: In a Twig Blight's location, discard Mundane Items, roll the d20, and add the Strength of the discarded Items. If the result is 8 or more, the Blight is cut down and removed from the gameboard.
Step 2: Advance: Dig Up the Roots: In the Gulthias Tree's location, discard a Magical Item and flip a Root token face-up. You may then stop, or repeat this process any number of times within a single action. If you stop, remove all revealed Root tokens from the Monster mat. If at any point two Roots with the same symbols are revealed in the same action, immediately turn all Roots revealed in this action face-down and shuffle them.
Step 3: Defeat: Timber!: Once you have removed all of the Roots, you may attempt to chop down the Gulthias Tree. In its location, discard Weapon Items, roll the d20, and add the Strength of the discarded Items. If the result is 15 or more, the Gulthias Tree and its Blights are defeated. Timber!
Gulthias Tree Notes:
- When setting up the Gulthias Tree, shuffle its Root tokens and place them face-down on its Monster mat. Insert the three Twig Blights into clear bases. Then, roll the d20 three times and place a Twig Blight at each of those locations.
- Twig Blights do not have to be defeated to Advance or Defeat the Gulthias Tree.
- If rolling the d20 would ever place a Twig Blight onto the gameboard in the same location as a character or another Monster, reroll the d20.
- See page 8 for rules on how the Gulthias Tree and its Twig Blights move and attack.
- The number of symbols on a Root token tells you how many total Roots there are with matching symbols (i.e. if you reveal a Root with three symbols on it, then there are two more matching Roots left!). Are you feeling lucky?
Baba Lysaga
Complexity: High | Frenzy: 2 | Color symbols: Sword (orange), Hat (brown), Shield (teal)
Objective: Steal the magical Gem powering the walking Hut, then defeat Baba Lysaga herself!
Power: Carried Off: Baba Lysaga moves up to two locations towards the closest Villager not currently in her location. Any Villagers already in her location move with her.
Step 1: Advance: Explore the Hut: At Baba Lysaga's location, do one of the following:
- Discard a Mundane Item to reveal a number of Hut tokens equal to the discarded Item's Strength OR move the Gem a number of unoccupied spaces equal to the discarded Item's Strength.
- Fight a revealed scarecrow by discarding a Weapon Item, rolling the d20, and adding the discarded Item's Strength. If your roll is equal to or higher than the target on the token, remove it.
- Release a raven by discarding a Magical Item, rolling the d20, and adding the discarded Item's Strength. If your roll is equal to or higher than the target on the token, remove it and gain a Perk card.
Step 2: Defeat: Confront the Witch: Once the Gem is at the Door space, you may battle Baba Lysaga herself. In her location, discard Magical Items (single type), roll the d20, and add the Strength of the discarded Items. If the result is 15 or more, Baba Lysaga and her Hut are defeated!
Baba Lysaga Notes:
- When setting up Baba Lysaga, place the Gem face-up in the top space on her Monster mat. Then, shuffle the Hut tokens and place them face-down in the remaining five non-Door spaces.
- If Baba Lysaga's token is revealed inside her Hut, she cannot be moved or removed. Find a path around her!
- Villagers moved to their safe location by Baba Lysaga won't leave the board or give a Perk Card (they're in Baba Lysaga's clutches!). If a Hero enters that location while the Villager is still there, or if the Villager leaves and comes back, then they will leave the board and award a Perk card.
Strahd von Zarovich
Complexity: High | Frenzy: 4 | Color symbols: Chest (yellow), Sword (orange), Shield (red), Wand (purple)
Objective: Find the three Relics, destroy the Heart of Sorrow, and face off with Strahd in Castle Ravenloft!
Power: Strahd's Fury: Deal 1 hit to all characters in Strahd's location.
Step 1: Advance: Consult Madam Eva: At Madam Eva's Tent, discard an Item to reveal the Tarokka card of the discarded Item's Type. Place the corresponding Relic at the location on that Tarokka card.
Step 2: Advance: Return the Relics: Place the Holy Symbol of Ravenkind in the Chapel, the Tome of Strahd in the Study, or the Sunsword in the Tomb. All three must be placed before being able to move on to the next Advance action.
Step 3: Advance: Destroy the Heart of Sorrow: Once all three Relics have been placed in the Castle, you may destroy Castle Ravenloft's Heart of Sorrow. At its location, discard Weapon Items (single type), roll the d20, and add the Strength of the discarded Items. If the result is 15 or more, remove the Heart of Sorrow from the Monster mat and place Strahd in the North Tower.
Step 4: Defeat: Showdown with Strahd: Once the Heart of Sorrow is destroyed, it's finally time to take on Strahd. At his location, discard three Items of any Type. Roll the d20 and add the Strength of the discarded Items. If the result is 15 or more, Strahd von Zarovich is defeated... for now!
Strahd Notes:
- When setting up Strahd, place his second Monster mat next to the Castle Ravenloft section of the gameboard. Shuffle the Tarokka cards and place three face down on the first Monster mat, then return the remaining ones to the box. Place the Relics in their spots on Strahd's first Monster mat and the Heart of Sorrow on its spot on Strahd's second Monster mat.
- Relics can be picked up and shared like Items. However, they cannot be discarded to negate damage.
- Strahd's second Monster mat acts as an extension of the gameboard. It takes one Move action to move between Ravenloft: Grand Stairway and Stairs on the mat. Any Monster or character may move onto the mat, but the mat is only used when playing against Strahd.
- When Strahd is defeated, the locations on his second mat stay in play.
Combining Horrified Games
Horrified: Dungeons & Dragons Ravenloft can be combined with other Horrified games. You can challenge yourself with combos of fearsome Monsters to create a terrifying mix of fear and destruction that only you can imagine!
Visit ravensburger.com/combinehorrified to learn more.