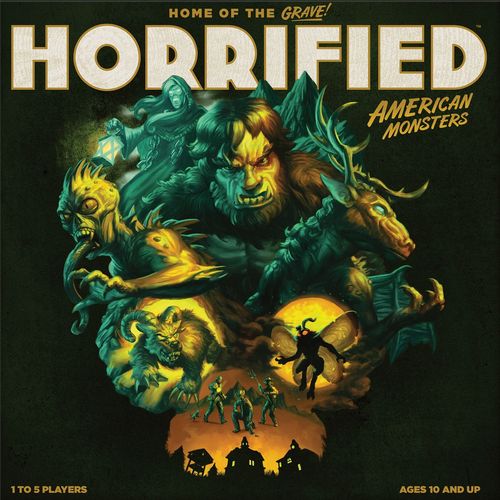
Horrified: American Monsters
Horrified: American Monsters Rulebook
Table of Contents
Table of Contents
Components
- 1 Game Board
- 7 Investigator Identification Tiles ("your ID")
- 7 Investigator Standees (insert into matching-colored bases)
- 6 Monster Mats
- 13 Citizen Standees (insert into clear bases)
- 6 Monster Figures
- 60 Item Tokens
- 1 Frenzy Marker (insert into a clear base)
- 1 Terror Marker (insert into a clear base)
- 1 Item Bag
- 5 Reference Cards
- 3 Dice
- 30 Monster Cards
- 20 Perk Cards
- 45 Monster Tokens (for use when playing against specific Monsters):
- Banshee of the Badlands: 7 Violins
- Mothman: 1 Eye of the Mothman, 4 Trap Tokens
- Bigfoot: 4 Footprints, 5 Photo Tokens, 1 High School Overlay
- Ozark Howler: 8 Death Marks, 5 Trail Tokens, 1 Abandoned Mine Overlay
- Chupacabra: 1 Farm Overlay
- Jersey Devil: 7 Clue Tokens, 1 City Hall Overlay
Monster Setup
Unfold the game board and familiarize yourself with the locations. As you set up and play the game, certain instructions and components will reference these locations.
- Assemble the Terror Marker by inserting the marker into a clear stand and placing it on the "0" location of the Terror Level Track located at the top of the board.
- Insert the 13 Citizen markers into the clear stands, and set them next to the board, next to the 3 Dice.
- Shuffle the Monster Cards and place them as a face-down deck next to the board.
- Choose which Monsters will be active during the game. (See Difficulty below.)
- Find the Monster mat that corresponds to each of your chosen Monsters and place these mats in a row next to the board, arranged from lowest to highest Frenzy Order. Frenzy Order can be found on the bottom left of each mat.
- Complete setup for each Monster in your game (see The Monsters). You can also find a simplified Monster setup on the back of any unused Monster mat.
- Return all unused Monster mats, figures, and tokens to the box.
- Place the Frenzy Marker on the Monster mat with the lowest Frenzy Order.
Player Setup
- Shuffle the Investigator ID tiles face-down and give one at random to each player. Give each player the Investigator standee and stand that match that ID, along with a Reference card. Return any unused IDs, Investigator standees, and Reference cards to the game box.
- Place each player's Investigator standee at the starting location indicated on their ID.
- Shuffle the Perk cards and give one at random to each player, face-up. Place the remaining Perk cards in a face-down deck next to the board.
- Put the 60 Item tokens into the Item Bag and mix them up. Draw 12 Item tokens from the Bag and place each one at the locations indicated on those Items. Place the Item Bag next to the board.
Objective
Horrified: American Monsters is a cooperative game in which the players all win or lose together. The players win if they defeat all the Monsters they are playing against. DEFEAT Monsters by ADVANCING and COMPLETING challenges. Each Monster's challenge and subsequent defeat is unique.
- Banshee of the Badlands: Survive the haunting music and the Banshee's screams.
- Bigfoot: Obtain photographic evidence of Bigfoot's existence.
- Chupacabra: Save and protect goats, then hunt the Chupacabra.
- Jersey Devil: Discover the 13th Child and confront the Jersey Devil.
- Mothman: Slow Mothman down and trap it.
- Ozark Howler: Follow this monster's trail and defeat it when you find its lair.
See The Monsters for details on each Monster, including notes on each Monster's complexity and how to defeat them.
The players lose immediately if any of the following occur:
TERROR: Each time an Investigator or Citizen is defeated, the Terror Level will increase. If the Terror Level reaches its maximum, indicated by the skull, the Monsters have overrun the town and the players have lost.
OUT OF TIME: Each turn, players will draw a card from the Monster deck. If a player is unable to draw a Monster card, it has taken too long to defeat the Monsters and the players have lost.
Playing Solo? Horrified: American Monsters can be played in single-player mode. See Solo Play for details.
Difficulty
Adjust the game's difficulty by playing against a different number of Monsters:
- Your First Game: Play with only 2 Monsters. We recommend Banshee of the Badlands and the Chupacabra.
- Novice Game: Any two Monsters.
- Standard Game: Any three Monsters.
- Challenging Game: Any four Monsters.
Playing the Game
Determine the first player: The player who most recently saw a horror movie goes first. After taking their turn by performing the two phases below, play proceeds clockwise around the table.
1. Investigator Phase
Take up to the number of actions indicated on your ID. In addition, ANY player may play any number of Perk cards.
See Investigator Phase below.
2. Monster Phase
Draw 1 Monster card from the top of the Monster deck and resolve all three parts of that card.
See Monster Phase below.
Some Monsters have special rules that may change the Investigator Phase, the Monster Phase, or even what actions can and cannot be taken. Review each Monster carefully before you start a game.
Investigator Phase
On your turn, perform the Investigator Phase before the Monster Phase. Actions are listed on your Reference card.
Take up to the number of actions indicated on your ID. You may choose to take fewer. You may take the same action any number of times, and you may take your actions in any order. The possible actions are:
Move
Move your Investigator along the lighted road to an adjacent location. Whenever you move, any number of Citizens on your location may move along with you. This includes any time any card tells you to move to a new location.
If you are instructed to place an Investigator or Monster in a new location, they do not follow a path. Pick up their standee or figure and place them in the new location, immediately. Remember, ask permission before moving a player's standee. You cannot place or move an Investigator that is not on the board.
Monsters do not affect movement. You may move into or out of a location containing one or more Monsters, and you may end your turn on a location with one or more Monsters. However, this may make you more vulnerable to attacks during the Monster Phase.
Guide
Move one Citizen from your Investigator's location to an adjacent location OR move one Citizen from an adjacent location to your Investigator's location. Monsters have no effect on this movement.
Special Action
Some IDs describe special actions. Each special action you take counts toward the total number of actions you can take on your turn. Special actions can be performed multiple times per turn.
Pick Up
Take any number of Items from your Investigator's location. Keep your Items in front of you, next to your ID. Picked up Items are not considered to be on the game board.
Strategy Tip: It's a good idea to pick up Items on your first turn. You will need certain Items to advance challenges and defeat Monsters. Items can also be used to defend against Monster attacks.
Share
All Investigators on the same location as your Investigator may freely exchange (give or take) any number of Items with each other.
Sharing does not require a one-to-one trade, and it does not need to involve your Investigator as long as all Investigators giving or taking Items this turn are at your Investigator's location.
Advance
At a specific location, use one of your Items to advance a Monster's challenge. Each Monster mat has instructions on how to advance a challenge. For more details, see The Monsters.
Defeat
Each Monster mat has instructions on how to defeat a Monster. For more details, see The Monsters.
You must complete a Monster's challenge BEFORE you can take the action required to defeat that Monster.
Citizens
During the Monster Phase, Citizens may appear in town. You will be directed to place Citizens at specific locations, and there is no limit to the number of Citizens that can be on the board at any time. Each Citizen is trying to reach a specific safe location, as indicated on their standee. The Move and Guide actions may be used to usher Citizens to their safe locations.
As soon as a Citizen reaches their safe location, they provide a reward for your assistance. The active player removes that Citizen from the board and draws a Perk card from the deck. Once a Citizen is either defeated by a Monster or reaches their safe location, place their standee back in the box.
Perk Cards
Each player starts the game with one Perk card. Players can earn additional Perk cards by getting Citizens to their safe locations. Keep all your Perk cards face up in front of you. It's a good idea to discuss your Perk cards and when to play them with the other players.
Perk cards may be played on any player's turn, but only during the Hero Phase. When you play a Perk card, do what the card says, and then put it in a discard pile face up. Playing a Perk card does not take an action.
Items
Items are important for advancing challenges, defeating Monsters, and for defending yourself against Monsters' attacks. Each Item has a color (indicating the Item's type) and a strength rating (indicated by the number on that Item). Each Item also names a location, indicating where the Item will be placed on the game board when it is drawn from the Item Bag.
Do not return Items to the Item Bag unless you are specifically instructed to do so, for example, when you advance Mothman. Whenever you use an Item, whether to take an action or to defend against an attack, place it in a discard pile next to the board.
An Item's color, strength, and location may be important. Refer to each Monster mat to decide what type of Item you may need.
- Yellow Items are physical.
- Green Items are survival.
- Brown Items are animals.
Only one Item of the indicated color may be played per action. If the Item is all black, it means any color Item may be used.
Any number of Items of the indicated color may be played as part of a single action. Add the Items' strengths together to meet or exceed the number indicated on the Monster mat.
Investigator Phase Example
It's Mary's turn, and she's playing as the Scout. She may take 4 actions as noted on her ID. After some discussion with the other players, Mary decides to do the following during her Investigator Phase:
Action 1: Mary uses the Scout's SPECIAL ACTION to move Willie the Salesman to the Intersection from his starting location at the Motel.
Action 2: Mary GUIDES Willie the Salesman to the Scout's location at the High School.
Action 3: Mary then PICKS UP the Flashlight and Helmet, as these two Items are at the High School.
Isaac, playing as the Mountain Man, then plays his Perk card "Convoy" which allows each Investigator to move up to two locations even if it is not their turn. Isaac moves the Mountain Man 2 locations, ending his move at the Tavern. Mary also moves Scout to the Tavern, taking Willie the Salesman along with her. (Remember that whenever an Investigator moves, whether by an action or a Perk card, they may bring along any Citizens in their location.)
Willie the Salesman is now at the Tavern, which is his safe location. Mary removes Willie from the board and draws a Perk card from the deck as her reward. She reads the card aloud and decides to keep it for later; she places this card face-up in front of her on the table.
Action 4: Mary now decides to take a SHARE action and gives Isaac the Poison and Flashlight Items. His turn is next, and this allows him more options.
After Mary completes her 4 actions, none of the players wish to play any other Perk cards. She will now proceed to the Monster Phase and draw a card from the Monster deck.
Monster Phase
The current player now draws a card from the top of the Monster deck and resolves the three parts of the card, from top to bottom. After resolving the entire Monster card, put it in a discard pile face up.
1. Items
Draw the number of Items listed at the top of the card from the Item Bag. Place each Item on the game board at the location indicated on that Item. If the Item Bag is empty, return all discarded Item tokens to the bag, mix them up, and continue drawing.
2. Event
Each Event involves either a Monster or a Citizen. The Event's name indicates the subject of that Event.
Read the Event out loud and do what it says. If the Event names a Monster that is not in your game, ignore that Event and continue to the Monster Strike.
3. Monster Strike
Monster Strike instructions can be found using the symbols at the bottom of each Monster card.
Example: Chupacabra moves 1 location and then attacks with 2 dice. Then the Frenzied Monster (even if that Monster is the Chupacabra) moves 1 location and attacks with 2 dice.
Monsters move and attack according to the Monster Icon shown, which are always resolved in order from left to right. You must move and attack with the first Monster before proceeding to the next. If a Monster Icon refers to any Monster not in your game, ignore that symbol. If the Frenzy symbol is shown, the Monster with the Frenzy Marker moves and attacks. This may result in the same Monster moving and attacking twice in one turn. (See Frenzied Monsters below.)
Follow the steps below for each Monster, in the order in which they are listed on the card:
Do the following in this order for each Monster, in the order they appear on the card:
- Move the Monster a number of locations toward the closest character (Investigator or Citizen), as indicated on the Monster Card. If a Monster moves to a location that contains a character, it stops moving. If a Monster starts on a location with a character, that Monster will not move during that turn.
- Attack one character on the Monster's location by rolling the number of attack dice indicated. If there is no character on the Monster's location, it will not attack (do not roll dice). If multiple characters are on a Monster's location, the Monster will always choose to attack an Investigator rather than a Citizen. If a Monster has a choice of targets, the active player chooses the target of that attack before it is rolled.
Special Rules
- PATH TOWARD: If you are directed to move a Monster, Hero, or Citizen toward someone or somewhere, you must move them along the shortest possible path. If there are multiple shortest paths, the current player decides which path they take. Once they reach whatever they are moving toward, they stop moving.
- NEAREST CHARACTER: If there are multiple characters equally close to a Monster, the Monster moves toward an Investigator rather than a Citizen. If there are still multiple closest characters, the current player chooses one of them.
- OTHER TIES: If an Event or Monster Strike could apply to multiple characters or locations, the current player decides which one to apply it to.
Some Monsters have special rules that take effect during the Monster Strike portion of the Monster Phase. Please read each Monster carefully to determine if there are any changes to the standard rules.
Monster Attack
If it has been determined that a Monster can attack, state the target out loud and then the player whose turn it is rolls the number dice indicated on the Monster card.
Attacking an Investigator
An Investigator may ignore a Monster's successful hit if they discard one Item for each Hit symbol rolled. If the Investigator does not have enough Items, or does not wish to discard any Items, they are defeated. One hit is sufficient to defeat an Investigator.
When an Investigator is defeated, remove that Investigator from the board. Increase the Terror Level by moving the Terror Marker up by one space. At the start of that player's next turn, they place their Investigator at the Hospital and take their turn as normal, with their full number of actions. A defeated Investigator does not lose any of their Perk cards or Items.
- If this symbol is rolled, the Monster's Power is activated once for each Power symbol rolled. For details on these powers, refer to the Monster's mat and The Monsters below.
- If this symbol is rolled, the character is hit by the Monster's attack once for each Hit symbol rolled.
- If no symbol is rolled, that die is a Miss. It has no effect.
Since you resolve each Monster's move and attack BEFORE moving on to the next Monster, an Investigator can be targeted by multiple Monsters during a turn ONLY if any previous attacks that turn missed, or if they use an Item to ignore a hit. If an Investigator is defeated, they are removed from the board before the next Monster is able to move or attack. That Investigator cannot be attacked again on this turn.
Attacking a Citizen
Citizens cannot have any Items. Thus, they are immediately defeated when hit by a Monster. When a Citizen is defeated, remove them from the board and increase the Terror Level by moving the Terror Marker up by one space. Investigators cannot discard Items to save Citizens.
Monster Phase Example
Sue, playing as the Psychic, is starting the Monster Phase of her turn. She draws the top card of the Monster deck and reveals "The Hunger." She resolves the card as follows:
- ITEMS: The card indicates that 0 Items will be drawn and placed this turn. Sue moves on to the next step.
- EVENT: The Event is specific to the Chupacabra, which is an active Monster in this game. Since the Chupacabra is in this game, Sue must read the Event out loud. The Event is, "Move Chupacabra to the nearest Investigator holding a Brown Item token." Since Sue is the ONLY player holding a Brown Item token, the Chupacabra moves immediately to Sue's location at the Sheriff's Station.
- MONSTER STRIKE: The Monster Strike's first Monster is the Ozark Howler, which is not an active Monster in this game. Sue ignores that Monster Strike. The second Monster Strike comes from Mothman, who is active in this game. Mothman is at the Resort and may move three locations this turn. Since the Psychic is the nearest character the Mothman must move towards her and ends up in the same location, the Sheriff's Station, as the Psychic and the Chupacabra. Sue rolls the one die, as indicated on the Monster Card. It comes up with a Hit. Sue decides that saving her Item and being defeated will make long term sense. So, she moves the Terror Tracker from 2 to 3 and removes the Psychic from the board. On her next turn she will start in the Hospital. Sue continues the Monster Strike and moves to the next Monster, the Jersey Devil. The Jersey Devil is not in this game and is ignored. Now Sue's turn is over.
Game End
The game can end in one of three ways:
Investigators Triumph
If you defeat all the Monsters being played, the game ends immediately and the players have won! You've saved the town, and perhaps the Monsters themselves, from a terrible fate.
Terror!
If the Terror Level reaches its maximum, indicated by the skull, the game ends immediately and the players have lost. Everyone, including the Investigators, are too HORRIFIED! to continue. The town is abandoned to the Monsters.
Out of Time
If the Monster deck is empty when you are required to draw a card from it, the game ends immediately. You've taken too long to save the town, and the Citizens have all fled. The players have lost and aren't able to continue. The game ends only when you need to draw a card, but none remain. When the final Monster card is drawn, play one final Investigator Phase to try and defeat any remaining Monsters.
Playing Again: Try playing against different Monsters or add additional Monsters to increase the game's difficulty. Other replay options including choosing your Investigators or trying to win before the Terror Track reaches a set number.
Solo Play
With only one Investigator trying to save the Town, the citizens are doubtful of your ability to do the job. Begin the game with the Terror Marker set to Terror Level 3. All rules remain the same, with the following exceptions:
- You may not play as the Psychic — that Investigator's Special Action cannot be used in a solo game.
- Remove the Perk cards "Swap" and "Signal Flare" from the deck before starting.
The Monsters
The following pages contain all the information about the Monsters, which is applicable to all games, as well as information specific to each Monster. We recommend that you read this section before the start of the game, to ensure that you understand each Monster.
Frenzied Monsters
The Monsters are agitated by your efforts to defeat them, and one Monster will always be frenzied. At the start of the game, place the Frenzy marker on the Monster mat with the lowest Frenzy Order. When the Frenzy symbol appears on a Monster card, the Frenzied Monster moves and attacks — this may result in the same Monster moving and attacking twice in one turn. Some Events will direct you to place the Frenzy Marker on the next Monster. When this happens, place it on the Monster mat with the next-highest Frenzy Order. For example, if you must move the Frenzy Marker when it is on the Banshee of the Badlands mat (Frenzy Order 1) and Mothman (2) and the Ozark Howler (5) are also in your game, move the Marker to Mothman's Monster mat. If there is no Monster with a higher Frenzy Order, place the Frenzy Marker on the Monster with the lowest Frenzy Order. If no other Monsters remain in the game, the Frenzy Marker does not move.
There will always be one Frenzied Monster during the game. If you defeat the current Frenzied Monster, the next Monster in Frenzy Order will become Frenzied.
Defeated by an Investigator
When a Monster is defeated, it is no longer considered to be in the game.
For the rest of the game, ignore all Events and Monster Strikes that refer to defeated Monsters.
Remove the Monster's figure and location overlay (if they have one) from the game board. If the defeated Monster had the Frenzy Marker, place it on the next Monster according to the frenzied Monster rules. If there are any Items on the Monster mat (as with Chupacabra), place those Items in the Item discard pile. Then, return all the defeated Monster's components to the game box, including their Monster mat, figure, and tokens. If an Investigator has one of the defeated Monster's tokens (such as Bigfoot's Footprints or Death Omen marker), it is also returned to the game box.
Chupacabra
Complexity: Low | Frenzy Order: 3
A voracious desert-dwelling predator who stalks prey by night and feasts on the blood of animals, the Chupacabra will stop at nothing to satisfy its appetite.
Setup: Place the Farm overlay on the Farm location. Place the Chupacabra figure at the Farm.
Special Rules: Chupacabra moves like any other Monster toward Citizens and Investigators. If there is more than one choice, Chupacabra will move toward an Investigator with a Brown Item token in their possession.
Advance — Save the Goats: The Investigators must save 6 goats from the ravenous Chupacabra. If a player has a Brown Goat Item token, they may move to the Farm and use an Advance action to place the Goat token on an empty spot on the Chupacabra Monster mat. An Investigator may only place one Goat per action.
Defeat — End the Predator: Once the 6th goat has been placed on its Monster mat, Chupacabra can be defeated. To do so, an Investigator must be at the same location as Chupacabra and spend Yellow Items with a total strength of 6+.
Power — Voracious Appetite: For each Power symbol rolled during a Chupacabra attack, remove one Brown Item token from the game board (not the Monster mat). The active player decides which Item to remove.
Example: The Chupacabra is located at City Hall. The Agent is located at the High School and the Journalist is located at the Tavern. Both are one move away. Since the Agent has a Brown Item token, the Chupacabra will move in his direction rather than toward the Journalist.
Banshee of the Badlands
Complexity: Low | Frenzy Order: 1
From the hellish, barren cliffs of South Dakota comes the Banshee of the Badlands and her eerie skeletal violinist, who lure unsuspecting travelers to their doom with mesmerizing melodies and unearthly wails.
Setup: Place the Banshee figure at the Cemetery. Each player takes the Violin token of their color and places it on the first violin location on the Monster mat.
Advance — Survive the Skeleton: To defeat the Banshee of the Badlands, the Investigators must survive the sound of her skeletal companion's violin. When an Investigator is at the same location as the Banshee, they may spend a Brown Item to roll one die or a Yellow Item to roll two dice. For each Hit/Power icon shown, move any player's Violin token back two spaces back toward the treble cleft, which is the safe zone. On a miss there is no effect. If an Investigator's Violin token reaches the skeleton, they are defeated, following the rules on Monster Attack. An Investigator cannot spend Items to stop this defeat. That Investigator resets their Violin token to the first note on the Banshee's Monster mat when they begin their next turn. Once every Investigator's Violin token is in the safe zone, they may try to defeat the Banshee.
Defeat — Ignore the Scream: To defeat the Banshee, an Investigator must be at the same location as the Banshee and spend 2 Yellow Items to ignore her wail. The Items' strengths do not matter.
Power — The Wail: For each Power symbol rolled when the Banshee attacks, move all the Violin tokens one space closer toward the skeleton. If an Investigator's Violin token is in the safe zone, move it to the first violin space.
Example: Sara spends a Yellow Item to roll two dice. The result comes up with a Miss and Hit. She decides to spend the Hit on the red violin token to move it from the fourth space back to the second space.
Bigfoot
Complexity: High | Frenzy Order: 3
Powerful, dangerous, and mysterious despite his many hunters, the merest sign of Bigfoot inspires terror in even the most stalwart of hearts.
Setup: Place the Bigfoot figure at the Cabin and place the overlay on the High School. Turn the five square Bigfoot Photo tokens face-down, shuffle them and place them face-down on the squares indicated on the Bigfoot Monster mat. Take the Footprint tokens and place them in a stack near the Bigfoot Monster mat.
Special Rules: If Bigfoot is activated for a Monster Strike, follow these rules:
Bigfoot rolls attack dice BEFORE moving. If there are Investigators in his location, he does not roll dice. He's too busy trying to hide and escape. Bigfoot only rolls the dice if there are no Investigators in his location. The only result that matters is his Power Symbol (see Power: It's a Bear). Hits and Misses do not count.
Once the attack step is done Bigfoot moves like an ordinary Monster, except that he will not stop if he encounters an Investigator or Citizen. Bigfoot will not end his movement in a location with an Investigator. If Bigfoot encounters an Investigator in a location add +1 to its Movement. As Bigfoot leaves and moves through locations place a Footprint token on each location. If you run out of Footprint tokens to place, remove the furthest token from Bigfoot's current location and move it the new location. The active player decides which is furthest. It is possible for multiple footprints to be in the same location.
Advance — Exposure: The Investigators use the Pick Up action to collect Bigfoot's Footprint tokens in order to reveal the Bigfoot Photo tokens. When an Investigator collects a Footprint, they use it to immediately reveal (turn face-up) one of the Photo tokens on the Bigfoot Monster mat. Place the Footprint token next to the Monster mat, to use on Bigfoot's next movement.
At the High School (they have the best photo lab!) an Investigator may take an advance action to discard any one Item to attempt to align the photo of Bigfoot. A turned-in Item may be used to swap one Photo token with another OR that Item may be used to slide a single token to the open space on the puzzle. You may make as many slides as the total strength value of the Item that was turned in. For example, a 4-strength Item will allow you to make up to 4 slides on the puzzle. Photo tokens can be slid or swapped even if they are still face-down.
Defeat — Photographic Proof: Once Bigfoot's photo has been aligned on the Monster mat, the Investigators may attempt to defeat Bigfoot. To defeat Bigfoot, an Investigator must spend three green Items of any strength, at his location. This will finally, once and for all, prove that Bigfoot is real.
Power — It's a Bear: Only one Power symbol is counted no matter how many are rolled. Move the Terror Marker up one space on the Terror Track and flip one revealed Photo tile to its reverse side.
Example: Monster Movement for this turn is 1. Bigfoot is at the Abandoned Mine with the Jock, and the Agent is at the Cabin. The active player moves Bigfoot to the Cabin, since the Agent is there, Bigfoot adds 1 to his movement. The Scout is at the Campground and the Jock is back at the Abandoned Mine, so Bigfoot is moved to the Intersection leaving Footprint tokens at the Abandoned Mine and the Cabin.
Example: Using the Advance action, an Investigator at the High School is going to turn in an Item with a 3 Strength giving her 3 slides on the Bigfoot challenge. She slides the head image to the free space and then slides the leg image down to the now empty space and then finally slides the torso right to the empty space. She has moved two images into the right spots but has a long way to go to get the other three in the correct order. Alternatively, she could have turned in that Item to swap the bottom right image (the head) with the top right image (the arm) to get the head in the correct place.
Mothman
Complexity: Medium | Frenzy Order: 2
Impossibly fast and keenly perceptive, Mothman is a harbinger of doom drawn to communities facing imminent tragedy and disaster.
Setup: Place the Mothman figure at the Motel. Pull 4 Item tokens out of the Item bag, until you get Items with 4 different locations, and place them face up on the four spots indicated on the Mothman Monster mat. Take the 4 Trap tokens and place them with the "closed" trap side showing in the four locations indicated by the Items. Set the Eye of the Mothman token near the Monster Mat.
Advance — Not Fast Enough: When an Investigator ends their movement at a location with a closed trap, they can use an Activate action to "arm" a Trap token by flipping it over. Return the specific Item token for that location on the Monster Mat to the Item bag. If Mothman enters a location that has a Trap, it must stop its movement. The next time it has a Monster action, Mothman may move as normal.
Defeat — Slowed Down: Once all 4 traps are armed, an Investigator may attempt to use a Defeat action. Mothman and the Investigator must be at the same location AND that location must have an "armed" trap. That Investigator may defeat Mothman by spending Yellow Items with a total strength of 10+.
Power — The Demon's Eye: When a Power symbol is rolled during Mothman's attack, check to see if the Eye of the Mothman token is on the game board. If it is, ignore any Hits rolled and move Mothman along the shortest possible route to the location of the Eye, ignoring all Traps. If there is a tie for shortest route, Mothman will move along the route that has the most Investigators and Citizens. If Mothman encounters any Investigators or Citizens along that route, they will each take one hit per Power symbol rolled during the attack.
Example: Mothman and the Psychic are at the Resort. Mothman's roll shows a Hit and a Power symbol. The players check to see if the Eye of Mothman is on the board. The Eye is at the Diner. Ignoring the hit for now, the player checks the multiple routes from the Resort to the Diner. There are many routes of equal distance, but the route that includes the High School and the Gas Station allows Mothman to hit 4 characters so that is both the shortest route and one that affects the most characters. Each character (the Psychic, the Scout, the Journalist and the Agent) along the route all take one hit and the Mothman ends up at the Diner.
Ozark Howler
Complexity: Medium | Frenzy Order: 5
The elusive and terrifying Ozark Howler marks anyone who sees it for death, making its victims susceptible to bad luck and twists of fate.
Setup: Place the Abandoned Mine overlay on the Abandoned Mine location. Place the Ozark Howler figure at the Trailhead. Turn the 5 Ozark Howler Tracker tokens face-down and mix them up. Place 3 of these tokens face-down on the Howler's Monster mat in the locations indicated. These Tracker tokens will create the trail you need to follow to find the Ozark Howler. Place the remaining Tracker tokens face-down nearby. Place the Death Mark tokens next to the Monster mat.
Advance — Hunt the Beast: Each Tracker token has a cost in Items to follow the trail of the Ozark Howler. Use an Advance action while at the Abandoned Mine to reveal the next Tracker token along the trail. You cannot reveal a new token until the previous token has been resolved. To resolve a revealed Tracker token, an Investigator must be at the Abandoned Mine and pay the Item cost shown on the Tracker token. Once resolved, remove that Tracker token from the Monster mat and but leave it face-up. An Investigator may then use another Advance action to reveal the next Tracker token while at the Abandoned Mine.
Defeat — Vanquish the Beast: Once all Tracker tokens have been removed, the trail to the Ozark Howler can be followed. Any Investigator at the same location as the Ozark Howler's may use the Defeat action to spend one token of each color to defeat the Howler.
Power — Death Omen: For each Power symbol rolled, the targeted Investigator or, if the target is a Citizen, the nearest Investigator as determined by the active player, gains a Death Omen token. For every Death Omen token an Investigator has, they take an automatic hit when a Monster rolls to attack them. Apply the Death Omen token first then any other Hits or effects from the dice. They can ignore the Hit by using Items as per the normal Hit rules. If an Investigator is defeated, return all their Death Omen tokens to the supply.
Example: Isaac is playing the Mountain Man and is located at the Motel. The Ozark Howler is at the Gas Station attacking Gus the Grease Monkey. Rolling the 2 dice results in a Miss and a Power Symbol. Gus is safe but since the Mountain Man is the closest Investigator, he gains a Death Omen token. A few turns later, the Banshee is attacking the Mountain Man with one die and rolls a Miss. The Mountain Man still takes one Hit from the having the Death Omen token. Isaac decides to counter that effect with an Item so that the Terror Tracker doesn't increase.
Jersey Devil
Complexity: High | Frenzy Order: 4
Rumored to be the 13th Child of a witch, the Jersey Devil emanates a malevolent aura that creates fear, confusion, and violence as it terrorizes the town while disguised as an ordinary human.
Setup: Place the Jersey Devil figure at Town Center and the overlay at City Hall. Remove all 13 Citizen cards from the Monster Deck and place them face-up, where all players can see them. Place each Citizen's standee on their individual card. Shuffle the remaining 17 Monster cards and place them face-down near the game board. Turn the 7 Clue tokens face-down and shuffle them. Place 3 Clue tokens face-down on the indicated spots on the Jersey Devil Monster mat.
Special Rule: A Citizen card can be played during the Investigator Phase of the game.
Advance — Who Is the 13th Child?: When an Investigator is at City Hall, they may use an Activate action to play a Citizen of their choice and place that Citizen's standee as normal. Only one Citizen can be played during an Investigator Phase. When a Citizen is chosen you also perform the Item, Event (if more than just Citizen placement) and Monster Strike as normal. If you play a Citizen (and their card), you DO NOT PLAY A MONSTER CARD FROM THE DECK at the end of your turn. You may still take your remaining actions after playing this card.
Whenever an Investigator escorts a Citizen to their safe location, that Investigator gains both a Perk card and reveals one of the Clue Tokens on the Jersey Devil's Monster mat. Each Clue token reveals one clue to who the Jersey Devil is by highlighting an item in their portrait on their Monster card. Once all three tokens have been revealed you should be able to determine who is the 13th Child and thus the Jersey Devil.
If at any time you have three clues revealed and cannot determine the 13th Child, reveal a fourth clue and apply it to the remaining two or three Citizens who matched the first two clues. Repeat this process until one Citizen remains. A Citizen either escorted to their safe location, revealed as the Jersey Devil, or defeated by a Monster cannot be replayed to the board. It is best to remove those standees from the play area. Leave their cards available so you can compare clues.
Defeat — Stop the Madness: An Investigator may attempt a Defeat action once they have identified the 13th Child. Both the Investigator and the Jersey Devil must be at 13th Child's starting location (The Citizen does not need to be on the board at all, only the location is important). The Investigator may then defeat the Jersey Devil by spending Items of any color with a total strength value of 14+.
Once defeated remove the Jersey Devil and the 13th Child/Citizen standee if it wasn't already played. Take all unplayed Citizen cards and turn them face-down and shuffle them into the remaining face-down Monster card deck.
Power — Constant Confusion: When this power is rolled, swap a face-up Clue token with an unused, face-down Clue token. If no unused tokens remain, this ability does nothing.
Example 1: Steve is playing the Jock and has taken a Move Action to City Hall. On his second Action he decides to place The Doctor, Dr. Challis, at her starting location. First, he draws three items and places them, then he places the Doctor token at the Hospital and now he resolves the Monster Strike. Bigfoot is not in the game, so he ignores that Monster, but the Frenzy Monster is the Banshee, so he moves her one location. Steve still has two more actions in his Investigator Phase before his turn is over. He cannot bring in another Citizen nor does he draw a Monster card during the Monster Phase.
Example 2: In a previous turn the team revealed the Clock clue. Looking at all the Citizens they were able to find clocks in the portraits of 6 Citizens: The Mayor, The Soda Jerk, The Sheriff, The Doctor, The Diner Owner and The Grease Monkey. A few turns later they revealed the clue Glasses. Now they can reduce the list to The Doctor, the Diner Owner and The Grease Monkey. The third clue, when revealed will indicate which of those three is the 13th Child. Once known they will have to lure the Jersey Devil to that Citizen's starting location to defeat it.