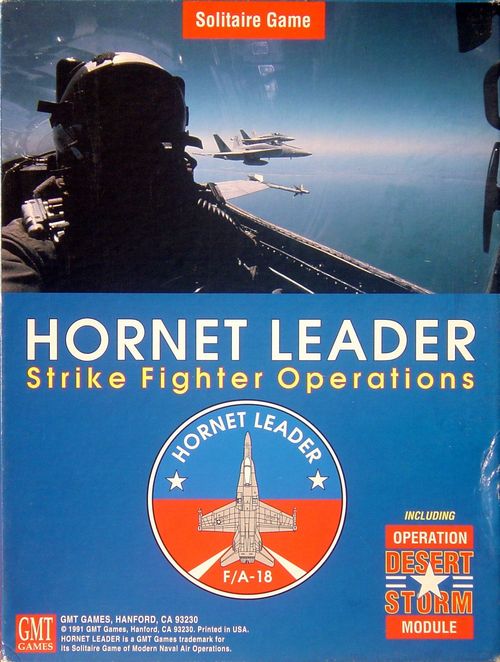
Hornet Leader: Strike Fighter Operations
Hornet Leader: Strike Fighter Operations Rulebook
Table of Contents
Table of Contents
- Designer, Developer, and Dedication
- 1.0 Introduction
- 2.0 Game Equipment
- 3.0 Setting Up the Game
- 4.0 Types of Missions
- 5.0 Sequence of Play
- 6.0 Mission Briefing
- 7.0 Mission Preparation (Pre-Flight)
- 8.0 In-Flight to the Target
- 9.0 Move Hornets / Jettison Ordnance
- 10.0 Air Combat
- 11.0 Air to Ground Attacks
- 12.0 SAM Attacks
- 13.0 AAA Attacks
- 14.0 Post Flight
- 15.0 Level of Mission Success
- 16.0 Loss of Command
- 17.0 Random Aviator Generation
- 18.0 Tour of Duty
- 19.0 Special Condition Notes
Designer, Developer, and Dedication
- Designer: Dan Verssen
- Developers: Gene Billingsley and Dan Verssen
- Art Director / Physical Systems Designer: Rodger B. MacGowan
- Game Package Design: Rodger B. MacGowan
- World's Most Devoted Playtester: Holly Johnson
- Ergonomics: Mike Anderson
- Playtesting: Gary Doriott, Paul Phillabaum
- Special Assistance: Richard DeBaun, Tom Switajewski, Jr.
Dedication: Hornet Leader is dedicated to the men and women of the United States armed services who served in Operation Desert Shield, and later Desert Storm.
Special Thanks: To the United States Navy, for their helpful cooperation and for their generosity in allowing us to use their photograph of Hornets in flight for the box cover. To United States Navy Captain John J. Zerr, for graciously allowing this game's developer to spend several exciting days aboard the aircraft carrier U.S.S. Constellation (CV-64). To the airmen of VFA-113 Stingers, who took the time to teach that developer a thing or two about flying.
1.0 Introduction
Hornet Leader places you, the player, in command of a squadron of F/A-18 Hornets. In game terms, you are aboard a United States aircraft carrier located off a hostile shore in one of the world's current "hot spots". Your duty is to successfully command your squadron's aviators and aircraft in a series of missions against designated targets within that hostile area.
As squadron commander, you will be given missions and targets to destroy. You will receive an intelligence briefing before each mission which will give you sufficient information (you'll hope!) about the strength and positions of any potential enemy threats to your mission. Based upon the information you receive, you will then choose aviators to fly the mission as well as the weapons loadout that each plane will carry. More often than not, you will then lead your squadron (YOU are represented by the card named "LEADER") on the mission. In Hornet Leader, you won't have to worry about "flying" your aircraft. You and your squadron mates are all assumed to be professional aviators, skilled in every aspect of flight. Instead, you'll face the challenges of how to successfully "fight" your aircraft during your missions. You'll need to successfully answer questions regarding how to approach the target, how to divide your forces between air-to-air and air-to-ground elements, and when and how to "roll back" the enemy defenses every time you fly a mission. If you're good enough, and occasionally lucky, you'll consistently accomplish your missions while bringing all your Hornets and aviators home safely.
2.0 Game Equipment
Each copy of Hornet Leader includes:
- 1 Mission Display
- 1 Rule Booklet
- 1 Mission Log
- 1 Carrier Display
- 1 Desert Storm Combat Mapsheet
- 1 Ten-sided die
- 110 Cards: 9 Campaign cards, 26 Target cards, 15 Special Conditions cards, 18 Mission Event cards, 15 Mission Briefing cards, 12 Hornet cards, 15 Aviator cards
- 200 Counters
Whenever a die roll is called for in the game, roll the 10-sided die (d10). This will generate random numbers from 1 to 10. Treat all rolls of "0" as "10".
2.1 The Mission Display
You use the Mission Display to organize tactical air-to-ground and air-to-air combat. It contains a Tactical Overview (which represents a surface target and its surrounding approach areas), and a detailed Air Combat Area. You will also find a brief Sequence of Play, as well as most of the charts and tables that are necessary for play (the remainder are located on the Mission Log).
2.2 The Carrier Display
The Carrier Display is used to organize your aviators and Hornets when they are not flying a Mission. Place the Hornet cards in the section of the Carrier Display labeled "Flight Deck". Place the Aviator cards in the section labeled "Briefing Room".
2.3 The Mission Log
After you complete each Mission, you record the results of that Mission on the Mission Log. The Log also includes a space for the name of your squadron and the squadron commander. You are free to make up a Squadron Leader's name. They usually hold the rank of Captain or Commander. You may also name your squadron (ex. "Stingers"). This sheet should be photocopied.
Once you have completed all of the missions for a particular Campaign, the CAG (Air Wing Commander) will determine how successful you were for the entire Campaign.
2.4 The Desert Storm Combat Mapsheet
This sheet is only used for playing the Desert Storm Campaign. It represents major targets inside Iraq and Kuwait and provides the basis for a look at the "what-ifs" of the aerial side of Operation Desert Storm.
2.5 The Cards
Campaign Cards. Hornet Leader includes nine Campaign cards, which indicate the geographical area where your battles are taking place, and the enemy nation that you are engaging. The cards note modifications to the defenses you will encounter during each particular Campaign. This may result in an adjustment to basic SAM (Surface to Air Missile) Density Levels and specific MiG types (as indicated on the Target Cards) encountered during your missions.
Example: A notation for SAMs of "Heavy to Moderate", would indicate that whenever a target would normally be defended with a Heavy SAM Density roll, the die roll would instead be made on the Moderate column of the table. A notation of "25s to 23s" indicates that whenever MiG-25s would normally be encountered, they would instead be MiG-23s. The overall quality of the enemy pilots is also specified on the Campaign card. This will modify their abilities in Air Combat (See 10.0). The Campaigns are divided into levels of difficulty. We suggest that beginning players attempt Campaigns in the following order: ... Expert Level: North Korea, Atlantic (WW III), Mediterranean (WW III).
Each Campaign card specifies the number of Missions you will fly during the conflict. Any modifications to the enemy SAM (Surface-to-Air Missiles) and/or MiGs (enemy fighters) is also listed. The Pilot Quality applies to all enemy fighters in the Campaign. Certain Target cards are removed from each Campaign; remove these before Set-Up. The aircraft carrier from which you fly your Missions is also specified on each card. This is for player interest only. It does not affect the game.
Mission Briefing Cards. Shuffle this deck at the start of each Campaign. These cards detail specific conditions for your Mission. This includes mission range, day/night mission indicator, and the number of Weight Points and Load Areas each Hornet may use to carry munitions.
Target Cards. Shuffle this deck at the start of each Campaign. These cards detail the target of your mission, and its defenses. Place the Target Card in the center of the Tactical Overview on the Mission Display. See 4.0 for types of targets and missions.
Special Conditions Cards. Shuffle this deck at the start of each mission. During the Mission Briefing segment of each mission, you roll one die to determine whether a Special Condition will be in effect for the current mission. If the die roll falls within the range indicated under "Special" on your Mission Briefing Card, a Special Condition will occur. Draw the top card from the Special Condition Deck to determine your special condition. If the die roll does not fall within the required range, there will be no special condition for that mission. (See section 19 for details on particular cards.)
Mission Event Cards. Shuffle this deck at the start of each mission. Each of these cards has two conditions. The one at the top of the card is used for Mission Events on the way to the Target. The one on the bottom is used for Mission Events on the way back to the carrier. (See section 19 for details on particular cards.)
Hornet Cards. Each Hornet card represents one aircraft. Each card depicts an overhead view of the aircraft, as well as five potential "load areas". The two areas near the top of the card are used only for Sidewinders (representing the Hornet's wingtip missile rails), while the other three areas carry bombs, missiles, and pods. Note that there are limits on the number of weapon counters the Hornets can carry on each Load Area. See the Hornet Load Areas section of the Mission Display as well as rules section 7.3 for limits on Weight Points and Load Areas. There are 12 Hornets in your Squadron at the start of a Campaign.
Aviator Cards. Each Aviator card represents one Naval Aviator in your squadron. The cards include Combat and Cool ratings for each aviator. The back side of each card depicts the aviator in a "Shaken" state. If the aviator flies a mission while Shaken, he uses the Combat and Cool values on the back of the card. There are 15 aviators in your squadron at the start of a Campaign. Each card lists the Pilot's Call Sign, the Pilot's Air-to-Air Style Rating, the Pilot's Air-to-Ground combat modifier, and the Pilot's Air-to-Air combat modifier. Skill Indicators (+1, +2) are used for noting aviators with experience.
2.6 Counters
Hornet Leader uses many different types of counters. Sample counters and an explanation of their values are contained in this section.
- Surface-to-Air Missile (SAM): SAM Size (a rating of the SAM Site's size), SAM Size Indicator (a graphic indicator of the SAM Site's size), and SAM Value (a numeric indication of the SAM Site's strength).
- AAA: The AAA counter represents small arms fire, machine guns, autocannon, and artillery in the Target Area. AAA Size, and Attack Penalty vs. AAA (apply this penalty to Hornet attacks aimed at AAA).
- Enemy MiG: MiG Type (the type of aircraft), MiG Defense Value (a modifier applied to Hornet attacks against the MiG), MiG Style Indicator (indicates the Air Combat Style of the MiG: A, N, D), and MiG Air Combat Values (rating of the MiG's Air Combat capabilities). Note: this is a pre-production MiG counter; the final counter will be arranged a bit differently and a Style Indicator will be added.
- Other Counters: F-14 Counters use the same values as MiG counters. A-10, F-117, EA-6, and A-6 Counters have no values; use rule 19 for combat.
- Target, Arming, High Profile, Hussein: For use with the Desert Storm Module.
- Large # Counters (300-311): Chits for Determining Random Hornets. Mission Event Counters: used when Mission Events require noting. Hit Markers (Explosions): used for marking hits on the main target. Did Not Move: designates a Hornet that remains in an Approach or Target Area for more than one consecutive Step. Evasive: designates a Hornet that becomes "Evasive" to avoid MiGs, SAMs, or AAA during Combat.
- Air-to-Air Missiles (AAMs): Sparrows are used for Long Range shots (Attack Resolution Step #1); Sidewinders are used for Dogfighting (Attack Resolution Steps #2, #3, and #4). Long Range Fire Position Modifiers and Dogfight Fire Position Modifiers are printed on the counter: the top number applies if 1 missile is fired, the bottom number if 2 missiles are fired.
3.0 Setting Up the Game
There are nine Campaign cards provided. Choose one, or draw one at random, to determine the general area of the world in which your missions will be taking place. Place the Campaign deck, with the chosen Campaign card face-up, in the allotted space at the bottom left corner of the Mission Display.
Certain Target cards are removed from each Campaign; remove these before Set-Up.
Place the Mission Display on a flat surface in front of you. Shuffle the following decks, and place them face-down at the bottom left corner of the Mission Display: Mission Briefing, Special Condition, Mission Event.
Place the Hornet cards in the section of the Carrier Display labeled "Flight Deck". Place the Aviator cards in the section labeled "Briefing Room".
4.0 Types of Missions
There are three general types of Missions. A description of each is given below.
Most of your Missions will be "Air-to-Ground". The objective is to go out and destroy enemy ground targets. These Missions will usually include both SAM and MiG defenders. Naval Strike Missions also fall into the "Air to Ground" category.
The objective of Fighter Sweep Missions is to go out and destroy enemy fighters. Determine the MiGs to be engaged during the "Determine/Place enemy MiGs phase". Do not place SAMs in the Target or Approach Areas for this type of Mission.
For Fleet Air Defense Missions, the fleet is under attack from enemy aircraft. Your objective is to protect your carrier. Determine the Strike Aircraft and Escorts to be engaged during the "Determine/Place enemy MiGs Phase". Do not place SAMs in the Target or Approach Areas for this type of Mission.
When conducting a Fighter Sweep or Fleet Air Defense Mission, the Tactical Overview is not used (no Air to Ground attacks, AAA, or SAM attacks occur during those missions).
5.0 Sequence of Play
Mission Briefing: Draw Target Card. Draw Mission Briefing Card. Check For Special Event. Determine and Place SAMs. Allocate AAA.
Pre-Flight: Select Pilots and Hornets for Mission. Arm Aircraft / Initial Placement.
In-Flight: Check For Target-Bound Mission Event. Roll Certainty For SAMs / Adjust SAM Counters. Determine / Place Enemy MiGs.
Attack Resolution (4 Times): Hornet Movement (NOT during Step #1). Jettison Decision. Air Combat — Determine Initial Air Combat Positioning (1st Step only); Determine Engagements; Choose Hornets to be "Evasive"; Roll For Fire Position/Results (2nd, 3rd, and 4th Steps only: Select Hornet Leaders/Wingmen; Determine Engagements; Roll For Fire Position/Results). Air-to-Ground Combat — HARM Attacks; SAM Lock-On (Select Hornets to be "Evasive"; Lock-On Results); AAA Attacks in Target Area (Select Hornets to be "Evasive"; AAA Results); AGW Attacks (each Hornet Fires Missiles, Bombs, or Cannon).
Post-Flight / Mission Results: Check For Carrier-Bound Mission Event. Roll d10 For Hornets Returning Damaged. Determine Fate of Pilots Who Ejected During Mission. Make Carrier Sheet Adjustments — Pilot Check; Hornet Check. Determine Level of Mission Success. Fill-out Mission Log.
The Attack Resolution Phase of Hornet Leader is divided into four nearly identical Steps. Each Step represents roughly 30 seconds of real time. During each Step, Movement and Combat may take place on the Mission Display. Use the "Step" counter included in the countermix to keep track of the current Step.
6.0 Mission Briefing
Draw the top card from the Target deck and place it in the center of the target display. This is your target for the mission. Draw the top card from the Mission Briefing Deck and place it on top of the Mission Briefing Deck, face-up.
6.1 Check for Special Condition
Roll a d10. If the result falls within the range specified by the "Special" box on the Mission Briefing card, the Mission will have a Special Condition. If there is a Special Condition, draw the top card from the Special Condition deck and place it face up atop the Special Condition deck. Apply its specific conditions to the current mission as indicated.
Example: The result of your Special Condition die roll is "8". The range of numbers in the "Special" box of your Mission Briefing Card is "1-8". Therefore, you would draw the top card from the Special Conditions deck. Let's say it is the "Low Clouds Over Target" card. You would apply the modifiers listed on this card throughout your current mission.
6.2 Determine and Place SAMs
There may be SAMs located both in the Target Area and in the surrounding Approach Areas. Check the Target Card to determine SAM density at and around the target. At the bottom right corner of each target card (except for cards depicting air-to-air missions), there is a SAM symbol, divided into two parts. The top portion lists the SAM density IN the Target Area, while the bottom portion lists the SAM density in EACH of the surrounding Approach Areas. The Levels of Density are as follows: None, Minimal, Light, Moderate, and Heavy.
Targets #16 and #18 list "None" for the SAM Density in the Approach Areas. This means there are no SAMs in ANY of the Approach Areas for these targets. All other targets list a density of at least "Minimal". Roll a d10 on the appropriate column of the SAM Density table to determine the level of SAM defenses located in each of the five Areas. Roll once per Area. Place SAM counters on the Mission Display (in their appropriate Areas of the Tactical Overview) to note SAM placements. Possible results are as follows: "-" = No SAMs in the area; Small = place one Small SAM in the area; Medium = place one Medium SAM in the area; Large = place one Large SAM in the area; Very Large = place one Very Large SAM in the area. Additionally, there are two levels of possible Long Range SAM Sites: Long and Large Long. A single "*" on the SAM Density table indicates a Long Range SAM is present in addition to the Normal SAM Site. A "**" indicates the presence of a Large Long Range SAM in addition to the Normal SAM Site. Note: SAMs are NEVER placed in the Pre-Approach Areas.
Example: The SAM box on your Target Card lists "Moderate" SAM density in the Target Area and "Light" SAM Density in the Approach Areas. To determine the actual SAM defenses in the Target Area, you roll a d10 and check the result against the "Moderate" column of the SAM Density chart. Let's say you rolled a "9", yielding a result of "Large*". This means you would place one Large SAM counter in the "Normal" box in the Target Area AND one Long-Range SAM counter in the "Long" box in the Target Area. You would then roll once for each of the Approach Areas (making certain to designate precisely which area you are rolling for on each roll) and check the result against the "Light" column of the SAM Density chart. Let's say you roll a "3" for the North Approach, a "10" for the East Approach, a "1" for the South Approach, and a "6" for the West Approach. According to the chart, this means you would place one Small SAM counter in the North Approach, one Large SAM counter in the East Approach, no SAM counters in the South Approach, and one Small plus one Long-Range SAM counter in the West Approach.
6.3 Allocate AAA
The Level of SAM Density in the Target Area dictates the Level of AAA. Place the appropriate AAA counter in the Target Area.
Examples: A Target has "Heavy" SAM Density in the Target Area. Therefore it would also receive a "Heavy" AAA counter. A Target has "Moderate" SAM Density in the Target Area, but the Campaign Card dictates that all "Heavy" SAMs be reduced to "Moderate". The Target would then have "Moderate" AAA.
7.0 Mission Preparation (Pre-Flight)
7.1 Select Pilots and Hornets
You, the Squadron Leader, must now decide how many aircraft to send out in order to accomplish the Mission. Your aviators and Hornets suffer from the strain of a Mission (see Post-Flight), therefore, you should send as few aircraft as possible, while still sending enough to complete the Mission.
Each Target Card indicates a "suggested" number of Hornets for the Mission. This represents the CAG's allocation of aircraft for this mission. You may send this number of aircraft on the mission. Alternately, you may send two (2) more or two (2) fewer aircraft on the mission. By sending two (2) fewer Hornets than suggested, you will gain bonus Mission Points equal to the "Points Per Hit" designated on the Target card. By taking two (2) more Hornets than suggested, you automatically lose Mission Points equal to the "Points Per Hit" listed for the Target. For Fighter Sweep Missions, use the "Damaged/Destroyed" Value instead of the "Points Per Hit" value. For Fleet Air Defense Missions, use the Value listed for MiG-27s.
Assign one aviator to each Hornet flying the Mission. Place the aviator card with the Hornet he is flying.
Sections. This is a very important paragraph, so read it carefully. In real life, aircraft operate in pairs, called "Sections". Before each mission, you must designate your Hornet Sections. This is usually done by placing each Section together. You must then fly your mission with your Hornets in Sections. A Section of Hornets may be equipped differently. Each Section of Hornets must fly the same Attack Plan. This means that while moving on the Mission Display, the two Hornets must always be in the same Area (i.e. Air Combat, East Approach, South Pre-Approach, etc.). Once "Sections" are designated at the start of a mission, they may not be adjusted during the Mission (EXCEPTION: see "Important" note below). You are free to designate new Sections at the start of each Mission.
Important: The only time a single Hornet may operate alone is when the other plane in its section is destroyed or forced to return to the carrier. If two such "single" Hornets begin a Step in the same area (Air Combat or the same Approach area), they may immediately join to form a section. All rules governing sections apply to them for the remainder of the mission.
As one aspect of your Hornet mission allocation, you will have to decide how many Hornets will fly Air Cover for your attack aircraft. Since you must make this allocation BEFORE you know the exact numbers and types of MiGs that you'll face, this can be difficult. Remember, if the MiGs are able to achieve more than a 2:1 advantage in numbers over your "Air Combat" Hornets, the excess MiGs can attack your air-to-ground attack planes at an advantage. Once you've decided which section(s) to allocate to Air Combat, place the chosen Hornets on the detailed Air Combat Display on the Mission Display in the side-by-side sections labeled "L" and "W" (the "W" box to the rear is only used for dogfight combat; see section 10.2).
Note: Even though there is no MiG threat listed for some missions, some Mission Events involve combat with MiGs. Thus, taking the "free" Sidewinders on the wingtips is always a good idea.
7.2 Arm Aircraft
You now allocate various weapons and pods to each Hornet you've selected for this mission. Naturally, the specific ordnance you choose will depend upon the combat role you expect each Hornet to perform during the mission. The numbers and types of weapons your planes carry are limited in four (4) ways: 1. Weight Limits; 2. Location (Load Area Limits); 3. Briefing Card Limits; 4. Counter mix.
7.3 Weight Points and Load Areas
Look at the Weight Points and Load Areas listed on the Mission Briefing card to determine the limits for the current Mission (the remaining Weight Points and Load Areas are assumed to be used for fuel tanks).
Each Hornet may carry at most 10 Weight Points of munitions. Each Hornet has 5 Load Areas. Three of the Load Areas (at the bottom of the Hornet Cards) may be used to carry a variety of weapons. The last two (at the top of the cards) may only be used to carry one Sidewinder Air-to-Air missile each. The two Wing Tip Load Areas may always be used; they are in addition to the Load Areas designated on the Mission Briefing card. Each of these Load Areas is limited to carrying 1 Sidewinder counter. The two Wing Load Areas may either be used to carry 1 Harpoon counter, or 2 counters of any other type. If carrying 2 counters, they can be of different types (i.e. a Mk. 82 and a Sparrow). The Center Line Load Area may carry any one of the Munitions listed on the Mission Display (Maverick, N-Pod, E-Pod, Mk. 82, or Mk. 83).
Specific Information on Weight Points and Load Areas is listed on the "Hornet Load Areas" section of the Mission Display.
The counters provided do limit selection. You may not use more of a given type of counter than the actual number of that counter provided in the game. Some of the counters have one type of munitions on one side, and a different type on the other side.
Example: You have drawn Target card #5 (Air Defense Battery), which recommends that you take 4 Hornets on the mission. You select Hornets #300, 301, 302, and 303. You note that there is no MiG threat for this mission, so you want to take your best air-to-ground pilots for the attack. You choose Leader (+1 Air-to-Ground Rating), Banzai (+2), Mustang (+1), and Griffin (+1). You create Sections (Leader and Mustang in 300 & 301, Banzai and Griffin in 302 & 303). The Mission Briefing card (Short-range night mission) indicates that each Hornet can carry up to 8 Weight Points on 3 Load Areas. Two sample aircraft load-outs are as follows — Plane #300: Sidewinder (0, Left Wingtip), Sidewinder (0, Right Wingtip), 2x HARM (2, Left Wing), 2x Mk. 83 (4, Right Wing), E-Pod (1, Center Line).
7.4 Hornet Initial Placement and Movement
In this step you will plan the location for each of your aircraft Sections during Step #1 of the Attack Resolution Phase. It is a good idea to plan this at the same time that you arm your aircraft. The role of a pair of Hornets in a Mission will usually determine what they should be carrying in the way of bombs and Air-to-Air Missiles (AAMs).
Place each Section of Hornets in an Area on the Mission Display. Each pair of Hornets may begin in any one of the following areas in the first Attack Step: Air Combat, Approach (any of the four), Pre-Approach (any of the four). A Hornet Section may NOT be INITIALLY placed in an Approach Area containing any type of Long Range SAM Site. It is possible for Hornets to be placed in an Approach Area free of Long Range SAMs, and later (during Certainty Check) discover a Long Range SAM present. This is permitted.
Adjacent Areas. Areas adjacent to Air Combat are: Approach (any of the four), Pre-Approach (any of the four). Areas adjacent to a Pre-Approach Area are: Air Combat, the Approach Area in its same compass direction (i.e. if the Hornets are in the West Pre-Approach, the West Approach is adjacent), and the two Pre-Approach Areas adjacent to the current Pre-Approach Area (i.e. the Hornets are in the North Pre-Approach, they could move to West or East Pre-Approach). Areas adjacent to an Approach Area are: Air Combat, the Target area, the two Approach Areas adjacent to its current Approach Area, and the Pre-Approach Area adjacent to it. Areas adjacent to the Target Area are: any of the four Approach Areas.
8.0 In-Flight to the Target
This represents the time from when the Hornets launch from the carrier until they reach the Target's location.
Your flight to the Target may not be uneventful. Roll a d10. If the roll falls within the range specified on the Mission Briefing card for "Special", draw the top-most Mission Event card. Use the Mission Event on the upper half of the card. Resolve the event as indicated.
8.1 Roll Certainty for SAMs
There is a good chance that the defenses will actually be as you were told. The range of numbers assigned to "Certainty" on the Mission Briefing card reflect the chance of each one of the Areas actually containing the SAM Site(s) placed during "Determine and Place SAMs".
Roll a d10 for each of the 4 Approach Areas and the Target (a total of 5 die rolls). If a roll falls within the Certainty range listed on the Mission Briefing card, the SAM(s) in that Area are not changed. If the roll is above the "Certainty" range, roll again on the appropriate SAM Density column (use the same column as specified on the Target card). Remove the old SAMs and replace with the new SAMs.
Example: Your Mission Briefing Card lists a "Certainty" of "1-7". You roll a "4" for the Target Area, then 7, 9, 2, and 6 for the North, East, South, and West Approach Areas. Thus, the SAMs remain the same in all areas except the East Approach. You now roll again on the SAM Density Table for the East Approach as per rule 6.2.
8.2 Determine and Place Enemy MiGs
The Target card will reveal the approximate level of fighter cover to be found over the Target, but the exact number and type of fighters present is not known until you reach the Target. Roll once on the "Fighter Presence" table to determine the exact fighters facing you.
Each fighter listed on the Fighter Presence table represents a pair of fighters (i.e. "21, 23" = 2 MiG-21s, and 2 MiG-23s). The fighters listed on the Fighter Sweep and Fleet Air Defense tables (on Target cards) do not represent pairs (i.e. "3 MiG-27s, 1 Su-24" = 3 MiG-27s and 1 Su-24).
Randomly select the appropriate MiG counters. Place the counters in the "MiGs" Area of the detailed Air Combat section of the Mission Display. Each counter is used to represent one fighter.
Example: The Target Card lists "Moderate" MiGs. You roll a "9" and refer to the Enemy Fighter Presence Table on the Mission Display. Cross-referencing your die roll with the "Moderate" column, you find the result of "21,23,23". Now you will randomly choose the 2 MiG-21 counters and 4 MiG-23 counters from the countermix and place them in the "MiGs" section of the detailed Air Combat Area on the Mission Display.
9.0 Move Hornets / Jettison Ordnance
As the first action in each Step (except Step #1, when NO movement is allowed!), you may move your Hornets from their current area into one adjacent Area (see 7.41 for definition of "Adjacent Areas"). This movement is voluntary, except during Step #4, when all Hornets in the Target Area must move out of that Area. No Hornets are allowed to move into or remain in the Target Area during Step #4.
Hornets do not move during Attack Resolution Step #1. During Steps #2, #3, and #4, a Section of Hornets may either remain in its current Area, or move to an adjacent Area.
Any Hornets may now "Jettison" (release) any and all munitions carried. This is usually used by Hornets carrying Air-to-Ground munitions (Mk. 82, Mk. 83, Maverick, Harpoon, or HARM) when going into Dogfight combat to avoid the negative Air Combat modifiers.
10.0 Air Combat
Your Hornets will be required to engage enemy fighters while performing their missions. There are two types of Air Combat: Long Range and Dogfight. Long Range Air Combat is conducted during Step #1 of Attack Resolution; Dogfight is conducted during Steps 2, 3, and 4.
Determine Initial Air Combat Positioning
As the two opposing groups of fighters fly toward each other, they attempt to shoot each other down with Long Range Air-to-Air Missiles (Hornets use Sparrow missiles).
Roll a d10 and refer to the Initial Air Combat Positioning Table on the Mission Display. The results of this die roll (after taking into account any applicable modifiers) determine which side has an initial advantage in Air Combat, or if there is no advantage. This roughly simulates one side acquiring the other first on radar. If one side has the "advantage" or "surprise", apply the following modifications to Long Range Air Combat (only!):
Advantage: the side with the Advantage resolves all of its Long Range Missile attacks before the enemy conducts its attacks. Surprise: the side achieving Surprise conducts all of its Long Range Missile attacks; the enemy is not allowed to conduct Long-Range Missile attacks. If the result is "Equal Positioning", both sides resolve Long Range Missile combat according to the "Engagement" rules.
There are positions for 8 Hornets in the Air Combat section. A player may, however, have more than 8 Hornets involved in Air Combat.
At the beginning of Air Combat Resolution, the Hornets that you placed in the Detailed Air Combat Area (see 7.5) and the MiGs that were placed in 8.2 will be facing each other. For now, which Hornets are facing which MiGs is not important. Targeting will be performed as part of the Long-Range and Dogfight Combat processes. All Hornets should be placed on the front row of boxes (LW LW LW LW), as no wingmen are allowed until Step #2 of Attack Resolution.
Determine Engagements
Note: This is one of the most critical rules sections in the game. Please read it carefully.
The initial step in the resolution of Air Combat involves determining which Hornets are engaged with which enemy MiGs. Each fighter will "Engage" (attempt to attack) one enemy fighter in combat during each Step. Every aircraft in the detailed Air Combat Area must be "engaged" before combat can be resolved. Place engaged planes opposite each other on the detailed Air Combat Display. Once you have determined which aircraft are engaged, each set of engaged fighters will fire at each other. Determine engagements as follows:
- You select one enemy MiG for each of your "Aggressive" Hornet aviators to Engage. Place that MiG opposite the "Aggressive" Hornet. Then each non-Engaged Aggressive MiG pilot selects one non-Engaged Hornet to engage. See "MiG Target Priority" list.
- You select one enemy MiG for each of your non-Engaged "Normal" Hornet aviators to engage. Then each non-Engaged Normal MiG pilot selects one Hornet to engage.
- Finally, you select one enemy MiG for each of your non-Engaged "Defensive" Hornet aviators to engage. Then each non-Engaged Defensive MiG pilot selects one Hornet to engage.
A second MiG will not engage a Hornet until all Hornets are engaged by one MiG. Once all Hornets have been engaged by a MiG, continue placing MiGs (using MiG Target Priority) until all Hornets have two MiGs, or there are no MiGs remaining.
MiG Target Priority: MiGs will engage Hornets in the following order: Damaged Hornets, Defensive Hornets, Normal Hornets, Aggressive Hornets. If more than one Hornet falls into a category, the player selects randomly (draw chits) between the eligible Hornets.
If the MiGs outnumber the Hornets by more than 2:1 (Leader/Wingman Sections count as 1 Hornet for purposes of this ratio), the remaining MiGs will attack the air-to-ground Hornets in the following order: Target, Approach, Pre-Approach — choosing random Hornets within these areas as necessary. Divide the MiG attacks evenly. A non-Air Combat Hornet will not be attacked by two MiGs until they are all attacked by one. If there are no non-Air Combat Hornets, continue placing MiGs against the Air Combat Hornets.
Once all MiGs have been engaged, any remaining Hornets in the Air Combat Area may be targeted against MiGs as the player sees fit.
A fighter will attempt to attack the enemy fighter with which it is Engaged. Damaged fighters do not attempt to Engage, although they may BE engaged by enemy aircraft. Strike Aircraft (SU-24s and MiG-27s) do not Engage Hornets. If not Engaged by a Hornet, a Strike Aircraft performs no action during the Step. Strike Aircraft are +0 to be attacked; in Air Combat, they are purely defensive.
All attacks take place in "Style" order. Pilots are rated not only for Air Combat skill, but also for their Style. "Aggressive" pilots shoot first. "Normal" pilots then conduct their attacks. Then "Defensive" pilots shoot. All attacks by one Style are executed, and the damage resolved, before the next Style may attack. As a result, an Aggressive pilot may fire at, and shoot down a Normal pilot, before the Normal pilot has a chance to fire back. If pilots of the same Style are engaged, their attacks take place simultaneously, meaning it is possible to shoot each other down.
Example: It is Step 1, and Hornets 300 (aggressive), 301 (aggressive), 302 (defensive), and 303 (defensive) are in the Air Combat Area opposed by 4 MiG-23s (1 aggressive, 2 normal, 1 defensive). You determine engagements as follows. 300 engages the aggressive MiG (this is your choice, but engaging the aggressive MiGs first does give you an advantage). 301 engages one of the normal MiGs. There are no more non-engaged aggressive MiGs, so now Normal pilots engage. The remaining Normal MiG engages a defensive Hornet. He picks from the two chits and engages 303. Finally 302 engages the defensive MiG.
Choose Hornets to be Evasive
This option may not be taken in Dogfight combat (Steps 2, 3, and 4). After determining engagements, you may designate one or more Hornets as "Evasive". Indicate which Hornets are Evasive by placing an "Evasive" counter on them. This indicates the Hornets will be evasively maneuvering during Long Range combat. As a result, both their attacks and those launched against them have a -2 chance to achieve a Fire Position. (This is the only instance in which Evasive Hornets can fire.)
A Non-Air Combat Hornet that is attacked by MiGs may elect to be "Evasive" rather than have the "Non-Air Combat" bonus applied. Place an "Evasive" counter next to Evasive Hornets. An Evasive Hornet may not conduct any attacks during Steps 2-4 of Air Combat. Being "Evasive" does not reduce the MiG's chance to achieve a Fire Position, it merely prevents the MiG from gaining the "vs. Non-Air Combat Hornet" bonus. Going Evasive in this way will also affect the AAA and SAM attacks during this Step.
Roll for Fire Position
Important: Make a new Engagement Determination during each Step. Neither Hornets nor MiGs are automatically "locked in" to engaging the same aircraft that they fought in the previous Step.
To resolve combat, each aircraft must first attempt to achieve a Fire Position. This represents getting a "radar lock" in Long-Range Combat or a "tone" in Dogfight Combat. If you achieve a fire position, then you roll again on the Fire Position Result Table to determine target damage.
Roll a d10 for each firing aircraft. In order to achieve a Fire Position, you must roll a modified "11" or greater. The modifiers for this roll are listed on the "By a Hornet" and "By a MiG" Tables on the Mission Display. The modifiers listed directly beneath the "By a Hornet" and "By a MiG" headings apply to both Long Range and Dogfight attacks. The modifiers under "Long Range Modifiers" and "Dogfight Modifiers" apply only to those specific types of attacks.
A Hornet cannot conduct a Long Range attack if it is not carrying a Sparrow. If a Hornet is carrying only one Sparrow, it will be launched, giving the Hornet a +3 to achieve a Fire Position. If a Hornet is carrying two Sparrows it will launch two Sparrows, giving it a +6 to achieve a Fire Position. Remove launched Sparrow counter(s) after making the Fire Position Die Roll. Sidewinder missiles cannot be used in Long Range combat. MiGs use the 1st number (reading left to right) at the top of their counter to modify their Long Range fire position die roll. The "-" on the MiG-21s means that they cannot engage or fire in Long Range combat.
During a combat Step, a Hornet which is carrying only one Sidewinder will launch it, giving the Hornet a +2 to achieve a Fire Position against the enemy fighter it is Engaged against. If a Hornet is carrying two or more Sidewinders it will launch two Sidewinders during the Step, giving it a +5 to achieve a Fire Position. Remove launched Sidewinder counter(s) after making the Fire Position Die Roll. A Hornet always gains the +1 for having a cannon in Dogfight combat, even if it is also using Sidewinders.
Sparrow missiles may not be used in Dogfight combat. The second, third, and fourth numbers across the top of the MiG counters (reading left to right) represent their dogfight modifiers during Steps 2, 3, and 4 of Air Combat, respectively. Note: the numbers (9/7/5/3) across the bottom of the F-14 counters are used in the same manner as for MiGs.
Example: A MiG-29 (5/6/5/2) gets a +5 modifier for Long-Range Fire Position die rolls. In Dogfight combat, it gets a +6 in Step 2, a +5 in Step 3, and a +2 in Step 4.
Wingmen. Wingmen may only be used for Dogfight combat. Wingmen are declared before engagements are determined. Leader/Wingman Section count as only 1 Hornet for purposes of determining the MiG:Hornet ratio. See 10.21. MiGs only attack Leaders, not their Wingmen. The Wingmen are placed in the "W" section behind their respective Leaders. A Leader may only have one Wingman. All Wingmen must have a Leader.
When a MiG gets a Fire Position on a Leader with a Wingman, that Leader's Wingman has a chance to negate the Fire Position, before the attack is resolved. Determine the value of the Wingman as if he were attacking the MiG in Dogfight combat. Then roll a die. If the die roll indicates a successful Fire Position, the MiG Fire Position was negated. This does not affect the MiG, it only negates the attack. Expend Sidewinders like a normal attack. Leaders and Wingmen may switch on a Step-by-Step basis without restrictions.
Example: Wedge (+2 Air Combat) fires two Sidewinders at a MiG-23 (with no MiG defense value). He rolls a "3". This is modified by +2 for his Air Combat Skill, +1 for the 20mm cannon, and +5 because he launched 2 Sidewinders. This gives a final modified die roll of "11", so the Fire Position is Achieved, and you will now roll on the Fire Position Result Table to resolve the attack.
Fire Position Results
Roll a d10 and refer to the Fire Position Result table. There are NO modifiers to this die roll for Long-Range combat. There are three possible modifiers to this die roll for Dogfight Combat. Dogfight attacks are usually more deadly than Long Range attacks (less time to dodge or use counter-measures). If the attack is launched by a MiG-23, add 1 to the die roll. If the attack is launched by a MiG-29, add 2 to the die roll. If executed by a Hornet which launched at least one Sidewinder, add 3 to the die roll.
Near Miss: the target of the attack is not able to attack during its next opportunity. Rotate its counter 90° to indicate this. These are not cumulative, so a fighter will not lose more than one future action. A Hornet which is affected by this result is not able to perform "Wingman protection" during the following Step.
Damaged, Jettison, ABORT: Damaged fighters must jettison all munitions and are not permitted to conduct any type of attack for the remainder of the Mission. They must, however, remain for one additional Step in the Air Combat Area (they are not required to stay if Damaged in Step #4). Any future attacks against a Damaged fighter, even those in the same Step, gain the "vs. Damaged Fighter" bonus.
Destroyed: If a MiG is Destroyed, remove its counter from play. If a Hornet is Destroyed, place the Hornet and aviator card off to the side. The Hornet will not take part in the remainder of the Mission. Conduct a Pilot Bail-Out Check to determine if the Hornet Pilot successfully ejected. If he did eject, determine his fate at the end of the Mission.
If a Leader of a Leader/Wingman Section is Destroyed by a MiG attack, any other MiGs which were Engaged against that Leader will attack the Wingman instead (assuming that they haven't already attacked during the Step).
Extended Air Combat Example
(Please take the time to lay out the Display, cards, and counters for this example.) At the start of the Attack Resolution Phase, two Hornets and four MiGs occupy boxes on the detailed Air Combat Display. Wedge (+2 Air Combat, Aggressive) and Hunter (+1 Air Combat, Normal) are in Hornets #300 and 301, respectively. Each Hornet is armed with 4 Sidewinders and 2 Sparrows. Enemy MiGs are as follows: MiG #1 MiG-23 (2/4/3/2) Aggressive +1 Defense Value; MiG #2 MiG-23 (2/4/3/2) Normal +0 Defense Value; MiG #3 MiG-21 (-/2/2/1) Defensive +0 Defense Value; MiG #4 MiG-21 (-/2/2/1) Aggressive +2 Defense Value. The Campaign Card indicates that all MiG pilots are "Normal". Resolve the Combat in the following order:
Step 1:
-
Determine Initial Air Combat Positioning. You roll a "5". Add +1 because of the "Normal" MiG pilots. That's 6, yielding a Result of "Equal Positioning".
-
Determine Engagements. Wedge chooses to engage the Aggressive MiG-23. Hunter engages the Normal MiG-23. Neither MiG-21 is able to engage (they could have been engaged if you had more Hornets!).
-
Choose Hornets to be Evasive. Neither Hornet goes evasive.
-
Roll For Fire Positions. You roll for Wedge and the Aggressive MiG-23 simultaneously. Expend both Sparrows from Wedge's Hornet. Wedge rolls a "5". Add +6 (2 Sparrows), +2 (Wedge's Air Combat Rating) and +1 (MiG's Defense Value) for a total of "14". This means that Wedge achieves a fire position. The Aggressive MiG rolls a "6". Add +2 (MiG's Value) and +1 (for Attacking an Aggressive Hornet) for a total of "9". The Aggressive MiG does not achieve a Fire Position. Now roll a d10 and refer to the Fire Position Result table to resolve Wedge's attack. The die roll is "7". There are no modifiers in Long-range combat. The result is "Damaged, Jettison, Abort". The MiG will remain in Air Combat for one more Step (although it can't engage or attack). You will remove it (if it has not been damaged again or destroyed) at the end of Step 2. Mark the Damaged MiG with an extra "Hit" marker.
You roll for Hunter and the Normal MiG-23 simultaneously. Hunter rolls a "1". Modifiers are +6 (Sparrows) and +1 (Hunter's Air Combat Rating). Ignore the MiG's Defense Rating, as it is a 0. This totals "8", thus you don't achieve a Fire Position. The MiG rolls an "8", modified +2 (MiG Value) for a total of "10". Thus, the MiG does not achieve a Fire Position.
Step 2:
-
You move no Hornets into or out of the Air Combat Area.
-
You choose not to adopt a Leader/Wingman formation (because there are three remaining MiGs, and a Leader/Wingman formation only counts as 1 Hornet for purposes of the 2:1 ratio — see 10.21).
-
Wedge engages the Aggressive MiG-21. Hunter engages the Normal MiG-23. The Defensive MiG-23 engages Hunter. The damaged MiG-23 cannot engage.
-
Combat: Wedge expends 2 Sidewinders and rolls a "1". Modifiers are +5 (Sidewinders), +1 (Cannon), +2 (MiG Defense), and a +2 (Air-to-Air Skill), for a total of "11". The MiG fires simultaneously, and rolls a "7", modified by +2 (MiG's value for Step 2 Combat) and a +1 (Attacking an Aggressive Hornet) for a total of "10". Wedge has achieved a Fire Position, but the MiG-21 has not. Wedge now rolls a "6" on the Fire Position Result Table. This is modified by +3 (Sidewinders) for a total of "9". The MiG-21 is destroyed and removed from play.
Hunter and the Normal MiG-23 fire simultaneously. Hunter rolls a "1", modified by +5 (Sidewinders), +1 (Cannon), and +1 (Pilot Skill), for a total of "8". He does not achieve a Fire Position, but must expend the two Sidewinders anyway (this, by the way, represents the fact that sometimes pilots fire without "lock-on" or "tone" just to get a missile flying in the direction of the enemy). The Normal MiG-23 rolls a "7", modified by +4 (MiG-23 Value for Step 2 Combat) for a total of "11". He does achieve a Fire Position. Now you roll again for the MiG-23 on the Fire Position Result Table. The result is a "5", modified +1 to a "6" because a MiG-23 is firing. The result is a "Near Miss, Lose Next Combat Action". Thus Hunter will not be able to engage, attack, or be a wingman during Step 3 (if he had not yet fired in Step 2, he would lose the Step 2 attack and be okay for Step 3). Rotate his counter ninety degrees. Now the Defensive MiG-21 fires at Hunter. The die roll is "3", modified by a +2 to a "5". Thus, he does not achieve a Fire Position. This concludes Step 2. Remove the damaged MiG-23. The combat now moves to Step 3.
11.0 Air to Ground Attacks
You must score a certain number of "Hits" on each Target in order to destroy it. Hits are scored with Air-to-Ground Weapons (AGW). Once the Target has been hit with the number of Hits specified on the Target Card, it is destroyed. Further Hits will not score additional points. During each Step, HARM attacks take place BEFORE SAM and AAA attacks (see 5.0 Sequence of Play). This gives you a chance to reduce or destroy enemy SAMs with HARMs before they attack you. HARM attacks are the ONLY air-to-ground attacks which are made before SAMs and AAA fire. AGW attacks take place after SAM and AAA attacks. However, since AGW and HARM attacks are resolved using the same procedure, they are both explained in this section. DO NOT resolve AGW attacks before conducting SAM and AAA attacks.
A Hornet is limited to which Areas it can attack based on its current position, and its weapons load. In any given Step, it may: 1. Drop any or all of its bombs (Mk. 82s and Mk. 83s), OR 2. Fire any or all of its missiles (HARMs, Mavericks, Harpoons), OR 3. Perform a Strafing attack. Each Hornet may perform one of these actions in a Step. You may not mix actions in a Step (for example, the same Hornet could not drop a Mk. 82 and fire a HARM). Within these guidelines, you may launch as many weapons as you are carrying during any given Step at any number of different eligible targets.
Example: A Hornet carrying 2 HARMs, 2 Mavericks, and 1 Harpoon could fire the two HARMs at different SAM Sites, then later (after SAM and AAA attacks) launch 2 Mavericks at separate targets within their 1-area range as well as the Harpoon at a target up to two areas away. Mk. 82s and Mk. 83s may be used to hit ground or naval targets (this includes the main Target, AAA, or SAMs) in the Hornet's current Area. Mavericks may be used against ground or naval targets in the Hornet's Area, or an adjacent Area. Mavericks may also be used against SAM Sites and AAA. Harpoons may only be used against naval targets. Harpoons may be used against naval targets in the same Area, 1 Area away, or 2 Areas away from the launching Hornet. Harpoons may be used against the SAM Sites and AAA in naval Missions (i.e. they are sinking a SAM/AAA equipped ship).
HARM attacks may only be used against SAMs, not the Target itself. HARMs may be used against any SAM in the Hornet's Area or in an Adjacent Area. A Hornet which conducts a HARM attack may conduct a normal Ground Attack during the same Step with Mavericks or Harpoons. Ground attacks may never be made by a Hornet while in the Air Combat Area. Although the Air Combat Area is adjacent to the Approach Areas for movement purposes, it is not adjacent for attack purposes.
Each Hornet is equipped with a 20mm cannon which can be used to score Hits against ground targets. A Hornet can perform one Strafing attack during a Step in which it does not perform any other attack. A Strafing attack can only be used to attack the main Target, AAA, or a SAM Site in the Hornet's Area.
11.2 How to Resolve an Attack
Designate all Attacks and Targets. Roll one die for each weapon counter expended. All attacks for a phase must be declared before any die rolls are resolved. This may result in overkill. If there are SAMs and/or AAA in the Target Area, each attack must be made specifically against the Target, AAA, or the SAMs. Decide before resolving any attacks.
In order to score a Hit with a Strafing attack, perform a normal Air to Ground attack, taking into account all modifiers in effect. On a modified roll of a "10" or greater (do not add the +1 Vulcan Cannon from the "Dogfight" table), one Hit is scored. Treat this as a Hit scored by any other munition.
Whenever you expend an Air to Ground Weapon (AGW), you will score zero, one, two, or three Hits of damage. Roll a d10 for each weapon fired. Look at the "Hit" numbers on that counter. If the modified die roll is equal to the first number and less than the second, one Hit is scored. If the modified die roll is equal to the second number or greater, two Hits are scored. The Mk. 83s are capable of achieving a third Hit; if the modified roll is equal to the third number, three Hits are scored. Remove each weapon counter from the Hornet as expended.
You may attempt to improve the hit chance for any Hornet in the Target Area by using High Visibility attacks. The target of a High Visibility attack must be in the Target Area (this includes: the Target, SAMs in the Target, AAA). You decide to make some, none, or all of your Hornets "High Visibility" during the Hornet Movement Phase of a Step. Turn High Visibility Hornets to the High Visibility (HV) side of their counters. This option gives the Hornets a bonus when attacking (representing the aviator taking a bit more time to "line up" on the target), but it also gives any existing SAMs and AAA a bonus to attack them. One Hornet in a section may be "Normal" while the other is "High Visibility".
12.0 SAM Attacks
SAMs (Surface-to-Air Missiles) are in place around the target area in order to shoot down attacking aircraft. There are two types of SAMs: Normal and Long. The Normal SAM will attempt to shoot down one or more of the Hornets in its Area during each Step. The Long Range SAM will attempt to shoot down not only the Hornets in its Area, but also the adjacent Areas. Determine adjacent Areas in the same way as they are determined for Ground attacks. SAMs may never attack Hornets in the Air Combat Area.
If both a Long-Range SAM Site and a Normal SAM Site are located in the same area, you automatically attack them as a group, NOT separately. When hits are scored, reduce then destroy the Long-Range SAMs before reducing or destroying the Normal SAMs.
Each Hit scored against an Area with SAMs (assuming that SAMs were the declared target) will reduce the size of a SAM Site present by one Level (i.e. Very Large to Large, Large to Medium, etc). Long Range SAMs suffer Hits first. Hits on Small SAM Sites and Long-Range SAM Sites destroy them. Each SAM counter has a graphic representation of its size to assist you.
Example: An Area contains a Medium SAM and a Large Long Range SAM. 3 Hits are scored against the SAMs. The first two are used to reduce, then eliminate the Large Long. The third reduces the Medium to a Small.
For each Hit scored, place one explosion counter in the Target Area on the Mission Display. The back sides of the counters have two explosions, indicating two Hits. Damage NEVER "spills over" to affect a different type of ground installation. This means that overkill against SAMs in the target cannot be carried over to damage the Target, or AAA.
Each SAM counter has a number printed on it. That number is the SAM's Value. A SAM Site will attempt to Lock-On to a number of Hornets equal to its Value. A specific SAM Site will never attempt to Lock-On to a specific Hornet more than once per Step.
All SAM Sites attempt to Lock-On and resolve their attacks simultaneously. Resolve SAM attacks one Site at a time, in any order. This will, at times, result in a Hornet being Locked-On to by more than one Site.
The Normal (Small, Medium, Large, Very Large) SAM will only attempt to Lock-On to the Hornets in its Area. If the number of Hornets in the Area is less than or equal to... (the source excerpt available for this transcription is cut off mid-sentence at this exact point.)
Roll a die for each Lock-On attempted. There are several modifiers to the die roll (see Mission Display). (The surviving excerpt breaks off here as well, so the specific modifiers and the Lock-On Result table are not reproduced.)
13.0 AAA Attacks
For each Hit scored, reduce the Level of AAA by 1 (i.e. 2 Hits would reduce "Heavy" AAA to "Light" AAA). When AAA is reduced below "Minimal" it is eliminated.
When you attack AAA (except Heavy AAA), you incur a penalty to the attack die rolls. The penalty is printed on the AAA counters. This reflects the difficulty of attacking isolated pockets of AAA fire. Resolve all attacks against AAA during a Step, before reducing its counter. This will ensure that all of the attacks suffered the same penalty.
Example: Hornet #303 launches a Maverick against AAA. Hornet #304 drops a Mk. 82 on AAA. Hornet #310 attempts to Strafe AAA. The AAA Site is "Mo" (Moderate). All of the attacks are at -1 to Hit due to the AAA penalty. The order in which they are conducted, and the success of each attack, will not affect the penalty for the attacks remaining to be conducted during the remainder of the Step.
14.0 Post Flight
Following the Sequence of Play, Post-Flight covers: Check For Carrier-Bound Mission Event; Roll d10 For Hornets Returning Damaged; Determine Fate of Pilots Who Ejected During Mission; Make Carrier Sheet Adjustments (Pilot Check, Hornet Check); Determine Level of Mission Success; Fill-out Mission Log.
Determining the Fate of Damaged Hornets
When Damaged by a Carrier-Bound Mission Event, no special considerations are needed; determine the Hornet's fate as described below. If a Hornet is Damaged it must Abort the Mission. If a Hornet should suffer 2 "Damaged" results it is Destroyed. If Damaged by a Target-Bound Mission Event, the Hornet is removed from the Mission and its fate is resolved at the end of the Mission.
When Damaged at the Target, the Hornet will either be Damaged while in the Air Combat Area, or in a Ground Attack Area. Regardless, it must IMMEDIATELY jettison ALL ordnance. If Damaged and Aborted in Air Combat, it must remain in Air Combat for one additional Step before it is removed from the Mission (Hornets do not remain if Damaged in Step #4). IMPORTANT: this also applies to MiGs that are damaged in Air Combat — Damaged MiGs CANNOT fire. If Damaged and aborted in a Ground Attack Area, it continues to move as normal (hopefully away from the defenses).
Hornet Check
Only a short excerpt of this subsection is available. On a die roll of a "10" the Hornet crashed while attempting to land — the Hornet is Destroyed. Go through the normal Pilot loss procedures for the crew.
15.0 Level of Mission Success
The excerpts recovered for this section are fragmentary. What follows are the sentences that could be verified against the source scan rather than a complete reproduction of section 15.0.
Enemy MiGs shot down by Tomcats are counted toward the player's Mission Points for Fighter Sweep or Fleet Air Defense Missions.
The base number [of Mission/Campaign Points, per the Pilot Experience Sheet] will be anywhere from 1 to 4 Points. This may be increased if the Target had heavy defenses.
15.41 Campaign Outcome
After all Missions for the Campaign are complete, add up the Campaign Points gained from each Mission. (The excerpt ends here; the table converting total Campaign Points into a final outcome is not reproduced.)
16.0 Loss of Command
No excerpt of this section's text could be recovered from the available source mirrors; it is omitted here rather than reconstructed from memory.
17.0 Random Aviator Generation
No excerpt of this section's text could be recovered from the available source mirrors; it is omitted here rather than reconstructed from memory.
18.0 Tour of Duty
No excerpt of this section's text could be recovered from the available source mirrors; it is omitted here rather than reconstructed from memory.
19.0 Special Condition Notes
Only one fragment of this section's card-by-card notes could be recovered:
Occasionally, you may find yourself with a "no-win" mission. An example of this would be a Capital Strike at Long Range... (the excerpt breaks off here).