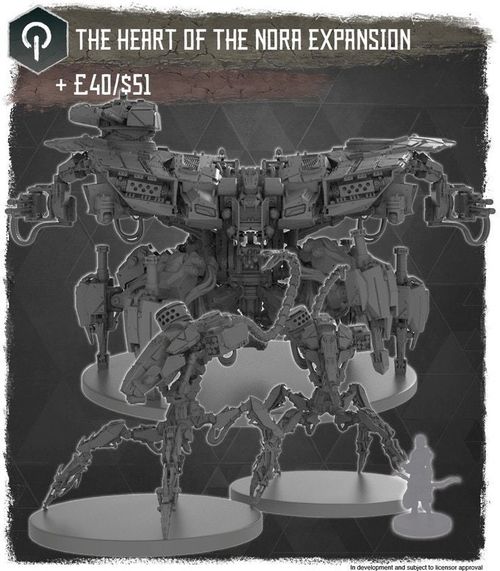
Horizon Zero Dawn: The Board Game – The Heart of the Nora
Horizon Zero Dawn: The Board Game – The Heart of the Nora Rulebook
Table of Contents
Table of Contents
Components
1 Rulebook 1 Deathbringer Board 4 Quest Cards
Deathbringer: 1 Miniature 1 Deathbringer Data Card 8 Deathbringer Behaviour Cards
Corruptors: 2 Miniatures 1 Corruptor Data Card 4 Corruptor Behaviour Cards
Narrative Scenarios
Narrative Scenarios are an alternate game mode for Horizon Zero Dawn™: The Board Game, allowing players to play tabletop adaptations of some of the iconic quests seen in the original videogame.
Narrative Scenario games use the core engine and game mechanics from Horizon Zero Dawn™: The Board Game but with some key exceptions, noted below.
- Narrative Scenario mode only supports 1-2 players, and cannot be played with 3-4 players.
- Narrative Scenario mode is completely cooperative. Players must work together to overcome each encounter.
- If a character faints during an encounter, both players lose the quest, and must start from the beginning of the quest again.
- Players do not earn glory points during Narrative Scenario mode.
- Each encounter ends as soon as the players earn the required number of encounter points listed on the quest card. Players do not draw salvage cards for completing a quest.
- The event deck, and Leader and Fledgling tokens are not used in Narrative Scenario mode.
- In Narrative Scenario mode, characters do not earn Sun tokens, level up, or visit the merchant.
Heart of the Nora
The Eclipse have returned once more, this time with their monstrous corrupted machines. With no warning and against such powerful adversaries, the Nora outposts guarding the Sacred Land had no hope of repelling the assault.
Now the cultists roam within, murdering any innocent tribespeople they find, and tainting the land with ancient evil.
Aloy has returned to fight alongside her people, and to claim the right of vengeance. The invaders cannot be allowed to visit such ruin—not to the Nora, nor any of the tribes. Their brutal reign of terror must stop here, and now. Standing with her is Sona, War-Chief and mightiest warrior of all the Nora.
Together, they shall bring salvation.
Playing Heart of the Nora
Heart of the Nora is a Narrative Scenario quest. During Narrative Scenario quests, the players use named characters from the Horizon Zero Dawn universe instead of hunters. For Heart of the Nora, these characters are Aloy and Sona, and are fixed for the quest.
Just like the hunters in the main game mode, each character has their own profile card, equipment, and action deck, which the players should lay out as normal. These decks can be found in the Kickstarter exclusives expansion. At the start of the game, the player controlling Aloy should shuffle the two Into the Borderlands upgrade cards and the two Heart of the Nora upgrade cards into her action deck.
Note that the Aloy player should use the Narrative Scenario Aloy deck for these games, and not the Event Card Aloy deck!
Aloy's Into the Borderlands upgrade cards are indicated by the symbol shown on the printed page (a dark hexagonal icon, not reproduced here).
Aloy's Heart of the Nora upgrade cards are indicated by the symbol shown on the printed page (a second dark hexagonal icon, not reproduced here).
Players then take the story deck for their quest, and lay out each of the cards in numerical order, from left to right.
One player reads aloud the narrative text printed on the first card to set the scene, and then flips the card over to reveal the encounter. Play the encounter using the same game mechanics from the main game, attempting to score enough encounter points to progress.
At the end of an encounter, players skip the Campfire Phase—time is short, and the characters' quest too urgent for them to stop and visit merchants! Each player shuffles their character's discard pile and action deck together, and then places the deck face down, ready for the next encounter. Read aloud the text on the next story card in the row, and then flip the card and set up the encounter, the same as before.
If the players are able to successfully complete all four encounters, they have completed the quest, and won the game!
The Heart of the Nora quest deck is made up of four story cards, numbered 1 to 4: Return to the Sacred Land (1), Into the Embrace (2), The Outskirts of Mother's Heart (3), and Purging the Corruption (4). The narrative text printed on these cards is flavour and is not reproduced here.
Setting Up
Place the Deathbringer board in the centre of the table and set up the encounter as detailed on the Purging the Corruption encounter card.
Although the Deathbringer board is a single large piece rather than four smaller tiles, hunters observe the standard rules when deploying and are placed in the quadrant indicated on the encounter card.
This board contains a new terrain element, which the players may not have encountered previously.
Terrain Elements
Water
Streams, lakes, and rivers are common across the land, even in the sprawling deserts. Although few enemies lurk within the depths, such waters leave hunters vulnerable, as they are forced to swim across.
While in a square containing water, a hunter may only perform the sneak action. If a hunter enters a square containing water during a sprint action, their action ends immediately. A hunter may perform a melee attack against an enemy on a square containing water, provided that the attack action starts on a square that doesn't contain water and then moves into the water as part of the attack.
Cultists can't move into water, and will move around squares containing water.
Machines are not restricted by water, as they are far larger than the hunters.
Enemies
The ancient machines included in this expansion are strange and terrifying foes. Each of these new enemies has their own data card and behaviour cards. To represent their unique behaviour, some of these adversaries have new attack icons and rules, which are detailed below.
Bludgeon
Some attacks made by particularly powerful foes feature the Bludgeon symbol. When a character suffers damage from an attack with Bludgeon, their player must discard cards from their hand if they are able to. If they are unable to discard the number of cards equal to the damage from their hand, any remaining damage must be discarded from the top of their deck.
Barrage
Some of the Deathbringer's behaviour cards feature a new attack symbol, Barrage. Attacks with Barrage target the character in range that has been attacked the least number of times during the Deathbringer's current activation. If both characters in range are eligible to be targets, the Deathbringer targets the closest character instead.
The Deathbringer Data Card
Note that although the Deathbringer data card looks slightly different to the data cards for other machines, many symbols are the same and serve the same function.
The data card is numbered as follows:
- Name
- Players (1-2 or 3-4)
- HP
- Armour Value
- Salvage Value
- Glory Point Value
- Encounter Point Value
- Special Rules
- Components
In addition, there are several new rules used for this huge machine, detailed below.
Deathbringer card values: Name: Deathbringer. Players: 1-2. HP: 45. Armour Value: 4. Salvage Value: none (shown as a dash on the card). Glory Point Value: none (shown as a dash on the card). Encounter Point Value: 10. (Each value is read from the numbered icon on the scanned card and matched to the legend above; the scan shows them as icons only.)
Special Rules (as printed):
- Overheat: Component A may only be targeted during the next hunter activation after this enemy suffers damage from Fire. Component A can't be destroyed. Apply the effects listed each time the component is attacked.
- Exposed Components: When targeting this enemy's components, ignore this enemy's armour value.
- Vulnerable to Fire: This enemy suffers an additional 1 damage when resolving Fire.
Components (card text as printed): Each component has a letter-coded attack symbol; the number printed beside each letter is shown as the component's value on the scan. The small chip-icon values on the component rows are not reproduced.
- Heat Core (attack A, 0): Damage inflicted to this component is applied directly to the enemy's HP.
- Flamethrower x2 (attack C, 6): Disables C attacks when both components are destroyed.
- Repeater Cannon (attack B, 8): Disables B attacks.
- Stabilisers x6 (attack D, 4): no card text.
Multiple Components
The Deathbringer is a truly massive machine, with several systems of the same type that are linked together. These components are represented by a multiplier next to the name, which indicates the enemy has multiple components of the same type that can be destroyed.
Unlike normal components, a component with this multiplier can be destroyed as many times as is indicated by the number listed. Each time one of these components is destroyed, the hunter gains glory, and the players apply any effects and the damage listed to the Deathbringer before placing a destroyed token on the enemy.
When the Deathbringer has gained the number of tokens listed for that component, all of the components of that type have been destroyed, and the hunters may no longer target that component.
Immense Base
Due to its massive size, the Deathbringer occupies four squares instead of a single square like most enemies. When the Deathbringer moves, it enters multiple new squares per point of movement.
When moving towards a hunter, the Deathbringer stops moving when the hunter is on any one of the four squares it occupies.
When determining range to or from the Deathbringer players count the squares from the closest square that the Deathbringer is occupying to their hunter.
In the example image on the printed page, Aloy is on one of the four squares occupied by the Deathbringer and is at range 0. Sona is 2 squares away from the closest Deathbringer square and so is at range 2.
Patrol Routes and Immense Base
Whilst non-alert, the Deathbringer will follow a patrol route, using a single point of movement to move into multiple new squares as shown in the example image below. When moving the Deathbringer along a patrol route, centre the base of the miniature on the patrol route. If any part of the Deathbringer's base is outside of the playing area after it moves along a patrol route, remove it from the playing area.
Quick Reference
Terrain Elements
Water
Hunters may only make sneak actions while on tile containing water. If entered during sprint action, ends action. Hunters may move into square containing water as part of a melee attack, if they didn't start in water.
Water does not affect enemies.
Symbol Reference
Barrage
Attacks with Barrage target the hunter in range that has been attacked the least number of times during the Deathbringer's current activation.
Bludgeon
Player must discard cards from their hand first, then from their deck.