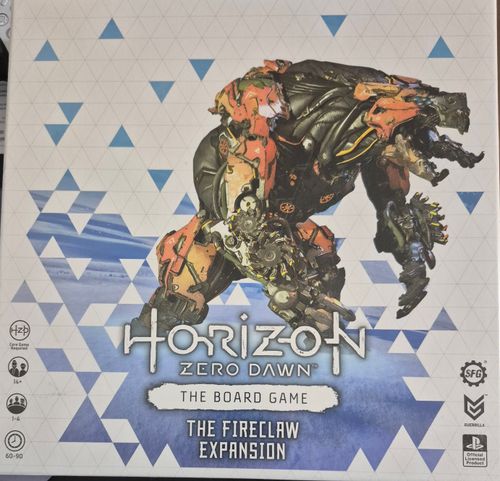
Horizon Zero Dawn: The Board Game – Fireclaw
Horizon Zero Dawn: The Board Game – Fireclaw Rulebook
Table of Contents
Table of Contents
Components
1 Rulebook 1 Fireclaw Board
13 Tracking Deck Cards
Fireclaw: 1 Miniature 2 Fireclaw Data Cards (1-2 Player and 3-4 Player) 1 Fireclaw Reference Card 9 Fireclaw Behaviour Cards
Adding the Fireclaw to Your Games
There are two ways players may encounter the Fireclaw as part of their game.
The first way of including the Fireclaw is by using the tracking deck included in this expansion, enabling the players to hunt this immense machine as their quarry instead of choosing from the other quests available to them.
Alternatively, players can add the Fireclaw to another quest from either Horizon Zero Dawn™: The Board Game or an expansion. If playing this way, the players should add the Hunters' Call card from the Fireclaw tracking deck to the end of tracking deck they wish to use for the quest, face down at the end of the row after the standard Hunter's Call card.
If the players are encountering the Fireclaw using these rules, after completing the standard Hunter's Call, resolve the Campfire Phase as detailed below instead of following the normal Hunters' Call sequence.
The Victory Step
Calculate glory and allocate Sun tokens to each player as in a standard encounter, including any changes in possession of the Leader and Fledgling tokens. Do not total up the points of each player's Sun tokens to see who has won the game.
The Level-Up Step
Skip this step unless the hunters haven't yet attained level 3. If they have yet to reach this level, the players may immediately increase their level by one, then select upgrade cards as normal.
The Merchant Step
Players visit a level 3 merchant to improve their equipment further before taking on their final challenge.
After these steps are completed, flip over the Fireclaw tracking card as the final encounter.
Setting Up the Fireclaw Encounter
Place the Fireclaw board in the centre of the table and set up the encounter as detailed on the Fireclaw encounter card.
If you're playing a game with two hunters, use the 1-2 player side of the Fireclaw data cards. If you're playing with 3 or 4 hunters, use the 3-4 player side of the Fireclaw data cards instead.
The Fireclaw has two types of behaviour card, for its biped and quadruped stances. Separate these cards into two piles, then shuffle each and place them face down next to the playing area to create the Fireclaw's behaviour decks. Place the reference card next to the behaviour deck with the quadruped side face up.
The player with the Fledgling token draws from the event deck and selects their card as normal, revealing it immediately after making their decision. If there are no cards remaining in the event deck, reshuffle all the discarded cards to form a new deck.
Although the Fireclaw board is a single large piece rather than four smaller tiles, hunters observe the standard rules when deploying and are placed in the quadrant indicated on the encounter card.
The Fireclaw Data Cards
Note that although the Fireclaw data cards look slightly different to the data cards for other machines, many symbols are the same and serve the same function.
The data card is numbered as follows:
- Name
- Players (1-2 or 3-4)
- HP
- Armour Value
- Salvage Value
- Glory Point Value
- Encounter Point Value
- Components
- Special Rules
- Structure Threshold
Fireclaw card values (1-2 player side): Name: Fireclaw. Players: 1-2. HP: 50. Armour Value: 2. Salvage Value: 5. Glory Point Value: 4. Encounter Point Value: 10. (Each value is read from the numbered icon on the scanned card and matched to the legend above; the scan shows them as icons only.)
Components (card text as printed): Each component has a letter-coded attack symbol; the number printed beside each letter is shown as the component's value on the scan. The small chip-icon values on each component row are read from the scan and listed beside each component, but the scan does not print what those chip icons mean, so they are not explained here.
- Fire Unit (attack A, 10; chip icon 10): Disables A attacks. This enemy suffers Fire.
- Power Cell x2 (attack B, 6; chip icon 3): This enemy suffers the lightning icon (Shock; the scan shows the icon only, and the name is taken from the Horizon Zero Dawn rulebook's terminology).
- Fire Sac Left (attack C, 8; chip icon 4): Remove Fire from C attacks. This enemy suffers Fire.
- Fire Sac Right (attack D, 8; chip icon 4): Remove Fire from D attacks. This enemy suffers Fire.
Special Rules:
- Fire Resistant: This enemy only suffers Fire from its components being destroyed.
- Attack Stances: This enemy has two behaviour decks. When it activates, draw from the deck which matches the current face of its reference card. At the start of the encounter the reference card should display the quadruped side.
Structure Thresholds: 10, 20, 30, 40, 50 (see Structure Threshold below). (The second card partly visible beneath the 1-2 player card on the scan carries the Fire Resistant and Attack Stances rules above; the booklet does not say which printed card each set of rules appears on, so they are listed here as one set.)
In addition, there are several new rules used for this huge machine, detailed below.
Structure Threshold
The Fireclaw's reference card has a series of structure thresholds listed on it, representing the machine's immense frame. Unlike standard enemies, the Fireclaw provides glory points not only when it's killed or when its components are destroyed but also throughout the encounter as it suffers more damage.
Structure thresholds are linked to the Fireclaw's hit points. If a hunter deals damage to the Fireclaw's hit points with an attack or by destroying a component that takes the Fireclaw's total damage above the next structure threshold, the hunter immediately gains 1 glory point. If a hunter exceeds multiple structure thresholds in a single attack, they gain glory points for each threshold they exceed.
Multiple Components
The Fireclaw is a truly massive machine, with several systems of the same type that are linked together. These components are represented by a multiplier next to the name, which indicates the enemy has multiple components of the same type that can be destroyed.
Unlike normal components, a component with this icon can be destroyed as many times as is indicated by the number listed next to the symbol. Each time one of these components is destroyed, the hunter gains glory, and the players apply any effects and the damage listed to the Fireclaw before placing a destroyed token on the enemy.
When the Fireclaw has gained the number of tokens listed for that component, all of the components of that type have been destroyed, and the hunters may no longer target that component.
Attack Modes
The Fireclaw is a unique foe that fights in two different modes; Biped and Quadruped. When the Fireclaw activates, draw a behaviour card from the deck that matches the current mode shown on its reference card.
Mode: When an action shows a mode symbol, flip the reference card to show the other side before continuing to resolve any remaining actions shown on the behaviour card.
Barrage
Barrage: Some of the Fireclaw's behaviour cards feature a new attack symbol, Barrage. Attacks with Barrage target the hunter in range that has been attacked the least number of times during the Fireclaw's current activation. If multiple hunters in range are eligible to be targets, the Fireclaw targets the closest hunter instead.
Bludgeon
Bludgeon: The Fireclaw is a powerful foe, and some of its attacks feature the Bludgeon symbol. When a hunter suffers damage from an attack with Bludgeon, their player must discard cards from their hand if they are able to. If they are unable to discard the number of cards equal to the damage from their hand, any remaining damage must be discarded from the top of their deck.
Failing the Encounter
Choosing to face such an adversary is the preserve of not only the bold individuals touched by destiny but also those possessed of incredible folly and wild overconfidence.
At any time during this encounter, if the total number of times the hunters have fainted is equal to or greater than the number of hunters, or if the Fireclaw leaves the playing area, the encounter immediately ends in failure.
If the encounter ends in failure, the players loses the game—the Hunters' Lodge does not entertain failure, especially not from those acting with such hubris!
Winning the Encounter
If the players defeat the Fireclaw, the encounter immediately ends. The hunter that killed the Fireclaw gains a Half-Sun token.
The players then resolve the victory step of the Campfire Phase to establish which hunters are awarded Sun tokens. Total how many victory points each hunter has earned, as if they had just finished the Hunters' Call.
The hunter with the most victory points is declared the winner, establishing themselves not only as the dominant figure of this quest but also as a hunter earmarked for patronage amongst the Hawks. Such an individual may look forward to a bright future within the Hunter's Lodge!
Quick Reference
Symbol Reference
Barrage: Attacks with Barrage target the hunter in range that has been attacked the least number of times during the Fireclaw's current activation.
Bludgeon: When a hunter suffers damage from an attack with Bludgeon, their player must discard cards from their hand if they are able to.
Mode: When an action shows a mode symbol, flip the reference card to show the other side before continuing to resolve any remaining actions shown on the behaviour card.
Structure Threshold
The thresholds are 10, 20, 30, 40 and 50.
If a hunter deals damage to the Fireclaw's hit points with an attack or by destroying a component that takes the Fireclaw's total damage above the next structure threshold, the hunter immediately gains 1 glory point. If a hunter exceeds multiple structure thresholds in a single attack, they gain glory points for each threshold they exceed.