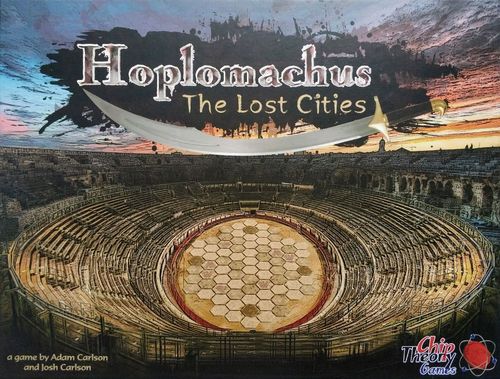
Hoplomachus: The Lost Cities
Hoplomachus: The Lost Cities Rulebook
Table of Contents
Table of Contents
- What's Inside
- Board Overview
- Goal
- Setup
- Starting a Game
- Phase 1: Draw Chips
- Phase 2: Deployment & Tactics
- Phase 3: Movement
- Phase 4: Attack
- Crowd Favor
- Arena Units (Beasts, Criminals, and Bosses)
- Beast/Criminal Turn Sequence
- Game Modes and Setup
- FAQ
- Gladiator and Champion Abilities
- Boss Abilities
- Gladiator & Champion Alt Attacks
- Boss Alt Attacks
What's Inside
- This Rulebook.
- 1 Gaming Mat
- 4 Reference Cards
- 14 Six-sided Dice: yellow die x4, blue die x2, black die x2, orange die x3, green die x2, red die x1
- 3 Crowd Favor Beads
- 3 Chip Bags
- 100 Health Chips
- 100 Unit & Tactic Chips:
| Atlantis | Xanadu | El Dorado | Arena Chips | |
|---|---|---|---|---|
| Champion | x1 | x1 | x1 | Bosses x6 |
| Gladiators | x15 | x15 | x15 | Beasts/Criminals x10 |
| Tactics | x8 | x8 | x8 | Crowd Favor Rewards x12 |
Board Overview
The gaming mat (Battle Scroll, Crowd Favor Meter, Reference Information, Champion Start Location Hex Type, Deployment Zone Hex Type, Die Legend, Crowd Favor Stone, Trapdoor Hex Type, Health Chip Stack, and Prep Area) lays out the arena for play.
Board Glossary
Champion Start Location Hex: At the start of each game, players may choose from 9 starting location hexes.
Crowd Favor Stone Hex: Gladiators occupying this stone at start of their turn earn Crowd Favor points which grant rewards at specific levels.
Deployment Zone Hex: Gladiators are placed on one of these hexes when being deployed. Each player has 6 hexes available to them at the start of the game.
Trapdoor Hex: Arena units (Beasts and Criminals) are placed on one of these hexes when they come into play. There are 6 Trapdoor hexes throughout the arena.
Die Legend: This legend is used to determine certain directional aspects within a game.
Prep Area Circle: Chips drawn from a player's chip bag are stored here until played within the arena. There are a total of 5 Prep Circles per player.
Goal
A player must eliminate their opponent's Champion to win. If you are playing a solo or co-op game, you must eliminate the Arena Boss(es) with at least 1 Champion remaining.
Setup
Roll out the game board in the center of the play area. Place a few stacks of health chips on either side of the game board. Each player must select a City to represent. All cities consist of 1 Champion, 3 special gladiators, 12 basic gladiators, and 8 tactics. Place your city's Crowd Favor (CF) bead at "0" on the CF Meter for each player.
Each player randomly selects a Level 1, 2, 3, and 4 CF Reward chip and places them face down on their respective levels of the CF Meter. You may look at these Rewards, but they will remain hidden from your opponent.
Place all of your gladiators and tactics into your chip bag except for your Champion and shake up your bag to mix the chips. Roll 1 black, 1 blue, and 2 yellow "hit" dice - the one who lands the most hits starts the game (Player 1).
NOTE!! Arenas may have special rules, setup instructions, and additional ways to win or lose the game. These rules will be posted on the "Battle Scroll" found in the upper left corner of the arena, so be sure to familiarize yourself with these rules and conditions when setting up the board.
NOTE!! As we move through this rulebook, we will be doing it from a PvP (Player vs Player) perspective. Solo and Co-op game modes are covered in gross detail within their own section after PvP.
Starting a Game
Player 1 will place their Champion face down, along with its health chips, in a desired location within the Champion placement area. Player 2 now does the same. At this point both Champions cannot move or take action, however, they can take damage.
A player's turn is broken down into 4 Phases. Once you move to a new phase, you cannot go back to an earlier one. These phases must be completed in order and once finished, your turn is over. Gameplay is conducted with players taking consecutive turns.
Phase 1: Draw Chips
To start this phase, record any Crowd Favor you have earned from occupying CF Stones. Crowd favor is tallied on the CF Meters on either side of the arena.
Next, a player must draw enough chips to fill their Prep Area (kept hidden from your opponent). If at the start of the game you draw 5 tactics (no gladiators), show them to your opponent, place them back in your chip bag and redraw. These chips serve as your "playable hand" for this turn. They will be spent and replenished throughout the game. However, once your bag is out of chips, your prep area must have chips on all 5 Prep Area circles. If you have unfilled circles with no more chips to draw, your Champion will begin taking 2 damage at the start of each of your following turns until your Champion has no health (which will end the game).
END GAME TIP: A player may choose to play some of these last remaining chips knowing that he/she will take damage the following turn. A few well-played tactics may allow you to overwhelm your opponent before your health runs out.
Chip Glossary
Attack Range: Number of hexes the target unit must be within to be attacked (a range of 1 can only reach adjacent units).
Health: Shown by red chips under unit.
Attack Power: Determines how many Basic Attack dice are rolled.
Move Range: Unit may travel up to (X) number of hexes on their turn.
Tactical Range: Number of hexes the target unit must be within to be played on. Tactics can always be played on yourself.
Basic Attack Dice: Use these dice when rolling for a Basic Attack.
Alternate Attack: Use this attack in place of this units Basic Attack.
Ability: This can be used once per turn and as soon as the unit is deployed.
Unit Type: Indicates the type of unit (Gladiator, Champion, Beast, Criminal).
Chip Overview (unit) callout: labels Attack Range, Health, Attack Power, Move Range, Tactical Range, Basic Attack Dice, Alternate Attack, Ability, Unit Name, and Unit Type around a sample unit chip. Tactical range of 1 can only reach adjacent units.
Phase 2: Deployment & Tactics
A player now has the option of playing chips from their Prep Area. On the first turn of the game (Player 1), only one chip can be played. After this, each player may play up to two chips (gladiators, tactics) per turn for the rest of the game.
If playing a gladiator, place it onto any one of your available unoccupied Deployment hexes (place health chips underneath the gladiator in the amount indicated on the chip). Any gladiator just deployed cannot move or take action until the next turn unless an ability allows for this to happen (e.g., First Strike, Initiative). If all your Deployment hexes are occupied, you cannot play a gladiator.
Also during the deployment phase, you may choose to play a tactic chip if you have one. Tactics cannot be played on Champions or Bosses. A tactic can only be played on a unit (friendly or enemy) within the tactical range of one of your units. This range is indicated by a spyglass on each unit chip. A unit with 'Tactical Range 3' must be within three hexes of the target unit during this phase. Tactics can always be played on yourself. If a gladiator is deployed, its tactical range is immediately available for playing tactics.
NOTE!! Single turn tactics (e.g., Stun) are placed on top of the affected unit. Permanent effects (e.g., Hamstring and Adrenaline) are placed between the unit chip and it's health chips. Hamstring removes any Adrenaline effects because it drops movement to zero (remove the Adrenaline chip). If Hamstring is played first, Adrenaline will increase that unit's move range from 0 to 1 (in this case, keep both Adrenaline and Hamstring chips under unit).
Phase 3: Movement
During this phase you may move your units based on each unit's move range. You do not have to move the full range of the unit. Once you choose to move, you cannot 'save' part of the unit's movement for later during the same movement phase (e.g., You cannot move a Tactician out of the way for other units to pass through, and then step back where it was). Be sure to check for movement modifiers under units before moving them.
In order to move to another hex, that hex must not be occupied. It's not possible to move "through" another unit unless a specific ability allows for this. There must be unoccupied hexes available between your current position and your move-to position.
NOTE!! If your unit is engaged with an arena beast, your unit is locked in combat with the beast and cannot disengage by just moving away. Certain abilities may allow you ways to get away however.
During this phase, abilities that allow special movement or unit displacement (e.g., Hurl, Pull), may be used. Please refer to the chart (pg. 13) for further details. All abilities are limited to one use per turn.
Move and Attack Examples:
- Attackers can move a distance of 2 hexes.
- Brawler's "Hurl" ability can flip Defender over the Brawler - away from protection.
- Brawler and Attacker both focus their attack on the unprotected Defender.
Phase 4: Attack
After completing the move phase, you may choose to attack, if possible. Each of your units may use it's basic or alternate attack, not both, if they are within range (refer to each unit's attack range to determine this).
To make an attack, roll all of the Basic Attack Dice indicated on that specific unit. There are 3 attack dice colors, each with its own odds of landing a HIT. Each 'H' that comes up is a HIT of 1 damage, and each blank is a MISS (Basic Attack Dice: black die 5/6 Hit, blue die 3/6 Hit, yellow die 2/6 Hit). The damage is immediate and your opponent must respond with a defensive ability (e.g., Intercept Blow, Retaliate) or remove a corresponding number of health chips from under the unit receiving the hit.
Attack Sequence
- Choose one of your units to perform an attack and declare if its a basic or alt attack.
- Declare the target unit of the attack (once you verify it is within range of your unit).
- Select the exact Attack Dice as pictured on your unit for that attack. Also, add Tactition die (see 'Strategic Attack' ability on pg. 13) if a friendly Tactition is adjacent to your attacking unit.
- Roll all dice and add up the total number of "HITS".
- Your opponent now has a chance to use an ability such as Intercept Blow or Retaliate.
- For each "HIT" suffered, your opponent must remove a health chip from under the unit receiving the hit.
- If a unit is defeated, it must be removed from play and Crowd Favor for the kill is recorded at this time.
NOTE!! It is considered proper etiquette to state your attacks loud and clear, along with pointing out the attacking unit followed by the unit being attacked. Also, should you roll a successful attack, allow your opponent to remove his/her own health and unit chips. It is the responsibility of your opponent to make any ability declarations during this time.
Crowd Favor
CF (Crowd Favor) is earned a number of ways:
- Killing an opposing gladiator grants you 2 CF (points for kills are taken immediately when the kill happens).
- Beast and Criminal kills grant you 2 CF per kill.
- You gain 1 CF if you occupy a CF Stone at the center of arena and 3 CF if you occupy both stones at the same time (These stones must be in your control at the start of your turn which is also when you should mark them on your CF meter).
TIP: It's important that you keep a constant awareness of where you are at with the crowd. CF rewards unlock the instant the level is reached. A Champion unlocked on your opponent's turn can move and attack on your turn! A deployment zone unlocked at the start of your turn can be used in the same turn! Remember, it is your responsibility to calculate and take credit for CF you have earned. Once the current phase ends, you cannot go back and adjust for missed CF.
Reaching a new CF level grants you 2 rewards. The first is a CF Tactic that is now available for your use.
This area will contain a list of specific Crowd Favor Tactics along with a picture. These tactics are still being finalized.
The other reward for each level is an arena effect. These effects are instantly activated once reached:
Level 1: Your Champion is activated. If this level is reached on your turn - your Champion cannot move, attack, or use abilities until your next turn. Level 2: All deployment zones (12 total) are now available for use. Level 3: All units gain "Initiative" ability (can move first turn) Level 4: CF Gladiator is unlocked and can be deployed during your next deployment phase.
CF Meter Track
The gaming mat's CF Meter runs from 0 up to Level 4, marked off with pegs a player's CF bead advances along as Crowd Favor is earned:
- 0: Start here. The crowd is waiting.
- 1: Arena chips in bag. CF chip now useable. Activate your Champion.
- 2: Arena chips in bag. CF chip now useable. All deployment hexes active.
- 3: Arena chips in bag. CF chip now useable. All units gain Initiative ability.
- 4: Arena chips in bag. CF gladiator immediatly deployable.
Arena Units (Beasts, Criminals, and Bosses)
When a B/C (Beast/Criminal) is drawn from someone's bag, a basic D6 will be rolled to determine which Trapdoor (1-6) it will deploy from. If a player's unit is standing on that Trapdoor hex, that unit is caught unaware by the beast and is instantly killed and removed from the arena. The B/C then takes that hex on the arena mat. The B/C will be granted a free attack against units standing within attack range of the B/C before the active player continues their turn. This attack is resolved immediatly and with no abilities. The active player will then draw an additional chip for each B/C they drew and continue their phase.
Beast Deployment Example: Image 1: Player moves onto a Trapdoor (numbered as 1). Image 2: On the next draw phase, active player ends up drawing a beast. The active player rolls a basic D6 to see where the beast will deploy. The roll is a 1, right where their Attacker is positioned. The Attacker is killed instantly and the beast takes its place on the Trapdoor hex. If other units had been adjacent to the Trapdoor hex, the beast gets a "free" attack on all of them. If other beasts were adjacent, they would not be attacked or hit by this beast's attack.
If another B/C is sitting on the Trapdoor where the drawn B/C is to be deployed, the drawn B/C will then shift to the next number Trapdoor (e.g., 1, 2, 3, 4, 5, 6, 1)
This area will feature an example of the B/C Trapdoor shift described above.
Beast/Criminal Turn Sequence
Beasts and Criminals take their turn after all players have gone.
Beast Movement
Beasts use 2 'Beast Move D6' dice to move (use the dice legend on the arena mat). If a wall or beast is in the way, the beast does not move that direction. Beasts move their entire move range (both dice) or until adjacent to a player. Once adjacent, the beast is engaged and neither Beast nor unit can disengage until a kill has been made. Other Beasts and/or Player units may join the fight, but each contact made will lock them in place until the battle(s) is resolved. Special abilities such as Pull or Hurl CAN disengage units.
Beast Attacks
After all Beast movement has been resolved, a Player must roll the 'Beast Attack D6' for each beast to determine it's action. If a base attack is rolled, Player must roll all attack dice indicated on the chip to determine damage. Base attacks hit all Player units in range. Refer to each chip and/or reference sheet for other skill explanations.
This area is being edited with additional examples and better clarification.
Criminal Movement
This unit uses the 'Criminal Move D6' to determine whether or not it advances towards your closest unit. If there are 2 or more units that are equally close to the Criminal, the Player will choose one of those units to attempt to 'taunt' the criminal toward. Roll the 'Taunt D6' and if you succeed (by rolling a "T"), the Criminal will advance as you planned. If you fail the taunt roll (continue to taunt with each unit until you have one unit left), the Criminal will automatically move towards the last unit. Criminals move their entire move range or until met with resistance. In the event that there are 2 ways in which to advance toward a single unit, the player gets to decide which hex the Criminal ends up on. Criminals will not move as long as they are engaged, however, a Player may disengage and re-engage as they please.
Arena Move and Attack Dice: Beast Move D6, Beast Attack D6, Criminal Move D6, Criminal Attack D6, Taunt D6.
Criminal Attacks
After all Criminal movement has been resolved, a Player must roll the 'Criminal Attack D6' for each Criminal to determine its action. If a base attack is rolled, Player must roll all attack dice indicated on the chip to determine damage. Base attacks hit all Player units in range. Refer to each chip and/or reference sheet for other skill explanations.
Bosses
Bosses function like all other B/C with one exception. Bosses perform an attack roll even when not in attack range as certain abilities, if rolled, can have arena-wide effects.
This area is being edited with additional examples and better clarification.
Game Modes and Setup
This area is being edited with additional examples and better clarification.
Player vs Player
To win: Eliminate opposing Champion. Setup: Use main rule set.
Diagram: the Pozzuoli Arena mat labeled with Player Hand and Champion, CF Rewards and Beasts, Counter, and 4 Beasts and 1 Criminal.
Player vs Board: Basic difficulty level
(other levels and scenarios are available at www.hoplomachus.com/pages/extras)
To win: Eliminate the arena Boss. Eliminate all criminals to get Boss to deploy. Setup: 4 random Beasts will start the game on Trapdoors 1, 2, 3, and 4. The other 4 Beasts are placed on the CF Meter (levels 1-4). Place 1 of the 4 Criminals on Trapdoor 6. As criminals are eliminated, another immediately deploys (roll a D6 to determine which Trapdoor it uses). Once all 4 Criminals have been eliminated, the Boss is deployed. Mix and draw an arena Boss (from the 3 Criminal and 3 Beast Bosses). Use main rule set to set up CF Rewards.
Co-op (2) vs Board: Basic difficulty level
To win: Team must eliminate both of the arena Bosses. One Champion must survive. Setup: Same as Player vs Board setup with these exceptions - Players only play with their Champion, two of each gladiator, and one of each tactic. Players will start on one end of the arena, will share 6 deployment zones, and can play just one chip per turn. If a Champion is eliminated, the owner may no longer deploy gladiators or use tactics but can still play out existing gladiators. Crowd Favor is shared as are the CF Rewards. Beasts from the CF meter must be put in the current players bag when level is reached. Draw 2 Bosses - deploy in the order drawn as the basic Criminals are eliminated.
Diagram: two arena mats showing Player 2's and Player 3's Champion, Shared Deployment, and Shared Crowd Favor for a 2-player co-op team.
Co-op (3) vs Board: Basic difficulty level
To win: Team must eliminate all 3 of the arena Bosses. One Champion must survive. Setup: Same as Player vs Board setup with these exceptions - Players only play with their Champion, two of each gladiator, and no tactics. Players will start on one end of the arena, will share 6 deployment zones, and can play just one chip per turn. If a Champion is eliminated, the owner may no longer deploy gladiators or use tactics but can still play out existing gladiators. Crowd Favor is shared as are the CF Rewards. Draw 3 Bosses - deploy in the order drawn as the basic Criminals are eliminated.
FAQ
Are you stumped on a specific rule or a odd situation in the game? Please check our FAQ page at www.hoplomachus.com/pages/faq for answers!!
Gladiator and Champion Abilities
Initiative: Unit can move the same turn it is deployed.
First Strike: Unit can attack the first turn it is deployed.
Retaliate: When attacked and hit, unit can do 1 damage back to the attacker.
Intercept Blow: When an adjacent friendly unit is hit, this unit can intercept the entire hit instead of the intended target. This ability only works with base attacks.
Pull: Unit is pulled in a straight line inward toward the puller (up to 2 hexes inward and from up to 3 hexes away). Cannot pull "thru" other units.
Uber Pull: Unit is pulled in a straight line inward toward the Champion (up to 3 hexes inward and from up to 4 hexes away). Cannot pull "thru" other units.
Hurl: Hurl can 'pick up' an adjacent unit (friend or foe) and 'throw it' to a different available, adjacent hex.
Uber Hurl: This hurl can 'pick up' an adjacent unit and 'throw it' up to 3 hexes away in any direction.
Fury Aura: Fury Aura does 1 damage to all opposing units 1 hex away. This damage is not part of this units attack but is performed during the attack phase.
Uber Fury Aura: This aura does 1 damage to all opposing units up to 2 hexes away.
Strategic Attack: All friendly adjacent units gain an additional yellow die to use with their base attack this turn.
abilities usable once/turn
Boss Abilities
Assassinate: Move to furthest opponent (use Taunt) and do 6 damage. (Player can choose Boss's placement hex next to unit)
Shadow Spear: Roll a basic D6 twice, a spear is thrown in those directions doing 2 dmg to each unit in its path.
Ground Pound: All opposing units within 4 hexes are stunned for 1 turn.
Strike Fear: All adjacent opposing units must retreat 1 hex straight away if possible.
Acid Spray: All opposing units are hit for 1 damage.
Snared: Gladiators and Champions within 2 hexes of unit cannot move for 1 turn.
Regen 3: Unit regains 3 health not exceeding max HP.
Boss abilities usable only when rolled
Gladiator & Champion Alt Attacks
Whirlwind: Roll 3 yellow dice, hits are applied to every adjacent opposing unit.
Stun: Roll 1 yellow die to attempt to Stun an adjacent unit. A stunned unit cannot move, attack, or use abilities for 1 turn.
Note!! Champions CAN be stunned by a gladiator (not a tactic).
Reposition: Instead of attacking, unit may move 1 hex (during it's attack phase).
Long Shot: Roll 1 yellow die to attempt a 1 dmg ranged attack from 3 hexes away.
Alt Attacks are used in place of a base attack
Boss Alt Attacks
Chase Down: If not engaged, move directly to closest opposing unit and do 4 dmg. (use Taunt if needed).
Frenzy: All opposing adjacent units must reduce their existing health to 1.
Death Coil: Single adjacent unit (use Taunt to decide) is permanently stunned and loses 2 health per turn.
Boss Alt Attacks are usable only when rolled