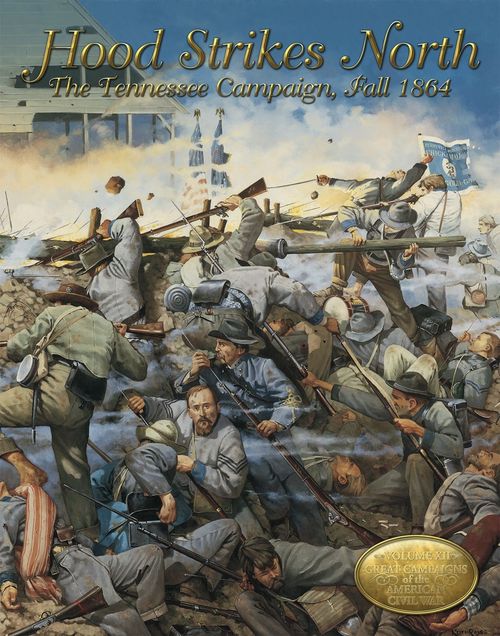
Hood Strikes North: The Tennessee Campaign, Fall 1864
Hood Strikes North Rulebook
Table of Contents
Table of Contents
- Introduction
- GCACW Standard Basic Game Rules
- 1.0 Introduction
- 2.0 Basic Game Concepts
- 2.3 The Map
- 2.4 Zones of Control
- 2.5 Command Radius
- 2.6 Abbreviations
- 3.0 Basic Game Sequence of Play
- 4.0 The Action Cycle
- 5.0 Actions
- 6.0 March and Movement
- 7.0 Combat
- 8.0 Recovery
- 9.0 Entrenchments
- 10.0 Bridges, Dams and Ferries
- 11.0 Demoralization
- 12.0 Rain
- Hood Strikes North Rules
Introduction
Hood Strikes North (HSN) simulates the Civil War campaign in Tennessee in November-December 1864 between the Confederacy's Army of Tennessee under General John Bell Hood and Union forces under General George Thomas. In the game, players control Union and Confederate military forces in turns representing one day of real time. The map portrays parts of Tennessee as they were in 1864, drawn almost exclusively from Civil War period maps. A hexagonal grid has been superimposed over the map, and each hex equals about 2,000 yards (1.15 miles) from side-to-side. Military units from regiments to divisions are represented along with each side's corps and army leaders. Military units consist of a varying number of points, each of which represents about 500 infantrymen or 700 cavalrymen.
The HSN rules are similar to those of the previous games in the Great Campaigns of the American Civil War (GCACW) series. Minor differences in the system from one game to the next existed prior to the 1999 publication of Standard Series Rules Upgrade in Issue No. 1 of The Skirmisher. These Standard Series Rules have been upgraded over time (currently to Version 1.4) and now form the basis for all games in the series. Hood Strikes North includes these Standard Rules in a separate rule booklet entitled "GCACW Standard Basic Game Rules." This booklet forms a comprehensive guide to the common rules shared between all games in the series. Basic Game rules sections 2.0 through 12.0 appear in this separate booklet. You will also find over the first few pages of this rulebook a few additions to the Standard Rules that must be used when playing Hood Strikes North.
Game Components. A complete game of Hood Strikes North contains the following: One GCACW Standard Rules Booklet (1.4), One Hood Strikes North Rules Booklet, One 22" by 32" Mapsheet, Two 280-piece Countersheets, Two Charts and Tables Cards, One Terrain Chart, Two Force Displays, Two 6-sided Dice.
Abbreviations. AT: Army of Tennessee (CSA). C: Cheatham's CSA infantry corps. Cav: Cavalry. DAT: Detachment Army of the Tennessee (USA). DC: Department of the Cumberland. DE: District of the Etowah. Demorize: Demoralized. DN: Defenses of Nashville and Chattanooga Railroad. DWV: Department of Western Virginia. Ldr: Leader. L: Lee's CSA infantry corps. Mntd: Mounted. Ohio: Army of the Ohio. Reinf: Reinforcements. S: Stewart's CSA infantry corps. Sub: Substitute. USCT: United States Colored Troops. Unmntd: Unmounted. VC: Victory Condition. VP: Victory Points.
GCACW Standard Basic Game Rules
Version 1.4. This booklet is shared by all games in the Great Campaigns of the American Civil War (GCACW) series and is included with Hood Strikes North.
1.0 Introduction
The purpose of this manual is to serve as a guide to playing Basic Game scenarios for any of the games that have been published to date in the Great Campaigns of the American Civil War (GCACW) series. The games published so far in the series are listed below (in order of publication), along with the three-letter abbreviation for each game. These abbreviations are used throughout this manual.
- Stonewall Jackson's Way (SJW) [Original Publication]
- Here Come The Rebels! (HCR)
- Roads to Gettysburg (RTG)
- Stonewall in the Valley (SIV)
- Stonewall's Last Battle (SLB)
- On to Richmond! (OTR)
- Grant Takes Command (GTC)
- Battle Above the Clouds (BAC)
- All Green Alike (AGA)
- Stonewall Jackson's Way (SJW) [redesign republication]
- Atlanta Is Ours (AIO)
- Here Come the Rebels! (HCR) [redesign publication]
- Roads to Gettysburg (RTG) [redesign publication]
- Rebels in the White House (RWH) [redesign publication]
- Hood Strikes North (HSN)
Two modules were also published in the Skirmisher #2 magazine: Burnside Takes Command (BTC) and Rebels in the White House (RWH).
The first six games in the series were each published with their own rule booklet that contained minor changes in Basic Game rules from one game to the next. The Basic Game rules for the series were then standardized with the publication of the Standard Series Rules Upgrade Kit in Issue #1 of the GCACW Gamer's Guide, The Skirmisher. This kit itemized the changes required to bring each game in line with the official common set of rules. Since the Basic Game rules have been standardized, each subsequent game in the series has included a Standard Basic Game rule book (such as this manual) and a separate set of rules that are unique to that campaign. The first version of the Standard Basic Game rules appeared in Grant Takes Command. These rules have only had minor revisions in games published since then. The new designation for the standard rules that are included herein are the GCACW Standard Basic Game Rules, Version 1.4. The rules that have been added or modified for Version 1.4 are shown in blue text for ease of identification.
Since these rule sections are the most recent version of the Standard Series Rules ("Standard Rules"), they should also be used to update the rules in Sections 2.0 to 12.0 for the first six games in the series. Please note that the special rules and setups for each scenario still must be referenced from the rule booklet that was originally published with each game. The Upgrade Kit in The Skirmisher also contained 130 updated counters that are needed to convert the first five games in the series to the Standard Rules. Note: the various notes and leader counters for SJW, HCR, and RTG contained in Skirmisher 1 should not be used when playing the republished version of SJW, HCR, and RTG; these items are already included in the republication.
Although these Standard Rules enhance the realism and enjoyment of the series, particularly the early volumes, their use slightly increases the complexity of play. Although this manual's rules are considered "official", it is entirely understandable that some players may prefer to play the games strictly as originally written. Before starting play of any GCACW game, players must agree whether or not these Standard Rules will be employed. It is recommended that if these rules are used, they be used in their entirety, not selectively. However, rules listed as "optional" may be used selectively.
2.0 Basic Game Concepts
One person is chosen as the Union player and the other as the Confederate player. However, playing the game solitaire presents no special difficulties.
2.1 Game Components
The components differ from one game to the next in the Great Campaigns series. Consult the original rule booklet for each game to find the list of components for that title in the series.
2.2 Playing Pieces
The following types of playing pieces (or counters) are used in the game: military units, leaders and informational markers.
Military Units. Each player controls a set of military units. These are usually identified by their commanding officer, who is listed by name on the counter (e.g., "Ward"). Some small units, however, are simply identified by regiment (e.g., "10 GA" — the 10th Georgia Infantry). Units also have designations on each side of the organizational symbol (the colored rectangle in the middle of the counter) identifying the corps and/or the division to which the unit belongs. For example, the Union "XX" designation means the unit belongs to the Twentieth Corps; the Confederate "M-W" designation means the unit belongs to Wheeler's Corps, Morgan's Division. Union infantry units also have a numerical division designation on the right side of the organizational symbol, which is used for informational purposes only.
Military units come in five different sizes: II = Squadron (Union only), III = Regiment, X = Brigade, XX = Division, X+ = Demi-Division (Confederate only). The demi-division was not a true military organization, although several Confederate reports from early 1862 used that term. It is an aggregation of 2 to 4 brigades from the same division and is appropriate for the early period of the war, when Confederate leaders could not easily control divisions with up to 16,000 men.
Military units are divided into three types: Cavalry, Infantry, Artillery. Military units have two values printed on their counters: the Tactical value, representing the military competence of the unit's commander and troops; and the Artillery value, representing the number of artillery batteries attached to that unit.
Military units have two sides: the front ("normal") side and the reverse ("exhausted") side. The exhausted side is marked by a white stripe across the top of the unit.
Leaders. There are four types of leaders in the GCACW series. A leader may never occupy a hex by itself. It must always be stacked with a friendly, subordinate military unit. The unique characteristics of each leader (and the proper way to identify their counters) are described below.
Army Leaders. Army leaders have only a single number on their counters, which is their Command value. Army leaders are used to initiate grand assaults, and in Advanced Game scenarios of some games in the series they can perform the Activate Army Leader action. They must be attached to a subordinate infantry (not cavalry or artillery) unit at all times. Army leaders are present for both players in every game except SIV and AGA.
District Leaders. District leaders are distinguished by the presence of a colored star on their counter. Like corps and division leaders, district leader counters contain two numbers: a Tactical value and a Command value. District leaders are hybrid units that are used to both activate units for movement and assault (like corps and division leaders) and initiate grand assaults (like army leaders). District leaders may not perform the Activate Army Leader action. They must be attached to a subordinate infantry (not cavalry or artillery) unit at all times. District leaders are found leading the forces in a side theater that was not large enough historically to warrant the deployment of an entire army (such as SIV or the GTC side theaters). Note: Not all games have District Leaders.
Corps and Division Leaders. Corps and division leader counters contain two numbers: a Tactical value and a Command value, but no red star. Players must check the "Size" column in the scenario setup to determine which leaders with these two numbers are corps leaders and which are division leaders. Corps and division leaders are used to both activate units for movement and to initiate assaults. Corps and division leaders must be attached to a subordinate unit belonging to the same corps or division at all times. This subordinate unit can be of any type (infantry, cavalry, or artillery), depending on the composition of the units in that corps or division. Some combination of corps and/or division leaders are present for both players in every game in the series. Some corps may even have both corps and division leaders present; in this case some units may be activated by either the corps or division leader at the player's discretion.
Informational Markers.
Strength Markers. A military unit must always possess a single Strength marker. A Strength marker has a front (organized) and a reverse (disorganized) side. The organized side has a single number from 1 to 21, which is both its "Manpower value" and "Combat value." The disorganized side has two numbers: a smaller number in value (1/2 to 14), which is its Combat value; and a larger number in value (1 to 21), which is its Manpower value. Strength markers never function by themselves; they must always be assigned to a military unit. At the start of a scenario, a Strength marker of the correct Manpower value is placed underneath a unit on its organized side. Wherever a unit goes, its Strength marker accompanies it. A maximum of one Strength marker may be assigned to a unit at a time. As a unit suffers losses, its marker changes. A player may examine his opponent's Strength markers at any time. Leaders never possess Strength markers.
Although Strength markers can have numbers from 1 to 21, in most games in the series, players are limited to a maximum Manpower value that is less than 21:
| Game | Maximum Manpower Value |
|---|---|
| RTG | 17 |
| SIV | 8 |
| OTR | 21 |
| BAC | 14 |
| AGA | 7 |
| AIO | 16 |
| HSN | 11 |
| All others | 18 |
Fatigue Markers. As military units move and fight, they become "fatigued." Fatigue is represented in five "Fatigue levels" from 0 to 4. Military units must always be at one of these levels. Fatigue markers are placed underneath a unit's Strength marker. As the unit's Fatigue level changes, its Fatigue marker is adjusted. A unit at Fatigue level 0 does not possess a Fatigue marker — the lack of such a marker indicates Level 0. Leaders never possess Fatigue markers.
Sample Units. Each military unit counter shows its size and organization at top, its name, its symbol (infantry, cavalry, or artillery), and its Tactical and Artillery values. A parenthesis around the tactical value means the unit may not be the only unit in an attack (marching or assault). Not all games have artillery units. Each counter has a front (normal) side and a back (exhausted) side, the latter marked with an exhaustion indicator. Strength markers likewise have a front (organized) side showing a single Manpower/Combat value, and a back (disorganized) side showing separate Manpower and Combat values. Army leader and corps/division leader counters show the leader's name, a portrait, and Command value (army leaders) or Tactical and Command values (corps/division leaders); district leaders add a colored star.
2.3 The Map
Major Terrain. Each land hex on the map is classified as one of nine major terrain types: clear, rolling, rough, woods, city, swamp, provisional swamp, hill, or mountain. Each terrain type has its own Movement Point cost, listed on the Terrain Chart, which military units pay to enter the hex. Clear, rolling and hill hexes have distinctive base colors: light yellow for clear, light green for rolling, and orange for hills. Other hexes can be recognized by special symbology:
- a green "brush" pattern for rough
- a dark green "forest" pattern for woods
- a gray "grid" pattern for city
- a light green "marsh" pattern for provisional swamps
- a highlight to the provisional swamp for permanent swamp hexes (in OTR and GTC this highlight is given by making the swamps a darker green; in all other games the permanent swamp hexes have a silvery-blue highlight applied)
- a brown "elevated land" pattern for mountain, and
- a tan pattern for hills.
A land hex is considered to be the terrain type of the predominant symbology in that hex. Only whole hexes are playable. Partial hexes are not playable for any game purpose; they are considered off-map.
Special Hex/Hexside Features. A number of terrain types appear along hexsides, such as rivers, creeks, ridges, fords, bridges, ferries, dams, and county borders. Several types of special terrain appear within a hex, such as villages, RR stations, pikes, roads, landings and redoubts, but these have no effect on a hex's major terrain classification. Woods Hexside: A "woods hexside" is a hexside between a woods hex and any other hex (including another woods hex). The hexside itself does not have to be covered with a forest pattern to be considered a woods hexside.
2.4 Zones of Control
A military unit, regardless of its status, exerts a Zone of Control (ZOC) into each of the six adjacent hexes surrounding it. Exceptions: ZOC extend across major or minor river hexsides only at fords, dams, ferries, or bridges. Also, ZOC extend into and out of swamp and mountain hexes only across hexsides crossed by a road, pike, RR or trail. Finally, ZOC do not extend across all-water hexsides.
Restricted ZOC: If a unit exerts a ZOC across a woods hexside (see definition above), and no road, pike, RR or trail traverses that hexside, the hex into which that ZOC is exerted is referred to as a "restricted ZOC." Non-restricted ZOC are sometimes referred to as "normal" ZOC. Unless otherwise specified, restricted ZOC hexes function like normal ZOC.
2.5 Command Radius
Sometimes a leader must trace a "command radius" between itself and subordinate units or another leader. A command radius is a path of three or fewer contiguous hexes between a leader's hex (exclusive) to a unit's hex (inclusive). Terrain is irrelevant when a leader traces a command radius — the three-hex path may enter any type of hex or cross any hexside. A command radius may not enter an enemy occupied hex or an enemy ZOC, including restricted ZOCs. (It may enter an enemy ZOC hex if that hex is occupied by a friendly unit.) The hex occupied by a leader is considered within its own command radius.
2.6 Abbreviations
Art: Artillery. Brig: Brigade. Cav: Cavalry. Cmd: Command. Disorg: Disorganized. Div: Division. Dmorlze: Demoralized. Inf: Infantry. MP: Movement Points. Org: Organized. Regt: Regiment. RR: Railroad. Sub: Substitute. VP: Victory Points. ZOC: Zone of Control.
3.0 Basic Game Sequence of Play
Each turn is performed according to a Sequence of Play:
- Random Events Phase. Two dice are rolled; the players consult the Random Events Table. (Random events are only used in a Basic Game scenario if the scenario specifically calls for it.)
- Leader Transfer Phase. Leaders may be transferred from one subordinate unit to another.
- The Action Cycle.
- Action Phase.
- A. Initiative Segment: Both players roll a die. The player with the higher roll wins. The winner must take initiative or pass (see 4.2). If both players roll the same number, special considerations apply. In BAC and AIO, either the Union or Confederate player may win initiative depending on the specific number rolled. Insubordination may also occur in BAC. Check the BAC or AIO Basic Game Rules for more details. In all other games, the Confederate Player wins initiative.
- B. Activation Segment: The player who has taken initiative must perform a single action with an eligible leader or unit. At the end of an Activation Segment, the players return to the Initiative Segment and a new Action Phase begins. Players continue to perform Action Phases indefinitely until both players pass in the same Action Phase (see 4.4).
- Action Phase.
- Recovery Phase. Eligible units may entrench, build bridges, repair bridges and ferries, and recover from fatigue, disorganization, exhaustion, and demoralization.
- Turn Indication Phase. The Turn marker is advanced one box on the Turn Record Track and the players begin a new turn.
Exceptions: Occasionally, an individual Basic Game scenario might draw on one or more rules sections from the Advanced Game rules for that volume. In these situations, additional phases may be added to the sequence of play after the Random Events Phase.
4.0 The Action Cycle
Every turn has a single Action Cycle of indefinite length.
4.1 The Action Phase
An Action Cycle consists of a variable number of Action Phases. Each Action Phase is composed of an Initiative Segment and an Activation Segment. As soon as a player completes an action in the Activation Segment, a new Action Phase begins. Action Phases continue indefinitely until conditions for ending the Action Cycle are fulfilled.
4.2 The Initiative Segment
During this segment, both players roll a die. The player with the highest roll wins. If both players roll the same number, special considerations may apply: in BAC and AIO, either the Union or Confederate player may win initiative depending on the specific number rolled (insubordination may also occur in BAC — check the BAC or AIO Basic Game Rules for more details); in all other games, the Confederate Player wins initiative.
In some games, such as all OTR scenarios and the GTC Grand Campaign game, players must note the number on the winning die. In such games, this number is used to determine which units are eligible for activation with that initiative; see 5.2 for an example. If one player has no units eligible for activation in an Initiative Segment, his opponent automatically wins, and the dice are not rolled. (Exception: In some scenarios, the turn may end early or Insubordination may occur on certain tied initiative rolls. In these scenarios, both players must roll the dice in each Initiative Segment, even if one player has no units eligible for activation. If the player who has no eligible units wins the roll, he must pass.)
The winning player must choose one of the following two options: Take Initiative (he may take the initiative, thereby obligating him to perform an action in the subsequent Activation Segment); or Pass (he may "pass," automatically yielding initiative to his opponent). A player who lost the initiative roll but who has initiative yielded to him by a "pass" must choose one of the following two options: Take Initiative (he may take the initiative, thereby obligating him to perform an action in the subsequent Activation Segment); or Pass (he may "pass," automatically ending the Action Cycle).
Passing. If the player who wins the initiative roll passes, he does nothing. His opponent must then either take the initiative or pass. If the opponent also passes, the Action Cycle ends.
4.3 Activation Segment
The player who takes initiative must perform a single action with an eligible unit or leader in the Activation Segment. The counter selected for this action is called the "active unit" or "active leader." The player controlling this unit/leader is called the "active player."
4.4 Ending the Action Cycle
As soon as a player completes an action in an Activation Segment, a new Action Phase begins. Action Phases repeat indefinitely in an Action Cycle until both players pass in the same Action Phase. Thus, an Action Cycle ends when the player who wins the initiative roll passes, and his opponent — who is given the choice of taking initiative or passing — also passes. The Action Cycle also ends when both players have no units eligible for activation; or if a player passes when his opponent has no units eligible for activation. When an Action Cycle ends, proceed to the Recovery Phase.
5.0 Actions
The player who takes initiative must perform a single action in the Activation Segment with one of his units or leaders. There are five types of actions: March, Activate Leader, Assault, Burn RR Station (not in SIV or OTR), Entrenchment (1863 or later).
5.1 March
Only a single unit (not a leader) may be chosen to perform a March action. A unit is eligible to march only if it is currently at a Fatigue Level of 3 or less — it may not march if it is at Fatigue Level 4. The unit's Strength marker may be organized or disorganized. A unit may march more than once per turn, but never more than once per Action Phase. A March is performed as follows:
- The player with initiative selects one eligible unit anywhere on the map. The unit's Movement Allowance is calculated as follows: Union Infantry or Artillery Unit — the Union player rolls one die; the result is the unit's Movement Allowance. Confederate Infantry or Artillery Unit — the Confederate Player rolls one die; the die roll is increased by 1; the modified die roll is the unit's Movement Allowance. (Exception: In OTR and AGA, the Confederate Player rolls one die but does not increase the roll by 1; the result is the unit's Movement Allowance, although the unit's minimum Movement Allowance is 2, even if the roll is 1.) Union Cavalry Unit — the Union player rolls two dice; the sum of the dice is the unit's Movement Allowance. Confederate Cavalry Unit — the Confederate player rolls two dice; the sum of the dice is increased by 1; the modified dice roll is the unit's Movement Allowance.
- The chosen unit's Fatigue Level is increased by one. The unit gains a new Fatigue marker (or has an existing marker flipped over) to reflect the change. If this march brings a unit on its normal side to a new Fatigue Level of 3 or 4, or a unit on its exhausted side to a new Fatigue Level of 2, 3 or 4, it is an "extended march," and the player must consult the Extended March Table. Note: Before proceeding to Step 3, enemy cavalry units in the active unit's ZOC may perform a cavalry retreat (see 7.7).
- An eligible unit may enhance its Movement Allowance by making a "force march." The Movement Points (MP) gained by a force march are added to the Movement Allowance calculated in Step 1 to determine a final Movement Allowance. If no force march is performed, the unit's final Movement Allowance is the number determined in Step 1.
- Place the "Active Movement Allowance" marker on the Movement Track in the box corresponding to the unit's final Movement Allowance.
- The unit performs its march. As it expends MP, the Active Movement Allowance marker is adjusted downward. The march ends when the marker reaches 0 or the active player states that the action is over. If the marker reaches 0 due to an attack, the action does not end until the attack is resolved.
(Optional) A unit at Fatigue Level 4 may be selected in Step 1 of a March action if its Strength marker is organized. If a unit at Fatigue Level 4 marches, its Strength marker is automatically flipped to its disorganized side. (It retains its Fatigue Level 4 marker.) The player does not consult the Extended March Table. If a unit at Fatigue Level 4 marches, it may not also force march.
Extended March. If a unit on its normal side marches and its fatigue increase brings it to Fatigue Level 3 or 4, the action is an "extended march." If a unit on its exhausted side marches and its fatigue increase brings it to Fatigue Level 2, 3 or 4, the action is also an "extended march." Before proceeding to Step 3 of the march procedure, the active player rolls a die and consults the Extended March Table (see Charts & Tables handout). This roll may be modified. If the unit's Strength marker is organized, the modified roll is cross-referenced with the "Organized" column. If the unit's Strength marker is disorganized, the modified roll is cross-referenced with the "Disorganized" column corresponding to its current Manpower value. There are three possible results: NE (No effect; the extended march has no effect on the active unit); D (Disorganized; the unit's Strength marker is flipped to its disorganized side); 1/2/3 (The unit's Manpower value is reduced by 1, 2, or 3; the unit's new Strength marker is placed on its disorganized side). As long as it is not eliminated by the result, the active unit resumes its march after determining the effects of its extended march.
Example: If, in RTG, a Union unit on its exhausted side that does not belong to the Army of the Potomac performs a march, and that march brings the unit to a new Fatigue Level of 3, that march is an extended march. The Union player consults the Extended March Table, adding 3 to his die roll (+2 because the unit does not belong to the Army of the Potomac; +1 because the march increased the exhausted unit's Fatigue Level from 2 to 3).
Force March. A player may enhance his active unit's Movement Allowance by declaring a "Force March." A force march may only be declared in Step 3 of the March procedure. An active unit may force march only if its Strength marker is currently on its organized side. Artillery and wagon units can never force march. To conduct a force march, follow this procedure:
- Flip the unit's Strength marker to its disorganized side.
- If an infantry unit force marches, roll one die and subtract 1 from the roll. If a cavalry unit force marches, roll two dice and subtract 1 from the dice sum. The result is the number of MP added to the active unit's Movement Allowance as determined in Step 1 of the March procedure. The minimum MP bonus gained by an infantry unit's force march is 2, even if the modified roll is 0 or 1. The minimum MP bonus gained by a cavalry unit's force march is 4, even if the modified roll is 1, 2, or 3.
- If the unmodified roll in Step 2 is 6 (for infantry), the active unit's Manpower Value is reduced by two if its current Manpower Value is 6 or more; otherwise, its Manpower Value is reduced by 1. If the unmodified roll in Step 2 is from 2 to 5 (for infantry) or 8 or more (for cavalry), the active unit's Manpower Value is reduced by one. New Strength markers are placed on their disorganized sides. If the unmodified roll in Step 2 is 1 (for infantry) or 7 or less (for cavalry), the active unit's Manpower Value is unaffected.
March Example: The Union player takes initiative and declares a march with Newton's infantry division, which currently is exhausted at Fatigue Level 1 with an organized Strength marker (Manpower/Combat value of 7). The Union player rolls a die to determine Newton's Movement Allowance, obtaining a 3. Newton's Fatigue Level is increased to 2, indicating that an extended march is in effect because of his exhaustion. The Union player rolls a die, obtaining a 4, and consults the Extended March Table, cross-referencing 4 with the "Organized" column. One is added to the roll because the +1 modifier for "Other Union Units" in the "Union Army Modifiers" is the only modifier that applies. The result is "NE," so Newton is unaffected by the extended march. The Union player decides to force march Newton, which is permissible because of his organized Strength marker. He flips Newton's Strength marker to its disorganized side and rolls a die, obtaining a 1. This is reduced by 1 to 0, but the minimum MP bonus in an infantry force march is 2. Thus, Newton's final Movement Allowance is 5 (3 + 2). The Active Movement Allowance marker is placed in the "5" box on the Movement Track. Newton does not suffer Manpower value loss due to the force march because the unmodified force march die roll was 1.
5.2 Activate Leader
The "activate leader" action enables a player to perform one or more consecutive march actions with eligible military units in the same Action Phase. The following actions may not be performed in an Activate Leader action: Assault, Burn RR Station, and (in Advanced Game scenarios) RR or amphibious embarking and movement. Only one district, division, or corps leader at a time may be chosen for activation. A leader is eligible for activation only if one or more units within his command radius belonging to his command are at a Fatigue Level of 3 or less. A leader activation is performed as follows:
-
The player with initiative selects an eligible leader anywhere on the map.
-
The player with initiative must select one or more units belonging to the active leader's command that are situated within the leader's command radius (other than the leader itself). All of the units selected to participate in an activate leader action must be at a Fatigue Level of 3 or less. Place a Union or Confederate "Leader Activation" marker on top of each unit selected. The player is not obligated to select every eligible unit within the leader's command radius, although he may do so. He must select at least one. In all games there will be units that do not belong to any leader's command. (Example: Union cavalry units in SIV, OTR, SJW, HCR, SLB and AGA do not belong to a command since there are no Union cavalry leaders in those games.) These units may not be selected to join an activate leader action. They may only perform march and entrenchment actions individually. Exception: Artillery units in all games may be selected to join in an Activate Leader action of any non-cavalry leader, even though they do not belong to the active leader's command.
In 1864-65, or in 1863 if playing with the "Entrenchment" action optional rule, the player must declare whether each unit selected will march or entrench. This designation must occur in Step 2 of this procedure, prior to the calculation of the Movement Allowance. The player is free to have some units march and others entrench during a single Activate Leader action.
(Optional) A unit at Fatigue Level 4 may be selected to march (not entrench) in Step 2 of an Activate Leader action if its Strength marker is organized. If a unit at Fatigue Level 4 marches, its Strength marker is automatically flipped to its disorganized side. (It retains its Fatigue Level 4 marker.) The player does not consult the Extended March Table. If a unit at Fatigue Level 4 marches, it may not also force march.
Special Rule for On to Richmond: In OTR, if the Union player is performing the Activate Leader action, he is limited in the number of units he may select by the number he rolled during the just-completed Initiative Segment of the current Action Phase: on a Union die roll of 1 to 4 the Union player may select only 1 eligible unit; on a 5 he may select 2 eligible units; on a 6 he may select any number of eligible units. Note: If the Confederate player won the initiative roll in the current Action Phase but passed, the Union player may select any number of eligible units in a leader activation regardless of the number he rolled in the Initiative Segment. Also, if the Union player has taken initiative in the current Action Phase without an initiative dice roll (which is possible if the Confederate player has no units eligible for activation), the Union player may select any number of eligible units in a leader activation.
Units activated by cavalry division leaders are limited by the following rule: only the first cavalry unit to march as part of an Activate Leader action initiated by a cavalry division leader may conduct an attack. The second or any subsequent cavalry unit to march in an Activate Leader action may not attack. Thus, a maximum of one cavalry unit may attack in an Activate Leader action initiated by a cavalry division leader. There is no such limitation in an Activate Leader action initiated by a cavalry corps leader.
- The active player now repeats Steps 6, 7, and 8 for each unit chosen to participate in the leader activation in Step 2. The player must perform Steps 6, 7, and 8 for each unit selected in Step 2; units may not withdraw from the action (although they are not obligated to move or attack). Each unit must perform Steps 6, 7, and 8 a maximum of once per leader activation. A unit must complete its march or entrenchment before another unit begins its action. The leader activation ends when each unit with a Leader Activation marker has completed Steps 6, 7, and 8.
Leader Activation Example: The Union player takes initiative and declares an "Activate Leader" action with Logan. Four divisions are situated within Logan's command radius: Osterhaus (Fatigue Level 4), ML Smith (FL 0), Harrow (FL 1), and Veatch (part of XVI Corps). All four divisions are on their normal sides. Osterhaus is not eligible to participate because he is at FL4; Veatch may not participate because he is part of XVI Corps. Thus, only ML Smith and Harrow are eligible to participate and the Union player chooses them both. He places a Leader Activation marker on both units. The Union player rolls a die, obtaining a 4. Since the movement allowance is one die plus one, the Leader Movement Allowance marker is placed in the "5" box of the Movement Track, where it remains for the duration of the action. Logan, who is currently stacked with ML Smith, now transfers to Harrow's hex. The Union Player performs a march action with Harrow, whose Leader Activation marker is removed. Harrow's FL is increased to 2, so an extended march is not in effect. No force march is performed, so the Active Movement Allowance is placed in the "5" box in the Movement Track. Harrow's march ends when the Active Movement Allowance marker reaches 0. Next, the Union Player performs a march action with ML Smith. He repeats the procedure that he followed for Harrow (remove the Leader Activation marker, increase FL, place the Active Movement Allowance marker, and perform the march). The Leader Activation now ends and a new Action Phase begins.
5.3 Assault
An "assault" action enables a district, division, or corps leader to attack a single, adjacent, enemy-occupied hex with a group of subordinate units rather than attacking with each individually. Only one leader at a time may be chosen for an assault. A leader is eligible for an assault only if one or more subordinate units in the leader's hex have a Fatigue Level of 3 or less. MP are not used in an assault, and the active player does not roll a die to determine a Movement Allowance. Assaults are explained in detail in the combat section (see 7.1).
5.4 Burn RR Station
Who May Burn RR Stations. Only a single military unit (not a leader) may be chosen to perform a burn RR station action. A unit is eligible for this action if it occupies a RR station hex and is at a Fatigue Level of 3 or less; it may not be chosen if it is at Fatigue Level 4. The unit's Strength marker may be organized or disorganized, but it must have a Combat Value (not Manpower Value) of 2 or more. Units in SIV and OTR may not burn RR stations.
Procedure. The player with initiative selects a single eligible unit anywhere on the map. The chosen unit's Fatigue Level is immediately increased by one. The unit gains a new Fatigue marker (or has an existing marker flipped over) to reflect the change. An extended march never occurs as a result of a burn RR station action, even if the unit goes to a new Fatigue Level of 2, 3, or 4.
If the unit's Combat Value is 2, 3, or 4, place a Damage marker in the RR station hex; if the unit's Combat Value is 5 or more, place a Destroy marker in the hex. The presence of other friendly units in the hex has no effect on the type of marker placed in the RR station hex. The action is now over and a new Action Phase begins. Damage/Destroy markers remain in place for the duration of the game. (Exception: Damage/Destroy markers may be removed in the Advanced Game in some of the volumes in the series). However, an existing Damage marker is flipped over to its Destroy side at the moment a unit with a Combat Value of 5 or more performs a burn RR station action in that hex. An existing Damage marker is unaffected if a unit with a Combat Value of 2, 3, or 4 performs a burn RR station action in that hex. A Destroy marker is unaffected if other units later perform a burn RR station action in that hex.
5.5 Entrenchment
In any 1864 or later scenario, or in a 1863 scenario if this Entrenchment Action optional rule is used by mutual consent of the players, players may add an "Entrenchment" action to the menu of actions available to active units. Entrenchment actions may be performed by units activated individually or as part of an Activate Leader action. Entrenching during the Action Cycle is always in addition to normal entrenchment rules. Eligible units may still entrench in Step 1 of the Recovery Phase.
Entrenchment Action Restrictions. The unit must meet all the following conditions to be selected for an Entrenchment action: it must be a military unit (not a leader); it must be at a Fatigue Level of 0, 1, or 2 if the year is 1863 (Fatigue Level 0, 1, 2, or 3 in 1864 — units may not perform entrenchment actions if the year is 1862 or earlier); it must not be demoralized (it may be exhausted, and its Strength marker may be disorganized); it must not already possess a completed Fort marker. Note: A unit may perform more than one Entrenchment Action per turn, assuming it is eligible.
Entrenchment Action Procedure. If an entrenchment action is declared, the active player follows one of the following two procedures, depending on the year of the game.
(Optional) 1863 Procedure: (1) The active unit's Fatigue Level is increased by two. (An extended march never occurs as a result of an Entrenchment action.) (2) The player places an Entrenchment marker on the active unit (or adjusts an existing Entrenchment marker) as follows: if the active unit does not currently possess an Entrenchment marker, place a Breastwork–Build marker atop the unit; if the active unit already possesses a Breastwork–Build marker, flip the marker to its Complete side (or, if using an RTG Breastwork marker, change it from a sideways to a normal alignment); if the active unit already possesses a completed Breastwork marker, place a Fort–Build marker atop the unit; if the active unit already possesses a Fort–Build marker, flip the marker to its Complete side. (3) The Entrenchment action ends, and a new Action Phase (or the next action in an Activate Leader action) begins.
1864 Procedure: (1) The active unit's Fatigue Level is increased by one. (An extended march never occurs as a result of an Entrenchment action.) (2) The player places an Entrenchment marker on the active unit (or adjusts an existing Entrenchment marker) as follows: if the active unit does not currently possess an Entrenchment marker, place an Abatis marker atop the unit (Exception: If an active unit is in a redoubt hex that it is eligible to benefit from — see 9.0 — place a Breastwork-Build marker atop the unit); if the active unit already possesses an Abatis marker, flip the marker to its Breastwork-Build side; if the active unit already possesses a Breastwork-Build marker, place a Breastworks marker atop the unit; if the active unit already possesses a Breastworks marker, flip the marker to its Fort-Build-1 side; if the active unit already possesses a Fort-Build-1 marker, place a Fort-Build-2 marker atop the unit; if the active unit already possesses a Fort-Build-2 marker, flip the marker to its Fort-Complete side. (3) The Entrenchment Action ends, and a new Action Phase (or the next action in an Activate Leader action) begins.
6.0 March and Movement
6.1 Rules of Marching
A marching unit may move and/or attack.
Movement. A unit moves from hex to adjacent hex, expending a number of Movement Points (MP) equal to the cost of the major terrain in the hex entered (see the Terrain Chart). A marching unit can expend some, all, or none of its MP (unused MP may not be saved from march to march, nor may they be transferred between units). As a unit expends MPs, the Active Movement Allowance marker is adjusted downward on the Movement Track. The unit may no longer move when the marker reaches 0.
Attack. Attacks (except for assaults) are part of the march procedure. A marching unit may attack any single adjacent hex occupied by enemy units. There are four types of attacks, each of which expends a different number of MP. (The MP cost also varies for infantry and cavalry units.) A unit may not attack if it does not possess the requisite MP. The four attacks and their MP costs are: Column of Route — 0 MP for both infantry and cavalry (a column of route attack may not be declared if a unit's Movement Allowance is 0; it may only be used if the unit has a Movement Allowance of 1 or more at the moment of declaration); Hasty — 1 MP for infantry, 2 MP for cavalry; Normal — 2 MP for infantry, 4 MP for cavalry; Prepared — 4 MP for infantry, 8 MP for cavalry. Note: The defender's terrain does not affect an attack's MP cost. The four types of attacks listed above are used only for units attacking in a march — they are not used in an assault.
6.2 Rules of Movement
Roads, Pikes, Railroads. If a unit enters a hex through a hexside crossed by a road, pike, or railroad (RR), it ignores the cost of the hex's major terrain and instead pays 1 MP. Unfinished railroads are treated as roads (not railroads) for all game purposes.
Trails. If a unit enters a mountain hex through a hexside crossed by a trail, it expends 2 MP. If a unit enters a non-mountain hex through a hexside crossed by a trail, it expends 1 MP.
Mountains. A unit may never enter or exit a mountain hex unless this move is performed across a hexside crossed by a road, pike, trail, or railroad.
Ridge. If a unit enters a hex across a ridge hexside, it must expend an additional 1 MP above the normal cost for entering the hex. This applies even if the hexside is crossed by a road, pike, trail, or RR, and regardless of the direction of movement (i.e., there is a penalty both when moving up and when moving down the ridge).
Swamps. A unit may never enter or exit a swamp hex unless this move is performed across a hexside crossed by a road, pike, or RR. Provisional swamp hexes function in all respects as rough hexes except in rain turns, when they convert to normal swamp hexes (see 12.0).
Rivers. A unit may not cross a major or minor river hexside except at a bridge, dam, ferry, or ford. A unit crossing a bridge, dam, or ford pays no MP penalty. (The MP cost of the major terrain in the hex entered is negated if the bridge, dam, or ford is crossed by a road, pike, or RR — and the road, pike, or RR MP cost is used instead.)
Dams. Dams are considered indestructible bridges in all GCACW games. A unit may cross a dam over a major or minor river with no movement point penalty, even in a rain turn, just as if it were a bridge. Unlike bridges, dams may not be destroyed. In SLB, dams were not official terrain features although they were labeled on the maps. When using the GCACW Standard Rules in SLB, any ford over major or minor rivers labeled on the map as a "dam" is now considered a dam instead of a ford. The following are the only dams in SLB: Occoquan Dam (SLB S5304) and Scott's Dam Ford (SLB S3526). Note: Strider's Dam (SIV N4322) is not a dam.
Ferries. A unit may cross a ferry over a minor river in non–rain turns with no MP penalty, just as if it were a ford. However, at a major river ferry on any turn (regardless of weather), or at a minor river ferry in a rain turn or while unfordable, the unit must pay a MP penalty (simulating the use of boats to cross). The unit's Manpower value is divided by 3 (drop fractions). The result is the MP penalty to cross the ferry. This penalty is in addition to the normal MP cost to enter the hex on the far side of the ferry (typically road movement cost). In SIV and SLB ferries were not official terrain features although they were labeled on the maps. When using the GCACW Standard Rules in those two games, only Berry's Ferry (SIV M5608) is now considered a ferry. Note: All fords labeled as ferries on the Potomac River are NOT considered ferries. They remain fords in the GCACW Standard Rules.
Creeks. Creek hexsides do not affect movement. Units may cross them at no special MP cost.
Water. Units may not enter water hexes.
Enemy-Occupied Hexes. A unit may not enter a hex occupied by enemy units (but see 7.6).
Enter Enemy Zone of Control. A unit must stop its movement at the moment it enters an enemy normal ZOC hex from a hex that is not in an enemy normal ZOC. The unit must then either attack or end its march. If the unit attacks successfully (i.e., it does not receive a "D," "F," "f," or "E" combat result), it is allowed to continue its march by moving and/or attacking. (However, if after a successful attack it still occupies an enemy normal ZOC, it again must either attack or end the march.) A unit must stop upon entering an enemy normal ZOC even if that ZOC is occupied by a friendly unit. If a unit enters an enemy cavalry unit's normal ZOC and the enemy unit performs a cavalry retreat, the unit may continue its march. A unit may not refuse flanks (7.8) when entering an enemy normal ZOC; however, it may refuse flanks if it marches in place in an enemy normal ZOC. In scenarios allowing Detachment (Advanced Game scenarios and Basic Game scenarios that specifically allow Detachment), a unit may detach a substitute when entering an enemy normal ZOC.
Exit Enemy Zone of Control. An active unit may not exit an enemy normal ZOC hex unless it starts its march in an enemy normal ZOC hex and its first activity is to exit that ZOC: ZOC to non-ZOC — if it moves from an enemy normal ZOC hex directly to a hex that is not in an enemy normal ZOC, it pays normal MP costs plus 1 MP to enter that hex; assuming the unit has MP remaining, it may continue its march. ZOC to ZOC — if it moves directly from one enemy normal ZOC hex to another, it ignores the hex's MP cost and instead pays a cost equal to the unit's entire Movement Allowance. This penalty applies even if the enemy normal ZOC hex entered is occupied by a friendly unit and even if the two enemy ZOC emanate from different enemy units not in the same hex. Since the unit then has 0 MP left, its march is over and it may not attack. (Even though a hex's normal MP cost is ignored, a unit may still not enter or exit a mountain or swamp hex — except by road, pike, RR or trail — or cross a major/minor river hexside, except by ford, bridge, dam, or ferry.) If a unit moves directly from one enemy normal ZOC hex to another and the two hexes are not connected by a road, pike, RR or trail, the unit's Strength marker is flipped to its disorganized side. (If it is already disorganized, reduce the Strength marker's Manpower value by 1.) Disorganization or loss is not applied if the unit moves from one enemy normal ZOC hex to another and the two hexes are connected by a road, pike, RR or trail. A unit may neither attack nor refuse flanks (7.8) when moving directly from one enemy normal ZOC to another enemy normal ZOC.
Restricted ZOC. "Restricted" ZOC hexes — those into which a ZOC is exerted across a woods hexside not containing a road, pike, RR or trail (see 2.4) — do not affect movement in any way.
Enter Friendly-Occupied Hex. An active infantry, artillery, or wagon train unit must pay an MP penalty to enter a hex occupied by one or more friendly infantry and/or artillery units, or a hex occupied by a wagon train. The MP penalty depends on the combined Combat value of the units already in the hex and the terrain entered:
| Combined Combat Value in Hex | City, Clear, Rolling, Hill | Rough, Woods, Swamp, Mountain |
|---|---|---|
| Less than 3 | NE | NE |
| 3 to 11 | +1 MP | +3 MP |
| More than 11 | +2 MP | +4 MP |
| Wagon Train | +2 MP | +4 MP |
Note: The combined Combat value may fall exactly between two rows of the chart above (e.g., 11.5). If so, round the value up. Cavalry units do not pay such MP penalties and do not trigger them if a friendly infantry, artillery, or wagon train unit enters their hex.
Cavalry Retreat. When an active infantry unit moves into the normal ZOC of an enemy cavalry unit — before the active player declares an attack — the cavalry unit may make a cavalry retreat (see 7.7).
Minimum 1 Hex Movement. As long as a unit does not attack during its march, it may always move at least one hex — even if its Movement Allowance is not sufficient for it to enter an adjacent hex. Exception: A unit may still not enter or exit a mountain or swamp hex (except by road, pike, RR or trail), or cross a major or minor river hexside (except at a bridge, dam, ford, or ferry). If an enemy cavalry retreat reduces an active unit's Movement Allowance to 0 before it has moved in its march, it may still move one hex. If a unit begins a march adjacent to a ferry hexside and does not have enough MP to cross due to the ferry MP penalty, it may cross that ferry hexside anyway using all of its available MP.
6.3 Leader Movement
A leader may never occupy a hex by itself; it must always be stacked with a subordinate unit. A leader is considered "attached" to a unit with which it is stacked and must move with that unit wherever it goes during a March or Activate Leader action (exception: see "Leaders and Combat," below). More than one leader may be attached to the same unit if they represent different organizational levels (e.g., a division and corps leader; or a corps and army/district leader). Once a unit with one or more attached leaders begins its movement in a March or Activate Leader action, it may not "drop off" a leader and attach it to a different unit in any hex entered during that action. A leader may neither move nor activate by itself, although it may "transfer" (see below).
Leaders and Combat. If a unit with one or more attached leaders is forced to retreat, the leaders must remain with that unit throughout the retreat. If, during its retreat, it enters a hex occupied by other units, it may not "drop off" a leader and attach it to another unit in that hex. If a unit with one or more attached leaders is eligible to advance after combat (see 7.6), the leaders accompany the unit during the advance. (Exception: If more than one unit is eligible to advance after combat, and some advance while others do not, the owning player may either keep leaders attached to their current unit, or he may reattach one or more of them to another subordinate unit in the hex immediately before the advance is undertaken.)
Leader Transfer. A leader may transfer from unit-to-unit in two ways:
Leader Transfer Phase. During the Leader Transfer Phase, the owning player may transfer some, none, or all of his leaders from one subordinate unit to another. To perform a transfer, the owning player must trace a path of contiguous hexes no more than 10 hexes in length from the leader's hex (exclusive) to the hex occupied by the unit to which the leader wishes to transfer (inclusive). This path may not enter enemy-occupied hexes, but it may enter enemy ZOC. It may transit any terrain type, including swamps, mountains, and rivers. The Union player must perform all desired transfers in the Leader Transfer Phase before the Confederate player executes any leader transfers.
Activate Leader Action. Leaders may transfer during an "activate leader" action (see 5.2). Such a transfer may only be performed once per action, and only before units march.
Army and District Leaders. Army and district leaders are subject to the following restrictions: they may transfer in the Leader Transfer Phase, but they may not attach to a cavalry/artillery unit or cavalry leader; if a District Leader is the Active Leader then he can leader transfer per section 5.2 step 5; if they are situated in the same hex as an active leader performing an Activate Leader action, they may transfer with the active leader in Step 5 of the Activate Leader procedure, although they are not obligated to do so (if an army/district leader transfers, it must transfer and attach to the same unit as the active leader — Exception: If the active leader is a cavalry leader, an army/district leader may not transfer in Step 5 of the Activate Leader procedure); if an army/district leader occupies a hex with more than one subordinate infantry unit, and one of those units to which the army/district leader is not currently attached leaves the hex during a March or Activate Leader action (including an advance after combat), the leader may attach to the departing unit or it may remain in the hex and stay attached to its current unit; an army/district leader is not obligated to be attached to an infantry unit to which a non-army leader is also attached — the army/district leader may be attached to an infantry unit by itself.
6.4 Stacking
An unlimited number of friendly units and leaders may occupy the same hex at a given time.
Force Markers. Since stacks of counters are unwieldy, players should use substitute counters called "Force markers" when they have more than two units per hex. Each player has his own set of Force markers and a corresponding Force Display. Each Force marker is identified by number and has a corresponding box on the display. A player may remove an unwieldy stack of counters from the map at any time and place the units, leaders, and markers comprising this stack in an empty box of the display. (Place units and markers in separate piles so they may be viewed at a glance.) Then the Force marker corresponding to this box is placed on the map in the hex formerly occupied by the stack. All units and leaders comprising a force are considered to occupy the hex in which the Force marker is situated, and they exert ZOC normally. Subject to normal marching rules, units and leaders may leave the force and be placed back on the map at any time the owning player wishes. Units may freely join a force if they end a march in the same hex as the marker. Force markers have no effect on play. Players are not obligated to use them.
6.5 Fatigue Levels
A unit's Fatigue Level is increased when it performs an action. It may also be increased due to combat. A unit at Fatigue Level 4 may not perform an action, although it may defend and retreat due to combat. Players may wish to turn units sideways when they reach Fatigue Level 4 so that they can see at a glance which units are no longer eligible for activation. (Exception: If playing with the optional rule in Sections 5.1 and 5.2, units at Fatigue Level 4 may activate if their strength marker is organized.)
7.0 Combat
7.1 Attacks
Only a unit performing a march or units participating in an assault action may attack.
Targets of Attacks. An attacking unit (or group of units in an assault) may attack any single, adjacent hex occupied by one or more enemy units. If the attacking unit is adjacent to more than one enemy-occupied hex, it may attack only one hex of the active player's choice.
Participation in Attacks. Attacks are never mandatory. In a march, only the active unit may attack. All other friendly units, even those stacked in the same hex as the active unit, never participate in the attack. A unit may attack more than once per march as long as it has the requisite MP and does not suffer a prohibitive result on the Combat Results Table. In an assault action, only subordinate units stacked in the same hex as the active leader may participate in the attack. (Exception: see "grand assault.") A maximum of one attack may take place per assault action.
Participation in Defense. All units in a hex being attacked must participate in that combat. The attacker may not single out a unit in the hex as a target, and the defender may not withhold units in the hex from combat.
Attack Restrictions. Rivers: An attack may not take place across a major or minor river hexside unless a bridge, dam, ferry, or ford connects the attacker's and defender's hexes. Mountains and Swamps: An attack may not take place against a unit in a mountain or swamp hex unless the attacker's and defender's hexes are connected by a road, pike, RR or trail. A unit in a mountain or swamp hex may not attack an enemy unit unless the two hexes are connected by a road, pike, RR or trail. Artillery: Artillery units may not be the only units in an attack (marching or assault). Woods Hexsides: A unit may only attack across a "woods hexside" (see 2.3) if it meets either of the following conditions: it starts the action in the hex from which the attack is made; or there is a road, pike, RR or trail connecting the attacker's and defender's hexes (in this case it is permissible for the active unit to have marched one or more hexes before initiating the attack across the woods hexside).
Attack Procedure (Marching Unit Only). A unit performing a march may attack as follows:
- Select Target: The active player states the attack's target.
- Select Attack Type: The active player states his type of attack: column of route, hasty, normal, or prepared (see 6.1). Adjust the Active Movement Allowance marker downward on the Movement Track by the attack's MP cost.
- Determine Combat Values: The players determine their Combat values and calculate the "ratio modifier" to the attacker's die roll in Step 5.
- Determine Die Roll Modifiers: The players determine the "tactical" and "artillery" modifiers and any other modifiers applying to the combat (see 7.4).
- Roll Dice: The attacker and defender each roll a die, modifying their rolls as required. The defender's modified roll is subtracted from the attacker's modified roll. The players consult the Combat Chart and apply the results (see 7.5).
- Continue Action: If the marching unit has remaining MP and the combat result does not require it to end the action, it may continue to perform its march. If the unit has no more MP or the result calls for the march to end, the action is over and a new Action Phase begins.
Attack Procedure (Assault Action Only). A corps, division or district leader may be selected for an assault only if one or more subordinate units at Fatigue Level 3 or less are stacked with that leader. A Movement Allowance is not calculated in an assault and MP are not used — thus, the active player does not specify a type of attack (column of route, hasty, normal, prepared). An assault is performed as follows:
- Select Participants: The active player selects an eligible leader. Next he chooses one or more units in the active leader's hex belonging to the same command as that leader. Each unit selected to participate in the action must be at Fatigue Level 3 or less. Exception: A player may select one or more artillery units occupying the same hex as the active leader to participate in an assault even though the artillery units do not belong to the leader's command. Note: an artillery unit may never be the only unit in an assault.
- Increase Fatigue: Each unit selected to participate in the assault in Step 1 has its Fatigue Level increased by one. Note: An "extended march" never occurs as a result of an assault action, even if the unit goes to a new Fatigue Level of 2, 3 or 4.
- Select Target: The active player states the target of the attack, which must be a single, adjacent, enemy-occupied hex.
- Cavalry Retreat: The enemy player may conduct a cavalry retreat with eligible units (see 7.7).
- Roll for Command: The active player rolls a die. This roll may be modified. If he rolls a 6 (before modification), the assault automatically ends — begin a new Action Phase, do not proceed to Step 6. If the roll is 5 or less, apply any appropriate modifier to this roll (see below), and subtract the modified number from the active leader's Command value. The result is the "Assault Number." If the Assault Number is less than 0, the assault ends — begin a new Action Phase, do not proceed to Step 6. However, if the Assault Number is 0 or greater, the assault takes place — continue the assault procedure. The Assault Number is the maximum number of attacking units that may participate in the assault. (If the Assault Number is 0, one unit must participate.) If the Assault Number is equal to or greater than the number of units selected in Step 1, all the units selected in Step 1 (and no more) must participate in the assault. If the Assault Number is less than the number of units selected in Step 1, the active player must choose (from among the units selected in Step 1) a number of units to employ which equals the assault number. (The assault must proceed, even if the number of units actually employed is less than the number selected in Step 1.) Regardless of whether or not an assault takes place, all units selected to participate in Step 1, even if they ultimately are dropped from the assault, gain one Fatigue Level in Step 2.
- Attempt Grand Assault: The active player may attempt a "grand assault" (see below). A successful grand assault allows additional units to participate in the attack. Even if a grand assault attempt fails, the assault must proceed to Step 7. The active player cannot back out of the action.
Example: Corps leader Palmer (XIV Corps, Command value, 5) is performing an assault. He is stacked with two XIV Corps subordinate divisions (Johnson and Baird). Both divisions are selected to participate in the assault in Step 1. The Union player rolls a die, obtaining a 5. Subtracting 5 from Palmer's Command value (5) yields 0, indicating that the assault takes place — but with only one unit. The Union player retains Johnson and drops Baird from the assault. But both divisions have their Fatigue Levels increased by one.
Assault Die Roll Modifier: The following modifier applies to the active player's assault die roll in Step 5 of the assault procedure of any game with district leaders: -2 if the active leader is a district (not a corps or division) leader. Note: Advanced Game assault die roll modifiers, such as SLB's "Hooker Loses Confidence" (SLB, 16.0) and OTR's Union "Passive" Command Posture (OTR, 18.0) are in effect in all applicable scenarios.
Grand Assault. A player may attempt a "grand assault" in Step 6 of the assault procedure only if all of the following conditions are in effect: Army or District Leader — a friendly army or district leader is situated within the command radius of the active leader's hex (a district leader who successfully initiated an assault may himself attempt a grand assault); Eligible Hexes — one or more of the six hexes adjacent to the defender is eligible to join a grand assault (a hex is eligible to join a grand assault if it is adjacent to the defender, including the hex in which the assault action was initiated, and it is occupied by one or more of the attacker's units which were not selected to participate in the active leader's assault, and at least one of those units is at Fatigue Level 3 or less); Non-Cavalry Leader — the active leader initiating the current assault must not be a cavalry leader; Combat Value — the total Combat value of the units committed to the Assault action is 3 or more (Exception: this requirement does not apply in AGA and SIV).
A maximum of one grand assault may be attempted per action, although an unlimited number may be attempted per turn. A grand assault is attempted as follows:
- Roll for Command: The active player rolls a die. In the Basic Game of all GCACW games, this roll is never modified. In some Advanced Games, however, it may be modified (see below). If the modified roll is 6 or more, the grand assault does not take place — the grand assault ends, return to Step 7 of the assault procedure. If the modified roll is 5 or less, subtract the number rolled from the army (or district) leader's Command value. The result is the "Grand Assault Number." If the Grand Assault Number is 0 or less, the grand assault does not take place — return to Step 7 of the assault procedure. If, however, the Grand Assault Number is 1 or more, the grand assault must take place — proceed to Step 2. Note: Advanced Game grand assault die roll modifiers, such as SLB's "Hooker Loses Confidence" (SLB, 16.0), and OTR's Union "Passive" Command Posture (OTR, 18.0) are in effect in all applicable scenarios.
- Select Eligible Hexes: From among the six hexes adjacent to the defender, the attacker must select a number of eligible hexes (not units) equal to or less than the Grand Assault Number which he wishes to use in the grand assault. He must select at least one hex. An "eligible hex" is defined above.
- Select Participants: In each hex selected in Step 2, the active player must select one or more eligible friendly units to join the grand assault. A unit is eligible to join a grand assault if it meets all the following conditions: it has a Fatigue Level of 3 or less; it must be eligible to participate in an attack as described in the "Attack Restrictions" rules; it must not have already been selected (successfully or unsuccessfully) in Step 1 of the assault procedure. A unit's command affiliation is irrelevant in this step. Any eligible unit, regardless of its command (including all cavalry and artillery units) may join in a grand assault. Exception: Refer to the specific game module you are playing for any exceptions regarding any restrictions on units that can be selected to participate in the Grand Assault. Note: The attacker may not back out of a grand assault once the grand assault procedure goes beyond Step 1. Each hex chosen by the attacker in Step 2 must contribute at least one eligible unit to the grand assault.
- Increase Fatigue: Each unit selected in Step 3 of the grand assault procedure has its Fatigue Level increased by one. An "extended march" never occurs as a result of a grand assault, even if a unit goes to a Fatigue Level of 2, 3, or 4.
- Return to Assault Procedure: Return to Step 7 of the assault procedure. Each unit selected in Step 3 of the grand assault contributes its Combat and Artillery values to the attacker's totals in Steps 7 and 8 of the assault.
Example (from AIO): Hardee, in hex W3014, successfully initiates an assault on hex W2914. Army leader Johnston (Command value 4) is in hex W3117, within Hardee's command radius. A non-active Confederate unit is in hex W3013 and another in W2813, both at Fatigue Level 2. Thus the Confederate player may attempt a grand assault. He rolls a die, obtaining a 1. Thus, the Grand Assault Number is 3 (Johnston's Command value [4] minus die roll [1] is 3). The grand assault must take place. The Confederate player selects two eligible hexes, W3013 and W2813. The non-active unit in each hex must be chosen to join the grand assault, and each unit's Fatigue Level is increased to 3. Both units contribute their Combat and Artillery values to Hardee's assault.
7.2 Combat Values
Every military unit has a Combat value shown on its accompanying Strength marker. A unit's Combat value varies depending on whether its Strength marker is organized or disorganized. If a unit's Strength marker is organized, its Combat value is simply the number shown on the marker. If a unit's Strength marker is disorganized, its Combat value is the smaller number in value. A unit with a disorganized Strength marker may have a Combat value of 1/2. (If so, this fraction is retained in combat — it is not rounded up or down.) A unit's Fatigue Level has no effect on its Combat value.
In combat, the attacker and defender combine the Combat values of all their participating units. Players cannot withhold any part of their units' Combat values. To determine the Combat value of an attacking unit in a march action, simply use that unit's Combat value alone (no other units may join the attack). To determine the final Combat value in an assault, combine the Combat values of all units participating in that assault, and add in the Combat values of those units joining in a grand assault (if any). To determine the final Combat value of defending units, combine the Combat values of all units in the defending hex.
Maximum Values. The maximum combined Combat Value of attacking and defending units is limited as shown in the table below (note that there are different limits in OTR). In a grand assault, the limit shown below applies to each hex containing attacking units, so the overall total from all hexes may exceed the number listed in the "Attacking" row below.
| Situation | OTR | Other Games |
|---|---|---|
| Attacking | 70 | 80 |
| Defending | 60 | 70 |
| At least one-half defending units entrenched | 100 | 120 |
| All defending units entrenched | 130 | 160 |
If in a grand assault, the total Combat value of attacking units is 80 or more, the attacker's Manpower value loss in that combat is increased as follows: if the attacker's Combat value is 80 to 89, his Manpower value loss number is increased by 1; if the attacker's Combat value is 90 to 99, his Manpower value loss number is increased by 2; if the attacker's Combat value is 100 or more, his Manpower value loss number is increased by 3.
7.3 Artillery Values
A unit's Artillery value is shown directly on the unit itself. A unit's Fatigue Level or Strength marker (organized or disorganized) has no effect on its Artillery value. Artillery values are used to determine the "artillery modifier" in combat (see 7.4).
7.4 Combat Die Roll Modifiers
Several factors modify combat die rolls. Modifiers are cumulative.
Ratio Modifier. The attacker's die roll must be modified by the ratio modifier. To calculate this modifier, compare the attacker's Combat value sum to the defender's Combat value sum and round this ratio down in favor of the defender to conform to one of the simplified ratios listed on the Ratio Chart. A modifier from –12 to +13 is listed next to each ratio. This is the ratio modifier.
Tactical Modifier. The attacker's die roll is modified by the tactical modifier. To calculate this modifier, the defender determines the highest Tactical value among the units and leaders in the defending hex. Meanwhile, the attacker makes the same determination among his units and leaders participating in the attack. A leader may contribute its Tactical value to an attack only if it is stacked in the same hex as a subordinate attacking unit. The defender's Tactical value is subtracted from the attacker's Tactical value. The result is the tactical modifier, which is added to (or, if a negative number, subtracted from) the attacker's die roll.
Some units have a split tactical, which consists of a number before and after a slash in the tactical position on the counter. The number before the slash is the tactical modifier to use when the unit attacks; the number after the slash is the tactical modifier to use when the unit defends.
In a March or Activate Leader action, a leader may contribute its Tactical value to any attack made by a subordinate active unit in the leader's hex, even if the attack is not being made by the unit to which the leader is attached. However in an assault action, the tactical value of the leader initiating the assault is always used, never the tactical value of a military unit or other leader.
Artillery Modifier. The attacker's die roll may be modified by the artillery modifier. (Note: If the defender occupies a woods, city, mountain, or swamp hex, it is not necessary to determine an artillery value differential because no artillery modifier can possibly apply in that circumstance.) The attacker adds the Artillery values of all attacking units and subtracts the combined Artillery values of all defending units from this sum. The result is the "Artillery Value Differential." On the Artillery Modifier Summary, cross-index the appropriate Differential column with the line corresponding to the terrain in the defender's hex. The result (a positive or negative number, or no effect) is the artillery modifier that is applied to the attacker's die roll. Some results call for the attacker to roll the die to determine the final artillery modifier. Note: the final artillery value in the defender's hex is rounded up due to any entrenchments (see 9.0).
Special Cases: If neither the attacker nor defender have Artillery values, no artillery modifier applies. If the defender's Artillery value is 0, a negative artillery modifier is converted to "no effect." If the total of the defenders' printed Artillery values (not counting entrenchments) in the hex is 1, a -2 modifier is converted to -1. If the total of the defenders' printed Artillery values (not counting entrenchments) in the hex is 2, a -3 modifier is converted to -2.
Artillery Modifier Summary (Artillery Value Differential = Attacker's Artillery Value minus Defender's Artillery Value):
| Defender's Terrain | –4 or Less | –3 to +1 | +2 to +4 | +5 to +7 | +8 or more |
|---|---|---|---|---|---|
| Clear | -3 | -2 | NE | +1 | +2† |
| Rolling | -2 | -1 | NE | +1* | +1 |
| Rough/Hill • | -1 | -1* | NE | NE | +1* |
| Woods/City/Mtn | NE | NE | NE | NE | NE |
| Swamp § |
* Just prior to combat, roll a die. If roll is even, indicated modifier is used; if roll is odd, no modifier is used. † Just prior to combat, roll a die. If roll is even, +2 modifier is used; if roll is odd, +1 modifier is used instead. • Also applies to provisional swamp hexes in non-rain turns. § Also applies to provisional swamp hexes in rain turns. NE: No effect.
Terrain. The defender's die roll may be modified by terrain: Bridge/Dam/Ferry/Ford — if an attack takes place across a bridge, dam, ferry, or ford hexside, the defender adds 2 to his roll. Creek — if an attack takes place across a creek (even across a road, pike, RR, or trail hexside), the defender adds 1 to his roll. Note: If, in a grand assault, more than one hex adjacent to the defender's hex has attacking units, the above modifiers apply only if the defender's hex is separated from the active leader by a bridge, dam, ferry, or ford — or a creek hexside.
Hill: If the defender occupies a hill hex, he adds 1 to his roll. However, if the active attacking unit occupies a hill or mountain hex, or if the active attacking unit is attacking down a ridge hexside, the defender's roll is not modified.
Mountain: If the defender occupies a mountain hex, he adds 2 to his roll. However, if the active attacking unit also occupies a mountain hex, or if the active attacking unit is attacking down a ridge hexside, the defender adds only 1 to his roll.
Ridge: If an attack takes place across a ridge hexside, and the active attacking unit is attacking up a ridge hexside, the defender adds 2 to his roll. If the active attacking unit is attacking down a ridge hexside, the defender adds 1 to his roll if the defender is in a mountain hex and 0 to his roll if the defender is in any other type of hex. Note: A unit is attacking up a ridge hexside if the ridge between his hex and the defender's hex is within the defender's hex. If it is within the attacker's hex, the unit is attacking down.
Ridge Combat Example: Geary's Union division occupies Dougherty (AIO W0533), and Cleburne's Confederate division occupies AIO W0532. If Cleburne attacks Geary, Geary adds 2 to his roll (Cleburne is attacking up a ridge hexside). If Geary attacks Cleburne, Cleburne adds 1 to his roll (Geary is attacking down a ridge hexside into a mountain hex).
Lee (Not In RTG). If a Confederate district, corps, or division leader successfully undertakes an assault action and the army leader Lee is currently stacked in the same hex as the active leader, the Confederate player adds 1 to his attack die roll. This bonus is in addition to the +1 modifier due to assault, and is applied regardless of whether or not a "grand assault" takes place. The Lee bonus may never be applied to defending units. The Lee bonus cannot be applied in any RTG scenario.
The Lee assault bonus may only be used with assaults started by leaders within one corps per turn. Once the Confederate player uses the Lee assault bonus in an assault in a turn, for the remainder of the turn the bonus may only be used with assaults initiated by leaders (corps or division level) from that corps in the current turn. The SEV district (found in Eastern Theater games after 1864 such as GTC) is treated as a corps for purposes of this rule. The Confederate player must state that the Lee bonus will be used immediately before the assault roll. If the subsequent assault roll fails, Lee's bonus is still tied to that corps for the rest of the turn.
Longstreet. In any scenario occurring in 1864 or later, the Confederate player adds 1 to his attack roll if the corps leader Longstreet successfully undertakes an assault action. This bonus is in addition to the +1 modifier due to assault, and is applied regardless of whether or not a "grand assault" takes place. The Longstreet bonus can never be combined with the Lee bonus.
Jackson. In the games SJW, HCR, and SLB the Confederate player adds 1 to his attack roll if the corps leader Jackson successfully undertakes an assault action. This bonus is in addition to the +1 modifier due to assault, and is applied regardless of whether or not a "grand assault" takes place. The Jackson bonus can never be combined with the Lee bonus. Note: in SLB Stonewall Jackson is treated as a leader with a 4 tactical for offense and defense, despite the 5/4 printed on his counter.
Types of Attacks. In a march, the type of attack chosen by the active player may modify the attacker's die roll: Column of Route — –3 to attacker's roll; Hasty — –1 to attacker's roll; Normal — No modifier to attacker's roll; Prepared — +1 to attacker's roll.
Assault Action. In an assault action, modifiers for column of route, hasty, normal, and prepared attacks never apply. Instead, an assault action always provides a +1 modifier to the attacker's die roll.
Rain. The attacker subtracts 1 from all his die rolls in rain turns (see 12.0).
Demoralization–2. If a unit with a Demoralize-2 marker is alone in a hex and is attacked by an enemy unit, the defending player subtracts 1 from his combat die roll. If the demoralized-2 unit is in a stack of friendly units that is attacked, the –1 die roll modifier only applies if more than one-half of the total Combat value in the hex is contributed by units with Demoralize-2 markers.
Flank Attacks. If, at the moment of combat, defending units are partially or completely surrounded by active and inactive enemy units or their ZOC (or impassable terrain), the attacker's die roll is enhanced. This bonus, called a "flank attack," applies even if some of the enemy units surrounding a defender do not participate in the attack. The flank attack bonus is computed as follows:
-
"Covered" Hexes: The active player determines the number of "covered" hexes among the six hexes adjacent to the defender. A covered hex is one meeting any of the following conditions: (a) It is occupied by an undemoralized unit friendly to the attacker (including the attacking unit itself). (b) It is in the ZOC of any undemoralized unit friendly to the attacker (including the attacking unit itself and including "restricted" ZOC; see 2.4). (c) It is a mountain or swamp hex (including provisional swamps in a rain turn) or the defender's hex is a mountain or swamp hex, and the two hexes are not connected to each other by a road, pike, RR or trail. (d) It is separated from the defender's hex by a major or minor river hexside not containing a bridge, dam, ferry, or ford. (Exceptions: In a turn when a river is unfordable, a hex is covered if it is separated from the defender by a ford hexside over such a river. In a rain turn, a hex is covered if it is separated from the defender by a creek hexside untraversed by a road, pike, trail or RR.) (e) It is a hypothetical hex just off the map that would be adjacent to a map edge hex occupied by the defender. Note: Each of the six hexes adjacent to the defender may be counted only once in this step even if it fulfills more than one definition of "covered."
-
Basic Flank Bonus: Six Covered Hexes — if all six hexes adjacent to the defender are covered, the "basic flank bonus" is +4, proceed to Step 3. Five Covered Hexes — if five of the six hexes adjacent to the defender are covered, the "basic flank bonus" is +2, proceed to Step 3. Four or Fewer Covered Hexes — if four or less of the six hexes are covered, there is no flank bonus; skip the rest of this procedure.
-
Final Flank Bonus: The basic flank bonus from Step 2 may be reduced to determine the "final flank bonus." The basic flank bonus is reduced by one for each covered hex meeting at least one of the following conditions: (a) It is occupied by an undemoralized unit friendly to the defender. (b) It is unoccupied and is separated from all adjacent units friendly to the attacker (including the attacking unit itself) by woods hexsides (see 2.3) untraversed by a road, pike, trail, or RR. (Exception: In SLB only, if the Confederate player is attacking, he ignores Step 3b of the flank bonus procedure — the basic flank bonus is not reduced by one for each unoccupied covered hex separated from adjacent Confederate units by woods hexsides untraversed by a road, pike, or RR. Step 3b does apply to the Union player in SLB.) (c) It is a mountain or swamp hex (including provisional swamps in a rain turn) or the defender's hex is a mountain or swamp hex; and the defender's hex and the covered hex are not connected to each other by a road, pike, trail, or RR. (d) It is separated from the defender's hex by a major or minor river hexside not containing a bridge, dam, ferry, or ford. (This case also includes: 1) a turn when a river is unfordable, if a hex is separated from the defender by a ford hexside over such a river, and 2) a rain turn, if a hex is separated from the defender by a creek hexside untraversed by a road, pike, trail or RR.)
Maximum Reduction: The maximum reduction that may be applied to the basic flank bonus in this step is –3, even if a greater reduction would normally apply. Also, the final flank bonus may never be less than 0. Thus, if all six hexes adjacent to a defender are covered (yielding a basic flank bonus of +4 in Step 2), there will always be a final flank bonus of at least +1.
- Apply Modifier: The final flank bonus from Step 3 is applied to the attacker's combat die roll, in addition to other modifiers.
Flank Bonus Reductions. The final flank bonus from Step 3 may be reduced in either of the following circumstances: Flanks Refused — Flank attack bonuses may be modified by "Flanks Refused" markers (Flanks Refused markers are no longer optional; they are used in all GCACW games; see 7.8). Cavalry — Flank attack bonuses may be modified if both the attacker and defender possess cavalry units (see "Cavalry and Flank Attacks," below).
Flank Bonus Conditions. The status of the attacker's units may modify a flank bonus. If one or more of the attacker's units occupy or exert a ZOC into a hex adjacent to the defender, and all of those units together have a combined Combat Value (not including entrenchments) less than one-fourth the defender's Combat value (including the defender's entrenchments and possibly capped by the Maximum Value from Section 7.2), that hex is not considered "covered" in Step 1a or 1b of the flank attack procedure. (The attacking player's units in different hexes can combine their Combat values to reach the one-fourth the defender's Combat value total, as long as all of the units are adjacent to the same "covered" hex.) Demoralized units (active or inactive) belonging to the attacker may not contribute in any way to the achievement of a flank attack bonus. A unit helping to provide a flank attack bonus which does not participate in the attack may not contribute its Tactical value to a combat, nor does it trigger terrain modifiers.
Cavalry and Flank Attacks. The final flank bonus may be reduced if both of the following conditions are in effect: the active attacking unit is a cavalry unit (or the active leader making an assault is a cavalry leader); and more than one-half of the total Combat value in the defender's hex is contributed by cavalry units. If both of these conditions are fulfilled in a combat in which a flank bonus applies, that combat's final flank bonus may be modified as follows: a "final flank" bonus of +4 is reduced to a +2 bonus instead; a "final flank" bonus of +3 or +2 is reduced to a +1 bonus instead; a "final flank" bonus of +1 is ignored (no bonus is awarded). Note: Non-flank attacks under these conditions do not provide the attacker with a +1 die roll bonus, as is the case with Flanks Refused markers (see 7.8). Also, if a Flanks Refused marker is already situated in the defender's hex, or if the defending units occupy a redoubt hex, normal flanks refused/redoubt rules apply instead of the above cavalry rules.
7.5 Combat Results
The Combat Chart is used to resolve combat. A combat produces two results: one for the attacker, one for the defender. To resolve a combat, the defender's modified die roll is subtracted from the attacker's modified roll. On the Combat Chart, the attacker cross-references the result with the column corresponding to his combined Combat value; the defender cross-references the result with the column corresponding to his combined Defense value (prior to applying entrenchment benefits). Both players' results, which are applied immediately, may consist of a number and/or one or two letters. A dash indicates that the player's units are unaffected.
Note: A Combat value may fall between two columns on the Combat Chart (e.g. 3½). If so, round the value up by ½ and use the right column of the two possible choices. Note: Union panic is triggered in the SJW advanced game by any italicized result on the GCACW Standard Combat Chart (see SJW Advanced Rule 6.0).
Letter Results. There are eight possible letter results:
- D (Disorganize/Fatigue): The unit's Strength marker is flipped to its disorganized side. (If it is already disorganized it remains so.) The unit's Fatigue Level is also increased by 3 (to a maximum of 4). If the unit is already at Fatigue Level 4, it remains so. Finally, an active unit obtaining a "D" may not expend any more MP; its march action is over and a new Action Phase begins.
- F (Fatigue-2): The unit's Fatigue Level is increased by two (to a maximum of 4). An active unit may not spend any more MPs; its march is over and a new Action Phase begins.
- f (Fatigue-1): The unit's Fatigue Level is increased by one (to a maximum of 4). An active unit may not spend any more MP; its march is over and a new Action Phase begins.
- E (End Action): An active unit may not spend any more MP; its march is over and a new Action Phase begins. This result has no effect on an assault action, since an assault automatically ends after the combat has been resolved.
- r (Retreat): The unit must retreat (see 7.6).
- R (Rout/Demoralize-1): The unit is routed (see 7.6). Also, the unit gains a Demoralize-1 marker. If it already has such a marker, it is flipped to its Demoralize-2 side. If it is already at Demoralize-2, there is no further effect.
- R* (Rout/Demoralize-2): The unit is routed (see 7.6). Also, the unit gains a Demoralize-2 marker. If it is already at Demoralize-1, flip the marker to its Demoralize-2 side and there is no further effect. If it is already at Demoralize-2, its Manpower value is reduced by one in addition to its normal manpower loss result.
- a (Advance): The unit may advance after combat (see 7.6).
NOTE: An "extended march" never takes place due to a combat result, even if a unit goes to a new Fatigue Level of 2, 3 or 4.
Number Results. Number results, which precede letter results, indicate a reduction of the unit's Manpower (not Artillery) value. Remove the unit's Strength marker and replace it with another one showing its reduced Manpower value (i.e., the unit's Manpower value before the combat minus the number result). The new Strength marker may assume a new status (organized or disorganized): if the original Strength marker was disorganized before the combat, the new Strength marker is also disorganized; if the original Strength marker was organized prior to the combat, the new Strength marker is disorganized if the combat result contains a "D" (Disorganized/Fatigue), or organized if the combat result does not contain a "D." Exception: If in a grand assault, the total Combat value of attacking units is 80 or more, the attacker's Manpower value loss in that combat is increased (see 7.2).
Applying Results. Attacker: In a march, the attacker's letter and number results apply only to the active unit, even if other friendly units occupy the same hex. In an assault, the attacker's letter result applies to each participating unit, including those joining in a grand assault. The attacker's number result applies to the attacking force as a whole — not to each individual unit. As long as the number result is fully applied, the attacker may divide it among any of his attacking units as he wishes. Units providing flank attack bonuses which do not participate in the attack are unaffected by combat results.
Defender: The defender's letter result applies to each defending unit. The defender's number result applies to the defending force as a whole — not to each individual unit. As long as the number result is fully applied, the defender may divide it among any of his defending units as he wishes. Combat results are always applied to the defending unit(s) before they are applied to the attacking unit(s).
Entrenchments and Combat Values. Defending units' Combat values may be enhanced by entrenchments (see 9.0). However, when determining the defender's combat result, the Combat Chart columns represent the defender's Combat value prior to the application of entrenchment benefits. Example: If Hindman's division defends with a Combat value of 8, its combat result is determined in the "7 to 11" column of the Combat Chart. If Hindman's division defends under a completed Breastwork marker, its Combat value is 16 (8 x 2). Although Hindman's Combat value of 16 would be used to calculate the ratio in that combat, its combat result is determined in the "7 to 11" column of the Combat Chart.
Unit and Leader Elimination. A unit is eliminated at the moment its Manpower value is reduced to 0. If, due to the elimination of a unit, a leader remains in that hex with no subordinate units, the leader is placed in the nearest hex occupied by a subordinate. A leader is eliminated at the moment no units subordinate to that leader exist.
7.6 Retreats, Routs, and Advances
There are three types of retreats: normal ("r"), rout ("R"), and cavalry retreat. In a normal retreat, a player must retreat all his defending units a minimum of two hexes and a maximum of four hexes. In a rout, a player must retreat all his defending units a minimum of four hexes and a maximum of six hexes. See 7.7 for cavalry retreats. The choice of retreat distance and path is left to the defender, as long as the path adheres to the following rules. Retreating units must move as a stack and cannot separate. Leaders must accompany retreating units with which they are attached. MP are not expended in retreats and, with the following exceptions, terrain is irrelevant.
Retreat Restrictions. Retreating units are subject to the following restrictions: Mountains and Swamps — a retreating unit may only enter or exit a mountain or swamp hex (including a provisional swamp hex in a rain turn) across a road, pike, trail, or RR hexside. Rivers — a retreating unit may cross a major or minor river hexside only at a bridge, dam, ferry, or ford; in a rain turn, a unit may not retreat across a ford hexside or a creek hexside untraversed by a road, pike, trail, or RR. Off-Map — a unit may not retreat off the map. Start Hex — a retreating unit may not enter the hex where a retreat began. Same Hex — a retreating unit may not enter the same hex twice. Adjacent Hex — a retreating unit may not end a retreat in a hex adjacent to the hex where the retreat began (Exception: The retreating unit may end up adjacent in a one-hex voluntary retreat, see "Defender's Retreat Option"). Closer to Attacker — a retreating unit may not enter a hex that is closer to the active enemy unit triggering the retreat than the hex retreated out of, counting by the shortest possible path. If there is a Grand Assault, the active enemy unit is the one initiating the corps assault. A unit may not retreat into the hex occupied by the active enemy unit.
Surrender: If there is no hex to retreat into that does not violate any of the aforementioned restrictions, a retreating unit surrenders, and is eliminated from play. VP are awarded for this occurrence.
Retreat Priorities. In addition to adhering to "retreat restrictions," a retreating player must follow "retreat priorities," which are listed on Retreat Charts 1 and 2. A retreating unit must adhere to retreat priorities in each hex entered in that retreat. Furthermore, the appropriate chart to use may change from hex-to-hex in that retreat.
Retreat Chart 1: A player must use Retreat Chart 1 in any of the following cases: for the first hex entered in a normal retreat; for each of the first four hexes entered in a rout/cavalry retreat; if in a retreat, rout, or cavalry retreat, a unit exits an enemy ZOC (including "restricted" ZOC; see 2.4).
Retreat Chart 2: A player must use Retreat Chart 2 in any of the following cases: for the second, third, or fourth hexes entered in a normal retreat, assuming the unit is not exiting an enemy ZOC; for the fifth or sixth hexes entered in a rout/cavalry retreat, assuming the unit is not exiting an enemy ZOC.
Using the Retreat Charts: Prior to entering each hex in a retreat, a player checks the appropriate chart and follows this procedure:
- Check Legal Retreat Hexes: The player determines how many of the six hexes adjacent to the retreating unit may be legally retreated into according to the "retreat restrictions" rules.
- Retreat Description: For each of the legal retreat hexes determined in Step 1, the player determines the "Retreat Description" from the appropriate Retreat Chart corresponding to a retreat into that hex.
- Priority: Each Retreat Description consulted in Step 2 has a corresponding "Priority Number." The player must retreat his unit into a hex using the Retreat Description from Step 2 with the lowest Priority Number. (Exception: see "Overriding Retreat Priorities.") If more than one hex fulfills this requirement, the player may retreat his unit into any of those hexes. Also, if two different Retreat Descriptions have the same Priority Number, the player may choose either description when retreating into a hex.
- Complete Retreat: The player repeats Steps 1, 2, and 3 for each hex entered in that retreat. When he fulfills retreat requirements (at least two and up to four hexes in a normal retreat; at least four and up to six hexes in a rout or cavalry retreat), the retreat is over.
Overriding Retreat Priorities. If, by adhering to retreat rules, there is no possibility of avoiding surrender of a retreating unit due to "retreat restrictions," a player may "override" retreat priorities no more than once in that retreat. To override, a player may retreat a unit into a hex by choosing any Retreat Description on the appropriate chart, regardless of its Priority Number. He is not obligated to choose the lowest Priority Number. If the unit cannot avoid surrender due to a single override, it is eliminated.
The player can make this override at any point in the retreat path — it does not have to be at the exact point that destruction would occur; thus the player may look ahead to avoid destruction. For example, if in a retreat path by following the retreat priorities a unit would get destroyed in the 3rd hex, the unit is allowed to do its override in the 1st or 2nd or 3rd retreat hex.
Manpower Loss. If a unit retreats into a hex using a Retreat Description with an accompanying Manpower loss, the retreating unit's Manpower value is reduced by the indicated number. Replace its Strength marker with a new one on its disorganized side reflecting the loss. If a stack of more than one unit retreats into a hex calling for Manpower loss, the loss number is applied to each unit in the stack — not just one.
Note: Manpower losses in retreats may vary depending on whether a unit retreats into a hex across a road, pike, trail, or RR hexside, or if the hex retreated into is friendly-occupied (see Retreat Charts). In a retreat, entering or exiting a city hex is the equivalent of crossing a road hexside, even if no road actually crosses that hexside.
Basic Retreat Principles. At first it may seem difficult to consult the Retreat Charts for every hex entered in a retreat. However, players will find them easy to use after a few games. To help the players become more familiar with the Retreat Charts, some of their basic principles are outlined below.
Retreat Chart 1: On Retreat Chart 1, the highest priority retreat is to move one hex more distant from the active enemy unit by crossing a road, pike, trail, or RR hexside into a nonenemy-occupied/non-enemy-ZOC hex. If that cannot be achieved, the next-highest priority is to attempt to do the same thing by crossing a non-road/pike/trail/RR hexside. If that in turn cannot be achieved, the next-highest priority is to retreat into any hex that is not enemy-occupied, nor in an enemy-ZOC. (This may incur manpower loss.) If that in turn cannot be achieved, the next-highest priority is to avoid retreating into an enemy-occupied hex. (This may incur manpower loss.)
Retreat Chart 2: On Retreat Chart 2, the highest priority retreat is to move into any hex that is not enemy-occupied, nor in an enemy-ZOC. If that cannot be achieved, the next-highest priority is to avoid retreating into an enemy-occupied hex. (This may incur manpower loss.)
Retreats Into Enemy-Occupied Hexes. Some Retreat Descriptions allow retreats into an enemy-occupied hex, an occurrence which causes a Manpower value loss of three to the retreating unit. (However, a unit may never retreat into the hex occupied by the active enemy unit.) A unit may not end its retreat in an enemy-occupied hex. If there is no alternative except to do so, its retreat may be extended by a sufficient number of hexes so that it ends the retreat in a hex unoccupied by an enemy unit.
Defender's Retreat Option. On any combat result applying to the defender not containing an "r" or "R", the defender may voluntarily retreat one or more of his units from one to four hexes subject to retreat rules. This is considered a retreat, not a rout. In this case the defender may end the retreat in a hex adjacent to the hex where the retreat began. There is no Fatigue cost to do this. (Exception: If the defender receives a "—" result [no effect], all units participating in the defender's retreat option gain one Fatigue Level, to a maximum of level 4.) Even units at Fatigue Level 4 may join in this retreat. The defender must execute a voluntary retreat immediately, before the enemy player performs further actions.
Advance After Combat. If the attacker receives an "a" result, none, some, or all of the attacking units may advance into the hex vacated by the defender. An advance is not considered movement and does not expend MP. A unit may enter or exit an enemy ZOC, or advance from one enemy ZOC to another, without penalty. Regardless of whether or not a unit obtaining an "a" advances, its march may continue as long as it did not also suffer a "D", "F", "f", or "E" result. However, it may not continue to move if it advances into an enemy ZOC. In this case, the unit must either attack again or end its march. Leaders (including army/district leaders) may advance with subordinate units (and must advance if no subordinate units remain in the leader's hex). A leader may advance with a subordinate unit to which it had not been attached prior to the attack, although if it does so the active player must specify its new attachment. A leader may not advance with and attach to a non-subordinate unit.
7.7 Cavalry Retreat
A cavalry unit may use "cavalry retreat" to avoid attack by an enemy infantry or artillery (not cavalry) unit. A cavalry unit may perform a cavalry retreat more than once per action. The player owning a cavalry unit may declare a retreat in any of the following circumstances:
Enemy Movement: An enemy infantry/artillery unit performing a march moves into a normal (not restricted) ZOC exerted by a cavalry unit.
Starts Adjacent: An enemy infantry/artillery unit begins a march in a normal (not restricted) ZOC belonging to a cavalry unit. Exception: If an enemy infantry unit begins a march in a restricted ZOC belonging to a cavalry unit and selects the cavalry unit as the target of his attack in Step 1 of the Attack Procedure, then the cavalry unit may perform a cavalry retreat.
Advance After Combat: An enemy infantry/artillery unit advances after combat into a cavalry unit's normal (not restricted) ZOC.
Assault: The enemy player declares an assault action against a hex containing at least one cavalry unit (unless the assault is declared by a cavalry leader — in which case a cavalry retreat is not possible).
A player wishing to declare a cavalry retreat must make his declaration as soon as any of the above circumstances occur — before the enemy player declares an attack (or, in the case of an assault action, before the enemy player rolls a die to determine whether or not the assault takes place). If he does not make the declaration at this moment, he forfeits his ability to perform a cavalry retreat in the hex occupied by his cavalry unit for the duration of the enemy unit's march.
Performing A Cavalry Retreat. A cavalry retreat is voluntary. A cavalry unit may perform a retreat regardless of its status — even if it is demoralized, disorganized, exhausted, or at Fatigue Level 4. A player wishing to perform a cavalry retreat states this fact as soon as his opponent has performed one of the aforementioned actions. The enemy unit's march (or assault) is temporarily suspended while the retreat takes place. A cavalry retreat is performed as follows:
- Roll Die: The cavalry player rolls a die. This roll may be modified (see Cavalry Retreat table in Charts & Tables handout). The modified roll is halved (round fractions down to a whole number). The result is the number by which the enemy unit's Active Movement Allowance marker is reduced on the Movement Track. In assault actions, this roll has no effect since no Movement Allowance is determined. However, the roll still takes place to see if the cavalry unit suffers loss in Step 2.
- Manpower Loss: If the Step 1 roll (before modifications and halving) is 1, the cavalry unit's Manpower value is reduced by one. Place the new Strength marker on its disorganized side. On a roll of 2 to 6, no loss occurs.
- Retreat 4–6 Hexes: The cavalry unit must retreat from four to six hexes. The retreating player must adhere to retreat restrictions, using Retreat Charts 1 and/or 2 to fulfill this retreat. However, a cavalry unit does not suffer any Manpower value loss in a cavalry retreat, even if it retreats into a hex calling for a loss on a Retreat Chart. Exception: If in a cavalry retreat, a unit retreats into an enemy-occupied hex, Retreat Priority #5 applies and the unit(s) suffers a Manpower value loss of 3. Note: A cavalry unit may use the above rule 7.6, "Overriding Retreat Priorities", to attempt to avoid destruction.
- Fatigue: After executing its retreat, the cavalry unit's Fatigue Level is increased by 1 (to a maximum of 4). Note: An extended march is never triggered by a cavalry retreat.
- Disorganization: The cavalry unit's Strength marker is flipped to its disorganized side. If it is already disorganized, there is no further effect.
- Resume Action: The active enemy unit or leader resumes its activities from the point of interruption. If a unit's Movement Allowance has been reduced to 0, its march ends. (Exception: If the unit has not yet moved, it is permitted to move one hex; see 6.2. It may not refuse flanks.) In an assault action, if the hex the active leader is assaulting is completely vacated by the cavalry retreat, the units participating in the assault may advance into the hex vacated by the cavalry unit. No attack occurs and the assault action ends. (Exception: If the active player's command die roll in Step 5 of the assault procedure is unsuccessful, the units participating in the assault may not advance into the hex vacated by the cavalry unit.)
Cavalry Stacked With Other Units. With Cavalry Unit: If two or more cavalry units are stacked in the same hex, they must perform a cavalry retreat together. Only one die roll is made in Step 1, and all units must end the retreat in the same hex. If a 1 is rolled for the cavalry retreat, only 1 cavalry unit suffers a manpower loss. With Infantry Units: A cavalry unit stacked with an infantry unit may perform a cavalry retreat, but the infantry unit may not.
Multiple Cavalry Retreats. Same Unit: A cavalry unit may perform a cavalry retreat more than once per action. Cavalry Units — Separate Hexes: If two or more cavalry units occupying separate hexes are eligible to perform a cavalry retreat and all of them wish to retreat, each performs the retreat separately. The enemy unit's Movement Allowance reduction, if any, is cumulative.
7.8 Refusing Flanks
At a cost of one MP, the active player may place a "Flanks Refused" marker of the appropriate side on top of a unit performing a march. (Exception: A Flanks Refused marker may not be placed on a unit in a mountain or swamp hex; also, it may not be placed on top of a unit performing an assault.) As soon as a unit gains a Flanks Refused marker, its march ends. (It may perform actions later.) Since a unit must stop moving upon entering an enemy normal ZOC, it may not refuse flanks when entering an enemy normal ZOC. A unit may refuse flanks if it marches in place in a hex with an enemy normal ZOC (an extended march must be done if required per 5.1).
A maximum of one Flanks Refused marker may exist in a hex at a time; its effects apply to all units in the hex. A unit does not have to spend one MP to enter a hex in which a Flanks Refused marker is already situated; it may enter the hex at no extra MP cost and receive the marker's benefits — and may continue its march.
A Flanks Refused marker never accompanies a unit when it leaves a hex. A marker may not be placed on a unit after it performs a retreat, rout, or advance after combat. The players are not limited to the number of markers provided in the game.
Effects of Flanks Refused Markers. Units in a hex with a Flanks Refused marker may perform all actions normally (although they may be forced to remove the marker after the action is over; see below). Units occupying a hex containing a Flanks Refused marker defend against enemy flank attacks more effectively, but less effectively against normal attacks: flank attacks fulfilling the requirements for a +4 attacker die roll bonus are reduced to a +2 bonus instead; flank attacks fulfilling the requirements for a +3 or +2 attacker die roll bonus are reduced to a +1 bonus instead; flank attacks fulfilling the requirements for a +1 attacker die roll bonus are unchanged (the bonus remains +1); all non-flank attacks always provide the attacker with a +1 die roll bonus (in addition to other modifiers), even though requirements for flank attacks have not been fulfilled.
Removal of Flanks Refused Markers. A Flanks Refused marker may be voluntarily removed from a stack of units at no MP cost if one of the units in the hex initiates a march. (The active unit does not actually have to leave the hex.) The marker must be removed if all the units in the hex participate in an assault action. It also must be removed if only one unit is in a hex and it moves or attacks. (This does not preclude the owning player from placing another marker on the unit later in its march at a cost of one MP.)
8.0 Recovery
In the Recovery Phase, the following actions are performed strictly in the listed order:
- Units at Fatigue Level 0 may entrench, build bridges, or repair bridges/ferries. A unit may not perform more than one of the aforementioned activities per Recovery Phase and may not perform any at all in a rain turn. In RTG, Confederate infantry units may impose a "levy" on Pennsylvania towns in this step (see RTG 19.0).
- In the Advanced Game, units at Fatigue Level 0, 1, or 2 may forage (see each GCACW game's "Forage" rules), but not if they undertook any activities in Step 1 of the Recovery procedure. Note: Units in RTG and SLB may not forage.
- Units at Fatigue Level 0 or 1 may be affected as follows: (a) Units at Fatigue Level 0 or 1 with disorganized Strength markers have their Strength markers flipped to their organized sides. Exceptions: If a unit has a Demoralize-2 marker at the start of this step, its Strength marker remains disorganized. Also, in each GCACW volume's Advanced Game, out of supply units with disorganized Strength markers remain disorganized. Note that there is no "out of supply" status in SLB and RTG. (b) Units at Fatigue Level 0 or 1 which are on their exhausted sides are flipped to their normal sides. Exception: If an exhausted unit has a Demoralize-2 marker at the start of this step, it remains on its exhausted side. (c) Units at Fatigue Level 0 or 1 with Demoralize-1 markers have these markers removed; units at Fatigue Level 0 or 1 with Demoralize-2 markers have these markers flipped to their Demoralize-1 sides.
- Units at Fatigue Level 3 or 4 are flipped to their exhausted (reverse) sides. If they are already on their exhausted sides, they remain so and there is no further effect.
- All units at Fatigue Level 1 or more lose three Fatigue Levels (to a minimum Fatigue Level of 0). Replace each unit's Fatigue marker with a new marker three less than the one being removed. (Units at Fatigue Level 0 do not have markers.)
- In the Advanced Game Scenarios of HCR, SIV (Union units only), OTR, GTC, BAC, RWH (Confederate units only), SJW, AGA, and AIO, out of supply units with organized Strength markers have their Strength markers flipped to their disorganized sides. Note: Step 6 of the Recovery Phase is skipped in SLB and RTG because units are never out of supply in those games.
9.0 Entrenchments
Entrenchments enhance a unit's defensive capabilities. Units may construct entrenchments in the Recovery Phase, and in games taking place in 1863 or later, in the Action Phase. Players may also gain entrenchment benefits from a hex feature called "redoubts." Another hex feature, a permanent Fort, provides even further defensive capabilities and is described in the Advanced Game Rules of any module in which it appears. Permanent Forts typically provide the same entrenchment benefit as a Redoubt when units occupy those hexes.
Building Entrenchments. There are four types of entrenchments: redoubts, abatis, breastworks, and forts. Redoubts and permanent Forts, which are printed on the map and represent permanent fortifications, may not be built. However, abatis, breastworks, and forts may be built in either the Action Cycle (see 5.5) or the Recovery Phase. Units building entrenchments in the Recovery Phase must be at Fatigue Level 0. A unit building a bridge or repairing a bridge/ferry may not also entrench in the same Recovery Phase. Units may not entrench in rain turns.
The procedure for building entrenchments in the Action Phase (for games in 1864 or games in 1863 if the Entrenchment Action optional rule is being used) is described in Section 5.5. The procedure for building entrenchments in the Recovery Phase is described below. Depending on the year depicted in the game being played, players use one of four different procedures, for games occurring in 1861, 1862, 1863, or 1864 and later. Hood Strikes North uses the 1864 procedure.
Entrenchments (1861): AGA. If a unit entrenches, place an Abatis-Build marker atop the unit. (Exception: if a Confederate unit entrenches in a redoubt hex, place a BW-Complete marker atop the unit.) If a unit already possessing an Abatis-Build marker entrenches, place an Abatis marker atop the unit. If a unit already possessing an Abatis marker entrenches, place a BW-Complete marker atop the unit. Forts: the only units that may be entrenched above the BW-Complete level are those that start a scenario in a fort marker. If those units leave the fort marker they may not re-entrench beyond the BW-Complete level.
Entrenchments (1862): SJW, HCR, SIV, and OTR. If a unit entrenches, place a Breastwork–Build marker atop the unit. (Exception: If a unit is in a redoubt hex that it is eligible to benefit from, place a Breastwork-Complete marker atop the unit.) If a unit already possessing a Breastwork–Build marker entrenches, flip the marker to its Complete side. If a unit already possessing a Breastwork–Complete marker entrenches, place a Fort–Build marker atop the unit. If a unit already possessing a Fort–Build marker entrenches, flip the marker to its Complete side.
Entrenchments (1863): SLB, RTG and BAC. If a unit without an entrenchment marker (or possessing a Breastworks-Build) entrenches, place a Breastwork marker atop the unit. This is the equivalent of the 1862 "Breastwork–Complete," and in SLB, the Complete side of the Breastwork marker is used. (Note: if a unit is in a redoubt hex that it is eligible to benefit from, this same procedure is still used.) If a unit already possessing a Breastwork marker entrenches, place a Fort–Build marker atop the unit. If a unit already possessing a Fort–Build marker entrenches, flip the marker to its Complete side.
Entrenchments (1864): GTC, AIO, RWH, HSN. If a unit without an entrenchment marker entrenches, place a Breastwork marker atop the unit. (Exception: if a unit is in a redoubt hex that it is eligible to benefit from, place a Fort-Build-1 marker atop the unit.) If a unit already possessing an Abatis marker entrenches, place a Fort-Build-1 marker atop the unit. If a unit already possessing a Breastworks-Build marker entrenches, place a Fort-Build-2 marker atop the unit. If a unit already possessing a Breastworks, Fort-Build-1, or Fort-Build-2 marker entrenches, place a Fort Complete marker atop the unit.
Removing Entrenchments. A unit's Abatis, Breastwork or Fort marker is removed at the moment the unit leaves the hex. If a unit with an Abatis, Breastwork or Fort marker exits a redoubt hex, its marker is removed but there is no effect on the permanent redoubt.
Effects of Entrenchments. Entrenchments may enhance the Combat and Artillery values of defending (not attacking) units: Redoubts in Virginia only provide benefits when the Confederate player has units in that hex. The redoubts in Tennessee and Alabama in BAC provide benefits for either the Union or Confederate player, depending on which player has units in that redoubt hex. The redoubts in Georgia in AIO (they are all near Dalton on the west map) provide benefits only for the Confederate player. The redoubts in Maryland on the HCR East map provide benefits for only the Union player and only for scenarios in or after 1863 (RWH). Exception: the Centreville (SJW N4318) redoubt also provides the Union player with redoubt benefits if he has units in that hex (this redoubt exists in all games except those in 1861).
Units in a redoubt hex (that they are eligible to benefit from) with no other entrenchments have their Combat and Artillery values multiplied by 1.5 when defending. (For Combat values, retain fractions; for Artillery values, multiply the sum of all the Artillery values in the hex by 1.5 and round fractions up to the nearest whole number.) Units directly under an Abatis marker (or a Breastworks-Build marker if the year is 1864 or later) have their Combat and Artillery values multiplied by 1.5 when defending. Units directly under a completed Breastwork, a Fort-Build marker (1863 or earlier), or a Fort-Build-1 marker (1864 or later) have their Combat and Artillery values doubled when defending. Units directly under a Fort-Build-2 marker (1864 or later) have their Combat and Artillery values multiplied by 2.5 when defending. Units directly under a completed Fort marker have their Combat and Artillery values tripled when defending. Units directly under a Breastworks-Build marker do not have their Combat and Artillery values modified if the year is 1863 or earlier.
Abatis, Breastwork, and Fort effects apply individually by unit, not by hex. In a stack of units, some may possess markers while others do not. Only units which actually entrenched in an earlier Action or Recovery Phase receive the Combat/Artillery value multiple provided by an entrenchment marker. Units without markers in the same hex use unenhanced values.
Exception: Units in a redoubt hex belonging to a player eligible to receive redoubt benefits gain the defensive benefit of the redoubt. However, only those units which entrench further in an Action or Recovery Phase gain defensive enhancements beyond those provided by the redoubt.
Entrenchments do not enhance the combat value of units for the purposes of determining if they have enough Combat value to contribute to the achievement of a flank bonus (see "Flank Bonus Conditions", 7.4). Entrenchments also do not boost a unit's Combat value for the purpose of determining the additional MP cost to enter that unit's hex (see "Enter Friendly-Occupied Hex", 6.2).
Flank Attacks Against Redoubt Hexes. If a unit occupies a redoubt and is eligible to receive defensive benefits from that hex, its defensive capabilities against some flank attacks are enhanced (see 7.4). +4 Bonus: If the attacking player fulfills requirements for a +4 final flank bonus in an attack against one or more units in a redoubt hex, that bonus is reduced to +2. +3/+2 Bonus: If the attacking player fulfills requirements for a +3 or +2 final flank bonus in an attack against one or more units in a redoubt hex, that bonus is reduced to +1. +1 Bonus: If the attacking player fulfills requirements for a +1 final flank bonus in an attack against one or more units in a redoubt hex, he receives no flank bonus at all.
Unlike Flanks Refused markers, non-flank attacks against redoubt hexes do not provide the attacking player a +1 die roll bonus. Defending units situated under Breastwork or Fort markers in redoubt hexes retain the redoubts' capabilities against flank attacks. However, Breastwork or Fort markers situated in non-redoubt hexes do not provide these capabilities.
10.0 Bridges, Dams and Ferries
Units may cross major and minor rivers only at bridges, dams, ferries, and fords. A unit entering a hex across a bridge, dam, or ford ignores the cost of the major terrain in that hex and instead pays 1 MP as long as a road, pike, or RR crosses that bridge, dam, or ford. A unit also pays 1 MP if a pontoon bridge is constructed over that river (as long as both hexes connected by the pontoon bridge have a road, pike, trail, or RR in them). Units entering a hex across a bridge or ford which is not traversed by a road, pike or RR must pay that hex's major terrain MP cost. (See 6.2 for ferry MP penalties.) Roads crossing creek hexsides are not considered bridges, dams, ferries, or fords.
10.1 Pontoon Bridges
In the GCACW Standard Rules, bridges built during the game are known as "pontoon" bridges to differentiate them from "permanent" bridges which are printed on the map. Also, in all GCACW games except SLB (see below), a player must make a die roll if he wishes to build a bridge, rather than building it automatically. Note: In SLB, all original bridge building rules (see SLB 10.0) are in effect, including major river bridges. These rules are unmodified by the GCACW Standard Rules.
Building Pontoon Bridges. Eligible infantry units may attempt to build pontoon bridges. Note: In some GCACW games, units had formerly been prohibited from building bridges over major rivers, but this is now permissible in the Standard Rules. Also, in the Standard Rules, bridges may always be built at fords.
An infantry unit is eligible to build a pontoon bridge only if it meets all of the following conditions in Step 1 of the Recovery Phase: it is at Fatigue Level 0; it has a Combat value of 5 or more (Exception: In SIV, it must have a Combat value of 3 or more); it occupies a hex containing at least one unbridged/undammed major or minor river hexside (Exception: Confederate units may only attempt to build a bridge over a major river in OTR, GTC, and AIO; Union units may attempt to build a bridge over a major river in all GCACW games except SIV); it must not have entrenched or repaired a bridge or ferry in the same Recovery Phase; if the bridge is to be built over a minor river, the player must have an unused minor river Bridge marker (Exception: In SJW, HCR, RTG, and SIV, the number of minor river Bridge markers in the game is not a limit — players may build as many minor river bridges as they wish); if the bridge is to be built over a major river, the player must have an unused major river Bridge marker.
In OTR and GTC, the Union and Confederate players are limited to eight and four minor river Bridge markers, respectively. In games in which either or both players may build major river bridges, they are limited to one major river Bridge marker each, except in AIO the Union may build 3 major river bridges. Note: In SLB, the original bridge rules limit the Union player to two major river Bridge markers, and these SLB limits remain in effect.
If a game limits the number of Bridge markers that may be employed, and all the Bridge markers of that type are in use, a player may not build a pontoon bridge of that type until one or more markers become available for use again due to dismantling or destruction (see 10.2).
Pontoon Bridge Restrictions. Cavalry/artillery units and leaders may not build bridges. Bridges may not be built across creek hexsides. A bridge may not be built between two hexes if one of the hexes contains an enemy unit (or units) with a combined Combat value of 5 or more. It may be built into a hex if the enemy unit(s) in that hex have a combined Combat value of less than 5. Entrenchments are not taken into account in determining the Combat value that prevents a bridge from being built. (Exception: In SIV, a bridge may not be built between two hexes if one of the hexes contains an enemy unit (or units) with a combined Combat value of 3 or more; it may be built into a hex if the enemy unit(s) in that hex have a combined Combat value of less than 3.) An eligible unit may attempt to build a maximum of one bridge per Recovery Phase, although it may attempt to build more than one bridge per game — even in the same hex. A maximum of one infantry unit per hex may make a bridge-building attempt in Step 1 of each Recovery Phase. A maximum of one bridge (of any kind) may be situated on each hexside at any time. Units may not build bridges in rain turns.
Pontoon Bridge Construction. For each eligible unit attempting to build a bridge in Step 1 of the Recovery Phase, the owning player follows this procedure. (Exception: In SLB, bridges are not built according to this procedure. The original SLB bridge rules are in effect.)
- He specifies the hexside over which the bridge will be built.
- He rolls a die, modifying this roll if necessary (see below). 5 or Less: If the modified roll is 5 or less, the bridge is successfully built — place an appropriate Bridge marker (minor or major) belonging to the building player directly on the hexside, with one end of the bridge symbol pointing to the unit's hex and the other end pointing to the hex directly across the river. 6 or More: If the modified roll is 6 or more, the bridge is not built — no action is taken. Another attempt to build a bridge across that hexside may not be made until the following turn.
Construction Die Roll Modifiers. A player's pontoon bridge construction die roll is modified if any of the following conditions are in effect (modifiers are cumulative): –3 if the Confederate player attempts to build a major river bridge within 10 hexes of the Confederate Capitol (OTR N0627/GTC S3626); +1 if the river being bridged is currently unfordable (see 12.0); +1 if the bridge is being built between hexes OTR S3409 and OTR S3509 (Barrett's Ferry); +2 if the river being bridged is a major river; +1 if there is no ford or ferry (or destroyed permanent bridge or ferry) across the hexside being bridged — but there is a road, pike, trail, or RR in both of the hexes to be connected; +2 if there is a road, pike, trail, or RR in only one of the two hexes to be connected; +3 if both of the hexes to be connected do not contain a road, pike, trail, or RR. Note: If a pontoon bridge is successfully built, it is considered to have a road (not pike) running across it as long as both hexes connected by the bridge have roads, pikes, trails, or RR in them. Otherwise the bridge is not considered to be traversed by a road.
Chatham Bridge in SJW/SLB: In SJW, Chatham Bridge (S4328-S4427) is considered a Union pontoon bridge, even though it is printed on the map. It is subject to all GCACW Standard Rules applying to dismantling and destruction (see 10.2), and it may be rebuilt if it is destroyed or dismantled. Chatham Bridge does not count against the Union player's limit of one major river bridge in SJW. In SLB, Chatham Bridge is considered destroyed at the start of the game.
10.2 Destroying Bridges and Ferries
In the GCACW Standard Rules, rules for bridge/ferry destruction and dismantling supersede the pertinent rules sections in all GCACW games, including the SIV Advanced Game (see SIV, 23.1). (The following rules are identical to the OTR model.) In all games, permanent bridges, pontoon bridges, and ferries may be destroyed, although permanent bridges/ferries are more difficult to destroy than pontoon bridges. Bridges and ferries may be destroyed in rain turns and while rivers are unfordable.
Destroying Pontoon Bridges. When a player builds a pontoon bridge, he "owns" it. Enemy units may not cross that bridge in a march, retreat, or advance after combat; nor may they attack across it. The bridge remains on the map until an enemy unit with a Combat value of 5 or more (or, in SIV, 3 or more) ends a march, retreat, or advance after combat in one of the two hexes connected by the bridge. At that time the Bridge marker is immediately removed. A pontoon bridge is automatically destroyed at the end of the Attachment Phase if the previous turn's Recovery Phase or the current turn's Attachment Phase has caused an enemy unit to have a combat value of 5 or more (or, in SIV, 3 or more) in one of the two hexes connected by the bridge. ZOC extend across undestroyed bridges normally, even a pontoon bridge constructed by the enemy player.
Dismantling. If at any time during a march, an active unit occupies one of the two hexes connected by a friendly pontoon bridge, the active player may "dismantle" that bridge. If so, the Bridge marker is removed. This does not cost any MP, and the active unit may continue its march afterwards.
Destroying Permanent Bridges And Ferries. If an infantry unit with a Combat value of 5 or more (or, in SIV, 3 or more) ends a march in either of the two hexes connected by a permanent bridge, or if an infantry or cavalry unit of any Combat value ends a march in either of the two hexes connected by a ferry, the active player may attempt to destroy that bridge/ferry. A unit may make a maximum of one attempt to destroy bridges/ferries per turn. However, a player may make more than one attempt to destroy the same bridge/ferry in a turn, as long as the attempts are made by different units.
Exceptions: If an enemy unit occupies one of the two hexes connected by a bridge/ferry, the active player may not attempt to destroy it. Also, if one of the two hexes connected by a bridge/ferry is an enemy ZOC — including restricted ZOC — and that ZOC is not occupied by a friendly unit, the active player may not attempt to destroy it. Finally, some permanent bridges are indestructible (see below).
Dams and Fords: Dams and fords may not be destroyed.
Permanent Bridge/Ferry Destruction Procedure: To attempt to destroy a permanent bridge or ferry, a player rolls a die. (This roll may be modified; see below.) Bridge: If the modified roll is 2 or less, a permanent bridge is "destroyed." If the modified roll is 3 or more, the attempt to destroy the permanent bridge has failed. Ferry: If the modified roll is 1 or less, a ferry is "destroyed." If the modified roll is 2 or more, the attempt to destroy the ferry fails.
If a permanent bridge/ferry is destroyed, place a "Destroyed" marker directly on the hexside. If a destroy attempt fails, the player may attempt to destroy the bridge/ferry again, as many times as he wishes, as long as a given unit makes no more than one attempt per turn. Note: SLB does not have Destroyed markers. Players may use Destroyed markers from other games, if available, or they may make their own markers.
Destruction Die Roll Modifiers: If a player attempts to destroy a permanent bridge or ferry, his die roll is modified if any of the following conditions are in effect (modifiers are cumulative): –2 if the Confederate player is attempting to destroy a ferry; –1 if neither hex connected by the bridge/ferry is an enemy ZOC hex (including restricted ZOC); –1 if the active unit attempting the destruction spent its entire march in the hex connected by the bridge or ferry, and the unit neither moved nor attacked during its march; +2 if the active player is attempting to destroy the C&O Canal Aqueduct (HCR W4126).
Indestructible Bridges: The following permanent bridges may not be destroyed: Chain Bridge (SJW N5809; HCR E0537); Aqueduct Bridge (HCR E0739); Patterson Viaduct (HCR E2317); Thomas Viaduct (HCR E2519); Frederick Junction RR Bridge (HCR W4317; RTG S2428); Long Bridge (HCR E0941); Hunting Creek Bridge (HCR E0845).
C&O Canal Aqueduct: This aqueduct at HCR W4126 is not a terrain feature that affects unit movement (it cannot be used as a bridge). Its only effect is destroying it gives the Confederates VPs in some scenarios. It is treated as a permanent bridge across hexside HCR W4126-W4226 for rules on how to destroy it. Note the +2 Destruction Die Roll Modifier for the Aqueduct.
Destroyed Permanent Bridge/Ferry Effects. If a permanent bridge or a ferry over a minor river is destroyed, a ford is considered to cross the hexside formerly occupied by the bridge/ferry. (ZOC do not extend across destroyed bridge/ferry hexsides when the river they are on is unfordable.) If a permanent bridge or ferry over a major river is destroyed, no ford is considered to exist at that location. Exception: If Snicker's Ferry or Berry's Ferry, both on the Shenandoah River, are destroyed, a ford is considered to exist across that hexside.
10.3 Repairing Permanent Bridges and Ferries
The following GCACW Standard Rules for permanent bridge and ferry repair (identical to those in OTR) apply to all GCACW games. Note: These rules supersede the pertinent repair rules in SIV (see SIV 23.2). In SIV, both Union and Confederate units may attempt to repair bridges and ferries according to the GCACW Standard Rules procedure.
An infantry unit is eligible to repair a permanent bridge/ferry only if it meets all of the following conditions in Step 1 of the Recovery Phase: it is at Fatigue Level 0; it has a Combat value of 5 or more (Exception: In SIV, it must have a Combat value of 2 or more); it occupies a hex containing at least one destroyed permanent bridge or ferry hexside; it must not have entrenched or built a pontoon bridge in the same Recovery Phase; in SIV, the Union player may only attempt to repair a bridge or ferry if at least one of the hexes connected by the bridge is situated in a county that is currently controlled by the Union player (see SIV, 22.1).
Repair Restrictions. Cavalry/artillery units and leaders may not repair bridges or ferries. A permanent bridge or ferry may not be repaired if one of the hexes connected by the bridge/ferry contains an enemy unit or units with a combined Combat value of 5 or more (or, in SIV, 2 or more). It may be repaired if the enemy unit(s) in the connecting hex have a combined Combat value of less than 5 (or, in SIV, a Combat value of less than 2). Entrenchments are not taken into account in determining the Combat value that prevents a bridge from being built. Each player may make a maximum of one repair attempt per Recovery Phase. Units may not repair in rain turns.
Repair Procedure. If an eligible unit attempts to repair a permanent bridge/ferry in the Recovery Phase, the owning player follows this procedure:
- He specifies the hexside on which the repair will be attempted.
- He rolls a die, modifying this roll if necessary (see below). Permanent Bridge: If the modified roll is 3 or less, the bridge is repaired — remove the Destroyed marker, the bridge is functional again. If the modified roll is 4 or more, the repair attempt fails. Ferry: If the modified roll is 5 or less, the ferry is repaired — remove the Destroyed marker, the ferry is functional again. If the modified roll is 6 or more, the repair attempt fails. Exception: In AIO, a roll of "1" for a major river bridge repair is always successful, regardless of the modifiers.
Repair Die Roll Modifiers: A player's repair die roll is modified if any of the following conditions are in effect (modifiers are cumulative): +1 if the river on which a permanent bridge or ferry is situated is currently unfordable (see 12.0); +2 if the river on which a permanent bridge or ferry is situated is a major river; +1 if the attempt is for the Etowah RR bridge (across hexsides AIO W5417-W5517); +1 if the attempt is for the Chattahoochee RR bridge (across hexsides AIO E2514-E2614).
Chatham Bridge in SLB: In SLB, Chatham Bridge (4328–4427) may not be repaired, although the Union player may build a bridge at that hexside according to normal SLB bridge rules (see SLB 10.0).
11.0 Demoralization
A unit is assigned a Demoralize-1 marker (or has an existing Demoralize-1 marker flipped to its Demoralize-2 side) if it suffers an "R" result in combat. A unit is assigned a Demoralize-2 marker if it suffers an "R*" result in combat. Leaders are never demoralized. Demoralized units may be chosen to perform actions normally, although their attack capabilities are less than normal.
Effects of Demoralization–1. A unit with a Demoralize-1 marker is affected as follows: it may not entrench; demoralized units (active or inactive) belonging to the attacker may not contribute in any way to the achievement of a flank attack bonus; its Combat value when attacking is halved, round fractions down to a whole number (Exception: A demoralize-1 unit with a Combat value of 1 or ½ has a Combat value of ½ when attacking) — the unit's Combat value when defending is normal; its Artillery value is 0 in both attack and defense; it may not be selected to participate in a grand assault.
Effects of Demoralization–2. A unit with a Demoralize-2 marker is affected as follows: it may not entrench; demoralized units (active or inactive) belonging to the attacker may not contribute in any way to the achievement of a flank attack bonus; its Combat value when attacking is 1 (Exception: A demoralize-2 unit with a Combat value of 1 or ½ has a Combat value of ½ when attacking) — the unit's Combat value when defending is normal; its Artillery value is 0 in both attack and defense; it may not be selected to participate in a grand assault; if a hex being attacked contains any units with Demoralize-2 markers, the defender may have to subtract 1 from his combat die roll (see 7.4).
Removal of Demoralization Markers. A Demoralized marker remains on top of the unit to which it is assigned wherever that unit moves. However, a unit's Demoralize-1 marker may be removed (or a Demoralize-2 marker flipped to its Demoralize-1 side) during Step 3c of the Recovery Phase if that unit has a Fatigue Level of 0 or 1 (see 8.0).
12.0 Rain
Rain is a random event in all GCACW games. The GCACW Standard Rules do not change the fact that rain effects apply only in the Advanced Game in some games (SJW, AGA, HCR, RTG, SLB, and BAC), and in both Basic and Advanced Games in others (SIV, OTR and GTC). Furthermore, the GCACW Standard Rules do not modify how players determine whether or not rain occurs. Each GCACW game uses its original Random Events Table according to that game's specific rules, without modification. Also, note that in rain turns, units may not perform Entrenching actions, nor may they entrench in the Recovery Phase.
Rain. The Random Events Table has four possible "Rain" results: Rain (Current) — Rain rules are in effect throughout the current turn only; place a Rain marker on the Turn Track in the box corresponding to the current turn. Rain (Current+1) — Rain rules are in effect throughout the current turn and the following turn; place Rain markers on the Turn Track in the boxes corresponding to the current and immediately succeeding turns. Rain (Current+2) — Rain rules are in effect throughout the current turn and the following two turns; place Rain markers on the Turn Track in the boxes corresponding to the current and immediately succeeding two turns. Rain (Current+3) — Rain rules are in effect throughout the current turn and the following three turns; place Rain markers on the Turn Track in the boxes corresponding to the current and immediately succeeding three turns.
Note: If a multiple turn Rain result occurs when there are already one or more Rain markers on the Turn Track, additional markers are placed on the track only if the new Rain result extends the rain time period into turns which did not previously possess a Rain marker. For example, if a "Rain (Current +2)" result occurs on Turn 6, Rain markers are placed in the Turns 6, 7, and 8 boxes on the Turn Track. If on Turn 7 a "Rain (Current +1)" result occurs, no additional Rain markers are placed on the track because the new result does not extend the rain period. However, if on Turn 7 a "Rain (Current +2)" result had occurred, a Rain marker should be added to the Turn 9 box due to the extension of the rain period.
Rain Effects. Provisional Swamps: Provisional swamp hexes function as full swamp hexes in rain turns. If a Rain event occurs while a unit is in a provisional swamp hex with no road, pike, or RR, the unit gains one Fatigue Level and its Strength marker is disorganized. (If it is already disorganized, it is not further affected.) It also must be immediately moved into an adjacent, non-enemy occupied hex. This special movement does not require activation and does not expend MP. It may not be into an enemy ZOC unless there are no non-enemy ZOC present. It also may not be into another swamp hex or across a major/minor river hexside without a bridge or ferry. If no legal hex is available to move into, the unit is eliminated, and VP are awarded for its loss.
Zones of Control: ZOC do not extend across ford or destroyed bridge/ferry hexsides in rain turns. They also do not extend across creek hexsides untraversed by roads, pikes, RR or trail (unless at least one of the two hexes joined by that creek hexside is a city hex).
Attacks: The attacker subtracts 1 from all combat die rolls in rain turns. Attacks cannot be made across ford or destroyed bridge/ferry hexsides in rain turns. Attacks cannot be made across creek hexsides in rain turns unless the hexside is crossed by a road, pike, trails, or RR (or at least one of the two hexes joined by the creek hexside is a city hex). In an attack across a permissible creek hexside in a rain turn, the defender gains a +2 combat die roll modifier (instead of the normal +1).
Movement: If a unit enters a hex across a road or RR hexside in a rain turn, it expends 2 (not 1) MP. A unit entering a hex across a pike hexside expends 1½ (not 1) MP in a rain turn. If a unit enters a mountain hex through a hexside crossed by a trail in a rain turn, it expends 3 MP instead of 2; if a unit enters a non-mountain hex through a hexside crossed by a trail in a rain turn, it expends 2 MP instead of 1. In rain turns, the cost to enter all types of major terrain without benefit of roads, pikes, trails, or RR is increased (see Terrain Chart).
Rivers and Creeks: In rain turns, units may cross minor and major rivers only at bridge, dam, and ferry hexsides — never at fords or destroyed bridges/ferries. Units may cross creeks only across road, pike, RR or trail hexsides in rain turns. Exception: Units may always cross a creek hexside if at least one of the two hexes joined by that hexside is a city hex.
Bridges: Units may not build or repair bridges or ferries in rain turns but may destroy them.
Entrenching: Units may not entrench in rain turns.
River Fordability. In rain turns, units may not use fords to cross major or minor river hexsides. Furthermore, Rain results on the Random Events Table may cause fords to be unusable for an extended period of time after rain turns. Each time a Rain result occurs, the players must place a "Major Rivers Unfordable" and a "Minor Rivers Unfordable" marker on the Turn Track. (If they are already on the Track, they must be advanced a variable number of boxes.) Note: If the game being played does not have either or both of these markers, players may use OTR or GTC markers, or they may make their own.
The placement and movement of these two markers on the Turn Track is governed by the type of Rain result that has occurred and the game being played. When a Rain result occurs in any game, consult the chart below to get a Rain Number for minor rivers.
Minor River Rain Number Table:
| Rain Event | OTR/AIO | SIV | All Others |
|---|---|---|---|
| Rain (Current) | 1 | 0 | 0 |
| Rain (Current +1) | 2 | 1 | 1 |
| Rain (Current +2) | 4 | 3 | 2 |
| Rain (Current +3) | 6 | n/a | 3 |
Place the Minor Rivers Unfordable marker on the Turn Track a number of boxes ahead of the current turn equal to the Minor River Rain Number. If the Minor Rivers Unfordable marker is already on the Turn Track, advance it by a number of turns equal to the Rain Number. Do not place the Minor Rivers Unfordable marker on the Track if the Rain Number is 0.
Next, consult the chart below to get a Rain Number for major rivers.
Major River Rain Number Table:
| Rain Event | OTR/AIO | SIV | All Others |
|---|---|---|---|
| Rain (Current) | 1 | 1 | 1 |
| Rain (Current +1) | 3 | 3 | 2 |
| Rain (Current +2) | 6 | 5 | 3 |
| Rain (Current +3) | 9 | n/a | 4 |
Place the Major Rivers Unfordable marker on the Turn Track a number of boxes ahead of the current turn equal to the Major River Rain Number. If the Major Rivers Unfordable marker is already on the Turn Track, advance it by a number of turns equal to the Rain Number. For example, in any of the games, for a Rain Current result on turn 3, if the Major Rivers Unfordable Marker is not already on the Turn Track, place it on turn 4.
Unfordability Effects. If the Major Rivers Unfordable marker is on the Turn Track, units may not move, retreat, or advance across major rivers at fords in the current turn and all succeeding turns up to and including the box occupied by the marker. If the Minor Rivers Unfordable marker is on the Turn Track, units may not move, retreat, or advance across minor rivers at fords or destroyed bridges/ferries in the current turn and all succeeding turns up to and including the box occupied by the marker. If a unit cannot cross a hexside due to unfordability effects then its ZOC does not extend across that hexside. If a unit uses a ferry to move across a minor river that is currently unfordable, that unit must pay the normal ferry movement point penalty (Manpower value divided by 3, see Section 6.2). Remove a marker from the Turn Track at the end of the turn corresponding to the box it occupies on the Track.
Limited Intelligence (Optional Rule). This optional rule can be used with any game in the series to better reflect the uncertainties of Civil War era command. It does significantly increase the time required to complete a scenario. This rule requires mutual trust between the players and should not be used for competitive play.
The Force Display. As described in Section 6.4, each player may remove stacks of counters and replace them with a Force Marker. Normally, forces kept off-map on the Force Display may be examined by either player at any time. When using these rules, each player's Force Display is kept secret from the enemy player. Hide each player's Force Display behind a screen or under a spare game box lid.
Placing Force Markers. Each player is allowed to utilize up to ten force markers at a time. Not all games in the Great Campaigns series include ten force markers for each player; players should substitute additional counters as necessary.
A player may place one or more force markers during the Action Cycle whenever he possesses the initiative. (He is not required to activate the units being replaced with force markers during this action; he is free to take the action elsewhere). As described in Section 6.4, the units are removed from the map and placed on the force display. Two or more force markers may be simultaneously placed in the same hex (or one or more force markers may be added to a hex that already has a force marker in it) to confuse the enemy about the direction in which a force will move. When more than one force marker is in a hex, the player is free to divide the units in that hex between those forces as he sees fit. A player is permitted to assign no actual units to a force marker; a phantom force of this type is referred to below as a "dummy marker". Dummy markers may be activated and moved (see below), but may not be used to reveal enemy forces, collect VP, or trigger any other action pursuant to the rules that requires the presence of an actual unit.
Placement of force markers must adhere to the following restrictions: a force marker may not be placed adjacent to an enemy unit (unless impassable terrain makes it impossible to move between the two hexes); a force marker may not be placed within two hexes of an enemy cavalry unit. (Exception: A force marker may be placed within two hexes of enemy cavalry if all two-hex paths between the units are blocked by either impassable terrain, or woods between the force marker and the enemy cavalry unit.)
Moving Force Markers. Units on the Force Display must move according to the published rules. A player moving a hidden force still rolls for that force's movement in view of the enemy player. Thus, the enemy player will have a good idea whether or not a friendly force marker contains infantry or cavalry based on the number of dice rolled for the movement. Dummy markers can be moved as either infantry or cavalry (with or without a leader) at the discretion of the owning player. The player's choice of how to move dummy markers should be based on which type of unit he is trying to trick the enemy player into thinking is present in that force. Any extended march rolls should be rolled in view of the enemy player; however, the moving player may make fake extended march rolls for hidden forces to confuse the enemy.
Movement of dummy markers normally requires the player to win initiative and spend an activation. The only exception occurs when more than one force marker starts an activation in the same hex. In that case, one or more dummy markers may be moved from that hex at the same time as the force markers with actual units without requiring a separate activation.
Revealing Enemy Forces. Players replace friendly forces markers with the units they represent (or remove them if they are dummies) in the following cases: if an enemy unit or force marker is adjacent to the friendly force marker (unless impassable terrain makes it impossible to move between the two hexes); if an enemy cavalry unit is within two hexes of the marker. (Exception: A force marker may remain on the map within two hexes of enemy cavalry if all two-hex paths between the units are blocked by either impassable terrain, woods hexsides not crossed by a road, pike, trail, or RR, or a friendly unit in the hex between the force marker and the enemy cavalry unit. Note: This case requires actual cavalry units to be present on the map within two hexes of the force marker; cavalry units under force markers can never reveal the composition of an enemy force.)
Besides removing force markers in the cases listed above, force markers can be voluntarily removed at any time by the owning player (usually when he would rather use them elsewhere on the map).
Recovery Phase Summary. (1) Units at Fatigue Level 0 may entrench, build bridges, or repair bridges and ferries. (They may only perform one of these activities per phase.) (2) Units at Fatigue Level 0, 1, or 2 may forage in the Advanced game. (3) Units at Fatigue Level 0 or 1 may be affected as follows (also see 8.0): (a) Units at Fatigue Level 0 or 1 with disorganized Strength markers have these markers flipped to their organized sides. Exception: In the Advanced Game, out of supply units with disorganized Strength markers are unaffected; their markers remain disorganized (except SLB/RTG). (b) Units at Fatigue Level 0 or 1 which are on their exhausted sides are flipped to their normal sides. (c) Units at Fatigue Level 0 or 1 with Demoralize-1 markers have those markers removed. Units at Fatigue Level 0 or 1 with Demoralize-2 markers have these markers flipped to their Demoralize-1 sides. (4) Units at Fatigue Level 3 or 4 are flipped to their exhausted sides. If they are already exhausted there is no further effect. (5) Units at Fatigue Level 1 or more lose 3 Fatigue Levels (to a minimum of 0). (6) Out of supply units with organized Strength markers in the Advanced Game have these markers flipped to their disorganized sides (except RTG/SLB).
Games of the Great Campaigns of the American Civil War Series. Volume 1: Stonewall Jackson's Way (1992). Volume 2: Here Come the Rebels! (1993). Volume 3: Roads to Gettysburg (1994). Volume 4: Stonewall in the Valley (1995). Volume 5: Stonewall's Last Battle (1996). Volume 6: On to Richmond (1998). Volume 7: Grant Takes Command (2001). Skirmisher Module 1: Burnside Takes Command (2003). Skirmisher Module 2: Rebels in the White House (2003). Volume 8: Battle Above The Clouds (2009). Volume 9: Stonewall Jackson's Way II: Battles of Bull Run (contains redesign of SJW and All Green Alike, 2013). Volume 10: Atlanta Is Ours (2018). Volume 11: Roads to Gettysburg II: Lee Strikes North (contains redesigns of HCR, RTG, and Rebels in the White House, 2018). Volume 12: Hood Strikes North (2020).
Woods Hexside (Restricted ZOC) Summary of Effects. (1) Movement: Restricted ZOC do not restrict movement in any way (Section 6.2). A unit can move through a restricted ZOC without having to stop and can leave a restricted ZOC without having to pay a +1 movement penalty. (2) Attacks: Units may only attack across a woods hexside in certain conditions. Refer to Section 7.0, Combat, Attack Restrictions. (3) Flank Attacks: Restricted ZOC count as covered hexes when computing the basic flank bonus. However, the final flank bonus is reduced by one for each hex covered by a restricted ZOC. Refer to Section 7.4, Flank Attacks. (4) Retreat and Rout: Restricted ZOC affect retreats and routs just like normal ZOC. (5) Command Radius: Restricted ZOC block an enemy leader's command radius just like normal ZOC.
The GCACW Standard Basic Game Rules also print an Entrenchment reference table cross-referencing current entrenchment marker against year (1861–1864) and phase (Action/Recovery), showing the next marker level and resulting combat multiplier; this table restates, in chart form, the entrenchment progressions already given in full in Sections 5.5 and 9.0 above and is not reproduced separately here. It, the Minor and Major River Rain Number Tables (reproduced in prose under Section 12.0 above), and the Combat Results Table, Ratio Chart, Artillery Modifier Summary, Retreat Charts, Extended March Table, and Cavalry Retreat Table live on the separate Charts & Tables handout cards included in the game box.
Hood Strikes North Rules
The Hood Strikes North rules booklet is bundled with the GCACW Standard Basic Game Rules booklet reproduced above. Basic Game rules sections 2.0 through 12.0 are covered entirely by that shared booklet; what follows are the additions and exceptions specific to Hood Strikes North, given at the same section numbers as the Standard Rules they modify, followed by the Basic and Advanced Game scenarios, historical background, map gazetteer, designers' notes, and credits.
Basic Game Rules (Hood Strikes North Additions)
2.2 Playing Pieces
Military Units. The Confederate player has one army leader, Hood; all Confederate units are part of his army. There are three Confederate infantry corps, each with a leader (Cheatham, Lee, Stewart), and one Confederate cavalry corps under Forrest. Forrest has five cavalry divisions, each with a division leader. Two of those divisions only appear in the Advanced Game.
Cleburne: The "4/3" on Cleburne's Confederate infantry division counter means that his Tactical value is 4 when he is attacking (either as an active attacking unit or successfully brought into an assault or grand assault) and 3 when defending.
Thomas: The Union player's units are divided into several groups. However, the army leader Thomas (who can change to Logan in the Advanced Game), commands all Union units in the game. Thus, Thomas (or Logan) may bring any Union unit into a grand assault, just as Hood can bring any Confederate unit into a grand assault. Note: While "DC" stands for the "Department of the Cumberland," Thomas (or Logan) is considered an army leader.
Schofield: Schofield is a Union district leader and units in both IV and XXIII Corps are part of his district in all scenarios. Schofield may only bring infantry (not cavalry) units belonging to IV and XXIII Corps into an assault or grand assault. Note: While IV Corps was not in Schofield's district, Schofield was the senior leader in the field at the start of the campaign; thus, IV Corps was subordinate to him. Note that IV Corps also has its own corps leader.
Milroy: Milroy is a Union district leader and has just "DN" infantry (not cavalry) units under his command. Milroy may only bring DN infantry units into an assault or grand assault.
Smith: The Union leader Smith commands the "DAT" Corps.
Union DE Units: Note that Union "DE" infantry units do not have any leaders.
Wilson: Wilson commands the Union Cavalry Corps, and all Union cavalry belong to his command. Wilson has five cavalry divisions, each with a division leader. Some of these divisions and leaders only appear in the Advanced Game.
Union Wagon Trains. The Union player has three wagon trains (A, B, C). If a wagon train conducts a March action, its Movement Allowance is determined like an infantry unit. One or more wagon trains may also participate in an Activate Leader action with any Union infantry or cavalry leader regardless of command affiliation. If it participates in an infantry leader's Activate Leader action, its Movement Allowance is determined normally, with a +1 die roll modifier. If it participates in a cavalry leader's Activate Leader action, it receives a +1 or +2 die roll modifier (depending on leader type), but its final Movement Allowance is halved (round fractions up). While leaders may activate wagons, a leader may not stack in a hex with just a wagon; a unit of the leader's command must also be in the hex.
- Wagon trains gain Fatigue Levels normally. However, if a wagon conducts an Extended March, the Union player must add 1 to his Extended March die roll in addition to other Extended March Table modifiers. (Exception: If the wagon occupies a hex south of the Duck River, the +1 Extended March modifier for wagons is not applied.) A wagon train may never force march. During the Recovery Phase, wagons become exhausted (or recover from exhaustion) normally. Example: A wagon occupying hex 2613 marches to Fatigue Level 3 on its exhausted side. Its modifiers are +1 for F3/exhausted, +1 for "Other Union Units," and +1 for the special wagon train modifier, or +3 overall. However, if the wagon train occupies hex 1615 (south of the Duck River), the +1 special wagon train modifier is not applied, and the final modifier would be +2, not +3.
- Wagon trains pay Movement Point costs normally. (Exceptions: The first time in a wagon train's March action that it enters a hex across a non-pike hexside, it pays a penalty of 1 extra Movement Point to enter that hex. The second and any later movement across a non-pike hexside in a wagon's march triggers no extra Movement Point penalty. Also, if a wagon train crosses a ford hexside, it must pay a penalty of 2 extra Movement Points to enter the adjacent hex.)
- See Standard Rules section 6.2 and the Standard Charts and Tables for rules on wagons and entering friendly occupied hexes.
- Wagon trains may neither attack nor participate in an assault. They defend normally as infantry units. Wagons may neither entrench nor participate in a Defender's Retreat Option. Confederate cavalry retreats may never be triggered by a Union wagon train.
- Wagon trains exert Zones of Control normally. However, they may never contribute to flank bonuses. Any hexes covered solely by wagon trains' ZOC, or hexes occupied solely by wagons, are not considered to be covered for a flank bonus computation. Wagons stacked in a hex with other units do not contribute their manpower for flanking purposes.
5.2 Activate Leader — Schofield
Schofield is a Union district leader in command of the Army of the Ohio. (He is not an army leader despite his command designation.) If Schofield undertakes an Activate Leader action, he is restricted as follows: he may activate no more than five infantry units (belonging to IV and XXIII Corps only) and three wagon trains as part of the same activation; if he initiates an assault, only IV and XXIII Corps units may participate; if he successfully attempts a grand assault, only IV and XXIII Corps units in eligible hexes may participate.
7.4 Combat Die Roll Modifiers
Hood Assault Bonus. If a Confederate infantry (not cavalry) corps leader successfully undertakes an Assault action and the army leader Hood is stacked in the same hex as the active leader, the Confederate player adds 1 to his attack die roll. This bonus is in addition to the +1 assault modifier and applies regardless of whether a grand assault takes place. The Hood Assault Bonus may be applied more than once per turn, but only to successful assaults initiated by the same corps leader to which the bonus was first applied that turn. It may not be applied to assaults initiated in the current turn by other corps leaders. In following turns, the Hood Assault Bonus may be applied to other corps leaders. The Hood Assault Bonus may not be applied to assaults against a hex with an undestroyed Union fort. (Union forts are only used in the Advanced Game and in Basic Game Scenario 5.)
Forrest Assault Bonus. The Confederate cavalry leader Forrest may carry out Assault actions with two special abilities: Infantry Division Inclusion — When Forrest initiates an Assault action, the Confederate player may specify in Step 1 of the assault procedure that one infantry division (or up to two infantry brigades) stacked in the same hex with Forrest may participate in the assault, even though those units do not belong to Forrest's command. Cavalry units may join in that assault too, although it is not mandatory that they do so. Assault Modifier — If Forrest successfully undertakes an assault, the Confederate player adds 1 to his attack die roll. This bonus is in addition to the +1 assault modifier. This bonus may be applied more than once per turn.
The Forrest Assault Bonus may not be applied to assaults against a hex with an undestroyed Union fort. (Union forts are only used in the Advanced Game and in Basic Game scenario 5.) The Hood Assault Bonus may never be applied to an assault carried out by Forrest. Also, since Forrest is a cavalry leader, a grand assault may never be attempted in an Assault action initiated by Forrest.
Artillery Modifier. In any Confederate attack or assault against a hex with an undestroyed Union fort, if the Confederate player gains an artillery modifier of +1 or +2, that modifier is converted to "No Effect." (Union forts are only used in the Advanced Game and in Basic Game scenario 5.)
9.0 Entrenchments — Union Redoubts
All redoubts on the map are Union redoubts. The Union player has redoubts in hexes 1714 (Fort Mizner), 4111 (Fort Granger), and the exterior Nashville defense line (hexes 5504-5506). Only Union units benefit from redoubts. Standard Rules, 9.0., specify the effects of Union redoubts.
10.0 Bridges
In Hood Strikes North scenarios, standard rules for "Bridges, Dams, and Ferries" apply. However, Hood Strikes North features no dams or ferries. The number of Minor River Bridge counters available in the game (three Union, three Confederate) is a strict limit, and if all are in use, no more may be built until one or more become available again due to dismantling or destruction.
Cumberland River. The Cumberland River is the only major river on the map. Three permanent bridges traverse the Cumberland, connecting Nashville and hexes 5805 and 5806. Only Union units may cross those bridge hexsides by means of marching or retreat. Confederate units may never cross, so hexes 5805 and 5806 are treated as off map to Confederate units. Neither player may build additional bridges or destroy existing bridges across the Cumberland. The Cumberland River has no fords.
Basic Game Scenarios
There are eight Basic Game scenarios of varying degrees of length and complexity. Unless otherwise noted in the following instructions, all units begin the game with their front (normal) sides face-up at Fatigue Level 0 with organized Strength markers. Before starting, place the Turn marker on the Turn Track in the box corresponding to the date on which the scenario begins. This is Turn 1. At the end of the game, calculate Victory Points (VP) and determine a winner. Since combat losses cause VP gain or loss, the players should keep track of Manpower value losses on a piece of paper, or use spare Union and Confederate Manpower counters to track losses for each side on the Victory Point Track.
The entire Hood Strikes North map is used for all scenarios.
Scenario 1: Here Come The Rebels!
NOTES: This quick scenario is ideal for new players to learn the game, either solitaire or with an opponent. There are only a few units for each side and minimal special rules. Also, many Standard Rules sections are not required for this scenario such as Recovery. This scenario covers the opening of the campaign when Confederate cavalry attempted to capture Columbia or block the Union infantry column from reaching the town.
GAME LENGTH: 1 turn, November 24, 1864.
SPECIAL RULES:
- Start: The Confederate player automatically wins the first initiative without the need for a die roll. After this, initiative is determined normally.
- Initiative: The Confederate player wins tied initiative die rolls.
- Hatch: Throughout this scenario, Croxton's cavalry brigade may be activated by Hatch as part of an Activate Leader action even though Croxton belongs to a different division.
- Moore: The first time the Union player activates Moore, he may move Moore up to 43 hexes as long as this movement follows railroad hexes only. If such a move is undertaken, Moore gains two Fatigue Levels. Moore may never enter an enemy ZOC during this movement, unless that hex is Union-occupied.
- Union Movement Restrictions: Union units may not enter any hex in the 01XX hexrow numbered 0120 or less or any hex in the 02XX hexrow numbered 0220 or less. Union units forced to retreat into any of those hexes are eliminated.
VC: Victory Conditions. The Confederate player gains and loses Victory Points (VP) for the following occurrences at the end of the game:
| VP | Reason |
|---|---|
| +12 | If an undemoralized Confederate unit occupies Columbia (1715). |
| +6 | If an undemoralized Confederate unit occupies Ft. Mizner (1714). |
| +3 | For each Union infantry unit that is either not within 3 hexes of Columbia (1715) or has been destroyed (for any reason; combat/retreat losses still apply, see below). This applies to all Union infantry, including Ruger and Moore. |
| +½ | For each undemoralized Confederate cavalry brigade north of the Duck River, rounded up. For example, if 3 undemoralized Confederate cavalry brigades end the game north of the Duck River, 1½ VP are rounded up to 2 VP. |
| +2 | For each point of Union Manpower value lost in combat, retreat, or cavalry retreat (not in extended march, force march, or moving from one enemy ZOC to another). |
| -3 | For each point of Confederate Manpower value lost in combat, retreat, or cavalry retreat (not in extended march, force march, or moving from one enemy ZOC to another). |
At the end of the game, the Confederate VP total is calculated and the players consult the chart below to determine the winner.
| Confederate VP | Winner |
|---|---|
| 15 or more | Confederate Decisive Victory |
| 12 to 14 | Confederate Substantive Victory |
| 9 to 11 | Confederate Marginal Victory |
| 6 to 8 | Union Marginal Victory |
| 3 to 5 | Union Substantive Victory |
| 2 or less | Union Decisive Victory |
Confederate Set-Up.
| Unit/Leader | Size | Command | Type | Manpower Value | Hex |
|---|---|---|---|---|---|
| Forrest | Corps | Cav | Ldr | – | 0511 (Poplar Grove) |
| Chalmers | Div | C-Cav | Ldr | – | 0511 (Poplar Grove) |
| Rucker | Brig | C-Cav | Cav | 2 | 0511 (Poplar Grove) |
| Biffle | Brig | C-Cav | Cav | 1 | 0511 (Poplar Grove) |
# Begins game with Fatigue Level 1 marker.
Union Set-Up.
| Unit/Leader | Size | Command | Type | Manpower Value | Hex |
|---|---|---|---|---|---|
| Schofield | District | Ohio | Ldr | – | 1220 (Pleasant Grove) |
| Cox | Div | XXIII | Inf | 11 | 1220 (Pleasant Grove) |
| Ruger | Div | XXIII | Inf | 2* | 1715 (Columbia) |
| O. Moore | Brig | XXIII | Inf | 4 | 5707 (Nashville) |
* Begins game under Fort marker. # Begins game with Fatigue Level 1 marker. † Begins game on Exhausted side. Note: A Duck River Bridge marker is also in play at the start of this scenario.
Scenario 2: The Race For Columbia
NOTES: As Hood's Confederate Army of the Tennessee initiates its long-delayed offensive from northern Alabama into central Tennessee, two Union corps under the command of Maj. Gen John Schofield rush northward toward Columbia to avoid being cut off from the major Union base at Nashville by the onrushing Rebel army. The last major Confederate offensive of the Civil War is underway.
GAME LENGTH: 7 turns, November 23–November 29, 1864.
SPECIAL RULES:
- Turn 1 Start: On Turn 1, the Union player automatically wins the first initiative without the need for a die roll. Afterward, initiative is determined normally.
- Initiative: The Confederate player wins tied initiative die rolls.
- Union Wagon Trains: Wagon trains are subject to several movement and combat restrictions; see Basic Game rules, 2.2.
- Union 01XX/02XX Hexrow Movement Restrictions: Union units may not enter any hex in the 01XX hexrow numbered 0120 or less or any hex in the 02XX hexrow numbered 0220 or less. If forced to retreat into any of those hexes, a Union unit is eliminated.
- Union Consolidation: When the Union player gains initiative, he may "consolidate" units instead of declaring an action as long as any subordinate units belonging to Ruger's division (Moore, 91 IN, 123 IN, 175 OH) are stacked in the same hex as Ruger; Opdycke's brigade is stacked in the same hex as Wagner's division; Post's brigade is stacked in the same hex as Wood's division; or Waters' brigade is stacked in the same hex as Whitaker's division. After performing consolidation, the players roll for the next initiative. There is no fatigue cost to consolidate; consolidating units may be at any fatigue level. Consolidated units may activate, but not until the Union player again gains initiative. Brigades or regiments consolidating with a division are removed. The division's Strength marker is removed and replaced by a new one with a Manpower value equal to the combined units. (Exception: The maximum Manpower value of the new Strength marker is 11.) The Strength marker is placed on the same side as the unit with the highest Manpower value. (If the values are the same, the Union player may place the new Strength marker on the same side as any consolidating unit.) If the division is exhausted or demoralized, it remains so. The division retains its current fatigue level, even if consolidating units had different levels.
- Hatch and Croxton: Throughout this scenario, Croxton's Union cavalry brigade may be activated by division leader Hatch as part of an Activate Leader action even though Croxton belongs to a different division.
- Moore: The first time the Union player activates Moore's brigade (which may not be on Turn 1; see below), he may move Moore up to 43 hexes as long as this movement follows railroad hexes only. If such a move is undertaken, Moore gains two fatigue levels. It may end this move in any railroad hex (not just a railroad station hex), but it may never enter an enemy ZOC during this movement (even if that ZOC is Union-occupied), nor may it enter an enemy-occupied hex. Also, Moore may not enter a hex with a "RR Station Damaged/Destroyed" marker.
Arrival Table:
| Die Result | Sets |
|---|---|
| -3 or less | 0 |
| -2 | 1* |
| -1 | 2* |
| 0 | 2 |
| 1 | 3 |
| 2 | 4 |
| 3 | 5 |
| 4 or more | 6 |
Modifiers: -7 on the Turn 2 die roll; -4 on the Turn 3 die roll; 0 on the Turn 4 die roll; +3 on the Turn 5 die roll. * Place a Fatigue Level 1 marker under the Confederate division arriving on the map.
The numbered result, from 0 to 6, is the number of "sets" of infantry divisions/leaders the Confederate player must place on the map in the current turn. Consult the Confederate Arrivals list, below: Nine sets of Confederate divisions/leaders are listed, numbered 1 to 9. When the Confederate player gains initiative in a turn in which he is due one or more sets of arrivals, he may either activate units already on the map or he may choose the lowest-numbered available set that has not yet arrived and place all the units comprising that set together in one of the entry hexes specified in the range indicated on the Arrival list. Infantry divisions are always placed on the map at Fatigue Level 0. (Exceptions: On the Arrival Table, -1 and -2 results require the Confederate player to place a Fatigue Level 1 marker on an arriving division. Also, the Arrival list provides a range of alternative entry hexes, and if an alternative hex is chosen for entry, each division arrives on the map at one fatigue level higher than the initial fatigue level required by the Arrival Table.)
When the Confederate player places an available set on the map, he must always choose the lowest-numbered set that has not yet arrived. Leaders (if any) must be placed atop an arriving infantry division. As soon as the Confederate player places a set on the map, he must immediately declare a March or Activate Leader action with the arriving set, which is carried out normally, including fatigue level gain for each activated unit. (Exception: In the first March or Activate Leader action undertaken by a set following its placement on the map, one is added to the Movement Allowance die roll in addition to other die roll modifiers. Thus, in a March action, the Confederate player adds 2 — not 1 — to his roll; in an Activate Leader action, he adds 3 — not 2 — to his roll.) When all nine arrival sets have been placed on the map, the Confederate player no longer consults the Arrival Table at the start of an Action Cycle.
- Late Rain: Starting on Turn 3, if both players roll a 1 during the Initiative Segment, "Late Rain" rules are in effect for the current turn only. (Exception: Late Rain only takes effect if both players have gained initiative at least once earlier in the turn; otherwise, double-1's are ignored. For example, if the Confederate player gains his first initiative in a turn with a double-1 roll, Late Rain does not take effect.) If Late Rain occurs, Rain rules (see Standard rules, 12.0) are applied for the rest of the turn. As soon as Late Rain takes place, Entrenchment actions may no longer be undertaken for the rest of the Action Cycle. However, entrenchment and pontoon bridge construction are permitted in the Recovery Phase.
VC: Victory Conditions. The Union player gains and loses Victory Points (VP) for the following occurrences at the end of the game:
+7 — The Union player has five infantry divisions (Whitaker, Wagner, Wood, Ruger, Cox) and three wagon trains (A, B, C). At the end of the game, the Union player receives 7 VP for each infantry division and wagon train that either occupies Franklin (4010) or Nashville (5706/5707); or can achieve a "Line of Communication" (LOC) to Franklin or Nashville. An LOC is successfully traced by either of the following two methods: 1) A Union unit can trace a path of continuous hexes no more than 10 Movement Points in length from the hex it occupies to Franklin or Nashville; or, 2) A Union unit occupies a pike hex or can trace a path no more than three hexes in length to a pike, regardless of terrain, and then can trace a continuous path of pike hexes no more than 12 hexes in length to Franklin or Nashville. Note: No part of an LOC (including a 10 MP path directly to Franklin or Nashville, a 3-hex path to a pike, or a 12-hex path along a pike) may enter a hex occupied by an undemoralized Confederate unit or units (infantry and/or cavalry) with a combined Combat value of 3 or more. Confederate cavalry units' combined Combat values are halved (round fractions down) when determining if this condition is fulfilled. An LOC is permitted to enter all Confederate ZOC and hexes occupied by Confederate units with a combined Combat value less than 3. Demoralized Confederate units' Combat values are never taken into account in an LOC calculation.
-2 — For each point of Union Manpower value lost in combat, retreat, or cavalry retreat (not in extended march, force march, or moving from one enemy ZOC to another). Exception: The Union player loses 2 VP for each point of Manpower value lost by a Union wagon train for any reason, including in an extended march and for moving from one enemy ZOC to another.
+3 — For each point of Confederate Manpower value lost in combat, retreat, or cavalry retreat (not in extended march, force march, or moving from one enemy ZOC to another).
-4 — If the RR station Brentwood (4910) has a Damaged or Destroyed marker at the end of the game.
-12 — If an undemoralized Confederate unit of any type enters or retreats into Columbia (1715) on Turn 4 or earlier. This VP loss may only be applied once, at the end of the game, and may not be applied if a Confederate unit enters Columbia on Turn 5 or later. Exceptions: If at any time on Turn 4 or earlier, all Union wagon trains on the map are situated six or fewer hexes from Franklin (4010), regardless of Confederate units or their ZOC, this victory condition is voided and may never be applied at the end of the game. Even if one or two Union wagons have been eliminated, this victory condition is voided as long as all surviving Union wagons are situated 6 or fewer hexes from Franklin on Turn 4 or earlier. Also, this VP deduction is not applied if a Confederate unit routs into Columbia.
At the end of the game, the Union VP total is calculated and the players consult the chart below to determine the winner.
| Union VP | Winner |
|---|---|
| 66 or more | Union Decisive Victory |
| 53 to 65 | Union Substantive Victory |
| 40 to 52 | Union Marginal Victory |
| 27 to 39 | Confederate Marginal Victory |
| 14 to 26 | Confederate Substantive Victory |
| 13 or less | Confederate Decisive Victory |
Confederate Set-Up.
| Unit/Leader | Size | Command | Type | Manpower Value | Hex |
|---|---|---|---|---|---|
| Forrest | Corps | Cav | Ldr | – | 0111 |
| Chalmers | Div | C-Cav | Ldr | – | 0111 |
| Rucker | Brig | C-Cav | Cav | 2* | 0111 |
| Biffle | Brig | C-Cav | Cav | 1* | 0111 |
| Buford |
* Placed on map on Exhausted side with Fatigue 1 marker. + Units may not activate on Turn 1 and do not recover on Turn 1 (see special rules).
Confederate Arrivals (Turns 2 and Later).
| Unit/Leader | Set | Size | Command | Type | Manpower Value | Entry Hexes | Alternative Entry Hexes |
|---|---|---|---|---|---|---|---|
| Lee | 1 | Corps | L | Ldr | – | 0110 to 0114 | 0101 to 0109 |
| Johnson | 1 | Div | L | Inf | 7 | 0110 to 0114 | 0101 to 0109 |
| Stevenson-A | 2 | Div | L | Inf | 7 | 0110 to 0114 |
Union Set-Up.
| Unit/Leader | Size | Command | Type | Manpower Value | Hex |
|---|---|---|---|---|---|
| Schofield | District | Ohio | Ldr | – | 0523 (Laurine) |
| Cox | Div | XXIII | Inf | 11 | 0523 (Laurine) |
| Ruger | Div | XXIII | Inf | 2• | 1715 (Columbia) |
| 123 IN | Regt | XXIII | Inf | 2*+ | 1303 |
• Begins game under Fort-Build-1 marker. * Begins game under Fort marker. + Units have activation, transfer, and recovery restrictions; see Special Rule 8. # Begins game on Exhausted side with Fatigue Level 1 marker.
Scenario 3: A Great Chance Was Lost
NOTES: As Hood's Confederate Army of the Tennessee launches a daring flanking maneuver across the Duck River to encircle the Union army entrenched at Columbia, Schofield belatedly orders his men to withdraw northward toward Franklin to avoid the trap. It is almost too late.
GAME LENGTH: 2 turns, November 28–November 29, 1864.
SPECIAL RULES:
- Turn 1: On Turn 1, the Confederate player automatically wins the first initiative without the need for a die roll. Afterward, initiative is determined normally.
- Initiative: The Confederate player wins tied initiative die rolls.
- Turn 1 Movement Restrictions: On Turn 1, both players may only activate cavalry units or cavalry leaders. Infantry units/leaders and wagon trains may neither activate nor entrench. Exceptions: Stewart's cavalry brigade and the 12 TN cavalry regiment (both Union units) may neither activate nor entrench on Turn 1. A Union unit is released from Turn 1 restrictions if it is attacked by a Confederate unit or a Confederate unit ends a March action one or two hexes away from that unit.
- 12 TN Cavalry Regiment (Union): The Strength marker of the Union cavalry regiment 12 TN begins the game on its Disorganized side. During the Turn 1 Recovery Phase, the 12 TN's Strength marker remains Disorganized; it is not flipped to its Organized side.
- Hammond's Cavalry Brigade (Union): The Union cavalry brigade Hammond must remain in Davidson, Williamson, or Rutherford Counties throughout the scenario. If forced to retreat outside of these counties, it is eliminated.
- Union Wagon Trains: Wagon trains are subject to several movement and combat restrictions; see Basic Game rules.
- R. Johnson and Croxton: Throughout this scenario, Croxton's Union cavalry brigade may be activated by division leader R. Johnson as part of an Activate Leader action even though Croxton belongs to a different division.
- Stewart and Johnson: Throughout this scenario, Johnson's Confederate infantry division (part of Lee's corps) may be activated by corps leaders Stewart or Lee as part of an Activate Leader action or participate in an Assault action by Stewart or Lee.
- Confederate Infantry March Bonus: Because Hood left most of his artillery behind when he initiated his flanking movement over the Duck River, the Confederate player receives a March Bonus for most of his infantry units in this scenario. (a) March Bonus Effect: The minimum Movement Allowance of a Confederate infantry division undertaking a march as part of a Leader Activation action is 6 Movement Points. The minimum Movement Allowance of a Confederate infantry division undertaking a normal March action is 5 Movement Points. (Exceptions: The infantry divisions Clayton and Stevenson are not eligible for this bonus.) (b) Artillery Penalty: All Confederate infantry divisions except for Clayton and Stevenson have Artillery Values of 0 in this scenario. Clayton and Stevenson use their printed Artillery Values.
VC: Victory Conditions. The Union player gains and loses Victory Points (VP) for the following occurrences at the end of the game:
+7 — The Union player has five infantry divisions (Kimball, Wagner, Wood, Ruger, Cox) and three wagon trains (A, B, C). At the end of the game, the Union player receives 7 VP for each infantry division and wagon train that either occupies Franklin (4010) or can achieve a "Line of Communication" (LOC) to Franklin. An LOC is successfully traced by either of the following two methods: 1) A Union unit can trace a path of continuous hexes no more than 10 Movement Points in length from the hex it occupies to Franklin. 2) A Union unit occupies a pike hex or can trace a path no more than three hexes in length to a pike, regardless of terrain, and then can trace a continuous path of pike hexes no more than 12 hexes in length to Franklin. Note: No part of an LOC (including a 10 MP path to Franklin, a 3-hex path to a pike, or a 12-hex path along a pike) may enter a hex occupied by an undemoralized Confederate unit or units (infantry and/or cavalry) with a combined Combat value of 3 or more. Confederate cavalry units' combined Combat values are halved (round fractions down) when determining if this condition is fulfilled. An LOC is permitted to enter all Confederate ZOC and hexes occupied by Confederate units with a combined Combat value of less than 3. Demoralized Confederate units' Combat values are never taken into account in an LOC calculation. If undemoralized Confederate units with a combined Combat value of 3 or more occupy Franklin (4010) at the end of the game, no Union unit may successfully trace an LOC.
-2 — For each point of Union Manpower value lost in combat, retreat, or cavalry retreat (not in extended march, force march, or moving from one enemy ZOC to another). Exception: The Union player loses 2 VP for each point of Manpower value lost by a Union wagon train for any reason, including in an extended march and for moving from one enemy ZOC to another.
+3 — For each point of Confederate Manpower value lost in combat, retreat, or cavalry retreat (not in extended march, force march, or moving from one enemy ZOC to another).
At the end of the game, the Union VP total is calculated and the players consult the chart below to determine the winner.
| Union VP | Winner |
|---|---|
| 63 or more | Union Decisive Victory |
| 48 to 62 | Union Substantive Victory |
| 32 to 47 | Union Marginal Victory |
| 14 to 31 | Confederate Marginal Victory |
| -2 to 13 | Confederate Substantive Victory |
| -3 or less | Confederate Decisive Victory |
Confederate Set-Up.
| Unit/Leader | Size | Command | Type | Manpower Value | Hex |
|---|---|---|---|---|---|
| Hood | Army | AT | Ldr | –+ | 1417 |
| Cheatham | Corps | C | Ldr | –+ | 1417 |
| Cleburne | Div | C | Inf | 7+ | 1417 |
| Bate-A | Div | C | Inf | 5+ | 1417 |
| Brown |
* May be activated by either Lee or Stewart in a Leader Activation action. + May not activate or entrench on Turn 1.
Union Set-Up.
| Unit/Leader | Size | Command | Type | Manpower Value | Hex |
|---|---|---|---|---|---|
| Schofield | District | Ohio | Ldr | –+ | 1814 (Annoatuck) |
| Cox | Div | XXIII | Inf | 11*+ | 1814 (Annoatuck) |
| Ruger | Div | XXIII | Inf | 8*+ | 1913 (Duck River Station) |
| Wood | Div | IV | Inf | 8+ | 1915 (Blacksmith) |
* Begins game under Fort marker. + May not activate or entrench on Turn 1. # Strength marker placed on Disorganized side and may not recover on Turn 1.
Scenario 4: We Will Make The Fight
NOTES: After Union troops slipped away at Spring Hill the night of November 29, they moved north on the pike to Franklin, and dug in to allow time to cross the Harpeth River. Hood immediately declared "We will make the fight," and attacked the strong Union position, deciding he did not have time for a flanking movement before the enemy could pull back to Nashville. The ensuing battle was a disaster for the Confederate army, with casualties of approximately 7,000, compared to about 2,500 for the Union.
GAME LENGTH: 2 turns, November 30–December 1, 1864.
SPECIAL RULES:
- Turn 1 Start: On Turn 1, the Union player automatically wins the first three initiatives without the need for die rolls. Afterward, initiative is determined normally. In these three Activation Segments, infantry and cavalry units may not be activated multiple times, although leaders and wagons may activate multiple times. In these three initiatives, when infantry units and wagons are activated as part of a March or Activate Leader action, the minimum die roll is 3. Die rolls of 1 and 2 are converted to 3. This minimum die roll does not apply to cavalry activations.
- Initiative: The Confederate player wins tied initiative die rolls.
- Union Wagon Trains: The Union player has three wagon trains that operate as described in the Basic Rules. Exception: In this scenario, wagons must pay a 1 Movement Point penalty to cross any bridge.
- Union DAT Corps: Smith, McArthur, and J. Moore may not activate on Turn 1.
- Croxton: Croxton's Union cavalry brigade may be activated by division leader R. Johnson as part of an Activate Leader or Assault action even though Croxton belongs to a different division.
- Confederate Movement Restriction: Confederate units may not move, attack, or retreat to within 3 hexes of any Nashville city hex.
- Johnson: Johnson's Confederate division, a part of Lee's Corps, may be activated by corps leaders Stewart or Lee as part of an Activate Leader or Assault action.
- Cleburne: Use the "Death of Cleburne" Advanced Game rule section (6.0) in this scenario.
- Confederate Infantry March Bonus: Because Hood left most of his artillery behind when he initiated his flanking movement over the Duck River, the Confederate player receives a March Bonus for most of his infantry units in this scenario on Turn 1. The following rules are only in effect on Turn 1. Historical note: The artillery caught up with the army the evening of November 30 and was distributed back to the various divisions. (a) March Bonus Effect: The minimum Movement Allowance of a Confederate infantry division undertaking a march as part of a Leader Activation action is 5 Movement Points. The minimum Movement Allowance of a Confederate infantry division undertaking a normal March action is 4 Movement Points. (Note that these bonuses are one less than in Scenario 3.) Exceptions: The infantry divisions Clayton and Stevenson are not eligible for this bonus. (b) Artillery Penalty: All Confederate infantry divisions, except for Clayton and Stevenson, have Artillery Values of 0 on Turn 1 instead of their printed values. Clayton and Stevenson use their printed values.
VC: Victory Conditions. The Union player gains and loses Victory Points (VP) for the following occurrences at the end of the game:
-40 — If an undemoralized Confederate unit enters Franklin (4010) on Turn 1. This VP award may only be gained once per game, and only on Turn 1.
+7 — For each Union infantry division (not brigade) and wagon train that can trace an LOC to either Nashville city hex. There are 7 such infantry divisions and 3 such wagons. An LOC is defined as a path of continuous hexes, no more than 13 Movement Points in length, from a unit's hex to either Nashville city hex (not counting the hex the unit occupies, but counting the Nashville hex). The path may not enter a hex occupied by, or in the ZOC of, an undemoralized Confederate unit(s) with a combined Combat value of 3 or more. Confederate cavalry units' combined Combat values are halved (round fractions down) in this calculation. Demoralized Confederate units' Combat values are not included in this calculation. Exception: A hex with a Confederate ZOC that would block the LOC per the above does not block the LOC if the hex is occupied by an undemoralized Union infantry or cavalry unit. In calculating the Movement Points in this path, do not add 1 to exit an enemy ZOC. However, wagons must still pay a +1 Movement Point penalty the first time their path enters a non-pike hex. Movement Point penalties to enter a friendly-occupied hex do not apply when calculating this path.
-2 — For each point of Union Manpower value lost in combat, retreat, or cavalry retreat (not in extended march, force march, or moving from one enemy ZOC to another). Note: In this scenario, wagons that lose manpower in an extended march or moving from one enemy ZOC to another do not cause a VP loss.
+3 — For each point of Confederate Manpower value lost in combat, retreat, or cavalry retreat (not in extended march, force march, or moving from one enemy ZOC to another).
At the end of the game, the Union VP total is calculated and the players consult the chart below to determine the winner.
| Union VP | Winner |
|---|---|
| 70 or more | Union Decisive Victory |
| 63 to 69 | Union Substantive Victory |
| 56 to 62 | Union Marginal Victory |
| 49 to 55 | Confederate Marginal Victory |
| 42 to 48 | Confederate Substantive Victory |
| 41 or less | Confederate Decisive Victory |
Confederate Set-Up.
| Unit/Leader | Size | Command | Type | Manpower Value | Hex |
|---|---|---|---|---|---|
| Hood | Army | AT | Ldr | – | 2814 (M. Cheairs Home) |
| Cheatham | Corps | C | Ldr | – | 2814 (M. Cheairs Home) |
| Cleburne | Div | C | Inf | 7* | 2814 (M. Cheairs Home) |
| Bate-A | Div | C | Inf | 5* | 2814 (M. Cheairs Home) |
* Begins game on Exhausted side.
Union Set-Up.
| Unit/Leader | Size | Command | Type | Manpower Value | Hex |
|---|---|---|---|---|---|
| Schofield | District | Ohio | Ldr | – | 3911 (Carter) |
| Cox | Div | XXIII | Inf | 11# | 3911 (Carter) |
| Ruger | Div | XXIII | Inf | 10# | 3811 (Toll house) |
| Wagon Train A | – | – | Wag | 2* | 3811 (Toll house) |
- May not activate on Turn 1 (see Special Rule 4). * Begins game on Exhausted side. # Begins game on Exhausted side, with Disorganized Strength marker, at Fatigue Level 1.
"I hereupon decided, before the enemy would be able to reach his stronghold at Nashville, to make that same afternoon another and final effort to overtake and rout him, and drive him in the Big Harpeth river at Franklin, since I could no longer hope to get between him and Nashville, by reason of the short distance from Franklin to that city, and the advantage which the Federals enjoyed in the possession of the direct road." — John Bell Hood, Advance and Retreat
"In all my intimate acquaintance with Schofield, I never saw him so manifestly disturbed by the situation he was in... Pale and jaded from the long strain of the 48 hours just past, he spoke with a deep earnestness of feeling he rarely showed. 'General,' he said, 'The pontoons are not here, the county bridge is gone, and the ford is hardly passable. You must take command of XXIII Corps and put it in position here to hold Hood back at all hazards till we can get our trains over and fight with the river in front of us.'" — Jacob Cox, The Battle of Franklin
Scenario 5: The Enemy Was Badly Whipped
NOTES: Following the Battle of Franklin, General Hood ordered most of Forrest's cavalry to cut the vital railroad line between Nashville and Murfreesboro. The Rebel horsemen set out in early December, attacking a series of Union blockhouses as they rode southward along the Nashville and Chattanooga Railroad. Simultaneously, Hood dispatched a single infantry division under Bate to probe the Union defenses of Murfreesboro. The 5,000 Union defenders of Murfreesboro, now cut off from their main base at Nashville, prepared to defend their outpost against the rapidly approaching Rebels.
GAME LENGTH: 4 turns, December 4–December 7, 1864.
SPECIAL RULES:
-
Turn 1: On Turn 1, the Confederate player automatically wins the first initiative. Afterward, initiative die rolls take place normally.
-
Initiative: The Confederate player wins tied initiative die rolls.
-
Union Blockhouses: Seven Union Blockhouse markers begin the game on various Nashville and Chattanooga railroad hexes. The Confederate player gains Victory Points for their destruction. Both players' units may enter, pass through, or end a march or retreat in a hex with a Blockhouse, except if the hex is enemy-occupied. A Blockhouse does not exert ZOC and has no effect on movement, retreat, or a command radius. It has no Combat or Artillery value and may neither activate nor entrench. It remains in place throughout the game unless it is destroyed. Confederate units may attack Blockhouses according to a special procedure (see below).
(a) Confederate Attacks on Blockhouses: Confederate units may only attack a Blockhouse if they occupy the same hex as the Blockhouse marker. Upon entering or beginning a march in a hex occupied by a Blockhouse, a marching Confederate unit may attack it. To do so, the Confederate player declares the type of attack (column of route, hasty, normal, or prepared) and expends a number of Movement Points equal to the attack type's MP cost. However, the normal combat procedure is ignored: Combat and Artillery values are not calculated, and the Combat Chart is not consulted. Instead, the Confederate player rolls a single die, modifies the die roll if necessary, and consults the Blockhouse Table, below.
Blockhouse Table:
Die Result Effect 2 or less No Effect (+2 FL) 3 No Effect (+1 FL) 4 No Effect
VC: Victory Conditions. The Confederate player gains and loses Victory Points (VP) for the following occurrences at the end of the game:
+12 — If one or more undemoralized Confederate units with a combined Combat value of 1 or more (unmodified by entrenchments) end the game in Fortress Rosecrans-East (5231) or Fortress Rosecrans-West (5131). The maximum VP award for this achievement, no matter how many Confederate units end the game in these hexes, is 12.
+6 — If one or more undemoralized Confederate units with a combined Combat value of 1 or more (unmodified by entrenchments) end the game in Murfreesboro (5232).
+6 — For each "Destroyed" result the Confederate player achieves on the Blockhouse Table.
+3 — If one or more undemoralized Confederate units with a combined Combat value of 1 or more (unmodified by entrenchments) end the game in Maple Grove (4934). (Exception: If the Confederate player also achieves 6 VP for occupying Murfreesboro at the end of the game, he may not gain 3 VP for also occupying Maple Grove.)
+3 — If one or more undemoralized Confederate units with a combined Combat value of 1 or more (unmodified by entrenchments) end the game in Salem (4730).
+3 — If one or more undemoralized Confederate units with a combined Combat value of 1 or more (unmodified by entrenchments) end the game in Catalpa (5028).
+2 — For each point of Union Manpower value lost in combat, retreat, or cavalry retreat (not in extended march, force march, or moving from one enemy ZOC to another).
-3 — For each point of Confederate Manpower value lost in combat, retreat, or cavalry retreat (not in extended march, force march, or moving from one enemy ZOC to another).
At the end of the game, the Confederate VP total is calculated and the players consult the chart below to determine the winner.
| Confederate VP | Winner |
|---|---|
| 58 or more | Confederate Decisive Victory |
| 51-57 | Confederate Substantive Victory |
| 43-50 | Confederate Marginal Victory |
| 35-42 | Union Marginal Victory |
| 28-34 | Union Substantive Victory |
| 27 or less | Union Decisive Victory |
Confederate Set-Up.
| Unit/Leader | Size | Command | Type | Manpower Value | Hex |
|---|---|---|---|---|---|
| Forrest | Corps | C | Ldr | – | 5810 (Franklin College) |
| Jackson | Div | J-Cav | Ldr | – | 5810 (Franklin College) |
| Armstrong | Brig | J-Cav | Cav | 2 | 5810 (Franklin College) |
| Ross | Brig | J-Cav | Cav | 1 | 5810 (Franklin College) |
Union Set-Up.
| Unit/Leader | Size | Command | Type | Manpower Value | Hex |
|---|---|---|---|---|---|
| Milroy | District | DMT | Ldr | – | 5232 (Murfreesboro) |
| Thomas | Brig | DMT | Inf | 4 | 5232 (Murfreesboro) |
| Anderson | Brig | DMT | Inf | 4+ | 5232 (Murfreesboro) |
| Van Cleve | Brig | DMT | Inf | 2+* | 5131 (Fortress Rosecrans-West) |
- May not activate until Turn 2. * Begins game under Fort marker.
Scenario 6: The Battle Of Nashville
NOTES: After devastating losses at the Battle of Franklin, Hood advanced his army to the outskirts of Nashville, not in any expectation of attacking, but mostly to preserve morale. Thomas waited through two weeks of bad weather while his cavalry refitted, before finally attacking. On both days of the ensuing battle, the Union concentrated on the Confederate left flank, smashing it on both days. At the end of the engagement, Hood's army was in full retreat southward, and with it the last forlorn hope of the Confederacy was shattered.
GAME LENGTH: 2 turns, December 15–December 16, 1864.
SPECIAL RULES:
- Turn 1 Start: The Leader Transfer Phase is skipped on Turn 1. The Union player automatically wins the first initiative on Turn 1 without the need for a die roll. In the next Initiative Segment, the Confederate player automatically wins initiative without the need for a die roll. Afterward, initiative is determined normally.
- Initiative: If both players obtain the same initiative die roll, the Union player wins tied rolls of 1-1, 2-2, and 3-3; the Confederate wins tied rolls of 4-4, 5-5, and 6-6.
- Union Movement Restrictions: Union units may not move or attack into hexes 5809, 5710, 5610, and hex column "44" (hexes 4401 to 4433). They may retreat into those hexes without penalty. Units retreating into any of those hexes are removed from the game with no VP penalty. These hexes are not treated as off-map to the Union for flank modifier purposes.
- Confederate Movement Restriction: Confederate units may not move, attack, or retreat into any hex within 2 hexes of Nashville (5706 and 5707).
- Croxton: Throughout this scenario, Croxton's Union cavalry brigade may be activated by division leader R. Johnson as part of an Activate Leader action even though Croxton belongs to a different division.
- Biddle: The Unmounted counter accompanying Biddle's Union cavalry brigade indicates that it operates as an unmounted cavalry unit for the entire scenario (see Advanced Rules, 5.5).
VC: Victory Conditions. The Union player gains and loses Victory Points (VP) for the following occurrences at the end of the game (unless otherwise stated):
+30 — If an undemoralized Union infantry unit occupies Brentwood (4910) and no undemoralized Confederate infantry unit is adjacent to Brentwood.
+15 — If an undemoralized Union infantry unit occupies Brentwood (4910) and an undemoralized Confederate infantry unit is adjacent to Brentwood.
If the Union player does not gain any VP for Brentwood occupation (see above), he gains 4 VP for each hex in Williamson County adjacent to Brentwood occupied by an undemoralized Union infantry unit.
+10 — If at the end of Turn 1, an undemoralized Union infantry unit occupies Brentwood (4910). These VP are in addition to any VP awarded for Brentwood at the end of the game (see above).
+25 — If no undemoralized Confederate infantry division is within 2 hexes of Brentwood (4910). These VP are in addition to any VP awarded for Union occupation of or adjacency to Brentwood at the end of the game (see above).
+3 — For each Confederate infantry division in Davidson County that cannot trace a Line of Communication (LOC) to Brentwood or Columbia (1715). The LOC is traced from a division's hex to Brentwood or Columbia by any path of continuous hexes that does not enter an enemy-occupied hex or a ZOC of an undemoralized Union unit, unless that ZOC is occupied by an undemoralized Confederate unit.
-2 — For each point of Union Manpower value lost in combat, retreat, or cavalry retreat (not in extended march, force march, or moving from one enemy ZOC to another).
+3 — For each point of Confederate Manpower value lost in combat, retreat, or cavalry retreat (not in extended march, force march, or moving from one enemy ZOC to another).
At the end of the game, the Union VP total is calculated and the players consult the chart below to determine the winner.
| Union VP | Winner |
|---|---|
| 55 or more | Union Decisive Victory |
| 45 to 54 | Union Substantive Victory |
| 35 to 44 | Union Marginal Victory |
| 25 to 34 | Confederate Marginal Victory |
| 15 to 24 | Confederate Substantive Victory |
| 14 or less | Confederate Decisive Victory |
Confederate Set-Up.
| Unit/Leader | Size | Command | Type | Manpower Value | Hex |
|---|---|---|---|---|---|
| Cheatham | Corps | C | Ldr | – | 5509 (Flat Rock) |
| Smith-A | Div | C | Inf | 3* | 5509 (Flat Rock) |
| Bate-A | Div | C | Inf | 3* | 5509 (Flat Rock) |
| Lowrey | Div | C | Inf | 6* | 5408 |
* Begins game under a Breastworks marker.
Union Set-Up.
| Unit/Leader | Size | Command | Type | Manpower Value | Hex |
|---|---|---|---|---|---|
| Steedman | Div | DE | Inf | 11 | 5707 (Nashville) |
| Morgan (USCT) | Brig | DE | Inf | 6 | 5807 (Reservoir) |
| Thompson (USCT) | Brig | DE | Inf | 4 | 5708 |
| Schofield | District | Ohio | Ldr | – | 5607 (Fort Negley) |
* Place Unmounted counter on top of Biddle; accompanies him the entire game (see Advanced Game, 5.5).
Scenario 7: Hood's Retreat
NOTES: The Confederate army retreated south in disorder following the two-day Battle of Nashville. Hood now needed to save what was left of his army by pulling away from the pursuing Union forces and get across the Tennessee River, far to the south. In the three days that followed the Battle of Nashville, the Confederates successfully retreated in good order to relative safety across the Duck River at Columbia. Union forces triggered several engagements along the way, but were not able to significantly delay the retreating Rebels.
GAME LENGTH: 3 turns, December 17–December 19, 1864.
SPECIAL RULES:
- Turn 1 Start: On Turn 1, the Confederate player automatically wins the first two initiatives without the need for a die roll. Then the Union player automatically wins the third initiative without the need for a die roll. Afterward, initiative is determined normally.
- Initiative: If both players obtain the same initiative die roll, the Union player wins tied rolls of 1-1, 2-2, and 3-3; the Confederate wins tied rolls of 4-4, 5-5, and 6-6.
- Hood's Retreat: On Turn 1 only, Confederate infantry divisions adhere to the following two special rules. Both these rules only apply when marching to Fatigue Levels 1, 2, or 3, not to Fatigue Level 4: the Confederate player applies a special -1 modifier on extended march rolls in addition to other modifiers (for example, if an infantry division marches to Fatigue Level 2 on its exhausted side, and the Confederate player makes an extended march roll of 6, the roll is reduced by 1, to 5 — a "No Effect" result); the minimum Movement Allowance of a Confederate infantry division undertaking a march as part of an Activate Leader action is 4 Movement Points, and the minimum Movement Allowance of a Confederate infantry division undertaking a March action is 3 Movement Points.
- Union Movement Restriction: Wood's three IV Corps divisions (Kimball, Beatty, Elliott) may neither move nor attack south of the Harpeth River on Turn 1.
- Forrest and Ross: The Confederate leader Forrest must be attached to Ross's cavalry brigade at the start of the game and may not transfer. This restriction is lifted the moment Forrest and Ross enter Columbia (1715). If Ross is eliminated for any reason and has not yet entered Columbia, Forrest is removed from the game.
- Confederate Movement Restriction: Ross's cavalry brigade and its attached leader Forrest may not enter Williamson County or any hex in Maury County north of the Duck River. However, as soon as Forrest and Ross enter Columbia (1715), this movement restriction is lifted.
- Common Movement Restriction: South of the Harpeth River, neither player may move units into any hex whose last two digits number "06" or less. This area is considered "off map" to Confederate units; a Confederate unit forced to retreat into it is eliminated, and any manpower loss also causes Victory Point loss. This area is considered out of play to Union units, and if a Union unit is forced to retreat into it, the unit is removed from play, but with no VP loss. Zones of Control extend into this area for flank modifier purposes.
- Confederate Artillery: Confederate infantry divisions each have an Artillery value of 1, not the 2 printed on their counters (Stevenson-B already has an Artillery value of 1.) Historical Note: In the Battle of Nashville, Union troops captured about half the Confederate artillery.
VC: Victory Conditions. The Confederate player gains and loses Victory Points (VP) for the following occurrences at the end of the game:
+9 — For each Confederate infantry division (there are eight) that ends the game in Maury County south of the Duck River.
+9 — If at least one undemoralized Confederate infantry division occupies Columbia (1715).
+2 — For each point of Union Manpower value lost in combat, retreat, or cavalry retreat (not in extended march, force march, or moving from one enemy ZOC to another).
-3 — For each point of Confederate Manpower value lost in combat, retreat, or cavalry retreat (not in extended march, force march, or moving from one enemy ZOC to another).
At the end of the game, the Confederate VP total is calculated and the players consult the chart below to determine the winner.
| Confederate VP | Winner |
|---|---|
| 90 or more | Confederate Decisive Victory |
| 80 to 89 | Confederate Substantive Victory |
| 70 to 79 | Confederate Marginal Victory |
| 60 to 69 | Union Marginal Victory |
| 50 to 59 | Union Substantive Victory |
| 49 or less | Union Decisive Victory |
Confederate Set-Up.
| Unit/Leader | Size | Command | Type | Manpower Value | Hex |
|---|---|---|---|---|---|
| Chalmers | Div | C-Cav | Ldr | – | 4511 (Blacksmith) |
| Biffle | Brig | C-Cav | Cav | 2* | 4511 (Blacksmith) |
| Lee | Corps | L | Ldr | – | 4410 (Hollow Tree Gap) |
| Clayton | Div | L | Inf | 5* | 4410 (Hollow Tree Gap) |
* Begins game on Exhausted side. # Begins game on Exhausted side, with Disorganized Strength marker, at Fatigue Level 1. • Forrest must be attached to Ross's cavalry brigade at the start of the game (see Special rule 5).
Union Set-Up.
| Unit/Leader | Size | Command | Type | Manpower Value | Hex |
|---|---|---|---|---|---|
| Wood | Corps | IV | Ldr | – | 5110 (Toll Gate) |
| Kimball | Div | IV | Inf | 7* | 5110 (Toll Gate) |
| Beatty | Div | IV | Inf | 10@ | 5110 (Toll Gate) |
| Elliott | Div | IV | Inf | 8* | 5110 (Toll Gate) |
* Begins game on Exhausted side. @ Begins game on Exhausted side and with Disorganized Strength marker. $ Place Unmounted counter on top of Biddle; accompanies him the entire game (see Advanced Game, 5.5).
Scenario 8: That Devil Forrest
NOTES: The bulk of the Confederate army has retreated off the south map edge towards the Tennessee River. Forrest commands a rearguard to slow down the pursuing Union force, which has finally crossed the Duck River in pursuit of Hood. The forces engage along the Columbia Pike on December 23 and 24, with the Confederates withdrawing southward late on the 24th.
GAME LENGTH: 2 turns, December 23–December 24, 1864.
SPECIAL RULES:
- Initiative: If both players obtain the same initiative die roll, the Union player wins tied rolls of 1-1, 2-2, and 3-3; the Confederate wins tied rolls of 4-4, 5-5, and 6-6.
- Turn 1 Start: On Turn 1, the Confederate player automatically wins the first initiative without the need for a die roll. Afterward, initiative is determined normally.
- Map Edge: Confederate units may retreat or rout off the map with no manpower or VP loss for the off-map portion of the retreat. Once a unit or leader retreats off-map, it is removed from the game. Normal off-map rules pertaining to flank attacks apply (see Standard Rules, 7.4, "Flank Attacks").
VC: Victory Conditions (Scenario 8). The Union player gains and loses Victory Points (VP) for the following occurrences at the end of the game:
+15 — If an undemoralized Union infantry division occupies Lynnville (0423) or Colored Church (0324). The maximum VP award for this accomplishment, even if both hexes are Union-occupied, is 15.
-2 — For each point of Union Manpower value lost in combat, retreat, or cavalry retreat (not in extended march, force march, or moving from one enemy ZOC to another).
+3 — For each point of Confederate Manpower value lost in combat, retreat, or cavalry retreat (not in extended march, force march, or moving from one enemy ZOC to another).
At the end of the game, the Union VP total is calculated and the players consult the chart below to determine the winner.
| Union VP | Winner |
|---|---|
| 21 or more | Union Decisive Victory |
| 17 to 20 | Union Substantive Victory |
| 13 to 16 | Union Marginal Victory |
| 9 to 12 | Confederate Marginal Victory |
| 5 to 8 | Confederate Substantive Victory |
| 4 or less | Confederate Decisive Victory |
Confederate Set-Up.
| Unit/Leader | Size | Command | Type | Manpower Value | Hex |
|---|---|---|---|---|---|
| Forrest | Corps | C | Ldr | – | 0820 (Ingram's Mill) |
| Buford | Div | B-Cav | Ldr | – | 0820 (Ingram's Mill) |
| Bell | Brig | B-Cav | Cav | 2 | 0820 (Ingram's Mill) |
| Crossland | Brig | B-Cav | Cav | 1 | 0820 (Ingram's Mill) |
Union Set-Up.
| Unit/Leader | Size | Command | Type | Manpower Value | Hex |
|---|---|---|---|---|---|
| Wood | Corps | IV | Ldr | – | 1715 (Columbia) |
| Kimball | Div | IV | Inf | 7 | 1715 (Columbia) |
| Beatty | Div | IV | Inf | 10 | 1715 (Columbia) |
| Elliott | Div | IV | Inf | 8 | 1715 (Columbia) |
* Begins game on normal side with Fatigue Level 1 marker.
Advanced Game Rules
Introduction. The following rules are used only in the Advanced Game (Scenario 9), unless they are specifically called for in the special rules of a Basic Game scenario. Rules colored blue in the original booklet are Standard Advanced Game Rules, which apply consistently in all GCACW games. Rules that are not blue-colored may be different in other GCACW games.
1.0 Advanced Game Sequence of Play
Each turn in the Advanced Game is performed according to the following sequence of play:
- Winter Weather Phase (Starting Turn 14): Starting on Turn 14, either player rolls a die, and the players consult the Winter Weather Table (see 4.0) to see if winter weather starts. Once winter weather starts, this phase is skipped for the rest of the game.
- Random Events Phase (Starting Turn 3): Starting on Turn 3, either player rolls two dice, and the players consult the Random Events Table (see 2.0).
- Union Manpower Enhancement Phase (Turns 3 To 9): Starting on Turn 3 and every turn thereafter through Turn 9, the Union player rolls a die to determine whether his units on the map may receive "Manpower Enhancement" (see 11.0).
- Reinforcement Phase: (A) Union Reinforcements — Starting on Turn 2 and in every Reinforcement Phase thereafter, the Union player rolls a die and consults the Union Reinforcement Table to determine his reinforcements for the current turn (see 12.0). (B) Confederate Reinforcements — In the Reinforcement Phase of Turn 10, the Confederate player receives a single infantry brigade as a "Constant" reinforcement. Starting on Turn 24, and in every Reinforcement Phase thereafter, the Confederate player rolls a die and consults the Confederate Reinforcement Table to determine his "Variable" reinforcements for the current turn (see 13.0).
- Leader Transfer Phase: Leaders may be transferred from one subordinate unit to another.
- Attachment Phase: Substitute units may be reattached to other units.
- The Action Cycle: Confederate Arrivals — Starting on Turn 2, the Confederate player rolls a die to determine his "Arrivals" (see 13.0). Once all these units have arrived on the map, this step is skipped for the rest of the game. Action Phase: (A) Initiative Segment — Both players roll a die. The player with the higher roll wins. If both players roll the same number, the winner of the roll depends on which side, if any, holds "Army Initiative" (see 3.0). The winner must take initiative or pass. (B) Activation Segment — The player with initiative must perform a single action with an eligible leader or unit. At the end of an Activation Segment, players return to the Initiative Segment, and a new Action Phase begins. Players continue to perform Action Phases indefinitely until both players pass in the same Action Phase.
- Recovery Phase: Eligible units may entrench, build and repair bridges, and recover from fatigue, disorganization, exhaustion, and demoralization.
- Union Cavalry Phase (Starting Turn 10): Starting on Turn 10 (December 2) and every turn thereafter, the Union player checks his cavalry units to determine their "mounted" status (see 5.0).
2.0 Random Events
Starting on Turn 3 (November 25), either player rolls two dice and the players consult the Random Events Table (see below).
Random Events Table:
| Dice | Result |
|---|---|
| 2 | Command Paralysis |
| 3 | Accelerated Union Reinforcements or Grant Relieves Thomas @ |
| 4 | Rain* |
| 5 | Winter Weather End Change or Enhanced Movement + |
| 6 | Late Rain* |
| 7 | Late Rain* |
| 8 | Union Night March or Army Initiative Change—A % |
| 9 | Lyon's Kentucky Raid or Union Pontoon Bridge Prohibition # |
| 10 | Late Rain* |
| 11 | Late Rain* |
| 12 | Army Initiative Change—B |
@ "Accelerated Union Reinforcements" is the effect on Turns 3-16; "Grant Relieves Thomas" is the effect after Turn 16. * Convert to "No Effect" if winter weather is in effect (see 4.0). + Apply "Winter Weather End Change" if winter weather is in effect (see 4.0). Otherwise apply "Enhanced Movement" event. % "Union Night March" is the effect on Turns 3-10; "Army Initiative Change–A" is the effect after Turn 10. # If "Lyon's Kentucky Raid" has already occurred, apply "Union Pontoon Bridge Prohibition" event instead.
2.2 Explanation of Random Events
Command Paralysis. The side with the "Army Initiative Advantage" (see 3.0) suffers Command Paralysis. If Army Initiative is "Neutral," either player rolls a die: if the roll is odd, the Confederate player suffers "Command Paralysis" in the current turn; if the roll is even, the Union player suffers "Command Paralysis" in the current turn.
Command Paralysis has the following effects: the Movement Allowances of the affected player's infantry and wagon units performing marches (in both March and Activate Leader actions) are reduced by 1 to a minimum of 1; the Movement Allowances of the affected player's cavalry units performing marches (in both March and Activate Leader actions) are reduced by 2 to a minimum of 1 (Union wagons are similarly affected if activated by a cavalry leader); units may not force march, though they may make extended marches; the affected player may not execute Assault actions.
Accelerated Union Reinforcements. This result may only occur on Turns 3-16. If it occurs, the Union player immediately gets his next scheduled reinforcement set and may place it on the map (see 12.0). The Union player still rolls for reinforcements normally in the Reinforcement Phase of the current turn.
Grant Relieves Thomas. This result may not occur until after Turn 16 (December 8). If the result occurs on Turn 17 (December 9) or later, the Union player immediately flips the "Thomas" Department of the Cumberland (DC) army leader counter over to the army leader Logan side. (Exception: If the Confederate player occupies no more than one of the following three towns with an undemoralized infantry unit at the moment this event occurs, then the result is converted to "No Effect": Columbia [1715]; Franklin [4010]; and Murfreesboro [5232].) For the rest of the game, Logan is considered the Union DC army commander. The only difference between Thomas and Logan is that Thomas's Command Value is 4, while Logan's is 3. In addition, as soon as Logan enters play, the Union player rolls a single die. The result is the number of consecutive turns (including the current turn) in which the Union player may not attempt a grand assault. For example, if the die roll is 2, the Union player may not attempt a grand assault in the current turn and the following turn. Place the "No Grand Assaults" marker on the Turn Track to remind players of this restriction.
Rain. Rain rules are in effect only throughout the current turn. For the effects of rain, see Standard Rules, 12.0. The "Minor River Rain Number" (see Standard Rules, 12.0) is 0, indicating that minor rivers are unfordable only in the current turn. Note: Since there are no fords across major rivers in Hood Strikes North, Major River "Rain Numbers" for major river fordability are never determined.
Late Rain. Rain takes effect in the current turn, but not until both players roll a 1 when determining initiative. Rain begins immediately when both players roll 1 for initiative and continues for the rest of the current turn. (Exception: Rain only takes effect if both players have gained initiative at least once in earlier Action Phases of the current turn; otherwise, Late Rain results are ignored.) When Late Rain begins, place a Rain marker on the Turn Track box of the current turn. For the effects of rain see Standard Rules, 12.0. The Minor River "Rain Number" is 0 for a Late Rain event. Note: When a Late Rain event occurs, entrenchment is permitted in the Action Cycle before rain takes effect. However, entrenchment during the Action Cycle is not permitted once rain begins. Entrenchment and bridge building are permitted in the Recovery Phase (unlike during a standard Rain random event).
Winter Weather End Change. Either player rolls a die. If the result is odd, the "Last Turn of Winter" marker is moved one box on the Turn Track ahead of its current location. If the result is even, the "Last Turn of Winter" marker is moved one box on the Turn Track before its current location. (Note: If an even die roll takes place when the Turn marker and the Last Turn of Winter marker occupy the same Turn Track box, winter weather immediately ends, and its effects no longer apply for the rest of the game.)
Enhanced Movement. Either player rolls a die. If the roll is odd, the Confederate player benefits from "Enhanced Movement" in the current turn. If the roll is even, the Union player benefits from "Enhanced Movement" in the current turn.
Enhanced Movement has the following effects: the Movement Allowances of the affected player's infantry units performing marches (in both March and Activate Leader actions) are increased by 1 (this movement bonus also applies to Union wagons even if activated by a cavalry leader); the Movement Allowances of the affected player's cavalry units performing marches (in both March and Activate Leader actions) are increased by 2.
Army Initiative Change—A. This result can only occur on Turn 11 or later. Army Initiative Change-A has the following effect: whatever the status of Army Initiative, it should be immediately changed to "Neutral." If it currently is Neutral, it remains so.
Army Initiative Change—B. This result can only occur on Turn 11 or later. (On Turns 10 or earlier, the random event is converted to "No Effect.") Army Initiative Change-B has the following effect: if Army Initiative is currently "Confederate Advantage," Army Initiative status immediately changes to "Neutral"; if Army Initiative is currently "Neutral," Army Initiative status immediately changes to "Union Advantage"; if Army Initiative is currently "Union Advantage," Army Initiative status immediately changes to "Neutral."
Union Night March. Union Night March may only occur from Turns 3 to 10. If a Night March result occurs, the Union player must choose one of the following two options: (1) He may declare a "Night March," in which all Night March special rules apply (see below); or (2) He may choose a single normal action, which is immediately carried out, and no Night March special rules apply. After the completion of the Night March or the normal action, initiative is determined normally.
Night March Special Rules: The following special rules apply to a Night March: in the first two Action Phases of the turn, the Union player automatically wins initiative with no need for a die roll; only March or Activate Leader actions may be chosen, and the same unit(s) and leader(s) may activate in both Action Phases; if an infantry unit performs a March action, or an infantry leader initiates an Activate Leader action, the minimum unmodified die roll is 3 (rolls of 1 and 2 are converted to 3) — if a cavalry unit performs a March action, or a cavalry leader initiates an Activate Leader action, the minimum unmodified die roll is 6 (rolls of 2-5 are converted to 6); extended march die rolls never take place, even if a Union unit (including a wagon train) on its normal side increases its Fatigue Level to 3 or a Union unit on its exhausted side increases its Fatigue Level to 2 or more; a marching unit may not enter an enemy ZOC (including restricted ZOC) unless that ZOC is Union-occupied (Exception: If, in order to exit a given hex, a unit has no choice but to enter an unoccupied enemy ZOC, it may do so — a unit may exit enemy ZOC, subject to normal penalties); attacks of all kinds are prohibited (Confederate cavalry units may perform cavalry retreat, but may not be attacked); units may not entrench.
Lyon's Kentucky Raid. This result causes some Confederate and Union reinforcements (see 12.0 and 13.0) to become unavailable for the rest of the game. This result may occur only once per game. If the "Lyon's Kentucky Raid" result occurs, the following Union cavalry leaders and brigades may never arrive as reinforcements during the game: McCook (leader), LaGrange, Watkins, Long (leader), A. Miller, Minty. However, if one or more of those Union leaders/brigades have already arrived on the map as reinforcements and the "Lyon's Kentucky Raid" event occurs, those units remain on the map and may be activated by the Union player normally. If the "Lyon's Kentucky Raid" result occurs, Lyon's Confederate cavalry brigade may never arrive as a Confederate reinforcement during the game. However, if Lyon has already arrived as a reinforcement and the Lyon's Kentucky Raid event occurs, Lyon remains on the map and may be activated by the Confederate player normally. Lyon is an independent brigade and does not belong to a division, although it is part of Forrest's cavalry corps.
Union Pontoon Bridge Prohibition. The Union player may not build pontoon bridges during the Recovery Phase of the current turn. Place the "No Pontoon" marker on the Turn Track to remind players of this restriction.
3.0 Army Initiative
There are three levels of "Army Initiative": Confederate Advantage, Neutral, and Union Advantage. Army Initiative determines which player wins tied initiative die rolls in the Initiative Segment of each Action Phase. A. Confederate Advantage: The Confederate player wins all tied initiative die rolls. B. Neutral: The Union player wins tied initiative die rolls of 1-1, 2-2, and 3-3; the Confederate player wins tied initiative die rolls of 4-4, 5-5, and 6-6. C. Union Advantage: The Union player wins all tied initiative die rolls.
Note: The Advanced Game always begins with Confederate Advantage. Place the Confederate Army Initiative marker in the Army Initiative box. The Army Initiative marker may change during the game due to random events (see 2.2).
4.0 Winter Weather
Starting on Turn 14 (December 6), the Union player rolls a die at the start of the Winter Weather Phase and the players consult the Winter Weather Table (see below). This roll may be modified depending on the current turn.
Winter Weather Table:
| Roll | Effect |
|---|---|
| 3 or less | No Effect |
| 4 or more | Winter Weather Start |
Modifiers: -2 on Turn 14 (December 6); -1 on Turn 15 (December 7); +1 on Turn 17 (December 9), and thereafter.
On a Winter Weather Start result, the Union player places the "Winter Weather Start" marker on the Turn Track box corresponding to the current turn. He then places the "Last Turn of Winter" marker on the Turn Track six boxes ahead of the Winter Weather Start marker. For example, if the Winter Weather Start marker is placed in the Turn 14 box, the Last Turn of Winter marker is placed in the Turn 20 box. Once a Winter Weather Start result is achieved, the players do not consult the Winter Weather Table for the rest of the game.
Winter Weather Effects. Winter weather begins on the turn the Winter Weather Start marker is placed on the Turn Track. Winter weather continues for seven consecutive turns and ends when the current turn advances past the "Last Turn of Winter" marker on the Turn Track. (Exception: Random Events may change the turn on which winter weather ends; see 2.0.) The effects of winter weather are as follows: there is no entrenching, either in the Action Phase or Recovery Phase; units may not perform Burn RR Station actions; each turn's Action Cycle ends immediately on the first tied initiative die roll — no further actions take place for the rest of the cycle, even if one or both sides have not yet gained an initiative in that turn; units must spend Movement Points to enter hexes as if it were a Rain turn (for example, the MP cost to enter a rolling hex would be 4, not 3, MP; however, unlike rain turns, units may cross creeks and fords with no penalty); a unit may not be selected to perform a March action, either independently or as part of an Activate Leader action, if that action would increase the unit's Fatigue Level to 3 or 4; in all combat the attacker has a special -2 combat modifier; assaults are not allowed; all Union wagons still on the map at the start of the winter weather are immediately removed, and if so, the Confederate player gains Victory Points (see Victory Conditions); the Union player may continue to roll for reinforcements (see 12.0) and cavalry remounts (see 5.0) during winter weather with no negative effect.
5.0 Union Cavalry Mounts
On Turn 10 (December 2) the Union player must begin to carry out the Union Cavalry Phase procedure and must continue to do so each turn for the rest of the game. The Union Cavalry Phase is carried out as follows:
5.1 Union Cavalry Phase. A. Horses Worn Out Segment (Turn 10 only): On Turn 10 only, during this segment, all Union cavalry units (not cavalry leaders) on the map have a "Horses Worn Out/Unmounted" counter added to them, on the Horses Worn Out side. B. Remount Segment: The Union player must attempt to "remount" each off-map Union cavalry unit (see 5.2). Note that on Turn 10, there can be no such units. C. Off-Map Removal Segment: If one or more cavalry units occupy hex 5805 or 5806 (just north of Nashville), the Union player may place none, some, or all of them temporarily off map as desired. Each removed unit flips its "Horses Worn Out/Unmounted" counter to the Unmounted side if not already on that side. Leaders may accompany their units, but must do so if no units in their command remain in the exited hex. Off-map units retain their current status (fatigue, normal/exhausted, organized/disorganized, and demoralization, if any), just as if they are on the map, and they recover normally in the Recovery Phase. D. Unmounted Segment: All Union cavalry units on the map with a "Horses Worn Out" marker must determine if the counter flips to the "Unmounted" side (see 5.3). E. Cavalry Return Segment: The Union player may place one or more off-map Union cavalry units in hexes 5805 or 5806 as desired, regardless of their mounted status. (They may still have an Unmounted counter.) Leaders may accompany units belonging to their command back onto the map.
5.2 Remount Segment. In the Remount Segment, the Union player attempts to remount each off-map cavalry unit. The Union player rolls a die for each off-map cavalry unit and consults the Remount Table, below, to determine the result.
Remount Table:
| Roll | Effect |
|---|---|
| 5 or less | No Effect |
| 6 | Remounted |
On a "Remounted" result, the Union player removes the Unmounted marker from the unit in question. The unit may never gain a Horses Worn Out/Unmounted marker again for the rest of the game. If a Union cavalry unit fails to achieve a Remounted result, the Union player may continue to attempt to remount that unit in future Remount Segments.
Capron, Croxton, G. Johnson. Three Union cavalry brigades — Capron, Croxton, and G. Johnson — are each depicted in two versions: an "A" version (with Artillery values of 0), and a "B" version (with Artillery values of 1). These units always initially appear in the game in their "A" versions. However, if they are removed from the map in the Union Cavalry Phase and subsequently achieve "Remounted" results, their "A" version is removed and is replaced by the "B" version, which remains in play for the rest of the game unless eliminated.
5.3 Unmounted Segment. In the Unmounted Segment, each Union cavalry unit on the map with a Horses Worn Out marker must determine if the marker flips to its Unmounted side. The Union player rolls a die once for each such unit (that roll may be modified; see below) and consults the Unmounting Table, below, to determine the result.
Unmounting Table:
| Roll | Effect |
|---|---|
| 5 or less | No Effect |
| 6 or more | Unmounted |
Modifiers (all cumulative): +1 if the unit is exhausted; +1 if the unit's strength marker is disorganized; +1 if the unit is demoralized.
An "Unmounted" result indicates that the Union player flips the Horses Worn Out marker to its Unmounted side. "No Effect" means the unit retains the marker on the Horses Worn Out side. If a Union cavalry unit obtains a No Effect result, the Union player must continue to check if the unit flips to its Unmounted side in future Unmounted Segments.
5.4 Attachment And The Unmounted Counter. If two Union cavalry units attach, the unit remaining after attachment must be assigned an Unmounted marker if at least one of the attaching units had an Unmounted marker. Similarly, if two Union cavalry units attach, one of which has a Horses Worn Out marker, and the other also has a Horses Worn Out marker (or no marker at all), the unit remaining after attachment must be assigned a Horses Worn Out marker.
5.5 Unmounted Union Cavalry Effects. A Union cavalry unit with an Unmounted (but not a Horses Worn Out) marker functions as infantry in all respects except for march and extended march rolls. Its movement roll in a March action is the normal two-dice roll for cavalry, but its final Movement Point allowance is one-half that roll, rounding up. If its division or corps leader activates the unit in an Activate Leader action, add the normal leader bonus to the die roll before halving and rounding up. A cavalry leader may activate both mounted and unmounted cavalry in the same Activate Leader action. In extended marches, unmounted units are considered cavalry. However, in terms of MP penalties to enter friendly-occupied hexes, an unmounted cavalry unit counts as infantry for all purposes. In combat, unmounted units are considered infantry and they may not cavalry retreat. However, an unmounted cavalry unit may trigger a Confederate cavalry retreat (see 7.7). The Unmounted counter stays with the unit the rest of the game unless the unit moves off map and successfully remounts (see 5.2).
If a unit has a Horses Worn Out counter, it has no effect on the unit other than that it may become Unmounted in the Unmounted Segment (see 5.3).
Notes On Union Cavalry Unmounting & Remounting. On Turn 10 the Union player probably will still be conducting a delaying action against a Confederate advance on Nashville. On-map Union cavalry units are at that time susceptible to becoming unmounted, and thus basically becoming infantry. The Union player will likely want to pull cavalry units off-map when they are not needed for defense, to obtain remounts. Remounted units will, for the rest of the game, be fully functional cavalry and be more useful in end-game operations.
6.0 Death Of Cleburne
In any combat in which Cleburne's Confederate division is attacking (not defending), and the Confederate and Union combat die rolls are identical before modification, Cleburne is killed. If Cleburne is killed, his division is immediately removed from the map and replaced by the Smith-A counter. The only difference between the Cleburne and Smith-A counters is that Smith's Tactical value for both attack and defense is 3, whereas Cleburne has a Tactical value of 4 when attacking. This rule applies whether Cleburne's division is attacking as part of a March or Assault action.
7.0 Substitute Units
The Union player has five "substitute" infantry brigades; the Confederate player has four. Both players have two "substitute" cavalry regiments.
7.1 Detachment. Either player may detach one or more substitute infantry brigades from a marching infantry unit as long as the marching unit has a Manpower value of 2 or more. Either player may detach one or more substitute cavalry regiments from a marching cavalry unit as long as the marching unit has a Manpower of 2 or more.
How To Detach. To detach, a player places a substitute in the same hex as the unit from which it detaches and assigns it a Manpower value. A Strength marker equal to the Manpower value assigned to the substitute is placed under it. The substitute's Manpower value is subtracted from the parent unit's Manpower, and the parent unit is assigned a new Strength marker, on the same side as the one it replaces, reflecting its reduced value.
Placement Of Detached Units. A detached substitute may be placed in the hex in which an active unit begins its march or in any hex it enters during its march. After a substitute is placed on the map, the active unit may continue its march (but the substitute may not move further during this action). After placement, substitutes function normally.
Detachment Restrictions. Counter Limits: The number of substitutes provided in the game is a strict limit. If all substitutes are currently in use, no more may be used. However, if substitutes reattach to other units, they are removed from the map and again become available for use. Size: After detaching, a parent unit must have a minimum Manpower value of 1. The Manpower value of a substitute is limited: substitute infantry brigades must be assigned a Manpower value of 6 or less for the Union player and 4 or less for the Confederate player; substitute cavalry regiments for both sides must be assigned a Manpower value of 1.
Determining Status Of Detachments. Fatigue: If a substitute is placed in the hex in which an active unit begins a march, the substitute is assigned a Fatigue marker equal to the active unit's Fatigue Level before it was selected to march. If a substitute is placed in any hex except the one in which the active unit begins a march, the substitute is assigned a Fatigue marker equal to the active unit's Fatigue Level at that moment. Entrenchment: If an entrenched active unit detaches a substitute in the hex in which it begins a march, the substitute is assigned the same kind of entrenchment marker possessed by the active unit. Disorganized, Demoralized, Exhausted: If an active unit has a disorganized Strength marker, is on its exhausted side, or possesses a Demoralized marker, then any substitute detached by that unit must possess the same characteristics. Command: The owning player should note on a piece of paper the number of each substitute placed on the map and the command to which it belongs. It belongs to the same command as the unit from which it detaches.
7.2 Attachment. In the Attachment Phase, a substitute (or a normal infantry regiment/brigade, or cavalry regiment; see "Special Attachment," below) stacked in the same hex as a friendly unit of the same type may "attach" to that unit. As long as one of these allowable units attaches to a unit of the same type (infantry or cavalry), it may attach to any friendly unit regardless of size or affiliation. (Exception: see "Union Commands," below.) Artillery units (Hood Strikes North has none), cavalry brigades, and infantry divisions may not attach.
How To Attach. Remove attaching units and all accompanying markers from the map. The Manpower value of an attaching unit is added to the Manpower value of the unit to which it attaches; this unit receives a new Strength marker with an enhanced Manpower value.
Attachment Restrictions. Unity: A unit may not attach a portion of its strength to another unit. The whole unit must be attached (and the unit removed from the map). Size: A unit may not attach to another unit if the addition of its Manpower value would raise the Manpower value of the unit remaining on the map above the following strengths: infantry divisions may not be raised above a Manpower value of 11 (Union) and 8 (Confederate); infantry brigades may not be raised above a Manpower value of 6 (Union) and 4 (Confederate); Union infantry regiments may not be raised above a Manpower value of 3 (the Confederates have no such units); cavalry brigades on both sides may not be raised above a Manpower value of 3; cavalry regiments on both sides may not be raised above a Manpower value of 1.
Union Commands. Union infantry units and any detachments from them belonging to the DAT, DE, and DN commands may only attach to units within their own command. Union infantry units and any detachments from them belonging to the IV or XXIII Corps may only attach to units within those two corps. Units from IV Corps may attach to XXIII Corps units and vice-versa.
Determining Status After Attachment. Strength Marker: The unit to which a unit attached is assigned a new Strength marker on the same side (organized or disorganized) as the one it replaces. Exception: If the Manpower value of an attaching unit is greater than the Manpower value of the unit to which it attaches, the new Strength marker of the unit remaining on the map is placed on the same side as the attaching unit's Strength marker. Fatigue, Exhaustion: If a unit attaches to a unit and the two units have different Fatigue Levels, the unit remaining on the map after attachment receives a Fatigue Level equal to the higher of the two levels. If a unit attaches to a unit and one of the units is exhausted and the other is on its normal side, the unit remaining on the map is flipped to (or remains on) its exhausted side. Entrenchments: If an entrenched unit attaches to an unentrenched unit, the unit remaining on the map remains unentrenched. However, if an entrenched unit or unentrenched unit attaches to an entrenched unit, the unit remaining on the map remains entrenched. Demoralized: If a unit attaches to a unit and at least one of the units is demoralized, the unit remaining on the map is assigned a demoralization level equal to the most severe level possessed by one of the units prior to attachment. Artillery: If a unit attaches to another unit, assign the attaching unit's entire Artillery value (if any) to the unit to which it attaches. If necessary, this unit receives a new Artillery marker with an enhanced Artillery value.
Special Attachment. Both players' non-substitute infantry regiments and brigades may attach to any friendly infantry unit as long as attachment rules are adhered to. Non-substitute cavalry regiments may only attach to friendly cavalry brigades. Union infantry units must adhere to the attachment restrictions specified in "Union Commands" (see above).
7.3 Substitutes And Artillery Values. If players wish, they may transfer Artillery value points to or from detaching and attaching units. Detachment: If a substitute detaches from a unit, it may be assigned some or all of the Artillery value points of the parent unit. If so, an Artillery marker equal to the Artillery value assigned to the substitute is placed under it. The substitute's Artillery value is subtracted from the parent unit's Artillery value, and the parent unit is assigned a new Artillery marker, reflecting its reduced value. Attachment: If a unit attaches to another unit, assign the attaching unit's entire Artillery value (if any) to the unit to which it attaches. If necessary, this unit receives a new Artillery marker with an enhanced Artillery value.
8.0 Union Forts
Several Union forts are printed on the map. These forts are Union-controlled and undestroyed at the start of all scenarios. Union forts printed on the map are not the same as Fort markers, which both players may build during a turn according to entrenchment rules (see Standard Rules, 9.0).
The Union player has two types of Forts: Class A (Hexes 5131 and 5231 [Fortress Rosecrans] and Hex 5607 [Fort Negley]); and Class B (Hexes 5603 [Hydes Ferry], 5604 [Fort Garesché], 5605 [Fort Sill], 5606 [Fort Morton], 5507 [Fort Casino], 5708, and 5807).
Effects Of Union Forts. Confederate units may not enter or retreat into a hex containing an undestroyed Union fort. Similarly, Confederate leaders may not transfer or exert a command radius into or through an undestroyed fort hex. Confederate units adjacent to an undestroyed Union fort do exert a ZOC into the fort; however, an undestroyed fort is always treated as occupied by a Union unit when determining the effects of Confederate ZOC. Union forts do not exert ZOC (unless a Union unit occupies its hex). A Union fort hex adjacent to a defending Confederate unit is considered "covered" for flank attack determination. Union units may enter fort hexes without restriction. Forts themselves may neither activate nor entrench.
Union Forts And Combat. Class A Forts: Class A Union forts have Combat values of 2 and Artillery values of 2. Class B Forts: Class B Union forts have Combat values of 1 and Artillery values of 1.
Intrinsic Combat and Artillery values may only be used in defense; a fort may never join in a Union attack (although Union units in fort hexes may attack).
Confederate Attacks on Forts: Confederate units may attack an adjacent fort hex. If no Union units occupy the fort, the fort's intrinsic Combat and Artillery values are used to resolve the combat. If one or more Union units occupy the fort, the Union player's Combat and Artillery values are calculated by adding the fort's intrinsic values to the values of the Union units defending in the fort.
Tactical Modifier: In Confederate attacks against forts, there can never be a tactical modifier in favor of the Confederate player. If the Confederate player has a higher Tactical value than the Union player, or if no Union units occupy the fort, no tactical modifier is used. If the Union player has a higher Tactical value, the tactical modifier is applied normally.
Flank Attacks: In Confederate attacks against fort hexes, the Confederate player may never gain a flank attack bonus.
Artillery Modifier: In Confederate attacks against a hex with an undestroyed Union fort, Confederate +1 or +2 artillery modifiers are converted to "No Effect."
Hood & Forrest Assault Bonus: The Hood and Forrest special assault bonuses (see Basic Rules, 7.4) are never applied to attacks against a hex with an undestroyed Union fort.
How Union Forts Are Destroyed. If the Union player suffers a combat result containing an "r" (retreat) or "R" (rout) in any Confederate attack against a Union fort hex, the fort is permanently destroyed. Any Union units in the fort hex must also retreat or rout. Place a "Fort Destroyed" marker in the hex. A Union fort is no longer considered to occupy that hex.
When calculating the defender's Combat value to determine the proper column to use on the Combat Chart, do not include the intrinsic Combat value of the fort. Combat results containing Manpower value losses, "f" (Fatigue 1), "F" (Fatigue 2), and "D" (disorganize) results have no effect on forts. However, these results do affect Union units defending in the hex. A Manpower value loss may not be taken by a fort; if there are any units in the fort, they absorb the full manpower loss. The destruction of a fort does not count as a Manpower value loss for Victory Point purposes in scenarios.
A destroyed fort is considered to be a Union redoubt hex for the rest of the scenario (see Standard Rules, 9.0). If Union units reenter the hex, they gain all benefits of a redoubt hex.
Entrenchment In Fort Hexes. Unentrenched Union units in a fort hex are treated as if they occupy a redoubt hex for entrenchment purposes. Thus, in a fort hex, unentrenched Union units have their Combat and Artillery values multiplied by 1.5 when defending. Units in forts may continue to entrench normally until they are under a completed Fort marker (which should not be confused with a printed fort hex).
9.0 Union Railroad Movement
Confederate units may never move by rail. The Union player may move infantry units by rail on the Nashville and Chattanooga Railroad, between Murfreesboro and Nashville. (Exceptions: see "Special Union Railroad Movement," below.)
Units Eligible For Rail Movement. Rail movement may only be performed by Union infantry units and attached leaders. To move by rail, a Union infantry unit must begin a March action in any undamaged or undestroyed railroad station hex on the Nashville and Chattanooga Railroad.
How Rail Movement Is Performed. To move an eligible unit by rail, the Union player declares a March action with a single infantry unit that must be at Fatigue Level 2 or less. The unit's Fatigue Level is then increased by two. An extended march never occurs due to rail movement. The unit (with attached leader if desired) may then move an unlimited number of hexes, regardless of terrain or rain, as long as it moves along continuous railroad hexes only on the Nashville and Chattanooga Railroad, and it ends its move in any undamaged or undestroyed railroad station. It may transit Union-occupied hexes without penalty. After moving by rail, a unit may perform actions later in the Action Cycle, Fatigue Levels permitting, but it may not move by rail again in the same turn.
Rail Movement Restrictions. A maximum of 11 infantry manpower points, plus attached leaders, may move by rail per turn. This may be one 11-manpower unit, or multiple units whose manpower does not exceed 11. (Exception: see "Special Union Railroad Movement," below.) A unit moving by rail is subject to the following limitations: it may not start in or enter an enemy-occupied hex or ZOC (even if that ZOC is Union-occupied); it may not enter a hex containing a damaged or destroyed RR station; it may not cross a hexside containing a destroyed bridge, even if a friendly pontoon bridge has been built across the hexside.
Special Union Railroad Movement. The Union player has two types of special railroad movement. (1) Reinforcements: Union "M" (Murfreesboro) reinforcements (see 12.0) may use the Nashville and Chattanooga Railroad upon their arrival (see "Entry Areas" following the Union Reinforcements list). Such units are placed on the map in the Reinforcement Phase and do not have to begin in a railroad station in order to use rail movement. The Manpower values of reinforcements using rail movement upon their arrival do not count against the 11-manpower per turn rail limit. (2) Moore: The Union infantry brigade Moore, which begins the game in Nashville (5707), may use rail movement on the Nashville and Chattanooga Railroad or the Central Alabama Railroad for its first activation of the game (see Scenario 9 special rules). It does not have to end its rail movement in a railroad station.
10.0 Supply
There are no supply rules in Hood Strikes North. All units are always in supply. The only reference to supply is the Standard Rules extended march modifier for being out of supply, which therefore does not apply in this game.
11.0 Union Manpower Enhancement
Starting with the Union Manpower Enhancement Phase of Turn 3 and every turn thereafter through Turn 9, the Union player rolls a die to determine whether he may "enhance" the Manpower value of one or more of his units. On a roll of 1, there is no effect. On a roll of 2 or 4, he may choose a single Union cavalry unit and increase its existing Manpower value by one. On a roll of 3 or 5, he may choose a single Union infantry unit (including regiments) and increase its existing Manpower value by one. On a roll of 6, he may choose one cavalry and one infantry unit and increase their existing Manpower values by one. When increasing a unit's Manpower value, the new Strength marker is placed on the same side as the old one. The selected unit may occupy an enemy ZOC, but it may not be enhanced if each of its six adjacent hexes is enemy-occupied or in an enemy ZOC that is not occupied by a Union unit. An infantry or cavalry unit may not be enhanced above the Manpower limits as specified in Attachment rules (see 7.0). Starting on Turn 10, the Union Manpower Enhancement Phase is skipped for the rest of the game.
12.0 Union Reinforcements
At the start of every Reinforcement Phase beginning with Turn 2, the Union player rolls a die and consults the Union Reinforcement Table (see below) to determine how many reinforcements, if any, he receives in the current turn. That roll may be modified.
Union Reinforcement Table:
| Die | Result |
|---|---|
| 1 or less | 0 |
| 2 | 1 |
| 3 | 1 |
| 4 | 2 |
| 5 | 2 |
| 6 | 3 |
Modifiers: -4 on reinforcement rolls on Turns 2, 3, and 4; -3 on the reinforcement roll on Turn 5; -2 on reinforcement rolls on Turns 6 and 7; -3 if Union reinforcement set 11 (J. Miller's division) has been made available as a reinforcement in an earlier turn of the game.
The numbered result, from 0 to 3, is the number of "sets" of units/leaders the Union player receives as reinforcements in the current turn. Consult the Union Reinforcement list (see Scenario 9). Sixteen sets of Union units are listed, numbered 1 to 16. If the Union player receives one or more reinforcement sets in the Reinforcement Phase, he must choose the lowest-numbered sets that have not yet arrived and immediately place the units comprising each set in one or more of the hexes specified in their Entry Areas. There are two Entry Areas: "N" (Nashville) and "M" (Murfreesboro), each of which has a range of hexes in which units can be placed. (Note that "M" infantry reinforcements may also be placed in various locations along the Nashville and Chattanooga Railroad under some conditions as described in the "Entry Areas" section at the end of the Union Setup.) Reinforcements are placed on their normal sides, with Organized Strength markers, at Fatigue Level 0. If the Union player wishes, he may withhold reinforcement sets in the turn of their availability and place them on the map in the Reinforcement Phase of future turns. The reinforcements may be activated in the Action Cycle of the current turn. When all Union reinforcement sets have arrived, the Union player no longer consults the Union Reinforcement Table at the start of a Reinforcement Phase.
13.0 Confederate Reinforcements And Arrivals
Only Forrest's three cavalry division leaders and six cavalry brigades start the game on the map. All other Confederate units enter the map as either "arrivals" or "reinforcements." Furthermore, the Confederate player has two types of reinforcements: constant and variable.
Arrivals. At the start of every Action Cycle beginning with Turn 2, the Confederate player rolls a die and consults the Arrival Table below to determine how many of his arrival units may be placed on the map in the current turn. That die roll may be modified depending on the turn in progress.
Arrival Table:
| Die | Result |
|---|---|
| -3 or less | 0 |
| -2 | 1* |
| -1 | 2* |
| 0 | 2 |
| 1 | 3 |
| 2 | 4 |
| 3 | 5 |
| 4 or more | 6 |
Modifiers: -7 on the Turn 2 die roll; -4 on the Turn 3 die roll; no modifier on the Turn 4 die roll; +3 on the Turn 5 die roll. * Place a Fatigue Level 1 marker under the Confederate division(s) arriving on the map.
The numbered result, from 0 to 6, is the number of "sets" of infantry divisions/leaders the Confederate player must place on the map in the current turn. Consult the Arrival list in the Confederate setup section: Nine sets of Confederate divisions/leaders are listed, numbered 1 to 9. When the Confederate player gains initiative in a turn in which he is due one or more sets of arrival units, he may either activate units already on the map or he may choose the lowest-numbered available set that has not yet arrived and place all the units comprising that set together in one of the entry hexes specified in the range indicated on the Arrival list. Infantry divisions are always placed on the map at Fatigue Level 0. (Exceptions: On the Arrival Table, "-1" and "-2" results require the Confederate player to place a Fatigue Level 1 marker on an arriving division. Also, the Arrival list provides a range of alternative entry hexes, and if an alternative hex is chosen for entry, each division arrives on the map at one Fatigue Level higher than the initial Fatigue Level required by the Arrival Table.)
When the Confederate player places an available set on the map, he must always choose the lowest-numbered set that has not yet arrived. Leaders (if any) must be placed atop an arriving infantry division. As soon as the Confederate player places a set on the map, he must immediately declare a March or Activate Leader action with the arriving set, which is carried out normally, including Fatigue Level gain for each activated unit. (Exception: In the first March or Activate Leader action undertaken by a set following its placement on the map, one is added to the Movement Allowance die roll in addition to other die roll modifiers. Thus, in a March action, the Confederate player adds 2 — not 1 — to his roll; in an Activate Leader action, he adds 3 — not 2 — to his roll.) When all nine sets of Arrival units have been placed on the map, the Confederate player no longer consults the Arrival Table at the start of an Action Cycle.
Constant Reinforcement. At the start of the Reinforcement Phase of Turn 10 (December 2), the Confederate player receives the "Smith-B" infantry brigade as a reinforcement (see "Constant Reinforcement" list). Smith may be immediately placed in any location from hex 0107 to 0114 as long as the hex in which it is placed is not Union-occupied. It is placed on its normal side at Fatigue Level 0 with an Organized Strength marker (Manpower/Combat value, 2). If the Confederate player wishes, he may withhold Smith and place it on the map in a later Reinforcement. Smith may be activated in the Action Cycle of the current turn.
Variable Reinforcements. At the start of every Reinforcement Phase beginning with Turn 24 (December 16), the Confederate rolls a die to determine if he receives Variable reinforcements (see "Variable Reinforcement" list). On a roll of 1 to 5, he does not receive any reinforcements. On a roll of 6, he receives a single "set" of reinforcements in the current turn. Consult the Confederate Variable Reinforcement list: Six sets of Confederate units are listed, numbered 1 to 6. If the Confederate player receives a reinforcement set, he must choose the lowest-numbered set that has not yet arrived and immediately place the unit (and leader, if any) in any hex listed in the "Entry Hex" range on the reinforcement list as long as the hex in which it is placed is not Union-occupied. Reinforcements are placed on their normal sides, with Organized Strength markers, at Fatigue Level 0. If the Confederate player wishes, he may withhold reinforcements and place them on the map in a later Reinforcement Phase. Reinforcements may be activated in the Action Cycle of the current turn. If all Confederate Variable Reinforcement sets have arrived, the Confederate player no longer rolls a die in the Reinforcement Phase.
Lyon's Kentucky Raid. If the "Lyon's Kentucky Raid" random event occurs, Lyon may never arrive as a Confederate reinforcement. However, if Lyon has already arrived on the map as a reinforcement and the Lyon's Kentucky Raid event occurs, Lyon remains on the map and may be activated by the Confederate player normally. Lyon's brigade does not belong to any division, but it is a part of Forrest's Cavalry Corps.
14.0 Exiting The Map
Both players have specific mapedge locations where their units may exit the map. In these locations, units may either retreat (retreat, rout, or cavalry retreat) off-map or move off-map. There is no extra manpower loss penalty for exiting the map during a retreat. During movement, the movement cost to exit is the same as entering a pike hex. Once a unit (including leaders) has retreated or moved off-map, it is removed from the game and may not return. Exception: Union cavalry may be temporarily removed from the map and return (see 5.0). Off-map areas still retain normal flank modifier rules. The following are the off-map exit areas for each player:
Confederate Player: Hexes 0111, 0125, and 0131.
Union Player: Hexes 5134, 5233, 5334, 5433, 5833, 5829, 5806, and 5805.
Advanced Game Scenario
There is a single Advanced Game scenario, Scenario 9. Unless otherwise specified, units begin Scenario 9 on their front (normal) sides at Fatigue Level 0 and possess organized Strength markers.
Turn Track Markers. At the start of the game, the players should place various markers and one combat unit in Turn Track boxes as follows: Turn 1 (November 23) — Place the "Turn" marker at the start of the game. Turn 2 (November 24) — Place the Union "Start Reinf Roll" marker. Turn 3 (November 25) — Place the Union "Manpower Enhance Start" marker; also place the "Random Events Roll Start" marker. Turn 9 (December 1) — Place the Union "Manpower Enhance End" marker. Turn 10 (December 2) — Place a Union "Horses Worn Out" marker to remind the players that the Union Cavalry Phase begins this turn (the Union player may later remove the marker from the track and use it if necessary); also place the "Smith-B" Confederate infantry brigade (Cheatham's Corps) in the Turn 10 box, remove it in the Turn 10 Reinforcement Phase and place it on the map. Turn 24 (December 16) — Place the Confederate "Start Reinf Roll" marker. Random Events — If Rain, Lyon's Kentucky Raid, Union/Confederate Command Paralysis, or Union/Confederate Enhanced Movement random events occur, the players should place the corresponding marker in the Turn Track box of the turn the event occurs to remind them of its effects. Winter Weather — When winter weather begins (see 4.0), place the "Winter Weather Start" marker in the Turn Track box corresponding to the current turn, then place the "Last Turn of Winter" marker on the Turn Track six boxes ahead of the Winter Weather Start marker.
Scenario 9: Hood Strikes North
NOTES: The Advanced Game scenario covers the entire 1864 Tennessee campaign, starting with Hood's rapid march to Columbia, his move north over the Duck River and the Union stand at Franklin, and the arrival of the Confederates on the outskirts of Nashville. It continues through the ensuing brutal winter weather, the final buildup of Union forces at Nashville, and the decisive Union offensive that shattered Hood's army and forced his retreat off the south map edge with Union troops in hot pursuit.
GAME LENGTH: 32 turns, November 23–December 24, 1864.
SPECIAL RULES:
- Turn 1 Start: On Turn 1, the Union player automatically wins the first initiative without the need for a die roll. Afterward, initiative is determined normally.
- Army Initiative: Army Initiative starts the game at "Confederate Advantage"; hence, the Confederate player wins tied initiative die rolls in the Initiative Segment of all Action Phases. Place the Confederate Army Initiative marker in the Army Initiative box. The Army Initiative marker may change to Union or Neutral Army Initiative during the game due to random events (see 2.2).
- Wagons: The campaign has the following additional wagon train rules: A Union wagon is immediately removed from the map if it enters Nashville (5706, 5707), Murfreesboro (5232), or Fortress Rosecrans (5131, 5231). (Exception: A wagon is not removed upon entering hex 5131 or 5231 if the permanent fort in that hex is destroyed.) The removal of wagons from the map impacts Confederate VP (see Victory Conditions, below). The Union player may voluntarily destroy one or more wagons any time he has the initiative. To do so the desired wagon(s) are immediately removed from the game regardless of their status (manpower, fatigue, exhaustion, etc.). This activity expends the Union player's current Activation Segment. The Confederate player gains VP for this (see Victory Conditions, below). (Exception: A wagon south of the Duck River may not be voluntarily destroyed.) All wagons still on the map at the start of the first turn of winter weather are immediately removed from the map (see 4.0). The Confederate player gains VP for this (see Victory Conditions, below).
- Union 01XX and 02XX Hexrow Movement Restrictions: On Turns 1 through 5, Union units may not enter any hex in the 01XX hexrow numbered 0120 or less or any hex in the 02XX hexrow numbered 0220 or less. If forced to retreat into any of those hexes, a Union unit is eliminated.
- Croxton: Throughout this scenario, Croxton's Union cavalry brigade may be activated by any Union cavalry division or corps leader as part of an Activate Leader action.
- Moore: The first time the Union player activates Moore's brigade in the game (which must be on Turn 2 or later; see below), he may move Moore up to 43 hexes as long as this movement follows railroad hexes only. If such a move is undertaken, Moore gains two Fatigue Levels. It may end this move in any railroad hex (not just a railroad station hex), but it may never enter an enemy ZOC during this movement (even if that ZOC is Union-occupied), nor may it enter an enemy-occupied hex. Also, Moore may not enter a hex with a "RR Station Damaged/Destroyed" marker.
- Union Unit Restrictions: (a) Turn 1 — The following Union units may not activate, transfer, or recover on Turn 1: Hatch, Coon, Croxton, Wagner, Whitaker, Wood, Waters, Wagon Trains (A, B, C), Stewart, 175 OH, Moore, and the leader Stanley. If a Confederate unit moves adjacent to a restricted Union unit during Turn 1, that unit may activate, transfer, and recover in that turn. (b) 91 IN and 123 IN — The Union player may not activate the regiments 91 IN and 123 IN until Turn 4. Exception: This movement restriction is lifted for both units if a Confederate unit attacks either unit on Turn 3 or earlier. (c) Van Cleve, 17 USCT, 140 IN, and 5 TN Cav — The Union player may not activate Van Cleve, 17 USCT, 140 IN, and 5 TN Cavalry (all of which set up in Murfreesboro, 5232) until Turn 4. Exception: This movement restriction is lifted if a Confederate unit enters Rutherford County on Turn 3 or earlier. (d) DE and DN Units — Union DE (Department of the Etowah) and DN (Defenses of Nashville and Chattanooga Railroad) units may not enter any hex whose first two digits number "38" or less until the current turn advances past the "Last Turn of Winter" marker on the Turn Track.
VC: Victory Conditions. The Confederate player gains and loses Victory Points (VP) for the following reasons. Players must record VP obtained during each Victory Point Phase by using the three Confederate "VP" markers on the "0," "00," and "000" lines of the VP Track on the Union Force Display card. Other Confederate VP gains and losses, such as for Destroyed RR stations or for Union wagons, should be tracked as they occur, recording them directly on the VP Track by adjusting Confederate VP markers. Manpower value losses from combat, retreat, cavalry retreat, and Union wagon marching loss also cause Confederate VP gain or loss. It is suggested that players should keep track of Manpower value losses on a piece of paper, or use spare Union and Confederate Manpower counters to track losses for each side on the VP Track. At the end of Turn 32, total the Manpower value loss for both sides and determine a final Confederate VP gain or loss due to manpower and add or subtract this number from the current Confederate VP total. At the end of the game, determine the final Confederate VP total to establish a winner and a victory level.
Automatic Victory: If the Confederate player occupies either Nashville city hex (5706 or 5707) during any VP Phase with an undemoralized infantry division, the game immediately ends in a Confederate Decisive Victory.
+1 — For each VP Phase in which an undemoralized Confederate infantry division or brigade occupies Columbia (1715).
+2 — For each VP Phase in which an undemoralized Confederate infantry division or brigade occupies Franklin (4010).
+12/+2 — For each VP Phase in which an undemoralized Confederate infantry division or brigade occupies Murfreesboro (5232). The Confederate player gains 12 VP for the first turn in the game he qualifies for this award and 2 VP for the second and all later turns he qualifies for it. Exception: These VP are not awarded if the Union fort in hex 5231 is not destroyed.
+12 — If in the VP Phase of Turn 32 (the last turn), an undemoralized Confederate infantry division or brigade occupies Murfreesboro (5232). Exception: These VP are not awarded if the Union fort in hex 5231 is not destroyed. This award is in addition to the +12/+2 VP gained for Confederate occupation of Murfreesboro on any given turn (see above). For example, if the Confederate player first occupies Murfreesboro during the VP Phase of Turn 32 (the last turn), he gains 24 VP: 12 VP for the first VP Phase in the game in which he occupies it and 12 VP for occupying it during the Turn 32 VP Phase. However, if he first occupied Murfreesboro on Turn 26 and still occupied it during the VP Phase of Turn 32, he would gain 14 VP: 2 VP for occupying it in any turn and 12 VP for occupying it during the Turn 32 VP Phase.
+5 — For each VP Phase in which one or more undemoralized Confederate infantry divisions occupy a hex (or hexes) adjacent to Nashville (5705/5706). The maximum VP award for this accomplishment is 5 VP per VP Phase, no matter how many Confederate infantry units are adjacent to Nashville.
+2 — For each VP Phase in which three or more undemoralized Confederate infantry divisions occupy a hex (or hexes) two or three hexes distant from Nashville (5705/5706). The maximum award for this accomplishment is 2 VP per VP Phase, no matter how many Confederate infantry divisions are situated two or three hexes from Nashville. Exception: These VP are not awarded if, during the same VP Phase, the Confederate player gains 5 VP for occupying one or more hexes adjacent to Nashville (see above). In this case, the +2 VP award is ignored.
+30 — In the first VP Phase of the game in which three or more undemoralized Confederate infantry divisions occupy one or more hexes within three hexes of Nashville (5705/5706). This is a one-time VP bonus and is in addition to other VP awards due to Confederate infantry divisions' proximity to Nashville. For example, if on Turn 10 the Confederate player has moved three undemoralized infantry divisions to hex 5609, and this is the first time in the game he has satisfied the requirement of having three undemoralized infantry divisions within three hexes of Nashville during the VP Phase, he gains 32 VP: 30 VP for achieving this requirement the first time in the game; 2 VP for achieving this requirement in the VP Phase of any turn.
+4 — For each Confederate infantry division in the Turn 32 VP Phase (the last turn of the game) occupying a hex south of the Duck River that has a valid Line of Communication (LOC). To trace an LOC, an infantry division must first occupy a pike, road, or railroad hex, or trace a path three or fewer hexes to a pike, road, or railroad hex. Terrain is irrelevant in that path. Then, from that pike, road, or railroad hex, the Confederate player must trace a continuous path of pike, road, or railroad hexes to any hex on the south map edge. No hex in the path from the division to the end of the LOC may pass through a "blocked" hex. (See "Blocked Hexes," below.) Breckinridge's division, which the Confederate player may gain as a reinforcement, is eligible for this VP award. Confederate infantry divisions that have exited the map (see 14.0) may never gain VP for tracing an LOC.
+4 — For each Confederate infantry division in the Turn 32 VP Phase (the last turn of the game) occupying a hex north of the Duck River that has a valid Line of Communication (LOC). To trace an LOC, an infantry division must first occupy a pike (not a road or railroad) hex or trace a path three or fewer hexes to a pike (not a road or railroad) hex. Terrain is irrelevant in that path. Then, from that pike hex, the Confederate player must trace a continuous path of pike hexes to any pike hex on the south map edge (there are three such hexes: 0111, 0125, and 0131) or to Murfreesboro (5232, but only if it is currently Confederate-occupied, and if the Union fort in hex 5231 is destroyed). No hex in the path from the division to the end of the LOC may pass through a "blocked" hex. (See "Blocked Hexes," below.) Breckinridge's division, which the Confederate player may gain as a reinforcement, is eligible for this VP award. Confederate infantry divisions that have exited the map (see 14.0) may never gain VP for tracing an LOC.
Blocked Hexes: For LOC purposes, a hex is blocked by any hex containing an undestroyed Union fort (i.e., a fort printed on the map, not a Fort marker). Also, any hex meeting all three of the following conditions is blocked: 1) It is occupied by one or more Union units with a total Combat value of 6 or more, unmodified by entrenchments — demoralized Union units may not contribute to this total; 2) All Union units combining to an unmodified Combat value of 6 or more in the hex must be entrenched to Fort level; 3) A Union corps or district leader (not cavalry division leader) must occupy the hex. (Exception: The Union player is not required to have a corps/district leader present if Steedman's division — not a substitute unit drawn from that division — is present in the hex.) Note: No Confederate infantry division, whether north or south of the Duck River, may be awarded VP for tracing an LOC if at the end of the game, all hexes adjacent to it are occupied by Union infantry units or in the ZOC of undemoralized Union infantry units (even if occupied by a Confederate unit). Exception: At the end of the game, any Confederate infantry division occupying Murfreesboro (5232) or any hex adjacent to Murfreesboro (assuming Murfreesboro is Confederate-occupied), is exempt from blocked hex rules and always gains VP for an LOC.
+1 — For each of the following RR stations with a RR Station Destroyed marker at the end of the game: Antioch (5514), La Vergne (5519), Smyrna (5523), Florence (5327), Brentwood (4910).
-3 — For each point of Confederate Manpower value lost in combat, retreat, or cavalry retreat (not in extended march, force march, or moving from one enemy ZOC to another).
+2 — For each point of Union Manpower value lost in combat, retreat, or cavalry retreat (not in extended march, force march, or moving from one enemy ZOC to another). Exception: The Confederate player gains 2 VP for each point of Manpower value lost by a Union wagon train for any reason, including in an extended march and for moving from one enemy ZOC to another. However, the Confederate player does not gain VP for Manpower value loss if the Union player voluntarily destroys a wagon or if it is removed from the map at the start of Winter Weather (see Special Rule 3, above).
+6 — For each Union wagon train that does not enter either Nashville city hex before the start of winter weather (see 4.0).
-2 — For each Union wagon that enters Murfreesboro (5232) or either Fortress Rosecrans hex (5131, 5231, assuming the permanent fort in the entered hex is not destroyed) before the start of winter weather (see 4.0).
+2/+1 — For each Union wagon train voluntarily destroyed by the Union player or still on the map at the start of winter weather (see 4.0). The Confederate player receives VP equal to the Manpower value of the wagon at the time of its voluntary destruction or when it is removed at the start of winter weather.
Note: Wagon VP awards are cumulative. For example, one wagon might lose 1 manpower making an extended march (+2 VP), fail to enter Nashville before winter weather starts (+6 VP), but enter Murfreesboro before winter (-2 VP), for a net Confederate VP award of +6 VP. Another wagon might lose no manpower, but be voluntarily destroyed (+2 VP). In this case, the wagon failed to enter Nashville before winter weather starts (+6 VP), yielding a net Confederate VP award of +8.
At the end of the game, the Confederate VP total is calculated and the players consult the chart below to determine the winner.
| Confederate VP | Winner |
|---|---|
| 205 or more | Confederate Decisive Victory |
| 190 to 204 | Confederate Substantive Victory |
| 175 to 189 | Confederate Marginal Victory |
| 160 to 174 | Union Marginal Victory |
| 145 to 159 | Union Substantive Victory |
| 144 or less | Union Decisive Victory |
Confederate Set-Up.
| Unit/Leader | Size | Command | Type | Manpower Value | Hex |
|---|---|---|---|---|---|
| Forrest | Corps | Cav | Ldr | – | 0111 |
| Chalmers | Div | C-Cav | Ldr | – | 0111 |
| Rucker | Brig | C-Cav | Cav | 2* | 0111 |
| Biffle | Brig | C-Cav | Cav | 1* | 0111 |
| Buford |
* Placed on map on exhausted side with Fatigue 1 marker. + Units may not activate on Turn 1 and do not recover on Turn 1 (see special rules).
Confederate Arrivals (Turns 2 and Later).
| Unit/Leader | Set | Size | Command | Type | Manpower Value | Entry Hexes | Alternative Entry Hexes |
|---|---|---|---|---|---|---|---|
| Lee | 1 | Corps | L | Ldr | – | 0110 to 0114 | 0101 to 0109 |
| Johnson | 1 | Div | L | Inf | 7 | 0110 to 0114 | 0101 to 0109 |
| Stevenson-A | 2 | Div | L | Inf | 7 | 0110 to 0114 |
See Section 13.0 for rules on Confederate arrivals.
Confederate Constant Reinforcement (Turn 10).
| Unit/Leader | Size | Command | Type | Manpower Value | Entry Hexes |
|---|---|---|---|---|---|
| Smith-B | Brig | C | Inf | 2 | 0107 to 0114 |
Confederate Variable Reinforcements (Available on die roll of 6, starting Turn 24).
| Unit/Leader | Set # | Size | Command | Type | Manpower Value | Entry Hexes |
|---|---|---|---|---|---|---|
| Roddey | 1 | Div | R-Cav | Ldr | – | 0107 to 0114 |
| Pickett | 1 | Brig | R-Cav | Cav | 2 | 0107 to 0114 |
| Breckinridge @ | 2 | Div | DWV | Inf | 5 | 3233 to 4534 |
| Burtwell | 3 | Brig |
@ See Section 13.0 for special rules regarding Breckinridge if he arrives. # If the "Lyon's Kentucky Raid" result has occurred on the Random Events Table, Lyon may never arrive as a Confederate reinforcement during the game. However, if Lyon has already arrived as a reinforcement and the "Lyon's Kentucky Raid" random event occurs, the event result is ignored and Lyon remains on the map and may be activated by the Confederate player normally.
Union Set-Up.
| Unit/Leader | Size | Command | Type | Manpower Value | Hex |
|---|---|---|---|---|---|
| Schofield | District | Ohio | Ldr | – | 0523 (Laurine) |
| Cox | Div | XXIII | Inf | 11 | 0523 (Laurine) |
| Ruger | Div | XXIII | Inf | 2• | 1715 (Columbia) |
| 123 IN | Regt | XXIII | Inf | 2*+ | 1303 |
• Begins game under Fort-Build-1 marker. * Begins game under Fort marker. + Units have activation, transfer, and recovery restrictions. See Scenario 9, Special Rule 7. # Begins game on exhausted side with Fatigue Level 1 marker.
Union Reinforcements (Available by die roll starting Turn 2).
| Unit/Leader | Set # | Size | Command | Type | Manpower Value | Entry Area |
|---|---|---|---|---|---|---|
| Hammond | 1 | Brig | Cav-7 | Cav | 2 | N |
| Knipe | 2 | Div | Cav-7 | Ldr | – | M |
| G. Johnson-A | 2 | Brig | Cav-7 | Cav | 2 | M |
| Thomas | 3 | Army |
* If the "Lyon's Kentucky Raid" result has occurred on the Random Events Table, all six of the indicated leaders/brigades may never arrive as Union reinforcements during the game. However, if one or more of these Union leaders/brigades have already arrived on the map as reinforcements and the "Lyon's Kentucky Raid" random event occurs, those units remain on the map and may be activated by the Union player normally.
Note: If Union cavalry brigades arrive as reinforcements on Turn 10 or earlier, they must follow the "Union Cavalry Mounts" procedure starting on Turn 10 (see 5.0). However, if the cavalry brigades arrive as reinforcements on Turn 11 or later, they are exempt from this procedure and function normally as mounted units for the entire game.
Entry Areas. There are two Union reinforcement Entry Areas: "N" (Nashville) and "M" (Murfreesboro). Each area has different entry restrictions as described below. Reinforcement leaders (if any) must be placed atop an arriving infantry or cavalry unit. Units may not be placed in a Confederate-occupied hex, but they may be placed in Confederate ZOC.
- N (Nashville): Reinforcements with an "N" Entry Area may be placed in any of the following four hexes: 5703; 5705; 5706; and 5707.
- M (Murfreesboro): Reinforcements with an "M" Entry Area may be placed in hex 4934, 5134, 5334, or 5433. Alternatively, infantry (not cavalry) reinforcements with an accompanying leader may be placed in hex 5707 (Nashville) or any undamaged or undestroyed railroad station on the Nashville and Chattanooga Railroad (Antioch, 5514; La Vergne, 5519; Smyrna, 5523; Florence, 5327; or Murfreesboro, 5232) as long as the reinforcing units can trace a continuous path of railroad hexes from its placement hex to hex 4934, and that path does not enter a damaged or destroyed railroad station, a Confederate ZOC (even if Union-occupied), or a Confederate-occupied hex, and does not cross a destroyed bridge hexside. This placement does not cause the arriving unit to gain any fatigue levels and it does not count against the Union player's rail movement limit of 11 manpower points per turn (see 9.0).
The Game As History
By Chris Withers
October, 1864 – Prologue. Atlanta finally fell to the Union on September 2nd after John Bell Hood's Army of Tennessee lost a series of battles near the city. Hood still had about 30,000 men, so on September 29th he crossed the Chattahoochee River near Atlanta, heading north to disrupt Sherman's railroad supply line from Chattanooga. His strategy at this time was to draw Sherman out of Atlanta and defeat him in battle on Hood's terms. Hood raided the railroad at several points all the way north to Dalton, where the Atlanta campaign had started on May 10th. Sherman sent a strong force in pursuit but was never able to catch up to the Rebels, with Hood deciding not to turn and give battle.
Hood then pulled back southwest, reaching a new supply base at Gadsen, Alabama on October 20th, with a bolder, although somewhat nebulous, plan in mind. He would move west and eventually cross the Tennessee River, meet up with cavalry under Nathan Bedford Forrest, and head north to both capture Schofield's forces and then take Nashville. This would then leave the way open in Hood's own post-war words to "march northeast, past the Cumberland River; in that position I could threaten Cincinnati – if blessed with victory [over a pursuing Sherman], to send reinforcements to Lee … or to march through gaps in the Cumberland Mountains and attack Grant in the rear."
Sherman's force stopped pursuing Hood after he left Gadsen. Grant approved Sherman's plan to move his army back to Atlanta and march to the sea. But Grant was deeply concerned about what Hood could do if he invaded Tennessee since Hood's army outnumbered the Union forces in middle Tennessee. Therefore, the Union IV Corps under Stanley with 14,000 men, and also the 10,000-man XXIII Corps under Schofield were sent to Tennessee to be under George Thomas at Nashville to defend the state. Hood moved west from Gadsen, looking for a good place to cross the Tennessee River, and finally one of his three corps crossed on October 30th at Florence, Alabama.
November, 1864 – Into Tennessee. November opened with rain that caused the river to swell, and Union cavalry also harassed the rest of the Rebels trying to bridge the river. It was not until November 20th that the bulk of the Army of Tennessee was able to cross the Tennessee River, and by this time Forrest's cavalry had arrived. The Union used early November to gather and increase their forces in Tennessee. Stanley's corps moved to Pulaski, 13 miles south down the pike from Lynnville (0423), in early November, and Schofield's corps also soon arrived and was spread out from Pulaski to Columbia (1715) and beyond. In the immediate area the Union also had several cavalry brigades. To initially oppose Hood's force of about 33,000 infantry and cavalry, the Union under Schofield (senior commander in the field of the Union force south of Nashville) had about 26,000 infantry and cavalry. On November 21st, Hood's army moved north from the river. Schofield's main force left Pulaski and got to Lynnville on the 22nd. The main portion of Hood's Tennessee Campaign is about to begin on the Hood Strikes North map.
November 23-24, 1864 – Here Come the Rebels. On the 23rd, Confederate cavalry pushed Union cavalry back on both pikes leading to Columbia. Forrest was with Chalmers' cavalry division, which forced Capron's brigade back to Mount Pleasant (0711). The other two Rebel cavalry divisions pushed Croxton and Coon back to near Pleasant Hill (0319). While the Union IV Corps remained near Lynnville, Cox's division moved towards Columbia and reached Pleasant Grove (1220). Schofield realized that Columbia (1715) and its vital bridges were not only threatened, but also that the Union wagon train at Lynnville was in danger of being cut off by the advancing Rebels. Columbia was only defended by Ruger's depleted division of about 800 men. Therefore, early on the 24th, the Union infantry/wagon column got on the move and Cox's division raced ahead to the Waynesboro Pike to help Capron halt Forrest's rapidly advancing cavalry. Cox stopped Forrest late in the day at about Grist Mill (1514). This first "race" for Columbia safely on the 24th.
November 25-27, 1864 – The Rebel Infantry Arrive. Lee's corps lead the Confederate infantry column, which camped near Mount Pleasant (0711) the night of the 25th. It rained most of the 26th and 27th, which slowed up the Rebel force. By the night of the 27th the Rebels had reached a point near Columbia, with two of Lee's divisions on the outskirts south of the town and the main force located to the southeast a few miles. Meanwhile, James Wilson had taken command of all the Union cavalry in the region, and had them defending the Duck River crossings east of Columbia. Schofield determined that Hood would try to push Wilson back and outflank him, so the Union abandoned Columbia the night of the 27th. The wagons moved a few miles to Rutherford Creek (2213), while a strong infantry force defended the pikes just north of Columbia.
November 28, 1864 – A Rebel Trap Develops. Hood's plan to trap the Union forces was for Forrest to cross first at the fords east of Columbia and push Wilson's cavalry northeast, away from the infantry advancing behind them, which would advance rapidly northwest to Spring Hill (2914). To speed up the infantry's pace, this main body left most of its artillery behind with two divisions, which moved into abandoned Columbia to shell the strong Union force across the river. Forrest did his job removing the Union cavalry from the operation. Hood's engineers were then able to put up a pontoon bridge at Davis Ford (1719), which took all day and some of the night. The main Rebel infantry force moved up to the ford during the evening and night to be able to cross at first light the next morning. Wilson was not able to get updated information to Schofield so the Union infantry and wagons rested all day in place between Columbia and Rutherford Creek.
November 29, 1864 – The Race to Spring Hill. Seven Confederate infantry divisions, numbering about 22,000 men, started early in the morning, crossed the Duck River on the pontoon bridge, and headed for Spring Hill. However, to reach their objective they had a long trek of about 17 miles by winding country roads. Meanwhile, Forrest's cavalry finished pushing Wilson out of the way, and turned towards Spring Hill, coming from the east, but was held back by a small Union garrison. Then Wagner's Union division, which was leading the wagon train, arrived just in time to secure the vital crossroads. Schofield was initially still unsure as to Hood's objective, so he did not release his strong rear guard from just north of Columbia until 3:30 P.M. Therefore, the Union force of about 6,000 infantry at Spring Hill, had to hold off four times their number of Confederate infantry and cavalry. Cheatham's corps pushed the Union back into Spring Hill; but there were conflicting orders from Hood, who wanted Cheatham to block the pike, and from Cheatham himself, who thought he was supposed to attack the town. Neither objective was gained, and the pike remained barely open so the Union rearguard was able to reach Spring Hill during the evening.
November 30, 1864 – The Battle of Franklin. In the early morning hours of the 30th, the Union army started to move north from Spring Hill (2914) to Franklin (4010). Infantry led the way, followed by the wagon train. Confederate cavalry under Ross attacked the column along the way but did little damage. At daybreak on the 30th, the Union rearguard was pulling out of Spring Hill, while at the head of the 12-mile long column, the lead elements under Cox were entering Franklin. Union troops immediately started repairing a bridge to enable the wagons to cross the Harpeth River, and also digging into a defensive perimeter south of Franklin.
Meanwhile the Confederates started their pursuit to Franklin, having discovered that the Union had escaped during the night. After reaching the outskirts of Franklin, Hood held a meeting with his senior commanders. He decided on an immediate frontal attack on Franklin, overriding objections about the strength of the Union position and Forrest's proposal to flank the enemy by fording the Harpeth River to the east. Another concern was that three Confederate divisions were still on the march and not available for the battle—Johnson, Clayton, and Stevenson—and they had most of the Confederate artillery. Hood reasoned that there was not enough daylight left to flank the Union position and cut the enemy off from Nashville, or to wait for the rest of his army. He knew that the Union force would soon retreat; therefore, an immediate attack was his last chance to try to overwhelm the enemy before they could get to the safety of Nashville.
The Battle of Franklin was probably the fiercest and bloodiest five hours in the Civil War. Union losses were 2,326, or about 10% of their forces in the battle. Confederate losses are less exactly known, but were in the range of 7,000 to 8,000 men, about one-third of the Confederate army. Thirteen Confederate generals were lost, including Cleburne. More Rebels died than Union soldiers sent to their deaths by Burnside at Fredericksburg, and almost as many as Grant had lost at Cold Harbor, where the forces were in far greater numbers.
December 1, 1864 – Union Retreat to Nashville. The Union army started its retreat during the night, and by daybreak it was across the Harpeth River. The exhausted Union soldiers were for once not harassed during a grueling march, this one an 18-mile trek to Nashville. They were met by two newly arrived divisions under A.J. Smith, which brought the Union force now collected at Nashville to 35,000. The Confederates now only had about 21,000 infantry, but Hood was determined to not admit defeat and retreat south to safety, or to defend along the Harpeth River. He reasoned his best chance for victory was to advance to Nashville and entrench. He would await possible reinforcements, defeat the inevitable Union attack, and then be able to counterattack into Nashville. Therefore, Forrest started forward on this day and reached Brentwood (4910). Later in the day, Lee's and Stewart's corps started marching towards Nashville, while Cheatham's shattered corps continued to rest in Franklin.
December 2-4, 1864 – Buildup at Nashville. On the 2nd, Hood sent Bate's division east towards Murfreesboro (5232) to destroy the rail line along the way. While the rest of the Confederate infantry assembled just south of Nashville, Bate discovered that Murfreesboro was well defended by a Union force under Milroy. Meanwhile, Thomas was preparing for an eventual attack against Hood, and Union infantry reinforcements were continuing to pour into Nashville. Thomas thought he already had enough infantry for an attack, but he wanted a strong cavalry force to help destroy the Rebels in their eventual retreat. Wilson's troops were all badly in need of refitting and remounts, so they were sent north for that purpose across the Cumberland River.
December 5-6, 1864 – Murfreesboro Raid & Nashville Entrenchment. Hood dispatched Forrest with some additional infantry and most of his cavalry to advance to Murfreesboro and take command there. Bate and Forrest with the reinforcements joined forces at Smyrna (5523) the night of the 5th, and advanced to Murfreesboro on the 6th. The morning of the 7th, Milroy sortied from Murfreesboro with 3,100 of his total force of about 5,000. The two sides engaged near Overalls Creek (5129), and while some of the Confederate infantry were routed, Milroy pulled back to Murfreesboro. Bate was ordered to join Hood at Nashville; while Forrest with about 5,000 men, mostly cavalry, remained near Murfreesboro.
December 7-14, 1864 – Winter Weather. At this point, the weather immediately stalled the Union offensive. On the 7th a cold rain storm blew in which turned to snow on the 8th with the temperature down to 10 degrees F. On the 9th the temperature continued to drop, reaching -6 degrees F. The frozen ground and bitter cold prevented any entrenching and made combat impossible. Although the extreme cold continued and thus prevented any offensive operations, Grant ran out of patience and on the 13th ordered John Logan to Nashville to relieve Thomas if the Union had not attacked. The extreme cold lifted on the afternoon of the 13th, the ice melted, and the Union prepared to attack on the 15th. Wilson's cavalry force was mostly remounted and back south across the Cumberland River, ready to participate in the offensive. However, Hood had sent Lyon's raiders towards Clarksville, Tennessee, so two of McCook's Union cavalry brigades, 3,000 men total, were sent on the 14th to chase Lyon.
December 15, 1864 – The Battle of Nashville, Day 1. Thomas's plan was for an early morning engagement on the Rebel right (east) flank to pin those defenders and divert attention from the main thrust against the west flank. Steedman commanded the attackers in the east, with a large part of his force two brigades of United States Colored Troops (USCT). Steedman's division marched into a trap and was repulsed with heavy losses (300 men), and failed to cause Hood to reinforce his right flank.
Union operations on the west flank also started poorly. Johnson's cavalry division was supposed to push away the Confederate cavalry, but was blocked for hours by Union infantry in the way. Ector's Rebel brigade was also picketing out on this flank, and pulled back upon seeing the approaching Union forces. Johnson eventually got through to engage Chalmers's cavalry, which soon pulled back with their flank exposed by the withdrawal of Ector's brigade. The Union infantry force of three corps (Wood's, Smith's, and Schofield's) finally got into position in the early afternoon and rolled back the Confederate left flank. The Union main force had about 35,000 infantry and 6,000 cavalry, and in a few hours they overwhelmed the 5,000-man force of Stewart's corps that had dug in on that front.
Meanwhile at Nashville, Hood set up a defensive line five miles long, but not long enough to reach the Cumberland River on either flank. On the east flank there was a gap of about two miles from the end of the line to the river, but it was not considered vulnerable due to a compressed area of maneuver. The west end of the line ended four miles from the river; and while it was picketed by Ector's small infantry brigade and by a cavalry brigade, it was weak due to the absence of Forrest and the rest of his cavalry. At this time the Union army was mostly waiting for Wilson's cavalrymen to finish refitting; they were expected back with remounts and ready for battle on about the 9th. But the overall commander of Union forces, Ulysses S. Grant, was tired of waiting for Thomas to attack, and on the 6th he issued Thomas a direct order to "attack Hood at once and wait no longer for a remount of your cavalry." Thomas replied at once and agreed to attack.
Darkness halted the Union attack, and the Confederates were able to retreat and regroup. Of the eight Confederate infantry divisions (French's division had been merged into other units before the battle), only one-and-a-half had been badly hurt in the action on this first day. Therefore, instead of a full-scale retreat, Hood decided to fall back only about two miles and form a new line to accept battle the following day.
December 16, 1864 – The Battle of Nashville, Day 2. Hood's new line was only about three miles long, stretching from the Granny White Pike (5108) to the Franklin Pike (5209), with both flanks refused, about five miles south of Nashville. Cheatham's corps was on the left, Stewart was in the middle, and Lee was on the right. The Union army initiated an artillery bombardment early in the morning, and it continued until the main battle started in the afternoon. Wilson's cavalry started the action and tried to turn the Confederate left, but were stalled by Smith's division. Then Union troops made several attacks on the Confederate right, but each was repulsed with increasing loss. However, these attacks caused Hood to move most of Smith's division over to the right. About 3 P.M. the main Union attacks started with Wood's IV Corps assaulting Peach Orchard Hill on the Confederate right flank. Wood was thrown back with heavy losses, but meanwhile Wilson was slowly enveloping the Confederate left flank that had been reduced in numbers. Then McArthur's division in Smith's corps took Compton's Hill on the Confederate left, and a general Union assault joined in. The Confederate position collapsed from left to right. Lee's corps and Chalmers' cavalry division were able to set up a block just north of Brentwood to keep the Confederate retreat from turning into a rout. In this rearguard action, Lee declared: "Rally, men, rally! For God's sake, rally! This is the place for brave men to die!" Union losses in the two-day battle were about 3,000 men. Confederate losses are not known, but there were 4,462 prisoners taken and 53 artillery pieces captured (about half the Confederate artillery).
December 17, 1864 – Retreat & Pursuit. The night of the 16th, most of Hood's army retreated to Franklin. Lee's corps and the Confederate cavalry set up a block about halfway between Franklin and Brentwood, centered in Hollow Tree Gap (4410). They were joined by Buford's cavalry division, which had been sent by Forrest the evening of the 16th. Forrest, who was a few miles west of Murfreesboro, retreated with the rest of his force of cavalry, infantry, and wagons due south. Wilson began the Union pursuit by sending Johnson's division across the Harpeth River west of Franklin, while most of the rest of the cavalry moved down the Franklin pike and engaged the Confederate rearguard. Lee and the cavalry fell back to Franklin after a few hours and managed to blow all the bridges. The Union cavalry was able to cross the river anyway at various locations and engaged the Confederate rearguard as it moved south from Franklin to Thompson's Station (3213). Meanwhile the main body of the Confederate infantry reached Spring Hill (2914) and bivouacked. The Union infantry reached the Harpeth opposite Franklin, but were unable to repair the bridges and had to wait for their pontoons to arrive.
December 18, 1864 – Hood's Retreat Continues. Wood's corps finally repaired a bridge at Franklin and started crossing the Harpeth the morning of the 18th. (The pontoons were still missing, having gone down the wrong road from Nashville.) Wood's troops marched to three miles south of Spring Hill and camped. Hood's main body was well ahead of Wood, marching to just north of the Duck River near Columbia. Cheatham's corps had become the rearguard and, with the Confederate cavalry, fought off attacks from Wilson, who then halted just south of Spring Hill to rest. In the afternoon, the Confederate rearguard pulled back south of the Rutherford, burned the bridges, and covered all the crossings.
December 19, 1864 – Rebels Back to Columbia. The Union forces moved south on the morning of the 19th but were halted by the swollen Rutherford. Cheatham and the Confederate cavalry, with Forrest leading them again, held off the Union all day while Hood crossed into Columbia with the wagons and most of the rest of the army. Union troops were not able to repair the bridges and their pontoons were still farther north, so the Confederates escaped unmolested.
December 20-22, 1864 – Union Stalled, Hood Escapes. Hood continued his retreat on the 20th from Columbia, marching to a few miles north of Pulaski (which is about 13 miles [12 hexes] south down the pike from Lynnville [0423]). His objective was to cross the Tennessee River using pontoons at Bainbridge, Alabama, about 64 miles southwest of Lynnville. Forrest was left behind in Columbia with all his cavalry and a reinforced infantry brigade under Walthall. Wood's IV Corps and Wilson's cavalry arrived across the river from Columbia late in the day on the 20th. With all the bridges blown and the river unfordable from the rain, the Union force had to wait for their pontoons to arrive, which they finally did on the 22nd. The Union got a bridge built in the early evening of the 22nd and started crossing the river into an empty Columbia. Forrest had abandoned the town earlier in the day, pulling back south to a few miles north of Lynnville.
December 23-24, 1864 – Forrest's Rear Guard. The Union infantry mostly finished crossing the Duck River early in the morning of the 23rd, but then waited for Wilson's cavalry to cross and lead the way south on the pike to Lynnville. The Union cavalry, assisted by Kimball's infantry division, engaged with Forrest's main force at a pass between Lynnville and Columbia, at approximately Cotton Gin (0721). Forrest held the Union back until dark and then retreated back to Lynnville, while the Union bivouacked in the pass. On the 24th, Forrest executed a surprise attack with his cavalry and sent the infantry under Walthall to dig at the crossings at Richland Creek (approximately 0125 and 0126, just off-map). The Rebel cavalry met Union cavalry on the pike north of Lynnville and conducted a fighting withdrawal all day until they met up with Walthall at Richland Creek late in the day. Union cavalry engaged along the creek, causing the Rebels to withdraw towards Pulaski after sundown.
December 25-28, 1864 – Epilogue. The campaign on the Hood Strikes North map was now over. Hood's army eventually crossed the Tennessee River at Bainbridge on a pontoon bridge on the 26th & 27th, and Forrest's rearguard crossed on the 28th. Hood's Tennessee campaign was a huge gamble that ended in disaster for his army, losing about 16,000 troops out of 33,000. The Union lost about 6,000 men, held Nashville, and shattered the Rebel army. The last offensive of the Confederacy was decisively defeated and in a few months the war was over.
Hood's soldiers symbolized the mood of the "Lost Cause" in the song they sung with both woe and elan during their retreat (sung to the tune of The Yellow Rose of Texas):
And now I'm going southward For my heart is full of woe I'm going back to Georgia To find my Uncle Joe [Johnston] You may talk about your Beauregard And sing of General Lee But the gallant Hood of Texas Played hell in Tennessee
Map Gazetteer
By Joseph Balkoski
Rattlesnake Falls (0113). This scenic waterfall is part of the Bigby Creek watershed, a major tributary of the Duck River. It is an element of the central Tennessee geologic zone known as the Highland Rim, encompassing the rough, high-elevation terrain surrounding the lower, rolling pastureland of Maury and Williamson Counties.
Gordonsburg (0201). The first county seat of Lewis County, founded in 1843 and named in honor of the renowned western explorer Meriwether Lewis. Lewis was traveling north to Nashville on the Natchez Trace in October 1809 when he died at age 35, most likely from suicide. The site of his death and his gravesite are located just a few miles south of Gordonsburg.
Lynnville (0423). Founded in 1810 and christened as Lynnville in 1839, Lynnville was heavily damaged by Union troops in 1862. After the war, most residents resettled a mile to the east at Lynnville Station (0525). The town was eventually renamed Waco and is now much more modest than it was during the Civil War.
Natchez Trace (0501). Largely in disuse by the Civil War, the Natchez Trace was a trail established in 1801 by the authority of the U.S. government to facilitate trade between Ohio, Cumberland, and Tennessee River settlements with Mississippi River delta markets. During the War of 1812, the Trace was a pivotal route used by U.S. troops moving between Tennessee and Louisiana.
Lynnville Station (0525). Lynnville Station was one of many new depots constructed on the Nashville and Decatur Railroad, which was completed just prior to the Civil War. After the war, the burgeoning settlement around the station was rechristened New Lynnville, and eventually simply Lynnville.
Mt. Pleasant (0711). Incorporated as a town in 1824, Mt. Pleasant was the birthplace of Sam Watkins, author of the classic Civil War memoir Company Aytch, A Sideshow of the Big Show, which has been defined as "one of the greatest memoirs ever written by a soldier in the field."
Ashwood Hall (1211). Built in 1837 by Leonidas Polk, then rector of St. Peter's Church in nearby Columbia, and future Confederate Army general. Polk was rumored to hold more slaves than anyone else in Maury County. Ashwood Hall was destroyed by fire in 1874.
St. John's Church (1212). The oldest church in Maury County, St. John's was built under the direction of Leonidas Polk following the construction of his nearby home, Ashwood. Polk himself was buried here in 1864 following his death during the Atlanta campaign, although his remains were removed to Louisiana in 1945. Similarly, upon his death at Franklin on November 30, 1864, Gen. Patrick Cleburne was buried here, but six years later his remains were transferred to Arkansas. Many of Polk's slaves are buried in the St. John's cemetery.
Zion Church (1311). Settlers from the Carolinas, including future U.S. president James Polk, established a devout Zion Presbyterian community in this vicinity in the early 19th century. The original Zion church was replaced in 1849 with a more permanent brick structure, which still stands.
Pillow Plantations (1313 and adjacent hexes). Three Pillow family plantations were constructed in this area, all of which still stand. The first, Clifton Place (1313), was built in 1838 for Gideon Pillow, a future general in the Confederate Army. Pillow Place (also known as Rose Hill, 1314, dating to 1852) and Bethel House (1213, dating to 1855) were built for Gideon's brothers Granville and Jerome Bonaparte. All three were designed by the same architect, Nathan Vaught.
Williamsport (1505). This village was laid out in 1817 at the site of a Duck River ferry owned by Edward Williams.
Ft. Mizner (1714). A small stone fort built in 1862 by Union troops under the command of Col. Henry Mizner. By 1864, the fort formed the central part of a trench line dug northwest of Columbia to protect the Nashville and Decatur Railroad bridge spanning the Duck River.
Columbia (1715). Columbia, the Maury County seat of government, was laid out in 1808, just a year after the establishment of the county. Among the notable lawyers who practiced in Columbia was future president James Polk, whose 1816 home still stands.
Lewisburg (1730). Named after the explorer of the Louisiana Territory, Meriwether Lewis. Lewisburg was laid out in 1836 as the governmental seat of the newly established Marshall County.
Annoatuck (1814). A local Indian word for "windy hill," the Annoatuck plantation house was built in 1818 by Nathan Vaught, who would later design the three Pillow mansions southwest of Columbia. It was torn down in 1991.
Santa Fe (2107). This village is said to be one of the oldest white settlements in Maury County, dating to the first years of the 19th century.
Kinderhook (2202). Founded in 1805 and also known in the 19th century as Lodibar, Kinderhook was a rest stop on the Natchez Trace, with several taverns and inns.
Rippavilla (2714). Built in 1855 by Nathaniel Cheairs in the popular Greek Revival style, defined by its ornate Ionic columns, troops of both armies passed close by Rippavilla on November 29, 1864, during the Union army's escape from Columbia to Franklin via Spring Hill. The following morning, an angry Hood met with his generals at Rippavilla prior to the Battle of Franklin. The house still stands.
Oaklawn (2715). Constructed in 1835, Army of Tennessee commander Gen. John Bell Hood used Oaklawn as his headquarters during the Rebels' bungled effort to block the Union army's retreat from Columbia to Franklin on November 29, 1864. Oaklawn was restored in the 1950s and for a time became the home of the renowned country singer Tammy Wynette.
M. Cheairs (2814). This 1850s Greek Revival home was built by Martin Cheairs, brother of Nathaniel, owner of nearby Rippavilla. The commander of the Union army's IV Corps, Maj. Gen. David Stanley, used the house as headquarters during the retreat to Franklin on November 29, 1864. On May 7, 1863, Confederate Gen. Earl Van Dorn was shot and killed in the house by a local physician, whose wife had been having an affair with Van Dorn.
Spring Hill (2914). Founded in 1809, Spring Hill was one of the first white settlements in Maury County. From 1830 to 1837, Jackson College (originally known as the Manual of Labor Academy) operated in Spring Hill before moving to Columbia. Enrolled students were required to perform manual labor several hours per day.
Chapel Hill (3027). Chapel Hill was settled in 1808 by families from the Chapel Hill area of North Carolina. William Forrest, a North Carolina blacksmith, moved to Chapel Hill in 1815, and six years later his son, Nathan Bedford Forrest, was born in a nearby log cabin on July 13, 1821. That cabin, situated on the game map in hex 2925, still stands.
Thompson's Station (3213). This depot was constructed in August 1855 as an important stop on the new Nashville and Decatur Railroad. On March 5, 1863, Confederate General Earl Van Dorn captured 2,000 Union troops under the command of Col. John Coburn in a small engagement about one-half mile northeast of Thompson's Station.
Hillsboro (3406). Also known as Leiper's Fork—there was another village named Hillsboro in Tennessee—this early-19th century settlement was a common stopover for Natchez Trace travelers.
Peytonsville (3818). Before the Civil War, Peytonsville was known as Snatchett, or according to some sources simply Snatch. Legend has it that the name originated when an early settler snatched ten dollars from the hands of a man who was delinquent in paying off his debts.
Carter (3911). This brick house stood just behind the central point in the Union line at the November 30, 1864, Battle of Franklin. It was built in 1830 by Fountain Branch Carter, who still lived in the house 34 years later at the time of the battle. Carter's 24-year-old son Tod, who served in a Confederate infantry brigade, was mortally wounded in the fighting and died two days later in the house in which he was raised.
McGavock (3912). This house, known as "Carnton," was constructed in 1826 by the former mayor of Nashville, Randal McGavock. The house was behind Confederate lines during the November 30, 1864, Battle of Franklin, and served as a hospital during and after the fighting. Four Confederate generals killed in the battle, among them Maj. Gen. Patrick Cleburne, were laid out on the back porch of the house prior to their burial.
Franklin (4010). Upon the establishment of Williamson County in 1799, a new town, consisting of about 200 lots, was laid out south of the Harpeth River as the county seat and named after Benjamin Franklin. Franklin was under continuous Union occupation from June 1862 until December 1, 1864, when Hood's battered Army of Tennessee entered the town following the Battle of Franklin.
Ft. Granger (4111). Fort Granger was constructed by Union troops in early 1863 on high ground just north of the Harpeth River. A Union artillery battery in Fort Granger was able to carry out long-range fire against the right flank of Hood's Rebels during their assault against the Union line at Franklin in the November 30, 1864, battle.
Hollow Tree Gap (4410). Also known locally as Holly Tree Gap, Confederates under Lt. Gen. S.D. Lee fought a rearguard action here on December 17, 1864, during the Army of Tennessee's retreat after its defeat at the Battle of Nashville.
Beechville (4606). This village, established in the last years of the 18th century, was one of the northernmost stopovers on the Natchez Trace.
Brentwood (4910). On March 25, 1863, the renowned Confederate cavalry leader Nathan Bedford Forrest led a raid across the Harpeth River against a Union garrison of two infantry regiments in Brentwood. More than 500 Federal troops were captured along with a large number of wagons, horses, and mules. A Union cavalry force dispatched from Franklin failed to catch Forrest, who successfully escaped southward across the Harpeth and soon reentered Confederate lines at Spring Hill.
Nolensville (4918). Nolensville was established by Revolutionary War veterans in the late 18th century. The pike connecting Nolensville to Nashville was completed in the early 1840s.
Battle of Stones River (5131, 5230, 5331). On December 26, 1862, the Union Army of the Cumberland, under the command of Maj. Gen. William Rosecrans, advanced southward from Nashville to confront the Rebel army under Gen. Braxton Bragg entrenched in and around Murfreesboro. The Battle of Stones River was fought here on December 31, 1862, and January 2, 1863, ending in Union possession of the field and eventual occupation of Murfreesboro.
Fortress Rosecrans (5131, 5231). One of the largest single fort complexes built during the Civil War, Union troops began constructing Fortress Rosecrans in the aftermath of the Battle of Stones River to protect the Nashville and Chattanooga Railroad and to provide a secure logistical base for future operations in southern Tennessee and northern Georgia.
Murfreesboro (5232). Founded in 1811 as the seat of government for Rutherford County, Murfreesboro also served as capital of Tennessee from 1818 to 1826. From January 5, 1863, three days after the Battle of Stones River, to the end of the Civil War in April 1865, the Union army held Murfreesboro, although on December 7, 1864, elements of Forrest's cavalry penetrated into Murfreesboro and engaged Union forces in the town for a few hours.
Nashville Forts (5507-5807). Following the Union occupation of Nashville on February 25, 1862—which was successfully maintained throughout the remainder of the Civil War—Federal troops laid out a plan for fortifying the city. Nearly three years later, when Hood's army commenced its invasion of central Tennessee in November 1864, Nashville had become one of the most heavily fortified cities in America. According to Maj. Gen. William Rosecrans, Thomas's predecessor in command of the Army of the Cumberland, "Nashville was girdled with a waist of formidable fortifications and encircled by a zone of warlike camps. Its proud Capitol, graceful and beautiful, upon the crown of a rocky hill, was a castle frowning with great guns on its battlements and bristling with glittering bayonets. The streets were barricaded with cotton and earthen parapets." The most impressive fortification, erected at the summit of St. Cloud Hill just south of the city, was Fort Negley, the largest non-coastal fort constructed from stone during the Civil War.
Smyrna (5523). In January 1942, the U.S. War Department established Smyrna Army Airfield just north of Smyrna. It was the major training center for pilots of B-17 Fortress and B-24 Liberator bombers during World War II.
Hyde's Ferry (5603). One of the main Cumberland River crossing sites in the Nashville environs, this ferry was established by Richard Hyde in the mid-19th century.
Tennessee Insane Asylum (5611). The government of Tennessee established this asylum in 1832, and it moved to this location in 1851. It operated here until 1995, and the original buildings were torn down four years later, replaced eventually by a computer assembly plant.
Nashville (5706, 5707). Founded in 1779, Nashville became the governmental seat of Davidson County in 1806 and the capital of Tennessee in 1826, replacing nearby Murfreesboro. On April 17, 1861, Tennessee Governor Isham Harris responded to President Lincoln's call for troops to suppress the southern rebellion by stating in Nashville: "Tennessee will not furnish a single man for purposes of coercion, but 50,000 is necessary for the defense of our rights and those of our Southern brothers." Tennessee seceded from the Union on May 6. Less than ten months later, however, Union troops occupied Nashville and held it for the remainder of the Civil War. President Lincoln appointed Senator (and future president) Andrew Johnson as Military Governor of Tennessee in March 1862. For the next three years, Johnson resided in Nashville, striving to establish a pro-Union government in Tennessee. Nashville's population of 17,000 in 1860 did not even place it in the top fifty cities in the United States measured by their number of residents.
Olivet Cemetery (5808). Established in 1856, in the years immediately following the Civil War, Olivet Cemetery created a "Confederate Circle" as the final resting place for hundreds of southerners killed on nearby battlefields. Benjamin Cheatham, one of Hood's three corps commanders in the Army of Tennessee, and William Bate, one of Cheatham's division commanders and a future governor of Tennessee, were buried here.
Designers' Notes
By Joseph Balkoski
The Great Campaigns of the Civil War is entering its fourth decade. When I first began the GCACW design with Stonewall Jackson's Way in 1991, I never imagined that its loyal followers would over the next thirty years enthusiastically support a 12-game series—so far—that covers almost every major American Civil War campaign. So my profound thanks goes out not only to the thousands of players who have sustained the series over the years, but also to my fellow designers—primarily Ed Beach and Chris Withers—who immersed themselves in meticulous Civil War research and gained an unsurpassed expertise in the game system, carrying the GCACW flag for years while I was drawn away by my all-consuming job. Also, the superb boardgame artist Charlie Kibler, who, in what now seems like a different epoch, hand-painted the Stonewall Jackson's Way map with watercolors thirty years ago, is still creating our beautiful GCACW maps—to be sure, with computers rather than with watercolors. GCACW could never have endured without such a strong sense of community, and for that I am not only deeply grateful, but also confident that the series will remain vibrant for many years to come.
As the old saying goes, practice makes perfect. With Hood Strikes North, our twelfth GCACW series game, we have sharpened the standard rules based on extensive play experience, introduced new concepts peculiar to the 1864 Tennessee campaign, and finely balanced scenarios for competitive play thanks to lengthy testing by expert players on the amazing VASSAL platform.
But Hood Strikes North presented some unique challenges. From a personal standpoint, a formidable challenge struck me on the first day I jumped into the design: I had not created a board wargame, GCACW or otherwise, for twenty years—not since On to Richmond in 1998, in fact. Fortunately, as I happily learned, game design experience of a quarter-century in duration is pretty difficult to forget, and the process of rekindling the research and design skills needed to create a new GCACW game was effortless.
A much more arduous challenge was balancing the Hood Strikes North design so that it was simple enough to attract newcomers to the system, but also preserved its appeal to GCACW devotees, allowing all levels of gamers to experience this unusual campaign from the series' unique operational perspective. From the beginning, we resolved to maintain a minimal design approach in terms of play space, counter density, and special rules; and to allow players to complete scenarios, from the simplest to the most advanced, in a relatively short time. Every previous game in the GCACW series has featured multiple maps, save one. (That one—Stonewall's Last Battle—is a special case because it uses an existing map from an earlier game.) But an essential requirement in Hood Strikes North was to depict the Confederates' 1864 Tennessee offensive on only a single map—a tough condition to fulfill, but one that was achieved by manipulating the map orientation and play area so that it included virtually every key site in the region where significant combat occurred during the campaign. And due to the comparatively small size of the armies—Union troops at their peak numbered little more than 50,000, and the Rebels much fewer than that—even a single map leaves plenty of maneuver room. Finally, our effort to keep Hood Strikes North players focused on maneuver and battle rather than on logistics led to the decision to abstract supply rules as much as possible.
I sincerely wish you derive not only many hours of gaming enjoyment from Hood Strikes North, but also discover the rich history of this unusual and often overlooked military campaign. If you're new to GCACW, we hope we've hooked you for good and welcome you into the family; if you're already an aficionado of the series, we thank you for your support over the years and hope your exploration of Hood's 1864 Tennessee campaign, as you experience it through the game, is lively and enjoyable. Either way—you can count on more GCACW products soon. We're already working on them. Thanks, and take care.
By Chris Withers
I started designing GCACW scenarios in 1999, and continued until now, working with Ed Beach and Mike Belles. HSN was my first chance to work with Joe Balkoski in depth, and it has been quite a pleasure. After Joe created the maps and did the initial research, we shared the writing of the rules and designing the scenarios. We quickly discovered that we had the same philosophy on the balance between simplicity and quantity of rules. Especially for HSN we wanted to keep the campaign rules as limited as possible because the module was designed from the start as one that players new to the system could enjoy without getting overwhelmed with supply and other advanced rules. Joe, Ed, and I are extremely happy with the resultant basic game scenarios and campaign that are fun to play, historical, balanced, and provide good variability and depth for alternate strategies.
As a final note we would like to especially thank our lead playtesters who tested the scenarios relentlessly with us. Justin Rice quickly got us going with a VASSAL version, without which we would have been completely stalled. Niall Taylor and Steve Likevich did retest after retest with us so we could get the scenarios balanced. Our Spanish contingent lead by Alberto Romero and Juan Caballero played 8 campaigns in 4 months to really help us get an alternative view on a few rules issues and to tighten up the balance. Alberto also created a slick VASSAL version for playtesting. All of us designers were pleased to meet him at the 2020 MMP convention, which we heartily recommend as an excellent time for gaming and meeting GCACW players.