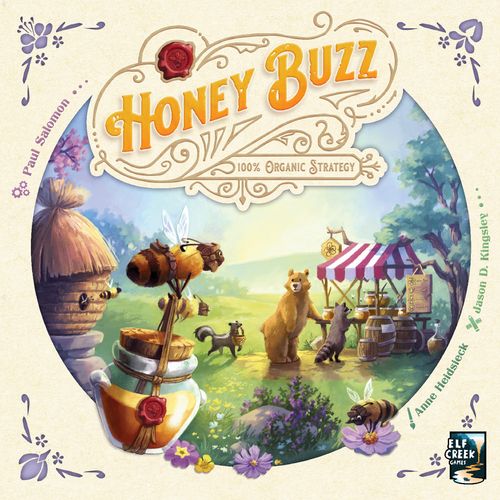
Honey Buzz
Honey Buzz Rulebook
Table of Contents
Table of Contents
Components
- 1 Hive Board
- 1 Woodland Board
- 4 Player Boards
- 4 Fan Tokens
- 16 Starting Hive Tiles
- 63 Standard Hive Tiles
- 40 Worker Beeples
- 4 Forage Tokens
- 26 Order Cards
- 18 Configuration Cards
- 24 Nectar Tiles
- 15 Pollen
- 12 Queen's Contest Cards
- 28 Honey
- 60 Coins
- 4 Player Aids
- 10 Drone Cards (solo)
- 2 Drone Beeples (solo)
- 12 Queen's Contest Cards (solo)
- 1 First Player Marker
Setup
Important! For your first game, we recommend that you use the queen's contest cards (step 4) and configuration card (step 10) marked with the star icon. Those cards have been designed with new players in mind.
-
Place the two game boards next to each other in the center of the table. For the hive board, use the side that is marked for the current player count (1-2 players or 3-4 players). For the woodland board, use side "A" for the standard game.
-
Sort the standard hive tiles into six groups by type. For each type, create a stack with all tiles of that type. Place each stack in its designated hive box on the hive board.
-
Place all of the coins, pollen, and honey next to the woodland board as the supply. Sort the honey into four piles by type. Do not sort the pollen; the different colors are for fun only and have no effect on gameplay.
-
Sort the queen's contest cards into three groups by color. For each color, select one at random, then return the rest to the game box. Place these cards in their designated spaces on the hive board. For each speed contest, take coins from the supply and place them on the contest card in certain values, based on player count (see table a).
Table a - Speed contest payouts:
- 2 Players: Place 20 coins on 1st place.
- 3 Players: Place 20 / 10 coins on 1st / 2nd place.
- 4 Players: Place 20 / 10 / 5 coins on 1st / 2nd / 3rd place.
-
Sort the order cards into two groups by type. Create three stacks, based on player count (see table b). Place them face down in their designated spaces on the woodland board, then flip the top card of each stack face up. Return unused cards to the game box.
Table b - Order stacks:
- 2 Players: For each stack, add 2 large orders at the bottom and 1 small order at the top (i.e., 3 orders total).
- 3 Players: For each stack, add 2 large orders at the bottom and 2 small orders at the top (i.e., 4 orders total).
How to Play (Overview)
- Connect hive tiles to make empty cells for storing nectar. The pattern on the cell border determines which nectar can be stored there.
- Move your forage token through the field to collect nectar that you have empty cells available for - or gain pollen instead.
- Place your fan token next to nectar tiles in your hive to produce honey, which you will place on top of the nectar tiles.
- Trade honey and pollen for points by selling to the market or completing orders. Then produce honey again and keep things buzzing!
Gameplay
The game is played in a series of player turns, beginning with the first player and continuing in clockwise seating order.
On a player's turn, they choose to either A) take a tile or B) recall workers. If they do not have enough workers available to take a tile, they have no choice; they must recall workers.
When one player's turn is over, the player on their left takes a turn. This series of player turns continues until the end of the game is triggered.
Take a Tile
When you take a tile, carry out these three steps:
1. Make a Beeline
Assign one or more of your available workers to a hive box of your choice on the hive board. No matter how many workers you assign, stack them all together to make a single stack, known as a beeline.
When the hive box you choose is already occupied by other beelines (whether they belong to you or your opponents), you must assign exactly one more worker to your new beeline than the number of workers in the tallest beeline already present in that space.
If you do not have enough workers available to make a new beeline taller than the tallest beeline already present in that space, then you cannot choose that space.
2. Expand the Hive
Take one of the hive tiles from the hive box where you just assigned your workers. Place that hive tile in your hive so that it touches one or more of the existing hive tiles, yellow edge to yellow edge.
In order to take a Decree hive tile, you must spend five coins, returning them to the supply. None of the other types of hive tiles cost coins. Note: This is still true in the two-player game, even though the Decree and Accounting hive tiles are in the same hive box.
Important! Each hive tile has four yellow edges that can legally touch other hive tiles. Hive tiles may not touch each other along the other edges.
3. Take Hive Actions
If placing the new hive tile creates an empty space that is completely surrounded by hive tiles, you have created an empty cell! It is possible to create multiple empty cells at the same time, with the placement of a single hive tile.
When you create an empty cell, you activate all action icons on the spaces adjacent to the empty cell. You may take the corresponding hive actions in the order of your choice, but you must take them all, if possible. (See hive actions.)
Each action icon can only be activated once per turn, even if you create multiple empty cells adjacent to that space. However, it is possible to activate multiple different copies of the same action icon in a single turn.
Recall Workers
When you recall workers, carry out these two steps:
1. Retrieve Workers
Remove all of your workers from every hive box on the hive board, including any new workers in the New Bee hive box, and return them to your player board. They are now available for you to assign on future turns.
2. Scout for Nectar
You may move your forage token up to one space for free, following all of the normal movement rules for forage tokens (see Forage). However, you may not spend coins to move it extra spaces, and you do not collect a nectar tile or gain pollen from the supply.
Hive Actions
There are six hive actions, each linked to a specific action icon. Forage, Produce, New Bee, and Decree action icons are found on standard and starting hive tiles, while Market and Accounting action icons are found only on standard hive tiles.
Forage
Move your forage token orthogonally in the field. You may move it up to one space for free, then you may move it extra spaces by spending two coins per extra space.
- Collect Nectar: If your forage token ends its movement in a space with a nectar tile and you have an empty cell in your hive for that type of nectar, collect the nectar tile and place it in that empty cell, face up.
- Gain Pollen: If your forage token ends its movement in an empty space -or- in a space with a nectar tile but you do not have an empty cell in your hive for that type of nectar, gain one pollen from the supply instead.
Forage tokens do not block the movement of other forage tokens. They may be moved past each other and even share the same space.
Forage tokens may only be moved orthogonally (i.e., north, south, east, or west). They may not be moved diagonally. They may move onto empty spaces.
Produce
Place your fan token on any space in your hive. Each nectar tile adjacent to that space immediately produces one honey; gain one honey of the matching type from the supply and place it on that nectar tile.
Each nectar tile can only hold one honey at a time; if a nectar tile is currently holding one honey, it cannot produce another.
When the action is complete, remove your fan token and keep it nearby.
New Bee
Move one of your workers from the supply to the nursery temporarily. The nursery is an area designated for new workers, located within the New Bee hive box. If you have no workers left in the supply, nothing happens.
The next time you recall workers, you will gain this new worker, and it will then be available for you to assign on future turns. This new worker counts toward the completion of contest cards immediately, even before you have gained it by recalling workers.
Decree
Take any one of the five other hive actions. You may choose any hive action, even one that you are already taking this turn from the activation of a different action icon. Note: While Decree tiles cost five coins to take, there is no cost to activate them. (Decree acts like a "wild.")
Accounting
Gain five coins from the supply. The supply of coins is meant to be unlimited; if there are not enough coins left in the supply, use pennies or some other substitute. (Note: Coins are worth points at the end of the game!)
Market
Perform one transaction: either A) sell to the market or B) complete an order.
A. Sell to the Market
Choose one resource: pollen or one honey type. Sell any quantity of that resource. For each unit sold, gain coins from the supply equal to that resource's current value, indicated by the position of the marker in that market column. Return the sold units to the supply.
After you have gained your coins, the value of that resource drops by one; move the marker down one space in that market column. The value only drops by one per sale, no matter how many units were sold. If that resource's value cannot drop further because the marker is already at the bottom of the market column, the value of a different resource drops instead (your choice).
B. Complete an Order
Choose one face-up order card. Complete the order by returning to the supply the units of resources required by that order. Take the order card and place it in front of you; it will be worth points at the end of the game.
When you complete an order, you also activate the action icon printed below that stack of orders: Forage, Produce, or Market. You must take the corresponding hive action if possible, but you may take it at any time before the end of your turn.
At the very end of your turn, flip the next order card in that stack face up.
Honey & Nectar
There are four types of honey: Wildflower, Rosemary, Cherry Blossom, and Acacia. Each type of honey can only be produced by a nectar tile of the same type.
When you create an empty cell in your hive, the pattern of dark borders surrounding the empty cell determines which type of nectar tile can be placed in that cell later. Each type of nectar corresponds to a unique pattern.
Wildflower nectar only requires three hive tiles, while Rosemary and Cherry Blossom nectar require four hive tiles and Acacia nectar requires five hive tiles. Generally speaking, the more hive tiles are required for the nectar, the more valuable the honey it produces will be.
Queen's Contests
In each game, three of the queen's contests are available. Contests are opportunities to earn coins or points by competing against other players in certain categories.
There are two types of contests: speed contests and final contests.
Speed Contests
Speed contests offer payouts of coins, awarded to each player immediately upon completion, based on how quickly they finish the contest compared to their opponents.
The three coins on the contest card (i.e., 20, 10, and 5) are the payouts available to the players who finish first, second, and third in the contest.
The player who finishes last never receives a payout, no matter the player count. This is why, in games with two or three players, not all places have coins on them.
Final Contests
Final contests offer payouts of points, awarded to each player at the end of the game, based on how highly they rank in the contest compared to their opponents.
The three point values on the contest card (i.e., 20, 10, and 5) are the payouts available to the players who place first, second, and third in the contest.
- If two players tie for a given place, each of those players receives the full payout for that place, and the next player's payout is decreased by one place.
- If three or more players tie for a given place, each of those players receives the full payout for that place, and no further payouts are awarded.
The player who places last never receives a payout, no matter the player count. However, if multiple players tie for last place, they receive their normal payouts.
End of the Game
The end of the game is triggered when at least one of these conditions occurs:
- The values of four of the five resources cannot drop further.
- The orders in two of the three stacks have all been completed.
When this happens, the game continues until all players have had an equal number of turns. This means that the last player in turn order will take the final turn of the game. Then tally points to determine final scores.
Final Scoring
Each player determines their final score by tallying their points in four categories. It might be easiest to use extra coins from the supply to track these scores.
- Coins: Add up the total value of your coins. Score points equal to that value.
- Honey & Pollen: Score one point for each honey and pollen left in your hive.
- Contests: Score the indicated points for your place in each final contest.
- Orders: Score the indicated points for each of your completed orders.
The player with the highest score is the winner! If there is a tie, apply these tiebreakers: 1) most remaining resources, then 2) most completed orders. If the tie persists, the tied players share the sweet taste of victory.
Clusters & Straight Lines
Clusters
Some contests require clusters. A cluster is a group of three cells that are all adjacent to a single space in your hive (i.e., creating a triangular formation). If all three cells contain nectar tiles, that is known as a nectar cluster. If all three cells are empty, that is known as an empty cell cluster. Each cell can even be part of multiple clusters.
Straight Lines
Some contests require cells in straight lines. A straight line is a single vector drawn through your hive in one direction. For contests that require cells in straight lines, the cells must be consecutive, creating a repeating pattern with only a single hive space between every two cells in the line.
Advanced Variant (Nectar Tile Backs)
In this variant, all nectar tiles are face down in the field when the game begins! This adds an element of memory and deduction, as well as some randomness, for those who want their foraging to be a little more challenging.
Game Setup
Set up the game as you would for the standard game, but observe the following important changes and additions:
- Use the "B" side of the woodland board.
- Sort the nectar tiles into four groups, according to their backs. Remove certain tiles from each group and return them to the game box, based on player count (see table f).
- For each nectar group, shuffle the remaining nectar tiles and place them face down in the matching quadrant of the field, with the tiles distributed randomly, one per space.
- Return the forage tokens to the game box.
Table f - Nectar tiles removed:
- 2 Players: Remove two of each type (2 Acacia, 2 Wildflower, 2 Cherry Blossom, 2 Rosemary).
- 3 Players: Remove one of each type (1 Acacia, 1 Cherry Blossom, 1 Rosemary, 1 Wildflower).
- 4 Players: Remove None.
Game Sequence
During the game, instead of moving your forage token through a field of face-up nectar tiles, you will be viewing the face-down nectar tiles secretly. Use that information to your advantage, but do not reveal it to your opponents!
Foraging for Nectar
When you forage for nectar, choose any one nectar tile in the field. Pick that tile up and secretly view the front side, to see which type of nectar it is.
- If you have an empty cell in your hive for that type of nectar, collect the nectar tile and place it in that empty cell, face up.
- If you do not have an empty cell in your hive for that type of nectar, put the nectar tile back exactly where it was, face down. Gain one pollen from the supply instead.
Scouting for Nectar
When you scout for nectar, choose one nectar tile in the field. Pick that tile up and secretly view the front side, to see which type of nectar it is. Then put the tile back where it was, face down. Do not collect the nectar tile or gain pollen from the supply.
Advanced Variant Clarifications
- You may look at the backs of the nectar tiles in your own hive at any time, to help you deduce which nectar tiles are still available in the field, but you may not look at the backs of the nectar tiles in opponent hives.
- With fewer players, there will be some empty spaces in the field at the start of the game. The position of the empty spaces within each quadrant does not matter, as long as each nectar tile is in its proper quadrant.
- When you view a nectar tile secretly, if you are not able to collect it, make sure you put it back in the same space where you picked it up from.
Solitaire Variant
In this variant, you play the game by yourself. Try to score as many points as possible, while dealing with the layabout drones that get in your way. But if you fail to score high enough in the queen's contests, you will lose!
Game Setup
Set up the game as you would for two players, even though there is only one human player. Observe the following changes and additions:
- Use the solo contest cards instead of the multiplayer contest cards.
- Select two configuration cards at random then choose one of them to use, based on which contest cards are in play for this game.
- Shuffle the drone cards together to form a single deck. Place this deck nearby, with the "hive" sides of the cards face up.
- On the hive board, place one drone beeple in the Decree/Accounting hive box and the other drone beeple in the Market hive box.
Difficulty Levels
Before the game begins, choose a difficulty level. The difficulty level that you choose will determine the minimum number of points you must score from the three contests combined in order to avoid losing the game (see table g).
Table g - Minimum score:
- Egg: 25
- Larva: 30
- Pupa: 35
- Adult: 40
- Queen: 45
Game Sequence
In this variant, play alternates between player turns and drone turns. The player always takes the first turn of the game.
Player Turns
On each player turn, follow the turn sequence exactly as in the multiplayer game. Observe these two new rules:
- There will be two hive boxes occupied by the drones at all times. You may not take hive tiles from those occupied hive boxes until the drones move to other hive boxes.
- Some nectar tiles may be removed from the game during drone turns. You may not collect nectar tiles that have been removed from the game.
Drone Turns
On each drone turn, flip the top card of the drone deck and place it beside the deck, "woodland" side up. However, if there is only one card left in the deck, do not flip that card. Instead, gather all ten cards and shuffle them together to form a new deck, then flip the new top card.
Drone Action: Look at the "woodland" side of the drone card that was just flipped. Perform the action shown on that card (see table h).
Table h - Drone actions:
- Order Card: Choose one of the face-up order cards. Remove that order card from its stack and return it to the game box. Then flip the next order card in that stack face up.
- Highest Honey and Pollen: The value of pollen and the honey type with the current highest value both drop by one. If there is a tie for highest value, you choose which of those honey types drops in value.
- Wildflower / Rosemary / Cherry Blossom / Acacia: Choose one of these two options: Identify the nectar tile of the matching nectar type that is closest to your forage token and remove it from the game -or- drop the value of the matching honey type by one.
Drone Movement: Look at the "hive" side of the drone card on top of the deck. Move the drone on that side of the hive board into the hive box shown on that card. If it is there already, nothing happens.
End of the Game (Solo)
The end of the game is triggered exactly as in the multiplayer game. If this occurs during one of your turns, the game ends immediately. If this occurs during a drone turn, you get to take one more turn before the game ends.
Final Scoring (Solo)
In the solitaire variant, each contest has a scoring condition and four scoring tiers. For each contest, score the indicated points for the highest tier that you achieved, based on how many times you met the scoring condition. Determine how many points you scored from the three contests combined. If you reached or surpassed the minimum score required for your chosen difficulty level, you have won! But if you did not, you have lost.
Losses are not scored, but wins are scored exactly as in the multiplayer game. Check your final score against the chart to see how well you did (see table i).
Table i - Rank titles:
- 0-79: Humble Bumbler
- 80-99: Scout Leader
- 100-119: Apiculture Expert
- 120-139: Honey Tycoon
- 140+: Hive Royalty
Solitaire Clarifications
- The two drones remain on their respective sides of the hive board at all times. One moves between the New Bee and Decree/Accounting hive boxes, while the other moves between the Forage, Produce, and Market hive boxes.
- If a resource's value cannot drop further when it is supposed to, the value of a different resource drops instead (your choice). This applies on your turns and drone turns.
- If there are multiple nectar tiles of the matching type that tie for being the closest to your forage token, you may choose which one of those tiles to remove.
- The solitaire variant can be combined with the advanced variant. When a drone action requires you to remove a nectar tile, choose any one face-down tile from the matching quadrant of the field, then reveal it and remove it from the game.