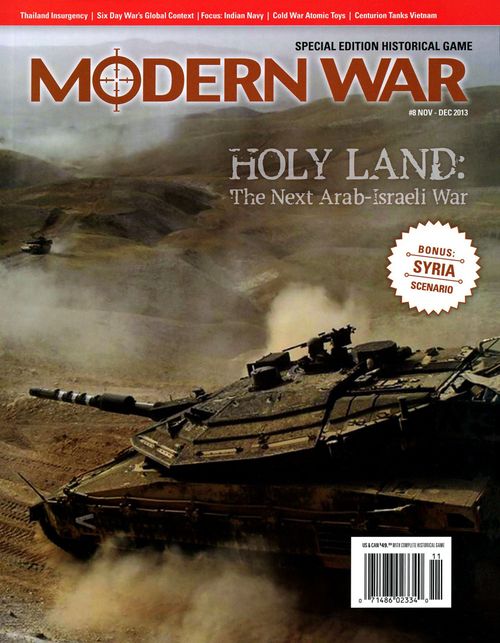
Holyland: Full Spectrum Warfare in the Middle East
Holyland: Full Spectrum Warfare in the Middle East Rulebook
Table of Contents
Table of Contents
- 1.0 Introduction
- 2.0 Components
- 3.0 How to Set Up the Scenario
- 4.0 How to Play
- 5.0 How to Win
- 6.0 Netwar Index
- 7.0 Control of Forces
- 8.0 Unit Levels
- 9.0 Regional Organization
- 10.0 Initiative (Per Sequence of Play)
- 11.0 Mobilization
- 12.0 How to Move Units
- 13.0 Conflict (General)
- 14.0 Conflict (Underground)
- 15.0 Voluntary Retreat
- 16.0 Conflict Results
- 17.0 Return Phase
- 18.0 Underground
- 19.0 Control of Hexes
- 20.0 Netwar Chits
- 21.0 Unconventional Forces
- 22.0 Air Operations
- 23.0 Naval Operations
- 24.0 Forward Operations Bases/Base Zones
- 25.0 Fog of War
- 26.0 Barrage & Precision Guided Munitions (PGM) Attacks
- 27.0 Jihad
- 28.0 Operation Samson
- 29.0 Optional Rules
- 29.1 Starting Points
- 29.2 Egypt and Sinai Demilitarization
- 29.3 Additional Air Missions
- 29.4 Special Units
- 29.5 Airmobile Transport
- 29.6 NATO Airlift
- 29.7 Joint Operations and Second Impulse Movement Combat
- 29.8 Suicide Bomber Attacks
- 29.9 Combat Logistics (Supply)
- 29.10 Kinetic Combat
- 29.11 Other CRTs
- 30.0 Holyland Initial Deployment Chart
1.0 Introduction
The premise of Holyland is that there is a revitalization of the militant Arab world. They then challenge the Israelis, using not only conventional military forces, but also the full spectrum of conflict, including insurgency and terrorism. The game includes several possible scenario options for different types of conflict. Holyland game shows some of the major factors involved.
The Holyland game system is based upon Decision: Iraq, but there are some differences, so players are advised to read the rules thoroughly even after learning to play Decision: Iraq.
1.1 Players
There are two players in Holyland:
The Arabs: This side represents various Arab Powers and Foreign Fighters, the latter possibly including Al Qaeda and Iranian support, among others. The Arab objectives may range from establishing an independent Palestinian state to the total destruction of the state of Israel.
The Israeli-Coalition: Their objectives range from maintaining their territorial integrity to launching preemptive strikes against hostile powers. The Israelis may possibly have the support of Coalition allies.
1.2 Netwar Index
Central to the play of the game is the Netwar Index. Each player has a Netwar Index that simply indicates how successful their side is in achieving its goals...effectively, representing the amount of international support each side is getting. The Netwar Index affects various game functions, such as mobilization of reinforcements.
Note: There is also a set of Netwar Chits, which represents various fortunes of war.
1.3 Units
Both players have a set of pieces that represent conventional and unconventional forces. Players move their pieces across the spaces on the map and engage in various kinds of conflict in order to destroy enemy forces, seize critical objectives, and change the Netwar Index (hopefully in their favor). Both sides can mobilize new units by paying for them with Netwar Points.
One unique feature of the Holyland is that as units engage in combat, their effectiveness may increase or decrease as they gain experience in fighting, or become demoralized.
2.0 Components
2.1 The Game Map
The game map shows Israel and adjoining countries.
2.2 Hex Boxes
The large hexagonal boxes are called "hexes", and each is named for a specific hex. These hex boxes represent the general geography of the hex. Players deploy their units into hex boxes, into "Open" status. Each hex box may contain any number of units. When both sides have units in the same region, conflict may occur.
2.3 Underground Boxes
The smaller boxes in hexes are Underground boxes. These represent the population of that region, as well as any physical underground. Units within Underground boxes may engage in a modified form of combat.
2.4 Movement Routes
The connecting arrows between boxes are the routes by which units move from one hex to another. There are three general types of routes: Land, Air and Naval.
2.5 Netwar Points
Printed at the top of each hex box, next to the hex name is the number of Netwar Points that each side receives for controlling that hex. These points may also be awarded or lost for certain combat outcomes in that region, including the Underground boxes.
The list of Netwar Points for each country is listed as follows, for reference:
- Egypt: 29
- Gaza: 4
- Jordan: 15
- Syria: 18
- West Bank: 2
- Lebanon: 10
- Israel: 49
2.6 Area Affiliation
Hexes are affiliated according to a color code, listed as follows:
- Israeli: Blue hexes
- Arab: Various other colors
- Neutral: All white hexes
Affiliation will affect the mobilization of certain units, the number of points gained, and the ability to go underground.
2.7 Israeli Special Hex
This is Dimona, the Israeli nuclear site.
2.8 Foreign Areas
These include Iran, Arab volunteer, Coalition bases (in Europe), and US Gulf bases. These have no Underground boxes, and are not worth any points. Units may enter foreign areas and conduct combat with restrictions.
2.9 Map Displays
There are numerous map displays to aid players during the course of the game, listed as follows:
2.9.1 Airstrikes Available
Place Airstrikes in the Airstrikes Available Box when not being used to attack targets on the map.
2.9.2 Netwar Chits Available
Place Netwar Chits that have been picked from their Netwar Pool.
2.9.3 Netwar Index
Each player has a Netwar Index. This records the player's current Netwar Points on a scale of 0-99.
2.9.4 Time Record Chart
This indicates the current turn.
2.9.5 Game Charts and Tables
There are numerous map charts and tables to aid players during the course of the game, listed as follows:
2.9.6 Conflict Resolution Tables
There are three of these. Each one represents a different type of combat: Peacekeeping, Guerrilla, Kinetic.
2.9.7 Mobilization Charts
This gives the cost of building units in Netwar Points for each side.
Errata: The top column of the Arab Mobilization Chart should be printed "Placement Arab" and "Placement Foreign Fighters" instead of "Placement Israelis" and "Placement Coalition", respectively. Furthermore, on both charts, ignore the reference to a "Combined Arms" type of unit.
2.9.8 Movement Restrictions Chart
This shows where the various force contingents can move.
2.10 The Playing Pieces
There are three general types of units in the game:
Conventional: These represent relatively large formations of troops.
Unconventional: These represent SOF, cadres, or other covert type teams operating throughout a hex. They have "UW" (unconventional warfare) rating printed on the back as a mnemonic.
Air: These represent aircraft, drones and helicopters. These are medium sized units.
Designer's Note: The precise definition of Conventional and Unconventional units is rather broad in the game.
2.11 Sample Unit
On each unit there are three numbers. The first is the unit's Conflict rating. Conflict is the ability of the unit to engage in various kinds of action in order to get their point across and to affect the other player's pieces.
The second (parenthesized) number is the unit's Level. This is the relative state of combat effectiveness and morale of the unit. The higher the Level of the unit, the more effective it is.
Note: Conventional unit levels may change in the course of conflict, and units may be replaced by units of higher or lower levels. Some units are printed with the same Level on their front and back sides, indicating that they never change levels, regardless of the combat result.
The third number is the unit's Movement rating. It is the number of hexes the unit may move each turn.
A highlighted movement rating means the unit can use Infiltration (it is an Infiltration Capable Unit).
An infinity symbol means the unit can use air movement (it is an Air Movement Unit).
2.12 Conventional Units
Most units in the game are Conventional, all of which are listed on the Unit Type Chart for each side.
2.13 Unconventional Units
Some units in the game are Unconventional units, which are identified with a "crossed arrows" NATO icon symbol. Unconventional units are listed on the Unit Type Chart for each side.
Unconventional units generally function in the same manner as Conventional units, but have certain special abilities as per rule 21.0.
Unconventional units have only one Level (indicated by the "0" as the Level rating.) They are not affected by certain combat results.
2.14 Air Units
Air units are neither conventional nor unconventional, but are a separate category that have a special combat ability. They have no Levels, and may be placed anywhere on the map.
Certain air units are backprinted with "Defensive Mission"; this is explained in the optional rules.
2.15 Israeli Units
Israeli units have the identification of the historical formations printed on them. This information has no effect on play, and are abbreviated as follows:
- CC: Central Command
- Gn: Golani
- J&S: Judea and Samaria
- N: Nahal
- NC: Northern Command
- SC: Southern Command
- Taz: T'zanhanim
- Y: Yaman/Yamas/Yamag police counterterrorist units
- Ya: Yaholam (elite engineers)
2.16 Arab Units
Arab units have the identification of the historical formations printed on them. This information has no effect on play, and are abbreviated as follows:
Note: Each Arab power has units in its own colors.
Lebanon:
- BVC: Bekaa Valley Command
Arab Nationalities:
- A: Army (collection of army level independent brigades or regiments)
- AA: Abdullah Azzam
- Cdo: Commando
- JAA: Jund Ansar Allah
- PG: Presidential Guard
- RG: Republican Guard, Royal Guard
- RGC: Revolutionary Guards Corps
- SF: Special Forces (sometimes, elite light infantry).
2.17 NATO Units
NATO units have the identification of the historical formations printed on them. This information has no effect on play, and are abbreviated as follows:
NATO:
- EU: European Union
- JSOTF: Joint Special Operations Task Force
- MEF: Marine Expeditionary Division
- MN: Multinational
- PMC: Private Military Contractors
- RRC: Rapid Reaction Corps
- SFG: Special Forces Group
- UK: United Kingdom
- US: United States
Note: The Israeli Mobilization chart refers to a "Stryker" unit; this unit is the NATO US 2nd brigade game piece.
2.18 Netwar Chits
Each player is provided with his own set of Netwar Chits. These represent the utilization of modern communications technologies as well as extremely unconventional methods of warfare.
2.19 Netwar Pool
Netwar Chits are initially placed in a wide mouthed opaque container, called a Netwar Pool. Each player has his own separate Netwar Pool.
2.20 Administrative Markers
Administrative markers are used to indicate various game functions. These include:
- Jihad: This indicates that the Arab player has called for a mass uprising.
- Netwar: This indicates the relative level of political support for a player.
- Samson Option: This indicates that the Israeli player has committed massive forces for an all-or-nothing war.
- Turn: This indicates the current turn.
2.21 Scenario Variant Chits
These are used with the optional rules to provide social conditions for the scenario.
2.22 Dice
Players will need two six-sided dice.
3.0 How to Set Up the Scenario
Do the following in the order listed:
-
Decide which player will control the Israelis, and which will control the Arabs. Each player then takes their units and sorts them out according to their Faction.
-
Determine the Starting Netwar Points:
a) Both sides initially start at 40.
b) One player rolls one die; multiply that number by ten (to get a number from 10 to 60).
Note: It does not make a difference which player rolls the die above. The same number is used for both players. The idea is that the starting level represents the overall tension of the region, so the higher it is, the more each side mobilizes.
-
Add this number to 40. Set the total for both players (to get a final from 50 to 100). Use any convenient pneumonic (such as a penny) to record this number on the track.
-
Determine Arab activation: The Arab player decides which Islamic powers will be involved in the scenario (this is a one-time event). He does this by expending the number of Netwar points indicated by the Activation chart to bring them in. The Arab player must activate at least one Islamic power. This gives the player the starting (initial) forces only.
-
Determine Israeli-Coalition activation. The Israeli player decides whether or not to bring in Coalition support in the scenario (this is a one-time event). He does this by expending the number of Netwar points indicated by the Activation chart to bring in the Coalition forces. Regardless, if the Israeli player decides to activate the Coalition or not, Israel itself is always activated. This gives the player the starting (initial) forces only.
-
Deploy starting Player Forces. Each player receives the forces listed by the scenario (see the end of this rules set; ignore the charts on the map), and places them on the map. The Arabs set up first, then the Israelis.
a) Each player then expends Netwar Points to build additional starting forces of nations which are activated. This is to be done secretly and simultaneously.
Note: Lebanese units are purchased and rebuilt via Israeli Netwar values.
b) The Arab player deploys his units on the map.
c) The Israeli player deploys his units on the map.
Note: This order may be changed via the play of Scenario Variant chits, if using the optional rules.
- Set up the turn marker in the Turn One box. The game begins on turn one with the Initiative Determination Phase.
4.0 How to Play
The game is played in turns.
4.1 Sequence of Play
Play each game turn according to the order as listed below:
-
Initiative Determination Phase Determine who will be the First and Second Players (see 10.0).
-
First Player Turn
a) First Player Chaos Events Phase: The First Player rolls on the Chaos Events Table (see 11.0).
Note: This is an on-line optional rule.
b) First Player Mobilization Phase: This applies only on a "B" turn. The First Player builds new units as per the Mobilization rule (see 11.0), including any just-activated power.
c) First Player Movement Phase: The First Player moves his units in accordance with the Movement rule (see 12.0).
d) First Player Conflict Phase: The First Player initiates conflict with his units in accordance with the Combat rule (see 13.0 and 14.0). First execute all "Open" status combat, then execute any Underground combat.
e) First Player Rebasing Phase: The First Player may now move units allowed to move in this Phase.
- Second Player Turn
a) Second Player Chaos Events Phase: The Second Player rolls on the Chaos Events Table (see 11.0).
Note: This is an on-line optional rule.
b) Second Player Mobilization Phase: This applies only on a "B" turn. The Second Player builds new units as per the Mobilization rule (see 11.0).
c) Second Player Movement Phase: The Second Player moves his units in accordance with the Movement rule (see 12.0).
d) Second Player Conflict Phase: The Second Player initiates conflict with his units in accordance with the Combat rule (see 13.0 and 14.0). First execute all "Open" status combat, then execute any Underground combat.
e) Second Player Rebasing Phase: The Second Player may now move units allowed to move in this Phase.
-
Control Phase Check each hex. If one player's forces control that region, then he gets the Netwar Points listed for his side and adds them to his Netwar Index (see 19.8).
-
Protracted Conflict Phase Players must now decide to continue the scenario or not.
a) To continue the Scenario, the Israeli player must expend a number of Netwar Points equal to twice the current turn number.
b) If the Israeli player has decided to end the scenario (or did not have the points to extend it), then the Arab player can continue the scenario by expending a number of Netwar Points equal to the current turn number.
Example: At the end of turn two, the Israeli player would have to expend four Netwar Points to continue the game.
c) If neither player extends the scenario, then the game comes to an end and victory is assessed. If the Israeli player has decided to expend the points, the Arab player is under no obligation to do so to continue the scenario.
Designer's Note: This represents the political realities of the situation. A protracted conflict would have a greater long term effect on Israel, given its smaller population and the pressures created by keeping its armed forces mobilized.
- End of Turn Phase Move the Turn Record marker one space to reflect the passing of one turn. If this is the final turn, the game comes to an end.
Note: The game may come to an end if one player seizes a Sudden Death Victory.
5.0 How to Win
At the end of the game, each player:
-
Totals the point value of all hexes they control.
-
Adds Dimona control: if the Arab player controls Dimona, then he gets double its points.
-
Deducts the points value for each of the hexes that he doesn't control; the points total for each country is listed as follows (for ease of subtracting points from the total, rather than counting them up anew each turn):
- Egypt: 29
- Gaza: 4
- Jordan: 15
- Syria: 18
- West Bank: 2
- Lebanon: 10
- Israel: 49
- Total each side's current Netwar points, and add them to each side's respective Netwar index.
5.1 Determining Victory
The player who has more points possibly wins. The number of points ahead a player is indicates how big a victory is achieved:
- 0-25 points: Draw
- 26-50 points: Marginal Victory
- 51-75 points: Operational Victory
- 76-100 points: Decisive Point
5.2 Sudden Death Victory
If at any point in the game, one side's Netwar Index goes under zero, the game immediately comes to an end. That player loses. The other player checks the number of points he has and adds 50 to it to get his level of victory.
Example: The Israelis have 20 points. The Arab Netwar Index drops to below zero. The game comes to an end and the final Points for the Israelis becomes 70, an Operational Victory.
6.0 Netwar Index
Each player has a Netwar Index. The current number of points are indicated by using the Netwar markers.
6.1 Gaining Netwar Points
When your side gains points, move its marker up the Netwar Index. If you lose or expend points, move the marker down the appropriate number of spaces.
6.2 Netwar Limit
If a player's Netwar Index goes to 100, it can go no higher. It can still go lower, however.
6.3 Sudden Death Defeat
If a player's Netwar Index drops to lower than zero, the game comes to an end (see 5.0).
6.4 Netwar Points Increase
Netwar points can go up if:
-
Owing to certain combat results.
-
As a result of controlling hexes during the Control Phase.
-
Owing to certain Netwar Chit play.
Netwar Points go down if:
-
Owing to certain combat results.
-
By the player voluntarily expending them to Mobilize units.
-
Owing to certain Netwar Chit play.
7.0 Control of Forces
Each player controls forces composed of different contingents.
7.1 Israeli Player
The Israeli player controls all of the Israeli and Coalition forces.
7.2 Arab League Player
The Arab Player controls Arab nations and Foreign Fighters.
Note: The term "Arab League" throughout the rules refers to both Arab nations on the map and Foreign Fighter units.
7.3 Coordination
Generally, all units on a side are considered friendly for all purposes (movement, control). However, units of two forces within the same side may not attack together (although, see the Joint Operations Netwar chit explanation; 20.0).
7.4 Uprising Units
An Uprising unit is identified as a unit that is printed with an AK-47 symbol within its icon. An Uprising unit can arrive in play via a Netwar Chit play, with the unique ability of arriving in any hex where a Jihadi or SOF type unit is present, even if that hex is an enemy-controlled hex.
7.5 Belligerency
A power is either belligerent or a neutral, but neutral powers can become belligerents.
- Activation
A power may be activated during initial setup by paying the Netwar point cost to make it a belligerent. Once a belligerent, it remains so for the remainder of the game. Additionally, a power may be activated during any friendly Mobilization Phase by paying the Netwar point cost.
- Belligerency
A belligerent power functions normally during the game. A country becomes belligerent by being activated.
- Neutrality
If a country is a neutral, its forces are not in the game. No power's units may enter its territory, with the exceptions noted below:
a) Lebanon: If Lebanon is neutral, the units of all powers may freely enter it, gain points for control of hexes, etc.
b) Palestine: Palestine consists of two areas, though for game purposes they are considered a single political entity: the Gaza Territory and the West Bank. If Palestine is neutral, the units of all powers may freely enter it, gain points for control of its hexes, etc.
- Off-map Areas: These include holding boxes (or "off-map bases") for NATO, US, Persian Gulf Bases, Iran, and Arab Volunteer states. Each of these can enter play only if activated. There are restrictions on which units can enter these off-map bases.
a) NATO: All Coalition (but not Israelis)
b) US Gulf: All Coalition (but not Israelis)
c) Iran: Iranian, Arab Foreign Fighters.
d) Arab Volunteer: Arab Foreign Fighters, Al Qaeda.
8.0 Unit Levels
8.1 Levels
Levels represent the effectiveness of a unit, with higher levels representing a better-equipped and more experienced (or better trained) unit. A unit's Level is indicated by the parenthetical number printed in the lower middle of its chit. There are four different Levels, though only some units are capable of progressing up all four levels, and some units do not go up or down a Level, even if required by a combat result (these units are printed with the same Level on both sides).
Note: A unit that is printed with the same Level on both sides is merely flipped to its opposite side when a combat result increases or decreases its Level.
Some units will begin a scenario on a particular Level or another, or on a particular side or another (the side with a particular conflict rating, for example); see 30.0 and 31.0. Furthermore, some units can go up and/or down multiple Levels (from "1" to "4"). For example, a Level "2" unit could go up to Level "3" by replacing a "2" unit with a "3" unit of the same type (the same contingent), and they go from "3" to "4" by flipping the unit over.
Note: Some units do not go up or down Levels, but are instead simply flipped over to their opposite side. Furthermore, some units only go up to Level "2" or "3".
Example: An Israeli Level "1" unit is to be raised to a Level "2" unit. An Israeli Level "2" unit would have to be used (not a Coalition Level "2" unit).
8.2 Maximum Level
If a unit is at the highest Level, it cannot go up any further. If a player has no unit of the correct Level, then the unit cannot go up any higher than its present Level.
8.3 Elimination
If a unit is at level "1", and is reduced to a lower level, it is eliminated. If a unit is at Level "2" or higher that is reduced, but there is not unit of the correct level available, that unit must go down to the next lower level. If no lower levels are available, that unit must be eliminated.
Example: A Level "3" unit is reduced one level; but all Level "2" units are in play and thus not available for reduction, so the player replaces the unit with a Level "1" unit.
Note: Units may skip levels in this way when going down, but may not skip levels when going up.
Example: A Level "1" unit is supposed to go up one level, but there are no level "2" units available; in this case, the unit does not go up.
8.4 Single Level Units
Certain units have only one level ("1"). In this case they do not go up; If reduced, they are eliminated.
Note: Some units are printed as "(1)" on the front and back, indicating that they are always flipped to their opposite side if suffering a level change (this staying the same level), but can never go up to any other higher level, nor skip levels, etc.
8.5 Level Changes by Event
Certain Conflict Resolution outcomes and events may cause units to go up or down levels.
8.6 Unconventional Units
Unconventional units have only one level, "0" (zero). However, as per the CRTs, they are not affected by certain combat results.
Example: An Israeli SOF unit receives a D2 result. It does not change levels.
8.7 Air Units
Similarly, air units have no levels. They are only affected by combat per the air rules.
8.8 Elite Units
The Israelis have two armored divisions which have a "4" level. Egypt, Syria and Jordan each have a "Guard" armored division, each with a third step, and are the only Arab units that do.
9.0 Regional Organization
9.1 Friendly and Enemy Hexes
A hex is friendly or enemy depending on which side it is on, explained as follows:
-
Israeli hexes are friendly to all Israeli and Coalition forces. Contrarily, Israeli hexes are enemy to all Arab forces.
-
Lebanese hexes are friendly to both sides' forces.
-
All other hexes are friendly to all Arab forces.
9.2 Netwar Points for Hexes
These are gained (or lost) as a result of combat, or during the Control Determination Phase.
9.3 Unit Status in Hexes
Units are in one of two statuses:
Open: "Open" status if they are in a hex but not in an Underground box.
Underground: "Underground" status if they are in an Underground box.
Unit status affects movement and combat, as explained below.
9.4 Stacking in Hexes
There is no limit to the number of units that may be in a hex in "Open" status. Indeed, both players may have units in the same region, and this can lead to Conflict (see 13.0.) If both friendly and enemy units are in the same region, they should be kept in separate stacks.
9.5 Stacking in Underground Boxes
A player may have units in an Underground box only if:
- The hex is friendly to the player. In this case, the number of units a player may have in an Underground box is up to the point value of that hex.
OR
- The unit is an SOF unit, in which case it may be in any Underground box. In this case, the number of SOF units a player may have in an Underground box is half of the point value of that hex.
10.0 Initiative (Per Sequence of Play)
During the Initiative Phase, players determine who will be the "First Player" and the "Second" Player.
10.1 First Player
The player who currently has the higher number of Netwar Points can determine who has the initiative and goes first in this turn; that player is known as the First Player. The other player is the Second Player, and goes second. In the event of a tie, the Arab player gets the Initiative.
10.2 Duration
Initiative remains in effect for the remainder of the turn, but this may change on a turn-by-turn basis.
Note: There are times when there are advantages to being the First Player or the Second Player.
11.0 Mobilization
11.1 Building Units
A player builds new units during his Mobilization Phase by expending Netwar Points. Each side's unit costs are indicated on their own respective Mobilization Chart printed on their side of the map.
11.2 Levels and Mobilization
Non-starting units with multiple Levels must be brought into play at Level "(1)" (front side). If no Level 1 unit is available, then the unit cannot be recruited until one becomes available (however, see 11.9).
Note: Each player's Mobilization Chart summarizes the number of levels for each unit type.
11.3 Zero Level Units
Units with a Level of "0" are mobilized on their zero Level.
11.4 Reserves
Certain units begin the scenario in the player's Reserve Box. Their level is set by the scenario, and when brought onto the map, they are brought in at that level.
Example: an Israeli reserve mechanized brigade with a level of "2" would be brought in as a "2" Level unit.
Reserve units cost 50% (fractions rounded up) of the listed Netwar points normally required to mobilize.
11.5 Deployment
A player places newly mobilized units on the map in locations as per the instructions on his Mobilization Chart. Units may be placed in "Open" status or in the Underground box of a region, depending on whether or not the units can enter those boxes.
11.6 Control
A player must control a hex to place his units in it. Some exceptions are noted on the charts.
11.7 Starting Units
Units deployed via scenario instructions do not cost Netwar points.
11.8 Netwar Generated Units
Units mobilized via Netwar chits do not cost Netwar points. They are placed as per the instructions in the event. In some cases, they may be deployed on a level higher than "1".
For example, Uprising units are placed in the same hex as a Jihadi/SOF unit, regardless of control.
11.9 NATO Units Exception
NATO units that enter play always come in at their "2" level. If they are eliminated, and later mobilized again, they still come in on their "2" level.
11.10 Replacements
When units are removed from the map for any reason, they become available for Mobilization. They are not eliminated from the game permanently.
11.11 Demobilization
A player may remove from the map any friendly units during a Mobilization Phase. These units become immediately available for mobilization, used to replace units via the Level system, etc.
11.12 Limits
The number of units in the counter mix is a limit.
11.13 Purchasing Netwar Chits
A player may do this during the Mobilization Phase by paying the designated number of Netwar Points and picking a marker at random.
12.0 How to Move Units
12.1 Movement Phase
A player moves his units during his Movement Phase. A player may move some, none or all of his units.
12.2 Movement
Units move from hex to hex via connecting movement routes (the dotted "Land Route" connecting lines printed in between hexes.) A unit can move into a number of hexes up to its movement factor.
Example: A unit with a movement of "2" that starts in Haifa could move one box into Central Israel and then a second box into Tel Aviv.
12.3 Halting Movement
A unit must halt when it enters a hex containing any enemy units in "Open" status. It may move no further that Phase. It may leave the hex in the following Movement Phase, and move normally. However, if it enters another hex containing enemy units, then it must again halt.
12.4 Unaffected Movement
A unit does not stop when it enters a hex containing enemy units only in the Underground box.
12.5 Minimum Move
A unit can always move one region, regardless of other considerations.
12.6 Infiltration Movement
A unit may use Infiltration Movement if its movement factor is printed atop a square symbol.
Infiltration is a special form of movement. It is conducted as per normal movement, except that the units may move through enemy units without having to stop.
Example: Airmobile, SOF and Jihadi units.
12.7 Movement Restrictions
Units are limited in which parts of the map they may enter owing to nationality. These limits are given in the respective Activation Chart.
12.8 Terrain Considerations
Land units may generally move only via Road and Land routes, but units capable of infiltration movement may move via all types of routes.
All terrain on the map is considered to be desert type terrain, except hexes that are indicated as cities or rough, or any blue boxes that are printed in the sea areas of the map.
12.9 Road Bonus
Land units using land movement which move entirely along roads add "1" to their movement allowance.
Exception: Infiltration-capable units do not get additional movement when moving along roads. They move normally.
12.10 Water Barriers
Water barriers are between regional boxes (such as the Suez Canal and Jordan River). Units moving by land routes must stop when moving across one. Units using infiltration or air movement can cross them without stopping, however.
12.11 Amphibious Movement
Amphibious and infiltration capable units may move across all sea areas. They must end their movement on land. Also, Coalition units may end their move in the NATO or Persian Gulf bases.
12.12 Coalition Movement onto the Map
Coalition units may move from the NATO or Persian Gulf base boxes to the map, and vice versa. This is done as either infiltration/air movement, or amphibious movement.
12.13 NATO Allies
Coalition land units in the NATO box may move into any North map edge hex in Syria. Coalition land units in the Persian Gulf box may move into any east map edge adjoining Iraq. Deduct two Netwar points per conventional unit, and one point per SOF unit entering. NATO units may also move off the map edge this way; this costs no points.
12.14 Arab Volunteer and Iranian Movement onto the Map
These units can move onto the map from any land map edge if the country whose hex they are entering is belligerent.
12.15 National Movement Restrictions
Units are limited in which parts of the map they may enter owing to nationality. These limits are given in the Movement Restrictions Chart.
12.16 Movement and Underground Boxes
This is explained in 18.0.
13.0 Conflict (General)
13.1 Resolving Conflict
Conflict represents various types of conventional and unconventional operations. Conflict must occur when there are enemy units (in "Open" status) in the same hex during a Conflict Phase. Conflict is resolved using the Conflict Resolution Tables. There are three of these tables: Civic Action, Guerrilla, and Kinetic.
Note: Units in adjacent hexes may not attack each other.
13.2 Attacking and Defending
The player whose turn is in progress is the "attacker." The other player is the "defender." The defending side always benefits from any beneficial terrain in a hex, even if both sides began the turn in that same hex together.
13.3 Preconditions
- Generally, if both sides have units in the same hex during a Combat Phase, and both sides' units are in "Open" status (outside of the Underground boxes), then the attacker must initiate combat.
Note: If both sides began the current turn in the same hex, the current player turn obligates that player as the attacker (requiring him to attack any other enemy units in "Open" status there).
-
If all of the attacker's units are in "Open" status and all of the defending forces are in Underground boxes ("Underground" status), then the attacker may choose to initiate combat (against the enemy units in the Underground boxes), or decline to initiate combat.
-
If the attacker has units in "Open" status, and the defender has units in both "Open" and "Underground" status, then the attacker must attack the units in "Open" status first. If the attack clears all enemy units from "Open" status, then the attacker may conduct a second attack in that same hex against defending units in the Underground box.
-
If all of the attacker's units are in the Underground boxes, then combat cannot occur. Units in Underground boxes may not attack (but may be attacked).
Note: This is determined solely from the perspective of the attacker. If the defender has units in "Open" status and all attacker units are in "Underground" status, then no combat can occur.
13.4 Attacking
-
When a player attacks enemy "Open" status units he must use all units in the hex to attack. He combines them into one force and attacks all enemy units as one combined defensive strength.
-
When a player attacks enemy units in the Underground box, he may use some or all units to attack. He combines those units that he chooses to attack with into one force and attacks all enemy units in the Underground boxes as one combined defensive strength.
-
Each unit may attack up to twice in a single Combat Phase. The first time must be against enemy units in "Open" status. The second time may be against enemy units in "Underground" status, if any. If there are no enemy units in "Open" status, the first attack may be resolved against the enemy units in "Underground" status there, but is not required.
-
The attacker must execute all combat in one hex before proceeding to another hex. Within this stricture, the attacker may execute attacks among the various hexes in any order he desires.
13.5 Defending
Generally, each unit may only ever be attacked once per Combat Phase.
13.6 Procedure: "Open" Status Conflict
Each combat is resolved in the following manner:
-
The Attacker declares which units will be attacking in which hex.
-
The Attacker chooses one of the three Conflict Resolutions Tables (CRTs) he will be using to make his attack.
Note: Air units may only ever be used with the Kinetic CRT, but may be used alone or in conjunction with a normal attack (if surviving air combat there, if any).
- Determine Combat Odds:
a) The attacker totals his units' Conflict strength.
b) The defender totals his units' Conflict strength.
Note: If the hex is also an "Israeli Fortified" hex, one defending Israeli (only) unit in that hex (of the Israeli player's choice) is assumed to have a doubled Conflict strength while therein.
c) Divide the attacker's strength by the defender's strength. This will produce a Conflict odds ratio. Drop any fractions. If the defender's strength is more than the attacker's strength, then the Conflict must be resolved on the <1-1 column.
Example: 9 factors attack 6 factors. Odds are 1.5 to 1. Drop the fraction and it comes out as 1 to 1 (1-1).
Example: 3 factors attack 4 factors. Odds are 0.75 to 1, so resolve on the <1-1 column.
- The attacker rolls one die: Cross index the die roll with the odds column on the selected CRT. This will give the Conflict Result.
Note: An attacking player may not purposefully reduce the odds of his participating attacking units to achieve a different odds column on any CRT.
-
Apply the result immediately. The results are given in terms of a code, explained adjacent to the CRTs.
-
Move on to the next attack, if any.
13.7 Freedom of Action
The attacker does not have to declare his attacks ahead of time; he resolves them on a one by one basis. Just remember, you have to finish all combat in a hex before moving on to the next.
13.8 Doubling
Certain game functions will double unit conflict factors. A unit may never have its combat factor more than doubled.
Note: See the rules for Tactical Edge markers and optional Suicide Attacks. Also, see the Terrain Effects Chart for hexes which may double a defending unit's combat factor.
14.0 Conflict (Underground)
14.1 Attacking Underground ("Underground" Status)
Units in "Open" status may attack enemy units in Underground boxes (also known as "Underground" status) only if there are no enemy units in "Open" status in the same hex.
14.2 Procedure: "Underground" Status Conflict
Underground conflict is resolved as per general combat, with the following changes:
-
The attacker may generally choose only the Civic Action or Guerrilla CRT.
-
The Kinetic CRT may be used against the Underground only if:
a) All attacking units are Unconventional. OR:
b) The attacker plays an ISR Netwar chit.
-
You may use some or all units in "Open" status to attack enemy units in "Underground" status. But remember, if you are using the Kinetic CRT, then you may attack only with Unconventional units.
-
If the attack succeeds in eliminating enemy (defending) units from Underground boxes, then the attacking units may advance into those boxes, and occupy them.
-
Airstrikes may not be used against "Underground" status units.
-
Israeli and Coalition air units may conduct units in an underground box if the player plays an ISR Netwar marker.
-
A player may have more than one type of unit attack into an Underground box, as long as the prerequisites are met.
Example: If the Israeli player plays an ISR marker, then the Israelis could make an attack that included Unconventional, Conventional and Air units. Or, if the Arab player played an ISR Netwar marker, then the Arabs could conduct an attack that included Unconventional and Conventional units, but not Air units.
- You can attack units in an Underground box if there are enemy units in "Open" status in the same hex. In this case, you would divide the attack up into two forces, one to attack the "Open" status units, and the other to attack the Underground units. The attacker could resolve these in any order.
15.0 Voluntary Retreat
During a player's own game turn, if he and the opposing player both have units in the same hex in "Open" status (which requires him to attack the enemy units there per 13.3), he may instead retreat any of his own units to any adjacent, connected, and friendly hex (if eligible). In doing so, however, any voluntarily retreated unit cannot conduct any other activity throughout the remainder of that game turn.
16.0 Conflict Results
16.1 Results Explanations
The Conflict Results Tables (CRTs) indicate outcomes via alphanumeric codes. These are explained in the charts adjacent to the CRTs.
16.2 Results Effect
Results apply only to units in the hex in which Conflict takes place.
16.3 Fractions
Fractions are always rounded up.
Example: If you have three units in a combat, and the result calls for 50% of them to be eliminated, then two are eliminated.
16.4 Eliminations
Eliminated results are always in terms of units eliminated of the defender's choice.
16.5 Civic Action / Guerrilla CRTs
16.5.1 Result Codes
These results use a two-letter code followed by a number. The results are specified on the Civic Action and Guerrilla Results chart.
16.5.2 Netwar Gain/Deduction
The first letter will be either an "A" or "D". This letter determines who gets the points for this combat:
"A" = Attacker gets the points. "D" = Defender gets the points.
Points are derived from the hex's point value, and are full value if applied to the friendly player, or half (rounded down) if applied to the enemy player.
16.5.3 Netwar Gain/Deduction Choice
The player indicated has the following choice:
- He can add the points listed for his side to his own Netwar Index.
OR
- He can deduct the points listed for the enemy side from the enemy's Netwar Index.
Example: The Israeli player gets an "A" result when engaging in combat in Dimona. The Israeli player has a choice. He can add subtract one point from the Arab Netwar index or add six points to his own Netwar Index. Conversely, if the result was a "D", then the Arab player could either gain one Netwar point, or subtract six from the Israeli Index. [Sic: "add subtract" is as printed in the source.]
16.5.4 Level Change
The second letter indicates what happens to the side that got the points:
An "L" means "Lowered" (that side's units go down to the next lower level).
An "R" means "Radicalization" (that side's units go up to the next higher level).
Exception: Zero-level units do not ever increase levels. Treat such a combat result as "no effect" instead.
The numbers following "L" or "R" is a key that indicates the winner's Conventional units which are changed, as per the chart:
Example: A combat result calls for "AL". The attacker determines who gets the points for the hex. Then the attack reduces 50% (fractions rounded up) of his conventional units in the hex.
16.5.5 Unconventional Units and R and L losses
Unconventional units are not affected by Radicalized (R) and Lowered (L) results on the Civic Action and Guerrilla Warfare CRTs (Unconventional units are not affected by Civic Action and Guerilla combat results,) and they are not counted per the "Effects" column of the Civic Action and Guerilla Results chart. Netwar Points are gained nonetheless, normally.
16.5.6 One-Level Units
Some units are printed with the same level on their front and back sides; Such units never change levels, representing various historical limitations, neither up nor down, but instead are simply flipped to their opposite side (from whatever side they are on, currently) whenever Radicalized or Lowered. This may result in a particular unit having better or worse ratings after it is flipped, but its level remains the same (although some units do not change at all whenever flipped).
16.5.7 Unconventional Units and R and L losses
Unconventional units are not affected by Radicalized (R) and Lowered (L) results on the Civic Action and Guerrilla Warfare CRTs (Unconventional units are not affected by Civic Action and Guerilla combat results), and they are not counted per the "Effects" column of the Civic Action and Guerilla Results chart. Netwar Points are gained nonetheless, normally.
16.6 Kinetic CRT
16.6.1 Results Code
The Kinetic CRT uses a two-letter code to indicate the overall outcome of the combat. The results are specified on the Kinetic Results Chart only.
16.6.2 Eliminations
Results will cause either 50% or 100% of all units of one side to be eliminated. Units are always eliminated completely, regardless of their Level, and whether Conventional or Unconventional (and never eligible to be repurchased). The affected player decides which units will be eliminated, however, if any units survive combat.
16.6.3 Retreats
If a result calls for one side to retreat, that player moves all surviving units. Units retreat as follows:
- Into an empty Underground box of the same hex (if it could otherwise be entered)...
OR
- Into an adjacent hex (they could normally enter). That hex may have no enemy units in "Open" status before the combat causing the retreat had been resolved, however. They may end their retreat in an Underground box, if it is available. A retreating player may split up retreating units.
16.6.4 Restrictions
If a retreating unit has no legal location to which it can retreat, it is eliminated instead.
16.6.5 Infiltration Capable Units and Retreat
Units capable of infiltration movement (printed with a square-encased move number) may retreat a number of hexes up to their movement factor. They may retreat through enemy units, but must not end in the same hexes as enemy units in "Open" status. They may end their retreat in an Underground box, if available.
16.6.6 Attacking Retreating Units
Units which retreat into a position where they may be attacked again may be attacked a second time.
Example: A unit retreats into an Underground box, and it could be attacked when the attacker conduct anti-Underground combat.
16.6.7 FOBs and Base Zones
FOBs and BZs are not affected by Retreats. Also, units in the same hex as a friendly FOB or BZ that survive the combat may ignore retreats. This is at the owning player's option.
Designer's Note: Players should examine the CRTs closely. It is entirely possible that the side which wins a Conflict (gains points) loses strength (have units reduced in Level).
16.6.8 Indecisive Battle Results
Regardless of which side is the attacker, this will always give the Arab player the points. (This reflects the Arab side making political capital about any Israeli casualties.)
17.0 Return Phase
During the Return Phase, the player:
-
Must move all air units which flew missions back to a base or carrier.
-
The player may move all airmobile units per airmobile movement (but does not have to).
-
The player may move "Open" status units eligible to go into an Underground box or vice versa, if otherwise qualified.
-
A player may move any naval units in a sea zone up to their movement factor if they can conclude the move in a port zone containing a friendly base.
Units moving in the Return Phase otherwise use the normal rules of movement.
18.0 Underground
Designer's Note: Underground boxes represent the "space" where the local populace resides. By moving units into an Underground box, you are committing your forces to working amongst the people. By so doing, you gain political advantages, but also face additional challenges.
18.1 Moving Into/Out of Underground Boxes
You may move units into and out of the Underground boxes. This is done by moving a unit from the region's "Open" box into the 'Underground' box. This costs one movement point. You can move out of an Underground box by the reverse process, costing one movement point.
18.2 Who May Enter Underground Boxes
Only the following unit types may enter Underground boxes:
-
All Unconventional Units.
-
Conventional Units if the hex is friendly.
Note: Units other than those listed above may under certain circumstances attack into an Underground box.
18.3 Limitations
A player can have a number of qualified units in an Underground box up to the point value of the hex (for that side.) Remember, this quantity is halved for units in enemy hexes (see 9.5).
Example: an Israeli hex with a point value of four could have up to four Israeli and two Arab units.
18.4 Movement Within a Region
A unit may always move into or out of an Underground box regardless if there are enemy units in the hex. But note that if there are enemy units in "Open" status in the region, they would have to stop moving.
18.5 Underground Combat
18.5.1 Defensive Only
Units in an Underground box may not attack. They defend normally.
18.5.2 Clearing an "Open" Region
You may not attack units in Underground boxes if there are other enemy units in the same hex outside of the Underground box (the units in the Underground box are ignored.) You may only attack enemy units in an Underground box if there are no other enemy units in the region's "Open" area.
Note: Units in an underground box may move out of that Underground box and into "Open" status, attack enemy units, then, if qualified, move back into the Underground box just vacated.
19.0 Control of Hexes
19.1 Control Phase
Control of a hex is checked during the Control Phase. By controlling a region, a player collects the Netwar Points designated for his side per each game turn.
19.2 Definition of Control
You control a hex if you have units that occupy the Underground box in that region, or have the only unit in that hex (in other words, no enemy land units are in that hex). Note, however, that enemy units that are in "Open" status have no effect on control (only control of Underground boxes determines control).
If a hex has no underground box, control is awarded to whichever side has the only units in that hex in "Open" status.
19.3 Disputed Control
If both players have units in a hex's Underground box, then control is disputed. In this case, neither player controls that hex.
19.4 Uncontrolled
If neither player has any units in Underground boxes, then that hex is uncontrolled.
Example: The Israelis would control Tel Aviv if their units occupied its Underground boxes, even if there were Arab units in "Open" status.
19.5 Control of Off-map Boxes
19.6 Israeli Control
The Israeli player always controls the NATO and US Persian Gulf boxes if they are in the scenario.
19.7 Arab Control
The Arab player always controls the Arab Volunteer and Iranian boxes if they are in the game.
19.8 Control Phase
During the Control Phase, both players check the map to see which hexes their forces control. Each player collects the Netwar Points for each hex his side controls, as follows:
-
If a hex is friendly, collect the full number of points.
-
If a hex is enemy, collect the half the number of points (rounded down).
Note: Unlike Conflict, you can only add to your own Netwar Index from Control, not subtract from the enemy's Index.
19.9 Intragame Hex Control
Certain Game functions (such as Attrition) require players to check Control at various points in the game. In this case, check for the control status at the moment you play the marker. However, you do not collect points for this.
20.0 Netwar Chits
20.1 Netwar Chit Pool
Each player has a unique set of Netwar Chits. These are initially placed in the player's Netwar pool off of the map, preferably in a small cup.
20.2 Purchasing Netwar Chits
A player may purchase Netwar Chits during the Mobilization Phase by paying Netwar Points for them. See 11.13.
20.3 Picking Netwar Chits
A player always picks a chit at random. He examines it, then places it face down in his Netwar Chits Available box. It remains there until played, at which point it is read aloud then returned to the Pool.
20.4 Netwar Chits Explanations
These are on the Netwar Chit Chart. This designates the point in the game turn in which each chit may be played, and their effects. Upon being played, the chit is returned to the players Netwar pool. There is no limit to the number of chits that may be played in a turn. (See Explanation Chart pdf)
21.0 Unconventional Forces
21.1 Types of Unconventional Forces
Unconventional Forces include SOF, Assault Engineers, PRT and Jihadi units. These units have the following additional special rules:
21.2 No Level
They are not affected by the Level system...they do not go up or down.
21.3 No Mandatory Attack
They do not have to attack if in the same hex as enemy units...though they may. If they choose to not attack, then they are not affected by other combats in the hex.
21.4 Kinetic CRT Stricture
Unconventional units may use the Kinetic CRT to attack enemy units in Underground boxes, if they are the only attacking units. In such case, friendly air units may participate in the attack per 22.0.
21.5 Hiding Amongst the Populace
If the only units the attacker has in "Open" status in a hex are Unconventional units, then these units may attack enemy units in "Underground" status without having to first clear "Open" status enemy units from the hex.
22.0 Air Operations
22.1 Air Unit Basing
Mobilized air units are placed in the Airstrikes Available box. They fly their missions from there.
22.2 Sorties
To fly a "mission", the owning player performs the following procedure:
-
The attacking player may decide to move any of his air units from his own Air Available box (this is still during the friendly Movement Phase) to a hex that his land units will be attacking. He may not move in more of his own air units than the quantity of friendly land units in that same hex (in "Open" status).
-
The defending player may now decide to move any of his air units from his Air Available box immediately thereafter, even if the attacker moved in none. The defender may not move in more of his own air units in the same hex (in "Open" status) than the quantity of friendly land units in that same hex.
-
Air combat is then resolved between the opposing air units, although whichever side has the most air units may, at this time, announce that any of those air units are not participating in air combat, if he prefers.
-
Air combat is resolved by each side rolling one die per air unit that is participating in air combat; whichever player rolls the highest net di(c)e roll wins air combat.
Note: Each Coalition air combat die roll is automatically modified with a +2 bonus, and each Israeli air combat die roll is automatically modified with a +1 bonus.
Whichever side rolls the highest net die roll result (after adding all dice and modifiers) wins air combat, and all of the enemy air units that participated in that air combat are eliminated. In the event of a tie net die roll result, both sides lose all of their participating air units.
- Any attacking air unit that did not participate in air combat may now execute a mission (during the friendly Combat Phase). Per the normal rules, each such air unit may attack by itself (using any CRT) or may attack in conjunction with other friendly units (in which case the air units are applied to the same CRT). In the latter case, however, only air units of the same nationality may ever attack in conjunction with other friendly units.
Note: Defending air units cannot contribute to the defense of land units.
- Move all of the surviving air units back to their own friendly Air Available box (during the friendly Rebasing Phase).
22.3 Loss of Basing
If all base units belonging to a power are eliminated, then all of that power's air units are eliminated. They become available for rebuilding if new bases are built.
22.4 Air Unit Loss
Air units are affected by Kinetic combat results. Other types of CRT results do not affect them.
22.5 NATO Airlift
If NATO is activated, then all Israeli/Coalition mobile land units may use "airlift".
22.6 Airlift Procedure
Units using airlift must start in an off-map base or an airport. The unit is then moved to another off-map base or airport anywhere on the map. This costs no movement points. Each base unit on the map can land or embark one unit.
23.0 Naval Operations
Sea spaces are generally treated the same as land, with the following special rules:
23.1 Movement
Land units may not move on sea spaces. However, land units capable of airmobile and infiltration movement may move via sea hexes. They must end their moves on land, or are eliminated. Air units, of course, can fly over sea hexes without restriction.
23.2 Naval Support Units
The Coalition is provided with naval support units, representing gunfire and cruise missile support. These units can be placed on any sea zones. They can add their attack strength to any one combat in an adjacent coastal land region, or even simply attack by themselves. They are never affected by combat results on land, nor do they contribute their strength to the totaling of losses.
23.3 NATO Sealift
If NATO is activated, then all Israeli/Coalition mobile land units may use "sealift", per the following procedure:
Units using sealift must start in an off-map base or a port. The sealifted land unit may then be moved a distance of sea boxes equal to that unit's printed movement value. Then, a sealifted unit may be moved from the sea box it is in to any hex that is connected to that sea box by a dotted line (this costs no extra movement points).
Note: Naval units themselves have no limit to their movement, and may move to any sea box on the map, if otherwise connected via a dotted sea route (or a series of connected dotted sea routes).
A land unit may be sealifted to a hex that contains an enemy unit (where combat will then be commenced normally), but no more than one land unit can ever be moved to a non-port hex. A port hex will only ever allow two land units to be sea-lifted into that hex (whether an enemy or friendly hex).
Exception: Marine-type land units may always be moved to any hex in any quantity, whether or not that hex is a port, and even if any other friendly land units are also landing there, as well.
23.4 Amphibious Assaults
Amphibious land units (units with the "marine" anchor symbol) may move from any coastal land area to any other coastal land area in the same sea (only). This is simply a special form of sealift.
23.5 NATO Trans-African Movement
NATO units may move from the NATO off-map base to the Persian Gulf, and vice versa. A maximum of one land unit per turn may do this.
24.0 Forward Operations Bases/Base Zones
24.1 Movement Prohibition
Forward Observation Bases (FOB) and Base Zones (BZ) are static units. Once placed on the map, they may not move.
Exception: Airmobile Movement (29.5).
24.2 Unit Placement
FOB and BZ may be used to place certain newly mobilized units, as per the Mobilization Chart. Simply place the recruited units in the same hex.
Note: It is permissible for FOB and BZ to be placed in Underground boxes.
Example: On turn 2, the Israeli wants to place an Israeli brigade division in Tel Aviv. There must be Israeli base in Tel Aviv at the start of Turn 2's Mobilization Phase. The base could not be mobilized turn 2 and then the division placed in that same turn.
24.3 Attack Discretion
FOB and BZ do not have to attack, but they may do so at the attacking player's discretion. In addition, if a player has a FOB or BZ in a region, then the player has the option to attack with some, none or all friendly units. Units which do not attack are not affected by combat results.
Note: This supersedes 13.3's requirement to attack. The defender still must defend with all units, regardless of the presence of FOB or BZ.
24.4 Retreat Negation
FOB and BZ are never affected by Retreat (see Combat Resolution). Also, if friendly units are in the same hex as a FOB or BZ and are called upon to Retreat, the owning player can negate the retreat for some, none or all of those units.
Additionally, a player that is required to retreat may opt to ignore a retreat by eliminating one unit in that hex, thereby nullifying that retreat requirement for any other friendly units already there.
25.0 Fog of War
25.1 Examining Opponent's Units
You may always examine enemy units on the map.
25.2 Examining Opponent's Netwar Chits
You may not examine enemy Netwar Chits unless:
-
They are revealed by being played.
-
You play a Netwar Chit that allows you to examine them.
-
The enemy graciously allows you to examine them.
26.0 Barrage & Precision Guided Munitions (PGM) Attacks
Barrage and PGM attacks are a special form of Netwar chits that allow players to perform specialized combats.
26.1 Arab Barrage Attacks
These are conducted during the Arab Combat Phase. The player must have both a SSM unit on the map, and at least one Barrage chit. Designate one Israeli hex within four hexes of the SSM unit. That hex must also be Israeli-controlled. The attack is made as if the SSM attack strength is ten ("10"), and the hex defense value is the printed point value of the hex (or 0.5, if no point value is printed in that hex). Resolve the attack on the Kinetic CRT. Ignore all results other than the ones calling for point gains. The Arab player may make more than one PGM attack per hex, but each is resolved separately.
Example: A barrage attacks an Israeli hex with a point value of "6". Odds are 1 to 1. The result is "EA". No Israeli units are eliminated, but the Arab player gains the points for the hex. If the result were "MD", the Israelis would have gained the points.
26.2 Israeli PGMs
PGMs are utilized in two different ways:
-
Offensively: During the Israeli Combat Phase, Israeli PGMs are utilized by air and/or naval support units. By expending a single PGM marker, air and/or naval units attacking into a hex can attack that hex exactly like an SSM (see 29.13). You may, however, combine more than one air and/or naval unit with one PGM marker.
-
Defensively: Play immediately if the Arab player barrages. This reduces the attack strength of the Arab barrage to five ("5"). No more than one PGM may be played per individual Barrage marker, however.
27.0 Jihad
27.1 Declaring a Jihad Option
The Arab player can declare a Jihad Option during the Mobilization Phase of his own turn to bring additional units into play.
27.2 Prerequisite
The Arab player may only declare a Jihad once per game, and the Arab Netwar Index must be at 75 or higher.
27.3 Effects of Jihad
A Jihad acts like an Uprising or Leader Netwar Marker. For each Jihadi unit on the map, the Arab player can do one of the following:
- Raise one Arab guerilla unit one level in the same hex as that Jihadi.
Note: All of (1) must be done before (2).
- Recruit one Arab guerilla unit at level "1" in the same hex as that Jihadi.
Exception: The player may not play Uprising or Leader markers in the same Phase as the declaration of a Jihad. Otherwise, units may be recruited normally.
27.4 Control Phase
During the Control Phase of that same game turn, the points that the Arab player gains for control of a hex are doubled.
28.0 Operation Samson
28.1 Declaring Operation Samson Option
The Israeli player can declare Operation Samson Option during the Mobilization Phase of his own turn to bring additional units into play.
28.2 Prerequisite
The Israeli player may only declare the Operation Samson once per game during the Mobilization Phase, and the Israeli Netwar Index must be at 25 or lower, or the Arab player must currently control both hexes of Jerusalem.
Note: The Israeli player must also control the Dimona hex.
28.3 Effects of Operation Samson
The Israeli player must immediately roll five dice; add that total to the Israeli Netwar index. As of the next game "B" turn, and for the remainder of the game, the Arab player must then double the mobilization cost for all units, and the Israeli player doubles the mobilization cost for all NATO units.
29.0 Optional Rules
Players may use Optional Rules to increase the game's realism, complexity and play balance.
29.1 Starting Points
Players may, by mutual agreement, start with a predetermined number of Netwar Points. For example, players might want to begin a scenario with 90 points. The only restriction is that both players must start with the same exact number of points.
29.2 Egypt and Sinai Demilitarization
If this optional rule is in effect, the Arab player may not initially deploy conventional units in the Sinai. This is part of Egypt east of the Suez Canal and west of Israel (but this does not include Gaza.)
Exception: The Arab player may deploy SOF and Jihadis in the Sinai. SOF unit may attack enemy SOF units in the Sinai without violating these restrictions.
After the start of play, this restriction is lifted.
Furthermore, the Israeli player may not move conventional units into the Sinai until a "Sinai Remilitarization" is declared and occurs (see below).
Exception: The Israeli player may deploy SOF and Jihadis in the Sinai. SOF unit may attack enemy SOF units in the Sinai without violating these restrictions.
The above restrictions also apply to airstrikes, naval support, and missile attacks.
A player can violate this restriction by declaring a "Sinai Remilitarization" at any time during his turn. To do so, he must roll four dice, and total them: The enemy gains this number of Netwar Points. Both players can enter and engage in combat in the Sinai without further restriction or penalty.
29.3 Additional Air Missions
The Israeli (including Coalition) player may conduct the following additional missions during the game:
Defensive Air: An air unit moves into a hex during a Rebasing Phase, and remains "in the air" throughout the Arab player turn. During the Arab player Combat Phase, the Israeli or Coalition air unit contributes its defense strength to any Israeli land units in the same hex involved in Kinetic combat. The air unit then lands during the ensuing Israeli Movement Phase (and may not fly an offensive mission during that Israeli turn, though could fly another defensive mission in the ensuing Rebasing Phase).
Note: If the Arab player were to fly air units into a hex that contains Israeli "defensive" air units, then those defensive air units would contribute to the defense of Israeli land units in the hex, also.
Air Superiority: Israeli air units may enter the Arab Air Available box, and attack Arab air units there (and only air units!) This is resolved as Kinetic combat.
Air Superiority Selectivity: The Israeli player can choose to attack the air units of individual Arab countries, or attack two or more together as one combined attack. To do so, Israeli air superiority missions must attack all air units of each Arab country together. If more than one Israeli air unit is making an air superiority attack, they may all be combined against one Arab country's air units, or be split up to attack different Arab countries' air units.
29.4 Special Units
The following special units may be employed:
Stryker and Security Units: These units can attack units the Underground boxes. They do not require an ISR chit to do this.
Engineers: If an engineer is located on either side of a water barrier (e.g., Suez Canal), then all friendly units can cross that water barrier without having to stop. Furthermore, if an engineer unit is part of a force attacking into a city, then all friendly land units have their attack factors doubled. If an engineer unit is attacking into a hex containing an enemy base, then mobile enemy units which receive a retreat result must retreat.
Israeli Independent Brigades: Israeli armor and mechanized brigades can be combined into armored or mechanized divisions. To do so, they must start an Israeli Movement Phase in the same hex in "Open" status. Remove the brigades and replace them with one division. This does not cost any movement points. Two armored and one mechanized brigade forms one armored division, whereas two mechanized and one armored brigade forms one mechanized division (an armored and mechanized brigade may not be combined to form any kind of division).
Note: The units must be the same level as the division to be formed.
Contrarily, divisions may be broken down into brigades by reversing the above process.
29.5 Airmobile Transport
Each airmobile unit may move as a special airmobile movement. This is done by simply picking up and moving the airmobile unit into a hex within the airmobile unit's movement allowance (but only if friendly air superiority exists in that hex; if not the airmobile unit must return to where it started, and may not be moved again that turn). Otherwise, if the airmobile unit has movement points remaining, it may continue to move.
29.6 NATO Airlift
The Coalition may move NATO land units from an off-map base onto the map via airlift. The unit must start its move in the base, and then is moved to any NATO base on the map. A maximum of one unit may be moved per turn this way. This consumes the unit's movement for the Movement Phase in any case.
29.7 Joint Operations and Second Impulse Movement Combat
A player can play a Joint Operations Netwar chit to generate a second impulse. This consists of one force of units moving and/or engaging in combat.
To do so, the player must play a Joint Operations marker after you have completed your Conflict Phase, but before starting your Rebasing Phase. You can now move any or all friendly units in any one hex, per normal movement; All those units must move together. At the end of this movement, those units can conduct combat. Or, the units can simply stay in place and engage in combat there.
You may add air and naval support to second impulse combat. Air and naval units may not have been used prior in the same turn.
Note: A player can play more than one Joint Ops marker to conduct more than one second-impulse, even if a unit moved and/or attacked during the regular Movement and Conflict Phases. Each is resolved one at a time. A single unit may engage in more than one second-impulse per turn.
29.8 Suicide Bomber Attacks
The Arab player may make special Suicide Bomber attackes. These may be conducted only by Arab Jihadi and Guerrilla units during the Arab Combat Phase. This has the following effects:
- Double the conflict factor of the Jihadi and Guerilla units for these attacks. And,
- double the points each player receives for these combats. And,
- for these combats, treat "AR#" results as "AL#".
Note: Units making Suicide Bomber attacks may be combined with other units.
Designer's Note: Suicide attacks represent a wide range of fanatic tactics, not simply people blowing themselves up.
29.9 Combat Logistics (Supply)
A unit is "in supply" if any of the following are in effect:
- If it can trace a line of connected friendly-controlled hexes - to a maximum of its movement - to a friendly city or FOB (via any land route only, and only if via friendly hexes). If supply is traced via a road, the road rate applies to the maximum movement distance.
Note: A unit may always draw supply into the hex it is in, even if there are enemy units present there, as well.
- If it is in "Underground" status (units in "Underground" status are always considered in supply while underground).
Units which begin their movement not "in supply" are reduced one movement factor, but never less than "one" (units can always move one per Movement Phase).
Exception: Infiltration units instead move like non-infiltration units...no infiltration movement.
Any unit that enters combat not "in supply" is calculated at half-strength (fractions rounded down).
Note: See the on-line optional rule concerning the effects of desert on logistics.
29.10 Kinetic Combat
In order for units to use the Kinetic CRT, they must be In Supply.
29.11 Other CRTs
Logistics do not affect the Civic Action or Guerrilla CRTs.
29.12 Air Supply for Combat
Israeli and Coalition units capable of infiltration (airmobile, SOF) may always trace a line of supply through enemy-controlled hexes.
29.13 SSM Attacks
Surface-to-Surface Missile (SSM) attacks are a special form of combat that a player can launch using SSM units. SSM attacks are executed in the friendly Combat Phase.
SSM units in different hexes must resolve their attacks one at a time. If stacked together, they may combine their attacks. Furthermore, an SSM unit that is stacked with normal conventional units may combine them with the normal conventional units there (as a combined attack into the same hex), in which case they are treated like normal conventional units during that attack.
An SSM unit can attack any hex on the map. This is executed as Kinetic combat (only). Combat results are administered normally, but attacking SSM units are never affected, nor does it ever contribute its strength in the event of a 50% unit loss.
29.14 Attrition
Certain units are subject to reduction during the Attrition Phase of a "B" turn. Attrition may cause units to go down levels.
If playing with this optional rule, add an Attrition Phase to the sequence of play. This occurs after the Rebasing Phase:
Second Player Attrition: The Second Player checks units subject to attrition.
First Player Attrition: The First Player checks units subject to attrition.
Attrition is applied against all guerrilla units located in a hex that is not controlled by their side.
During a player's Attrition Phase, he checks all units he controls that are subject to Attrition. 50% (round any fractions up) of all units in each hex subject to attrition are thus reduced one level. The player can choose any combination of units to be reduced.
Example: the Arab player has one Level "1" Guerrilla and two level "2" Guerrilla in a hex subject to attrition. He could reduce both Level "2" units to Level "1", or eliminate the level "1" and reduce one level "2" unit.
29.15 Global Level Information Operations
This is a special form of Netwar Operations that adds Netwar points. This is executed during the friendly Combat Phase.
To do so, the player must expend two Infowar chits, and then roll two dice: The total result is added to his own Netwar Index, or subtracted from the enemy's Netwar Index. This may force the enemy Netwar Index to zero (thereby ending the game).
Additionally, a player may negate an enemy Hyperwar action by playing a Black Ops or Fatwa marker. Return all chits used in the Hyperwar attempt to the pool without being played. This can, in turn, be countered by playing a Fatwa or Black Ops chit.
30.0 Holyland Initial Deployment Chart
(Place only the units of activated powers!)
Note: This chart supersedes the charts printed on the map.
30.1 Arab Initial Forces
Egypt
Anywhere in Egypt:
- 5 x "(1)" armored division (with conflict rating of "4")
- 8 x "(1)" mechanized divisions (with conflict rating of "4")
- 1 x "(1)" infantry division
- 2 x "(1)" engineer brigade
- 3 x "(1)" airmobile brigades
- 4 x "(1)" security divisions
- 2 x "(1)" SSM brigades
- 2 x "(0)" SOF
In Egypt, no more than one per hex:
- 2 x "(2)" Base Zone
- 4 x "(1)" Base Zone (with (2) level on reverse side).
Airstrikes Available:
- 3 x airstrikes
Syria
Anywhere in Syria:
- 1 x "(2)" armored division (with conflict rating of "4")
- 3 x "(2)" mechanized divisions
- 1 x "(2)" airmobile brigade
- 1 x "(1)" engineer brigade (with conflict rating of "1").
- 2 x "(2)" security brigade
- 1 x "(1)" security brigade
- 1 x "(1)" SSM brigade (with conflict rating of "2")
- 1 x "(0)" SOF
In Syria, no more than one per hex:
- 1 x "(1)" Base Zone
Airstrikes Available:
- 3 x airstrikes
Jordan
Anywhere in Jordan:
- 1 x "(3)" armored division
- 4 x "(2)" armored divisions
- 3 x "(2)" mechanized divisions
- 2 x "(2)" airmobile brigades
- 2 x "(1)" security brigades
- 1 x "(0)" SOF
In Jordan, no more than one per hex:
- 1 x "(2)" Base Zone
- 4 x "(1)" Base Zones
Airstrikes Available:
- 1 x Airstrike
Palestinians
In the West Bank:
- 1 x "(0)" Jihadi
- 1 x "(1)" infantry division
- 2 x "(1)" guerilla
- 2 x "(1)" base zone
In Gaza:
- 1 x "(0)" Jihadi
- 1 x "(1)" infantry division
- 2 x "(1)" guerilla
- 2 x "(1)" base zone
In South Lebanon:
- 3 x "(0)" Jihadi
- 2 x "(3)" guerilla (with movement rating of "1")
- 1 x "(2)" guerilla
- 1 x "(1)" SSM brigade (with movement rating of "1")
- 1 x "(2)" base zone
Saudi
In Tabrik:
- 1 x "(1)" mechanized division
- 1 x "(2)" Base Zone
Airstrikes Available:
- 1 x airstrike
Iran
In the Iran box:
- 1 x "(0)" Jihadi
- 2 x "(2)" mechanized divisions
- 1 x "(1)" FOB
- 1 x "(1)" SSM
In South Lebanon (if activated):
- 1 x "(0)" Jihadi
- 1 x "(1)" FOB
Foreign Fighters
None
Al Qaeda
In the Foreign Volunteers box:
- 1 x "(0)" Jihadi
- 1 x "(2)" infantry brigade
Recruit Box
All remaining Arab units are available for recruiting.
Arab Netwar Pool
Place all Arab Netwar Chits in the Arab Pool; they can be purchased.
Jihad Markers
Place all in the holding box.
30.2 Israeli Player Initial Forces
Israel
In Israel:
- 2 x "(4)" armored divisions
- 3 x "(2)" infantry divisions
- 1 x "(1)" infantry division (80th) (with a conflict rating of "2")
- 1 x "(2)" airmobile brigade
- 1 x "(2)" amphibious brigade
- 1 x "(1)" recon brigade (with a conflict rating of "6")
- 1 x "(2)" security
In the West Bank:
- 1 x "(2)" infantry division
- 1 x "(1)" infantry brigade (Kfir)
- 1 x "(2)" security
In Israel and/or the West Bank:
- 2 x "(2)" armored brigades
- 4 x "(2)" mechanized brigades
- 1 x "(2)" Engineer
- 5 x "(0)" SOF units
In Israel, no more than one per hex:
- 10 x "(2)" Base Zones
- 6 x "(2)" FOBs
Airstrikes Available box:
- 9 x Airstrikes
Israeli Reserve box:
- 10 x "(1)" armored divisions
- 2 x "(2)" armored brigades (500th, 7th)
- 5 x "(2)" airmobile brigades
- 1 x "(0)" SOF unit
("In Israel" includes Israel and the Golan Heights.)
Lebanon
In Beirut West, Beirut East, and/or Tripoli:
- 1 x "(2)" mechanized division
- 1 x "(1)" mechanized division
- 2 x "(1)" infantry divisions
- 1 x "(0)" SOF
In Beirut West, Beirut East, and/or Tripoli, no more than one per hex:
- 3 x "(1)" Base Zones
Airstrikes Available box:
- None
Coalition
No starting units
Recruit Box
All remaining Israeli units are available for recruiting.
Israeli Netwar Pool
Place all Israeli Netwar Chits in the Israeli Pool; they can be purchased.
Samson Option Marker
Place in the holding box.