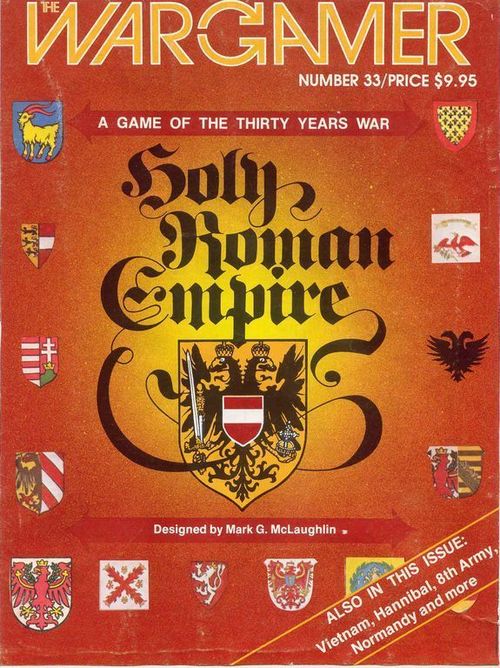
Holy Roman Empire
Holy Roman Empire Rulebook
Table of Contents
Table of Contents
- 1. Introduction
- 2. Game Components
- 3. Description of Game Components
- 4. Turn Sequence
- 5. Random Events
- 6. Finances
- 7. Diplomatic Bidding
- 8. State Cards
- 9. Special State Cards
- 9.2 Swiss Cantons/Swiss Confederation
- 9.3 Principality of Transylvania
- 9.4 Republic of the United Provinces
- 9.5 Free State of the Three Leagues
- 9.6 Kingdom of Poland
- 9.7 Ottoman Empire
- 9.8 Imperial Free City of Nuremberg
- 9.9 Kingdom of Bohemia
- 9.10 Kingdom of Denmark
- 9.11 Hanseatic League
- 9.12 Duchy of Saxony and Margraviate of Brandenburg
- 10. Mercenary Cards
- 11. Alliances
- 12. Combat Units
- 13. Movement
- 14. Forced March
- 15. Naval Movement and Combat
- 16. Off-Board Zone
- 17. Land Combat
- 18. Field Battles
- 19. Fortress Combat
- 20. Imperial Rules
- 21. Victory
- 22. Victory Points
- 23. Optional Tactical Combat
- 24. Fewer Than Six Players
- 25. Scenarios
1. Introduction
The year is 1619. Matthias, Emperor of Germany, has gone to his grave. A year-old rebellion in the imperial province of Bohemia had divided the empire along religious and political lines. Bohemian rebels have elected a minor German prince, Frederick, Elector Palatine, as their king. Protestant princelings rally to Frederick, elevating his status to that of a rival to Emperor Ferdinand II, Archduke of Austria, for the imperial throne. As mercenary armies are raised against Ferdinand, the Catholic King of Spain and Duke of Bavaria rally to his side. France and Sweden turn their attention to Germany in eager anticipation of the dismemberment of their great rival, the Holy Roman Empire (HRE).
HRE is a political and military game of the 17th Century struggle for empire that plunged Europe into one of its longest and most destructive wars. Up to six players control the major dynasties of the era, fielding armies, navies, and engaging in diplomatic intrigue, and bribery. Who will wear the crown of the Holy Roman Empire?
2. Game Components
In the final printed version (differs slightly from box and rules) the game contains::
- 1 Rule Book
- 1 Battle Rules Book
- 1 Main Map
- 1 Battles Map
- 1 charts sheet
- 1 full sheet terrain tiles (or 2 half sheets)
- 4 half sheets counters
- 1 deck of cards
- 2 dice
- 6 player aid sheets
3. Description of Game Components
3.1 State Cards
[Diagram: a State Card, with callouts for Income, Religion, Coat of Arms, and Map Location (one further callout is cut off in the source).]
3.1.2 Income Key
[Icons: sample income coins showing 8, 10 and 5, one for each colour entry below.]
- Green numbered State Cards (Duchy of Bavaria, Kingdom of Bohemia): income halved unless controlled by original owner.
- Blue numbered State Cards (Kingdom of Sweden, Kingdom of France, Kingdom of Spain): Card cannot be bid on, conquered or transferred.
- Red numbered State Cards (Kingdom of Poland, Republic of the United Provinces, Ottoman Empire, Swiss Cantons): No income (unless aid die roll specified on card).
All other State Cards have Black numbered income values.
3.1.3 Religion
- RC: Roman Catholic
- LU: Lutheran
- CV: Calvinist (Reformed)
- M: Muslim
Note: Some states have more than one religion.
3.2 Playing Pieces
3.2.1 Political Markers
[Diagram: political markers. Front side: Bavaria, France, Palatine. Back side: Sweden, Austria (HRE), Spain.]
3.2.2 Leaders
[Diagram: a leader counter, with callouts for Name, Stacking Value, Combat Value + Bonus, and Movement.]
3.2.3 Combat Units
3.2.4 Information Markers
3.2.5 Battle Board Terrain Markers
Bridge, Forrest, Hedge, Hills, Marsh, Stream, Town, Wagon, Wall.
3.3 The Mapboard
3.3.1 The mapboard represents the states and provinces of Central Europe in 1619. Each State is identified by its coat of arms and its name in large type (e.g. VENICE).
3.3.2 Some of the States are divided into provinces which are delineated by dashed lines.
3.3.3 Many states or provinces contain one or more cities, which are represented by boxes composed of dashed lines and are identified by the city name in small type (e.g. Paris).
3.3.4 There are also three sea zones: the Baltic, North Sea and English Channel. (The first two are separated by Denmark, the other two are separated by a dotted blue line.)
The map is bordered by a location grid that is used to assist players in locating the States & Provinces represented by the various State Cards.
4. Turn Sequence
4.1 A game of HRE may have as many as 15 turns. Each turn represents approximately two years and is composed of six phases.
4.2 All aspects of a phase are performed simultaneously by all players, except that players perform the Movement/Combat phase sequentially.
4.3 All players must complete a phase before beginning another phase. When all six phases have been completed, the turn marker is moved one space to the right to indicate the end of a turn.
4.4 The six phases are:
- Random Events
- Finances
- Diplomatic Bidding
- Alliance Declaration
- Movement/Combat
- Victory and Game Conclusion Determination
5. Random Events
5.1 Beginning with the second turn of the game (Turn 2 in the Campaign Game, Turn 8 in the Swedish War scenario) one player rolls two differently colored dice, reading one as the tens and the other as the ones) and consults the Random Events Table. All effects listed under that number on the Random Events Table are applied immediately. If a number higher than 46 is rolled or the conditions listed on the Random Event Tabke do not apply, there is no random event that turn.
5.2 The Random Event Table is self-explanatory. Except for event 16 (Baltic War) there is no limit to the number of times an event may occur. If the Baltic War has already occurred, or if the event listed does not apply (e.g. Plague may not strike until turn 10) there is no random event that turn.
5.3 Random Events 41-46 (Internal Affairs) require the player who rolled the dice to randomly determine which player is affected. Event 44 requires that a player temporarily remove all leaders in his control from the map, place them in a cup, and draw one who is considered to have died and is removed from play. The remaining leader counters are returned to their positions on the map.
NOTE: Any method of randomly selecting leaders will work, actually. Feel free to substitute a die roll or other method, if you like.
6. Finances
6.1 All players simultaneously calculate and adjust their finances in the following order:
- Receive income (6.2)
- Pay maintenance (6.3.1), upgrade state cards (6.3.2), and repair damaged units (6.3.3)
- Upgrade, purchase and place new national units (6.4.2)
- Secretly write purchase requests for mercenary units (6.4.3)
- All players simultaneously reveal purchase requests (6.4.4)
- Allocate, place, and pay for new mercenary units (6.4.5)
6.2 Receive Income
6.2.1 Total the income value of the cards on the player's Player Mat. A player receives:
- FULL VALUE of all cards in his control pile.
- HALF VALUE of all cards in his influence pile (total income listed on cards, divide by two and round fraction upward). Note, if a state whose income is marked in green (see 3.1.2) is held by any player other than the original owner, the income received from that card is reduced after all halving/quartering is performed. If controlled, the value is halved, if influenced it is quartered. All fractions are rounded up in the holding player's favor.
6.2.2 Players do not receive any income from Conquered states, states currently held by a mercenary leader (See Mercenary Rules) or from states whose income is marked in red (see 3.1.2), EXCEPT for the Polish and Turkish cards which, as explained on the card, allow the player controlling that card to roll a die for additional income.
6.2.3 Penalty: The income received from any state is reduced by one for each province and/or city in that state that is occupied by enemy combat units or contains a looted marker. If a province with a city in it contains enemy units, the income would be reduced by two (one for the city, one for the province). If a single province state has a loot marker or is occupied by enemy units no income is received by the player holding its card. The income value of a state may never be reduced to less than zero.
6.2.4 Charity: If a player has an income of four or less he may pawn his crown jewels, title, etc. and roll two dice. The resulting number is the number of crowns a player adds to his treasury. A player may not roll for charity on two consecutive turns.
6.2.5 All income (and expenses) is marked by the use of the player-specific Treasury tokens on the Treasury Tracks on the Player Mats. If a marker currently is on 5, for example, and the player receives 12 crowns of income, the markers move from 5 to 17 (5+12=17).
6.3 Pay Expenses
6.3.1 Maintenance
6.3.1.1 Each combat unit (infantry, cavalry, artillery, naval counter, etc.) in a player's control requires one crown for its maintenance each turn.
6.3.1.2 Units need not be maintained. National units that are not maintained are eliminated and removed from the map and placed in the player's Force Pool. They may be rebuilt in a later Finance Phase. Non-national units (white counters with black symbols) that are not maintained may be bid for as mercenaries or may become marauders (see Diplomatic Bidding, Mercenary and Marauder rules, respectively).
6.3.1.3 Leaders do not require maintenance (except for Mercenary Leader von Wallenstein. See Rule 10.3).
6.3.1.4 The cost of maintaining a mercenary unit stacked with any mercenary general is halved, fractions rounded down (except for Mercenary Leader von Wallenstein. See Rule 10.3).
6.3.2 Upgrading Cards
6.3.2.1 In addition to maintaining units, a player may upgrade the status of the cards on his Player Mat.
6.3.2.2 It costs two crowns to upgrade a card from Conquered to Influenced status, and one crown to upgrade a card from Influenced to Controlled.
6.3.2.3 A card may not be upgraded more than one level per turn.
6.3.3 Damaged Units
Elite infantry, gendarme and naval units that have been flipped due to combat (See Combat Rules) may be repaired by expending one crown per unit. The damaged unit is flipped back to its full value side.
6.4 Purchase New Units
6.4.1 A player may also use his crowns to purchase new units.
6.4.2 National Units: All players may purchase any of the national units available in their respective Force Pools. National units (except for leaders and fleets) must be rebuilt or repaired before any non-national units (the white units) are purchased. National units are then placed in a controlled province of the player's home territory.
6.4.2.1 Home provinces are any friendly province in France, Bavaria, Sweden, the United Provinces, Swiss Cantons, Brandenburg, or Saxony for those national units. Swedish national units may be placed in Stockholm, the Palatine national unit may be placed in Bohemia, and Spanish national units may be placed either in Milan (if controlled) or the Spanish Off-Board Zone (see Off Board Zone rules). If there is no home province available in which a player might be able to build any of his national unitss or Fleets (but excluding Leaders) because of control by another player, those units are not placed in the Force Pool if eliminated (and removed if already in the Force Pool). Such units would be returned to the Force Pool immediately upon the availability of any home province in which to build (i.e., return to full player control).
6.4.2.2 All of the above costs are immediately subtracted from the income track and those units are immediately placed/upgraded.
6.4.3 Next, all players wishing to purchase non-national units (white counters) secretly write down the number and type of units to be purchased. Purchase costs are not deducted until the units are distributed. Costs for non-national units is the same as for national units.
Unit Costs Table
| Unit Type | Crowns |
|---|---|
| Light Artillery | 1 |
| Light Cavalry | 2 |
| Infantry | 2 |
| Reiter | 2 |
| Naval Unit | 2 |
| Leader | 3 |
| Elite Infantry | 3 |
| Elite Cavalry | 3 |
| Heavy Artillery | 3 |
| Gendarme | 5 |
6.4.4 Players reveal their written purchase requests simultaneously. The most expensive units (gendarmes, heavy artillery), are allocated before the less expensive units on the reverse of the counter are allocated (units are purchased from Gendarme to Light Artillery, in order from bottom to top of the above table.
6.4.4.1 If there are not enough units of a particular type available to meet all purchase requests, the units are dealt out equally among those players who attempted to buy that type of unit. See Rule 12.3.
6.4.4.2 If there are not enough units left to allocate an equal number to each purchasing player, randomly select the player(s) to receive the odd units (e.g., competitive die rolls). Those players not selected do not receive a unit.
6.4.4.3 NOTE: a player may not attempt to buy more units than he can pay for, nor may he purchase more units or units of a different type than he specified in his written orders.
6.4.5 Allocate, Place, and Pay for New Mercenary Units
(Heading taken from the step list in Rule 6.1; the printed PDF gives this rule's body without a separate heading.)
6.4.5.1 A player only pays for those units that he actually receives.
6.4.5.2 Units may only be placed in controlled states.
7. Diplomatic Bidding
7.1 During the Diplomatic Bidding Phase players may bid for Mercenary Leaders, Marauder Units, and State Cards. These items may be bid for even if another player currently holds them.
7.2 The player with the most money remaining on his/her Treasury Track begins the bidding (if two or more players have equal amounts of money, the Player holding the HRE State Card decides the order of the bidding among them).
7.2.1 The first player to bid may either choose the item to be bid upon, opening the bidding with a bid greater than zero, or may pass the choice to the player with the next largest treasury. After an item has been purchased, the player who began the bidding may either select another item or pass the bid to the player with the next largest treasury. A player must pass the bid to another player if he has no money or has already initiated the bidding on three items that turn, regardless of who won the bids.
7.2.2 Each player with money will have the opportunity to initiate the bidding. Only the player who has the bid may initiate a bid on an item. Other players may only react to his bid by bidding on that item.
7.2.3 Bidding is conducted by players in clockwise order as seated around the table, starting with the player who initiated the bidding. Players must either raise the bid on their turn or pass, and players who pass may not reenter the bidding for that item. Bidding continues until only one player remains.
7.3 The opening bid must be at least equal to the printed value of the state card or to the maintenance costs of the stack of mercenary units being bid upon. A bid on a mercenary leader must be equal to the total income of all cards held by that mercenary leader and the total value (in terms of maintenance costs) of the non-national units stacked with that leader. Bids for leaders without units or cards must begin at least at one crown.
7.3.1 NOTE: If there are two or more leaders present in a stack, the owning player must designate which leaders control which units. National units must be placed with a national leader if possible. If a mercenary leader is being bid upon, national units under his command are not counted for bidding purposes and do not remain under his command if the leader's allegiance changes.
7.4 A player's bid may be modified in value by several factors.
7.4.1 If a card is marked as being controlled, influenced or the hereditary property of that player or of a card which that player controls (e.g. the Palatinate player controls the Bohemia card which gives him an advantage with Silesia), the cost of the final bid is halved (fractions rounded down). For example, if a player bid 10 crowns he/she would actually have to pay 5 crowns.
7.4.2 If a card marked as being pro-the player (or pro- a card he controls), is currently in the player's Control pile, or is a mercenary employed by the player, the cost of the final bid is halved (fractions rounded down). For example, if a player bid 10 crowns he/she would actually have to play 5 crowns.
7.4.3 If a card is of a different religion than the player or is marked as anti-that player, the cost of their final bid would be doubled. For example, if a player bid 10 crowns he/she would actually have to pay 20 crowns.
7.4.4 In situations where several modifiers apply, the least expensive takes precedence.
7.5 Successful Bids: When a player wins a bid for a card, that card is then moved to his Influence pile, with the following exceptions:
7.5.1 If the card is already in his Control pile it remains there.
7.5.2 If the card is marked as being hereditary or initially controlled by that player, or the card is a mercenary, it is moved to his Control pile. (See Rules 8.4, 8.5, and 8.6).
7.6 Limits: No item may be put up for bid more than once per turn. Therefore, a player may not lose an item in the same turn as he successfully bid for it.
8. State Cards
8.1 Each state in the game is represented by a State Card. State cards have coats of arms symbols and a grid coordinate to allow players to find their locations on the map. All cards are coded for religion and have their income value printed on the card. Some cards also have special rules or allegiances indicated.
NOTE: For the grid coordinates, the first number can be found on either the bottom or the top, the second on either the right or left sides of the map, whichever happens to be closer to that province.
8.2 In addition, many cards have a dynastic status and are marked as the reserve, hereditary, controlled, or influenced states of a player. All other cards, unless specified by the scenario, are considered to be Independent.
8.3 Reserve Cards are initially placed in the Control pile on the owner's Player Mat and are never bid for, transferred, or conquered. No victory points are awarded for these cards.
8.4 Hereditary Cards are initially placed in the Control pile of the owner's Player Mat and may not be bid for if the original owner holds the card. A player will only lose a hereditary card if the state represented by that card is conquered or if the owner voluntarily traded the card to another player (see Alliances). Exception: See Saxony and Brandenburg (see Rule 9.12). Whenever a player regains one of his hereditary cards, either by bidding or conquest, it is immediately placed in his Control pile of his Player Mat (see Rule 7.5.2).
8.5 Controlled Cards are initially placed in the owning player's Control pile but may be bid for during the Diplomatic Bidding Phase. If they are lost and then regained (by bid or conquest) by the original owner, however, they are immediately returned to the Control pile of the original owning player's Player Mat (see Rule 7.5.2).
8.6 Influenced Cards begin in the owner's Influence pile and, if lost and regained (by bid or conquest) by the original owner, they are immediately returned to the Influence pile of the original owning player's Player Mat (see Rule 7.5.2).
8.7 Pro- And Anti-Cards are cards listed as pro- or anti- a particular player and remain that way for the entire game, regardless of who holds the card or where it is on the player's Player Mat.
8.8 Independent States: All cards not marked as reserve, hereditary, controlled, or influence are considered as Independent States. Independent states are kept off of the board. Players may find it convenient to group the independent states by religion or geographic location for ease of play.
9. Special State Cards
9.1 Certain independent states have special rules, which are noted on the reverse of the state card. The following rules further clarify those notes.
9.2 Swiss Cantons/Swiss Confederation
(Heading reassembled from the split printed heading "SWISS CANTONS/SWISS CONFEDERATION".)
9.2.1 A player gains control of Swiss Cantons by bidding for the card and in the next turn paying to move it from the Influence to the Control pile.
9.2.2 Swiss Cantons may never be entered or attacked. The player who controls Swiss Cantons may use the Swiss Army, which consists of one leader (who may only move Swiss units) and four elite infantry (who may only be moved by the Swiss leader) .
9.2.3 Swiss units must be maintained like any other National unit. The crowns spent on their maintenance, however, also counts for money spent on diplomacy if another player attempts to bid Swiss Cantons away from the controlling player (e.g., if the controlling player spent four crowns on maintenance it would be as if he spent 6 crowns in the bidding phase: 4+50% since he controls the card).
9.2.4 Eliminated and/or Damaged Swiss units (including the Swiss leader) are replaced/repaired free of charge in Swiss Cantons.
9.2.5 At the end of any Diplomatic Bidding Phase in which control of the Swiss Cantons State Card changes, the Swiss Leader and all Swiss units are immediately removed from the board and placed in the Swiss Cantons, province, replacing all losses free of charge.
9.3 Principality of Transylvania
9.3.1 The controlling player receives one free light cavalry unit per turn in Transylvania. There can be only four Transylvanian light cavalry units in play at any given time.
9.3.3 Transylvanian light cavalry units which begin the Movement Phase in Transylvania may move into any adjacent province without a leader.
9.4 Republic of the United Provinces
9.4.1 The player who controls the United Provinces (aka, "Dutch") receives the Dutch Fleet (two 2-strength naval units) and army (one leader, four elite infantry, one elite cavalry and a light gun). They may be placed anywhere within the United Provinces by the owning player.
9.4.2 The controlling player receives no income for the Dutch card, but need not maintain the Dutch army. Up to three Dutch units (one per each of the three Dutch provinces that are neither looted nor occupied by enemy units) may be rebuilt or repaired free of charge during the Finance Phase; all other Dutch construction must be paid for.
9.4.3 The Dutch land units may only move with the Dutch leader, and may only enter the Spanish Netherlands and provinces in or adjacent to the United Provinces. The Dutch Navy may sail anywhere but may not leave the North Sea if Spanish fleets are present in that sea zone.
9.4.4 If the player controlling the Dutch units does not control the Dutch card at the end of a diplomatic bidding phase, the Dutch units are returned to the United Provinces.
9.4.5 If the United Provinces are an independent state, they defend with the Dutch military units instead of the normal quota of regular infantry that defend other independent states (See Independent State Forces ).
9.5 Free State of the Three Leagues
9.5.1 Only the controlling player and his formal allies may pass through the Free State of the Three Leagues freely.
9.5.2 An influencing or conquering player and his allies must pay one additional movement point to enter the Free State of the Three Leagues.
9.6 Kingdom of Poland
9.6.1 Poland provides a variable income to the controlling player. Each Finance Phase, the controlling player rolls one die, halves the number and drops fractions, for aid. If the die roll is a six, he may instead take a free non-national gendarme (if any are available in the counter mix) and place it in Warsaw. It may move without a leader that turn only, and, unlike the Polish Army, it may leave Poland. Once it has left Poland, however, a Leader is required to move it in subsequent turns.
9.6.2 The Polish Army begins the campaign scenario already on the board. The Polish Army consists of two infantry and two of each of the four types of mounted units, all in Polish colors. The army is placed in Warsaw and may be moved without a leader. The Polish Army may never leave Poland.
9.6.3 Unlike other Independent States, Poland is not conquered until the entire Polish Army is eliminated and each of the five Polish provinces is occupied by an invading unit. If Poland is conquered the Polish Army is removed from play.
9.6.4 If Polish units are eliminated in combat, one unit is replaced free of charge in each of the five Polish areas that do not contain enemy units. If Poland becomes independent and is again attacked, the Polish Army, in its entirety, reappears in Warsaw.
9.6.5 The Polish Army always moves first in a turn in which invading units begin the turn in Poland. If Poland is invaded and the Polish Army had not moved that turn, the Polish Army moves immediately after the invader has completed his move. If no player controls Poland, a player hostile to the invader moves the Polish Army (players should decide between them who this should be, or roll a die). EXCEPTION: The Player controlling Sweden may never control the Polish Army.
9.6.6 In the Swedish Scenario, Poland is considered to have been conquered by Sweden and rules 9.6.1 through 9.6.5 no longer apply.
9.7 Ottoman Empire
9.7.1 The Ottoman Empire is similar to Poland in that the controlling player receives a variable income. The total of one die is received in crowns. In addition, if a six is rolled, the Polish aid (if any) is cancelled for that turn and both the Spanish and the Austrian players lose five crowns of income that turn.
9.7.2 The Ottoman Empire may be invaded, but normal rules are amended as follows. A player must enter the Ottoman Empire with at least 5 combat units and a leader. The Ottoman Empire may never be conquered, but as long as a player maintains a force of five combat units plus a leader in the Ottoman Empire, the player who controls the Ottoman Empire may not roll for Ottoman aid and Random Event 13 (Ottoman raids) has no effect. If there are fewer than 5 occupying combat units plus a leader in the Ottoman Empire the aid die may be rolled and if a 6 results all occupying units are eliminated, in addition to the effects listed in Rule 9.7.1.
9.8 Imperial Free City of Nuremberg
9.8.1 The player who is Holy Roman Emperor controls the State Card, and it may never be bribed or produce income.
9.8.2 Any leader (but no troops) on the board may freely enter the city, if he can reach it, to receive free sanctuary.
9.8.3 If any player attacks the city, he must pay double to bid on any state for the remainder of the game. This penalty supercedes those provisions in Rules 7.4.1, 7.4.2, and 7.4.3.
9.8.4 If Nuremburg has been conquered, it is treated like any other normal state, and Rules 9.8.1 through 9.8.3 become void.
9.9 Kingdom of Bohemia
9.9.1 The Palatinate player is the original owner of Bohemia in the Campaign Game and as long as that player holds it no other player may bid for it. In the Swedish Scenario, the Kingdom of Bohemia is in the Conquered Pile of the Austrian Player and may be bid upon as normal.
9.9.2 Note that Silesia, Lusatia and Moravia are listed as being pro-Bohemia. The player who currently controls the Bohemia state card bids on and bribes these states as if they were Pro-that player.
9.10 Kingdom of Denmark
9.10.1 The player who controls Denmark receives the Danish Fleet (one unit worth 2 strength points) and the Danish Leader Christian IV. If Denmark is an independent state and is invaded, these units appear in Copenhagen in addition to the independent state forces, although they do not appear if they have been previously eliminated. These units are maintained but not replaced free of charge.
9.10.2 The player who controls Denmark also receives two Danish Garrison units in Copenhagen. If Denmark is an independent state and is attacked, these units DO NOT appear in addition to the independent state forces. These units are maintained and replaced free of charge.
9.10.3 Denmark includes the provinces of Schleswig and Holstein and the city of Copenhagen. Units located in the Schleswig province or Compenhagen city who are controlled by the player who controls the Kingdom of Denmark State Card in Schleswig may freely move between these two locations without requiring any fleet strength points. These two locations must be controlled by the player at the time of the movement. This benefit is not extended to units controlled by allies of the player controlling the Denmark card.
9.10.4 Denmark is not conquered until Copenhagen and the two provinces of Schleswig and Holstein are enemy controlled.
9.11 Hanseatic League
9.11.1 The Hanseatic League has no provinces but consists of four separate cities: Lubeck, Stralsund, Bremen, and Hamburg.
9.11.2 The player who controls the Hanseatic League receives the Hanseatic fleet (one unit worth two strength points, a white counter with black symbols) placed at any one of the four Hanseatic cities. The fleet is maintained but not replaced free of charge.
9.11.3 In addition, one Hanseatic Garrison infantry unit is placed in each of the four Hanseatic cities. Garrisons may not move.
9.12 Duchy of Saxony and Margraviate of Brandenburg
9.12.1 Saxony and Brandenburg are special multi-card Independent states. Saxony includes the Duchy of Saxony and Saxon Duchies Cards; Brandenburg includes Brandenburg, Berg, Mark, Prussia, and Pomerania.
9.12.2 All of the cards of Saxony or Brandenburg are stacked together. A player must bid for the entire stack, not for individual cards, as long as those cards are independent.
9.12.3 If a player controls the Saxon Electoral or Brandenburg card all of that state's other cards are considered to be friendly to him in the bidding process (i.e., he receives the benefits listed on the cards).
9.12.4 Individual cards may be held by a player because of conquest, but if a player attacks one of the Saxon or Brandenburg territories, that country (Saxony or Brandenburg) and all the cards stacked with it become anti-that player.
9.12.5 The player who controls the Duchy of Saxony or Margraviate of Brandenburg State Card receives, free of charge to produce and maintain, the Saxon and Brandenburg armies, respectively.
9.12.6 The Saxon Army consists of a leader (John George) two infantry and one reiter unit; the Brandenburg Army consists of one leader (George William) and one infantry unit. If they are eliminated they are replaced free of charge next turn in the electorate.
9.12.7 If Saxony or Brandenburg are independent and are attacked, these armies are placed in addition to normal independent state forces.
9.12.8 The Saxon and Brandenburg armies are unreliable. If a player wishes to move these units he must roll a die. If the result is a "1" they will not move (one die roll is made per province for all such unts in the province; Saxon units are rolled for separately from Bandeberg units). If the controlling player wishes to use these units in combat, he must roll at the beginning of each tactical or strategic round (see combat). If the result is a "1" they may not initiate combat in that round but if specifically attacked by the opposing player, they will fight back. (If the battle is being fought on the tactical board, if a "1" is rolled the Brandenburg/Saxon units may not move in the next round, unless they are specifically attacked by the enemy player in the meantime).
9.12.9 Saxon/Brandenburg armies and leaders are removed from the mapboard at the end of any Diplomatic phase in which their electoral cards are in a player's Conquer or Influence pile. They reappear in the home electorates if the card is in a Control pile or becomes independent.
9.13 Republic of Venice and Duchy of Savoy
9.13.1 The player who controls the Duchy of Savoy or the Republic of Venice State Card also receives four Savoyard/Venetian Garrison units in Savoy or Venice, respectively. If Savoy/Venice is an indeopendent state and is invaded, these units DO NOT appear in addition to the independent state forces. These units are maintained and replaced free of charge.
10. Mercenary Cards
10.1 General Rules
10.1.1 There are four mercenary cards: Ernst Graf von Mansfield, Albrecht von Wallenstein, Bernard von Saxe-Weimar, and Georg von Arnim. The reverse of these cards are for George V von Brunswick, Götz von Berlichingen, Friederich von Schomberg, and Franz Albrecht (respectively).
10.1.2 When a mercenary leader is bid for, the bid must at least equal the value (in maintenance costs) of all the units with him and all of the cards stacked with his card. The mercenary's cards are kept in a separate pile below his employer's Control pile.
10.1.3 The political leanings of three of the mercenary leader is listed on the card.
10.2 Von Mansfield & Saxe-Weimar
10.2.1 The hiring player must give these mercenaries one card from his control pile when he hires them (unless he already employs them and has merely bid on them to prevent another player from hiring them away from him).
10.2.2 Von Mansfield also has an income of one crown which is added to the controlling player's income during the Finance Phase each turn.
10.3 Von Wallenstein
10.3.1 This mercenary leader is more valuable. Any units stacked with him are maintained free of charge that turn.
10.3.2 Wallenstein is more ambitious and expensive, and instead of forfeiting one card to his control when he is hired, the hiring player must forfeit one card each turn that Wallenstein is in his employ.
10.3.3 Once per game, at the start of any turn, any employer may appeal to Wallenstein to raise his own army. One infantry or reiter unit from the countermix (if available and before any other players may buy units) is raised for each card held by Wallenstein. These units are placed with Wallenstein. Each subsequent diplomatic phase, however, the employer must roll a die and pay Wallenstein that amount of money. If he does not, the von Wallenstein Leader and all non-national units in the same province (and controlled by the now formerly controlling player) become Marauders.
10.4 Bribing Mercenaries
10.4.1 Players may bid for mercenaries that are either employed by another player or who have become marauders, as well as mercenaries who are unemployed.
10.4.2 Mercenaries may be bid for (bribed) either with money or with cards from a player's Control pile. The value of the card that is offered is doubled for purposes of bidding. Thus, a state worth two crowns would be worth four crowns if it was offered as a bid or bribe to a mercenary.
10.5 Mercenary-Held State Cards
10.5.1 Cards given to a mercenary are kept stacked with the mercenary's card in a separate pile. These states are considered to be Independent and have independent garrisons. Units and leaders accompanying the mercenary who holds these states, however, may treat them as controlled states for movement purposes.
10.5.2 All players who bid on a mercenary's states must bid at least the doubled face value of the card.
10.5.3 If a player attacks a state held by a mercenary he may never bid to hire that mercenary in any future game turn. If the player currently employs the attacked mercenary that mercenary leader and all mercenary units with him immediately become marauders.
10.6 Discharging Mercenaries
10.6.1 Mercenary leaders may be discharged by a player at the start of the Diplomatic Bidding Phase.
10.6.2 The discharging player rolls one die and halves the result (fractions rounded up). The result is the number of crowns the player must spend to "pay off" the Mercenary Leader. If the player does not pay, the Mercenary Leader and all non-national units located in the same province (and controlled by the now formerly controlling player) become Marauders. If the player does pay, the Mercenary Leader is removed from the map, and the Mercenary Card is removed from the player's Player Mat. Non-national units located in the province and not stacked with other leaders are eligible to be bid upon during the Diplomatic Bidding Phase, and if unpurchased, become Marauders.
10.7 Assassinating Mercenaries
10.7.1 Once per turn, at the start of the Diplomatic Bidding Phase, a player may try to assassinate a Mercenary Leader he/she controls.
10.7.2 The player must spend a minimum of one crown to "hire" an assassin and rolls one die. If the die roll is a "1" the assassin is successful and the Mercenary Leader is killed. For each additional crown he spends, up to a maximum of three crowns, the player may subtract one from the assassination die roll. If the mercenary is killed see Rule 10.8.
10.7.3 If the attempt is unsuccessful, the leader, the non-national units stacked with him, and his controlled state cards immediately become independent and anti- the would-be assassinating player. That leader and his cards may be bid for immediately (the player with the most money on their Treasury Track begins the auction). The assassinating player may never again bid for the mercenary, but may bid/bribe for his states. If the leader and his troops are not bid for they become Marauders.
10.8 Death of a Mercenary
10.8.1 If a mercenary leader is killed in battle or through assassination, the mercenary counter is removed from the map. The reverse or replacement side only may he hired and returned to play on a subsequent bidding phase.
10.8.2 If the controlling player does not have any national leaders, or not enough national leaders present to command all of the mercenaries (non-national troops) that were led by the late mercenary general, the excess mercenaries are placed in a separate stack. They may be bid for immediately as a single force (the player with the most money remaining bids first) as if they were an unmaintained force. If not bid for, they become Marauders.
10.8.3 All of the cards stacked with the mercenary become independent states and are separated from the mercenary card.
10.9 Replacement Mercenary Leaders
10.9.1 On the reverse of each mercenary leader counter is the name of his replacement. When a mercenary leader has been killed, his replacement may be hired. All replacement leaders are treated in the same manner as von Arnim, i.e., they have no political loyalties and do not require state cards.
11. Alliances
11.1 During the Alliance Phase players may form or disband alliances and may make any agreements they wish. Players may also use this time to discuss strategy and conduct diplomacy with other players. Players may wish to set a time limit (say, five minutes) on diplomacy, except for the first turn, in which players should agree to a more liberal time limit.
11.2 Alliances may be formed by two or more players. A player may not be a member of more than one alliance. (Example: Spain may be allied to France and Austria as part of the Catholic League. Spain cannot ally with Austria in the Catholic League and with France in the German Entente.) Only players who are allied may trade cards in their control pile, may give one another crowns (adjust the Treasury Tracks as required) or exchange mercenary leaders or non-national military units. These actions may ONLY be done during the the Alliance Phase. (NOTE: If non-national units are exchanged they must be placed under a leader or political marker of the player who now controls them).
11.3 Players who are allied may not attack each other's units or states nor may they bid for cards on the other player's Player Mat.
11.4 Allies have a limited ability to move together. A player may declare during his movement phase that one or more of his leaders and the units stacked with them will move in an ally's phase rather than in the player's own turn. The leader and units to be moved later are so designated and may not have moved in the player's turn. They may be "picked up" by an allied leader during the ally's movement turn. They may not move independently of an allied leader. The owning player may also order their move halted at any point once they have been picked up.
11.5 Players may unilaterally break alliances during the Alliance Phase, and only during the Alliance Phase. The player who wishes to pull out of the alliance removes his political marker from the alliance box. Players may also agree to expel a member of their alliance in the same manner, if all other members of the alliance agree to do so. A player may only join an existing alliance if all other players in that alliance agree him.
12. Combat Units
12.1 National Forces
12.1.1 There are a limited number of national forces available to each player (except the Austrian player, who has no national forces). These are identified by counters with the same background and symbol color or as the country's political marker.
12.1.2 If a player does not have sufficient income to maintain national forces, the unmaintained units are removed from play and placed in the player's Force Pool. They may be rebuilt on a later turn.
12.2 Special State Forces
12.2.1 The Swiss Cantons, Duchy of Saxony, Margraviate of Brandenburg, Kingdom of Denmark, Republic of the United Provinces, Principality of Transylvania, Kingdom of Poland, Duchy of Savoy, Republic of Venice, and the Hanseatic League have their own combat units.
12.2.2 Special state forces are produced, maintained (exception: See Swiss Canton Rule 9.2) and (in most cases except where specified in the Special State Card rules) replaced free of charge. Except in the case of Poland, the Savoy/Venice/Denmark Garrison units, and the United Provinces, these forces are placed IN ADDITION to Independent State Forces if the state is attacked while independent.
12.3 Non-National Forces
12.3.1 All white military units - infantry, gendarmes, reiters, elite and light cavalry and heavy artillery - are considered non-national forces. These units may be purchased and used by all players.
12.3.2 Units that are not maintained are eligible for bidding and, if not controlled by a player, become Marauders (see Rule 12.9).
12.3.3 All non-national units are back-printed. When purchasing units, the most expensive side of the counter (i.e., the heavy artillery or elite cavalry sides) is allocated to players purchasing the units before players buying the less expensive side (i.e., light artillery, light cavalry) may have their orders filled.
12.3.3.1 Any of the above mentioned units which take a hit in combat (see combat rules) are eliminated and returned to the countermix (except artillery, which can be captured).
12.3.3.2 Gendarme units must be purchased only as Gendarmes. The reverse side, which depicts a Reiter, is used only if the gendarme takes a hit in combat, in which case it is inverted to show a Reiter unit. The unit, however, remains in play and for a cost of one crown can be rebuilt back to its gendarme side during any financial segment.
12.4 Independent State Garrisons
12.4.1 Independent states (states that are not marked with a player's political marker) have a garrison of non-national Garrison units equal to the income value printed on the state card. Players may use available infantry units as needed.
12.4.2 The garrison is only placed on the board when the state is attacked and is removed from play if the garrison is eliminated, in which case the state is conquered, or the attacker's force retreats or is eliminated. In the latter case, if the state is attacked again on that or any other turn while still independent, the garrison, in its entirety, is immediately returned to play.
12.4.3 In multi-province states, the entire garrison is placed in the province being attacked. If they are eliminated, the state is conquered. (For example, an independent Bohemia - income of 8 - would have 8 Garrison units as its garrison. If Upper Bohemia is attacked, all 8 appear in Upper Bohemia. If they are eliminated, Bohemia is conquered. )
12.4.4 If there are insufficient white counters available to represent the garrison, players may use any counters or keep track of the garrison with paper and pencil.
12.4.5 Independent garrisons may not use the optional tactical combat board but must fight all battles using the strategic combat rules (See appropriate rules sections).
12.5 Non-Independent Garrisons
12.5.1 Any state which is conquered, influenced or controlled by a player is garrisoned only by the military units present in the state. Exception: Savoy/Venice/Denmark Garrison units. See Rules 9.10.2 and 9.13.1.
12.5.2 The political marker in states that are Influenced or Controlled however, is treated as an additional non-national infantry unit. The marker may not move or attack enemy units in adjacent states or provinces. It is always the last unit eliminated in combat (exception: when using the optional tactical rules if the unit is eliminated and the controlling player won the battle, one of his existing units MUST be exchanged for a control marker) .
12.5.3 Each province in a controlled or influenced multi-province state (such as Bohemia, France or Poland) is considered to have a garrison of one marker.
12.6 Naval Units
12.6.1 Naval units are represented by strength points. A unit has either one or two strength points. Two-point units that take a hit in combat (See Combat rules) are flipped to their one strength point side. One strength point units that are hit are eliminated.
12.6.2 Players may only replace naval units in cities in coastal areas or, for the Spanish and French players, the Off-Board Zones (OBZ) belonging to that player. Naval units cost two crowns to rebuild if eliminated; one crown to upgrade if they have been flipped to their one-point side. Naval units have a Combat Value equal to their strength points.
12.6.3 Combat between one player's naval units and another player's land units is not possible except as described in the siege rules.
12.6.4 Opposing land and naval may be present in a given coastal province, in which case the land units ALWAYS hold possession of that province.
12.7 Leaders
12.7.1 National Leaders are, at the owning player's discretion, either combat units or non-combat units. If they are used as combat units, they are treated as a light cavalry unit and if eliminated in combat the leader is killed. If they are non-combat units they are only killed when specified in the leader injury section of the rules.
12.7.2 Mercenary and Independent State leaders may never fight as light cavalry.
12.7.3 Some leaders have bonuses of one or two (designated by +1 or +2 on the counter). These bonuses are added to the die roll of one unit stacked with the leader in combat, or to the leader itself if being used as light cavalry.
12.7.4 When a leader unit is killed he is replaced in the player's Force Pool on the reverse side. The replacement leader may be purchased as normal in a future game turn.
12.7.5 If a replacement leader is killed the leader unit is removed from play.
12.7.6 If a player's last named leader is killed, a generic "General" leader unit is placed into the player's Force Pool. This leader unit may be killed any number of times, and each time is returned to the player's Force Pool.
12.8 Superior Units
12.8.1 Elite infantry which take a hit in combat are flipped over to their regular infantry side.
12.8.2 Gendarmes that take a hit in combat are flipped over to their Reiter side.
12.8.3 These units may be rebuilt to their original strength for the cost of one crown/unit during the finance phase. If hit while at their reduced strength they are eliminated.
12.9 Mercenaries/Marauders
12.9.1 Non-national units that are not maintained become Mercenaries and may be bid for by any player. If a player successfully bids for and receives them, he may build and place any of his leaders not on the board on the stack, or may integrate them into a stack of friendly units in the same state/province or may place a political control marker on them to designate ownership. They become his troops.
12.9.2 Any mercenaries (non-national troops that have not been maintained) that are not bid for and hired by a player become Marauders.
12.9.3 Players may bid for marauders as if they were mercenaries; if hired they are no longer considered to be marauders.
13. Movement
13.1 Order of Movement
During each Movement/Combat Phase units move in a strict order, as follows:
- Marauders
- Independent States
- Player Units
13.2 Marauder Movement
13.2.1 Marauders move first in the Movement Phase. If there are several marauding stacks, a die is rolled to determine the order of their movement. Marauders move as follows.
13.2.2 Marauders that begin the turn in an unlooted province immediately attack all defending units in the province, provided the marauders outnumber the defenders. If the marauders win the battle they loot the province.
13.2.3 If marauders begin the turn in a province that has a looted marker, or in which defending troops outnumber the marauders, the marauders move to an adjacent province.
13.2.4 Marauders must enter the adjacent province with the most income, the fewest defenders, and which costs the fewest number of movement points, in that order. For example, in a choice between two provinces worth the same income, the one with the fewest defenders would be the target. If these two provinces were equal in income and defenders, the province would be determined by which cost the fewest number of movement points to enter. If there were still a tie, a die is rolled to determine which province is entered.
13.2.5 When marauders enter a province they IMMEDIATELY attack the units in the province. Marauders fight until either all the marauders or all of the defenders are eliminated. If all of the defenders are eliminated, the province and all its cities are looted. (See 19.8).
13.2.6 Marauders will never retreat from combat.
13.2.7 If Marauders cannot abide by the above movement rules they are immediately disbanded and returned to the countermix.
13.3 Independent State Movement
13.3.1 Independent states that: 1) have more than one province AND, 2) have marauder and/or player units in one of those provinces AND, 3) have their own independent state forces, may move to attack any enemy units in that state.
13.3.2 The player who has the fewest number of cards in his control pile AND is either not allied to or is openly opposed to the player who has units in the independent state may move and attack with the independent state's forces.
13.3.3 The independent state forces may not be moved out of or attack out of the independent state.
13.4 Player Movement
13.4.1 To determine the order of movement of player units, each player places his/her Initiative Marker into an opaque container (a player controlling more than one country per Rule 24 selects one Initiative Marker to use). One of the players picks one marker out of the cup, and that player performes movement/combat. When that player completes his/her movement, including all combats generated by that movement, another chit is picked and that player moves. The process continues until all players have moved.
13.4.2 Leaders are the only land units that have a movement allowance. Leaders have an allowance of three movement points (MP).
13.4.2.1 A Leader Unit can move by himself or with controlled land Combat units equal to the Leader's Stacking Value.
13.4.2.2 A leader may only move units that begin the movement phase anywhere in the same province with him. A leader may not pick up combat units as he moves, but he may drop them off during his movement. EXCEPTION: See 13.6
13.4.2.3 Several leaders and their stacks may move together (e.g. a pair of leaders together could move 10 units) and units/leaders of allies that are declared to be "subordinated" to one player's leader in the area may also move together.
13.4.3 Leaders expend movement points to move across the map, and the leader must cease moving when all movement points have been expended. All movement costs are cumulative.
13.4.3.1 A leader expends no movement points to enter a state or province that contains a friendly (i.e., his own or his allies') political marker. A leader may not enter a friendly state or province, however, if he does not have any movement points remaining (either regular or forced march movement points - see Forced March Rule 14).
13.4.3.2 A leader expends one movement point to enter a hostile state or province (any state or province that does not contain a friendly political marker). Leaders pay an additional movement point if the hostile state/province is forested.
13.4.3.3 Leaders entering a hostile area through a border that contains a river or mountain pay an additional movement point (two additional points if both a river and a mountain are present). Units moving through Mountain Passes do not pay the mountain movement penalty. The passes include the following borders: Milan-Free State of the Three Leagues-Tyrol-Augsburg and Upper Bohemia-Bayreuth.
13.4.3.4 All Polish provinces, regardless of allegiance, cost a minimum of one movement point to enter.
13.5 Movement-Combat-Retreat
13.5.1 When a Leader Unit moves into an uncontrolled or non-allied province the defending forces, garrison or other units have the choice of whether or not to fight the moving force in the field or to retire into the city, if there is one in the province. If the units go into the city the moving player may either continue moving or attack/lay siege to the city (see Fortress Rules). If the defending units decide to fight in the field, a battle is fought immediately before any other movement takes place. (See Combat rules).
13.5.2 If the moving player's forces are victorious in the battle (all of the defending units retreat from the province, retire into the city or are eliminated) the moving player may continue moving his leader up to the number of movement points remaining.
13.5.3 If the moving player retreats from the battle, the units return along their line of march to an adjacent friendly province. If no such province exists, the units may NOT elect to retreat. If they began the movement phase in that province/state they may retreat into any adjacent friendly state. Once an active player's leader has retreated during his/her movement/combat phase, however, that leader may no longer move that turn.
13.5.4 Units in a besieged city may not retreat out of the city.
13.6 Multiple Leader Stacks
13.6.1 Leaders may pick up other leaders and the units co-located with them during movement. Only those leaders and co-located units that have not yet moved, however, may be picked up – individual units without leaders may not be picked up.
13.6.2 Once a leader and units join a moving leader, the newly joined leaders and units forfeit their own movement for the turn and move as part of the moving leader's original stack. They have no movement of their own, may not move futher than the original moving leader, and may not continue to move separately.
14. Forced March
14.1 A leader may increase his movement point allowance by one or two points, up to a maximum movement allowance of five by forced marching. He may attempt to force march at any point during his movement phase and may add these movement points to any points he has not yet spent. Each unit that is to accompany the leader rolls on the Forced March Table below.
14.2 Procedure
14.2.1 The player announces which Leader Unit is attempting to force march, which units are stacked with the Leader Unit, the number of attempted force march MPs, and the path of the attempted movement. Leader Units beginning in the same province may attempt to force march separately or together.
14.2.2 The player then rolls once for each unit that is force marching (except the leader, who automatically makes the forced march) on the following table:
Forced March Table
| Die Roll | Result |
|---|---|
| 1-4 | Successful |
| 5 | Unsuccessful-Halt |
| 6 | Eliminated |
Modifiers (cumulative)
| Modifier | Die Roll |
|---|---|
| Heavy Artillery | +1 |
| Elite Cavalry/Reiter | -1 |
| Light Cavalry | -2 |
| 2MP Force March | +1 |
| Led by +1 Leader | -1 |
| Led by +2 Leader | -2 |
There are three possible results from the forced march table. These are:
- Successful: The unit makes it to its destination.
- Unsuccessful-Halt: The unit may not move further that turn.
- Eliminated: The unit is destroyed and returned to the countermix. Exception: Elite Infantry/Gendarme units take a hit and halt.
14.3 Aborted Move
14.3.1 After a player has rolled to force march his units, he may halt rather than complete his move to the destination he identified.
14.3.2 Eliminated units are, of course, eliminated, and halted units are halted. But the player then decides which of the other units will actually force march : all, none or some.
15. Naval Movement and Combat
15.1 Naval units have six movement points and do not require a leader in order to move. Naval units are NOT eligible to force march. Naval units may remain "at sea" at the end of a movement phase.
15.2 Naval units may only enter sea zones (of which there are three), provinces which border those sea zones, the cities of Copenhagen and Stockholm, which are in sea zones, and the Off Board Zone (OBZ), consisting of the Bay of Biscay, France, and Spain boxes.
15.2.1 It costs one naval movement point to enter any of the above areas. Units may move from any city or province bordering a sea zone into that sea zone or vice versa at a cost of one movement point. A naval unit may also move from one province into an adjacent province that borders the same sea zone or from a City that borders the sea zone into the surrounding province that also borders the same sea zone.
15.2.2 Naval units in provinces that border the Baltic may only enter provinces to the west of Denmark (Schleswig Holstein) by first entering the Baltic Sea and then moving into the North Sea. Likewise, units on the west coast of Denmark may only enter provinces to the east of Denmark by first moving into the North Sea.
15.2.3 Units may not move between the Baltic and North Seas if Denmark is hostile to the moving player.
15.3 Naval Transport
15.3.1 Naval units may pick up (embark) land units that begin the movement phase in a province or city bordering a sea zone, provided those land units have not yet moved this turn. Naval units do not pay any cost to embark or carry the land units, and the land units do not pay any movement points to embark or be transported. Land units, however, do pay one movement point to disembark, and another if they are disembarking in a hostile province or city.
15.3.2 Each naval strength point can carry four units and any number of leaders.
15.3.3 Naval units may remain at sea, but land units may not end their turn aboard naval units. They must end their movemenbt phase on land.
15.4 Naval Combat
15.4.1 If naval units enter a sea zone, province or city containing hostile naval units, the naval units must fight. This occurs prior to (dis)embarking land units.
15.4.2 Naval combat is conducted in the same manner as land combat, except that only the naval units (and not the land units aboard them) may fight.
15.4.3 Leaders do not affect naval combat.
15.4.4 If the moving player's naval units are victorious, they may continue moving ; if they retreat they must end their move in a friendly city/province bordering that sea zone. If there is none, roll one die for each naval unit : a 1, 2, or 3 and it sinks ; a 4, 5, or 6 and it may go to any friendly port (provided it does not have to pass through a hostile Denmark to leave or enter the Baltic to do so).
15.4.5 If naval strength points are eliminated for any reason, land units (including leaders) that they are carrying are eliminated. (If a 2-step fleet carrying two land units is reduced, the fleet owner chooses which units are lost).
15.5 Fortresses
Naval units in fortresses may decline combat as long as the fortress is occupied by friendly land combat units. If the fortress falls, the naval units must leave and fight any enemy naval units stacked on top of (blockading) the port.
16. Off-Board Zone
16.1 The Bay of Biscay and the provinces along the Franco-Spanish border are not on the map but are represented by an "off board zone" (OBZ). Only French and Spanish units may be placed in or enter the OBZ.
16.2 Naval units in the English Channel may move to the Bay of Biscay OBZ at a cost of one movement point, and vice versa. Naval units in the OBZ must move into the English Channel before moving anywhere else on the map.
16.3 To move by normal land movement, units in the Spain OBZ may move to either (a) Milan or (b) the France OBZ. Units in the France OBZ may move to either Lyonnais, Bourbonnais, Savoy or the Spain OBZ.
16.4 Moving into a hostile OBZ costs one movement point. Movement into a friendly OBZ costs no movement points.
16.5 A player may attack units in an OBZ by moving into it as if the attacker were moving into and attacking a province with a mountain border. Naval units may fight other naval units in the OBZ as if the battle occurred in a sea zone. Units in battle in a OBZ may retreat either to their own OBZ or one of the provinces bordering it, or, for naval units, the English Channel.
16.6 If a player's OBZ is occupied solely by enemy units the original owner may still build there. His units, however, may not leave the OBZ until all enemy units in the OBZ are eliminated.
16.7 The OBZ is not worth income points, but is worth victory points to a Spanish or French player who controls both the France and Spain OBZ.
17. Land Combat
17.1 General Rules
17.1.1 When a player moves units into a hostile province combat occurs immediately. Combat occurs during movement and must be completed before any other movement is begun.
17.1.2 Players may choose to resolve combat either strategically or tactically (see optional tactical rules). Strategic combat is resolved on the mapboard; tactical combat is resolved on the battle board.
17.2 Which Type of Combat
17.2.1 When an active leader unit moves into a province containing enemy units, the defending player has two options: he may either fight a field battle or, if there is an unlooted city in the province that does not contain (or is besigned by) enemy units he may retire into the city.
17.2.1.1 If the defender's units remain in the province a field battle is fought.
17.2.1.2 If the defender's units retires into the fortress, the moving player may storm, besiege, mask or ignore the fortress.
- Storm: A battle is immediately fought with the defender having the advantage of the fortress. (See Rule 19.1).
- Siege : At least an equal number of the attacking player's units must stop moving and remain in the province with the defending units; all other attacking units may continue moving. Combat is resolved on the Siege Table in the defending player's Movement Phase. (See Rule 19.2).
- Mask: At least an equal number of the attacking player's units must stop moving and remain in the province with the defending units; all other attacking units may continue moving. A Siege may be declared by the units that remain in the province.
- Ignore: The moving player can continue moving to another province. If he wishes to remain in the province, however, he must do one of the above.
18. Field Battles
18.1 Set Up
18.1.1 When a field battle occurs both players immediately remove all military units and leaders from the province where the battle is occurring and place them in an open space to the side of the map. The players should note where the battle is occurring.
18.1.2 Each player then lays his units out in a line so that all units of both sides are visible to both players. Players may stack heavy or light artillery with non-artillery units. Leaders may stack with any unit. No other units may be stacked together.
18.2 Combat Value
18.2.1 Each combat unit has the combat value shown below. A unit must roll a number on one die equal to or less than the combat value shown to cause a hit.
| Unit | Value |
|---|---|
| Light Artillery | - |
| Heavy Artillery | (2) |
| Light Cavalry | 1 |
| Reiter Cavalry | 2 |
| Infantry | 2 |
| Elite Cavalry | 3 |
| Elite Infantry | 3 |
| Gendarmes | 4 |
18.3 Combat Procedure
18.3.1 After all modifiers have been accounted for, each player rolls one die for each of his units. If the number is equal to or less than the combat value of the unit, a hit is inflicted on the enemy force. All modifiers are cumulative.
18.3.2 Combat is fought in rounds, with each unit of both sides "firing" at the other side. Note that units are not paired off against specific targets (in the strategic combat method), but combat hits are accumulated and applied to the enemy force as a whole.
18.3.3 All units that roll a "6" automatically miss and all units that roll a "1" automatically hit, regardless of any modifiers.
18.3.4 The owning player may decide which units of his that are involved in the battle receive hits.
18.3.5 Note that elite infantry units and Gendarmes can each take a hit and be inverted to their reduced strength side. All other units that take a hit are eliminated.
18.4 Artillery
18.4.1 Light Artillery has no combat value of its own, but increases the combat value of any non-artillery land Combat unit it is stacked with by one (e.g. an infantry unit, worth 2, would be worth 3 if stacked with a light artillery unit).
18.4.2 Heavy Artillery can either fire on its own, with a value of 2 , or may be added to a non-artillery unit in the same manner as light artillery to increase the unit's value by one.
18.4.3 Light and heavy artillery may not add their bonuses to the same unit, nor to each other.
18.5 Leaders
18.5.1 Leaders (except for mercenary and independent state leaders) may act as light cavalry units (combat value of 1) or they may act as non-combat units.
18.5.2 A Leader Unit with a Combat Bonus (+1 or +2) may, when stacked with a non-artillery land Combat Unit or when acting as a Light Cavalry Unit, add that bonus to the combat value of that unit.
18.5.3 A Leader Unit may increase the value of another Leader Unit acting as a Light Cavalry unit. For example, a stack containing an infantry unit, worth 2, a light artillery unit, and a +2 Leader Unit would be worth 5 combat points (2+1+2).
18.6 Terrain Modifiers
18.6.1 Mountains: If an attacking player crossed a mountain border to enter the province in which the battle is being fought, all of his cavalry units (reiter, light or elite cavalry and gendarmes) have their combat value lowered by 1 for all rounds of combat. In addition, the defender fires and any losses inflicted on the attacker are assessed before the attacker rolls the combat dice.
18.6.2 Rivers/Beach: If an attacking player crossed a river border or used naval transport to enter the province in which the battle is being fought, the defender fires first in the first round only. Fire is simultaneous in the second and subsequent rounds.
18.6.3 Forest: If an attacker is fighting a battle in a forest province, all of his mounted units have their combat value LOWERED by 1 for all rounds of combat.
18.6.4 Mountain Passes: Units that move into a hostile province or state through a mountain pass border do not incur the mountain penalty. The battle is instead fought as if in clear terrain.
18.7 End of the Combat Round
18.7.1 At the end of each round of combat, either player, beginning with the attacker, may decide to retreat. A player may retreat into a friendly city in the province (in which case he may be besieged, stormed, masked or ignored) or into a adjacent friendly province. Units may not retreat into hostile provinces.
18.7.2 If the attacker retreats, the battle is over and that attacking group of units must cease movement for that movement phase.
18.7.3 If the defender retreats, the attacking player may, if he has movement/forced march points available, continue moving and may, if possible, even engage his opponent again in battle.
18.7.4 If the player who is not retreating has any light cavalry units (not leaders acting as such) those units get one free shot at the retreating forces. Each pursuing light cavalry fires with a combat strength of three (3).
18.8 Leader Losses/Capture
18.8.1 After each player has taken/inflicted hits, he rolls for any leaders involved in the battle (i.e., stacked with units or which fought as light cavalry or, if alone after all combat units have been eliminated). On a die roll of 11 or 12 the leader is eliminated, (two dice).
18.9 Subsequent Rounds
If neither player retreats, another round of combat is fought until one side either retreats or is eliminated.
18.10 End of Combat
18.10.1 If ALL defending enemy units in a province (including those in the fortress) are eliminated, the province is Conquered. If there is only one province within the State, the State is also Conquered.
18.10.2 If there are no victorious units left in the province, or if the victor continues moving without leaving units behind to garrison the province, the province becomes Independent. The political marker is removed and the card is placed in the independent state pile (if a single-province state).
18.10.3 If a garrison is left behind, however, the province is conquered. Place a marker of the conquering player on the province and put the card in the Conquer section of his Player Mat (if a single-province state).
19. Fortress Combat
19.1 Storm
19.1.1 A storm is resolved in the same manner as a field battle, although no forest, mountain, river or beach modifiers apply.
19.1.2 The Combat Value of all cavalry units (reiter, light or elite cavalry and gendarmes) is reduced by one when Storming a fortress. Units reduced to a "0" Combat Value may not fire.
19.1.3 A Storm is resolved in the following sequence:
- Heavy Artillery: Both players simultaneously fire their Heavy Artillery and take any casualties. No leader/terrain modifiers apply to heavy artillery fire.
- Defender Fires: All of the units/stacks of the defending player, including heavy artillery fire; the attacking player takes his losses.
- Attacker Fires: All of the units/stacks of the attacking player, including heavy artillery, who have survived now return fire.
- Surrender: If the attacker cause at least twice as many casualties as he suffered, and has at least TWICE as many combat (not leader) units as the defender remaining, the defender surrenders. If the defender does not surrender, and has not been eliminated, another round of battle occurs. The Storm sequence is repeated until either side is eliminated or surrenders or the attacker decides to stop storming the fortress.
19.2 Siege
19.2.1 A fortress is under siege if the besieging player has as at least as many combat units outside the fortress laying siege as the defender has inside the fortress under siege.
19.2.2 A siege is resolved in the defender's next movement phase. The defender must do one of the following:
- Relieve the siege by moving another army into the province to fight the besieger (in which case the army under siege may not join the battle until the second round of combat), or
- Sally out, in which case the besieged units attack the besieger. The Storm sequence listed in 19.1 is followed in reverse, with the besieger firing first, etc. Roll one die on the Siege Table, applying all modifiers (cumulative) and consulting the table below.
Siege Resolution Table
| Die Roll | Result |
|---|---|
| 0-1 | 2 Besieger units eliminated; Siege continues |
| 2 | 1 Besieger unit eliminated; Siege continues |
| 3-4 | 1 unit of each side eliminated; Siege continues |
| 5-6 | 1 unit of each side eliminated; Fortress surrenders |
| 7 | Fortress surrenders |
Siege Modifiers
| Modifier | Value |
|---|---|
| Per Defender Light Artillery unit | -1 |
| Per Defender Heavy Artillery unit | -4 |
| Per Attacker Light Artillery unit | +1 |
| Per Attacker Heavy Artillery unit | +4 |
| Attacker Outnumbers Defender 3:1 | +2 |
| Attacker Outnumbers Defender 2:1 | +1 |
Defender and Attacker may each use one leader's Combat Bonus.
19.3 Honors of War
19.3.1 At any time in a storm prior to a round of combat or in a siege prior to the die roll, either player may propose honors of war. This is a diplomatic agreement whereby all or some of the units in a besieged fortress are allowed to leave the fortress and return to a nearby friendly province. The besieger may grant the besieged units the right to traverse the besieger's territory in order to reach another friendly province. Regardless, this move is made immediately. The defending units moving due to honors of war may not attack or move again that turn.
19.3.2 The besieging player may grant or decline honors of war and may even negotiate a price such as the surrender of all artillery in the fortress or an amount of crowns to be transferred to his treasury. Players may also negotiate non-binding diplomatic agreements in connection with honors of war.
19.3.3 Honors of war apply only when all players involved agree to the terms proposed.
19.3.4 Defending units granted honors of war must end up in the closest province friendly to the defender which is reachable only through territory by the player(s) granting honors of war. If there is no such province, the defenders may not ask for honors of war.
19.4 Unpaid Garrison
If a player does not pay to maintain all of the units in a beseiged fortress the fortress immediately surrenders.
(The printed PDF has no Rule 19.5; numbering runs 19.4 to 19.6 as printed.)
19.6 Fall of Fortress
19.6.1 A fortress falls when all of its defenders are eliminated or a surrender result is achieved in a storm or siege or the unpaid garrison rule is invoked.
19.6.2 Prisoners: When a fortress falls, all national units are eliminated. One half of all non-national infantry and mounted units, by type, are eliminated (fractions rounded up) and any remaining units join the victor. All non-national artillery units are captured and may be immediately used by the victor. Leader Units become Prisoners (See 19.7)
19.6.3 Fleets: Any naval units in the city must immediately move out to sea unless blockaded (i.e. enemy naval units are on the city) in which case they must immediately fight the blockading naval units.
19.7 Leader Capture & Ransom
19.7.1 Leader Units who are Prisoners must be placed in a fortress of the capturing player.
19.7.2 If the fortress is captured, the imprisoned leader may be captured, executed or liberated by the victor. Captured leaders may be executed or held for ransom (the victor may return them to his opponent for income, cards, troops, diplomatic concessions etc.) that may be negotiated during any Alliance phase. This is the only time non-allies may exchange cards, troops or income.
19.7.3 Ransomed leaders are placed in any controlled province of the owner's choice. Mercenary leaders may be ransomed, executed or hired at a price equal to the value of the cards held by the mercenary (only the player holding the mercenary captive may bid to hire him).
19.8 Looting
19.8.1 When a fortress falls in a storm or siege, a die is rolled. If the result is a 5 or 6 (or a 4, 5, or 6 if non-national units stacked with a Mercenary Leader or Swiss units are present in the victorious army) the city is looted. A Looted marker is placed on the city.
19.8.2 Looted cities are no longer fortresses. A state loses one crown of printed income if the province or a city has been looted, and two crowns if both the province and the city within has been looted.
19.8.3 A looted city/province may be rebuilt and all looted effects removed by having a player expend two crowns during the financial maintenance phase.
20. Imperial Rules
20.1 Election
20.1.1 At the end of any Diplomatic Bidding Phase, and number of players who between them control (i.e., have the corresponding State Cards in their Control pile) four or more of the imperial electors may call for a diet to hold an election for Holy Roman Emperor. These cards have an imperial elector crown symbol printed on them: Archbishopric of Trier, Archbishopric of Mainz, Archbishopric of Cologne, Duchy of Saxony, Margraviate of Brandenberg, Kingdom of Bohemia, and County Palatine of Rhine (Lower) (or possibly per Rule 20.1.1.1, Duchy of Bavaria).
20.1.1.1 If the County Palatine of the Rhine (Lower) State Card is in the Conquered pile of the Austrian, Bavarian, or Spanish Players, then the Electorate in Bavaria replaces that of the Palatinate. The electoral crown on the County Palatine of the Rhine (Lower) State Card (and on the map) is ignored for all game purposes, and the electoral crown on the Duchy of Bavaria State Card (and on the map) is active for all game purposes. Once the electoral crown has been transferred to Bavaria, it remains with Bavaria for the remainder of the game.
20.1.2 Each player who control an electoral crown card receives one vote for each such controlled card. There are two possible results of an election:
- One player receives four or more votes and is crowned emperor. He/she places the HRE State Card, as well as all State Cards that are listed as HRE Control or Imperial Free City, in his/her Control pile. If any of these cards are held by another player, they are immediatley turned over to the HRE player.
- No player receives four or more votes, in which case there is no change in possession of the HRE, HRE Control, and Imperial Free City State Cards.
20.2 Diet
20.2.1 A diet may be held at the end of any Diplomatic Bidding Phase. Only the player who has the HRE State Card in his/her Control pile may call for a diet. Diets may follow any election that may have been called in the same game turn.
20.2.2 In a diet, each player who has a State Card printed with an imperial elector crown symbol in his/her Control pile (see Rules 20.1.1 and 20.1.1.1) receives one vote for each such card. Each player who has any of these State Cards in his/her Influence Pile receives one-half vote for each such card (retain all fractions). The player who has the HRE State Card in his/her Control pile receives one vote.
20.2.3 A diet may vote on ONE of the following items. If an item receives for or more votes it is passed and put into effect. If it does not receive at least four votes it fails and the diet is adjourned until a following turn.
Items for voting:
20.2.4 Edict of Restitution: Church lands held by Protestant nobles are returned to the Roman Catholic Church. If passed, all Austrian, French, Bavarian, or Spanish bids for Roman Catholic State Cards are reduced in final cost by an additional 50%. The Pope supports the holder of the HRE State Card with a stipend of 5 crowns each turn.
20.2.5 Edit of Reversal: Revokation of Edict of Restitution. If passed, the effects of the Edict of Restitution are cancelled, and all Swedish or Palatine bids for Lutheran or Calvinist State Cards are reduced in final cost by an additional 50%. Note that an Edict of Reversl may only be voted upon if there is an Edict of Restitution that has previously been passed, but these items may be voted upon and passed more than once per game (Restitution -> Reversal -> Restitution -> Reversal, etc.
20.2.6 Ban on Foreign Troops: If passed, all Spanish, French, and Swedish units must leave any States not controlled by their respective players and that are within the boundaries of the Holy Roman Empire (all provinces except those of the following States: Kingdom of Poland, Kingdom of Sweden, Ottoman Empire, Principality of Transylvania, Kingdom of France, Kingdom of Hungary, Duchy of Savoy, Duchy of Milan, Republic of Venice, and the OBZ). These players may not enter any of the provinces within the Holy Roman Empire unless they are controlled by r allied to that player.
20.2.6.1 The first player who violates this ban incurs the following penalties: All State Cards not marked as being Heriditary, Controlled, or Influenced by that player are treated as being anti- that player for the duration of the ban. This penalty supercedes all other penalties and voids the provisions on Rule 7.4.4 while in effect.
20.2.6.2 Once the ban has been broken by a player, other players affected by the ban are free to violate it without penalty until a new ban is decreed in a future diet.
20.2.6.3 The Ban of Foreign Troops may be rescinded in a future diet, as well.
20.2.7 Players who attend a diet (or election) are not allowed to attack any other player who attended a diet for the duraton of this turn. The first player to violate this truce suffers the same effects as a player who violates a Ban on Foreign Troops. Likewise, other players who violate a truce may do so without penalty.
21. Victory
21.1 At the end of each turn, players count the cards in their control pile. If any player has 30 or more cards AND is either the emperor or controls four electoral cards, the game is over and that player wins.
21.2 If there is no victor at the end of a turn, play continues until at least turn 10. At the end of each turn, beginning on turn 10, if no one has won a victory as listed above, a die is rolled. If the die is equal to any of the numbers printed below the turn number on the turn record chart (one on turn 10, one or two on turn 11 etc.) the game is over and victory points are counted as listed below and modified by the scenario. The player with the most points wins (ties are possible). All the games must end by the conclusion of turn 15.
22. Victory Points
22.1 General Rules
Each of the six major powers/players (Austria, France, Bavaria, Spain, Sweden and the Palatinate) totals its points separately. If a player is running two or three countries (in a scenario with fewer than six players) the points held by those countries are averaged. Example: One player runs Spain (30 points) and Bavaria (40 points) . The total is 70 divided by two for an average of 35 victory points. Round fractions down.
22.2 Basic Points
Each player receives a number of victory points equal to:
- FULL printed value of controlled cards
- HALF printed value of influenced cards
- NO value for conquered or cards marked with blue or red income values..
22.3 Bonus Points
Each player receives an additional point for each card in his control pile marked as being a hereditary, controlled or influenced card of his country.
22.4 Dynastic Bonus Points
22.4.1 Each player receives additional (bonus) points for holding certain cards. These reflect both the historical policies of those countries and a handicap bonus for smaller powers.
22.4.2 Spain
- 1VP per French province occupied by Spanish Units
- 2VP per English Channel/North Sea/France OBZ/Bay of Biscay OBZ or United Provinces province occupied by Spanish units
- 5VP if the HRE State Card is in the Control pile of Spain, Austria, or Bavaria
- 5VP for the Spanish Road (an unbroken chain of controlled or influenced states between and including the Spanish Netherlands and Milan)
22.4.3 France
- 1VP per state adjacent to France occupied by French units
- 2VP per English Channel/North Sea/Spain OBZ/Bay of Biscay OBZ occupied by French units
- 10VP if Spain does not have the Spanish Road.
22.4.4 Bavaria
- 2VP per Protestant state card controlled/influenced
- 3VP per Catholic state card controlled/influenced
- 5VP per electoral crown card controlled/influenced
- 10VP for having the HRE State Card in the Bavaria Control pile
22.4.5 Palatinate
- 1VP per Protestant state card controlled/influenced
- 2VP per electoral crown card controlled/influenced
- 10VP for having the HRE State Card in the Palatine Control pile (Campaign Game only)
- 20VP for having the HRE State Card in the Palatine Control pile (Swedish War Scenario only)
22.4.6 Austria
- -10VP if the HRE State Card is not in the Austria Control pile (Campaign Game only)
- -20VP if the HRE State Card is not in the Austria Control pile (Swedish War Scenario only)
22.4.7 Sweden
- -1VP per Polish province not occupied by Swedish Combat units and/or Political Markers
- 1VP per province bordering the Baltic Sea occupied by Swedish Combat units and/or Political Markers
- 1VP if the Baltic Sea is occupied by Fleet strength points controlled by (not allied to) the Sweden player
- 5VP if the HRE State Card is in the Sweden or Palatine Control pile
23. Optional Tactical Combat
23.1 Due to our adoption of the new tactical battle map and the terrain tiles, the original optional rules for fighting out tactical battles no longer apply. Rather than putting the new rules for that section here, we elected instead to provide a separate booklet for the tactical battles map that will be appropriate for both the basic game and the tactical battles books that will be released later. The rules will also be included in the tactical battles books, which will be available later (and will be shipped automatically to all Kickstarter supporters).
24. Fewer Than Six Players
24.1 Five Players
The Spanish player plays Spain and Bavaria (the Catholic League). Spain may give but not take crowns from Bavaria. Spain may never give Bavaria cards nor take cards from Bavaria.
24.2 Four Players
24.2.1 Spain plays Spain and Bavaria as above.
24.2.2 The Palatine player plays the Palantinate and his choice of either Sweden or France as well. France (or Sweden) may give crowns to but may never take nor give cards to the Palatinate.
24.3 Three Players
24.3.1 Austria plays Spain and Bavaria. The limit on Bavaria listed in the above variations applies.
24.3.2 The Palatine player plays the Palatinate and either Sweden or France. The third player takes the remaining state. The limitations of the four player game apply.
24.4 Two Players
24.4.1 Austria plays Spain and Bavaria.
24.4.2 The Palatinate plays the Palatine, Sweden and France.
24.5 General Rule
24.5.1 If a player is running more than one of the six major powers, those powers are always allied and may not attack or bid against each other.
24.5.2 If a player controls more than one country per 24.1, 24.2, 24.3, or 24.2, only one Initiative Marker is used to represent that player.
24.5.3 In the two player game, if the Imperial Alliance player (Austria, Spain, Bavaria ) does not have the HRE State Card in the Control pile of one of the three countries at the end of the game, regardless of points, that player loses.
25. Scenarios
25.1 Campaign Game
25.1.1 Initial Deployment
- All treasuries are set to 20 crowns.
- The turn marker is set at turn 1.
- Random Events Phase is omitted on Turn 1. Play begins with the Finance Phase.
25.1.2 FRANCE :
- Controlled cards: Kingdom of France
- Military Units: French Leader Crequi, three French Gendarmes in Paris. Four French Fleet strength points in Picardy.
- Force Pool: French Leader Harcourt, French Leader Orleans.
25.1.3 SPAIN:
- Controlled Cards: Kingdom of Spain, County of Alsace, County of Luxembourg, Spanish Netherlands, Duchy of Milan, County of Franche Comte
- Military Units: Spanish Leader Spinola, two Spanish Elite Infantry in Brussels. Spanish Leader Cordoba, two Spanish Elite Infantry in Milan. Four Spanish Fleet strength points in Antwerp.
- Force Pool: Spanish Leader Piccolom, two Spanish Elite Infantry, two Spanish Fleet strength points.
25.1.4 BAVARIA
- Controlled Cards: Duchy of Bavaria
- Military Units: Bavarian Leader Maximill, Bavarian Leader Pappenh, Bavarian Leader Tilly, one Bavarian Elite Infantry, one Mercenary Infantry, one Mercenary Elite Cavalry in Munich.
- Force Pool: None..
25.1.5 SWEDEN
- Controlled Cards: Kingdom of Sweden
- Influenced Cards: Hanseatic League
- Military Units: Swedish Leader Gustavus, Swedish Leader Horn, Swedish Leader Torstens, four Swedish Elite Infantry, two Mercenary Elite Cavalry, two Swedish Light Artillery, two Swedish Fleet strength points in Stockholm.
- Hanseatic League: One Hanseatic Garrison unit in ech of Bremen, Hamburg, Lubeck, and Stralsund. Two Hanseatic Fleet strength points in any one Hanseatic League city.
- Force Pool: Two Swedish Light Cavalry.
25.1.6 PALATINATE
- Controlled Cards: County Palatine of Rhine (Lower), County Palatine of Rhine (Upper), Kingdom of Bohemia, Principality of Anhalt, Duchy of Brunswick (-Wolfenbuttel), Bishopric of Halberstadt, Ernst Graf von Mansfield
- Influenced Cards: Republic of the United Provinces, Kingdom of Denmark
- Military Units: Palatine Leader Thurn, one Palatine Elite Infantry in Prague. Palatine Leader Brunswick, one Mercenary Infantry in Halberstadt, Palatine Leader C.-Anhalt, one Mercenary Infantry in Anhalt. Mercenary Leader Mansfield, three Mercenary Infantry, 1 Mercenary Reiter in Upper Palatinate.
- Republic of the United Provinces: Dutch Leader Maurice, four Dutch Elite Infantry, one Mercenary Elite Cavalry, one Dutch Light Artillery, four Dutch Fleet strength points anywhere in United Provinces territory.
- Kingdom of Denmark: Danish Leader Christ IV, two Danish Fleet strength points, two Danish Garrison in Copenhagen.
- Force Pool: One Dutch Light Cavalry.
25.1.7 AUSTRIA
- Controlled Cards: Holy Roman Emperor, Margraviate of Moravia, Kingdom of Hungary, Archduchy of Styria, Duchy of Silesia, Archduchy of Austria, Archduchy of Carinthia, Archduchy of Carniola, Duchy of Lusatia, County of Tyrol, Kingdom of Poland, Imperial City of Nuremburg.
- Influenced Cards: Archbishopric of Mainz, Archbishopric of Trier, Archbishopric of Cologne.
- Military Units: Austrian Leader Bucquoi, one Mercenary Infantry in Vienna.
- Kingdom of Poland: Two Polish Gendarmes, two Polish Elite Cavalry, two Polish Rieter, two Polish Light Cavalry, two Polish Infantry in Warsaw.
- Force Pool: Austrian Leader Holk, Austrian Leader Gallas, Austrian Leader Ferdinand.
25.1.8 OTHER MILITARY FORCES
The Palatine player sets up the United Provinces, Danish and Saxon units. The Swedish player places the Hanseatic units. The Brandenburg and Swiss armies are placed in Berlin and Swiss Confederation, respectively, and the Polish army is placed in Warsaw. The following minor state forces are set up as indicated.
- Duchy of Saxony: Saxon Leader J. George, two Saxon Infantry, one Saxon Reiter anywhere in Duchy of Saxony controlled territory (see 9.12.1), set up by the Palatinate player.
- Duchy of Brandenberg: Brandenburg Leader Geo Wm, one Brandenburg Infantry in Berlin.
- Swiss Cantons: One Swiss Leader, four Swiss Elite Infantry in Swiss Confederation.
25.2 Special Rules
25.2.1 FRANCE : may not move French leaders/units outside of France on turn one or two unless France is invaded. May, however, bid for and move mercenary units and bid for other cards.
25.2.2 SPAIN : may not attack the United Provinces on turn one due to treaty.
25.2.3 UNITED PROVINCES, DENMARK : may not be bid for or attacked on turn 1. These cards are shifted free of charge to Palatine Control pile during the maintenance phase of turn 2.
25.2.4 SWEDEN : begins the game at war with Poland. Swedish units may only enter Swedish controlled/influenced states and Polish provinces (and the Baltic) until one of the following conditions has been met: (a) the Polish card has been placed in the Swedish conquer, influence or control pile, (b) Swedish units/provinces/cards have been attacked or entered by non-Polish hostile units, or (c) non-Polish units hostile to Sweden have entered Poland.
25.3 Swedish Scenario
25.3.1 Initial Set-Up
- All treasuries are set at 10 crowns.
- Random Events Phase is omitted on Turn 7. Play begins with the Finances Phase.
- The electoral crown of the Duchy of Bavaria has replaced that of the County Palatine of the Rhine (Lower).
25.3.2 SWEDEN: set up as per Campaign game with following ADDITIONS
- Controlled Cards: Hanseatic League, Margraviate of Brandenburg, Duchy of Pomerania, Duchy of Prussia, Duchy of Berg, County of Mark.
- Influenced Cards: Kingdom of Poland
- Military Units: Swedish Leader Gustavus, Swedish Leader Horn, Swedish Leader Torstens, four Swedish Elite Infantry, two Mercenary Elite Cavalry, two Swedish Light Artillery, two Swedish Fleet strength points in Stockholm.
- Duchy of Brandenberg: Brandenburg Leader Geo Wm, one Brandenburg Infantry in Berlin.
- Hanseatic League: Two Hanseatic Fleet strength points in any one Hanseatic League city.
- Force Pool: Two Swedish Light Cavalry..
25.3.3 AUSTRIA: set up as per Campaign game with following additions
- Controlled Cards: Holy Roman Emperor, Margraviate of Moravia, Kingdom of Hungary, Archduchy of Styria, Duchy of Silesia, Archduchy of Austria, Archduchy of Carinthia, Archduchy of Carniola, Duchy of Lusatia, County of Tyrol, Imperial City of Nuremburg.
- Influenced Cards: Archbishopric of Trier, Archbishopric of Cologne, Landgraviate of Hesse-Darmstadt.
- Conquered Cards: Bishopric of Osnabruck, Archbishopric of Bremen, County of Oldenburg, Kingdom of Bohemia.
- Military Units: Austrian Leader Ferdinand, Austrian Leader Montecuci (reverse of Bucquoi) in Vienna. Austrian Leader Gallas, Austrian Leader Holk, three Mercenary Infantry, one Mercenary Reiter, one Mercenary Heavy Artillery in Bohemia. One Mercenary Infantry in Osnabruck. One Mercenary Infantry in Bremen.
- Force Pool: None.
25.3.4 BAVARIA: instead of Campaign set up.
- Controlled Cards: Kingdom of Bavaria, County Palatine of Rhine (Upper), Bishopric of Augsburg
- Influenced Cards: Bishopric of Halberstadt, County of Bayreuth.
- Military Units: Bavarian Leader Maximil, one Mercenary Infantry in Munich. Bavarian Leader Pappenh, Bavarian Leader Tilly, one Bavarian Elite Infantry, four Mercenary Infantry, two Mercenary Rieter, two Mercenary Elite Cavalry, one Mercenary Heavy Artillery besieging Magdeburg.
- Force Pool: None.
25.3.5 PALATINATE: Instead of campaign set up.
- Controlled Cards: Republic of the United Provinces, Duchy of Saxony, Saxon Duchies, Archbishopric of Magdeburg, Margraviate of Baden, Landgraviate of Hesse-Cassel.
- Influenced Cards: Duchy of Brunswick(-Wolfenbuttel), Duchy of Brunswick-Luneberg, Republic of Venice.
- Military Units: Two Mercenary Infantry, one Mercenary Heavy Artillery besieged in Magdeburg. Mercenary Leader V. Arnim, two Mercenary Infantry, one Mercenary Reiter in Leipzig. Palatine Leader GV Baden (reverse of C-Anhalt), one Mercenary Infantry in Baden. Palatine Leader H-Cassel (reverse of Brunswick), one Mercenary Infantry in Hesse-Cassel. Palatine Leader Melander (reverse of Thurn), one Mercenary Infantry in Amsterdam.
- Republic of the United Provinces: Dutch Leader F. Henry (reverse of Maurice), four Dutch Elite Infantry, one Mercenary Elite Cavalry, one Dutch Light Artillery, four Dutch Fleet strength points anywhere in United Provinces territory.
- Duchy of Saxony: Saxon Leader J. George, two Saxon Infantry, one Saxon Reiter anywhere in Duchy of Saxony controlled territory (see 9.12.1).
- Republic of Venice: Four Venetian Garrison in Venice.
- Force Pool: One Dutch Light Cavalry.
25.3.6 SPAIN: Instead of Campaign set up.
- Controlled Cards: Kingdom of Spain, County of Alsace, County of Luxembourg, Spanish Netherlands, Duchy of Milan, County of Franche Comte, Bishopric of Metz, Archbishopric of Mainz, Bishopric of Strasburg.
- Influenced Cards: Free State of the Three Leagues.
- Conquered Cards: County Palatine of Rhine (Lower)
- Military Units: Spanish Leader Cordoba, Spanish Leader Melo (reverse of Piccolom), four Spanish Elite Infantry, two Mercenary Infantry, one Mercenary Reiter, one Mercenary Heavy Artillery in Brabant. Four Spanish Fleet strength points in Antwerp. Spanish Leader Infante (reverse of Spinola), two Spanish Elite Infantry two Spanish Fleet strength points in Spain OBZ. One Mercenary Infantry in Milan. One Mercenary Infantry in Lower Palatine.
- Force Pool: None.
25.3.7 FRANCE : Instead of Campaign set up
- Controlled Cards: Kingdom of France, Duchy of Savoy, Ottoman Empire, Bernard von Saxe-Weimar.
- Military Units: Mercenary Leader S-Weimar, two Mercenary Infantry, one Mercenary Reiter in Baden. French Leader Crequi, French Leader Turenne (reverse of Harcourt), French Leader Orleans, three French Gendarmes in Paris. Four French Naval strength points in Picardy.
- Duchy of Savoy: Four Savoyard Garrison in Savoy.
- Force Pool: None.
25.3.8 OTHER FORCES
The following minor state forces are set up as indicated.
- Kingdom of Denmark: Danish Leader Mitzlaff (reverse of Christ IV), two Danish Fleet strength points in Copenhagen.
- Swiss Cantons: One Swiss Leader, four Swiss Elite Infantry in Swiss Confederation.
25.4 Special Rules
- Austria and Spain may not initiate but may respond to bids on Turn 7.
- The Edict of Restitution in in effect.
- von Wallenstein holds the Mecklenburg card and is unemployed.
- Mansfield is dead and general Goetz has replaced him.
- The Swedish player may elect to go first on Turn 7 or take his turn normally as part of the Initiative Chit draw.