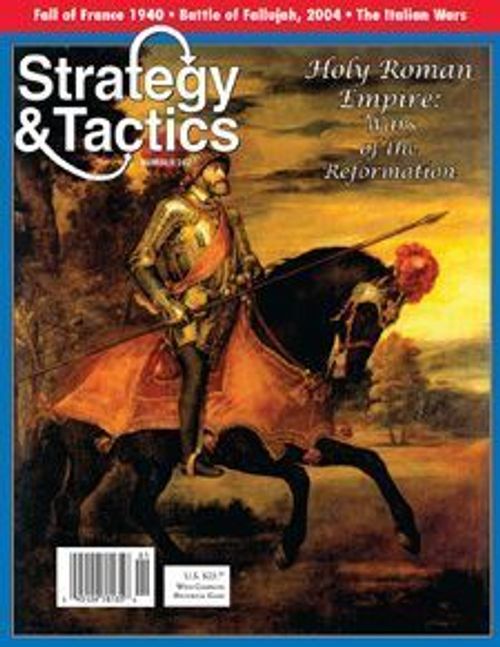
Holy Roman Empire: Wars of the Reformation, 1524-38
Holy Roman Empire: Wars of the Reformation, 1524-38 Rulebook
Table of Contents
Table of Contents
- 1.0 Introduction
- 2.0 Components
- 3.0 Sequence of Play
- 4.0 Control of Powers
- 5.0 Occupation of Squares
- 6.0 Initiative Determination
- 7.0 Imperial Diets
- 8.0 Player Negotiations
- 9.0 Gold & Treasuries
- 10.0 Campaign Markers
- 11.0 Recruiting
- 12.0 Diplomacy
- 13.0 Stacking & Zones of Control
- 14.0 Movement
- 15.0 Combat
- 16.0 Forced March
- 17.0 Naval Operations
- 18.0 Pillage
- 19.0 Provisioning
- 20.0 Leaders
- 21.0 Fortresses
- 22.0 Civilization Markers
- 23.0 Off-Map Areas
- 24.0 Mercenaries
- 25.0 Rebels
- 26.0 Fog of War
- 27.0 Victory Conditions & Set Up
- 28.0 Ferocious Units
- 29.0 Sieges
- 30.0 Declarations of War
- 31.0 Increasing Taxes
- 32.0 Mutinies
- 33.0 Supply Magazines
- 34.0 Prisoners & Ransom
- 35.0 Deficit Financing
- 36.0 Optional Record Keeping Tables
- 37.0 Franco-Ottoman Naval Cooperation
1.0 Introduction
1.1 Holy Roman Empire: Wars of the Reformation, 1524-38 (HRE) is a wargame of intermediate complexity intended for play by four, three or two players. The era it covers —from the Peasants Revolt to the Truce of Nice—proved decisive in shaping what has since come to be known as 'modernity.' On one side was the Holy Roman Empire, the (theoretically) Europe-wide polity under control of the Habsburgs. Contending against them were the Kingdom of France, the Ottoman Empire and miscellaneous minor states, as well as the rising tide of Protestantism.
HRE is primarily intended to be played by four players, each representing a different major power: the Habsburgs, France, the Ottomans, and the "League" (the latter representing assorted minor power coalitions that came and went). Each player has a variety of military and political instruments with which he can attempt to gain control of Europe. The rules are written with procedures for four-player games in mind; however, games with three or two players can also be managed by using the altered framework provided for such contests.
1.2 The "League Player" & The "Hanseatic League"
"Hanseatic League" is a term of convenience we've borrowed from an earlier era of history than is actually covered by this wargame. As used here it's a convenient way to refer collectively to the agglomeration of otherwise independent or autonomous cities along the south shore of the Baltic Sea. The "League player," on the other hand, is a convenient way to refer to the totality of minor powers represented in the game as being under the direction of that single player. During play it will often turn out the Hanseatic League is part of the League player's territory; though that won't necessarily always be the case.
2.0 Components
2.1 Map
The map shows portions of central and western Europe as it was early in the 16th century. A square grid has been superimposed over it to regularize the positioning and movement of the playing pieces. When setting up and playing the game, the playing pieces are always placed within, and moved among, individual squares. Note the letters "A" through "P" are printed down the side of the map, one letter per row of squares, while the numbers "1" through "20" are printed across the top. That creates an alpha-numeric grid by which individual squares can be easily identified and located. For example, the city of London is in square "A1," while the city of Belgrade is in "O16."
2.2 Powers
There are four major powers in the game: the Habsburgs, France, the Ottomans and the League. Each power other than the League has its own distinct set of units. There are also numerous minor powers. Minor powers may be controlled by the major power players or they may be neutral. Rebels are generally treated as minor powers but are not controlled by any player. Mercenaries may be controlled by any player who recruits and pays them.
2.3 Off Map Areas
Spain, Western France, Constantinople, and Denmark/Sweden represent four areas adjoining the map, and each is controlled by players according to the instructions given in the rules.
2.4 Free Cities
Certain minor powers consist of a single city in a single square, such as Trier in E5. Such one-square minor powers are referred to as "Free Cities," though they are in no other way distinguished from larger minor powers. Note Calais (B2) is not a free city; it's part of the minor power of England.
2.5 Playing Pieces
Examine the sheet of die-cut cardboard playing pieces. There are three general categories of units: combat units and leaders, campaign markers, and information markers.
2.6 Combat Units are described below. They represent various types of military formations.
2.7 Reading Combat Units
[The eRules file gives this heading with no body text; the counter illustration it refers to is not in the file.]
2.8 Unit Background Colors
- Habsburgs: red
- French: yellow
- Ottomans: green
- Minor Powers: light gray & name of a specific minor power
- Rebels: black with "Rebel" in white
- Mercenaries: black with unit names
2.9 Leaders are a special sub-category of combat units that have the following information across the top of their counters: 1) military value, the left-hand number, is used as a modifier when engaging in non-siege combat; the political value, the center number, is used for various other purposes; and 3) the siege combat value, the right-hand number, is used in the optional siege rules.
Certain leader units are "sovereign lords," representing certain of the greatest emperors, kings and sultans of the era. That status is indicated by a crown icon on the counter next to the leader flag icon.
Certain units are naval leaders (admirals). That status is indicated by an anchor icon next to the leader flag icon. Note, no admiral is a sovereign and no sovereign is an admiral.
2.10 Unit Types. Each unit represents a combined-arms force to one degree or another, but ones in which certain tactical types generally predominate.
- Garrison: militia and other strategically static troops.
- Levy: late-feudal-era mixed light troops.
- Professional Infantry: regulars, usually based around a single tactical system, such as Swiss pikemen or Ottoman Janissaries.
- Gendarmes: heavy cavalry.
- Tercio: a well balanced combined-arms force using both the latest shock and firepower tactics of the era.
- Reiters: light cavalry.
- Fleets: ocean-going naval vessels.
- Leader: a strategic-level commander plus his staff and household troops.
2.12 Markers are used to show changes to map features due to player activities. Note that Fortress, Civilization and Pillage markers are all player-neutral and may each be used by any player as needed during play. Control markers are in national colors.
- Civilization: palaces, etc., which you build in order to impress everyone with your superior level of culture.
- Control: shows who controls regions and units. They are used in two ways: 1) place them atop mercenary units to indicate you control them; and 2) place them anywhere within the territory of a controlled minor power to indicate you control it.
- Fortress: a heavily fortified city.
- Pillage: a square that's been looted and devastated.
- Siege: indicates a fortress under siege in that square.
[The source numbers its marker rule 2.12 and has no 2.11.]
2.13 Abbreviations
Mercenary Units
- Bnd: Banbanere
- Cln: Formation commanded by the Italian mercenary leader Colonna.
- Con: Condotierri (Italian mercenaries)
- Frn: Formation commanded by the German mercenary leader Frundesberg
- LK: Landsknechts (German mercenaries)
- R: Reiter
- Str: Stradiot (Italian light troops)
- SWS: Swiss
French Infantry "Legions"
- Chm: Champagne
- Lng: Languedoc
- Nor: Normandy
- Pic: Picardy
Habsburg Tercios
- Fln: Flanders
- Ger: Germania
- Hsp: Hispania
- Lom: Lombardy
- Nap: Naples
- Rhn: Rhine
- Scl: Sicily
Leaders
- AD: Andrea Dorea
- Aub: Aubigny
- Bay: Bayard
- Brb: Bourbon
- Cdb: Cordoba
- Chr: Christian
- Cns: Constable
- Crd: Cordona
- CV: Charles V
- DF: De Foix
- FB: Frundesberg
- Frd: Ferdinand
- F I: Francis I
- Hen: Henry
- KAD: Khair Ad-Din
- Lan: Lannoy
- Lou: Louis
- Ltr: Lautrec
- Mrc: Maurice
- Mrq: Marquis
- NW: Nicholas William
- Sig: Sigismund
- Sul: Suleiman
- Viz: Vizier
Minor Power Names
- Brn: Brandenburg
- Bvr: Bavaria
- DS: Denmark/Sweden
- Eng: England
- Flo: Florence
- Gen: Genoa
- GS: German States
- HL: Hanseatic League
- Hun: Hungary
- Lor: Lorraine
- Mil: Milan
- Mnz: Mainz
- Plt: Palatinate
- Pol: Poland
- PS: Papal States
- Sav: Savoy
- Swz: Switzerland
- TR: Trier
Others
- Jan: Janissaries (elite Ottoman infantry)
2.14 Campaign Markers are used to generate and define various military and political actions as well as random events.
2.15 Game Scale
Each game turn represents one year. Each unit represents 5,000 to 15,000 combatants along with sundry camp followers and hangers-on. Each square is approximately 50 miles across.
2.16 Dice
Players will need to provide themselves with one or more six-sided dice in order to play the game. Dice are used to randomize various game functions and to resolve combat.
2.17 Seating
The Habsburg player should sit off the east side of the map; the Ottoman player should sit off the south side of the map; the French player should sit off the west side of the map, and the League player should sit off the north side of the map.
3.0 Sequence of Play
3.1 Players set up their units and markers according to the instructions given in section 27.0. Each game will last up to a maximum of 15 game turns. Within each game turn every player will have his own "player turn," in which he will conduct various actions with his units in a specific sequence of activity consisting of a number of rigidly sequenced "phases." The player whose player turn it is at any given moment is said to be the "phasing player."
3.2 Each game turn consists of the following phases.
-
Initiative Determination Phase. Players determine who among them will be the "first player" for the coming game turn. The first player takes his player turn first during that game turn, with every other player taking his own player turn, in turn, proceeding clockwise around the table from the first player.
-
Negotiation Phase. Players may make agreements with each other as described in section 8.0.
-
Imperial Diet Phase. Starting with the first player, potentially each player (other than the Ottoman) may call for an "Imperial Diet." There may not be more than one Imperial Diet per game turn, and there need not be any.
-
First Player Turn.
a) Taxation Phase. The phasing player receives gold points equal to the total economic values of the cities he controls.
b) Recruiting Phase. The phasing player may expend gold to build new units, pick campaign markers, place fortress or civilization markers, and to remove pillage markers. He may also initiate bidding for any one available mercenary unit.
c) Diplomacy Phase. The phasing player may conduct diplomacy to gain control of minor powers.
d) Movement Phase. The phasing player may decide to move none, some, or all of his units. Non-phasing players may declare "countermarch" by expending Forced March markers, which work to temporarily interrupt the moves of the phasing player.
e) Combat Phase. The phasing player must attack with those of his forces occupying squares that contain other players' units.
f) Pillage Phase. The phasing player may attempt to pillage squares occupied solely by his units.
g) Provisioning Phase. The phasing player pays the maintenance costs for his units, or else suffers attrition.
-
Second Player Turn. The second player becomes the phasing player and executes the same steps described above, only using his own forces.
-
Third Player Turn. The third player (if any) becomes the phasing player and executes the same steps described above, only using his own forces.
-
Fourth Player Turn. The fourth player (if any) becomes the phasing player and executes the same steps described above, only using his own forces.
-
End of Game Turn Administration. All the players together take actions designated as taking place at the end of a game turn.
3.3 Three-Player & Two Player Games
When playing with three players, one player commands the Habsburgs, the second commands the French and the Ottomans, and the third commands the League. When playing with two players, one commands the Habsburgs while the second commands the French, the Ottomans and the League. The player commanding more than one major power must take care not to violate any of the rules concerning the independence of those nations and their forces. That is, he must keep separate treasury totals for each, can't combine their forces in a single square (exception: see optional rule 37.0) and, in general, must try to run each one's affairs as if he were two or three individual players. Of course, within the framework of these rules, none of this is meant to say there can't be military or diplomatic cooperation between powers in the game.
Design Note. Two-player and three-player matches will inescapably be more an anti-Habsburg 'crusade' than will be the case in four-player matches. We feel that's at least somewhat balanced by the fact the typical wargamer will be much more strategically savvy in play than was his historical counterpart Charles V in reality.
4.0 Control of Powers
4.1 There are two types of powers in the game, major and minor. The major powers are the Habsburgs, France, the Ottomans, and the League. Minor powers include all of the minor polities shown on the map (for example, Bavaria) as well as rebels. The League player doesn't have any units or territories that are inherently his; rather, he must recruit units from whatever minor powers he controls at any one moment. There are also mercenary formations that may be hired and controlled by any player.
4.2 Minor Power Status.
A minor power may be in one of two states: belligerent or neutral. Major powers are all belligerents from the start of each game.
-
Belligerent. A belligerent minor power is controlled by a specific player and is thereby actively involved in play. That player controls all its forces, leaders, campaign markers, etc.
-
Neutral. A neutral minor power isn't controlled by any player. No one may maneuver or attack with its forces, etc. Neutral minor powers don't recruit units or receive campaign markers, nor do their units require provisioning.
4.3 France, the Ottoman Empire, and the regions comprising the Habsburg homelands are always belligerent and may never be neutral. Minor powers may switch from belligerence to neutrality and vice versa, potentially any number of times during the course of single game. The League player is himself always a belligerent, even if for some reason he loses control of all minor powers.
4.4 Minor Power Neutrality Violations
Neutral minor powers become belligerent under any of the following circumstances. 1) A player attacks a neutral power's forces. That is, he moves into a square containing one or more neutral units. In that case, the minor power becomes controlled by one of the major power players who didn't launch that attack. 2) A player pillages a square inside a neutral power's borders. In that case the minor power also becomes controlled by one of the major power players who didn't attempt the pillaging.
Note that a player's forces may enter a neutral power's territory without triggering belligerency as long as the entering force doesn't do either of the above. That represents the loose, still semi-feudal, territorial organization of the era when viewed at these time and space scales.
4.5 At the instant a power's neutrality is violated, it becomes belligerent. That power comes under the control of any one player other than the one who violated neutrality. Choose at random, by high die roll, one of the other non-violating major powers to gain control of the power. (Also follow that same procedure in two-player and three-player games.)
4.6 If a player controls more than one minor power, their forces are treated in all regards as friendly to each other and to his major power's forces, meaning they may stack, move, attack and defend together. The League player always maintains just one treasury for the totality of the minor powers he controls. All treasury points for jointly commanded major powers must be kept track of in separate national treasuries.
4.7 Minor powers may also become belligerent due to diplomacy and certain event chits. See the relevant rules sections below.
4.8 Reversion to Neutrality
If a belligerent minor power reverts to neutrality, the player who controlled that power removes all of its units from the map that are located outside its borders. He places all those units back in their home country in city squares of his choice. If all the city squares of that minor power are occupied by the forces of other powers at that time, the units are eliminated instead.
4.9 Minor Power Control
All players should openly show on the map, with the use of control markers, which minor powers are theirs.
4.10 Mercenaries.
Mercenary units are controlled by whichever player won the bid for them. Place an appropriate control marker atop them.
4.11 Rebels are not controlled by any player. They may only defend; they never move or attack; nor do they require provisioning, etc.
4.12 Minor Powers & Random Picks.
Certain game functions require players to randomly pick a minor power. To do so, roll two dice and consult the Minor Power Control Table printed on the mapsheet. If the minor power indicated by the dice roll is already controlled by a player, roll again until an uncontrolled one is picked.
5.0 Occupation of Squares
5.1 A player occupies a square by having one or more of his combat units or leaders in it. If a player completely empties a square of all his combat or leader units, he loses control of that square, and any other player who moves a force into it gains control for as long as one or more of his units remain there. A player may regain control of a previously lost square by reoccupying it with one or more of his combat or leader units. Occupation of squares with economic value (EV) gives that player that income in gold.
5.2 All types of combat and leader units may control squares. Naval units and admirals may control coastal squares.
5.3 Fortress or civilization markers can't initiate or maintain control of squares by themselves.
5.4 Control vs. Occupation
It's important to understand the distinction between "control" and "occupation." Control means a player has the loyalties of the ruling elite of a minor power and hence also has control of its forces. Occupation means the player has units physically inside a square, and he thereby controls those resources no matter the loyalty of its elites; however, control over that place's armed forces doesn't follow from the simple act of occupation. For example, say the Ottoman player has units occupying the Leipzig square (E11, a city within the territory of the minor power of Saxony). While he in that way can gain the point of gold for its EV, he doesn't in any way control Saxon forces unless he also gains control of Saxony via diplomacy. That represents the difference between extorting tribute and gaining the loyalties of the local elite. Note this distinction also means you can never gain control of enemy major powers. For example, the Habsburg player will never gain control of France, even if his forces occupy Paris.
6.0 Initiative Determination
6.1 During each game turn's Initiative Determination Phase, players determine who among them will be the first player for that game turn.
6.2 Each player secretly commits any number of gold points, from zero up to the total he possesses, by writing down that number out of sight on a piece of paper. All the players then simultaneously reveal their bid. The player with the highest total thereby gains the initiative and becomes first player for that turn. All the gold points committed to that bidding, for both the winner and the losers, are debited from their treasuries. (In three-player and two-player matches, the combined player must make separate bids for each major power he controls.)
6.3 The first player takes his player turn first, followed by all other players, one at a time, moving clockwise around the table from him.
6.4 Ties
In the event of a tie, roll a die and the major power that gets the higher result goes first. All gold points of all players risked in the pre-tie bidding are still debited from their treasuries. (Of course, if all bid zero, no debits are made.)
7.0 Imperial Diets
7.1 Entirely skip this rules section when playing with only two or three players.
In four-player games any eligible player may call for an imperial diet (assembly) in order to see to the adjustment of various internal political arrangements within the Holy Roman Empire.
There are seven electorate cities on the map: Berlin (D13, in the minor power of Brandenburg); Leipzig (E11, in the minor power of Saxony); Worms (G7, in the minor power of the Palatinate), Prague (G12 in the minor power of Bohemia); Cologne (a free city in D6); Trier (a free city in E5); and Mainz (a free city in F7). In general, a player must occupy (see 5.4) at least one electorate city in order to be able to call for an imperial diet. You don't necessarily have to control the minor power to which the city belongs (again, see 5.4). The occupying unit(s) may be from any power he controls. Note the Ottoman player may never call for, or directly take part in, an imperial diet.
7.2 During each game turn's Imperial Diet Phase, any eligible player may openly call for one, starting with the player who has the initiative and going around the table clockwise from him, one player at a time. If all players pass, there is no diet that game turn. If one or more players call for a diet, a diet occurs. All eligible players may then still decide to participate in the diet (or not), even if they didn't originally want to call for one that turn. It's possible for a diet to be attended (and therefore totally dominated by) just one player. Also, for further Ottoman and French participation restrictions, see 7.9 below.
7.3 Once a diet has been called, each player other than the Ottoman simultaneously and secretly allocates diplomacy points from his hand of such markers to one, two or all of the voting issues. Those issues are: 1) raise troops; 2) gain recognition; and 3) condemn a foe. All diplomacy expenditures for all three categories are secretly recorded on pieces of paper by each player, and then all expenditures are revealed at the same time and resolved one at a time. Bids of "zero" are acceptable. When the bid totals are revealed, all bidding players must sort through their hand of markers and return the corresponding number of diplomacy point markers to the pool (see 10.17 and section 12.0). No fake or deficit bidding is allowed.
7.4 Outcomes
The player whose diplomacy value in a category is higher than the combined total of all others voting in that category is the winner for that category. In case of ties, or if nobody voted in a particular category, or if nobody bid more than the other players combined in that category, no one wins in that category. For example, if the French player bid three diplomacy points in the "raise troops" category, while the Habsburg and League players both bid one point in that category, the French player wins that category. If just one of the other players had bid a point more, however, the result would've been a tie (no winner), and the matter would've been resolved simply by putting all the bid diplomacy point markers back into the marker pool
7.5 Raise Troops
The winner rolls a die, divides by two and rounds up. That's the total number of units he receives for his own major power or any of his controlled minor powers. (His open and deliberate pick, based on what's available in his pool of off-map units.) Those units may be of any types, and are placed as if they were standard recruits, except they cost nothing. They're subject to normal maintenance rules, etc., afterward.
7.6 Gain Recognition
The winner rolls two dice, totals that result, and picks that number of campaign markers from the pool. He also directly selects any one neutral minor power anywhere on the map and takes control of it.
7.7 Condemn a Foe
The winner indicates any one other player attending the diet. That player must roll a die and then must return that number of campaign markers to the pool. The indicated player must also pick any one of his controlled minor powers (if any) and it reverts to neutrality.
7.8 Alliances
Players may give each other diplomacy markers, secretly or openly, prior to the voting at a diet. Even if the donating player isn't attending the diet. It's the only way the Ottoman player may indirectly take part in a diet. Players may not otherwise combine outcomes. That is, no more than one player may ever win in each of the three categories.
7.9 French Restrictions
The French player may call or attend a diet only if he controls one or more minor powers that contain electorate cities. That eligibility requirement having been met, the French player is affected by the results as follows.
- Raise Troops: same as above, but the French player may place only units belonging to French-controlled minor powers.
- Gain Recognition: same as above, but a winning French player would roll only one die for determining the number of campaign markers he gains.
- Condemn a Foe: same as above.
8.0 Player Negotiations
8.1 Don't use this rules section when playing with only two players. In three or four-player games, during the Negotiations Phase of every game turn, players may conduct negotiations with each other, making whatever agreements they decide on within the following strictures. Players may agree to any of the following.
- Restore to neutrality any one or more minor powers controlled by any of the major power players taking part in that negotiation.
- Transfer control of a minor power from one player to another. Exception: the Ottomans may never gain control of a minor power in this way (see 12.10).
- Trade or give campaign markers.
- End the game. All players must agree on this and, if all players do so agree, immediately determine the game's winner, if any.
- Any other agreements players find acceptable, as long as they don't violate any rules. For example, players might agree not to attack for a turn.
8.2 Violating Agreements
Agreements may be made secretly or openly. All secret agreements must be written and then set aside, available for examination by all players at the end of the game or whenever one of its signatories wants to reveal it prior to that time (for example, if another player violates it). Open agreements need only be verbal, though they must then be made at the table and within earshot of all the players.
When a player violates any agreement, secret or open, he must immediately place all the campaign markers then in his hand back into the pool. Every other player then openly rolls a die and receives that number of campaign markers picked randomly from the pool.
Note: the Negotiations Phase is the only time during which players can trade markers, change minor power control, etc. You may not, for example, conduct any kind of negotiations during a combat phase.
When playing with three or two, all 'agreements' made between major powers commanded by the same player must be made aloud.
Minor powers controlled by a player may also be included in agreements as long as the strictures given above are also observed for them.
9.0 Gold & Treasuries
9.1 During the Taxation Phase of every player turn, the phasing player receives into his treasury the number of gold points equal to the total of the economic values of all the cities he occupies. Players may use paper and pencil to openly record that amount of points, or they may choose to use tokens such as poker chips, coins, etc. Gold points may be used to do the following, as explained elsewhere in more detail: bid for initiative (see section 6.0); recruit and maintain units (see sections 11.0 and 19.0); to randomly buy campaign markers (see 10.3), and to 'lubricate' negotiations (see section 8.0).
9.2 Occupation Necessary
A player may always collect gold from any and all occupied cities, regardless if he controls the minor power in which it's located. Further, no tracing of any kind of path of communications (or supply, etc.), between or among occupied cities, is involved. Note, though, even cities within your starting 'home' territories must be occupied in order for those places to yield up their EV.
9.3 Pillaged cities have an EV of zero while they remain pillaged (see section 18.0).
9.4 There is no deficit spending or financing in the standard rules. If an event marker calls for a player to lose more gold than he possesses, simply reduce his treasury to zero. See optional rules section 35.0 for deficit spending.
10.0 Campaign Markers
10.1 Players use campaign markers to conduct various military and political actions during a game. We recommend you read thoroughly all the campaign marker explanations given below in 10.11 through 10.39, as some of them will have major impact on the course of play. Certain campaign markers are deliberately crafted to shift the course of events in favor of an otherwise losing player.
10.2 At the start of play put all the campaign markers in an opaque container, such as a coffee mug or cereal bowl, which will henceforth be referred to in the rules as the "pool." When instructed by the rules to pick campaign markers, you pick the designated number of markers at random, without first looking at any of those picks. Once you've picked the designated number of markers, you may look at them. Unless otherwise instructed, you don't have to show your markers to the other players; though you may do so if you wish. You should keep all the campaign markers presently in your 'hand' face-down in a convenient location near you at the map.
10.3 Gaining Campaign Markers
A player gains campaign markers as follows.
-
Initial Set Up. The set up rules designate the number of action markers each player has in his hand at the start play (again, all chosen randomly).
-
Recruiting Phase. At the start of the Recruiting Phase of each of your own player turns, you pick, at no cost, campaign markers for each electorate and capital city in which you have a leader unit. That number of markers is equal to the leader's political value. One leader per eligible city may make this contribution. If more than one leader is present and one of them is a sovereign lord (see 2.9), he must be the one chosen for this purpose. If more than one non-sovereign leader is present, you may choose one from among them. For example, if the Habsburg player had a "1" leader in Prague and another in Vienna, he'd get two free campaign markers. You may also decide to purchase additional campaign markers at the cost designated on the Gold Expenditure Table.
-
Spoils of Battle. Each time you win a battle you may, depending on the size of the enemy force you defeat, be entitled to pick a certain number of markers; see 15.9.
10.4 Hand Maximums
You may accumulate and keep in your 'hand' up to the following number of campaign markers: 18 in a two-player game; 12 in a three-player game; and nine in a four-player game. In two-player and three-player games, separate hands must be maintained for each major power.
10.5 If you have the maximum number of campaign markers and some game action calls for you to gain more, you must first return to the pool the number of markers sufficient to make up the difference before randomly picking new ones. You must do it that way; it's not a choice. And, yes, it's possible to pick again one or more of the markers you just discarded. Additionally, at the very start of any of your Recruiting Phases, you may choose to deliberately return to the pool any action markers then in your hand, without having played them, in order to decrease your hand size.
10.6 Using Campaign Markers
There are two types of campaign markers, event and action. Event markers must be played the instant they're picked.
Action markers are played at the owning player's option during times in the turn specified by each marker's particular explanation (see below, 10.11 to 10.39). Certain campaign markers may even be played by you during the player turns of other players.
10.7 Campaign markers that are played are immediately returned to the pool unless otherwise specified in their explanations.
10.8 Within the strictures above, you may potentially play any number of campaign markers over the course of a player turn or game turn.
10.9 Forfeiting Campaign Markers
Certain occurrences in play will force you to forfeit campaign markers from your hand. To do so, randomly pick the designated number of campaign markers from your hand and return them to the pool. If you're instructed to lose all your campaign markers, return to the pool all in your hand at that time.
10.10 If you're required to lose campaign markers but currently have none, no action is taken and there is no carryover effect if you later acquire some markers. Likewise, if you have some markers in your hand, but not enough to satisfy a call for a specific number of returns, simply return what you have and, again, there's no carryover.
Explanation of Campaign Markers
10.11 Alliance (Action)
Play during any of your Diplomacy Phases. If played by the League player, he rolls a die, divides that result by two, rounds up any remainder, and gains control of that number of neutral minor powers, chosen at random via die rolls on the Minor Power Control Table printed on the mapsheet. If played by the Habsburg, French, or Ottoman players, that player gains control of one neutral minor power, again chosen at random from the table. Regardless of who plays this, as compensation for the upset in the balance of power, every other player randomly picks a campaign marker for free. This marker may be played only once per game turn. After it's played set it aside and don't return it to the pool until the end of that game turn.
10.12 Balance of Power (Event)
The following go into effect in this order: 1) the player who currently occupies cities with the highest total of economic values rolls a die and returns to the pool that number of campaign markers; and 2) the player who currently occupies cities with the lowest total of economic values rolls a die and picks from the pool that number of campaign markers. Pillaged cities count as half-value for this purpose. In the event more than one player has the most/least number of economic points, roll a die to determine which player loses/picks markers. This marker may be played only once per game turn. After it's played, set it aside and don't return it to the pool until the end of that game turn.
10.13 Bankers Provide Support (Action)
Play during any of your own Taxation Phases. Roll two dice and receive that number of gold points.
10.14 Civil War (Event)
Roll a die and place the marker in the indicated off-map box: 1 = Spain; 2 = Western France; 3 = Constantinople; 4 = Denmark/Sweden; 5-6 = no effect. For the remainder of the game turn: 1) no player may move units out of the marked area, though units may still enter there normally; 2) the player who controls the marked area doesn't gain any gold or units for it during the rest of that game turn. If he previously gained gold or placed units in the area during the same game turn, but prior to this marker's placement, no retroactive adjustments are made. This marker may occur no more than once per game turn. Place it in the affected off-map area for the remainder of the game turn and put it back into the pool at the end of the game turn.
10.15 Catholics Rally (Event)
The player who drew it rolls a die and all players then consult the following list: 1-3 = Habsburg; 4-5 = France; 6 = the League. The player selected in that way makes another die roll and randomly picks that number of campaign markers from the pool. This marker may go into effect only once per game turn; set it aside for the rest of the game turn after its been played once in a game turn. Return it to the pool at the end of the game turn.
10.16 Diplomacy (Action)
Play in any Diplomacy Phase. See section 12.0 for details.
10.17 Economy (Event)
Roll a die. On a 1-3, each player rolls another die and receives that number of gold points; on a 4-6, each player rolls another die and loses that number of gold points. Use the same principle explained in 10.9 when it comes to empty or low treasuries.
10.18 Extreme Weather (Event)
Each player loses a campaign marker, picked at random. Then roll a die for each fleet on the mapsheet. If a fleet is in an on-map or off-map port, it's eliminated on a roll of six. If a fleet is any other location, it's eliminated on a five or six. Transported units on an eliminated fleet are also eliminated.
10.19 Forced March (Action).
Play of this marker allows you to do any one of the following: 1) played during the your Movement Phase, it allows you to conduct more than one move with the same force; 2) played during another player's Movement Phase, it allows you to conduct a "countermarch" against a moving force; 3) played prior to battle, it allows the defender to retreat a square before combat or the attacker to negate such a retreat; or 4) it allows an attacker to conduct pursuit. See section 16.0 for further details.
10.20 Honors of War (Action)
This is played by either the attacker or defender after a battle has been declared but before the die is rolled to resolve it. This: 1) converts a result of BB into AD if the attacker played it, or into a DD if the defender played it; and 2) the battle ends following the retreat with no loss or gain of campaign markers; 3) the winner may not conduct pursuit; and 4) the garrison of a fortress may retreat out of the fortress with no penalty. If this marker is played, the No Quarter marker (10.29) may not be played during the same battle.
10.21 Imperial Crisis (Action)
This may be played by the Habsburg, French or League player during any game turn's Imperial Diet Phase. That player may call an Imperial Diet even if he doesn't occupy an electorate city.
10.22 Leader Recalled (Action)
This may be played at any time. Indicate any non-sovereign leader on the map belonging to another player. Roll a die. If the die roll is greater than that leader's combined military and political values, he is removed from play (but may be replaced normally). If the die roll is less than or equal to the total, nothing happens except the targeted player gets a free campaign marker pick from the pool. (If using the optional siege rules, include the leader's siege value in the calculations.)
10.23 Leader Recruit (Action)
Play during any of your Recruiting Phases. You receive one major power leader, picked at random; see section 20.0. This costs no gold. Place the leader in the same square as any friendly unit.
10.24 Machiavelli (Action)
Play during any of your Recruiting Phases by exchanging this marker for any one action marker from the pool. That action marker isn't picked at random; you may sort through the markers in the pool and select the one you want.
10.25 Mercenaries Demand Pay (Event)
Expend one gold point for each mercenary unit you control, including mercenary leaders. Eliminate every such unit for which you don't expend gold. Eliminated units are eligible for later recruitment under the normal rules for that; see section 24.0.
10.26 Military Revolution (Action)
Play during any of your Recruiting Phases. You may do one of the following: 1) place a fortress marker on any occupied and unpillaged city; or 2) receive as a reinforcement a tercio (if available) on any friendly unit that's already on the map. Either way, no gold expenditure is involved.
10.27 Reformation Expands (Event)
The League player gains control of one neutral minor power selected at random, and he also rolls a die and gains that number of campaign markers. Thereafter the League player gains an extra campaign marker in each of his Recruiting Phases at no cost. Once this marker is played, it remains in effect for the remainder of the game. Don't put it back into the pool.
10.28 New World (Action)
Play during any of your Recruiting Phases. Roll a die and receive that number of campaign markers; then roll a second die and receive that number of gold points. The Ottoman player may not play this marker; if he draws it he simply shows it to the other players and then puts it back into the pool.
10.29 No Quarter (Action)
This is played by either the attacker or defender after a battle is declared but before it's resolved. This converts a result of AR, AD, DD or DR into a BB. If this marker is played, the Honors of War marker (10.20) may not be played during the same battle.
10.30 Ottoman War (Event)
Treat this the same as the War on a Distant Frontier (10.39), but the Ottomans are automatically affected. This event may go into effect only once per game; remove it from the pool after playing.
10.31 Plague, Fire, Famine & War (Event)
This affects the units of all powers, belligerent and neutral, major and minor. Roll a die for each square on the map that has two or more units in it. If the number rolled is less than the number of units in a square, the strongest unit in that square is eliminated. (Use attack factors to judge the strongest; in case of ties, roll another die.) This event may go into effect only once per game; remove it from the pool after playing it the first time.
10.32 Papal Intervention (Action)
The player playing this marker may do one of the following: 1) at any time in the game turn, negate the play of any one other action marker then being played by returning that marker to the pool without carrying out its instructions; or 2) gain the initiative for the player playing it at the end of an Initiative Determination Phase, regardless of how much gold was bid. This marker may never be played by, nor may it be played against, the Ottoman player. If the Ottoman player draws it, he should first show it to the other players and then return it to the pool. No substitute pick is made.
10.33 Rebellion (Event)
The player who drew this marker is affected by rebellion. He must immediately: 1) roll a die and return to the pool that number of campaign markers from his hand; 2) he then picks at random a rebel unit and places it in any city occupied by his forces. His units in that square must be retreated out of it immediately (no combat occurs). There may be only one rebellion per game turn; set this marker aside and return it to the pool at the end of the game turn.
10.34 Renaissance (Action)
Play during any friendly Recruiting Phase. You may do one of the following: 1) roll a die and pick at random that number of campaign markers; or 2) place a civilization marker on any occupied unpillaged city at no cost. This marker may be played no more than once per game turn; after it's played, don't return it to the pool until the end of that game turn. This marker may never be played by the Ottoman player. If he draws it, he should first show it to the other players and then return it to the pool. No substitute pick is made.
10.35 Reformation Chaos (Event)
Roll a die and the indicated player must return 50 percent of his campaign markers to the pool (chosen at random; round up): 1-3 = Habsburg; 4-5 = France; 6 = League. This marker may go into effect only once per game turn; set it aside for the rest of the game turn after it's been played. Return it to the pool at the start of the next game turn.
10.36 Spy (Action)
Play at any time in the game turn. This may be used to either: 1) examine all the campaign markers in the hand of any one player; or 2) examine the diplomacy point commitments of any one player during an Imperial Diet or in a diplomatic attack prior to the Diet or diplomacy attack being resolved; or 3) negate the play of an enemy Spy marker prior to its going into effect.
10.37 Tactical Advance (Action)
Play at the start of any battle. For each such marker played, the combat percentage column on the CRT is shifted one in the player's favor, or he gains a "1" die roll modifier for the Siege Table. These markers may be played one at a time by each player in a given battle, or all at once, as each participant sees fit.
10.38 Treachery (Action)
Play in any of your Diplomacy Phases. Do one of the following: 1) randomly select a neutral minor power and take control of it; or 2) deliberately pick any one enemy controlled minor power and return it to neutrality; or 3) remove the rebel units from any one square on the map; or 4) remove any one mercenary unit from play and return it to the Mercenaries Available Box.
10.39 War on Distant Frontier (Event)
Each player rolls a die and the high roller is affected (if a tie, roll again). That designated player must immediately roll another die and lose that number of campaign markers, picked at random. He then rolls yet another die and must deduct that number of gold points from his treasury. This marker may go into effect only once per game turn. Once played, set it aside and don't return it to the pool until the end of the game turn.
10.40 No Chain-Reactions
If you pick an event marker as the result of an instruction to make a marker pick by the explanation of a marker that was played by another player, ignore it in order to prevent a cascading chain reaction of such events. That is, such chain-picked event markers are first shown to the other players to verify their identity, and they are then returned to the pool. No substitute picks are made.
11.0 Recruiting
11.1 Recruiting occurs in the Recruiting Phase of each of your own player turns, starting with that of the first game turn. In each of your Recruiting Phases you may expend gold points to receive new units or additional campaign markers. Players may also receive new units via the Imperial Diet or by play of certain campaign markers. In those cases, though, no gold is expended and the units are placed immediately (not in the Recruiting Phase).
11.2 Recruiting allows for the purchase of units, as designated by the Gold Expenditure Table printed on the mapsheet. You expend the designated number of gold points, then place the unit type you want to acquire according to 11.3 below. Note that certain units within a particular type may have different strengths; regardless, they all cost the same in gold.
11.3 Placement of New Units
- Land units may generally be placed in any friendly occupied city or any friendly off-map area that's part of their specific country of origin.
- Levy units may be placed on any square within their country of origin, as long as that square isn't occupied by enemy units at that time.
- Fleets may be placed on any friendly occupied port square.
- Fortresses and Civilization markers may be placed in any friendly occupied city square.
- Mercenaries may be placed on any friendly occupied land hex, regardless of location. See section 24.0 for more details.
- Leaders may be brought into play only by playing the Leader Recruit campaign marker. That costs no gold points. See 10.23 for details.
11.4 Restrictions
You may always place a minimum of one unit per eligible square per friendly Recruitment Phase regardless of that square's economic value (EV). If a square has an EV greater than one, that value is the limit on the number of units, of all types combined, which may enter play there during any one Recruitment Phase. Units may not be placed in pillaged squares. The same strictures apply to placement in friendly off-map boxes. There may never be more than one fortress and one civilization marker per square (maximum of one of each).
11.5 Limits
The number of units in the counter mix is a deliberate design limit reflecting the historic realities of those times. Players may not recruit more units than are available for a particular power. Units, other than leaders, which have been eliminated for any reason may potentially be recruited back into play any number of times.
11.6 All newly arriving units, no matter the exact method of their recruitment into play, immediately have all normal movement and combat capabilities available to them.
12.0 Diplomacy
12.1 Players use diplomacy to change the control status of minor powers. You conduct diplomacy during the Diplomacy Phases of each of your own game turns. (Note there is also a Negotiation Phase, which is different than the Diplomacy Phase; see section 8.0). You must expend at least one Diplomacy campaign marker to initiate a diplomacy attack. You may expend additional Diplomacy campaign markers to improve the chances of a given diplomacy attack succeeding. Other players may play their own Diplomacy campaign markers to try to thwart your diplomacy. Each Diplomacy marker has a Diplomacy Value printed on it, representing its 'strength.' Each minor power has a Diplomacy Defense Value (DDV) of "1," "2" or "3," printed on the Minor Power Control Table on the mapsheet. For example, the DDV of England is "3," that of Florence is "1."
12.2 A player may initiate diplomacy only in his own Diplomacy Phases. Non-phasing players may defend against your diplomacy attempts as you're conducting them, decided by each one of them on a case by case basis.
- The phasing player designates a minor power he wants to target with a diplomacy attack.
- The phasing player places face-down in front of him one or more Diplomacy campaign markers.
- Simultaneously reveal all Diplomacy markers.
- Determine the total DDV. That's the total of the minor power's own DDV and any Diplomacy markers other players might care to contribute to that place's defense.
- The phasing player rolls a die for each diplomacy strength point he's played.
- Any one of the non-phasing players rolls a die for each point of DDV.
- If the attacker's total of die rolls is greater than the defender's total of die rolls, the phasing player's Diplomacy attack succeeds. If the minor power was neutral, it becomes controlled by the player who just succeeded in his diplomacy attack against it. If the minor power was belligerent, it becomes neutral.
- If the defensive die roll total is greater than or equal to the phasing player's total, that Diplomacy attack has failed. In that case, the attacked minor power's control status doesn't change. Further, if the attacked minor power was player controlled at the time of the attack, that controlling player randomly picks a campaign marker for free from the pool. Note that you may not diplomatically target a minor power that's under your control at the start of a Diplomacy Phase.
- Return all committed Diplomacy markers to the pool.
12.3 Example
France initiates a diplomatic effort against England, which is neutral. France plays Diplomacy markers with a total strength of three. The Habsburg player decides to support England, and plays a Diplomacy marker with a value of one, which is added to England's DDV of three, for a total DDV of four. The French player rolls three dice and gets a six, a two and another two, for a total of 10. The Habsburg player rolls four dice and gets a two, a one, a three and a one, for a total of seven. Since the attacker's total is greater than the defender's, the Diplomacy attempt succeeds, and France gains control of England. Had the attempt failed, England would remain neutral. In that case the Habsburg player, even though he'd gone to the defense of England, wouldn't gain control of England (nor would he get to draw a free campaign marker), though he would certainly have frustrated French ambitions.
12.4 The attacker must always play at least one Diplomacy marker in order to initiate a diplomacy attack. Within that limit, you may make any number of diplomacy attempts in each of your Diplomacy Phases. You are never required to make any diplomacy attacks.
12.5 A country attacked by diplomacy always defends using, as a minimum, its DDV.
12.6 If a targeted minor power is neutral, one player, chosen at random, rolls the dice for its defense. Any and all players other than the attacker may, in any order, add in their own Diplomacy markers for a combined defense value. If one player contributes to a minor power's diplomatic defense, he should be the one to roll the dice for it. If more than one player contributes, they should decide between or among themselves who will roll each of the dice.
12.7 If the targeted minor power is a belligerent, the player controlling it rolls the dice for it. That controlling player, as well as any and all players other than the attacker may, in any order, add in their own Diplomacy markers for a combined defense value.
12.8 A defender doesn't have to play any Diplomacy markers to defend, though he may always choose to do so within the limits of his marker hand.
12.9 Successful Diplomacy
See section 4.0 for details of what happens when the control status of a minor power changes. When you gain control of a minor power, you also gain control of all of its forces on the map.
12.10 Ottoman Diplomacy
All of the above rules apply to the Ottoman player. In addition, the Ottomans may not attempt to gain control of any minor power unless, at the time of that diplomatic attempt, he is in occupation of every city square within that minor power.
13.0 Stacking & Zones of Control
13.1 Combat and leader units may not end a Movement or Combat Phase in a square in numbers in excess of that square's forage limit. If they do, any excess units are immediately eliminated. All players should keep a careful watch on each other's stacks and immediately declare any violations. See 19.3 for forage.
13.2 Units may move through hexes in excess of stacking limits but, if at the end of any Movement or Combat Phase they exceed the stacking limit in their square, the owning player must remove the excess units. If there is a choice of units, mercenaries must always be the first to be eliminated; otherwise it's the owning player's choice. Opposing units don't count against each other's stacking limit.
13.3 Friendly units may enter squares containing opposing units; however, they must immediately stop in that square. Such entry triggers combat during the ensuing Combat Phase.
13.4 EXCEPTION 1
Naval units may move into and through coastal squares containing enemy or neutral land units without attacking them; however, if they end their move in an enemy or neutral-occupied coastal square, they do trigger combat. If land units enter a coastal square containing enemy naval units, they must stop and attack them. (Fleets would almost always anchor near to shore at the end of operations.)
13.5 EXCEPTION 2
A force that enters a hex containing an enemy force in a fortress may, instead of attacking normally, declare a siege if you're using that optional rule (see 29.0).
13.6 Coalitions
13.6 Coalitions
If a player controls units from different minor powers, he may place them in the same squares and treat them as if all were part of the same force, along with the forces of his own major power. If for some reason you lose control of some coalition forces in the same square while retaining control of others, you must use the procedures given in section 4.0 for the units over which you've lost control.
13.7 Ottomans, France & the League
In two-player and three-player games, if Ottoman, French or League forces are being commanded by the same player, none of those major or minor power units may end a move (move-through OK), nor may they attack into, the home territory or controlled minor powers of any of those other major powers. The control of minor powers is maintained on an Ottoman or French or League basis. There is no joint control, and those minor powers must observe the same movement and combat strictures as given for the major powers.
13.8 Fortresses & Civilization Markers
There may never be more than one Fortress and one Civilization per square. Fortresses and Civilization markers don't in any way affect, or count toward, stacking or forage limits. See section 26.0 for more details.
13.9 Zones of Control
Unlike many other wargames, there are no zones of control in HRE.
14.0 Movement
14.1. A unit moves from square to square by paying appropriate movement point costs to enter each square along its route. Units may be moved singly or in stacks.
14.2 A unit or stack moves from contiguous square to contiguous square. Each square entered generally costs one movement point; that is, a unit with a movement factor of three could move into three squares in each of its side's Movement Phases throughout the game.
14.3 You may choose to move none, some, or all of your units in each of your own Movement Phases. You may move units in any order you decide. Once you've completed a unit's or stack's movement, you may not retrace or in any way redo its movement unless all other players agree to let you do so.
14.4 Neutral units may not move. Further, units with printed movement factors of "0" (zero) may never move once placed on the map, no matter their status in terms of belligerency or neutrality. Movement factors may never be given, loaned, sold, or in any other way transferred, from unit to unit, nor may they be accumulated from one Movement Phase to another Movement Phase.
14.5 A moving unit or stack may not pick up additional units as it moves. It may drop off units as it moves, but dropped off units may conduct no further movement that phase.
14.6 Slow Stacks
If friendly units start a Movement Phase together in the same square, they all have the movement allowance of the slowest friendly unit in that square for that phase. (Don't count units with movement factors of zero, and figure separately the movement factors of naval and land units.) That remains true even if the units in that square are moved off individually or in sub-groups. It also remains true even if the slower units are dropped off during the course of the move. A naval force that's transporting land units uses the movement allowance of the naval units, not the transported units.
14.7 Roads & Rivers
A unit or stack that moves along road or river squares halves the normal non-mountain movement cost while doing so. For example, each road or river square entered from another contiguous road or river square costs only half a movement point. A unit or stack moving via roads or rivers isn't required to stop when it enters a mountain square (see 14.8 below). A road or river moving unit or stack must still stop when entering an enemy occupied square. A unit or force may combine road, river and non-road or river movement in the same move, paying appropriate costs for all squares entered.
14.8 Mountains
All units and stacks must stop when entering mountain squares unless using road or river movement. Road or river movement through mountains is at the rate of one square per movement point expended.
14.9 Enemy and Neutral Occupation
Every moving unit or stack must stop when it enters an enemy occupied square. Moving units and forces may enter squares that contain neutral units, but such entry causes that minor power to become a belligerent (see section 4.0).
14.10 Stop & Start
Units or stacks that were required to stop in a square may resume normal movement in their next Movement Phase, or even that same phase if a Forced March marker is played for them. They may even move directly into another adjacent move-stopping square, but must then immediately stop again in that next square. Note that a unit or stack that enters an enemy occupied square and then leaves it via the play of a Forced March marker will not have to attack the forces in that original stop-square in the ensuing Combat Phase.
14.11 Cities are treated as clear terrain for movement purposes.
14.12 Map Geometry
Units may move only across the sides of squares; they may not move through corners. That is, units may not move diagonally. For example, no unit may move directly from K1 to J2.
14.13 Otherwise adjacent coastal squares separated by all-sea sides may not be moved or attacked across by land units. (There are no adjacent coastal squares separated by all-land sides; so you don't have to worry about the reciprocal.)
14.14 Map Edges
Units may exit the map only to go into captivity, into the dead pile or to enter a friendly off-map area.
15.0 Combat
15.1 Combat is used to eliminate or retreat enemy units and seize objectives. You must initiate combat during your own player turns' Combat Phases when you have friendly units in the same square(s) as opposing units. The phasing player is always the "attacker;" the player being attacked is always the "defender," no matter the overall situation across the map. Combat is resolved using the Combat Results Table (CRT) printed on the mapsheet.
15.2 For each battle, you must follow this sequence:
- Total the attacker's strength.
- Total the defender's strength. Include the effects of terrain.
- Determine the combat percentage. To do that, divide the attacker's strength by the defender's strength and multiply by 100. That gives a percentage corresponding to one of the columns on the CRT.
- Shift the percentage column by the modifiers listed under the "Defense" column of the Terrain Effects Chart printed on the mapsheet. A "1 Left" adjustment means shift the combat percentage one column in that direction (in favor of the defender) on the CRT. If both the attacker and defender have adjustments, use the cumulative difference.
- Roll a die and cross-index that result underneath the final percentage column. That will give a "combat result." The combat result is applied immediately.
- Conduct any retreats and pursuits.
- Gain or lose any campaign markers for the combat result.
15.3 Attacking & Defending
Attacking is mandatory when a phasing force begins a friendly combat phase in the same square as an opposing force. All friendly units in the square must attack, and all enemy units in the square must defend, in one large battle. Only units in the same square may attack; units may not attack from adjacent squares.
15.4 The phasing player may move units from more than one square into the same square in order to take part in the same attack. Once they are in the same square, they are considered to be one force.
15.5 Timing
Each battle is conducted sequentially, with the players completely resolving one before starting that of the next. The phasing player determines the order of resolution. He need not declare that overall order beforehand; he may decide and declare the order of resolution one battle at a time.
15.6 Eliminating Units
You always choose which of your units will be eliminated when losses are called for and if there is a choice. You may choose to eliminate a stronger unit than a weaker one (for example, to save a leader). Units are always eliminated based on their printed combat strength.
15.7 Retreats After Combat may result in either a one square retreat, or one die roll of retreat. The owning player chooses the square(s) into which his units will retreat. Retreat is not part of regular movement and therefore doesn't consume movement points. If a square retreated into contains prohibited terrain, opposing or neutral units, all retreating units are eliminated, and they count as losses for determining the number of campaign markers gained or lost. Units with a "0" movement factor are always eliminated instead of retreating.
Units may retreat into neutral territory as long as there are no opposing or neutral units in the square. Retreating into neutral territory is not a neutrality violation. Units of 'allied' major powers may not retreat into each other's squares.
Units must retreat an additional square if a normal retreat would cause them to be overstacked.
15.8 Pursuit. See 16.4.
15.9 Spoils of Battle
Determine the number of campaign markers that will be gained or lost as stated in the combat results. That depends on the starting total combat strength plus the military (including siege if using that optional rule) and political leader values of the losing enemy force:
- ≥26: winner picks five campaign markers; loser loses two campaign markers.
- 21-25: winner picks four campaign markers; loser loses two campaign markers.
- 16-20: winner picks three campaign markers; loser loses one campaign marker.
- 11-15: winner picks two campaign markers; loser loses one campaign marker.
- 6-10: winner picks one campaign marker; loser loses no campaign markers.
- 1-5: winner picks no campaign markers; loser loses no campaign markers.
15.10 Players should examine the combat results explained below in 15.11 through 15.17. In general, note that all combat outcomes will result in only one player's units remaining in the square at the end of each battle. The optional siege rule (see section 31.0) alters that.
15.11 Attacker Annihilated: AA
- Eliminate all attacking units.
- Defender picks campaign markers (see 15.9).
15.12 Attacker Defeated: AD
- Eliminate half of the attacking combat factors.
- Attacker retreats all surviving units one square.
- Defender picks campaign markers (see 15.9).
15.13 Attacker Routed: AR
- Eliminate half of the attacking combat factors.
- Attacker rolls a die for each surviving unit and must retreat it that number of squares.
- Defender picks campaign markers (see 15.9).
15.14 Bloodbath: BB
- The side with the lower total combat strength eliminates all units.
- The other side must eliminate an equivalent or greater number of factors.
- Neither player picks campaign markers.
15.15 Defender Defeated: DD
- Eliminate half of the defending combat factors.
- Defender retreats all surviving units one square.
- Attacker picks campaign markers (see 15.9).
15.16 Defender Annihilated: DA
- Eliminate all defending units.
- Attacker picks campaign markers (see 15.9).
15.17 Defender Routed: DR
- Eliminate half of the defending combat factors.
- Defender rolls a die for each surviving unit and must retreat it that number of squares.
- Attacker picks campaign markers (see 15.9).
16.0 Forced March
16.1 A player may conduct additional moves by the same force during a single Movement Phase by expending Forced March campaign markers. Additionally, Forced March campaign markers also allow non-phasing players the opportunity to conduct "countermarch."
16.2 Forced March Movement
After a player has completed moving a force, he may move it again by expending a Forced March campaign marker. The force may then move again up to its normal movement factor.
16.3 A player may play a Forced March marker any time after a force has completed its initial movement. There is no limit to the number of times a unit may Force March during a phase, other than those imposed by the number of Forced March markers a player possesses. For example, a player moves a force normally, then moves another force, then moves the first force again by playing a Forced March marker for it, then immediately moves it a third time by playing another Forced March marker for it.
16.4 You must expend one Forced March marker for each force making a Forced March.
16.5 A force making a forced march may drop off units in its starting square, but not in any squares entered during the march.
16.6 Infiltration
A force making a forced march may move out of a square containing enemy or neutral units without having to attack them. For example, a unit moves into an enemy occupied square using normal movement. That causes its movement to stop. The player then expends a Forced March marker, thereby allowing that stopped force to make another move. Again, such marker expenditure could be made immediately, or after other friendly forces had completed moves.
16.7 Countermarch
A non-phasing player may conduct countermarch by playing a Forced March marker. That allows the non-phasing player to conduct a limited move with one of his forces during the phasing player's Movement Phase. Countermarch may be declared at any time(s) in the phasing player's Movement Phase.
16.8 Countermarch Procedure
The instant a phasing force moves adjacent to a non-phasing force, that non-phasing player may declare countermarch by playing a Forced March marker. The phasing player's Movement Phase is temporarily suspended while the countermarch is conducted. The countermarch force simply moves one square into the square occupied by the phasing force that just had its movement interrupted by the declaration of the countermarch. That will probably work to stop the movement of that phasing force for that phase. Note, though, if the phasing player chose to play a Forced March marker, either immediately or later that same phase, he could then resume the movement of his intercepted force. Also note adjacency is not established between opposing forces that are in squares connected only by corners. For example, units in L1 and K2 aren't adjacent to each other.
16.9 A countermarch may be made into a square even if there were other phasing or non-phasing units in it that weren't part of the moving phasing force or the countermarching non-phasing force.
16.10 Note that countermarch doesn't trigger immediate combat. Of course, if the intercepted phasing force doesn't move out of the square via a Forced March, it will be forced to attack during the Combat Phase.
16.11 Each countermarch marker may initiate one countermarch by one force. You may conduct more than one countermarch per movement phase, including more than one countermarch against one particular square at the same time, but you must expend one Countermarch marker for each force that will make a countermarch.
16.12 Countermarch may be declared only against phasing forces. Non-phasing players may not declare countermarch against each other, nor may the phasing player declare countermarch against a non-phasing force. Countermarch may not be declared against forces retreating or pursuing after combat.
16.13 Retreat Before Combat
Prior to the initiation of any combat, the defender may play a Forced March marker in order to move his involved defending force one hex as if it were retreating after combat. The attacker gains control of the square. Such retreats before combat may be negated by the attacker playing a Forced March marker. That cycle can continue until one player or the other runs out of markers or chooses not to play another.
16.14 Pursuit
If a player wins a battle by clearing all enemy units from a hex, the player may immediately declare a pursuit. If he then expends a Forced March marker, one, some, or all the units (his choice) in the winning force may move up to half of their force's movement allowance (round up). If a pursuing force ends its movement in the same square as an enemy force, it may attack again (all as part of a single operation). The player may continue conducting pursuit and pursuit combat as long as he keeps winning and as long as he expends a Forced March marker for each such operation.
17.0 Naval Operations
17.1. Players conduct naval operations with their fleets. Land units may move through sea squares via naval transport. Fleets are treated like other combat units, with the following modifications.
17.2 Fleets may be only in coastal and all-sea squares. Fleets may never enter all-land squares or cross all-land square sides. There is no riverine fleet movement.
17.3 In general, fleets conduct movement, combat, pillage and other game operations in the same manner as land units. Fleets must attack opposing naval units in the same all-sea or coastal squares and enemy land units in the same coastal squares. Fleets in coastal squares may conduct any type of game function that land units would be allowed there.
17.4 Naval units that enter all-sea or coastal squares containing opposing naval units must stop and fight in those squares. They need not do so when they enter and pass through coastal hexes containing only opposing or neutral land units. In that case they could choose to stop and attack or they could keep going. If a naval forces stops in a coastal square containing an opposing or neutral force, however, they must attack.
17.5 Occupation
A fleet in a coastal square is considered to be occupying that square for all game purposes. Exception: a fleet must actually end its movement in a neutral coastal square for that incursion to count as a neutrality violation; otherwise, a fleet may move through a coastal square containing a neutral force without triggering a violation as long as it ends its movement in some square not containing a neutral force.
17.6 Naval Transport
Land units may be transported by fleets. Both the fleet and the land force must start the move in the same port or coastal square. The fleet embarks the land units and they then move as one force. Place the transported land units under the transporting fleet units. Land units that use naval transport may not conduct other movement in the same movement phase unless using Forced March.
17.7 Capacity
Each fleet may transport up to two land units. A land unit must have a printed movement factor of "1" or more to be transported.
17.8 Port Embarkation
Fleets that embark units in coastal squares containing a city do so without expending any 'extra' or 'penalty' movement points. All cities in coastal hexes are considered ports.
17.9 Coastal Embarkation
Fleets may embark units from coastal squares that don't contain cities. When doing so, however, it costs the fleet one movement point to embark the involved land force (one point per force, not per unit in a force).
17.10 Remember, a "move" is defined as a single movement; a force may therefore conduct more than one move during a single Movement Phase by having a Forced March marker expended for it. For example, in relation to naval movement, you may move a land force into a port or coastal square containing a friendly fleet, then expand a Forced March marker in order to allow that land force to be embarked on that fleet and moved via naval transport.
17.11 Contested Ports
If for some reason both opposing and friendly units occupy the same port square, which may happen as the result of a Forced March, neither player is considered to be in control of that port. Exception: if there is a fortress marker in the square, then the side garrisoning the fortress controls the port. If embarking, via use of a Forced March marker, from a contested port, the transporting fleet would need to pay the coastal embarkation cost described above in 17.9.
17.12 Movement
A force using naval transport uses the transporting fleet's movement factor to determine the maximum total movement points it has available for the transport move.
17.13 Debarking
At any point in a naval transport move, the involved land force may debark (exit the fleet) if it's on a coastal or port square. Place the land units on top of the fleet units to indicate that. The debarked force may conduct no further movement as part of that move. The involved fleet(s) may continue moving if they have movement points remaining. Units are debarked at no cost to the fleet in ports, and at the cost of one movement point in non-port squares.
17.14 A land force may stay embarked on a fleet at the end of its move and at the end of the movement phase.
17.15 Naval Combat is, in general, conducted exactly as land combat. If, however, naval combat is taking place in an all-sea square, the attacker must roll a die prior to the resolution of that battle. On a roll of 1-3, the combat takes place normally; on a 4-6, the fleets miss each other and there is no combat. In that case the opposing units simply remain in place throughout the remainder of that player turn. They are considered to have obtained a combat result of "No Effect." If naval combat is taking place in a coastal square (port or no), that battle is mandatory.
17.16 Land units being transported by naval units add their combat strength to the strength of the fleet transporting them. If a fleet is eliminated so is the transported land force. Transported units may not be taken as losses separate from the unit transporting them. Apply leader military strengths normally.
17.17 Amphibious Attack
A fleet transporting a land force that enters a coastal square containing enemy forces may still disembark the transported land force in that square. Both the fleet and the disembarked units may attack normally in the ensuing Combat Phase.
17.18 Fleets are never enhanced on defense for terrain; however, they are enhanced if defending in a square containing a fortress they control. Similarly, if they're defending in a coastal square in conjunction there with one or more friendly land units, then all normal terrain bonuses apply.
17.19 Provisioning
Fleets must be provisioned. They count against a square's forage value. Land units being transported by a fleet must be also be provisioned. All-sea squares have a forage value of zero; so a fleet at sea must be provisioned in order to survive.
17.20 No Circumnavigation
Fleets may not transfer from the Mediterranean or The Adriatic to the Atlantic, North or Baltic Seas or vice versa. (That's due to the different ship designs needed for the Mediterranean as opposed to the North and Baltic Seas.)
17.21 Mediterranean-Adriatic & Baltic-North Sea Movement.
Movement between the Adriatic and Mediterranean takes place between squares P6 and P9 in both directions at the cost of six movement points. Movement between the Baltic and North Seas is also allowed, at the same cost, between squares A9 and A11.
18.0 Pillage
18.1. You may choose to pillage a square in order to destroy its values and to gain campaign markers.
18.2 You pillage during the Pillage Phases of your own player turns. For each pillage attempt, do the following.
- Total the number of friendly combat units in the square to be pillaged.
- Roll a die. If that result if less than or equal to the total number of friendly units, the square is pillaged. Place a Pillaged marker in the square. The player successfully conducting a pillage may also decide, at his option, to destroy any fortress in the square. Any Civilization marker in a pillaged square must be removed.
- If the square contains a city, the pillaging player rolls one die and adds the result to the city's economic value; the total is the number of gold the player immediately receives (from loot).
- All other players also each pick a campaign marker (representing the popular reaction to your troops running amok).
18.3 Terrain and leader values don't affect the pillage procedure.
18.4 You may attempt to pillage a given square only once per Pillage Phase.
18.5 Restrictions
A force may not conduct pillage if it is in: 1) a square that already has a pillage marker; 2) an all-sea square; or 3) a square that has opposing or neutral units in it.
18.6 Pillage Effects:
- The economic and forage values of a pillaged square are reduced to zero; 2) any port in a pillaged square, though otherwise still considered a city, ceases to function as a port; and 3) any Fortress or Civilization marker in a pillaged square must be removed
18.7 Duration of Pillage
You may remove a Pillage marker during any of your own player turn's Recruiting Phases. To do so you must have at least one friendly unit in the square. You then expend a number of gold points equal to one plus the square's economic value.
18.8 Removing a Pillage marker restores the square to normal values, including any port; however, any fortress or civilization marker that might have been in the square are not restored. They could be rebuilt normally if you decided to do so.
19.0 Provisioning
19.1. During the Provisioning Phase of each of your player turns, you must pay to keep certain units on the map. "Provisioning" has two components: maintenance and forage. Paying a given unit's maintenance cost does not mean its forage requirements have thereby also been met, and vice versa.
19.2 Maintenance
A player must pay the maintenance cost of each non-leader, non-garrison combat unit he has on the map. If he fails to do so, or for any reason decides not to do so, each unit not paid for is eliminated. Note: leader units never require maintenance expenditures.
19.3 Forage
If a player has units in a square in excess of that place's forage value, he must pay a gold point per excess unit in that square, in addition to normal maintenance costs. If he fails to do so, or decides not to do so for any reason, the unpaid-for excess units are eliminated, possibly including leaders or garrisons.
19.4 Fleets and units being transported by them must be provisioned normally. Fleet units, and any units being transported by them, can forage if they are on coastal squares, using the coastal square's forage value.
19.5 If there is a choice of units to be eliminated, the owning player generally chooses which will be removed; however, mercenaries must always be the first to go. Should a fleet in an all-sea square be eliminated, all land units aboard it are also eliminated.
19.6 Neutral units don't need to be provisioned and are not affected by foraging.
20.0 Leaders
20.1. Leader units represent a great commander plus his personal troops, camp followers, and whatever machinery of government he chooses to bring along. Leaders are treated like other combat units, with the following special capabilities.
20.2 Leader Values
Each leader has a political and a military value (and a siege value if you're using that optional rule).
20.3 Campaign Marker Picks
In each of your Recruiting Phases you may randomly pick ('for free') a number of campaign markers equal to the combined military and political value of one leader per capital city and electorate city you occupy. A maximum of one leader per eligible city may do that. If more than one non-sovereign leader is present in an eligible city, you pick the enabling leader. If a sovereign lord is present, you must use him.
20.4 Combat.
At the start of each battle, each player designates one friendly leader present at that battle as the commander for it. That leader gives a CRT column shift, in favor of his side, equal to his military value. (Also see 20.12 below.)
20.5 Combat Precedence
If a player has more than one non-sovereign leader in a battle, the one with the highest political value must be used as the commander for that battle. In case of ties, the player chooses. Again, though, if a sovereign lord is present, he must command.
20.6 Leader Elimination
Leaders may be eliminated in combat in the same ways as other combat units. If a sovereign leader is eliminated, the owning player must immediately return to the pool a number of chits equal to his political value (chosen at random).
20.7 Recruiting
You may play a Leader Recruit campaign marker to recruit a leader for any major power you control. That's the only way leaders may enter play after a game has begun. When recruiting, pick at random from leaders not in play for the power(s) you control.
[The source numbers the next rule 20.9; there is no 20.8 in the eRules.]
20.9 In general, once eliminated, a leader may not be replaced; however, the Leader Recalled marker removes a leader from play without eliminating him; that leader may be recruited again as described above in 20.7.
20.10 Minor Power Leaders
If you control a minor power, you also control all the leaders associated with that power. If you later lose control of that minor power to another player, the player gaining control of it also gains control of its leaders. If a minor power is restored to neutrality, all its leaders are also returned to neutrality.
20.11 No type of leader ever needs to have maintenance costs paid for them (forage, yes).
20.12 Admirals
Leaders with anchor icons on their counters must move and fight, etc., as if they were fleets. Admirals, in fact, automatically come with their own intrinsic fleets 'attached' to them. In battles fought in all-sea squares, only admirals may be used to shift the combat percentage column. In battles fought in coastal hexes, use the normal procedures described above in 20.4.
20.13 Mercenary Leaders
See 24.5 for mercenary leader details.
21.0 Fortresses
21.1. Players may place Fortress markers on the map to gain additional defensive benefits in a square.
21.2 Fortresses are built during your own Recruiting Phases. To do so you: 1) indicate an unpillaged city square occupied by at least one friendly unit; 2) expend the designated number of gold markers; and 3) place the fortress marker.
21.3 Restrictions
Fortresses may be placed only in unpillaged city squares occupied by at least one friendly unit. They may not be placed in squares already containing another fortress.
21.4 There may never be more than one fortress per square.
21.5 Control of Fortresses
Fortresses have no nationality. A fortress is controlled by whichever player has his units in the same square. All such units are considered to be garrisoning the fortress. If no player has units occupying a square containing a fortress, no player controls that fortress. If you occupy a square containing an ungarrisoned fortress, you thereby also occupy that fortress.
21.6 If more than one force is in a square containing a fortress, the fortress there belongs to the player who had a force in the square prior to the latest entry of units into it. That ownership should be indicated by the garrisoning player placing his units under the Fortress marker.
21.7 Fortress Effects
A Fortress benefits its garrison in the following ways.
-
It provides a defensive (leftward) CRT column shift in addition to any available for the other terrain in that square.
-
A force garrisoning a fortress may ignore any requirement to retreat when attacking or defending. The enemy must retreat regardless of the battle's outcome, unless the battle has cleared all garrisoning units from the square.
-
Fortresses increase the forage value of unpillaged squares by one for the garrison.
21.8 Fortress Destruction
Once placed on the map, a fortress may be eliminated only if its hex is pillaged. Fortresses are never affected by combat results.
22.0 Civilization Markers
22.1. Players place Civilization markers on the map to gain additional economic value from them.
22.2 You place Civilization markers during your own Recruiting Phases. To do so you: 1) indicate an unpillaged city square occupied by at least one friendly unit; 2) expend the designated number of gold points; and 3) place the marker.
22.3 Restrictions.
Civilization makers may be placed only in city squares occupied by at least one friendly unit. They may not be placed in squares already containing a Civilization marker, nor may they may be paced in pillaged squares.
22.4 There may never be more than one Civilization marker per square.
22.5 Control
Civilization markers have no nationality. A Civilization marker is controlled by whichever player has his units in the same square with it. If no player has units in the square, no player controls it. Should another player occupy the square, he gains the benefits of the Civilization marker in it.
22.6 If more than one force is in a square containing a Civilization marker, the marker belongs to the player who had a force in the square prior to the latest entry of units into it. That ownership should be indicated by the owning player placing his units under the Civilization marker.
22.7 Civilization Effects
A Civilization marker increases the economic value of a city square by one.
22.8 Destruction of Civilization Markers
Once placed on the map, a Civilization marker may be eliminated only by a successful pillage operation in its square. Civilization markers are never affected by combat results.
23.0 Off-Map Areas
23.1. There are four off-map areas: Spain, Western France, Constantinople, and Denmark/Sweden (that last being one combined area).
23.2 The Habsburgs control Spain. France controls Western France, and the Ottomans control Constantinople. Any player may potentially control Denmark/Sweden. Once in control of an off-map area, you don't need to garrison it in order to maintain control there; it's considered to have an intrinsic garrison force.
23.3 Only the player who controls an off-map area may have his units enter it. Other player's units may never do so. Also, only units of the same major power may do so. For example, only Habsburg units may enter Spain; Habsburg-controlled minor power units may not do so.
23.4 Units enter and exit off map areas via routes described below. A given unit may not both enter and leave an off-map area in the same turn.
23.5 A player may stack an unlimited number of units in an off-map area. They are not affected by foraging. They do require normal maintenance payments be made for them.
23.6 Units in off-map areas may not be involved in combat in any way.
23.7 If an off-map area is designated as a port, it functions in all ways as a port.
23.8 Each off-map area has an economic value printed in its box on the mapsheet.
23.9 Routes to/from Spain
Spain is adjacent to the following map edge for sea movement: N1, O1 and P1. Spain is also considered adjacent to the south map edge hexes in Italy (P6-P9), because the Spaniards controlled the Kingdom of Naples at the time.
23.10 Routes to/from Constantinople
Constantinople is adjacent to the following map edges for sea movement: the southern map edge in the Mediterranean and Adriatic Seas (P1-P5 and P13-P17). Constantinople is also adjacent to the following map edges for land movement: the south map edge in Hungary (P13-P20).
23.11 Routes to/from Western France
Western France is adjacent to the following map edge for land movement: the western map edge in France (C1-M1).
23.12 Routes to/from Denmark/Sweden
Denmark/Sweden is adjacent to the following map edges for sea movement: the northern map edge in the Baltic (A14-19). Denmark/Sweden is also adjacent to the following map edges for land movement: the north map edge in Germany (A9-11).
24.0 Mercenaries
24.1. Certain units are mercenaries they may be controlled by any player. At the start of play, mercenary units are placed in the Mercenary Available Box and on the map as described in the set up instructions. During any of your own Recruiting Phases you may initiate bidding for mercenary units (one at a time, picked deliberately and openly by you). Bidding proceeds clockwise from you after you've announced your bid in gold points for the selected mercenary unit. The player who bids the most gains control of the unit and expends his gold. The other players who bid but lost keep their gold. The bid-for mercenary unit is placed in the same square as any unit of the winning player. No player other than the first is required to bid. Bids of zero may not be made.
24.2 Once a player gains control of a mercenary unit, it's considered to be friendly to his forces for all purposes. It doesn't have to stay stacked with friendly units in order to keep that status.
24.3 If a mercenary unit is eliminated for any reason, place it back into the Mercenaries Available Box, from where it may be recruited again.
24.4 If a player can't or won't pay maintenance for a mercenary unit, the other players may initiate bidding for it while it's still on the map. If another player thereby wins control of it, immediately move the unit to the nearest square occupied by that player's units.
24.5 Mercenary Leaders are bid on normally; they aren't received via the Leader Recruited campaign marker. If they are once eliminated, however, they may not be reentered into play during the rest of that game.
25.0 Rebels
25.1 Rebel units are generated by certain campaign markers, tax rebellions and other game events. Rebels aren't controlled by any player. Once placed in a square, they remain there immobile and may never attack. They defend normally against any forces that attack them. When some event calls for the placement of Rebel units, the involved player picks at random the number of Rebel units indicated and places them in the indicated squares.
25.2 In the event of a battle, a player chosen at random controls the rebel units for the duration of the battle.
25.3 Rebel units are hostile to all units except other rebels.
26.0 Fog of War
26.1. Given the time, space and unit scales involved in this game, there are few "fog of war" considerations. That is, all the units and markers on the map are always deployed face up, and all players are free to examine all stacks on the map at all times. Treasury totals are likewise kept openly.
26.2 A player may keep secret the campaign markers he has in his hand, except when a given marker's instructions specify otherwise. You may choose to voluntarily reveal your campaign markers to one or more of the other players at any time. Also see 10.36.
27.0 Victory Conditions & Set Up
27.1 The game is won by one player gaining strategic control over Europe. At the end of the game, players determine who is the winner. It's possible for there not to be a winner, and it's also possible for there to be more than one winner.
27.2 Political Victory
There are two different ways to win the game, political victory and military victory. To claim a political victory, you must: 1) simultaneously occupy four or more of the seven electorate cities; and 2) control the minor powers within which those occupied cities are located; and 3) occupy at least one capital city. Controlled cities may be pillaged and still count toward a political victory.
As an exception to number two above: if a non-Habsburg player is using the electorate city of Prague to help fulfill that victory condition, he wouldn't be able to control its territory of Bohemia, since that minor power starts play as part of Habsburg home territory. All players are therefore excused from minor power control portion of that victory condition when it comes to Prague.
27.3 Military Victory
To claim a military victory, you must occupy cities whose combined economic value is as follows for each player: Habsburgs 30; France 15; League 10; Ottomans 12. Pillaged cities are counted at half their printed values (retain fractions). Off-map areas don't count for those totals. You must also occupy at least one capital city.
27.4 Any other result is a defeat. More than one player may win a game if they fulfill their conditions. If a player gains both types of victory, he is declared Sovereign Lord of Europe and wins regardless of other players' victories. No superiority between military and political victory is implied; it's just two different ways to go after the same result. If one or more players gain one type of victory, and another or other players gain the other type, that game is drawn between (or among) them.
27.5 No Coalition Victories
When calculating victory in two-player and three-player games, the victory status of each major power and its controlled minor powers must be calculated separately.
27.6 Ottoman Sudden Death Victory
In four-player games (only), the instant an Ottoman force occupies Vienna (J13), play stops and that player is declared to have won a combined military and political victory.
[The source numbers the next rule 27.8; there is no 27.7.]
27.8 Set Up
- Place all the action campaign markers in the pool, temporarily setting aside the event markers.
- Mercenaries: all are available in their holding box on the mapsheet except for those listed as starting the game under French or Habsburg control.
- Decide who will play each major power (see 3.3), then set up the units listed below in the order they're presented.
- Minor powers start the game neutral unless described as being controlled by one of the players.
- When the game has been set up, start with the normal sequence of play for Game Turn 1, 1524.
[The source numbers its set-up steps 1-4 and 6; there is no step 5. The unit placement lists the source refers to are not present in the text layer.]
27.9 Scenario Length
Each game lasts a maximum of 15 game turns, but also see rule 8.1(4).
27.10 Major Power Deployment
On the map.
28.0 Ferocious Units
28.1 Units with an "f" printed between their combat and movement factors are "ferocious." If your total combat strength is made up of at least 50 percent ferocious units, then, prior to the start of combat, you may declare "No Quarter!" That works to convert an AD or DD combat result to BB. The attacker has the option to declare first, then the defender.
28.2 Rivalry. If both sides have any amount of ferocious units involved in a battle, that combat is automatically "No Quarter!"
28.3 Variable Mercenary Effectiveness. If any Swiss mercenary units are involved in an attack that results in an AA or AR, all Swiss mercenary units thereby lose their ferocity for the remainder of the game. Landsknecht units don't begin as ferocious units; however, if any LK are involved in an attack that results in a DA or DR, all LK units thereby become ferocious for the remainder of the game.
29.0 Sieges
29.1. Occupying the same square as a friendly fortress provides additional benefits, including avoiding the necessity to retreat. Prior to the initiation of any attack against a square containing a garrisoned fortress, provided one or more of your involved units has a siege factor of one or more, you may choose to declare a "siege."
29.2 Procedure.
- Total the number of siege strength points along with one leader's siege value.
- Subtract from that the number of defending siege strength points plus one defending leader's siege value.
- That number is the die roll modifier on the Siege Attack Table.
- Roll a die and apply the result.
29.3 There are no terrain modifiers for siege attacks.
29.4 Regardless of the result on the Siege Table, the attacking player may also choose to make an attack on the regular CRT. You make that conventional attack using all of the combat units in the square, even those that participated in the siege attack.
29.5 Formal Sieges. You may place a Siege marker in an enemy occupied fortress square if you have at least one unit capable of conducting siege combat and the force that moved into the square expends three movement points. Friendly and enemy forces may co-exist in the same city square as long as one force is garrisoning a fortress and the other has a Siege marker in place there. The force that controls the fortress is considered "under siege." The force that placed the siege marker is the besieging force.
29.6 A force under siege may not exit its square by movement or retreat, retreat before combat, or pursuit. It may do so if an Honors of War result is obtained on the Siege Table or via the Honors of War campaign marker.
29.7 Combat The force under siege may attack the besieging force. Such efforts are treated as normal combat, with the besieging force gaining the defense modifier for the fortress. Both the under siege and besieging force may co-exist indefinitely in the same square. They don't have to attack each other.
29.8 Both the besieged and besieging force may ignore retreat results when conducting combat against each other.
29.9 Relief Forces. The besieged player may move another force into the square where the siege is taking place. That is a "relief force." A relief force must attack the besieging force. That's resolved as normal combat with no modifier for the siege marker or fortress. A relief force may not combine with a besieged force into one attack; both may attack the besieging force, but each must do so separately. Retreat results are applied normally in combat between a relief force and a besieging force.
29.10 A fortress under siege has its economic and forage values reduced to one (if pillaged to zero). The forage value of a besieging force is always one.
29.11 If a besieged force in a coastal fortress contains one or more fleets, that fleet(s) may leave there freely unless the besieging force also contains one more fleets. In the latter case, the besieged fleet(s) then has to obey all the normal siege rules presented above.
[The source numbers two rules 29.11; the second is the table heading below, which is labeled 29.11 as printed.]
29.11 Siege Attack Table
| Die Roll | Outcome | Effects |
|---|---|---|
| ≤1 | Sortie | Eliminate one unit from the force making the siege attack (attacker's choice). No further combat against the fortress is possible this combat phase. |
| 2-3 | No effect | Resolve any regular combat as normal combat (use fortress defense). |
| 4 | Honors of War | Retreat all defending units into an adjacent square (exception to normal siege rules). Attacker gains control of the city and the fortress. |
| 5-6 | Breach | Remove the fortress marker; resolve combat as normal combat (no fortress defense). |
| ≥7 | No Quarter | Same as Breach, plus: 1) the attacker must make an attack on the regular CRT against the fortress this turn; and 2) if the attacker clears all defenders from the square in the ensuing combat, the city is automatically and immediately pillaged. |
30.0 Declarations of War
30.1. This was an era in which formalities were observed before the bloodbath began. Accordingly, before you violate the neutrality of a minor power, you must declare war against it. That occurs during your Diplomacy Phases. You announce which minor power(s) on which you will declare war that turn; then pay the number of gold points equal to each minor power's total economic value (pillaged cities count as full value for this purpose). That minor power(s) becomes a belligerent.
30.2 Sneak Attack. You may violate the neutrality of a minor power without declaring war, but the instant you does so every other player rolls a die and randomly picks that number of campaign markers from the pool.
30.3 Once one player has violated a given minor power's neutrality, the other players may invade it without paying any gold or other penalty.
30.4 None of this has anything to do with making war on major powers.
31.0 Increasing Taxes
31.1. You may attempt to increase the economic value of cities you occupy by using the Increasing Taxes Table. Deciding to increase taxes is done on an occupied city by occupied city basis by the occupying player. You may decide each turn increase taxes for some, none, or all your occupied cities.
31.2 Procedure. You simply declare: "Increasing Taxes!" and indicate any one of your occupied cities. Roll a die; consult the table below, and immediately apply that result.
31.3 Increasing Taxes Table
| Die Roll | Outcome | Effects |
|---|---|---|
| 1 | Big Rebellion | Eliminate a unit in the city; retreat all other units in it one square; place a rebel unit in it. |
| 2 | Small Rebellion | Retreat all friendly units in the city one square and place a rebel unit in it. |
| 3 | Tax Strike | Collect no gold points. |
| 4 | Normal | Collect normal gold points. |
| 5 | Taxes x2 & Small Rebellion | Collect double gold points, then also apply the results of small rebellion. |
| 6 | Taxes x2 | Collect double gold points. |
| ≥7 | Taxes x3 | Collect triple gold points. |
31.4 Die Roll Modifier
Add in the political value of any one leader in the square.
32.0 Mutinies
32.1 If a player doesn't pay unit maintenance, they may mutiny. For each square in which there are any unpaid troops, roll once on the table below. The outcome is applied regardless of the number of mutinying units or the presence of paid troops in the square.
32.2 Mutiny Table
| Die Roll | Outcome | Effects |
|---|---|---|
| ≤1 | Go Home | All units in the square are removed form play. Leaders are not effected |
| 2 | Mutiny | Eliminate all leader units in the square. Then implement the effects of run amok. |
| 3-4 | Run Amok | The square is immediately pillaged. You don't receive any campaign markers for it. |
| ≥5-6 | Troops Stay loyal | Nothing happens. |
32.3 Die Roll Modifiers
Add in the military value of one leader in the square.
Subtract one from the die roll if there are any mercenary units in the square.
33.0 Supply Magazines
33.1 Units located on, next to, or within two squares of a friendly occupied fortress square require only half their normal maintenance costs. Units located three or more squares from a friendly occupied fortress pay normal maintenance costs.
33.2 Units adjacent to a fortress square automatically gain this advantage. If two squares away, then the intervening square may not be occupied by any opposing, neutral or rebel units, nor may it contain mountains or be all-sea. Adjacency is defined as being connected via a side, not diagonally.
33.3 Besieged fortresses provide this support to their garrisons but not to units outside the fortress or to any relief force.
34.0 Prisoners & Ransom
34.1 Whenever a leader unit is eliminated as a result of an AD, AR, DD or DR, he's considered to be a prisoner of war. Such leaders are held off-map by their capturing players. During the Negotiations Phase of any turn, players may exchange prisoners on any terms they decide via negotiations (for example, in exchange for gold).
34.2 Returned prisoners are placed on any square containing units of the same nationality as the leader and as mutually agreed on by the two players concluding that negotiation.
34.3 Captured leaders are otherwise out of play.
35.0 Deficit Financing
35.1. Players may spend more gold than is presently in their treasuries with certain restrictions and penalties.
35.2 Each player may run their treasury into a deficit up to each major power's deficit limit. The limit for each major power is:
- Hapsburgs: -30 gold points
- France: -20 gold points
- League: -10 gold points
- Ottomans: -5 gold points
35.3 A player may not voluntarily expend gold points in such amounts as to put a major power beyond its deficit limit. Game events that force a player to lose gold may drive a major power beyond its deficit limit. For example, the French could expend gold to recruit units such that they had -20 points. At that point, the French player could no longer choose to expend more gold. If, however, the campaign event marker "Economy" was picked and the French player had to thereby lose three gold points, the French treasury would be reduced to -23 gold points.
35.4 Penalties. If a player is operating with a treasury of less than zero points, when calculating military victory at the end of the game, deduct the current deficit from his total of economic points. For example, say the Hapsburg player occupies cities that have a total economic value of 10, but his treasury has a deficit of minus-four points. The final tally of his economic points for purposes of reckoning victory would be six.
35.5 Bankruptcy. If a major power is forced below its deficit limit, it immediately goes into bankruptcy.
35.6 Bankruptcy Effects
- The bankrupt power may not recruit any new units, or bid for mercenaries, as long as it is bankrupt. It may otherwise maintain units normally.
- The bankrupt power may not play any action campaign markers as long as it is bankrupt, though it may retain them. Event campaign markers are applied normally.
- A bankrupt power may not win the game if it's bankrupt at end of play.
35.7 A bankrupt power recovers from bankruptcy by getting its treasury back above its deficit limit. A power may go bankrupt and recover any number of times in the course of a game.
36.0 Optional Record Keeping Tables
36.1 Players may photocopy the following table and use it to keep track of the number of gold points in their treasury during play. Use the second table to record which major power has the loyalty of each mercenary unit in play.
Turn & Year / Gold Points (table as printed; the gold-point column is blank)
- Turn 1—1524
- Turn 2 – 1525
- Turn 3 – 1526
- Turn 4 – 1527
- Turn 5 – 1528
- Turn 6 – 1529
- Turn 7 – 1530
- Turn 8 – 1531
- Turn 9 – 1532
- Turn 10 – 1533
- Turn 11 – 1534
- Turn 12 – 1535
- Turn 13 – 1536
- Turn 14 – 1537
- Turn 15 – 1538
MERCENARY CONTROL
- Swiss-1
- Swiss-2
- Swiss-3
- Landsknechts-1
- Landsknechts-2
- Landsknechts-3
- Landsknechts-4
- Condotierri
- Bande Nere
- Reiter-1
- Reiter-2
- Fruendsberg
- Colonna
37.0 Franco-Ottoman Naval Cooperation
37.1 This rule may only be used when playing with four, and its use allows for combined Franco-Ottoman fleet operations. To use this rule, both the French and Ottoman players may decide, during any game turn's Negotiations Phase, to expend one diplomacy point each for that purpose. The effect is to allow the Ottoman player to immediately remove from anywhere on the map (or the Constantinople off-map box) one of his fleet units and hand it to the French player. The French player then immediately places that Ottoman fleet in any Mediterranean or Adriatic all-sea or coastal square in which there is one or more of his own fleets. Throughout that game turn the turned-over Ottoman fleet operates in all ways as a French fleet unit. Either player may pay its maintenance.
The deal may be made or unmade on a game turn by game turn basis, requiring the same diplomacy expenditure from both players each time it is made. At the end of each game turn in which the deal was in place, pick up the Ottoman fleet and place it in the Constantinople off-map box. During years in which the deal is in place, French and Ottoman units, as well as those of both nations' controlled minor powers, may not attack each other in any way.