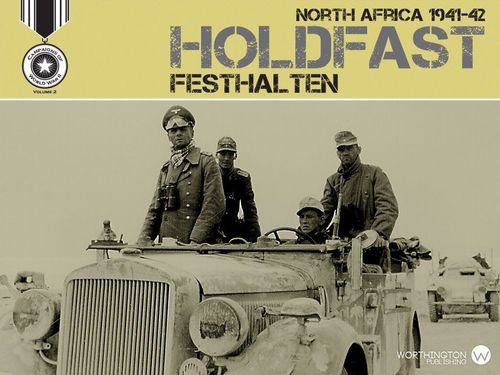
Holdfast: North Africa 1941-42
Holdfast: North Africa 1941-42 Rulebook
Table of Contents
Table of Contents
- Components
- Game Board
- Blocks and Label Sheet
- The Units
- Markers
- Set Up
- Sequence of Play
- Weather
- Resource Points (RP)
- Reinforcements and Replacements
- 11. Activating Units for Movement and Combat
- 11.1 Movement
- 11.2 Combat
- 12. Supply
- Movement Example
- 13. Victory
- 14. Design Notes and Strategy
- 15. Campaign 1 - Initial Set Up
- 16. Campaign 2 - Initial Set Up
Components
- Game board
- Gray and Olive blocks
- Label sheet
- Rules
- Dice
- Player aid card
Game Board
The game board shows a map from Axis controlled El Agheila east to the great city of Alexandria, home to Britain's Mediterranean Fleet and center of its African colonial empire. On the game board is a hex grid and terrain features that affect and regulate movement, supply, and combat.
The Allied player controls all fortified cities at the start of the campaign game with the exception of El Agheila. Control changes as players move units through fortified cities the other player controls.
The combat effects of terrain is based on the location of the defending unit. Terrain combat effects are cumulative. This may mean some units may not be able to attack through certain terrain.
For example: A defender is located in a rough terrain hex behind an escarpment. An infantry unit is attacking it across the escarpment. The attacking infantry unit would be -1 die for the rough terrain and -1 die for the escarpment. The cumulative effect is -2 dice for the attacking infantry.
Terrain movement effects are not cumulative. The terrain cost to enter a hex is the highest cost if more than one condition exists.
For example, for an infantry unit to enter a rough terrain hex that is located in an enemy ZOC would cost 2 MP not 4.
Terrain
Terrain and its effects are as follows:
| Terrain Type | Appearance on Board | Movement Cost in MP | Combat Effect |
|---|---|---|---|
| Clear | Plain desert | 1 MP | None |
| Roads | Road hexes | 1/2 MP from road hex to connected road hex. Negates any other terrain effect for movement | None |
| Rough | Broken ground | 2 MP for infantry and 3 MP for Armor | -1 die for attacking unit |
| Village | Village buildings | 1 MP | +1 die to defending unit |
| Fortified City | Walled city hex | 1 MP | +3 die to defending unit |
| Escarpment Hex Line | Escarpment along hex side | Infantry 2 MP additional to cross. Armor may not move across. |
Air Units
The Axis and Allied player air units in the game have a plane icon. They are kept off board and placed during attacks on clear weather turns.
Leaders
Leaders are kept off board and placed with units during movement and attack. They may add 2 dice to one attack in a turn. They also add up to two movement points to any one unit per turn when placed with the unit for movement.
Rommel (Axis) and Montgomery (Allied) are the leader units printed with a +2 modifier.
Blocks and Label Sheet
There are two sets of blocks, one olive and one gray. The olive represents the Allied army, the gray the Axis army. On the label sheet there are three different colored groups of labels, one grouping in olive (Allied), one in tan (German), and the final in green (Italians). Players should place one olive outlined label on each olive block, one tan label on each gray block, and also one green label on each gray block.
Other labels are game markers that should be divided among the remaining blocks, one label per block.
Fog of War: During play the blocks are stood upright with the label side facing the controlling player. The only time the opposing player may see the label side of an enemy unit is when both sides reveal the type of unit for combat.
The Units
Each of the four sides of the infantry and armor units have a number from 1 to 4. This number is the strength points (SP) of the unit and determines how many hits in combat the unit can take before it is eliminated. The units current SP should be shown as the top SP on the upright unit. At the top of each unit is the unit's historical name.
The unit block shows: the unit name (top), the dice rolled in combat (upper left), the target hit number (upper right), the current SP (lower left), and the available MP (lower right).
The Dice Rolled in Combat is the number of dice the unit rolls when attacking or defending in combat. Target Hit Numbers is the number or higher that needs to be rolled on a die when the unit is attacked to score a hit on that unit. MP is its movement rate.
Infantry units: Infantry units have a national symbol on them. Infantry have 4 or 5 movement points (MP hereafter).
Armor units: Armor units have the same icon with tank tread under the icon. Armor units have 6 to 8 MP.
Unit Chart
| Unit | Dice Rolled in Combat | Target Hit Numbers | Available MP |
|---|---|---|---|
| German Infantry | 3 | 5 | 5 |
| German Armor | 5 | 6 | 8 |
| Italian Infantry | 3 | 4 | 4 |
| Italian Armor | 3 | 5 | 6 |
| British Infantry | 3 | 5 | 5 |
| British Armor | 4 | 6 | 8 |
| Air Unit |
Markers
Turn and Weather: This marker is used to track game turns and weather status. Weather is noted by what text is at the top ("Clear Turn" or "Poor Turn").
Unit Status: Place this marker with units as they have moved, attacked, or both (done) during a turn. Status is noted by what text is at the top ("Moved", "Attacked", or "Done").
Set Up
Based on the set up charts for the campaigns, players set their units on board matching the unit's historical name to the location shown on the game board. Units start at their maximum SP (unless stated otherwise). Place the RP markers for both players on the RP track on the game board; air and leader units are placed on the side of the board. Start the turn marker, with weather as "Clear" on the turn track.
Sequence of Play
A full game turn is the sequence below. After the Allied player finishes, the turn marker is advanced one space. After the December 1942 turn the game ends and a victor is determined, unless automatic victory is determined earlier.
- Roll a die to determine the weather for the turn.
- Commit air units to Malta. Axis first, Allied second. Roll dice to see Malta affects to Axis resource points for the turn. Determine resource points for each player.
- Axis player places reinforcements and replacements.
- Axis player activates units for movement and combat checking supply for the activated unit.
- At the end of the Axis player's turn he checks supply for unit elimination.
- Allied player places reinforcements and replacements.
- Allied player activates units for movement and combat checking supply for the activated unit.
- At the end of the Allied player's turn he checks supply for unit elimination.
Malta Box
The German rolls his total die and for a each even die roll it reduces the effect of the British die roll by 2. For each odd die roll it reduces the effect of the British die roll by 1. German die rolls are cumulative. If the German cumulative result is equal to or greater than the British high die there is no reduction that turn.
Any air unit placed in the Malta box may not be used for combat in that turn.
For example: It's April 1941 and the German player receives his 12 RP. He places no air units in the Malta box. The British player rolls one die and the result is a 4. The German player reduces his 12 RP by 4 leaving him 8 RP for the turn.
For example: It's May 1942 and the German player receives his 12 RP. He places 2 air units in the Malta box. The British player places one air unit in the Malta box. The British player rolls his two dice (1 for Malta, and 1 for the air unit) and the result of the die rolls are a 1 and a 5. The German player rolls his 2 dice for his air units committed to the Malta box and the result is a 5 (odd - 1) and 2 (even - 2). The German cumulative total is 3. The German 3 cumulative total is deducted from the British high Malta die of 5 yielding a reduction of 2 RP of the German 12 leaving him with 10 RP for the turn.
Resource points are used by each player to add replacement steps to units or to add eliminated units to their armies. Resource points are also used to activate units for movement and combat. As each player spends their resource points they move their marker down the track to reflect their lower resource point total. Once a player has spent all of his resource points or wants to perform no other activations/replacements then their turn is over.
Weather
Each turn the Axis player rolls one die to determine weather for the turn. A roll of 1 through 5 results in clear weather. A roll of 6 means the weather is poor. Place the turn marker with the current weather side up on the turn track.
Clear Weather: Players receive full RP, full movement for units, and all air units are available.
Poor Weather: Infantry units reduce MP by 1, armor units reduce MP by 2. Air units are not available. The allied Malta box die roll is not affected but air units may not be added for either player.
Resource Points (RP)
Each player to start the turn receives their RP for that turn. The German player receives 12 RP each game turn. The British player receives 10 RP from March through October 1941; 12 RP from November 1941 through May 1942; and 14 RP from June 1942 until the end of the game.
No player may spend more RP than they receive in a turn. RP may not be saved for future turns.
The Malta box represents the effect of Malta on the North African Campaign resources for the German player. Each turn the Allied player rolls dice to attempt to reduce the German players RP. The British player rolls one die each turn for Malta. The result of the die roll is the die roll is the reduction of German RP for that turn.
Each player, the German first, followed by the Allied player, may add air units to the Malta box in an attempt to effect the Malta die roll. The German player may place from 1 to 3 air units in the Malta box. The British player may place from 1 to 4 air units in the Malta box. No player may place more air units in the box than they currently have in the game.
Each British air unit adds 1 die to his Malta die roll and he uses the highest single die rolled as the reduction in the German RP. Each German air unit adds 1 die to his counter Malta die roll.
Resource Point Costs
| Resource Point Use | Resource Point Cost |
|---|---|
| Replace one infantry SP | 1 RP |
| Replace one armor SP | 2 RP |
| Replace one eliminated infantry unit at 1 SP | 2 RP |
| Replace one eliminated armor unit at 1 SP | 3 RP |
| Activate a unit for movement | 1 RP |
| Activate units for combat | 1 RP per hex attacked |
Reinforcements and Replacements
The active player should check the turn track to determine if he receives reinforcements, noted by the player's icon. Axis reinforcements come in at El Agheila. Allied reinforcements come in at Alexandria. Reinforcements enter the game at their maximum SP for no RP cost. Units can temporarily over stack when entering the game, but the hex can only have one unit by the end of the turn. It cost 1 RP to move each unit from the hex. Not all reinforcements have to enter on the turn designated on the turn track but may be delayed until future turns.
For example, to start the turn the Axis player receives 12 RP. He takes no losses to his RP from Malta.
The Axis player checks the turn track and receives no reinforcements this turn. He has one eliminated German armor unit, and four infantry units that have been reduced to 2 SP each. He replaces the eliminated armor at 1 SP and places it in El Agheila. That cost him 3 of his 12 RP leaving him 9 RP. He then spends 2 RP to raise the armor to a 2 SP value. After deducting his 2 RP from his 9 RP, he now has 7 RP. He spends another 2 RP adding 1 SP to two of his reduced infantry raising them to 3 SP each. After deducting his 2 RP for that he has 5 RP remaining.
The active player may spend RP to bring back previously eliminated units as 1 SP replacement units. It costs 2 RP to bring back an eliminated infantry unit, and 3 RP to bring back an eliminated armor unit. Replacement units are placed on board at the same locations and under the same conditions as reinforcements.
The active player may add replacement steps to IN SUPPLY units on board that are not at full strength. It costs 1 RP for each infantry SP, and 2 RP for each armor SP added. Replacement steps may also be added to replacement units just placed during the current turn. Units adjacent to enemy units may only add 1 SP per turn. A unit not adjacent to an enemy unit may add as many steps as a player wants as long as they do not exceed their maximum SP. The player's RP marker is adjusted on the track as they spend RP for replacements.
Reinforcement Arrival Turns
| Date | Axis | Allied |
|---|---|---|
| May 1941 | 15th Panzer | |
| June 1941 | 7th Armor | |
| July 1941 | 50th Infantry | |
| August 1941 | 51st Infantry, 1 Air Unit | |
| November 1941 | Trieste, Fascists, Sabratha, 1 Air Unit | 1st Infantry SA, 2nd Infantry NZ, 1st Armor |
| January 1942 | 90th Infantry, 1 Air Unit | |
| May 1942 | 1 Air Unit | 10th Infantry Ind |
| June 1942 | 164th Infantry, 51st Para, Pistolio, Centor, 1 Air Unit | 1 Air Unit, Montgomery |
For example: The Axis player spends 2 RP to move two infantry units Pavia and Trenta adjacent to enemy A. He then spends 1 RP to attack with the 21st Panzer armor unit that started the turn next to enemy unit B and that attack eliminates enemy unit B. The Pavia and Trenta infantry units who moved earlier now attack enemy unit A for 1 RP. He now spends 1 RP to move his 21st Panzer armor unit that attacked earlier.
11. Activating Units for Movement and Combat
Once a unit has been activated for movement, it may not be activated again in the same turn to move. Once a unit has been activated to attack, it may not be activated again in the same turn to attack.
If the unit is in supply then each RP allows 1 unit to move up to its full movement allowance. If the unit is out of supply, each RP allows the unit to move with -1 MP if infantry, -2 MP if armor and this modifier is applied after weather effects.
1 RP allows all adjacent units to attack 1 hex with a defender located in it, following all terrain rules.
Check supply for an activated unit at the time of activation. A unit may be activated once a turn to move. Also, a unit may be activated once a turn to attack. This may be done in any order, and other friendly units can be activated in between the two actions. (In other words units can be activated in any order to perform a move or attack as long as they are only activated once for each in a turn).
For example, The Allied player has this turn moved two 3 SP infantry units into an Axis units ZOC spending 2 RP. An Allied armor unit started the turn in the Axis ZOC but has not moved yet. The Allied player spends 1 RP to announce an attack. The Allied player announces he is attacking with the two infantry units. He wants to save the armor unit for movement and attack in case he breaks through the Axis unit. The Allied infantry receive 3 dice for each unit giving a total of 6 attacking dice. There is no terrain modifier. The Axis player reveals his unit is a 2 SP German armor unit. The German armor receives 5 dice, with no terrain modifier.
Each player rolls their dice. The Allied player rolls and the dice are 1, 2, 2, 5, 6, and 6. Because he is attacking Axis German armor only the 6's score hits. He has scored two hits on the armor unit. The German player dice results are 2, 2, 3, 5, and a 6. He has scored two hits on the infantry units as results of 5 and 6 are hits on infantry. The German reduces his 2 SP armor by 2 SP and it is eliminated and placed in the replacement pool on the side of the board. The Allied player simultaneously reduces each of his infantry units by 1 SP leaving him with 2 SP on each infantry unit. The two infantry units are done moving and attacking for the turn. They may not move into the attacked hex even though the defender was eliminated.
If the Allied player has RP remaining he could then activate the Allied armor and move with it into the vacated hex or keep moving and even attack for another RP if he can get adjacent with the armor unit to an Axis unit.
11.1 Movement
An activated unit spends its weather and supply adjusted MP to move. It cost 1 RP to activate a unit for movement, allowing it to move its available MP. When activated a unit checks its supply status and if out of supply it reduces its available MP.
Movement is from hex to adjacent hex. Units may not skip hexes when moving. Units may not spend more MP than they have in a turn. MP may not be saved or transferred between units. The cost of the terrain in each hex is deducted from the unit's available MP until it does not have enough MP to move any further, or the player does not want to move the unit further.
No hex may have more than 1 unit located in it. Units may move through hexes with friendly units located in them, but may not stop. Units may not enter a hex that contains an enemy unit.
Road Movement: Anytime a unit moves from a road hex to a connected road hex it cost 1/2 MP. Units can break road movement up into segments by leaving the road and moving along other terrain then returning to the road within one turn.
Strategic Movement: An in supply unit activated for movement that does not begin, end, or move through an enemy ZOC may move twice its available MP. Strategic movement may be used in addition with road movement. Leader movement bonus is not doubled during strategic movement.
For example, a German armor unit with a 8MP can move 16 movement points using strategic movement. If all were expended using the roads (and assuming it does not enter any enemy ZOC), the unit could move 32 hexes along the road. With a leader bonus, the unit could move 34 hexes.
Leader Units: They are kept off board and placed with units during movement and attack.
The leader units can be applied to one unit during movement. Place the leader unit face up with the moving unit and it adds 2 MP to that unit even if the unit is out of supply. Remove the leader unit after the move is completed and set it aside.
The leader units can be applied to one attack during a turn. Place the leader face up next to the defending hex and add 2 attack dice. Remove the leader unit after the attack is completed and set it aside. Leader attack dice can be combined with air unit attacks.
See additional movement examples on page 7.
Unit Zone of Control
Each land unit has a Zone of Control (ZOC) which extends into all 6 hexes around the hex the unit is located in. ZOC does not extend across escarpment for armor units (noted by the red hex) unless there is a pass. The ZOC affects movement cost and supply. It cost 2 MP to enter an enemy ZOC and for each hex moved through an enemy ZOC.
Printed callout beside the ZOC diagram: "Only enemy units in the attacking unit's ZOC may be attacked." (Rev. 10/16)
11.2 Combat
Units are never required to attack. Only units in an enemy ZOC are eligible to attack. Not all units in the defenders ZOC have to attack. To attack a defending hex containing an enemy unit a player spends 1 RP.
Note: the sentence "Only units in an enemy ZOC are eligible to attack." is struck through in the printed Rev. 10/16 text. It is kept here, struck through, as printed; the callout above ("Only enemy units in the attacking unit's ZOC may be attacked") is the revised rule.
The attacker announces which adjacent units will be attacking, and if air support and/or a leader will be added. The player may add one air unit and/or a leader to an attack on a hex. This cost zero RP, but adds 2 attack dice to the attack. Each air unit and leader may only be used once a turn. Air units and leaders are not affected by terrain.
Each player reveals the attacking and defending units by laying them down, with their labels facing up (care should be taken so the SP is not accidentally changed in this process).
Combat is simultaneous so both players roll for attack and defense at the same time. The attacker totals the number of dice to roll for the attacking units, and modifies that total by any terrain. The defender then adds any terrain modifiers to his defending units dice. The players roll their attack and defense dice. A hit is scored on opposing units for each number that is rolled that corresponds to an opposing units hit number. Hits are applied simultaneously; no hits are applied until both players have rolled. Any 6's rolled are always applied to armor, unless none are present, in which case they are applied to any infantry. Other than a 6 hit on an armor the owning player decides how to apply hits to his units. In the case of Italian armor, any 5's rolled must also be applied to them before applied to any infantry.
During combat, each time a unit receives a hit, it should be rotated to the next lower SP. When a unit is reduced below 1 SP it is removed from the board and placed in the replacement pool.
12. Supply
For a unit to be in supply it must be able to trace a path of up to 7 connected hexes, not in an enemy ZOC, from the unit to the road. Terrain does not affect tracing a supply path. Supply can be traced over escarpments even for armor units. The hex on the road must be able to trace a continuous path along the road to El Agheila for the Axis player, and Alexandria for the Allied player. This is the units supply chain. Supply chains may not be traced through an enemy unit or an enemy ZOC.
Friendly units negate enemy ZOC in hexes they occupy, but friendly ZOC does not negate enemy ZOC.
When a unit is activated it checks supply for movement effect. If it is out of supply it receives -1 MP for infantry, -2 MP for armor. If a unit is out of supply when it ATTACKS, it is -1 die. At the end of his turn the player checks his units for supply. A unit that is out of supply at the end of it's turn is eliminated.
A unit in the fortified cities of Bardia, Benghazi, and Tobruk are always in supply for both the Allied and Axis Player. An Allied unit is always in supply in Alexandria. An Axis unit is always in supply in El Agheila.
Supply Example
It is the Axis turn prior to activating units. The shaded hexes are the Allied ZOC. The green line and arrow is the Axis lines of supply that is 7 hexes or less and traces to the road that is a continuous road, free of enemy units or enemy ZOC to El Agheila. The red X shows the out of supply unit at this point. The Italian unit is out of supply as it can not trace a line of 7 hexes to a road that is continuous to El Agheila (note: his continuous line is blocked at the village of Acroma by the Allied armor's ZOC that extends through the pass). If the Italian out of supply unit is not in supply by the end of the Axis turn it will be eliminated.
The Allied units ZOC blocks the line of supply, however, the Axis units in a hex negate the Allied ZOC for supply purposes. So, the Centor Italian unit can trace back through the Littoro and Pavia units to the road. If one of those units were not in their hexes then the ZOC from the Allied 10th Infantry IND or 7th Armor would cut the line of supply. The Axis 15th Panzer in that case would not be out of supply because it is in the fortified city of Bardia, which puts it automatically in supply.
Supply is again checked after all Axis movement and combat is complete. Any Axis unit out of supply at that time is eliminated.
Printed spelling kept as in the source: "Littoro" in the caption (the unit on the map is the Littorio).
Movement Example
The printed movement example is a map diagram with no caption text. Its labels read "Strategic Movement" (blue path along the road), "Moving into enemy ZOC" (blue path), and "Splitting Road Movement" (green path), each with numbered hex-count markers.
13. Victory
Victory is determined at the end of the game. For both campaign games it is having control of 3 of the 5 fortified cities, which is considered a marginal victory, 4 of 5 is a decisive victory.
Any player wins an automatic victory if at any time they control all fortified cities simultaneously, at the end of their turn.
14. Design Notes and Strategy
We wanted to design a fast playing, low unit density game system for the Holdfast games.
Units: Division scale for the units worked perfectly for the WWII desert campaigns. The units were rated on what we felt were their historic strengths and weaknesses. Not all historical units are actually portrayed in the game as some units cycled in and out of the theater, however, they are reflected by the adding of replacement units, or steps to units damaged in combat.
Resource Points and Supply: In the Holdfast system the resource points obviously represent the supply for each army. Throughout history supply has been an issue for generals, particularly when you throw in the variables such as weather, transportation of supplies, and length of supply lines. In the desert of North Africa this was especially true. For the axis units these variables were critical during this campaign.
Supply lines in HoldFast North Africa are tied to the major road network running along the coast. Take care to protect your road supply lines behind your positions against potential breakthroughs by supplied enemy units. A single friendly unit on the road BEHIND your lines can be an effective block against deep breakthroughs by enemy armor by limiting how far a breakthrough can be exploited. Remember to be in supply your opponent (and you too) must be able to trace a supply path 7 hexes TO A ROAD and then the road must be able to trace a CONTINUOUS path along the road to El Agehia for the axis and Alexandria for the allies.
Tobruk and Other Fortress Locations: Tobruk, with Bardia and Benghazi, control movement and the supply lines along the coastal road. Commanders treated the desert like the sea where defined positions are few and range was determined by fuel. Tobruk, Bardia and Benghazi are the key defined positions in the sea of the desert. Anchor your supply and battle lines at these locations when possible. Place strong forces in the fortress hexes because they can limit how far your opponent's supplied units can move and protect your supply lines. They are also the key victory locations so holdfast when you control them.
Note that when defending fortress locations it is tempting to put a strong armor unit there. But if you look closely at the terrain, all have some hex sides with escarpment. Defending armor can not move, attack or extend its ZOC across escarpment hex sides so they limit how much you can cut the supply lines on the roads and their movement and escape options can be confined. Defending infantry on the other hand, can move, attack and extend its ZOC across the escarpment hex sides and thus cut more supply lines around these fortresses. The same goes for attacking fortress locations. They are well protected and escarpment around them limit the hex lanes of attack for armor. Combination attacks with infantry, armor and an air unit and leader are most effective. Your strategy at fortress locations (holdfast, cut opponents supply, attack out, etc.) may determine the type of units to use there.
Malta: Malta directly affected the supply situation for the Axis in North Africa. At times the Axis would dedicate their air units to attacking the island in an attempt to neutralize the it. Players have those same choices. But at a cost to the availability of those air units to support their offensive attacks in North Africa.
British use of air units should align with its near term strategy in North Africa. If you are in a defensive posture, it is generally best to use some of your air units in Malta. If on the offensive, you will need most if not all of your air units to help out on attacks in North Africa.
German strategy is not as clear cut. Malta always affects your supply (RPs). Your air units are the only way to reduce that threat. However, air units are needed when attacking fortresses and to support offensive operations. But Malta's reduction of your RP can also affect your offensive operations. Finding the right balance on where to use your air units can be difficult.
German 88 Anti-Tank Weapons: These guns were the most effective weapon against tanks in the desert. They could be used for offense or defense. We decided to factor the German 88's into the German armor by having them roll 5 dice as opposed to the Italian and Allied armor rolling 4 dice.
15. Campaign 1 - Initial Set Up
Start the turn marker on March 1941 along the game turn track. The game ends December 1942. All units are set up at maximum SP unless noted otherwise. Follow the game reinforcement schedule to bring in additional units. Axis RP is 12 for the entire campaign, Allied start at 10RP.
Axis
| Location | Units |
|---|---|
| El Agheila | 21st Panzer, Ariete, Trenta, Brescia, Pavia, Bologna, Savena |
| Off Board | Rommel, 1 Air Unit |
Allied
| Location | Units |
|---|---|
| El Alamein | 4th Infantry Ind |
| Mersa Matruh | 7th Infantry Aus at 2 SP |
| Sollum | 22nd Guards at 2 SP |
| Tobruk | 9th Infantry Aus at 3 SP |
| Mechili | Free French at 1 SP |
| Msus | 2nd Armor |
| Benghazi | 2nd Infantry SA at 1 SP |
16. Campaign 2 - Initial Set Up
Start the turn marker on January 1942 with the weather as clear. The game ends December 1942. Follow the game reinforcement schedule to bring in additional units. Axis RP is 12 for the entire campaign, Allied start at 12RP.
Axis
| Location | Units |
|---|---|
| El Agheila | 15th Panzer, 21st Panzer, 90th German Infantry, Ariete, Trieste, Brescia, Pavia, Bologna, Sabratha, Trenta |
| Off Board | Rommel, 2 Air Units |
| Replacement Pool | Savena |
Allied
| Location | Units |
|---|---|
| Agedabia | 1st Armor at 3 SP |
| Benghazi | 4th Indian |
| Gazala | 2nd Armor at 2 SP |
| Tobruk | 7th Armor |
| Bardia | 2nd Infantry SA |
| Sollum | Free French |
| Alexandria | 1st Infantry SA, 9th Infantry Aus, 2nd Infantry NZ |
| Off Board | 1 Air Unit |
| Replacement Pool | 7th Infantry Aus, 22nd Guards, 50th Infantry, 51st Infantry |