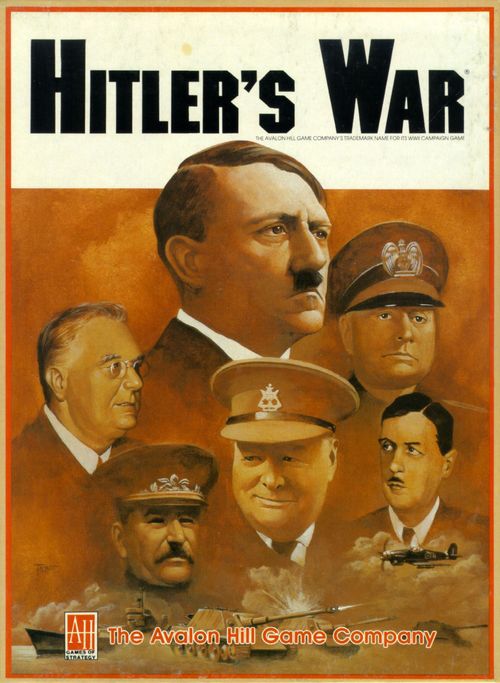
Hitler's War
Hitler's War Rulebook
Table of Contents
Table of Contents
Changes from the Original Rules
- Campaign game one and two are no longer two separate scenarios. There is now just one campaign game scenario that incorporates all of the optional rules.
- Stacking has been clarified. Two armies can no longer occupy the same hex. The only exception occurs when an army is forced to retreat and has no other option but to stack with another army.
- Assaults and exploitations have been clarified.
- Supply has been amended. Each side must be able to trace a line of unbroken hexes to their supply source. This prevents the farcical situation occurring where German armies surrounded deep in Soviet Russia are still fully supplied.
- Repair of production points has been clarified. A side must be able to trace supply from the production point back to their sides supply source in order to repair it.
- Some new ports have been added to the map board.
- Some production points have been removed from the map board.
- Britain now receives some production points through trans-Atlantic shipping.
- The Western Allies now start with eight Trans-Atlantic shipping points.
- Trans-Atlantic shipping now costs three production points to build.
- When U-Boats attack Trans-Atlantic shipping, production and shipping is now lost.
- U-Boats may now attack A.S.W. instead of Trans-Atlantic shipping.
- Axis surface raiders now attack Trans-Atlantic shipping in conjunction with U-Boats.
- The Western Allies may add capital ship strength points to A.S.W.
- A nation's ability to transfer strength points across oceans and seas is no longer fixed. It is governed by the number of capital ship points at sea in the relevant body of water.
- Naval battle has been clarified and slightly amended. Fleets at sea can now try to avoid battle.
- The capabilities of amphibious points have been changed.
- The rules for amphibious invasion have been slightly amended.
- The inexplicable restriction on Para-troops being included in armies which have amphibious strength points has been removed. Para-troops may assist in amphibious invasions under certain circumstances.
- The limitations around Soviet entry into the war have been amended.
- The rules governing Italian entry into the war and the use of Italian forces have been clarified and amended.
- The rules governing the Axis minor allies have been amended.
- The rules governing the surrender of all sides have been amended. In particular, the rules governing French and Soviet surrender have changed.
- The morale rules have been completely rewritten.
- Partisans have been removed.
- Aircraft carriers have been removed.
- The rules for unaligned forces have been changed.
- Possession of some Mediterranean islands provides an advantage when seeking to engage enemy fleets in the Mediterranean.
Components
The game includes:
- Map board
- Two sheets of unit counters and markers
- Three military record cards
- One manual
- One six-sided die
Map Board
- Shown is a full colour map of the area of Europe, North Africa and the Near East that served as the battlegrounds of the European Theatre. This will be your battlefield and here you will manoeuvre and fight with your armies and fleets toward ultimate victory or defeat.
- Superimposed over the map is a hexagonal grid needed to regulate the movement and location of your playing pieces. Each hexagon (forever after referred to as "hex") is identified by a unique letter-number code called a grid coordinate, a very useful tool for locating particular hexes and recording unit positions.
- The other important features to be found on the map board will require fairly detailed explanations so will only be identified in a general way at this time, reserving fuller explanations for later in the rules. Colour indicates each country's allegiance at the start of the war:
-
Brown - Great Britain and allied territory
-
Light Green - France and allied territory
-
Yellow - Italy and allied territory
-
Red - Soviet Union
-
Light Blue - Germany
-
Dark Green - United States
-
Dark Blue - Nations inclined towards the Axis
-
Orange - Unaligned nations
-
Grey - Permanently neutral nations
-
Production Points - Some hexes and off map boxes contain numbers ranging in size from one to sixteen. These numbers represent the production capacity of the hex. Those without numbers have no production.
-
Circled Stars - Indicate national capitals. The capture of a capital forces that country's surrender.
-
Crossing Arrows - Land armies may cross the straits marked by these arrows without need of sea transport.
-
Mountains - Hexes containing mountain symbols. They reduce the effectiveness of mechanized attack.
-
Anchor - Locates the major naval ports which can harbor more than one fleet strength point.
-
Lend-Lease Symbol - The two half-darkened circles inside the Soviet Union. They mark the port facilities for Allied Lend-Lease.
-
Dark Blue Sea Lines - Divide the waters into five separate seas: Black Sea, Mediterranean Sea, Baltic Sea, Atlantic Ocean, and the Red Sea/Persian Gulf complex.
-
Sea Arrows - Direct sea passages to off-map boxes. The associated numbers indicate their length.
-
Off-Map Boxes - Represent large land areas some distance from the map but which are yet accessible to it.
-
Charts and Tables - Placed onto the unused areas of the map board for quick and convenient reference.
Playing Pieces
- These are divided into two categories: unit counters and markers. The former consist of the armies, fleets, air forces and special military units that move and fight on the map board. The latter are used to keep records. The majority of the markers are number markers.
- The most important unit counters are the armies and fleets. Unlike the case in most other war games, unit counters do not proclaim their strength on the piece itself. The information printed on the counter is intended only to identify it. Its strength is maintained on its Record Sheet. This is because the unit counter's composition, and thus its strength, will continually change.
Military Record Sheet
- Each side is provided with a record sheet which maintains their unit strengths and holds other key game information. The heart of the record sheet is the spaces provided for the twelve armies. Each army has component boxes, one for each of its infantry, mechanised, tactical air and para-troop strengths.
Prepare for Play
It isn't necessary to digest all of the variations and possibilities offered by Hitler's War in one sitting. To ease the time and effort required to learn the game, the rules are presented in a step-by-step manner. Each step culminates in a scenario you can play with the rules you are familiar with. When satisfied with your understanding of the rules, you can proceed to the next scenario.
- Choose sides: Axis, Soviet Union and Western Allies. Additional players can be given sub-commands. The Barbarossa Scenario has only two players, the other scenarios have three sides.
- Decide which scenario to play; then choose sides.
- Each player places their armies and markers on the map board as instructed by the Scenario Set-up.
- The strengths of the units in play are recorded on the Record Sheets as shown in the Scenario Set-up. Each player's Record Sheet is always open to inspection.
- In some scenarios, devastation markers must be placed on the map in hexes already with production damage.
- Each player enters their total production available at the start on their Record Sheet. These amounts have been provided in the Scenario Set-up to save the trouble of counting them each time.
- Finally, the Turn Marker is placed in the starting space on the Time Track where indicated in the Scenario Set-up.
- Play can now begin.
Barbarossa Scenario
Sequence of Play
- Movement
- Combat
- Determine supply
- Announce initial attacks
- Resolve defensive assaults
- Resolve initial assaults
- Resolve initial advances
- Exploitation (one army at a time)
- Production
- Build new strength points
- Repair production
Please consult the scenario set-up which details which player moves first in each specific scenario. Once each player has finished their turn a seasonal turn is completed and the turn marker is moved forward to the next season.
Hex Control and Garrisons
Friendly hexes
- Each Scenario Set-up specifies which countries belong to each side at the start of the scenario. Every hex within these countries is considered friendly to that side. All other hexes are unfriendly.
- As the game progresses, new territory will be captured while old territory is lost. An unfriendly hex becomes friendly to a side if one of its armies enters that hex or if the side manages to isolate it from supply. The process of an army advancing into an unfriendly hex and making it friendly is often called capturing the hex. It does not matter where the hex is. The Axis player can have friendly hexes deep in the Soviet Union whereas the Soviet player can make Sicily friendly if they should ever get any army there to capture it.
- A hex remains friendly to a side as long as no enemy captures or isolates it. It does not have to be continually occupied to stay friendly regardless of its location.
- To aid in recognizing friendly hexes in unfriendly countries, place occupation markers in them.
Garrisons
- Every hex containing land terrain (including those with coastlines or islands or both) has one point of inherent defence strength when not occupied by armies.
- This strength is called a garrison. It can neither attack nor defensively assault. It can defend only against advance attempts into its hex.
- Garrisons cannot move. They are tied to their hex. Because of this, there is no need to mark a garrison's location with a unit counter.
- Empty hexes can be attacked and their garrisons destroyed but, if not occupied by the end of the Combat Phase, are automatically resupplied with a new garrison strength point.
- While a hex is occupied by an army, it cannot have a garrison. The hex's garrison disappears immediately when an army enters a vacant hex.
- Lost garrisons do return. During a movement phase, a garrison re-occupies a hex at the moment all of the occupying armies leave. During a combat phase when a hex becomes unoccupied the garrison returns at the conclusion of the Combat Phase.
Movement
- In their turn, a player is permitted to move any of their strength points (none, some or all) assigned to their armies on the map board.
- Strength points can travel unlimited distances over land. Their travel route, including the final hex to be occupied, must be traced entirely through a connected line of friendly hexes. A strength point is not allowed to move through or jump over an unfriendly hex. The route may not cross a side of a hex entirely in the sea except at a crossing arrow. A hexside must be completely free from the black coastline to be considered entirely in the sea.
- Travelling strength points may pass through friendly hexes containing other friendly armies without penalty.
- Strength points assigned to armies may be transferred between friendly armies. Exercise care that infantry points are not transformed into mechanized points and vice versa in the process.
- New armies may be created to accept strength points moved to vacant hexes. Just remove them from the Record Sheet and place them where wanted on the map board. Contrariwise, an army depleted of all its strength is removed from the map board and returned to the Record Sheet.
- The idea of moving strength points instead of armies may seem unnecessarily complicated at first. Consider, though, what an army is. It is only the organizational shell that controls and directs the fighting forces assigned to it. They are vessels to hold strength points. As such, it can be created and disbanded at whim any time during the movement. At the conclusion of the phase, every strength point must be assigned to an army. Strength points cannot operate outside armies and fleets. Armies and fleets cannot exist without any strength points.
- All three sides have been given armies of different colours and names which sometimes represent their historical allies. Different scenarios place restrictions on the use of some armies. In some cases, sides are barred from using specific armies. Specific scenarios state when these conditions exist.
- A final observation. The just described operations have all been collected under the description of movement. Perhaps, a better understanding of what is happening would be gained by viewing it not as movement but rather as a re-arrangement. The movement phase becomes an opportunity for a player to re-organize and re-arrange their forces as they wish within the movement rules.
Stacking
- Each hex can only contain one army at any time.
- No more than ten strength points (regardless of type) may be placed in the same army at the end of a movement phase. The army counters, themselves, are never counted towards this total.
- If a player accidently over-stacks at the end of their movement phase, they must eliminate strength points of their choice to bring the total down to ten.
- Armies may retreat to a hex containing another army only if there is no other option available. When this occurs both armies forfeit the right to defensively assault for the remainder of the turn. If the situation cannot be rectified at the end of the player's next movement phase, then all strength points in excess of ten are lost. The remaining ten strength points are allocated to just one army.
- Newly built strength points may not be placed in a hex if it would cause over-stacking.
- The lone exception to this rule is off map boxes. Any number of armies may occupy an off map box. Each army is still limited to ten strength points.
Combat
Launching attacks
- Each player has the opportunity to launch attacks with their armies during the Combat Phases of their turn.
- Making attacks is purely voluntary and is never required. During their turn the player decides which armies will launch an attack. They may select all or some armies; they may choose to avoid combat altogether that turn.
- Armies can make several kinds of attacks. Assaults are used to destroy enemy strength. Advances are used to capture territory.
- For the Barbarossa scenario, only infantry and mechanized strength points are available.
- An army may attack only one hex at a time, and this target hex must always be adjacent to the hex the army occupies.
- Attacks are always directed against hexes and never against the forces contained therein. Even empty hexes must be attacked to be captured.
- The Combat Phase is divided into six distinct phases. Each phase must be completed prior to the commencement of the next phase.
Determine supply
- To be in supply, each army and friendly hex must be able to trace a supply route through an unbroken chain of friendly hexes to their side's supply source.
- This supply route can be of any length.
- A supply route may pass through any number of crossing hexsides. It may not cross a full sea hexside.
- The Axis supply source is Berlin (P10). The Soviet supply source is Siberia.
- An army that cannot trace a supply route to their side's supply source may not attack that turn.
- A hex which cannot trace a supply route to their side's supply source at the conclusion of their side's combat phase is unsupplied.
- All unsupplied hexes are immediately captured by an opponent. Any armies in these unsupplied hexes are eliminated at the same time.
- An unsupplied hex becomes friendly to the opposing side with the closest un-devastated production point. Resolve any ties with a die roll.
- Supply is only determined for a player's army during that player's turn. Armies cut off from supply during an opponent's turn are not removed from play unless they are still unable to trace a supply route at the conclusion of their side's combat phase.
- Armies cut off from supply during an opponent's turn are able to defensively assault.
- Armies cut off from supply during an opponent's turn are able to move during their side's movement phase following the usual rules. Obviously they cannot be transferred from armies out of supply to armies with supply without breaching the rules for movement.
Announce initial attacks
- The attacking player first announces all of the initial attacks that they wish their armies to make that turn.
- They must name each attacking army and the hex targeted for its attack. Those armies not named to attack at this time lose the opportunity to attack later in the combat phase.
- More than one army may be named to attack the same adjacent hex.
- Any adjacent hex may be named a target hex for attack even if already friendly (reasons for this apparently nonsensical kind of attack will be provided later in these rules).
Resolve defensive assaults
- After the attacker has announced all their attacks, each army occupying a target hex is given the chance to defend itself by making its own defensive assault.
- Defensive assaults are voluntary actions available to the defender.
- An army can only make one defensive assault per turn.
- The defender can choose to reserve it for a possibly more advantageous occasion later in the combat phase.
- Once all defensive assaults have been announced, execute each assault one army at a time.
- To execute a defensive assault, roll on the assault table. The number indicates the losses inflicted. The owner of the army taking losses always determines which strength points are removed.
- Once all defensive assaults have been executed and losses removed, the attacker may then proceed with their attacks.
Resolve initial assaults
- Execute each assault one army at a time. The order in which the assaults are conducted is decided entirely by the attacker.
- To execute an assault, roll on the assault table. The number indicated is the losses inflicted on the defending army. The owner of the army taking losses always determines which strength points are removed.
- Once all assaults have been executed and losses removed, the attacker may then proceed with their advances.
Resolve initial advances
- Each army that conducted an assault is also permitted to attempt an advance into the same hex. The player can choose not to advance. The order in which the advances are conducted is decided entirely by the attacker.
- To execute an advance roll on the advance table. If the number rolled is equal or less than the number indicated on the table, the advance is successful.
- If the advance is successful, the player advances their army into the hex. If the defending player had an army in the hex, they must retreat it to a vacant friendly hex. If there is no vacant hex to retreat to, the army is eliminated.
Exploitation attacks
- Armies which successfully advanced into their target but did NOT launch an assault may participate in the exploitation phase.
- Attacks in the exploitation sub-phase are completed one army at a time. The order in which the exploitations are conducted is decided entirely by the attacker.
- Once the attacker begins one army's exploitation, they cannot then return to finish another army's earlier exploitation attack.
- To exploit, the attacker names the army which is exploiting. They then name the hex it is to attack.
- Any armies in the target hex may defensively assault the attacking army if they have not already made assaults that turn. Such assaults are conducted immediately.
- Thirdly, the attacking army may assault the hex if it has not already made an assault that turn.
- Finally, the advance attempt is resolved. Unlike the initial attack, each exploitation attack against a hex must culminate in an attempt to advance into the hex.
- The attacking army may continue to attack, following the above four steps, until it finally fails to advance, the attacker decides to attack with another army, or the army makes an assault. If the army makes an assault it may still attempt to advance into the hex it assaults.
- After failing to advance, an army is no longer able to assault. It has then lost its opportunity to do so for the rest of the turn.
Assault resolution
- Both the attacker's assault and defensive assault are resolved in the same way.
- Assaults are resolved one army at a time.
- The player making an assault adds the strength points (both infantry and mechanized) of the army together to form the firing strength. An assaulting army must use all of its strength or none at all; it may not reserve part for use at a later time. They then roll a die and cross-index the number with the firing strength on the Firepower Table. The result indicates the number of strength points lost by the opponent.
- In the case of an attack assault, the losses must be removed from the army in the target hex. With a defensive assault, the losses may be divided among all of the armies designated to attack the hex at the time of the assault.
- The controlling player decides which of their own strength points will be removed. They readjust the appropriate number markers on their Record Sheet to reflect the losses.
- If an army loses all of its strength, it is immediately removed from the board.
- Assaults may be directed against empty hexes in order to remove the inherent garrison strength point.
- A hex which becomes empty because its occupying armies have been eliminated does not regain its garrison strength point until the end of the combat phase, and therefore, for purposes of any future advance into it that phase, has a strength of zero.
Advance resolution
- Each army must attempt to advance individually. Armies cannot combine together to improve their chances.
- An advance attack is directed against an adjacent hex. If the advance succeeds, the attacking army moves into the hex. If the advance fails, the army remains where it is and can make no more attacks that turn.
- The target hex may not contain a friendly army.
- To resolve an advance, the attacker counts only the number of mechanized strength points in the advancing army (the infantry is not counted) and compares it with the total number of strength points in the target hex on the advance table. This provides the player with the range of die results needed to succeed.
- The player rolls the dice. If the number is within the range the attacking army advances into the hex and all defending armies are displaced. If the number rolled is greater than the die range, the advance fails.
- Displaced armies are retreated by the defender. They may move them into any adjacent friendly hexes. They may not retreat through crossing or all-sea hex sides.
- If no vacant hexes are available, they may enter an adjacent friendly hex occupied by other friendly armies even if it causes over stacking. This action will result in both armies forfeiting the right to defensively assault for the remainder of the turn.
- An army, unable to retreat into an adjacent friendly hex, must be eliminated. All its strength is removed from the record sheet.
- An unoccupied hex with an undestroyed garrison has a combat strength of one point against an advance.
- A successful advance into an unfriendly hex destroys the garrison for the rest of the combat phase, devastates all of the production contained therein, and immediately converts it to a friendly hex. If the hex has a production value, a devastation marker equal to the production number is placed to mark the production loss. Place an occupation marker in the hex to record its new allegiance.
- It is possible for an army with no mechanized strength to attempt an advance but, as revealed by the advance table, only against either unoccupied and ungarrisoned enemy hexes or friendly hexes.
- Treat a defensive strength in excess of ten as ten on the Advance Table. This is no penalty since no advance can succeed against ten points.
- Each time an army successfully advances, its chance of continuing to do so is reduced. This reflects the difficulty of keeping mechanized columns operational without periods of refit. The attacking army adds one to its advance die roll for each hex that it has already advanced that turn. For instance, an army which has already advanced two hexes is forced to increase its advance die roll by 2 when attempting to advance a third time.
- Once the combat phase begins none of its strength points may be transferred between its armies. Existing armies cannot be divided into more separate armies.
Advancing into friendly hexes
- An army may advance into friendly hexes during its turn. There is a special column provided in the Advance Table for just this kind of advance. Because exploitation must be conducted one army at a time, a successfully advancing army can create a path of friendly hexes behind it as it penetrates into enemy territory. Armies advancing after it can then follow at an improved chance of success. Also, advancing into friendly hexes allows armies to move along their own lines once combat begins.
- Friendly armies can never assault one another. Advancing into friendly hexes does no damage to production. They remain unscathed. Friendly armies cannot retreat.
Mountain combat
- Mechanized strength points may not assault targets in mountain hexes. Mechanised strength points in a mountain hex are permitted to defensively assault.
- An army attempting to advance into a mountain hex must add two to its die roll in addition to any other modifiers.
Sea/crossing hex side combat
Armies are not permitted to attack across crossing hex sides or full sea hex sides.
Soviet winter combat
Historically, the Axis armies were totally unprepared for the severity of Russian winter. Deprived of the appropriate winter protection, both men and tanks froze to a standstill. The following restrictions reproduce the historical situation.
- Axis armies have all of their assault, advance and defensive assault rolls increased while occupying Soviet hexes during winter turns.
- During the first such winter turn, the modifier is plus four; during the second such winter turn, the modifier is lessened to plus two; and for all following winters, the modifier drops to a final plus one.
Off-map combat
Off map boxes represent very large areas away from the map board that are of enough significance to warrant inclusion. Siberia is the only accessible off map box in the Barbarossa scenario. The others can be reached only by sea.
- Each off map box should be thought of as one greatly over-sized hex with no limitations to stacking. Siberia can be attacked by armies from any of the hexes adjacent to it. Siberia can also be the base for attacks out into any of the adjacent hexes.
- A successful advance into an off-map box captures the entire box and devastates all of its production.
- Siberia is the only off map box from which defending armies may retreat. Armies displaced in the other off-map boxes must be eliminated.
Production
Production points
- At the start of each production phase, the player counts all the un-devastated production points they control. They cannot include un-devastated points unless they can trace a supply route back to their nation's supply source. The total represents their side's production output for that season.
- It is recommended that each side's starting production amount is recorded on the Record Sheet. Players are responsible for maintaining this total by making adjustments when gains or losses occur. This frees players from the burden of recounting their total capacity each turn.
- Production is used to construct new strength points and repair devastated production points.
- Production points not spent during the turn cannot be saved for use in later turns. They are irretrievably lost.
Building strength points
- Each type of strength has a specific cost which is shown on each record sheet. Some costs are different for different sides.
- For this introductory scenario only infantry and mechanized strength points may be built. Infantry costs two production points and mechanised costs five.
- A player may build any number of infantry and mechanized strength points within their budget. For instance, with fifteen points of production, a player can build three mechanized strength points, or seven infantry strength points (the one production point remaining is lost), or five infantry points and one mechanized point, or any other combination they can imagine so long as the cost does not exceed fifteen production points.
- Newly built Axis strength points may be placed only in German hexes with at least one un-devastated production point. Newly-built Soviet strength points may be placed only in un-devastated production hexes in the Soviet Union. Each new strength point can be placed with an existing army or a new army may be created to hold it.
- Strength points cannot be placed in a hex that already holds ten strength points.
- Because production cannot be hoarded, the cost for building a strength point cannot be divided over several turns. A strength point must be built in a single turn.
Repairing devastated production
- Whenever an army advances into an unfriendly hex, all production therein becomes completely devastated. A devastation marker of the appropriate strength is placed there to show its status.
- Players are able to repair devastated production in friendly hexes during their production phases.
- Players may only allocate twenty-five percent of their total production points (rounded down) towards the repair of devastated points.
- The cost is three production points to repair one production point.
- Repair is allowed in captured hexes in enemy countries since they now have become friendly.
- Production points cannot be repaired unless the player is able to trace a supply route to their side's supply centre. Those without a supply route must remain devastated.
- Several hexes hold more than one production point. A player is not required to repair all at once. They may repair some in one turn and the rest later, or not at all.
- Repaired production cannot be used on the turn of repair. It is available for use during the following turn.
Barbarossa Set Up and Special Rules
Axis armies in play
| Army | Location | Infantry | Mechanized |
|---|---|---|---|
| Army Group North | Q13 | 5 | 5 |
| Fourth Army | P13 | 5 | |
| Army Group Centre | O14 | 2 | 8 |
| Army Group South | N13 | 3 | 7 |
| Rumanian Army | K14 | 6 |
Soviet armies in play
| Army | Location | Infantry | Mechanized |
|---|---|---|---|
| Moscow | Q17 | 2 | 2 |
| Leningrad | T15 | 3 | 1 |
| Baltic Military District | R13 | 3 | 1 |
| NW Army Group | Q14 | 3 | 1 |
| Western Military District | P14 | 3 | 1 |
| SW Army Group | O15 | 3 | 1 |
| Kiev Military District | N14 | 3 | 1 |
| Siberian Army | Siberia | 2 | 3 |
Axis-friendly areas at start
Germany, Italy, Poland, Denmark (to hex D12), Norway, Low Countries, Morocco, Algeria, Western Libya, Tunisia, Corsica, Greece, Crete, Rumania, Hungary, Bulgaria, Finland.
Three production points in France are permanently devastated and cannot be repaired (Axis player chooses which). All production in Yugoslavia and Greece are devastated but may be repaired.
Axis production at start: 34.
Soviet-friendly areas at start
Soviet Union & the Baltic States.
Soviet production at start: 16.
First turn - final turn
Summer 1941 - Winter 1943. Axis player moves first each turn.
Victory conditions
- The Axis player wins immediately at the moment they simultaneously control all three capital hexes in the Soviet Union (Leningrad hex T15, Moscow hex Q17 and Stalingrad hex M19).
- The Soviet player wins if they prevent the Axis player from fulfilling their victory conditions. They win immediately the moment they gain control of the German capital (Berlin hex P10).
Special rules for the Barbarossa scenario
- All hexes not controlled by either side at the beginning of the scenario cannot be attacked by either side. They remain neutral for the entire war.
- To reflect the amount of the Axis Production devoted to the North African and Western Fronts, total Axis production every turn must be reduced by 17. For example, if the Axis player controls 34 un-devastated production points, only 17 points can be spent in a turn.
- The strength points that start in Siberia may not move on the first turn. On the second turn and thereafter, they are free to leave.
- The production points in Siberia are not available to the Soviet side until the second turn, winter 1941. At this time, it has a capacity of eight production points that are added into the Soviet Production. Beginning with the Spring 1943 turn, this production automatically increases to twelve production points for the rest of the game but only if Siberia is still friendly to the Soviet side.
- Only Siberia notes 4 and 7 for the Time Record apply to the Barbarossa Scenario. The others relate to the upcoming scenarios.
The Fall of Germany Scenario
This section adds to the rules already presented for the Barbarossa scenario. Only the Set-up will need to be changed to adapt to a new starting situation. A third side, the Western Allies, is introduced in this scenario. If only two are to play, one will control the combined Allied-Soviet side.
Changes to the Map Board
- Disregard all of the turn record notes.
- Add port symbols to the following locations: Tunis (H9), Tripoli (E10), Tobruk (E13), Calais (O8), and Konigsberg (Q13).
- The "at sea (raid)" box is now referred to as the Atlantic convoy box (AC box).
- The following locations no longer have a production point: India, Cairo, British Africa, French Africa, Canada and Finland.
- The Western Allied player now receives eight production points each turn via Trans-Atlantic shipping. In order to receive these production points the Allies must have enough Trans-Atlantic shipping points.
- The following off map boxes no longer exist: India, British Africa, French Africa, and Canada.
- Gibraltar now borders the Atlantic and the Mediterranean.
Sequence of Play
- Movement
- Combat
- Determine supply
- Announce initial attacks
- Resolve amphibious assaults
- Resolve defensive assaults
- Resolve initial assaults
- Resolve initial advances
- Exploitation (one army at a time)
- Production
- Build new strength points
- Repair production
Sea Movement
In the Barbarossa scenario, neither side possessed fleets, which contain naval strength points. Due to this the movement of strength points was denied across the seas except at a crossing. This scenario introduces the fleets and their strength points. It also introduces amphibious strength points and details how players launch amphibious invasions.
Fleet strength points
- Naval strength points must be attached directly to a nation and not just to the side. The nations which can have fleets are France and Great Britain for the Allies, Germany and Italy for the Axis and the Soviet Union for the Soviets. Each fleet counter has been given a colour to associate it with a nation.
- British fleets may only be placed or moved into friendly ports in Great Britain or Allied hexes (brown hexes). French fleets (light blue) may only be placed or moved into friendly ports in France or allied hexes (green hexes). Italian fleets may only be placed or moved into friendly ports in Italy or allied hexes (yellow hexes). German fleets (black) may be placed or moved into ports in any Axis friendly hexes. Soviet fleets may be placed or moved into ports in any Soviet friendly hexes.
- A ship strength point, when built, may be assigned to any fleet counter from its side.
- Newly built ship strength points may be assigned only to fleets in port.
- Once assigned to a fleet it is forever fixed to that fleet's nation. A player may transfer ship strength points but only between fleets of the same colour. A country may never have more fleets than have been provided for it.
Movement of naval strength points and fleets
- Naval strength points and fleets move in much the same way as land based strength and armies move. Naval movement occurs during the movement stage. All naval movement is conducted prior to any land movement.
- Each fleet can hold a maximum of ten naval strength points.
- No two fleets can occupy the same hex.
- A fleet and an army MAY occupy the same hex IF that hex is a partial land/partial sea hex.
- Port hexes are denoted by the anchor symbol on the map. Each port can hold up to ten strength points. Gibraltar is the lone exception. It can hold just three.
- Fleets may either be at sea or in port. If a fleet occupies a port hex and the owner of the fleet has stipulated that the fleet is in port, then the fleet is in port. In all other circumstances the fleet is considered at sea.
- At the beginning of their movement phase, a player must move all of their ship strength points currently at sea to port.
- This fleet must be able to trace a sea route to the port it is travelling to. The route travelled from sea to port may be of any length.
- The sea route cannot cross an all land hex side. The sea route may cross a partial land/partial sea hexside only if both adjacent hexes are friendly.
- The route may cross a hexside with a crossing arrow only if both adjacent hexes are friendly.
- Sea routes may travel to and from the map and the off map boxes along the sea arrows.
- New fleets may be created or disbanded to facilitate this movement.
- Ship strength points which no longer have a port or which would exceed the port's capacity are eliminated, instead.
- The player may then move their ship strength points as they wish. Ship strength points may make one move either to another port or to a full sea or coastal hex. Fleets travelling to a full sea or coastal hex are considered "at sea".
- The route travelled to a full sea or coastal hex must be no more than seven hexes from its port.
- Fleets may be moved to a hex containing another fleet. This action may trigger a naval battle in the combat phase, unless one of the fleets is in port.
- Ship strength points in port are safe from any direct attack (though they can be expelled from port by a successful enemy advance into it). Expelled fleets must move immediately to another port.
- Fleets can be created at any time to receive ship strength points. Empty fleets are removed from play but can return at any time to receive new ship strength points. At the end of movement, every ship strength point must be assigned to some fleet counter. They cannot be left to float around on their own.
- Leningrad (T15) is a port on the Baltic Sea. Kiel (Q10) is a port both on the Atlantic and the Baltic. Friendly ships may pass between the Atlantic and the Baltic by way of the Kiel Canal. Gibraltar is a port on both the Mediterranean and Atlantic. Ships may leave and enter the port of Taranto (hex J11) by hex I12 only.
Fleets at sea
- Fleets at sea remain in place until their side's next movement phase unless called into action.
- Fleets at sea are always "at sea" in a specific sea or ocean. For example, a fleet located at P4 is at sea in the Atlantic, as is a fleet located at H2. A fleet at I9 is at sea in the Mediterranean.
- While at sea, they can transport strength points across oceans, supply armies via sea, block supply via sea by enemy fleets, escort amphibious invasion forces, intercept enemy invasions and battle with enemy fleets. Their actions though are limited to what sea they are placed in.
- Fleets at sea may only perform one action each turn. A fleet could not transport strength points and attack another fleet in the same turn.
Sea transportation
- A fleet at sea may transport one strength point for each capital ship strength point in the fleet per turn.
- The fleet may only transport strength points through the sea it occupies. For example, for the Western Allied player to transport two strength points to Cairo (hex D15) they would need to have two capital strength points at sea in the Atlantic Ocean and two strength points at sea in the Mediterranean.
- A fleet at sea also ensures that an army may draw supply through that sea to their side's supply centre.
Trans-Atlantic shipping
- The Western Allies receive eight production points via Trans-Atlantic Convoy. This represents key war materials from colonies in the commonwealth arriving via the Atlantic convoy. Each Trans-Atlantic shipping point can carry one production or one strength point.
- The Western Allies start with eight Trans-Atlantic shipping points.
- There is no limit to the amount of Trans-Atlantic shipping the Allies may build.
- Each Trans-Atlantic shipping point costs three production points to build.
- If the Western Allies lack sufficient transports in the Atlantic convoy to transport all eight points, then whatever cannot be transported is lost.
- Strength points can only be transported between America/Canada and the United Kingdom via Trans-Atlantic shipping.
Blocking sea routes
- A fleet at sea prevents enemy movement routes passing through its hex. This prevents enemy fleets moving through the hex during the movement phase, and enemy fleets trying to transport strength points and supply through that hex.
- It cannot stop enemy ship strength points from entering its hex to do battle with it.
Escorting amphibious invasions
- A fleet at sea is able to escort a friendly army which is amphibiously invading as long as the invasion passes through the body of water it is at sea in.
- A fleet may escort only the part of an invasion route that passes through the same sea that it occupies.
- Any intercepting fleets must first defeat this escorting fleet before they may attack the amphibious force directly.
- Escorting fleets may provide naval fire into the amphibious invasion hex, provided they survive the journey, as per the amphibious assault rules.
- Only one fleet may escort each amphibious invasion. A fleet may only escort one amphibious invasion per turn.
- Players assign escorting fleets when announcing their initial attacks.
Intercepting amphibious invasions
- A fleet at sea is able to intercept an enemy army which is amphibiously invading as long as the invasion passes through the body of water it is at sea in.
- A fleet may intercept only the part of an enemy invasion route that passes through the same sea that it occupies. This invasion route is vulnerable along its entire length whilst in the sea.
- The intercepting fleets must first defeat any escorting fleet before they may attack the amphibious force directly.
- Multiple fleets at sea may attempt to intercept the amphibiously invading force. Each fleet must first defeat any escorting fleets before they may attack the amphibious force directly. Once an intercepting fleet defeats the escorting fleet all remaining fleets at sea may attack the amphibiously invading force (provided they have been instructed to intercept).
- Any intercepting fleets which have already been defeated are NOT allowed to attack the amphibiously invading force should the escorting fleet be defeated by another intercepting fleet.
- Players assign intercepting fleets after the moving player has announced their initial attacks.
Attacking enemy fleets
- A fleet at sea may try to attack another fleet at sea in the same sea.
- If the defending player wishes to do battle a naval battle is immediately conducted.
- The defending player may choose to evade battle. If the defending fleet decides to evade, the attacking player rolls the die. If the number shown is equal to or less than the TOTAL SIZE of the defending fleet a naval battle occurs. If it is greater than the TOTAL SIZE of the defending fleet, the fleet has successfully evaded.
- Evading fleets move immediately to the nearest friendly port. If they are unable to move to a friendly port, they may not evade.
- Players declare which fleets are attacking enemy fleets when announcing their initial attacks.
Naval battle resolution
- A player may initiate naval battle in two ways. During their movement phase they may try to attack an enemy fleet in the same sea. Alternatively, naval battle may occur between fleets escorting and/or intercepting amphibious invasions.
- All naval battles are resolved during the resolve amphibious assaults phase.
- To resolve a naval battle each side doubles its capital ship strength and simultaneously attacks the other on the Firepower table.
- When losses are removed, the larger of the two fleets remains at sea and the smaller fleet must return to a friendly port (owner's choice) on the same sea. In case of a tie, the fleet that inflicted the greater losses remains at sea. If this is also the same, the defending fleet remains at sea. The loser always returns to port.
- If the loser is unable to return to port, because they have no friendly port on the same sea or cannot trace a sea route to a friendly port, the fleet is eliminated.
Amphibious Invasions
Amphibious strength points
- Amphibious strength points now become available for use. They are built, assigned to armies and moved just like infantry and mechanized strength points. They count toward the ten points stacking per hex limit. During combat they have the ability to conduct amphibious invasions.
- In ordinary combat, amphibious strength points act exactly like infantry strength points.
Invasion procedure
- A player includes all of the amphibious invasions they wish to make (naming each invading army and its target hex) when announcing their attacks during the announce initial attacks phase.
- Only armies whose strength is composed of at least half amphibious strength points may amphibiously invade.
- The invading army must be able to trace a sea route to the target hex in order to invade. The sea route can travel through multiple seas and oceans. It can be of any length.
- The target hex of an amphibious invasion can NEVER be a friendly hex.
- When invading armies travel through multiple seas and oceans, different fleets must escort it through the separate seas and oceans.
- The invading army does not have to end its movement phase positioned adjacent to its target hex. At that time, it need only occupy a coastal hex from which it intends to begin its sea journey to the target hex in the upcoming combat phase.
- Amphibious invasions are resolved in the resolve amphibious assault phase.
- Only one army can be designated to amphibiously assault each hex.
Invasion resolution
There are seven steps followed in order to resolve amphibious invasions.
- The attacking player describes the sea route between each invading army and its target hex.
- Resolve naval battles between any escorting/intercepting fleets.
- Resolve naval fire between any intercepting fleets and the invasion force.
- Resolve coastal bombardment between surviving escort fleets and the target hex.
- Armies in the target hexes may defensively assault their invaders.
- The invading armies may amphibiously assault their target hexes.
- Each invading army MUST attempt to advance into its target hex.
An invading army does not physically leave its coastal hex unless it successfully advances into the target hex. Each invasion is resolved one at a time. The attacker determines the order in which their invasions are resolved.
Naval fire
- Amphibiously invading armies which do not have escorting fleets, or whose escorting fleets have been destroyed, are vulnerable to naval fire.
- Naval fire is resolved using the Firepower Table. For each full sea (not partial sea/partial land) hex side that the invasion route travels, the player rolls once on the Firepower Table.
- The firepower total for each naval fire is always equal to the number of capital ship strength points in the fleet.
- In the unlikely event that an invasion is directed against an off map box, the number of hex sides the army travels along a sea arrow is shown by the number next to it.
- Losses are removed from the invading army immediately. At least half the losses of each separate fire must be amphibious strength points.
Coastal bombardment
- Escorting fleets, should they survive the journey, may provide coastal bombardment against the invasion's target hex.
- The firepower total for each coastal bombardment is equal to the number of capital ship strength points in the fleet, however it may NEVER be higher than the number of amphibious strength points in the invading army.
- Losses are removed immediately.
Defensive assault
- An army in the target hexes may use its one defensive assault capability for the turn against the invading army.
- Defensive assault against invading armies is resolved in the same way as ordinary defensive assaults.
- At least half of any losses inflicted by defensive assault must be amphibious strength points.
Invasion assault
- An invading army may use the one assault available to it that turn against the invasion's target hex.
- Amphibious assaults are resolved on the firepower table in the same manner as normal assaults.
- Only amphibious strength points can be counted toward the firepower strength of the invasion assault. Infantry and mechanized points are NEVER counted.
Invasion advance
- Amphibious advances are resolved on the advance table in the same manner as normal advances.
- The strength used for an invasion advance is composed of all the amphibious strength points plus an equal number of infantry and mechanized strength points. For example, an army with four amphibious, two mechanized, and three infantry strength points attempts to advance with a strength of eight.
- If the attempt succeeds, the invading army is placed in the target hex and any defending armies retreated as normal. All amphibious points are then converted to normal infantry strength points.
- If the attempt fails, the invading army remains on its coastal hex. Any amphibious strength points in the army are eliminated. Fleets at sea may not conduct any additional naval fire on defeated armies.
- Invading armies that successfully advanced, but did NOT amphibiously assault, can continue attacking during the exploitation attack phase. They cannot attempt another amphibious invasion that turn.
Fortifications
Production
- Fort strength points are built like other types of strength points. Each costs five production points. They count toward the ten strength point stacking limit. If unsupplied at the end of their side's turn they are eliminated.
- When built, fort strength points can be assigned only to forts. Each fort marker can only contain five fortification strength points.
- Fort strength points may only be assigned to a friendly hex which can trace a supply route back to its side's supply source.
- If there is no fort counter already in the hex, one must be placed there. Once assigned to a fort, they can't be transferred.
- No more than seven fort counters of a side may be in play at a time, though a fort may be voluntarily dismantled to be placed elsewhere. In that case all abandoned strength must be eliminated.
- Forts and their strength points cannot move.
Fort strength under construction
- Fort strength points cannot function for one full season turn after their production. To signify this under construction state, place the point markers representing the newly built strength points face down in their fort squares on the Record Sheet.
- In the side's next production phase, the markers are flipped face-up to show that they are now operational.
- While in the under construction state, fort strength points count neither in battle nor toward the hex stacking limit.
Effect of forts on combat
- Completed fort strength points cannot attack. They can defensively assault and they count toward any defence against advance.
- Fort strength points can be selected as losses to enemy assaults (not defensive assaults) and coastal bombardment.
- Forts reduce losses inflicted on their hex. Total losses inflicted per turn are reduced by the number of fort strength points. In effect, each fort strength point absorbs one point of loss per turn without penalty. For example, when losses of five strength points are demanded of a hex with three fort strength points, only two strength points are removed.
- A successful enemy advance into a hex with a fort marker destroys the fort and all of its strength points.
Allied & Soviet Cooperation
Movement and combat
- The Soviet and Allied player may never attack one another.
- Soviet armies may not enter hexes friendly to the Western Allies and Allied armies may not enter hexes friendly to the Soviet side.
- Soviet and Allied armies may not combine in the same attack (highly difficult considering that they attack at different times). Allied armies, in their turn, may attack Axis hexes previously attacked by Soviet armies.
Lend-Lease
- During the Allied production phase the Allied player may choose to give up to four production points from their budget each turn to the Soviet player.
- Each friendly Soviet lend-lease depot (in hexes U15 and M20) can receive up to two production points per turn from the Allied player. When either is lost to the Axis, the Soviet player is no longer able to get its share of the lend-lease. While both are lost to the Axis, of course, lend-lease is stopped.
- The lend-lease gift can't be spent until the Soviet player's next turn. A square has been provided alongside the Soviet Current Production to record the size of the gift until it can be used.
- The lend-lease gift must be spent in the first available Soviet production phase available or it is lost.
- The Soviet player may NEVER give production points to the Allied player.
Allied Supply and Production
- Newly built Allied strength points may be placed only in production hexes in Great Britain, the United States, or Canada.
- The Allied supply source is London (P7).
- Allied units in the USA and Canada off map boxes are ALWAYS in supply.
The Fall of Germany Set Up and Special Rules
Axis forces in play
| Army | Infantry | Mechanized |
|---|---|---|
| Place in any Axis Friendly Territories | 29 | 14 |
| Fort | Location | Strength |
|---|---|---|
| No. 1 | N9 | 2 |
| No. 2 | O10 | 2 |
| No. 3 | K10 | 2 |
| No. 4 | P8 | 1 |
| No. 5 | Q9 | 2 |
| No. 6 | Q10 | 3 |
Axis-friendly areas at start
Germany, Italy (hexes L9, L10, K10, K11), Poland, Denmark, Norway, Low Countries, Bulgaria, Finland, The Baltic States, France, Yugoslavia, Greece, Crete, Rumania, Hungary, Soviet Union (hexes S15, R14, Q14, Q15, P14, O15, N14, N15, M15, M16, M17, L15).
Devastated production hexes: M8, L8, N8, L11, L12, S14, Q15, N15 and L15. Three points in hex O10. All may be repaired except those in France.
Axis production at start: 30.
Axis naval forces: 2 Capital ships.
Soviet-friendly areas at start
All hexes of the Soviet Union not friendly to the Axis. All production is available. No devastation.
Soviet production at start: 23.
Soviet naval forces: 1 Capital ship.
Soviet forces in play
| Army | Infantry | Mechanized |
|---|---|---|
| Place in any Soviet Friendly Territories | 40 | 16 |
| Fort | Location | Strength |
|---|---|---|
| No. 1 | T15 | 2 |
Allies forces in play
| Army | Infantry | Mechanized | Amphibious |
|---|---|---|---|
| Place in any Soviet Friendly Territories | 28 | 12 | 12 |
Allied-friendly areas at start
United States, Lebanon-Syria, Morocco, Algeria, Italy (hexes J10, J11, I11, I12, H11), Iran, Sicily, Sardinia, Corsica, Iraq, Tunisia, Libya.
All British allied nations (coloured in brown), all production is available. No devastation.
Allied production at start: 35.
Allied naval forces: 8 Capital ships, 8 T/A Ship.
First turn - final turn
Spring 1944 - Winter 1945. Axis moves first, then Soviets, then Allies.
Victory conditions
- The game ends if the Soviet or Allied capture of Berlin (hex P10); or, at the conclusion of the winter 1945 turn.
- The Axis player wins if Berlin is friendly.
- The Soviet player wins if Berlin is no longer controlled by the Axis and the Soviets have at least two thirds the seasonal production of the Allies.
- The Allied player wins if neither the Axis nor Soviet players have been able to win.
- When checking for victory, all friendly production points are counted regardless of their location or devastation.
Special rules for the Fall of Germany scenario
- If only two players can play, one must control both the Allied and Soviet sides. The Allied/Soviet player wins only if Berlin is captured from the Axis before the end of the game. The Axis player wins if Berlin remains friendly.
- The following countries are neutral and may not be attacked by any player: Portugal, Spain, Sweden, Turkey and Saudi Arabia.
- All capitals other than Berlin (hex P10) are ignored.
The War for Europe Scenario
All of the Barbarossa and the Fall of Germany rules except for the set-up instructions are to be used with this scenario. These new rules deal with political, economic and military aspects of the entire war, 1939-1945.
Sequence of Play
- Movement
- Combat
- Determine supply
- Announce initial attacks
- Resolve amphibious assaults
- Resolve defensive assaults
- Resolve initial assaults
- Resolve initial advances
- Exploitation (one army at a time)
- Production
- Build new strength points
- Repair production
- Conduct research
Entry into the War
Initial belligerents
At the start of play, Germany is at war with Poland, France and her allies (all countries coloured in green) and Britain and her allies (all countries coloured in brown).
The Soviet Union
- The Soviet Union is not at war with anyone in 1939. The Soviet Union may not attack the Axis, Italy or any nations inclined to the Axis in the winter 1939 turn.
- The lone exception to the rule is Poland. If the Axis has NOT forced a Polish surrender in 1939, the Soviet Union may attack any Polish hexes not conquered by the Axis. If the Soviet Union forces a Polish surrender then all hexes - other than those already captured by the Axis - become Soviet.
- The Soviet and Axis forces may NOT attack each other until the Polish have surrendered.
- Starting with the spring 1940 turn the Soviet Union may attack Germany, Italy, nations inclined towards the Axis and any unaligned countries provided Poland has surrendered.
- If the Soviet Union attacks Germany or any territory conquered by the Axis the Soviet Union is considered at war with the Axis.
- If the Soviet Union attacks any nation inclined towards the Axis, then the Axis player may declare war on the Soviet player. The Axis player may also elect not to declare war.
- If the Soviet Union attacks Finland (prior to being at war with the Axis) the Soviet player adds two to all assault and advance rolls directed at Finnish hexes. The Finnish army may subtract two from all defensive assault rolls.
- If the Soviet Union fails to force Finland's surrender by the conclusion of the first turn, hostilities cease and Finland becomes inclined to the Axis. Any Finnish territory conquered by the Soviet Union remains Soviet. The Soviet Union may attack Finland again in later turns - but if they do so they will risk war with the Axis as per rule six of this section.
- If the Soviet Union attacks the Baltic States (prior to being at war with the Axis) and fails to force its surrender by the conclusion of the first turn, hostilities cease and the Baltic States become inclined to the Axis. Any Baltic territory conquered by the Soviet Union remains Soviet. The Soviet Union may attack the Baltic States again in later turns - but if they do so they will risk war with the Axis as per rule six of this section.
- If the Soviet Union attacks any other unaligned nation (prior to being at war with the Axis) and fails to force its surrender by the conclusion of the first turn, hostilities cease. Any territory conquered by the Soviet Union remains Soviet. The Soviet Union may NOT attack that unaligned neutral for the remainder of the game.
- Once the Soviet Union is at war with the Axis it may attack any unaligned nations as per the usual rules for attacking unaligned nations.
Soviet production limitations
- The Soviet player may NEVER count production points in Siberia towards their production total until the Soviet Union is at war with the Axis.
- The Soviet player must deduct four production points from their total each turn. This production represents the resources devoted to maintaining the Siberian army. The Soviet Union is freed from this cost beginning with the spring 1941 turn.
- Ignore time record notes number six and eight on the time record. These are no longer relevant.
Siberian production
- Siberian production (displayed as eight on the board) starts the game at zero. Use the -8 devastation marker to reflect this.
- Each turn the Soviet player may "repair" one devastated point at a cost of three production points (the usual cost for repairing devastated production).
- Siberian production becomes available for use from the winter 1941 turn (provided the Soviet Union is at war with the Axis).
- From the winter 1942 turn potential Siberian production increases from eight to twelve. To reflect this, devastate an additional four production points in Siberia and treat total production in Siberia as twelve.
- If Siberia is captured by the Axis NO production points may ever be repaired by the Axis.
Italy
- Italy begins the game unaligned.
- Ignore time record note number two on the time record.
- Starting with the spring 1940 turn, the Axis player may make an Italian activation roll, provided they have declared war on the Low Countries.
- The Axis player rolls one die; on a roll of 1-2 Italy joins the Axis.
- The Italian army activation roll is modified by -1 if the Axis occupies all of the Low Countries and -1 for each French hex captured by the Axis. These modifiers are cumulative.
- The Italian activation roll is made at the beginning of the Axis production phase. If successful, Italian production is added immediately to Axis production and may be used that production phase.
- Strength points in the Italian army and the PAA are available for use in the following turn.
Italian forces
- The Axis player must maintain a force of at least five infantry strength points and one mechanised strength point between the Italian Army and the PAA.
- The PAA must remain in Africa or the Middle East. If there are no Axis friendly hexes in Africa or the Middle East, it may be placed in Italy. If there are no Axis friendly hexes in Italy or the Middle East the PAA may not be used.
- Africa and the Middle East includes Morocco, Algeria, Tunis, Libya, Egypt, Malta, Palestine, Trans-Jordan, Lebanon-Syria, Iraq, Iran, Kuwait and Qatar.
- The Italian army may be moved anywhere provided the PAA is in Africa or the Middle East.
- The PAA may never contain more strength points than the Italian army.
- The Italian Army always adds +1 to all assault and advance rolls. It defensively assaults like a regular army. This rule does NOT apply to the PAA.
- Italian fleets cannot leave the Mediterranean unless the Allies do not possess any friendly ports in the Mediterranean and Gibraltar is no longer friendly to the Western Allies.
- Italian fleets are not subject to the same modifiers as the Italian army.
Activity limitations
- While unaligned, Italian strength points may not move or attack.
- While unaligned, Italian production is not available for Axis use.
Nations inclined toward the Axis
Hungary, Rumania, and Bulgaria (all coloured in dark blue) begin the game unaligned. Finland and the Baltic States may become inclined towards the Axis providing certain conditions are met (see The Soviet Union, rules 8 & 9, above). Nations inclined towards the Axis may join the Axis provided certain in-game conditions are met.
- At the beginning of the summer 1941 turn Rumania joins the Axis provided they are still unaligned. If Rumania becomes Axis in this manner the Rumanian Army is placed in hex L14 with four infantry and one mechanised strength points. Add Rumanian production to the Axis total.
- At the beginning of the summer 1941 turn Bulgaria joins the Axis provided they are still unaligned.
- At the beginning of the summer 1941 turn Hungary joins the Axis provided they are still unaligned. If Hungary becomes Axis in this manner increase the size of the Rumanian Army (in hex L14) by one infantry and one mechanised strength point.
- Provided Finland is aligned to the Axis it will join the Axis on the turn it declares war on the Soviet Union. The Axis player immediately places four strength points in a new Axis army located in hex T13. This army is supplied for the initial turn but on all following turns it must be supplied via the Baltic.
- Provided the Baltic States are aligned to the Axis it will join the Axis on the turn it declares war on the Soviet Union. The Axis player immediately places two strength points in any of their armies.
The Rumanian army
- Provided Rumania joins the Axis in the summer of 1941, the Axis player now gains control of the Rumanian army.
- Strength may be added to the Rumanian army but they may never leave it.
- The Rumanian army may only be moved to Rumanian and Axis friendly hexes in the Soviet Union. It may advance into Soviet hexes in the Soviet Union.
- The Rumanian army always adds +1 to all assault and advance rolls. It defensively assaults like a regular army.
The United States
- The United States begins the game unaligned. At the beginning of the Allied Spring 1942 player turn the U.S. will join the Allied side if still unaligned.
- Each turn after the U.S. joins the Allied side, its production increases by one. For the spring 1942 turn, it adds sixteen production points to the Allied total, for the summer 1942 turn it adds seventeen points; and so on.
- When the U.S. joins the Western Allies the first six strength points built during the production phase must be placed in the United States.
- Strength points in the U.S. may be transported to Europe using Trans-Atlantic shipping during the movement phase.
Activity limitations
- While unaligned, U.S. strength points may not move or attack.
- While unaligned, no U.S. production is available for use.
France
- France starts the game at war with Germany. However, it is best to look upon France as an ally of Great Britain.
Activity limitations and British obligations
- No fortification points may be built in France until the winter 1940 turn.
- The Western Allies may build strength points in France. The Allies must build at least three strength points in France per turn. Paris is also an allied supply source.
- Allied strength points already in France must remain in France. They can only leave France via combat advance.
- Once France surrenders these activity limitations are no longer in effect.
All remaining unaligned countries
- All other unaligned countries remain so until attacked.
- The Low Countries and the Baltic States are, each, treated as a single nation even though they were, in reality, composed of several smaller countries.
- The grey areas of Switzerland and Saudi Arabia are permanently neutral and can never be entered.
Violation of neutrality
- Unaligned nations are vulnerable to attack and conquest by all sides.
- If the first player to attack a hex of an unaligned nation is unable to force it to surrender in the same combat phase, then the nation and all of its un-captured hexes automatically join one of the other sides.
- Unaligned countries first attacked but not conquered by the Soviets automatically join the Axis, provided the Axis is at war with the Soviets. (If this is not the case refer to the Soviet Union rules above.)
- Unaligned countries first attacked but not conquered by the Western Allies automatically join the Axis side.
- Unaligned countries first attacked but not conquered by the Axis automatically join the Western Allies side.
- In the extremely unlikely event that Italy is attacked by the Axis player, it joins the Western Allies and its armies are replaced by Allied armies with identical strengths.
- In the extremely unlikely event that an unaligned U.S. is attacked by the Allied player, the U.S. joins the Axis and its army is replaced by an Axis army with identical strength.
- In the extremely unlikely event that Finland, Baltic States, Hungary, Rumania, and Bulgaria are first attacked but not conquered by the Axis player, hostilities cease, any territory conquered by the Axis remains Axis and the country joins the Soviet side.
- Poland is the lone exception. Until conquered, it remains unaligned to all.
Surrender
Germany
- If Berlin is captured, the nation which occupies Berlin (hex P10) may make a German surrender roll at the end of their Combat Phase. If this roll is a three or less Germany immediately surrenders. This roll is modified by -1 for each German hex, other than Berlin, which is occupied by the Soviet or Western Allied side.
- Germany will also surrender as per the morale rules (see National Morale, below).
Italy
- Should the Western Allies capture four hexes in Italy (including Sicily but not Sardinia) the Western Allies may roll for Italian surrender at the end of their combat phase. Italy will surrender on a roll of two or less. This roll is modified by -1 for each hex they occupy in Italy (in addition to the initial four required for the surrender roll).
- Upon surrender the Axis player immediately eliminates five infantry strength points and one mechanised strength point from the Italian army or the PAA. Strength points in the Italian army must always be removed first.
- Once Italy surrenders the Axis may no longer use the Italian Army or Italian fleets. These counters are removed from play and all strength points contained within them lost.
- Unoccupied Italian hexes, though, do not change alignment. Only by capture can an Italian or Italian Allied hex be made friendly.
Rumania and Bulgaria
- Rumania and Bulgaria both surrender if the Soviets have an Army in or adjacent to Rumania or Bulgaria and the TOTAL number of strength points in all Soviet armies exceeds the TOTAL number of Axis strength points on the EASTERN front.
- The eastern front includes all territory in the Soviet Union, The Baltic States, Finland, Poland, Hungary, Rumania and Bulgaria.
- When Rumania and Bulgaria surrender all strength points in the Rumanian army are removed. The Axis can no longer use the Rumanian army.
- All Rumanian and Bulgarian territory becomes Soviet unless it is occupied by an Axis army, other than the Rumanian army, at the time of surrender.
Finland
- If the Axis army in Finland ever becomes unsupplied the Finnish will immediately surrender.
- If the Axis army in Finland contains LESS than four strength points at the conclusion of an Axis combat phase the Finnish will immediately surrender.
- Upon surrender all Axis strength points located in Finland are lost.
- Upon surrender Finland becomes unaligned and may not be attacked by any side for the remainder of the game. Any Finnish hexes captured by the Soviet Union remain Soviet after Finland surrenders.
Soviet Union
- The Soviet Union will only offer to surrender as per the morale rules (see National Morale, below).
- If the Axis accepts the surrender, the Soviet player retains control of those hexes friendly to them at the time of the surrender. The Axis retains control of all Axis friendly hexes in the Soviet Union. No further attacks are allowed between the Axis and Soviet players.
- The Soviet player counts the strength points remaining in their armies. The Axis player must maintain a force of at least as many strength points in armies which are located in the EASTERN front. The eastern front includes all territory in the Soviet Union, The Baltic States, Finland, Poland, Hungary, Rumania and Bulgaria.
- If the Axis player chooses to refuse a Soviet surrender the Soviets will NEVER surrender again.
- Once the Soviet player surrenders they take NO further part in the game.
France
- If the Axis captures Paris (hex N7) they may roll for French surrender at the end of the Axis combat phase. On a roll of two or less France surrenders. The roll is modified by -1 for each Axis friendly hex in France, other than Paris.
- No additional production is devastated when France surrenders.
- Upon surrender all uncaptured hexes in France and Corsica become friendly to the Axis. All French hexes in Lebanon, Syria, Tunisia, Algeria and Morocco become Vichy French.
- The Western Allied player rolls a die for each infantry strength point in French or Vichy French territory. On a roll of a one or a two the point is placed in the Free French Army, relocated in P6. If the roll is a three through to six, the strength point is removed from play.
- All mechanised strength points in French territory are removed from play.
- All tac air strength points in French territory are relocated to the Free French Army in P6.
- France can only surrender once a game.
Vichy France
- The Axis player may add French production to the Axis production total. However French production is always reduced by three. For example, if there were two devastated production points in France the Axis adds two production points to the total. Germany may never receive more than four production points from Vichy France.
- The Axis player may repair devastated French production.
- Axis strength points may move into and through France. They may not move into and through Corsica, Lebanon, Syria, Tunisia, Algeria and Morocco.
- The Western Allies may attack Vichy French territories at any time following the usual rules. Morocco, Algeria, Tunisia and Lebanon/Syria have neutral forces of two infantry points each should they be attacked. The Axis player places these forces. These countries have no capitals and can never surrender. They must be occupied a hex at a time.
- The Axis may dissolve Vichy France at any point. After Vichy France is dissolved, Morocco, Algeria, Tunisia and Lebanon/Syria no longer have neutral forces of two infantry points. All Vichy territory becomes Axis territory and Axis units may be placed there during the Axis movement phase under the standard rules.
- Vichy France is immediately dissolved should the Allies capture hex M8 (Vichy).
Great Britain
- If London (hex P7) is captured the Axis may make a British surrender roll at the end of their Combat Phase. If this roll is a two or less Britain immediately surrenders. This roll is modified by -1 for each British hex, other than London, which is occupied by the Axis side.
- Britain will also surrender as per the morale rules (see National Morale, below).
- If the British surrender before the United States has entered the war all uncaptured hexes of the following British territory become friendly to the Axis: the British mainland, North Ireland, Gibraltar, Malta, Egypt, Cyprus, Palestine and Transjordan. The Western Allies player takes no further part in the game.
- If the British surrender after the United States has entered the war only the British mainland becomes friendly to the Axis. The Western Allies player remains in the game.
- Britain can only surrender once in a game.
The United States
- The United States can never surrender. It must be occupied by the Axis.
- In the unlikely event that this occurs the Axis can never use U.S. production points.
Other countries
- All other countries will surrender immediately when their capital is captured.
- The following hexes are now capitals: T10 Oslo, H13 Athens, L12 Belgrade.
- The Low Countries are the lone exception. They never surrender and must be occupied a hex at a time.
- When a country surrenders no additional production is devastated. All devastated production may be repaired by the new owner.
- Once a country has surrendered it can never surrender again in the same game.
Unaligned Forces
- In addition to their hex garrisons each unaligned nation receives infantry strength points, called home forces.
- These home forces are not and never can be assigned to armies. Instead, they are placed directly on the map board in their home country. Place number markers on the map board to represent these forces.
- Home forces cannot leave their homeland. If forced to retreat out of their country, they are eliminated. When their home country surrenders, they disappear forever.
- Home forces are placed on the map board at the moment the first attack of a hex in their home country is announced but before it is resolved. They can be placed anywhere in their country, limited to a maximum of three strength points per hex.
- An unaligned country's home forces are placed and directed by the player who would be the one to control the country if it doesn't surrender.
- These strength points of a home force may be moved like any other strength points during the controlling side's movement phases. They cannot move out of the home country. They may move into the capital in excess of three strength points.
- Once eliminated, they cannot be rebuilt. They are available just once.
Home forces table
| Country | Infantry Strength Points |
|---|---|
| Poland | 8 |
| Spain | 6 |
| Turkey | 6 |
| Sweden | 6 |
| Finland | 4 |
| Rumania | 5 |
| Norway | 3 |
| All other countries | 2 |
The forces available to Finland, Rumania, and Hungary are independent of those provided to the Axis side in the summer of 1941. However, when the Axis side receives these reinforcements, these countries are no longer eligible to receive home forces.
Tactical Airpower
Tactical air abilities
- Tactical air strength points can now be built and assigned to armies like other strength points.
- Tactical air strength points alone have a special stacking exemption. An unlimited number of tactical air points may be assigned to the same army over and above the ten strength points per hex limit.
- Tactical air strength points participate only in assault and defensive assault. They cannot be used either in advance or be counted in the defence against advance.
Air attacks
- The method of resolving assaults is expanded into a two-step process of air attack and normal assault.
- When beginning the assault, the attacking player first commits a number of their tactical air points to air attack. If their tactical air strength is equal to or less than the opponent's tactical air the assaulting player must commit all available tactical air to the air attack. If they have more tactical air strength than their opponent, the number committed must at least match the defending armies' tactical air strength.
- The air attack is resolved on the firepower table. All losses are deducted immediately from, and only from, the opposing air strength. Excess losses are ignored. More than ten tactical air points can air attack.
- The normal assault is now resolved. Tactical air strength not used in the air attack can be added into the assault strength. Losses from the assault cannot be taken from tactical air strength unless they are the only points remaining.
- An air attack is fought only as an integral part of an assault and cannot be separated from it. An army can never air attack without assaulting.
- Air attacks are used in defensive assault as well and are conducted in the same way.
- Tactical air can be used during amphibious invasion assaults but only if the target hex is one hex away from a friendly hex.
- Armies without tactical air ignore the air attack portion of assault.
- Armies can never contain only tactical air at the conclusion of a movement phase. If an army is reduced to only tactical air points during another side's combat phase that army MAY use the garrison, if available, for defence.
Air superiority
- Each time an army must retreat from a hex, additional loss may be inflicted upon them. Compare the tactical air strength of the advancing army to the tactical air of the retreating army. For every attacking tactical air point in excess, remove one strength point from the retreating army. These losses cannot be taken in tactical air points.
Paratroops
Para-drop
- Para-troop strength points are built and assigned to armies like other strength points. Ordinarily, they operate like infantry. However, when part of an advance, they can para-drop.
- Para-troops can only para-drop in the first hex which an army is attempting to advance to during its combat phase.
- All an army's para-troops do not have to drop, but if they do not drop they will not be able to drop later on in the same combat phase.
- Para-troops designated to para-drop have their strength points doubled and added to the number of mechanised strength points when determining the die range on the Advance Table.
- The attacking player must announce the size of the para-drop before resolving the advance.
- If a para-drop forces the mechanised total over ten, it is treated as ten.
- If the advance fails, all para-troop strength points used in the para-drop are eliminated.
Para-drop across water
- Para-troops may take part in amphibious invasions. They cannot be chosen to amphibiously assault. They can be added to the amphibious advance if the target hex is one hex away.
- Armies which consist entirely of para-troop strength points may attack an adjacent hex across a sea or crossing hexside. These armies may be assigned tac air.
- When para-troops drop over water the para-troop strength points cannot take part in the assault. They are doubled and added to the advance like a normal advance. Any assaults must be conducted by tactical air, alone.
Research and Technology
Item cost
- The cost of each type of strength point will no longer be at the fixed rate provided by the Basic Units Cost Chart. The cost now varies with its current tech level. For example, each mechanized strength point costs six production points while the player is at tech level zero for mechanized points. If the player advances to tech level one, their cost is reduced to four production points. If they can continue to improve their tech level, they can eventually bring their cost for a mechanized strength point down to two production points.
- The costs for various strength points at each tech level are shown in the unit capability table on the game board. The last cost shown for an item is the cheapest at which it can ever be produced.
- Certain items cannot be produced until the player reaches a certain tech level. For example, atomic bombs may not be built until the player has advanced to tech level six for atomic bombs. The non-producing levels for these items have been distinguished with the letter P (for prohibited).
- Each side starts play with its own set of costs for its producible items. They often differ from the other side's costs for the same items. These start levels are provided in the research and development section on the Record Sheets. Although progress is measured and often described by tech levels, it is more practical to represent it on the record sheet by their equivalent costs, instead.
- Each item that a side is allowed to produce has been included in its research and development section along with its starting cost printed underneath. When a player succeeds in improving the tech level of an item, they should place a number marker showing the new cost in its square on the record sheet. By this method, an accurate record of all current costs can be kept close at hand. The blank squares alongside have been provided for fractions.
Research
- Players use research to improve the costs of their items. When successful, the improvements are reflected by better prices.
- At the beginning of play, each player should collect their item markers and place them in the Start circle on the Research Track of their Record Sheet.
- Each player's research is conducted during their research phase. A player may not devote more than twenty-five percent of their total production available (rounded down) to research. For each item that they wish to improve, the player expends one or two production points and moves its marker the same number of spaces along the track.
- Research for different items cannot be combined.
- When they are satisfied with their investments, the player may then determine their success. They roll one die for each item and check the result underneath its space. This will be a letter A, B, or C.
- An A result means success. The cost of the item is reduced to that of the next tech level. The marker is returned to the start.
- A B result indicates some success but not to the degree hoped for. The item's tech level remains unchanged but its cost is slightly reduced by one production point. If the difference from its current cost to the next tech level is only one production point, then reduce the cost by only one half. If the difference is less than one production point, no improvement may be made. The marker is returned to the start.
- A C result means failure. No change is made to the item cost. Roll the die again and check the efficiency table on the game board for the item marker's new position.
- A player is never required to resolve the research for their items. They may choose, instead, to delay the resolution for any or all of them, thereby protecting their positions. In subsequent turns, they can pay to advance them to even more favourable spaces farther along the track before rolling for the results.
- An item can never be advanced beyond step 5, Research Complete. This is the best chance for success.
- No player can conduct research during the first turn of the game (winter 1939).
Research special cases
- Until the Soviet Union and the Axis sides are at war, Soviet research is limited to one production point per item per turn. As soon as they are at war, the Soviet can begin spending two points per item per turn.
- A player may spend only one production point per turn for an item's research if it is currently cheaper than those of the other two sides. This reflects the lack of research incentive to improve something that is already considered the best. For example, the Axis infantry cost at the start of the game is one point less than both opponents' infantry (two production points to three production points). While it remains cheaper, the Axis player is limited to spending one production point per turn on infantry research. As soon as one opponent can reach the same level, they may begin spending two production points per turn on it.
- A player improves their chances for successful research for an item if another player currently has the same one at a better tech level. In this situation, the player treats a B result for that item as an A result. For example, the Soviet player gets a B result for their mechanized research. Because the Axis player is currently paying one production point less for a mechanised strength point than they are, the Soviet player converts the B result into an A result. This rule illustrates the common practice in wartime of one side using another side's successful idea as a model for their own programs.
- The two research modifications explained in rules 2 and 3, above, cannot be applied to items at prohibited levels, U-Boats or A.S.W. These are entirely free from any kind of influence until in operation.
United States technology
- When the U.S. joins the Western Allies side, they advance to tech level 2 for the atomic bomb and tech level 1 for capital ships but only if not already at or past these levels.
Strategic Bombing
- Any player, once they reach the required tech levels, may begin to produce bomber and bomber escort strength points.
- They may begin building air defence strength points anytime. As soon as they are built, they are assigned to their marker which, in turn, is placed in the strategic bombing or air defence box.
- During their combat phase players may declare attacks against other sides using their strategic bombers. Attacks are announced in the initial attacks phase.
- The bombing raid is resolved during the resolve initial attacks phase.
- Before the bombing is resolved the defender has a chance to destroy bomber strength points with their air defence strength using the Firepower Table. Losses are deducted from the attacking bombers immediately.
- The surviving bomber strength points attack the enemy industry using the Firepower Table. The result is the number of production points devastated. The attacking player decides which production points will be devastated. Any point within four hexes of a friendly hex may be selected.
- Bomber strength points are doubled if the defender does not have any air defence strength points.
Bomber escorts
- Each time a bomber escort is built, it is immediately exchanged for one enemy air defence strength point. The Axis player picks between the Allied or Soviet air defences when there is a choice. When a player has excess escort strength, they place the Escort marker in the air defence box, to be exchanged for enemy air defence strength as soon as it is produced.
- Soviet and Allied bombers may not attack each other's territory. Their bomber escorts cannot attack each other's air defence.
Strategic Missiles
- When the required tech level is reached, missile strength points may be produced like any other strength point. They may be assigned only to missile counters in a hex with at least one un-devastated production point in their home country (Axis: Germany, Western Allies: Great Britain, Soviets: Soviet Union). Each side may have only three missile counters on the map board at any one time.
- Missile counters are moved on the map like armies. However, they cannot fight like armies. They can only fire missiles at enemy industry. They cannot retreat but are eliminated instead when their hex is occupied by an enemy army.
- Missiles are fired during the combat phase. The attack is announced with initial attacks and resolved with assaults. In their turn, a player may launch as many of their missile strength points as they wish. A missile strength point can be fired just once and then removed from play.
- For each missile attack, the player rolls a die and consults the firepower table. The result indicates the number of production points devastated. All production selected must be within two hexes of the missile counter. Which production points are to be devastated is decided by the attacking player.
Atomic Bombs
- When a player has successfully researched through the prohibited tech levels to level six, they can produce atomic bombs. Each atomic bomb strength point built is immediately assigned to a bomber or missile counter. Number markers can't double for both bomb and missile strength points so devastation markers are substituted to represent atomic bombs.
- Atomic bombs are dropped as part of a bombing raid or missile launch. To be dropped, an atomic bomb strength point must be carried by a bomber or missile strength point. A player is free to drop as many of their atomic bombs as they can in a turn. Atomic bomb strength points are eliminated after use.
- The player conducts their bombing raid and/or missile launch as per the normal rules. If bomber strength points are destroyed by air defence, the player may choose to lose bombers not carrying an atomic bomb. When bomber strength points carrying atomic bombs are lost, the bombs are also lost, without detonating.
- Atomic bomb strength points do not add into the normal bomber or missile strength. Their damage is resolved separately, each bomb at a time. Each bomb is dropped on a hex of the attacker's choice within range. It permanently devastates one production point therein (never to be repaired again). It also attacks the strength points in the hex with a strength of six on the Firepower Table. The defender chooses which strength points are lost. Missile strength points cannot be chosen as losses.
- All normal bomb and missile damage is determined before atomic bomb damage is determined.
- Atomic bombs also reduce the target's national morale as explained in the National Morale section of the rules.
U-Boats
- Only the Axis player may build U-boat strength points. Like surface fleets, they must be either in port or at sea. Those U-boat strength points in port are safe from attack.
- U-boat strength points are built during the Axis production phase just like any other strength points. Newly-built U-boat strength points may only be assigned to the U-boat marker in port.
- During their movement phase, the Axis player may move U-boat strength points from port to the AC box or vice versa. U-boat strength points can never be at sea. They are limited to port or the AC Box.
U-Boat attack
- U-boats attack Allied shipping at the end of the Western Allied movement phase. The attack is resolved on the firepower table using the U-boat strength currently in the AC box.
- For each loss inflicted by the U-boats the Western Allies must remove one Trans-Atlantic strength point and reduce the number of production points delivered via Trans-Atlantic shipping by one.
- If Trans-Atlantic shipping was transporting some strength points the Western Allied player may elect to remove strength points instead of reducing the number of production points delivered.
- If more than one loss is inflicted a combination of strength points and production may be lost.
- A loss is deducted just once. To maintain losses to Allied production, the U-boats must continue to operate at sea each turn.
Surface raiders
- Axis fleets in port on the Atlantic may choose to move into the AC box. Axis capital ship strength points are doubled and added to the U-boat total when they are in the Atlantic convoy box.
- Axis fleets attempting to move to the AC box are subject to interception when trying to move there.
- At the beginning of the Axis player's next movement phase, all fleets in the AC box must return to a port (owner's choice).
- Each Allied fleet at sea in the Atlantic may try to intercept the Axis fleet moving to the AC box. When the Axis player announces their intentions to send one or more of their fleets out to raid, the Allied player selects which of their fleets they wish to use to chase them.
- All fleets which attempt to intercept must return to a port (of their choice) after the operation. This occurs regardless of whether the chase was successful or not.
- The Allied player resolves these attempts one at a time. Each fleet attempting to intercept rolls a die. If the result is a one or less the two fleets immediately conduct a naval battle. If the result is greater than one the Axis fleet proceeds to the AC box and the intercepting fleet moves to a port.
- This procedure continues until the Allied player has resolved all their intercepts. They may stop at any time.
- Allied fleets at sea either on hex U7 (Scapa Flow) subtract two from their search die rolls for Axis fleets leaving from any port along the Baltic Sea, or Germany, Denmark, and the Low Countries. They may subtract one from their search die rolls for Axis fleets leaving Norway along the Atlantic.
Anti-submarine warfare
- The Allied player can challenge the U-boat menace at sea with Anti-Submarine Warfare (A.S.W.). A.S.W. strength points are built like any other strength points.
- When built they are assigned to the A.S.W. box on the Record Sheet and the A.S.W. marker is placed in the AC box.
- The Allied player makes their A.S.W. attack against the Axis U-boats at the conclusion of their movement phase. A.S.W. attacks simultaneously with the U-boat and/or surface raiders attack.
- The Allied player attacks the U-boat strength at sea on the firepower table using their A.S.W. strength. Losses are removed from the U-boat strength in the AC box.
- The Allied player may also move capital ship strength points to the AC Box. Any capital ship strength points are added to the A.S.W. strength points.
- If there are NO U-boats in the AC box, but there are capital ship strength points present, then the Axis must remove capital ship strength points as losses resulting from A.S.W. attack.
- The Axis player may elect to attack Allied A.S.W. rather than Trans-Atlantic shipping during their U-boat attack. If the Axis player selects this, then losses resulting from U-boat attack are removed from A.S.W. as opposed to transports. NO production or strength points are removed should the Axis elect to attack A.S.W. rather than Allied shipping.
- If there is NO A.S.W. in the AC box, but there are capital ship strength points present, then the Allies must remove capital ship strength points as losses resulting from U-boat attack. This can only occur if the Axis elects to target A.S.W. as opposed to Trans-Atlantic shipping. Capital ship losses can NEVER occur if the Axis U-boats target Trans-Atlantic shipping.
- U-boat strength points are doubled if the defender does not have any A.S.W. points. Axis capital ship strength points are still doubled but not tripled if the Allies do not have any A.S.W. points.
National Morale
- In addition to the conditions already described in the surrender section all three sides will surrender if their national morale falls to or falls below zero.
- All other countries are uninfluenced by morale and invulnerable to surrender in this manner.
- Squares have been provided in the Allied and Axis Record Sheet for regular maintenance of the changing morale levels. The Soviet player can maintain their morale using markers placed just below their production.
- Morale is raised or lowered by the events described in the national morale chart (below) as they occur. A country's morale can never be greater than nineteen.
- For an atomic bomb to influence morale it must be dropped in that side's home country (Axis: Germany, Western Allies: Great Britain, Soviets: Soviet Union).
- For morale determination, hex gains and losses are calculated for the side and not by country (such as England, France and the U.S.). It would be impossible to determine morale in that way.
- If a country's morale is reduced to five or less, one must be added to all of their assault and advance rolls. They still defensively assault as per normal.
- If a country's morale reaches fifteen or more all of their assault and advance rolls are reduced by one. They still defensively assault as per normal.
- If morale is zero, or less than zero, at the end of its turn the side will surrender. See the Surrender rules above for additional details on surrender.
National morale chart
| Condition | Result |
|---|---|
| Gain of six or more hexes during a combat phase | +1 to all |
| Loss of five or more hexes during a combat phase | -1 to all |
| No attacks declared during a combat phase | -1 to all |
| Atomic bomb dropped | -4 to all |
| Strategic Missile strength point destroys production point | -1 to all |
| Rumania & Bulgaria surrender | -1 to Axis |
| France surrenders | +2 to Axis, -2 to Western Allies |
| Soviet Union surrenders | +2 to Axis, -1 to Western Allies |
| Great Britain surrenders | +2 to Axis, -1 to Soviet Union |
| Italy surrenders | +1 to Western Allies, -1 to Axis |
| U.S. joins Western Allies | +2 to Western Allies |
| Italy joins the Axis | +1 to Axis |
| Axis captures Alexandria | +1 to Axis, -1 to Western Allies |
| Axis captures Gibraltar | +1 to Axis, -1 to Western Allies |
| Axis captures Leningrad | -1 to Soviet Union |
| Axis captures Moscow | -3 to Soviet Union |
| Axis captures Stalingrad | -1 to Soviet Union |
| Allies capture last Axis friendly hex in Africa | +1 to Western Allies |
| Soviet army occupies hex in Germany | -1 to Axis |
Leaders
- Armies have the opportunity to acquire leaders who improve their effectiveness. Each army with a leader may subtract one from all combat die rolls.
- Each player should mix up their leaders with the no-leader markers provided for their side. This forms a pool of ten markers for their side.
- For every ten strength points (not counting tactical air) currently assigned to their armies, a player is allowed one leader marker in play.
- Leader assignments are made at the end of the production phase after all builds. The player randomly selects the number of leader markers they are allowed to put into play and assigns them face down to the armies of their choice.
- Each army can only have one leader at a time. The now empty army squares on the Record Sheet are perfect places for the markers.
- The Leader marker is kept face-down until the army either attacks or is attacked. The leader counter is then turned over. If it is a leader it may begin to influence that army's combat rolls immediately. If it is a no-leader marker, it is mixed back into the leader pool.
- Leaders, once revealed, can move between armies during the movement phase just like other strength points. Leaders don't count toward stacking. They can move via sea transport provided the fleet is also transporting some strength points that movement phase. They have no inherent strength. They are eliminated if left by themselves.
- Each time an army with a leader suffers casualties the player rolls one die. A six forces the loss of the leader. The counter is mixed back into the pool where it is available for future draws.
Firepower Table
It is possible for firepower attacks by sea or air to be in excess of ten points. All points can fire. Resolve them in groups of ten and with whatever remains for the final fire. For example, if twenty-five U-boats attacked Allied shipping, the Axis player would roll a die three times on the Firepower Table. Twice, referencing the "ten" column and once using the five column.
Partial Ship Builds
- Until the advent of this rule, capital ship strength points had to be purchased in one single payment. Due to their high cost they will be exempted. A player needs pay only for a part of a ship strength point in any one turn.
- A player keeps track of the unpaid cost for each unfinished ship strength point on the development track at the bottom of their Record Sheet. A "1" number marker is used to represent the partially completed strength points on the track.
- The Axis player begins the game with one ship strength point partially built. It needs six production points to complete. The Allied player has two partially built ship points both six production points away from completion. Italy has one ship strength point partially built. It needs nine production points to complete.
The Mediterranean Islands
- Possession of Sardinia (J8), Malta (G11) and Crete (G14) provides an advantage when seeking to engage enemy fleets in the Mediterranean.
- When a fleet at sea in the Mediterranean attempts to evade, the attacking player subtracts one from the evasion die roll for each of the three aforementioned islands owned by their faction.
Norwegian Effects on Axis Production
- The Norwegian ports were vital to Axis production as they facilitated the transport of raw materials from Sweden to Germany. To reflect this the status of Norway and Sweden affects Axis production.
- If the Western Allies or the Soviet Union have possession of U10 hex, Axis production is reduced by one. Axis production is not reduced if Norway is neutral.
- If Sweden is occupied by the Western Allies or the Soviet Union Axis production is reduced by two.
- These reductions to Axis production are not cumulative. If both Sweden and Norway are occupied Axis production is reduced by two, not three.
The War for Europe Set Up
Axis forces in play
| Unit | Location | Infantry | Mechanised | Tactical Air | Amphibious | Para | Fort |
|---|---|---|---|---|---|---|---|
| German Army | Place in any German territories | 9 | 10 | 2 | 1 | 1 | |
| Fort No. 1 | N9 | 1 | |||||
| Italian Army | L9 | 4 | 1 | ||||
| Panzer Army Africa | D12 | 1 |
Axis Fleet in port: 2 capital ship strength points. U-boat fleet in port: 2 strength points. Italian fleet in port: 3 capital ship strength points. Manstein: place in any German Army at the start of play.
Soviet forces in play
| Unit | Location | Infantry | Mechanised | Tactical Air | Amphibious | Para | Fort |
|---|---|---|---|---|---|---|---|
| Soviet Army | Place in any Soviet territories | 13 | 6 | 2 | |||
| Siberian Army | Siberia | 2 | 3 |
Soviet Fleet in port: 1 capital ship strength point.
Western Allies forces in play
| Unit | Location | Infantry | Mechanised | Tactical Air | Amphibious | Para | Fort |
|---|---|---|---|---|---|---|---|
| French Army | Anywhere in France | 12 | 4 | 1 | |||
| British Army | Anywhere in Britain | 2 | 2 | 1 | 1 | ||
| U.S. Home Army | U.S. | 8 | 3 | 1 | 1 | ||
| Fort No. 1 | N8 | 2 | |||||
| Fort No. 2 | M9 | 3 | |||||
| Fort No. 3 | H4 | 2 | |||||
| Fort No. 4 | G11 | 1 |
British Fleet in port: 8 Capital ship strength points (8 Trans-Atlantic Shipping Points). French fleet in port: 5 Capital ship strength points. Strategic Bombers: 2 Strength Points.
Starting areas and production
- Axis-friendly areas at start: All German territory (Morale 10). Axis production at start: 16.
- Soviet-friendly areas at start: All Soviet territory (Morale 10). Soviet production at start: 15.
- Allied-friendly areas at start: France and Allies (green territory), Britain and Allies (brown territory) (Morale 10). Allied production at start: 23.
Russia sets up first, followed by the Allies and lastly Germany.