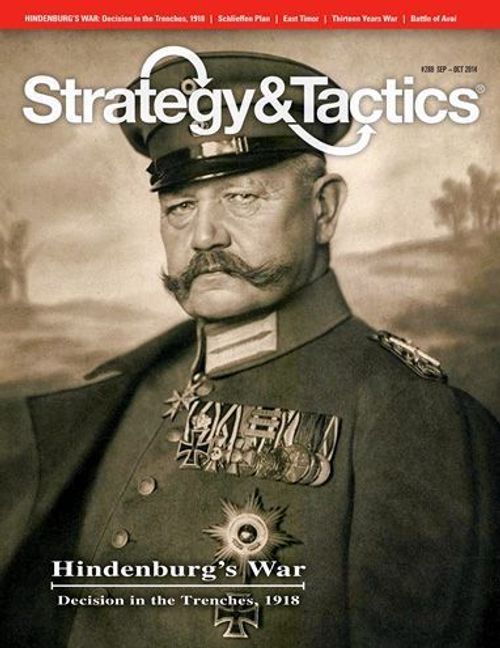
Hindenburg's War: Decision in the Trenches, 1918
Hindenburg's War: Decision in the Trenches, 1918 Rulebook
Table of Contents
Table of Contents
- Map Errata
- 1.0 Introduction
- 2.0 Components
- 3.0 Set-Up & Hex Control
- 4.0 How to Win
- 4.1 Course of the Game
- 4.2 Mid-Game Victory Check
- 4.3 Effects of a Successful MGVC
- 4.4 Allied Victory
- 4.5 Drawn Game
- 4.6 German Victory Prior to the MGVC
- 4.7 Turn 15 German Win
- 4.8 French Collapse
- 4.9 Bombardment of Paris
- 4.10 British Withdrawal
- 4.11 British Line of Communications
- 4.12 Germany Army Morale
- 5.0 Turn Sequence
- 6.0 Stacking & Fog of War
- 7.0 Supply
- 8.0 German Attack Supply
- 9.0 Reinforcements & Replacements
- 10.0 Strategic Movement
- 11.0 Regular Movement
- 12.0 Trenches & Entrenching
- 13.0 Combat
- 13.1 In General
- 13.2 Combat Participation
- 13.3 Combat Die Rolls
- 13.4 Defender's Terrain
- 13.5 Unsupplied Defenders
- 13.6 Defending Against German Attack Supply
- 13.7 Loss Application
- 13.8 Overkill
- 13.9 Retreat From Combat
- 13.10 Attacker Advance After Combat
- 13.11 Multiple Battle Rounds
- 13.12 Anglo-French Tank Brigades
- 14.0 Minor Allied Armies
Map Errata
The hex between 2901 and 2903 should be numbered 2902, not 2802.
1.0 Introduction
1.1 Overview
Hindenburg's War: Decision in the Trenches, 1918 (HW) is a strategic-level, two-player wargame of low-intermediate complexity that covers the fighting on World War I's western front during that final year of the war, from the start of the first German offensive on 21 March through Armistice Day on 11 November. The game's sub-systems are crafted to present a supreme-commander's-eye-view of the war: it is therefore almost fully strategic in its perspective, with only the most pastel of operational undertones added to enhance historical tone and texture. Despite it's larger-than-usual size, HW takes two experienced players only about six hours to complete and is easily adaptable for solitaire play.
1.2 Designer's Notes
I designed HW by drawing on four main sources of inspiration (meaning I stole ideas from the following): The first is Richard Spence's and James Gabel's classic design, Kaiserschlacht: 1918, the Battle for Europe. The second is the even older classic board game Risk. The third is the teaching of historians John Mosier and David Stevenson as presented in their books (respectively), The Myth of the Great War and With Our Backs to the Wall. The fourth is the ongoing success of my good friends Joseph Miranda and Chris Perello at distilling truth and art out of war via the craft of game design.
1.3 Scales
Each hex on the map represents 10.31 miles (15 km) when measured from side to opposite side. Each full turn of play, other than the first and last, represents half-a-month. The first turn covers only 21 through 31 March, but is nevertheless played as a turn of normal duration because both sides were still fresh at that time and were therefore able to get more done in less time. The last turn covers 15 October through 11 November, but it's also played as a turn of normal duration, thereby modeling the effect of the spiraling global influenza epidemic on operations. Every combat unit in the game represents one division of infantry or one brigade of tanks.
Design Note. Cavalry divisions, though still carried on the tables of organization of the major belligerents' armies, had no functional role on this front by 1918. Those units have therefore been omitted from the game's order of battle. Similarly, the various nationalities identified within the counter-mix have been selected based on their separate functionality as perceived at the level of highest headquarters during these campaigns. Therefore only the Australians and New Zealanders get separate billing within the larger overall "British Army," while the handful of Austrian, Polish and Italian formations serving in the German and French Armies do so anonymously here.
2.0 Components
2.1 List of Game Components
The components to a complete game of HW include these rules, the two map sheets, and two sheets with a total of 456 die-cut counters. A number of charts, tables, boxes, & tracks are located on the map.
2.2 The Map
The game maps show the militarily significant terrain (at this scale) on the western front. The hex grid regulates the placement and movement of units. A unit is considered to be in only one hex at any one time. Each hex contains natural and/or man-made features that affect movement and combat. The unique four-digit number in each hex is provided to help you find referenced places more quickly. For example, the city of Trier is in hex 2822. They also allow you to record unit positions if a match has to be interrupted and taken down before it can be completed. To assemble the maps, trim the edge of one, then overlap it onto the other using the hex numbers as a guide.
2.3 Unit Counters
Most of the counters (also referred to as "units" and "unit counters") represent formations that took part in the campaign. Additional counters are provided as informational markers and memory aids. After reading through these rules, punch out the counters. Trimming the "dog ears" from their corners with a fingernail clipper will facilitate easier handling and stacking during play.
2.4 Sample US Division
This unit is a US infantry division. That nationality is shown both by background color (green) and a two-letter abbreviation (US). Like all units in the game, It has two combat factors (also referred to as "hit numbers"), both being "4" in this case. The first (left) number is the unit's "attack factor," which—as the name suggests—pertains when the unit is attacking. The second (right) number is the unit's defense factor, which pertains whenever it defends. In this game, unlike all other units, US divisions contain two steps.
The combat factors are the same on both sides, the only visual difference being the numbers on the reverse (reduced) side are printed in a white circle. That models the fact US divisions contained roughly double the manpower of their Allied and enemy counterpart formations. Thus, when US units suffer their first "hit" in combat, either offensively or defensively, they're flipped in place and may continue operating until they suffer a second hit. For more details on that process, and the further significance of this unique US characteristic, see section 13.0. This unit doesn't begin the game in play; it becomes available as a reinforcement during Turn 4 as indicated by the circled number. See section 9.0 for more details on that.
2.5 Sample Non-US Division
Like the German division shown below, all non-US divisions in the game have only one step, with combat strengths of either a "1-2," "2-3," "3-3," or "4-4." When a non-US division suffers a "hit" in combat, it isn't flipped and kept in place on the map, but is immediately removed and entered into the replacement system. Depending on the army and game turn, the unit may return with its reverse ("low morale") side showing and will use the lower combat factors.
2.6 Nationality
The following seven nationalities are identified by the abbreviations listed below as well as by the background colors of the units themselves. The significance of nationality will be discussed at numerous places throughout the rules.
AN – Australian / New Zealand (tan) BE – Belgian (orange) BR – British (red) FR – French (blue) GE – German (green with black type) PO – Portuguese (yellow) US – United States (olive drab with white type)
Design Note: Australian and New Zealand units are shown and function as one combined nationality in the game.
2.7 Unit Types
There are two types of units in the game: infantry divisions of all participating nationalities, and British and French tank brigades. Tank brigades don't actually function as separate combat formations; rather, they're attached to individual attacking infantry divisions at a one-to-one ratio (see 13.12). The icons for the various units are as follows.
2.8 Combat Factors ("Hit Numbers")
These numbers serve as measures of each division's ability to engage enemy formations in combat. In general, when a die is rolled for a division that's "firing" in combat, if the number rolled for it is less than or equal to its combat factor, it has scored a hit on an opposing unit. See section 13.0 for more details.
Design Note: With regard to the nomenclature used by the German high command at the time, their 4-strength units are shock (Stoss) divisions; the 3-strength units are "first class" formations; the 2-strength units are "second class," and the 1-strength units are "third" and "fourth class." Because of the lofty perspective of this design, the shock units don't get any bonus beyond that of their high combat factor.
2.9 Movement Factors
Unlike most wargames, movement factors aren't printed on the counters. That's because the movement factor of all units is "1." For more details on that, see section 11.0.
2.10 Markers
The counter-mix also includes the following three types of informational memory aid markers. Their uses are explained in appropriate sections of the rules.
German Attack Supply (8.0) German & Allied Hex-Control Markers (3.5) Entrenchment markers (12.0)
Design Note. The number of hex control and entrenchment markers included in the counter-mix isn't a design limit. If you need more, make more. The number of attack supply markers is a design limit.
2.11 Player Aids
In addition to the hexgrid and terrain, the map also includes a 15-box Turn Record Track (TRT), an 11-box Action Track, and a Strategic Reserve Holding Box for each player, plus the French Collapse Table (see 4.8), British Withdrawal Table (see 4.10), Replacement Table (see 9.3), and Terrain Effects Chart (see 13.0).
3.0 Set-Up & Hex Control
3.1 Preparing to Play
After first deciding who will command which side, both players should sort and set up the units of their own side according to the following instructions. Stacking limits apply during set up (see section 6.0).
3.2 Allied Set Up
The Allied player commands all non-German (AN, BE, BR, FR, PO, & US) units in the game. He completes his set up before the German player begins his. The Allied player sets up his units, all with their front sides showing, in the following sequence.
-
Put all US divisions on the Allied Turn Record Track in the boxes corresponding to the circled number on each.
-
Put the three French reinforcement units and the two British reinforcement units on the Allied Turn Record Track in the boxes corresponding to the circled number on each.
-
Place into the Allied Strategic Reserve Holding Box a total of eight starting British (and/or AN) divisions, 39 French divisions, plus the four British and three French tank brigades.
-
Set up the 13 Belgian divisions in any one, some, or all of the four hexes of that country lying west of the front line printed on the map.
-
Set up the remaining British, AN, and PO divisions in any hexes on the map that lie west of the starting front line inclusive and north of the 28xx hex row in France and Belgium. Both PO units must start in the same hex, but there is no such requirement for the AN units. Every trench hex from 2905 to the sea must have at least one unit in it.
-
Set up the remaining French units in any hexes on the map that lie west of the starting front line inclusive and south of the 29xx hex row (exclusive). Every trench hex from 2806 to 2019, plus the cities of Rheims (2609) and Verdun (2415) must have at least one unit in it.
Player Note. Not all units (other than the hard-pressed Belgians) need start in the forward-most hexes along the front line. The 28xx/29xx Anglo-French dividing line has no further significance once set up is completed.
3.3 German Set Up
The German player commands all German (GE) units. After the Allied set up is complete, the German player sets up his units, all with their front sides showing, in the following order.
-
Place all German units with turn-of-arrival indicated by the circled number adjacent to the image into the boxes of the German Turn Record Track corresponding to each one's number.
-
Place any number of divisions into the German Strategic Reserve Holding Box. There is no requirement to place any set number of units, or any units at all, in reserve.
-
Place all remaining German divisions in any hexes east of the starting front line. There is no requirement to place all units at the front, but every trench and city hex east of and adjacent to the starting front line must have at least one unit in it.
-
Place as many attack supply markers (8.0), from zero to four, he wants to use during Turn One in any hexes east of and adjacent to the starting front line, no more than one marker per hex. Place any unused markers in the Turn 2 box of the German Record Track.
3.4 Initial Marker Placement
Other than the AS counters deployed according to step 4 above, the other counters shown in 2.10 should be set aside until needed. Place each side's "Action" marker in the "10" box of the appropriate Action Track.
Player Note. There are no turn markers because they would get lost in the morass of recycling divisions that soon will fill the Turn Record Tracks. If desired, we recommend players use a more easily seen marker, such as a chess piece, poker chip, or large coin.
3.5 Hex Control
At the start of play the Allied player controls all hexes lying generally west and south of the starting front line; the German player controls all hexes lying generally to the east and north. The control status of a hex changes from one side to the other each time a unit of the opposing side moves into it (opposing units will never be in the same hex at the same time). A hex's control status may switch back and forth any number of times during play. Where necessary, use the control markers to indicate hex control. For more on the significance of hex control, see 2.10, 4.2, 4.3, 4.4, 4.9, 7.5, 10.5, 13.9 (9), 14.1 and 14.2.
4.0 How to Win
4.1 Course of the Game
During the first half of the game the German player is attempting to win offensively by convincing the British or French to give up the war (see 4.8 & 4.10), or, failing that, to seize enough territory west of the starting front line to keep Germany in the war. His success or failure is determined by mid-game victory check (see 4.2). If the amount of territory seized is insufficient, the game may end at that time with an Allied victory. If it is sufficient to keep Germany fighting, the game continues. In the second half of the game the Allied player is on the offensive and wins by seizing key cities on the German side of the starting front line; the German player wins by preventing that outcome. Draws are possible.
4.2 Mid-Game Victory Check
The German player must make the mid-game victory check (MGVC) at the end of any one of his actions (see 5.0) during Turn 9 (July II). The players tally the number of hexes lying west/south of the original front line that are German controlled and supplied at that moment.
If that number is less than 30, play stops and the Allied player is declared the victor.
If the hex-count number is 30 or more, but the Allied player controls one or more victory city hexes lying in or east/north of the original front line, play stops and the Allied player is declared the victor.
If that number is 30 or higher and the German player controls all the city hexes lying east of the original front line, play continues with some modifications (see 4.3). Finish any remaining operations in Turn 9 and play through the end of Turn 15 or until one player concedes, whichever comes first.
Design Note. The MGVC can't win the game for the German player; it merely decides if he's played well enough to have avoided defeat up to that time.
4.3 Effects of a Successful MGVC
The following rule changes take effect after the MGVC.
-
No further die roll checks are made for French collapse (4.8) or British withdrawal (4.10).
-
German Army Morale is checked every turn (4.12).
-
All non-US Allied units (except the Portuguese, see 14.1), whether in play on the map, in the Strategic Reserve Holding Box, or being rebuilt on the Turn Record Track, are immediately flipped to their stronger (front) sides and remain there for the rest of the game.
-
The German player may no longer win the game as described below in 4.6. He may only win it as described in 4.7.
4.4 Allied Victory
Failing an Allied win at the time of the MGVC, the Allied player wins at the end of Turn 15 if he then controls in supply all city hexes lying west/south of the original front line and also controls in supply two or more Allied Victory Cities lying east/north of that line.
4.5 Drawn Game
If, at the end of Turn 15, the Allied player controls in supply all city hexes lying west/south of the original front line and controls in supply only one Allied Victory City lying east/north of it, that game ends in a draw. No matter how many Victory Cities the Allied player controls at the end of Turn 15, he can't win if the German controls in supply even one city hex lying west/south of the original front line. All such situations are draws.
Design Note. The historic outcome was a draw in game terms. The Allies controlled only Mons (3508).
4.6 German Victory Prior to the MGVC
If, any time prior to the MGVC, the German player causes the national morale of France to collapse or, similarly, causes the British government to decide to withdraw its forces from the theater of operations, play stops immediately and the German player is declared the winner of that game.
4.7 Turn 15 German Win
If the German player survives the MGVC and then goes on to prevent the Allied player from achieving a victory or draw at the end of Turn 15, that game ends in a German victory.
4.8 French Collapse
During the Victory Check Phase of Turns 1 through 8 (see 5.2), the players must check for French collapse. The German player rolls one die. Consult the French Collapse Table on the map. Modify the die roll for all applicable die roll modifiers (DRM) listed beneath the table (and see 4.9). If the modified die roll result is nine or higher, play stops at that time and the German player has won the game.
4.9 Bombardment of Paris
Concerning the first DRM beneath the French Collapse Table, Paris is within bombardment range whenever one or more supplied German units is within six hexes of one or more Paris hexes (2400, 2401 and/or 2500). Count from the German unit to Paris; don't count the location hex of the unit; do count the Paris hex.
4.10 British Withdrawal
During the Victory Check Phase of Turns 1 through 8 (see 5.2), the players must check for the withdrawal of the British army from the continent. The German player rolls one die. Consult the British Withdrawal Table on the map. Modify the die roll for all applicable die roll modifiers (DRM) listed beneath the table (and see 4.11). If the modified die roll result is nine or higher, play stops at that time and the German player has won the game.
4.11 British Line of Communications
The last DRM listed beneath the British Withdrawal Table concerns the line of communications (LOC) connecting the British and French sectors of the Allied front. The LOC is intact if there is a line of contiguous Allied-controlled hexes entirely free of German units and running from hex 3400 (Abbeville) to one or more of the Channel Ports: Boulogne (hex 4000), Calais (4101), and/or Dunkirk (4203). The LOC may not cross the starting front line. The port reached by the LOC need not be the same one from turn to turn. Once a given Channel Port is controlled by the German player, it may no longer fulfill its LOC role if retaken by the Allies.
4.12 Germany Army Morale
Once the German offensives had failed, the faith of the German soldier in ultimate victory was shaken. Much of this is reflected in the reduction of combat factors through replacement (9.0). In addition, on all turns after the MGVC the Allied player checks German morale by rolling one die (see 5.2). The result is the number of "Black Days" the German Army suffers that turn (see 13.13).
5.0 Turn Sequence
5.1 Phases
Every turn of HW is divided into phases. The Operations Phase (III) consists of 10 pairs of actions, one German and one Allied. Once a player has finished an action or an entire phase within a turn has been completed, neither player may go back to perform some forgotten action or redo a poorly executed one unless his opponent graciously permits it.
5.2 Turn Sequence Outline
I. Reinforcement Phase. Each player checks this turn's box on his Turn Record Track and moves all units (reinforcements and/or replacements) in that box, plus any Allied tank brigades and/or German Attack Supply markers, to his Strategic Reserve Holding Box.
II. German Army Morale Check Phase (Turns 10 through 15 only). The Allied player rolls one die to determine how many German-occupied hexes are affected by morale failure (see 4.12 & 13.13).
III. Operations Phase. The German player conducts one action (see 5.3) then moves his action marker down one box on his action Track. The Allied player conducts one action (see 5.3) then moves his action marker down one box on his action Track. If there are actions yet to be conducted, repeat step III, otherwise proceed to step IV.
IV. US Recovery Phase. All on-map US units showing their reverse sides are flipped to show their front sides.
V. Victory Check Phase. At the end of Turns One through Eight, check for French collapse (4.8) and British withdrawal (4.10). On Turn 15 check for victory.
5.3 Actions
During each of his actions, a player may do any one of the following.
-
Make a strategic move (see 10.0).
-
Move the force in one hex (see 11.0).
-
Entrench the force in one hex (see 12.0)
-
Attack from one hex (see13.0).
6.0 Stacking & Fog of War
6.1 Stacking Defined
Stacking is the word used to describe the piling of more than one friendly division in the same hex at the same time. Stacking limits don't pertain to units on the Turn Tracks or Strategic Reserve Holding Boxes, or to Anglo-French tank brigades (see 13.12). Attack supply, entrenchment, and control markers do not count toward stacking limits.
6.2 Stacking Limits
Up to ten (10) divisions of one side may be in any one hex at any one time. Stacking rules are in effect at all times, but there's no limit on the number of units that may enter and pass through a given hex over the course of a phase or turn as long as the stacking limit is met at each instant.
6.3 Overstacking
If any hexes are found to be over-stacked or improperly stacked at the end of an operation, the violating player must select the minimum number of units necessary from that hex in order to bring it back into compliance with the stacking rules. Those units are eliminated and are put into the replacement system.
6.4 Allied International Stacking
Divisions of two or more Allied nationalities may stack and operate together freely at all times. That is, any combination of 10 or fewer Allied divisions may stack in, move into, or attack from a single hex. However, in hexes east/north of the starting front line, Allied units stacked internationally may not attack together; only units of one nationality may attack from a single hex (but see 6.5).
6.5 Australian-American Corps
The Allied player may, at his convenience on an action-by-action basis, declare that any one hex east/north of the original front line contains the "Australian-American Corps." That hex may contain any mix of US and AN units (up to a combined total of 10), and those units may attack together as if they were one single nationality. Not all AN units need take part in the corps, and when not doing so any AN unit(s) may attack along with regular British (BR) units as if it/they were BR.
6.6 Fog of War
Neither player may look beneath the top unit in any opposing stack unless and until he's declared an attack against it. Both players may at a distance look at the Turn Tracks and Strategic Reserve Holding Boxes of the other player; however, they're not allowed to pick through them to examine stacks and piles within them.
7.0 Supply
7.1 In General
Units require supply to operate with full efficiency. A ground unit is always in one of two general supply states: "supplied" or "unsupplied" (that last is also referred to as being "out of supply" or "OOS"). A unit's supply state is determined prior to initiating an action or when being attacked (7.2) by tracing a supply line (7.5) to a supply source (7.3-7.4). Unsupplied units are heavily penalized for movement (7.6), combat (7.7), and replacement (7.8) but are not eliminated just for being OOS (7.9).
7.2 When to Check Supply
Check the supply status of a unit or stack before initiating an operation of any kind. The status determined at that time lasts through the entire action but not beyond it. Determine a hex's supply status anew each time an operation is to be launched into or out of it. Check supply for a unit or stack if it is attacked during an enemy action. The supply state is determined afresh with each action; a given hex may go in and out of supply any number of times during a given turn.
7.3 Allied Supply Sources
French and US supply comes from the west and south map edge hexes from 3400 (Abbeville) to 2018 (Nancy), inclusive. British, AN, BE, and PO supply comes from any one, two or three of the Channel Ports (see 4.11). Allied units located west/south of the starting front line, and with supply lines that run entirely west/south of that same line, may trace supply to any Allied supply source hexes regardless of nationality. Allied units located east/north of the starting front line, and/or with supply lines that run at least partially east/north of that same line, may trace supply only to nationally appropriate Allied supply source hexes. Map-edge supply sources do not function when enemy-controlled, but regain their function when they again become friendly-controlled. However, a Channel Port, once brought under German occupation, may never again function as a supply source.
7.4 German Supply Sources
German supply sources are all hexes along the north, east and south map edges from 4212 to 2021, inclusive. As with Allied map-edge sources, they do not function while occupied by Allied units but regain their function when German-controlled.
7.5 Supply Lines
A supply line consists of a line of contiguous hexes, of any length, from the tracing unit to an appropriate supply source. The supply lines of the various Allied nationalities may cross each other any number of times. Allied supply lines may cross any kind of terrain to include all-sea hexes. German supply lines may not cross all-sea hexes. Neither player's supply lines may cross enemy-controlled hexes. The supply line for a given unit may cross the starting front line only once.
7.6 OOS Effects on Movement
No unit may strategically move, move, or entrench while it is OOS. A supplied unit may move into a hex where it will be unsupplied, but a unit may not enter the map from a Strategic Reserve Holding Box into an unsupplied hex.
7.7 Combat Effects of Being OOS
A unit may not attack while OOS. Defending OOS units gain no terrain or river hex side dice roll benefits, and they roll only one die for every three units. In such cases, if a group of three OOS defenders contains units with different combat factors, the hit number of that group is that of the lowest combat factor among the units within it. When dividing by three to determine the number of dice to be rolled by an isolated stack of units, round up the result.
7.8 OOS Effects on Replacement
A unit eliminated while OOS isn't put into the replacement system, but is permanently eliminated from the game.
7.9 No Auto-OOS Elimination
Within all the strictures given above, units may remain OOS indefinitely without suffering any kind of auto-elimination due to simply being in that state.
7.10 Off-Map Supply
Units in a Strategic Reserve Holding Box or on a TRT are always in supply.
8.0 German Attack Supply
8.1 Attack Supply Availability
The German player has four Attack Supply (AS) markers. During his initial set up he may place none, any, or all of them on the map as described below, with any remaining markers going into the Turn 2 box of the German Turn Record Track. Once placed, the AS marker remains in place for the entire turn. At the end of the turn of use, it is placed on the German Turn Track two turns later. At the beginning of each game turn, the German player receives any attack supply markers along with his reinforcements and replacements for that turn. Once it becomes available, the marker may be used that turn or held for use in a subsequent turn. For example, an AS marker used on Turn One would go into the Turn Three box. It then could be used on Turn Three or saved for a later turn. All AS markers are removed from the game permanently at the end of Turn Eight (even if on the Turn Record Track).
Player Note: The German player thus has a maximum of 16 increments of attack supply which may be used in any combination on any turn from one through eight, no more than four per turn. Within those strictures, the time and place of actual deployment is entirely up to him.
8.2 AS Placement
Each AS marker may be placed, one per hex, on any supplied, German-controlled hex east/north of the starting front line. An AS marker may be placed in a supplied, German-controlled hex west/south of the starting front line with two conditions.
-
Placement of an AS marker west/south of the starting front line requires the expenditure of a second AS marker; place one marker in the chosen hex, the other back on the Turn Record Track two turns later.
-
The supply line for the hex in question may not be traced through any hex in the Devastated Zone other than a German trench hex.
8.3 Attack Supply Effects
An AS marker in a supplied German-occupied hex has three effects.
-
It acts as a town for purposes of strategic moves (see 10.0).
-
The number of dice rolled by the Allied defending force(s) diminishes (see 13.3).
-
It allows multiple rounds of combat (see 13.11).
8.4 Early Removal of AS Markers
If an AS marker is successfully deployed, but the German then decides he doesn't want to attack from that hex, he doesn't have to do so; however, that marker is forfeit unused and still takes two turns to return to play. If a hex containing an AS marker is rendered OOS or is entered by an Allied unit, the marker is removed from the map immediately and recycled per 8.1.
9.0 Reinforcements & Replacements
9.1 Arrival of Reinforcements & Replacements
Reinforcements are units that don't start the game set up on the map; instead, they enter play for the first time during turns after the game has begun. Replacements are units that were eliminated in combat and are returning to play. In both cases, the units are placed in one of the boxes on the owning player's Turn Record Track. During step I of the sequence for each turn, move Allied and German units from that turn's box on the TRTs into their respective Strategic Reserve Holding Boxes on the map. This is mandatory; the units may not be delayed (and there is no good reason to do so). From there, they may be moved to the map via strategic movement (see section 10.0). Once on the map, arriving units operate like units in play since the start of the game.
9.2 Reinforcement Availability
Reinforcement units are placed on the TRTs during set up (3.2 & 3.3). Each unit becomes available on the turn indicated by the circled number. No reinforcements enter play during Turn 1.
9.3 Replacement Procedure
Most units eliminated in combat return to the game later as replacements. After resolution of a combat, roll one die for each eligible unit eliminated in that combat. Locate the column on the Replacement Table corresponding to that unit and the current turn. Cross index the column with the die roll. Depending on the roll, the unit will be available to return to play the next turn, or 2, 3, or 4 turns later. Place it on the appropriate box of the owning player's TRT. An eligible unit can go through the replacement process any number of times during a game (but see 9.5).
Example. The Allied player replaces a BR division eliminated in combat on Turn 1. He rolls a five and checks under the "BR & FR Turn 1" column on the replacement table. The division becomes available two turns later, so is placed in the Turn 3 box of the Allied TRT.
Historical Note. The separate Turn 1 column for BR and FR units is due to the fact there was something of a panic among Allied forces attacked at the start of the German offensive. When those men regained their composure, they were more easily regrouped than would later be the case as actual casualties mounted. The slower replacement of AN and BE units after Turn 1 is due to the fact there were simply fewer men of those two nationalities available, so the reorganization of their units takes longer.
9.4 Replacement Morale
German units coming back as replacements always do so on their reverse (weaker) sides. Non-US Allied units coming back as replacements prior to the MGVC do so on their reverse (weaker) sides. After the MGVC, all non-US Allied units (on the map or the TRT) flip to their front (stronger) sides for the remainder of the game, even if eliminated and replaced. The morale of US units is never affected by replacement in any way. Non-US Allied units eliminated prior to the MGVC but still on the Allied TRT after the MGVC do flip back to their stronger sides.
9.5 Non-Replaceable Units
Any unit of any nationality that's eliminated while out of supply is permanently removed from play. Don't make a replacement roll for it. The two PO units are never replaced once eliminated.
9.6 US Division Replacement
When eliminated US divisions are brought back into play through the replacement system, they reappear each time at their full two-step strength. Also note that during each turn's US Recovery Phase (Step V), all supplied-but-reduced US units on the map are immediately flipped back to their full two-step strengths. US units found to be OOS and reduced at the start of a US Recovery Phase are left in their one-step state until a US Recovery Phase begins in which they've regained supply. (Also note that being OOS doesn't by itself cause the step reduction of a full-strength US division.)
9.7 Anglo-French Tank Brigade Replacement
Each time a BR or FR tank unit is used to support an attack (see 13.12), it's automatically eliminated. Tank units replace automatically two turns after each of their eliminations; no die roll is made.
10.0 Strategic Movement
10.1 Strategic Reserve Holding Boxes
Each player's Strategic Reserve Holding Box represents units stationed as reserves well behind the front plus units in transit behind the front. Any number of units may be in the box at any given time; there is no stacking limit. A unit may remain in the box indefinitely and is considered to be supplied. Units may be placed in the box during set up, may arrive there as reinforcements or replacements, or may be placed there as a result of strategic movement. Units may leave the box only through strategic movement.
10.2 Strategic Movement Actions
Strategic movement, one of the four choices available for each action, models the ability of both sides to use rail and (on the Allied side) motor transport to shift large concentrations of units relatively rapidly from one area of the front to another. Other than the limited number of actions, there is no limit on the number of strategic move actions a player or a single unit may conduct per turn or during the game as a whole. One strategic movement action consists of a group of units moving from the Strategic Reserve Holding Box onto the map (10.4), or one group of units moving from the map to the Strategic Reserve Holding Box (10.5).
10.3 Ineligible Units
Portuguese units may never go into the Allied Strategic Reserve Holding Box. Belgian units may only appear there when reentering play via the replacement system.
10.4 Strategic Movement to the Map
To make a strategic move out of the Strategic Reserve Holding Box, move up to five divisions from the box to any supplied, friendly-controlled hex or hexes on the owning player's side of the original front line. All five units may be placed on one hex, one unit on each of five hexes, or any combination in between. Each placement hex may have friendly units in it already, but stacking restrictions apply at the moment of placement; a hex may not have more than 10 divisions at any time. Once placed, strategically moved units are available for normal use in other actions that turn.
10.5 Strategic Move from the Map
To make a strategic move into the Strategic Reserve Holding Box, pick up to five divisions from any supplied, friendly-controlled hex or hexes on the owning player's side of the original front line and move them into the Strategic Reserve Holding Box. All five units may come from one hex, one unit from each of five hexes, or any combination in between. The hexes providing the units need not be emptied of units at that time; some friendly units may be left behind. Once in the Strategic Reserve Holding Box, units are available for strategic movement in the following action.
10.6 Strategic Movement to and from Cities
A single strategic movement onto or off the map may be made by 10 divisions at one time if all 10 divisions move from or to any one friendly-controlled city hex, even one on the enemy side of the original front line (remember German AS markers act as towns for this purpose).
11.0 Regular Movement
Old Hands Note. There are no zones of control in this game.
11.1 Regular Movement In General
Regular movement (aka movement), one of the four choices available for each action, is the method by which units on the map move from hex to hex. Other than the limited number of actions, there is no limit on the number of move operations a player or a single unit may conduct per turn or during the game as a whole. All divisions have the same movement ability, no matter their nationality, step strength or morale state. Unlike most wargames, terrain has no effect on movement.
11.2 Movement Procedure
A movement action enables a player to move all or some of his divisions from one supplied hex into one adjacent hex. A move is always exactly one hex to one hex; units from two or more hexes may not merge into one hex, nor may units in one hex split up and move into two or more hexes. Units may not move while OOS (7.0). Tank units never move (see 13.12). Units may not move into an enemy occupied hex (they may enter it after combat; see 13.0), but may enter a hex containing only control, trench, and/or attack supply markers.
11.3 Movement in Friendly Territory
A unit or stack moving into friendly controlled hexes and attempting no attack on an enemy unit at the end of the move, may move two hexes in a single action.
12.0 Trenches & Entrenching
12.1 Printed Trenches
The trenches printed on the map represent the elaborate defensive systems emplaced by both sides over the preceding three years of fighting. Printed trenches can be utilized only by the original owners: Allied trenches by the Allies, German trenches by the Germans. A unit occupying an enemy trench ignores the trench and uses the underlying terrain. For instance, if a German unit occupied hex 3305, an Allied rough-trench hex, it would defend there as if it were only a rough hex. Printed trenches are never destroyed. To continue the above example, if the Allies were to regain control of 3305, Allied units would gain the trench benefit.
12.2 Entrenching Actions
Entrenching is one of the four choices available for each action. Other than the limited number of actions, there is no limit on the number of entrenching actions a player or a single unit may conduct per turn or during the game as a whole. The entrenching action consists of placing one entrenchment marker onto a hex, subject to 12.3 below. The trench marker turns a hex into a trench hex fully equivalent to the ones printed on the map. Trench markers may be reused by both players any number of times and, when removed for any reason, become available for reuse.
12.3 Requirements & Strictures
A hex must be supplied and occupied to receive an entrenchment marker. It may not have an entrenchment marker already. They may not be placed on any city hex or on a friendly printed trench. They may be placed on an enemy printed trench hex.
12.4 Entrenchment Utilization
All friendly units in a hex with an entrenchment marker gain the benefit of that marker, including units moving into the hex after it is built. Units may move out of the trench hex.
12.5 Involuntary Removal
A marker must be removed if at the end of any action its hex is unsupplied; the marker is not replaced if supply is restored in a later action. The marker must be removed if at the end of any action its hex empty of friendly divisions for any reason, movement or combat. Enemy units advancing into an entrenched hex after combat do not "capture" the trench.
Player Note. There's no way to take over an enemy entrenchment, though hexes once entrenched by the enemy might later be entrenched by you and vice versa.
12.6 Voluntary Removal
You may decide to remove any of your entrenchment markers at any time, and such removal doesn't constitute an action.
13.0 Combat
13.1 In General
Combat is one of the four choices available for each action. Other than the limited number of actions, there is no limit on the number of combat actions a player or a single unit may conduct per turn or during the game as a whole. Combat is always voluntary; the mere adjacency of enemy units doesn't force either player to attack. A single combat action involves attacking units in one hex against defending units in one hex.
13.2 Combat Participation
Only supplied attacking units in one hex may participate in the combat; unsupplied units may not attack. The attacker may exclude some units from participation in that combat (to leave units behind in case of an advance), but once excluded they may not participate in subsequent rounds of the same combat, if any. The defender may not exclude any units from the combat.
13.3 Combat Die Rolls
One die generally is rolled for each unit in the attacking force (but see 13.12). The number of dice rolled per defending unit depends on the terrain type and supply status of the defender's hex (see 13.4 through 13.6). Compare each attack die roll with the attack factor of the chosen attacking division, and compare each defense die roll with the defense factor of the chosen defending division. In all cases, if the roll is less than or equal to the combat factor, that division has scored a hit on the opposing force (see 13.7); a die roll greater than the combat factor is a miss and has no effect. Specific target units among the opposing force need not be designated ahead of time. No firing unit's hit number is ever modified, up or down, into some other number; only the number of dice rolled changes. US division step-strength does not affect the number of dice rolled; that always is one die per division when attacking, and the number of dice determined by normal terrain and supply considerations when defending.
13.4 Defender's Terrain
The number of dice rolled for each involved defending unit will vary based on the terrain in the defended hex and/or the presence of a river along the hex side over which the attack is coming. Consult the Terrain Effects Chart on the map to determine how many dice are to be rolled for each defending unit.
13.5 Unsupplied Defenders
An unsupplied defender receives no benefit from any terrain and rolls one die per three units. See the Terrain Effect Chart.
13.6 Defending Against German Attack Supply
If an Allied force is being attacked by a German force using attack supply, the number of dice rolled per defender is reduced by one. If the force is defending clear terrain, it must be divided into groups of two units—the last one unit counts as one group—and one die is rolled for each group. If units with different combat factors are organized into one group, that group fires based on the lowest combat factor within it. If the Allied force also is unsupplied, determine the die rolls per rule 13.5.
13.7 Loss Application
All die rolls of both sides in a combat are treated as simultaneous. Count the total hits scored by each side before applying any. In general, both players are free to apportion their hits among the opposing force as each sees fit. That is, the attacker apportions the hits scored by his own die rolling among the defenders, and the defending player apportions the hits scored by his die rolling among the attackers. The exception is the German player may not give any involved US division a second hit unless all involved US divisions are already reduced.
Combat Example. If the Allied player has just fired, each of those hits will send one opposing German unit – of the Allied player's choice – into the dead pile. If the German player has just fired, each of those hits will send one opposing non-US Allied unit into the dead pile. One hit on a full-strength (two-step) US division will cause that unit to flip over to its one-step side; a second hit will then send it into the dead pile.
Design Note. In practice, depending on how many dice you have on hand and the size of your table space, etc., you should have one player roll and then the other. Don't apportion any hits to either side's units until both players have rolled all their allotted dice.
13.8 Overkill
After losses have been applied, if one player has two or more extra kills, meaning hits taking no effect because there are no surviving enemy units to be killed, his losses are reduced by one half of the overkills (rounded down). The enemy player still chooses which units are killed.
13.9 Retreat From Combat
At the end of the combat, the defender may choose to retreat any surviving units. If he chooses to retreat, all units must retreat; he may not retreat some and leave behind some. Retreating units must be moved by the owning player into an adjacent hex according to the following strictures; a unit unable to retreat must remain in place. The retreat does not count as an action for either player; it is part of the combat action leading to it. The defender may not retreat before the combat has been conducted.
-
The retreat must be into an adjacent hex; no unit or stack may retreat more than one hex.
-
Retreating units may not cross an all-sea hex side, nor may they retreat into any hex containing one or more enemy divisions, nor may they retreat into the hex from which the attack originated.
-
Retreating units may not enter a friendly occupied hex in violation of the stacking rules.
-
Retreating stacks must retreat as a stack, only being split up to retreat into more than one hex if necessary to meet the strictures above. They may not be split up if a vacant hex is available.
-
If a defending unit or stack retreats from an attack and then finds itself in another hex that comes under attack later that same turn, it participates normally in that subsequent combat.
-
Entrenchment and AS markers never retreat. If either or both are left behind, they are removed immediately.
-
An enemy control marker alone in a hex doesn't block retreat into that hex.
-
A retreating unit may not move into an unsupplied hex if an eligible supplied hex is available.
-
Within the strictures above, if more than one hex is available to receive a retreating force, the retreating player has his choice among them; there is no directional priority.
13.10 Attacker Advance After Combat
If the defender's hex is emptied by a combat, either due to elimination or a retreat, all surviving attacking units must move into the hex; this is mandatory, not voluntary. The attacker may not leave behind any units unless those units did not participate in the combat. Units that did not participate may not advance. The advance does not count as an action; it is part of the combat action. Victorious defenders never advance after combat; they remain in their original hex.
13.11 Multiple Battle Rounds
When both players have fired and losses have been apportioned, one round of battle is completed. Most battles will consist only of one round. Three types of battles may have multiple rounds: attacks by German units using an attack supply marker (see 8.0), attacks by Allied units stacked with tanks (see 13.12), or attacks by US divisions. In those cases, another round of battle may take place if there are surviving units in both the defending force and the attacking force. Conduct the following steps for each additional round of battle.
-
The defending player must announce whether he will stay for another round of combat or will make a retreat. If it's to be the latter, he retreats all his involved units (see 13.9) and the surviving attacking units advance into the vacated hex (see 13.10).
-
The attacker announces whether he'll launch another round of attack or will break off. If the latter, that combat is over sand the action ends. [sic]
-
Conduct another round of combat per rules 13.2 through 13.8). Remember the attacker may not use units left out of the first round, and Allied tanks are eliminated at the end of the first round so do not count for combat (but do enable multiple rounds). All other surviving units of both sides fire in every round. When the round ends, return to step 1 above; go through the same procedure as above as many times as necessary until the battle is brought to an end by one of the situations described in this rule.
13.12 Anglo-French Tank Brigades
When initially designating any attacking force, the Allied player may assign one available tank brigade per division of the same nationality (BR or FR, but never AN or any other Allied nationality). That tank-supported division has two dice rolled for it during the first round. The tank brigade then immediately goes into the replacement system and is automatically replaced two game turns later. Any surviving attacking divisions in that force (even those not assisted by tanks) may attack in a second round of combat (but only one additional round). Tanks may not be used in attacks into rough terrain or across river hex sides. Tanks may, however, be used to support attacks coming from rough (and rough-trench) hexes. All seven tank brigades in the counter-mix are available for this kind of use from the start of play on Turn 1. Tank brigades are not in any way counted toward their hex's stacking limit, and they should be kept off the map except when committed as described in this rule.
13.13 Another Black Day
In Phase II of Turns 10 through 15, the Allied player rolls one die to determine the number of morale failures suffered by the German Army (see 4.12 & 5.2). For each morale failure, the Allied player selects one German-controlled hex (occupied by units or not). It may be any hex on the Allied side of the original front line or any non-city hex on the German side. The line must be adjacent to a supplied Allied force. The German player retreats his units from the hex (normal retreat rules apply; see 13.9). One adjacent, supplied, allied force must advance into the hex. These morale failures and their attendant retreats and advances do not count as actions and cause no casualties.
14.0 Minor Allied Armies
14.1 Portuguese
The two Portuguese divisions, once eliminated in combat, may never be brought back into play by any method. Portuguese units may never attack, nor may they ‘march along’ with an attack by the forces of any other Allied nation to be used as cannon fodder. If PO units are in a hex from which other Allied units are attacking, their presence is ignored. PO units may never be in the Allied Strategic Reserve Holding Box for any reason, once eliminated they are permanently out of the game.
14.2 Belgian
Belgian units may never be deliberately put into the Allied Strategic Reserve Holding Box by the Allied player; they may only be there as a result of being replaced. When on the map, Belgian units may only attack into and out of hexes in Belgium or hexes immediately adjacent to Belgian territory. When away from such hexes, Belgian units are considered to be out of supply (7.0).
14.3 Australian-New Zealand
AN units are treated for all purposes except replacement as part of the British army and may stack and attack freely with regular British (BR). They also have a limited ability to stack with US units (see 6.5).