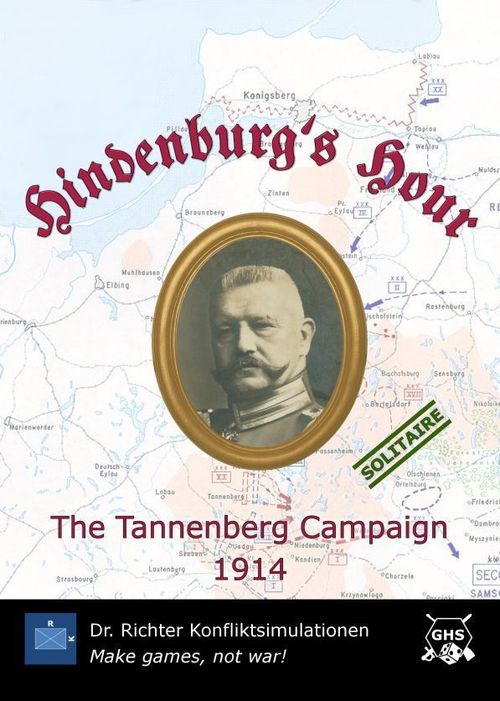
Hindenburg's Hour: The Tannenberg Campaign 1914
Hindenburg's Hour: The Tannenberg Campaign 1914 Rulebook
Table of Contents
Table of Contents
1. Setup
The map shows the province of East Prussia and surrounding areas in 1914. A grid of hexagons ("hexes") has been superimposed on it in order to regulate movement. Moving from one hex to another represents having covered a distance of approximately ten kilometers. Note that north is on top of the map.
Put the four playing pieces depicting corps' of the Russian 1st Army (Cav., XX., III. and IV.) onto their designated hexes. Proceed likewise with the corps of the Russian 2nd (VI., XIII., XV., XXIII. and I.) and the German 8th Army (I., XVII., I. Res. and XX.). All units are undisrupted. Note that there is no difference in the treatment of army, reserve and cavalry corps. The designations are for historical reference only.
Put the turn marker onto the August 17 space of the turn track. All other markers are set aside.
2. Sequence of Play
Hindenburg's Hour is played in a series of up to 15 turns, each representing one day of actual time. A turn consists of six phases which must be completed in the following order:
- 1st Army march and combat
- 2nd Army march and combat
- 8th Army movement and combat
- Supply
- Rally
- Victory check
3. 1st Army March and Combat
March
Roll one die, subtract one for each disrupted and/or unsupplied (see 7.) corps in the army (do not subtract more than one per corps even if disrupted and unsupplied) and compare the result to the march table on the map. If the result is 6, put the forced march marker for the 1st Army onto the space for the current day on the turn track. No army may be forced marched on consecutive turns. If 6 is rolled again, it triggers the advance of one hex only. The forced march marker is removed from the turn track after the 1st Army march phase following a forced march.
If the (modified) die roll yields an advance (3-6), all corps of the 1st Army move one or two hexes westward according to the following principles:
- The army moves along the northernmost hexes of the map until reaching the hex column containing Angerburg.
- Once all corps' have reached the Angerburg column, roll one die before advancing. On a result of 1-3, the 1st Army moves northwestward, otherwise southwestward. In case of a forced march, a second die roll may be necessary after having advanced the first hex.
- A corps must stop when entering a hex adjacent to an enemy unit.
- Hexes containing impassable terrain (Masurian Lakes or all-sea) or a German corps may not be entered. Other than impassable, there are no terrain effects. Terrain features on the map are for illustration only.
- There is no stacking in Hindenburg's Hour. There may never be more than one corps in a hex. If a retreat path is blocked by a friendly corps, the path cannot be used.
- The 1st Army sticks together. If the advance of a corps would create a gap in the Russian line, it may not move. Note this does not mean that all corps' always have to occupy the same column. It may happen that some do move while others are blocked - as long as no gap in the Russian line emerges.
- If there ever is a gap in the Russian line, it must be closed at first opportunity.
Note that the army may not deviate from its designated march route. If units cannot advance along this route (because it would create a gap in the Russian line, for example), they do not advance at all. Hence, the 1st Army never moves otherwise than northwestward or southwestward.
Example: A 6 has been rolled on the march table for the 2nd Army which becomes 5 because one corps, the XV., is disrupted. The army should hence move one hex (northward, see 5.). The XXIII. Corps must advance to close the gap in the Russian line. The XV. Corps may not advance for this would open another gap. The same is true for the I. Corps, but it is blocked by a German unit anyway, as is the VI. Corps. The XIII. Corps advances one hex.
If two or more hexes are eligible destinations, make a random decision where to go by rolling a die.
Combat
If a (modified) movement result has been rolled on the march table (3-6) and at least one Russian corps is adjacent to a German corps after movement, the entire army attacks all adjacent enemy corps.
Design Note: This represents the impact that Russian units in the vicinity of a battle would have even if not directly engaged, for example by reinforcing their fellow combatants, threatening the enemy's flanks etc.
Roll one die. 1-3 means a German, 4-6 a Russian victory. If any side has more undisrupted and supplied corps participating than the other, modify the die roll by adding the number of surplus corps in case of Russian and subtracting it in case of German superiority. Note that all undisrupted and supplied corps of the 1st Army count, but only those undisrupted German corps adjacent to the enemy.
After combat, roll one die for each involved corps adjacent to the enemy. On a result of 1-3, it is disrupted. Flip it to its reverse side. If already disrupted, it may take longer to rally (see 8.).
If the Germans ("you") lost the combat, all their corps' adjacent to the enemy must retreat one hex toward the Königsberg area. If more than one hex is equally distant, you decide. If already there or no way toward Königsberg is open, retreat may go elsewhere, but first priority is to move away from the enemy. Corps' that cannot retreat are removed from play. The victorious Russians may not advance. If they were the losers, they do not have to retreat.
Following the advance of the 2nd Army above, at least one undisrupted and supplied Russian corps is adjacent to a German unit. Therefore, the entire army of five corps will now attack the three adjacent enemy units. The die roll yields a 3 which is modified to 4 since the Russians do have a four to three superiority in undisrupted corps'. Each unit adjacent to the enemy (I., XIII. and VI. Russian, I., XVII. and XX. German Corps) rolls for disruption. Afterward, the Germans as the losers must retreat one hex toward Königsberg. The Russians may not advance.
4. 2nd Army March and Combat
This phase is conducted similar to 1st Army march and combat with two alterations:
- The 2nd Army is considered to be out of play until the August 19 turn. It may neither march nor attack on the first two turns. To forestall a German invasion of Russian Poland, the tsarist government had deliberately neglected the infrastructure south of East Prussia. This delayed the mobilization of the 2nd Army.
- The 2nd Army's march direction is always northward.
5. 8th Army Movement and Combat
Movement
Foot
At the beginning of each 8th Army phase, roll one die for the I. Corps. On a result of 6, the unit must, if possible, move one hex. Roll again to indicate the direction: 1 would be north, 2 northeast, 3 southeast, 4 south, 5 southwest, 6 northwest. There is no further advance. If being adjacent to the enemy after having moved, the I. Corps alone must attack all neighboring Russian units. It may not participate in other movement (including by rail) or attacks this turn. Only if no 6 was rolled in the first place, the I. Corps may be used just like any other German unit.
Hermann von François, the commander of the I. Corps, was a headstrong general who repeatedly acted quite differently from what 8th Army command had ordered him to do.
You may march all, some or none of the 8th Army's corps' one hex. Undisrupted units may forced march two hexes. Mark them with German forced march markers for one turn during which they may not forced march again.
A corps must stop after entering a hex adjacent to an enemy unit. Disrupted German (and only German) units may not move adjacent to the enemy in the first place.
The Russian starting hexes may neither be entered nor attacked, nor do zones of control (see 7.) have any impact there.
German troops operating beyond the Masurian Lakes (see the corresponding line on the map) may not move east of the easternmost 1st Army corps or south of the southernmost 2nd Army corps. If placed in such a position by Russian movement, the Germans do not cut supply (see 6.) and must move west and north, respectively, at first opportunity. The I. Corps is exempted from this rule when activated by François.
Even for daring commanders like Hindenburg and Ludendorff, battles of encirclement in areas so remote were hardly conceivable at that time.
Rail
Each turn you may move one corps by rail inside Germany over an unlimited number of hexes, but not beyond the Masurian Lakes. At no time, including start and finish, may this unit be adjacent to a Russian corps, or enter a hex which has lastly been occupied by the enemy.
Combat
Combat is voluntary for you with the lone possible exception of von François' actions. You may attack all, some or only one enemy unit, with one or more of your corps' which must all be adjacent to the enemy to take part in the assault. You may await the outcome of one battle before deciding whether to risk another. Still, each German corps may attack, each Russian corps be attacked only once per turn.
8th Army combat is conducted similar to Russian combat, including disruption rolls. If the Russians lose the combat, all their corps' adjacent to the enemy - even those not attacked - must retreat one hex. 1st Army units retreat northeast or southeast, 2nd Army units southeast, south or southwest. Corps' that cannot retreat in these directions are removed from play. First retreat priority is not to let a gap emerge in the Russian line, second priority is for the army to cover as broad a front as possible. If two or more hexes are eligible destinations, make a random decision where to move by rolling a die.
The victorious Germans may not advance. If they were the losers, they do not have to retreat.
6. Supply
The German corps' (and only they), whether disrupted or undisrupted, exert a zone of control (ZOC) into their six neighboring hexes. The presence of an enemy unit negates a ZOC.
In the supply phase, Russian units surrounded by the enemy may surrender. Surrounded means that they are completely encircled by German corps', ZOC and/or impassable hexes. Note that this is the only function that ZOC have in Hindenburg's Hour.
Roll one die for each surrounded Russian corps. On a result of 1-3, it is removed from play. Otherwise, denote it with a "no supply" marker. If still encircled in the next supply phase, the corps surrenders automatically.
7. Rally
Roll one die for each corps that has been disrupted this turn. A German unit is turned face-up again on a result of 3-6, a Russian unit at 5-6. If an attempt fails, rotate the corps clockwise by 90 degrees. German units so designated will rally automatically in the rally phase of the next turn, Russian units will be turned face-up at 3-6. If the Russian attempt fails again, rotate the corps another 90 degrees. It will rally automatically in the corresponding phase of the next turn.
Operating on their own soil, the Germans had much better preconditions to refit their units.
An already disrupted corps which obtains another disruption result must start the rally procedure again, that is it must be turned northward, rallying at 3-6 as a German and at 5-6 as a Russian unit.
Delayed Rail Movement
(Unnumbered paragraph in the printed booklet, placed after section 7.)
Roll one die for each corps using rail movement. On a result of 1-3, place it on the turn track one day ahead. It will arrive at the end of the 8th Army's next movement phase.
Russian Exhaustion
(Unnumbered paragraph in the printed booklet, placed after section 7.)
A Russian army may not move (and attack) on a turn following a forced march.
8. Victory Check
If, during the victory check phase of any turn, one or more Russian corps' occupy one or more hexes of the Königsberg area, and/or units of the two Russian armies are adjacent to each other, the game ends immediately in a Russian victory.
Otherwise, after the victory check phase of the last turn, count the number of corps' that each side has lost throughout the game. Subtract the German from the Russian number. If the result is five or higher, you have won. Four would be a draw, three or less a defeat.
9. Optional Rules
Variable Army Activation
Roll one die at the beginning of each turn after August 18. Depending on the result, the army activation order is as follows:
- 1: 1st Army, 2nd Army, 8th Army
- 2: 1st Army, 8th Army, 2nd Army
- 3: 2nd Army, 1st Army, 8th Army
- 4: 2nd Army, 8th Army, 1st Army
- 5: 8th Army, 1st Army, 2nd Army
- 6: 8th Army, 2nd Army, 1st Army
10. Literature
- BUTTAR, PRIT: Collision of Empires. The War on the Eastern Front in 1914. Osprey Publishing, Oxford/New York, 2016.
- STONE, NORMAN: The Eastern Front 1914-1917. Penguin Books, London, 1998.
- TUCHMAN, BARBARA: The Guns of August. Ballantine Books, New York, 2004.
Notes on the Printed Text
- Several printed cross-references do not match the section numbers printed in this booklet (for example "unsupplied (see 7.)" in section 3, "rally (see 8.)" in section 3 combat, "zones of control (see 7.)" and "supply (see 6.)" in section 5, and "(northward, see 5.)" in the 2nd Army example). They are transcribed as printed.