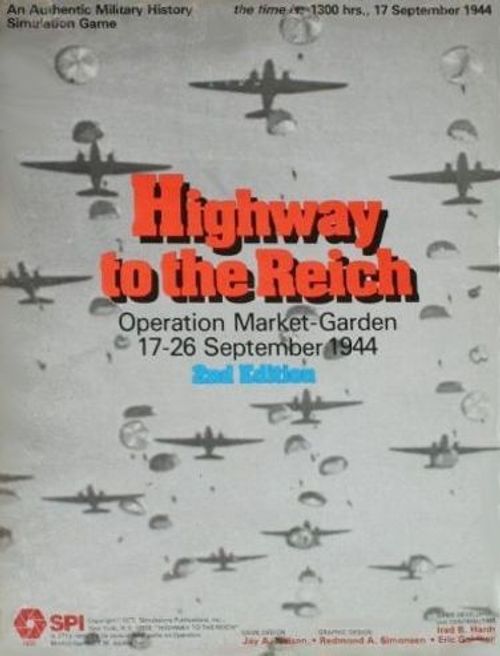
Highway to the Reich: Operation Market-Garden 17-26 September 1944
Highway to the Reich: Operation Market-Garden 17-26 September 1944 Rulebook
Table of Contents
Table of Contents
- How the Game Is Organized
- 1.0 Introduction
- 2.0 General Course of Play
- 3.0 Game Equipment
- 4.0 Sequence of Play
- 5.0 Fire Combat
- 6.0 Observation
- 7.0 Zones of Control
- 8.0 Movement
- 9.0 Stacking
- 10.0 Terrain
- 11.0 Command/Supply
- 12.0 Communication
- 13.0 Organization Modes
- 14.0 Air Landing Operations
- 15.0 Airstrikes
- 16.0 Cross-River/Canal Movement
- 17.0 Subordination
- 18.0 Special Units Effects
- 19.0 Leaders
- 20.0 German Off-Map Movement
- 21.0 The Formation Display
- 22.0 Reinforcements
- 23.0 Optional Rules
- 24.0 Introductory Scenario: Hell's Highway, 22 Sept.
- 25.0 Scenarios
- 26.0 Drop of the 101st Airborne Division, 17-18 Sept., 1944
- 27.0 Drop of the 82nd Airborne Division, 17-18 Sept., 1944
- 28.0 Drop of the British 1st Airborne Division, 17-18 Sept., 1944
- 29.0 Destruction of the British 1st, 19-21 Sept., 1944
- 30.0 The Breakout of the XXX Corps
- 31.0 The Campaign Game
- 32.0 Game Notes
- 33.0 Explanation of Counter Designations
- Course of the Battle
- First Edition Component Errata
- Highway to the Reich Errata (As of December 1978)
- Charts and Tables
- 5.61 Fire Value Matrix: Direct Fire
- 5.62 Fire Value Matrix: Indirect Fire
- 5.63 Fire Results Table
- 8.72 Close Action Value Table
- 8.73 Close Action Results Table
- 10.15 Terrain Effects Chart for Movement, Stacking and Observation
- 11.51 Disruption Recovery Table
- 11.54 Adjustment to Disruption Recovery Die Roll
- 14.11 Weather Conditions Table
- 14.92 Air Landing Table
- Allied Turn Record / Reinforcement Track
- German Turn Record / Reinforcement Track
- German Off-Map Movement Display (see Rules Section 20.0)
- German Formation Display
- Allied Formation Display
How the Game Is Organized
The rules to Highway to the Reich are divided into Major Sections. Each Major Section is numbered with a whole number (e.g., 1.0, 2.0, 3.0, and so forth). Many Major Sections lead off with a General Rule, which is a simple statement of what that section covers. The detail of the specific rules in that Section is given in the Cases. These Cases are numbered decimally as subdivisions of the number of the Major Section (for example, Cases 5.1, 5.2, and 5.3 are all parts of Major Section 5.0). In some instances, the Cases themselves are subdivided into secondary Cases (for example, 5.11, 5.12 and 5.13 are all subdivisions of Case 5.1).
Preliminary to and during the reading of the rules, Players should examine all the main components of the simulation. Examine the playing pieces, the map sheets, and the charts, tables, and tracks. Players should then skim the rules by reading the General Rules and Commentary sections, paying particular attention to the Sequence of Play as it represents the concrete structure of the game. Then read through the rules and examine and experiment with each activity described therein using the actual components.
1.0 Introduction
Highway to the Reich is a tactical, company/troop level simulation of the Allied/German combat action which took place during the critical ten day period of Operation Market-Garden: September 17-26, 1944. Operation Market-Garden was the code name for an Allied attempt to outflank the German Westwall fortifications and gain a crossing of the Rhine River. The operation involved the capture of a seventy-kilometer stretch of highway. Over this Airborne carpet the troops of the British XXX Corps would pass. The primary concern of the XXX Corps plan was the capture of the crossings of all major water obstacles on the route. Through the course of the game, Players will be presented with problems similar to those faced by the leaders in all levels of command in the opposing forces. Each of these problems will require a decision on the part of the Player; this decision-making process is the core of the simulation, and the Player's level of skill in the process will determine the outcome of the game.
2.0 General Course of Play
Highway to the Reich (hereafter HWTR) is designed for play by two or more Players. Solo play is feasible, and in the campaign game play by more than two individuals (team-play) is recommended. The play of the game is constructed around a series of turns called Game-Turns, each of which represents two hours of real time. During a Game-Turn both Players' pieces (called units, and representing the actual combat units in the historical situation depicted) move and engage in combat in an attempt to achieve certain objectives. This activity takes place in a manner prescribed by the Sequence of Play which places specific strictures on when and how Players undertake actions. The two major game activities are Movement and Combat.
The game may be played in Scenarios in which a specific section of the larger action of the operation is recreated, or Players may opt to play the entire operation. In any case, the description of each Scenario or the Campaign lists the opposing forces and the conditions under which they engage. Victory conditions by which Players' performances may be evaluated are included in the Scenario and Campaign listings.
3.0 Game Equipment
3.1 The Game Map
The Game Map is composed of four separate 22" × 34" mapsheets, which, when placed together, form the operational area of Market-Garden from the Belgium/Netherlands border to the Neder Rijn. A numbered hexagonal grid is superimposed on the Game Map in which each hex is analyzed as to its Terrain Type, in order to regulate the movement and location, and to calculate the firing ranges and sighting abilities of the playing pieces. Each of the several different types of terrain on the map is displayed on the Terrain Key section of Map B. The various effects of terrain are stated in Section 10.0 and integrated into the various charts and tables.
3.2 Game Charts and Tables
The game makes use of various tables, charts, and tracks as part of its play system and to organize data into an easily retrievable form. The use of these graphic aids is explained in the appropriate rules sections. Players should examine the charts and tables when they are referred to in the rules. Note the various locations of these charts and tables on the separate chart sheets.
3.3 The Playing Pieces
The variously colored set of die-cut counters supplied are the playing pieces of the game. They are divided into two basic types with each type having a number of sub-types. The first basic type consists of the Unit. These counters represent the actual Infantry Companies, Tank Troops, and Artillery Batteries which were available to the commanders in the historical situation. These Organizational counters are printed in a variety of colors to show their respective nationalities. Both the Allied and German forces are made up of a variety of "nationalities" and/or branches. Additionally, there are three sheets of markers (see Case 3.42). These are used to reflect changes in the strength, status, or mode of the units. Others mark certain hexes on the map as entrenched, drop zones, or supplyheads.
[3.31] All of the "combat" units (those depicting a military formation as opposed to an individual leader) are printed on both sides. This permits the Player to deploy the unit in either one of two different modes by simply flipping the unit over (see 13.0 for more detail). Note that regardless of which side of the unit is face up, the numerical value representing its Strength remains constant. When and if a unit loses strength, the Player will place an appropriate Strength marker under the unit to reflect the loss. Depleted and Disrupted markers are placed on a unit when it is in these states. Travel markers are placed on armored and infantry units when they are in the Travel Mode. This is not necessary with Headquarters, Artillery, AT and Flak units as one of their printed sides shows them in Travel Mode. Note finally that the Effectiveness Rating of a unit changes (or disappears) when a unit is flipped over.
[3.32] The front side of a unit depicts its "strongest" aspect (usually concentrated). The back side depicts a lesser aspect (usually dispersed or in travel).
3.4 Sample Units
Sample unit counters illustrate the printed values found on the counters: Unit Symbol, Subordination Designation, Assigned Strength, Effectiveness Rating, Travel Mode Capability, and Morale Rating for Infantry units (Concentrated and Dispersed Modes), and Assigned Strength, Range, and Effectiveness Rating for Artillery units (Dispersed and Travel Modes). Headquarters units show Assigned Strength and a parenthesized Effectiveness Rating on their Concentrated face, and Assigned Strength with a Travel Mode indicator on their Travel face.
[3.41] Unit Type Symbology. Every unit is identified by the symbols printed on the counter face. The unit type determines whether the unit is a Direct Fire unit or an Indirect Fire unit and whether it is a protected (armored) target or a non-armored target. Unit type also affects the costs for movement.
Direct Fire units (non-armor): Infantry, Engineers, Reconnaissance, Machine Gun, Headquarters, Anti-tank Gun, Flak (Anti-aircraft).
Direct Fire units (armored): Armor (tanks), Armored (tank) recon, Armored (car) recon, Tank Destroyer, Armored Infantry.
Indirect Fire units (non-armor): Artillery, Rocket Artillery, Heavy Weapons.
Indirect Fire units (armored): Armored Artillery.
Airborne units: some Allied units bear either a parachute symbol or glider symbol in addition to their basic symbol. These are airborne units — Parachute Infantry, Glider Infantry, Parachute Artillery, Parachute Engineers, Parachute Anti-Tank, Glider Headquarters, Parachute Heavy Weapons, Glider Heavy Weapons, Glider Reconnaissance.
Notes on Unit Types: Armored Infantry units are considered Infantry units except that they defend against Fire and move as Armored units do.
Bridge Engineers are differentiated from Combat Engineers by a capital "B" or "T" in place of the effectiveness rating. As they have no effectiveness rating, Bridge Engineers may not Fire under any circumstances.
Combat Engineers can be in concentrated, dispersed, or travel mode at the Owning Player's option, but they can perform their special functions only in concentrated mode. The Combat Engineers can, however, still move and Fire while dispersed as do normal Infantry units, losing all Morale benefits when they do so.
Headquarters possess the same symbol as an Infantry unit. However, they possess a parenthesized effectiveness rating on their concentrated face. Note that all Headquarters possess the Infantry symbol regardless of the formation to which they belong, i.e., the Headquarters of the 10th SS Panzer Division possesses an Infantry symbol.
Airborne units. The parachute symbol or the glider symbol is relevant only when the unit is landed on the map. For normal movement, combat, etc., there is no functional difference between an ordinary infantry unit, for instance, and a parachute or glider unit.
Airborne Artillery and Anti-Tank units all possess the parachute symbol. In fact in almost every case these were actually glider delivered units. We chose to give them the parachute symbol because the glider symbol would look awkward.
Armored Reconnaissance units do possess a Travel Mode capability, though their counters are not marked with a "t".
Tank Destroyer units perform exactly as do Anti-Tank units, except that they move and defend as do Armored units.
[3.42] Markers. The marker sheets include, front/back: a typical Strength Marker (numeral, e.g. "2" reduced to "1"); Disrupted / Depleted status markers; Bridge Under Repair / Bridge Destroyed markers; Travel Mode / Entrenched markers; a Drop Zone (or "Pathfinder") marker; and an Airborne Division Supply Source marker.
[3.43] Nationalities and Major Subgroups. The counters (basically) are divided into two major national groupings: the Germans and the Allies. Each group is further subdivided. The Germans are divided into branches of their armed forces and the Allies are divided into nationalities (and in the case of the British subdivided into airborne and non-airborne forces). All these groupings are distinguished by color:
| Color | Counter Group |
|---|---|
| Black | German SS |
| Gray | German Wehrmacht (army) |
| Blue-Gray | German Luftwaffe Ground Units |
| Dark Blue | German Kriegsmarine (Navy Troops) |
| Khaki Brown | British Non-Airborne |
| Red | British Airborne |
| Dark Red | Polish Airborne |
| Green | U.S. Airborne |
3.5 Glossary
Strength: A unit's strength is printed directly on the counter. The strength number indicates the approximate manpower of the unit (for infantry type units) or number of vehicles or guns (for armor and artillery type units), with one strength point equivalent to 25 men or one vehicle/gun. The printed strength is the unit's Initial or Assigned Strength. Whenever the unit loses strength (because of Combat, etc.) the Player should place a Strength marker under the unit to reflect reduced strength. If a unit with an initial strength of 5 lost one Strength point, the Player would place a "4" Strength marker to reflect the loss, giving the unit a Current Strength of 4.
Effectiveness Rating: The relative killing ability of a unit's weaponry rated on a scale of 1 to 9. The Effectiveness Rating changes with a unit's organization mode. A unit's firepower depends on its Strength and its Effectiveness. Strength will fall with losses; Effectiveness will change with mode.
Movement Allowance: Every unit has a Movement Allowance of four Movement Points. (It is not printed on the counter.) Whenever a unit moves from hex to hex it expends one or more (or a fraction of) Movement Points. It may spend no more than four Movement Points per Movement Phase.
Morale: The Initial Morale Rating of a unit is the number of white triangles printed on its face. (Three triangles equals a morale rating of 3.) The current Morale Rating is the Initial Morale less the number of Strength Points the unit has lost.
Example: A unit with a printed Morale of 2 which had lost 4 Strength Points would have a current morale of minus two (−2).
Range: The distance in hexes that a unit may fire. Units with no printed range have a one hex range.
3.6 Game Scale
Each hexagon on the map represents approximately 600 meters of terrain from side to side. Each infantry unit represents a company. Each Armor tillery unit represents a battery. Each day Game-Turn represents two hours of real time. Each night Game-Turn represents four hours of real time.
3.7 Inventory of Game Parts
A complete game of Highway to the Reich includes: One Rules Booklet; Three different unit counter sheets; Three (identical) marker sheets; Four 22" × 34" Map Sections (A, B, C, D); Two (identical) sheets of tables; One German Off-map Movement Display; One German Formation Display; One Allied Formation Display; One German Turn-Record Track; One Allied Turn-Record Track; Two dice; Two standard game boxes.
3.8 Preparation for Play
The four map sections have been designed so that they overlap each other when placed together. Players should note that certain scenarios may be played on one map section, thus requiring less space for play. The four map sections are identified by letter code: A, B, C, or D. Section A is the northernmost (top) Map Section. Section B the next lowest, followed by C and then D. When setting up all four map sections overlap the southernmost (0100) hexrow of Map Section A on the northernmost (3900) hexrow of Map Section B (refer to the compass rose on the maps for orientation). Similarly, the southernmost hexrow of Map Section C is overlapped on the northernmost hexrow of Map Section D. The Map Sections are then oriented as shown in the diagram — from north to south: Section A, Section B, Section C, Section D — and the southernmost hexrow of Map Section B is overlapped on the northernmost hexrow of Map Section C. Note that hex 0101 on Map Section B should overlap hex 6101 on Map Section C, and hex 0134 on Map Section B should overlap hex 6134 on Map Section C. Check that the various roads and terrain features match in the overlap hexes. Hex 0101 is always visible on all maps in the southwest corner.
Note that all hexes are identified by Map Section letter and hex number; thus the city of Arnhem is located around hex A2332, and the town of Zon is located in hex C0715.
The many units should be sorted into their divisional organization as fully as permitted by the component trays. The various markers should be sorted by type. These activities will, to say the least, greatly facilitate play.
4.0 Sequence of Play
General Rule: The heart of the simulation is the Sequence of Play; it structures the play of the game by rigidly controlling when and in what order each activity in the Game-Turn takes place. This game employs a reciprocating sequence in which each of the two Players is alternately considered the Active or Phasing Player; there are fifteen strictly sequenced Phases. During each Phase, one Player is considered the Phasing Player while his opponent, who is not active, is considered the non-Phasing Player. The Player controlling the force named in the title of a Phase is considered the Phasing Player during that Phase. Each Game-Turn, and all activity within the Game-Turn, must procede strictly according to the Sequence of Play. Each Scenario dictates a starting point in the sequence outline.
Game-Turn Sequence Outline
- Allied Command Phase: The Allied Player judges the supply status of all Headquarters units under his command. The Allied Player may then try to remove Disruption. At the end of the Phase, all Airstrike markers are placed.
- German Organization Phase: The German Player may alter the Organization Modes of his units. Such activity may trigger Allied Opportunity Fire.
- Allied Conditional Fire Phase: The Allied Player may execute Fire Attacks with all eligible Allied Units. Note that the Allied Units which make Fire attacks may not move in the following Allied Conditional Movement Phase.
- Allied Conditional Movement Phase: The Allied Player may move all, some, or none of the Allied units that did not Fire in the previous Conditional Fire Phase, within the limits and restrictions of the Movement rules. The Allied Player may bring scheduled reinforcements onto the map during this Phase as explained by the Reinforcement rules. The non-Phasing (German) Player's units may not move during this Phase; however they may have an opportunity to fire upon moving Allied units. At the end of the Phase, all Airstrikes are resolved.
- German Conditional Fire Phase: Same as the above Allied Conditional Fire Phase.
- German Conditional Movement Phase: Same as the above Allied Conditional Movement Phase.
- Allied Free Fire Phase: The Allied Player may execute Fire Attacks with all eligible Allied units.
Note: Phases 8-14 basically repeat Phases 1-7; however, the Players' roles are now reversed; the German Player now executes the activities undertaken by the Allied Player during the earlier Phases and vice-versa.
- German Command Phase
- Allied Organization Phase
- German Conditional Fire Phase
- German Conditional Movement Phase
- Allied Conditional Fire Phase
- Allied Conditional Movement Phase
- German Fire Phase
- Game-Turn Record Phase: The Game-Turn Marker should be advanced one space on the Game-Turn Record Track to mark the passage of one Game-Turn.
5.0 Fire Combat
Commentary
Each unit in the game is classed either as a Direct Fire unit or an Indirect Fire unit. The most common Direct Fire units are the infantry companies and tank platoons. The most common Indirect Fire units are the artillery batteries and heavy weapons companies. The tank platoons and infantry companies are predominantly armed with weapons which must be fired on targets directly observed by the gunner to take effect; i.e., the tank gunner or rifleman or machine gunner must see his target to hit it. Hence the term Direct Fire unit. Artillery and mortars (the predominant weapon in the Heavy Weapons company) are usually fired at targets which are hidden or masked from the view of the firing position, with detached observers who can see the target using a radio or telephone to call the fire on target. Hence the term Indirect Fire.
General Rule: During a Player's Conditional Fire Phase or his Free Fire Phase, he may use his Direct Fire units to make Direct Fire Attacks upon specified individual Enemy units. He may also use his Indirect Fire units to make Indirect Fire attacks upon hexes containing Enemy units, attacking one unit of his choice within the chosen hex. In addition, during the Enemy Conditional Movement Phase or the Enemy Organizational Phase, the Enemy Player may act in such a way as to trigger Allied Opportunity Fire from Friendly units.
Direct Fire Attack Procedure:
- Refer to table 5.61 (separate sheet).
- Crossreference the current strength of the firing unit versus its effectiveness rating, with reference to the type of unit being shot at (armor or non-armor) and the target's effectiveness rating (if armored). This locates a fire value (number).
- Refer to table 5.63 (separate sheet)
- Plug in the Fire Value (obtained in step 2 above) on one of the top lines, making reference to the target unit mode (dispersed or undispersed) and the terrain in the target hex.
- Roll two dice. Crossreference the number rolled with the Fire Value. This locates a result which is immediately applied to the target unit.
Indirect Fire Procedure:
- Refer to table 5.62 (separate sheet)
- Crossreference the current strength of the firing unit versus its effectiveness rating, with reference to whether the target is armored or non-armored. This locates a Fire Value.
- Refer to table 5.63.
- Plug in the Fire Value into one of the top lines of the table making reference to the target unit's mode and the terrain in the target hex.
- Roll two dice. Crossreference the number rolled with the Fire Value. This locates a result which is immediately applied to the target unit.
Note: Indirect and Direct Fire makes use of different tables to derive the Fire Value of the attack. Once the Fire Value is derived, both kinds of fire use the same table (5.63) to determine the result.
Example of Combat: A British paratroop infantry company with a strength of five (5) and effectiveness of three (3) fires on a German Infantry company which is dispersed in mixed terrain. Table 5.61 gives a Fire Value of four (4). This value plugs into table 5.63 on the line labeled "Dispersed in Other Terrain." This means the Attacker must roll a 2 or 3 to inflict a loss of a Strength Point. Note that the strength of the target unit is immaterial when executing Fire. Only its mode, the terrain it occupies and (for armor only) its Effectiveness Rating matter.
Cases
[5.1] Multiple-Unit Fire
When it is his Conditional Fire or Free Fire Phase a Player may use all, some or none of his units to fire on all, some or none of the Enemy units subject to the restrictions of the rules. The order in which his units fire is at the complete discretion of the Owning Player.
[5.11] The fire of each unit is a separate event. It is executed and any results applied before any other unit's fire is executed.
[5.12] Any number of units may fire at the same target unit in the same Fire Phase. The Firing Player is not required to define all the attacks before resolving the first of them. In this sense all fire is sequential in its execution and effect (Exception: see Case 17.2).
[5.13] Units stacked together are not combined for purposes of executing fire. They may fire at the same target or not, at the Player's option, but the resolution of each fire is a separate event.
[5.14] A unit (Direct or Indirect Firing) fires at a specific target unit. Such Fire affects only the target unit (Exception: see Case 5.35). The presence of "other" units, Friendly or Enemy, does not block fire (Exception: see Case 5.23).
[5.2] Restrictions on Fire Combat
[5.21] A unit is never required to fire. A permissable fire attack is always executed at the option of the Player who controls the eligible unit.
[5.22] Units in the following modes may never fire: Travel Mode, Disrupted Mode, Depleted Mode.
[5.23] Only the two topmost units in a stack may execute Direct Fire (including Opportunity Fire) and this fire may only be directed at either of the two topmost units in a stack. Indirect Fire (Artillery and Heavy Weapons) units may fire from any position in a stack against any unit in a stack (top or bottom).
[5.24] A unit may fire once during each of its own Fire Phases (Exception: see Case 5.26). However a unit may fire Opportunity Fire whenever it is triggered as often as it is triggered (see Case 8.4).
[5.25] No unit may fire in excess of its range (Exception: see Case 5.53). Direct Fire may not be directed against targets the firing unit cannot observe. Indirect Fire units may fire on self-unobserved units so long as they have Communications with a Friendly observing unit.
[5.26] A unit's Current Strength is always used for Fire Combat purposes. However, during any Friendly Fire Phase (only) a unit may choose to split its Combat Strength (only) for Fire Purposes, directing it at any number of target units or hexes, as long as the total Combat Strength of the unit is not exceeded, and all the targets fired upon fulfill all requirements for fire (i.e., all rules concerning fire are fulfilled). Note that the current Combat Strength of the unit is divided, not the final Fire Value, nor the Unit's Effectiveness Rating. Although a unit's fire may be split, each attack made by that unit must have as the object of its attack a different target.
[5.27] Units with parenthesized Effectiveness Ratings may never fire in the Phasing Player's Combat Phases; they are eligible only for Opportunity Fire.
[5.28] A Direct Fire unit may never execute Fire through a Dike hexside.
5.3 Effects of Fire
Fire has two effects. First and foremost, it inflicts casualties, killing and destroying men and equipment. The second effect is a by-product of the first effect. It is the tendency of a formation under fire to spread out or 'go to ground' in an effort to reduce losses in the face of incoming fire. In this game we would say that fire which causes casualties tends to force the target to disperse to prevent greater casualties. The Combat Results Table contains three possible results. One possible result is "no effect" meaning that the fire failed to inflict any measurable casualties and it was not perceived as dangerous by the target. The second possible result is a number (1, 2, 3, etc.). This indicates that the fire "killed" that number of the target's Strength Points (and is obviously perceived as dangerous by the target). The last possible result is a "D" (for dispersion) which means that the fire is close and intense such that if the target does not disperse at once it will suffer casualties.
[5.31] No Effect: The firing unit has shot and missed. Play proceeds to the next action.
[5.32] 1, 2, 3, etc.: The target unit's strength must be immediately reduced by the number given on the table. In other words, if the result is "2" the target unit loses two Strength Points. The Owning Player simply puts a strength marker under the unit to show its new reduced strength. If the target unit is already dispersed there is no further effect. If the target is concentrated the Owning Player must (1) disperse it immediately (flip it over) or (2) take an additional one Strength Point loss but retain the unit in the concentrated mode. If the target is in travel mode the unit must take an additional one Strength Point loss. (It may not pass out of travel mode). If the unit is disrupted there is no further effect.
[5.33] "D": If the target unit is already dispersed or disrupted there is no effect. If the unit is concentrated the Owning Player must either immediately disperse the unit or lose one Strength Point from the unit but retain it in the concentrated mode. If the unit is in travel mode it must lose one strength point.
[5.34] In most cases a unit is fired upon by an adjacent unit. If the target disperses as a result of fire, such an act does not trigger Opportunity Fire. (Normally when a unit changes its mode within an Enemy Zone of Control it does trigger Opportunity Fire, but in this case we view dispersion as an effect of fire; essentially an involuntary act because the Owning Player either disperses or loses a point.)
[5.35] When a unit's strength is reduced to zero, it is removed from the map — it is eliminated. If there are excess losses taken, and there are no other units in the hex, the excess losses are ignored. Otherwise, Cases 9.43 and 9.44 apply.
[5.36] The effect of a "D" (dispersal) combat result is applied to the target unit immediately. If the target unit is fired on by another unit, the target unit is a dispersed target and the combat is resolved as if it is a dispersed target.
[5.37] For Headquarters and other units which may not disperse, the Owning Player has two options when they are directed to disperse or take a combat loss by a combat result: a) the unit in question may lose an additional strength point and remain undispersed, or b) the unit in question may avoid taking any additional loss and elect to become disrupted. Players can expect that the second option will only be taken when a unit would otherwise be eliminated, since the disrupted headquarters would most likely just "disorganize" the nearby Friendly forces.
5.4 Indirect Fire
Artillery units and Heavy Weapons units are Indirect Fire Units. During a Player's Fire Phases they attack using the Indirect Fire Procedure (see also Case 18.1). In many cases they will fire at units they themselves do not observe.
[5.41] The firing artillery unit must be stacked with or adjacent to a "controlling" headquarters unit. A "controlling" headquarters unit is defined as either the headquarters to which the artillery unit is subordinate, or a headquarters subordinate to the headquarters to which the artillery unit is subordinate.
Example: An artillery unit subordinate directly to the 43rd Division could fire if it was stacked with a regimental headquarters which was subordinate to the same division.
[5.42] Some unit subordinate to the controlling headquarters must be able to observe the target, and this observing unit must be able to Communicate with the controlling headquarters (see Section 12.0).
[5.43] If the conditions of Cases 5.41 and 5.42 are not met, the artillery unit may not fire except that the artillery unit may always fire at a target which it can observe.
5.5 Restrictions on Indirect Firing Units
[5.51] Artillery units may not execute Opportunity Fire, except when they are defending against a Close Action. As a further restriction, the artillery unit must be one of the top two units in its stack, and it may only fire on the top unit in the stack executing the Close Action. The Owning Player executes this Opportunity Fire exactly as if the Opportunity Fire were being performed by a Direct Fire unit; i.e., the Direct Fire procedure and Matrix are used.
[5.52] Artillery units may not participate in a Close Action with an attacker. If they are part of a stack that makes a Close Action attack, their presence is ignored (except of course if they are the topmost unit in the stack, in which case the stack can't attack).
[5.53] Artillery (not Heavy Weapons) may fire up to twice its printed range. When it does so, its Effectiveness Rating is reduced by 50%, dropping any fraction.
5.6 Fire Tables
[5.61] Fire Value Matrix: Direct Fire (see separate sheet)
[5.62] Fire Value Matrix: Indirect Fire (see separate sheet)
[5.63] Fire Results Table (see separate sheet)
6.0 Observation
Commentary
With the increasing use of called fire (Indirect Fire in the game), sighting for an artillery unit became a very important function of front-line troops. In the area in Holland in which Operation Market-Garden was executed, sighting became doubly important because of the huge amount of cover the Dutch countryside offered defending troops. In Highway to the Reich, a unit must "see" another unit before it can fire, Directly or Indirectly. The following rules delineate the restrictions upon and procedures of Observing units.
General Rule: To fire, a unit must observe its target's hex in some way or other. The Players should draw an imaginary straight line between the Observing unit(s) and the Target unit(s). This imaginary line is called the Line of Sight (LOS). If (a) the LOS is unobstructed by blocking terrain, and (b) the distance between the Observing and Target unit does not exceed the Observation limit, then the Observing unit sights its target. An Indirect Fire unit has the option of having another unit sight for it if the Indirect Fire unit itself cannot see the target. If this is the case, the Player must establish that the Observing unit has an unobstructed LOS to the target, and that the Observing unit also is in Communication (see Section 12.0) with the Indirect Firing unit.
Procedure: Draw a line between the Target unit and the Observing unit. Note the type of terrain in each of the intervening hexes. Consult the Terrain Effects Chart (see Case 10.15). Determine whether any of the hexes block the LOS, and that the LOS does not exceed the maximum LOS distance. If the LOS is not blocked and is within the proper distance, the Observing unit can see the target hex. An Observing unit can always see into the hex directly next to it within the restrictions stated in Case 6.1.
Cases
[6.1] Restrictions Upon Observing Units
[6.11] A unit may never Observe across a dike hexside, regardless of the terrain.
[6.12] A disrupted unit may not Observe for another unit.
[6.13] A unit's LOS is blocked when it coincides with the side of any Blocking terrain hex or hexside. Should the LOS coincide with a Blocking hexside or a hexside adjacent to a Blocking hex, the LOS is blocked.
[6.2] Effect on Direct Fire
Since the vast majority of Direct Fire units have a range of one hex, the only time that Observation affects most Direct Fire is when the Direct Fire unit's LOS is blocked by a Dike hexside. In the case of those few Direct Fire units which have a range of two, apply the normal sighting procedures in Case 6.1.
[6.3] Effect on Indirect Fire
When an Indirect Fire unit cannot see a target itself under the normal sighting procedures, it may use a Friendly unit that is in Communication range (see 12.0) to sight for it. All Combat and Headquarters units may sight for Indirect Fire units, but Leader units may not.
[6.4] Effect on Airstrikes
Airstrikes may attack any target on the map with the following exceptions: a) any dispersed unit in a city or forest hex that is not adjacent to a Friendly unit, and b) any Leader unit alone in a hex.
[6.5] Effects of Night Upon Observation
On Night Game-Turns, the Observation range of all units is reduced to two hexes. All other daytime Observation rules apply.
[6.6] Effects of Weather on Observation
[6.61] Weather Conditions 0 through 6 have no effect upon Observation.
[6.62] During the Game-Turns when weather conditions 7 through 10 prevail, the Observation range of a unit is reduced by one hex, if the unit is on a Hilltop, in a City, or in a Town hex, during daytime turns only. Weather Conditions 7 through 10 have no effect on Observation at night.
[6.63] Weather Conditions 11 and 12 subtract two from the Observation range of a unit if it is on a Hilltop, in a City, or in a Town hex, and subtract one if the unit is sighting from a Raised Road, Railroad, or a Trail hex in the daytime. Weather Conditions 11 and 12 have no effect on Observation at night.
[6.64] When Weather Condition P occurs, all Observation ranges are halved, rounding any fractions down. At night, Weather Condition P reduces all Observation ranges to one hex (i.e., adjacent hexes).
[6.65] When sighting between maps with different Weather Conditions, the Observation range is governed by the prevailing Weather Condition on the map where the Observing unit is located.
7.0 Zones of Control
General Rule: All non-Disrupted Combat units (including Headquarters) exert a Zone of Control in the six hexes surrounding them. Any Combat unit with a printed Range Allowance of two or more exerts a Zone of Control extending outward two hexes from the hex it occupies. A hex in a Zone of Control is said to be a Controlled hex. Friendly Zones of Control affect Enemy Movement. Enemy Opportunity Fire is triggered by Friendly unit activity in an Enemy Zone of Control.
Cases
[7.1] Effect of Zone of Control on Movement
[7.11] When a Friendly non-armor unit leaves an Enemy Controlled hex it must pay two Movement Points in addition to any other Movement costs.
[7.12] When a Friendly armored unit leaves an Enemy Controlled hex it must expend one Movement Point in addition to other Movement Costs. Note: A unit does not pay to enter a Zone of Control, only to leave a Controlled hex.
[7.2] Effect of Zone of Control on Opportunity Fire
Whenever a Friendly unit in an Enemy Controlled hex attempts to leave the hex, alter its stacking position, or change its operational Mode, or execute a Close Assault it triggers Enemy Opportunity Fire (see Case 8.4).
[7.3] Effect of Zone of Control on Supply
A Supply Path may not be traced through Enemy Controlled hex(es) except when the hex(es) are occupied by Friendly unit(s).
[7.4] Effect of Terrain on Zones of Control
[7.41] A unit does not exert a Zone of Control into a hex which it cannot observe.
[7.42] A Zone of Control does not extend through a dike hexside.
[7.43] Zones of Control do extend across river, canal and stream hexsides. In other words a unit may control a hex it might not be able to move into. This is because Zone of Control simulates primarily a unit's ability to cover an area with fire.
[7.5] Effect of Friendly Units on Zone of Control
The presence of Friendly units does not in any way lessen or negate the Zone of Control of an Enemy unit(s) except for purposes of tracing a Friendly Supply Path.
Note: It cannot be overemphasized that a unit expends Movement Points to leave a Controlled hex, not to enter it. There is no cost to enter a Controlled hex. If a unit leaves one controlled hex to enter another it pays to leave but not to enter. Thus Zone of Control inhibits but does not prohibit Movement. Indeed, by operation of Case 8.14 a unit could leave a Zone of Control and enter an adjacent hex (which may or may not be Enemy controlled) at a cost (Terrain plus Zone of Control) in excess of four Movement Points.
[7.6] Units Without Zones of Control
[7.61] Units with no printed (or with a zero) Effectiveness Rating have no Zones of Control.
[7.62] Units which are Disrupted, Depleted, or in Travel Mode exert no Zone of Control.
8.0 Movement
General Rule: During his Conditional Movement Phase, a Player may move any of his units which have not fired in the immediately preceding Conditional Fire Phase. He may move one unit or one stack of units at a time. In moving each unit expends a Movement Point(s) or fraction thereof (from its Movement Allowance of four Movement Points) to enter each hex. The exact expense depends on the terrain traversed, the mode of the unit, and Enemy Zones of Control.
Procedure: To move a unit (or stack of units) the Player simply displaces it across the hexgrid, hex by contiguous hex. As he does so he must crossreference the mode and type of the Moving unit with the terrain it enters or crosses on the Terrain Effects Chart. This tells him the cost of entering each hex.
Cases
[8.1] Restrictions on Movement
[8.11] Movement of a unit must always be continuous. Movement of a stack of units must be continuous. In moving a stack, units may be picked up and dropped off from the moving stack so long as each individual unit's movement is continuous.
[8.12] A unit may not enter a hex containing an Enemy unit. There is a specific action called Close Assault which may be executed at the conclusion of a unit's movement. This may force an Enemy unit to vacate its hex and thus permit the moving unit to enter the just-vacated hex.
[8.13] A unit may not expend Movement Points in excess of its Movement Allowance. A unit may spend some, all or none of its Movement Allowance, but it may not save any from Phase to Phase nor loan points to other units.
[8.14] A unit may always move one hex (even if it exceeds its Movement Allowance in so doing) except that it may not enter or cross Prohibited Terrain or across Blocked hexsides (Exception: see Case 8.23).
[8.15] A unit may not enter a hex in violation of stacking limits without penalty (see Section 9.0).
[8.2] Effect of Unit Mode on Movement
The mode a unit is in affects its ability to move. All things being equal, a unit in dispersed mode expends more Movement Points to enter a hex than a unit in a concentrated mode, while a unit in a travel mode expends the least amount of Points. These effects are summarized for all types of terrain on the Terrain Effects Chart. However, some terrain has the exact opposite effect prohibiting or penalizing the Movement of a concentrated or travel mode unit more than a dispersed unit.
[8.21] Some units (headquarters and artillery in particular) assume the travel mode by flipping over to their travel mode face. Armor, recon and "motorized" infantry units (those possessing a "t" on their concentrated face) assume the travel mode by having a travel mode marker placed on them (see Section 13.0).
[8.22] The mode of a unit is determined by the Player during his Organization Phase. Thus, the modes he establishes for his units during this Phase will affect the ability of those units to move during the subsequent Conditional Movement Phases. A Player may not change a unit's mode during his Movement Phase (he has to play the hand he dealt), except that a Player may remove a unit from Travel Mode at the conclusion of its Movement at an expense of one Movement Point.
[8.23] A disrupted unit may not move even one hex. (In fact, it can't do anything except exist and pray that its disruption will be removed.)
[8.3] Effect of Unit Type on Movement
While every unit has a Movement Allowance of four Movement Points, the type of unit (armored, infantry, etc.) determines how many points or fractions of points it must expend to traverse a given type of terrain. For example in most cases an armored unit will expend far fewer Movement Points to enter a given hex (particularly on a road) than an infantry unit. These effects are summarized on the Terrain Effects Chart. Before moving a unit a Player must know what type of unit it is and its mode in order to know what the Movement Point cost of entering each hex is.
[8.31] Almost all artillery, anti-tank and anti-aircraft (flak) units are depicted on their front side in a dispersed mode. The flip or reverse side shows them in travel mode. These units can only move when they are in the travel mode. These units can only move when they are in the travel mode (and conversely can only fire when they are in their dispersed mode). Thus a Player may only move such a unit by first placing it in the travel mode (during his Organization Phase) and then moving it, paying the costs for units in Travel Mode. Note that this requirement effectively prohibits such units from entering certain kinds of terrain (forest, broken, etc.) except via road or trail.
[8.32] For purposes of movement, reconnaissance and armored (car) recon are identical. Armored (tank) recon is identical to armor, as is armored infantry. Machine gun, heavy weapons, engineer, and headquarters units are identical to infantry. Although certain armored infantry units lack a "t" symbol, they may adopt Travel Mode. All units displaying the armored symbol may use Travel Mode. Glider reconnaissance units may use Travel Mode, as do regular reconnaissance units.
[8.33] Headquarters units are depicted in a Concentrated Mode (front) and Travel Mode (back). They may move in either mode.
[8.34] Infantry, heavy weapons and engineer units are always assumed to be on foot if they are in their Dispersed or Concentrated Modes regardless of whether they possess a "t" symbol or not. Units which possess a "t" symbol on their Concentrated Mode face are capable of assuming the Travel Mode. (That is, they have trucks available to mount and ride.) Units which do not have a "t" symbol may not assume the Travel Mode. (They have no trucks and are doomed to walk forever.)
[8.4] Opportunity Fire
When a unit or stack of units moves out of an Enemy controlled hex, it triggers Opportunity Fire from the controlling Enemy units, which occurs before the movement in the hex from which the units move. Opportunity Fire is also triggered whenever a unit changes mode or position in a stack in an Enemy controlled hex. When a mode change triggers Opportunity Fire from an Enemy unit, the Opportunity Fire is executed upon the target unit while the target unit is in its original mode. A Disruption Recovery does not trigger Opportunity Fire. If a unit changes both its stacking order and its mode in the same phase (which is possible only in the Conditional Movement Phase), then the unit triggers Enemy Opportunity Fire twice — once for changing stacking order and again for changing mode. If an entire stack changes both mode and stacking order, then only the top two units may be the targets of Opportunity fire from each Enemy unit eligible to fire on the units on the top of the stack.
[8.41] Opportunity Fire is a type of Fire Combat which is executed by the non-Phasing Player during the Organization and Conditional Movement Phases, when either of the two topmost units in a stack controlled by the Phasing Player changes modes in a non-Phasing unit's Zone of Control, exits the Zone of Control of a non-Phasing unit, or changes Stacking position in a non-Phasing unit's Zone of Control.
[8.42] Any unit may execute Opportunity Fire (Exception: see Case 5.51). It is the only fire that Headquarters units may execute. Opportunity Fire is executed as normal Fire (Direct or Indirect, according to the firing unit).
[8.43] When a Player moves a stack of units, he triggers one Opportunity Fire from each controlling Enemy unit. Thus, it is advantageous to move a stack of units out of an Enemy Zone of Control than to move the units individually. If they are moved one by one, each in turn will trigger Opportunity Fire.
[8.44] A unit which triggers Opportunity Fire subjects itself to a number of Opportunity Fire attacks, the number of which is limited only by the number of Enemy units which exert a Zone of Control in the hex.
[8.45] There is no limit to the number of times a unit may use Opportunity Fire. It may be executed every time it is triggered and only when it is triggered. It is theoretically possible for a Player to move a unit through three hexes adjacent to an Enemy unit that exerts a Zone of Control. But as he executes this movement, he would be triggering Opportuity Fire from the Enemy unit in each of the adjacent hexes his unit moves out of.
[8.46] Opportunity Fire may only be executed against units which actually trigger the Opportunity Fire. The presence of other (remaining) units is ignored. This provision takes precedence over the restrictions that only the top two units may trigger Opportunity Fire. For example, if the third unit in a stack moves and triggers Opportunity Fire, and the top two units remain in position, then only the triggering unit may be fired upon.
[8.47] When a Player undertakes any activity which triggers Opportunity Fire, he should declare his intention, giving his opponent time to fire at the concerned unit in its present position and mode before the unit's activity is executed.
[8.48] A unit cannot be fired upon for being forced to adopt a mode involuntarily while in an Enemy Zone of Control. Only a voluntary mode change renders a unit susceptible to Opportunity Fire.
[8.49] Although Close Action combat (see Case 8.6) is executed and resolved while opposing units occupy adjacent hexes, the attacking unit(s) is considered to be attempting to enter the hex occupied by the defending unit(s). Thus, a unit which initiates a Close Action Attack in an enemy Zone of Control may be fired upon by all eligible units before the Close Action itself is resolved. The attacking unit(s) is fired at in the hex it occupies, not the hex occupied by the defending unit(s). If, after this fire, the Close Action attack allows the attacking unit(s) to advance into the hex formerly occupied by the defender, the attacking units cannot be fired at by Enemy units while making this advance, even though they may be exiting Enemy Zones of Control.
[8.5] Stacking
A unit may freely enter a hex containing other Friendly units, either to pass through the hex or to terminate its movement stacked with the other units (see Section 9.0). When it does so it is considered to be the topmost unit and is so placed while it is in the stack. There is no Movement cost per se to enter a hex containing Friendly units.
[8.51] At any time during Movement, a Player may rearrange the order of a stack (at no Movement cost). If done in an Enemy controlled hex, such a rearrangement triggers Opportunity Fire on either of the new two topmost units. Such Opportunity Fire is in addition to any caused by subsequent or prior Movement. During stacking changes, the Enemy Player may not use units to Opportunity Fire at any units below the two topmost units (Exception to Case 8.46).
[8.52] Rather than move one unit a Player may move a stack of units. However he must take care that no unit in the stack exceeds its Movement Allowance or violates any Movement restriction. As he moves, a Player may accumulate a stack of units or conversely reduce a stack, by dropping units off so long as no unit exceeds its allowance or violates a restriction.
[8.6] Close Action
Close Action is a type of Combat which occurs during the Conditional Movement Phase. Only the Phasing Player may initiate Close Action during the Conditional Movement Phase. Close Action is considered to be Movement, therefore a unit which Fired in the immediately preceding Conditional Fire Phase may not execute a Close Action attack during the Conditional Movement Phase. Close Action Combat may only occur between opposing units which occupy adjacent hexes during the Conditional Movement Phase. Execution of a Close Action attack requires that all units expend one Movement Point in addition to the costs of entering the hex they are attacking. After a unit executes a Close Action attack it may move no further during the current Conditional Movement Phase except as a result of Close Action Combat. Close Action Combat is initiated and resolved at the option of the Phasing Player in any sequence he desires. His units are used to attack; units controlled by the non-Phasing Player must defend if attacked. No unit is granted the opportunity to "retreat" before Close Action combat is resolved. Although Close Action combat is executed and resolved while opposing units occupy adjacent hexes, the attacking unit(s) is considered to be attempting to enter the hex occupied by the defending unit(s). All Units in the hex which is the object of a Close Action attack are considered to be units of the Defending Force.
Close Actions from different hexes are resolved separately. Under no circumstances are units from different hexes combined in a Close Action attack. Players should note that once a Close Action is announced, it must be executed, unless the conditions are such that the rules specifically prohibit the units from completing the attack. Also, the extra Movement Point cost for executing a Close Action is in addition to the cost of leaving an Enemy Zone of Control which must be paid in a Close Action.
[8.7] Close Action Combat Resolution Procedure
- Determine the Effectiveness Rating of the topmost Attacking unit and the topmost Defending unit, which is the printed Effectiveness Rating plus or minus any modifications for cross-river attack, mode, etc. (see Case 10.4). Subtract the Defender's modified Effectiveness Rating from the Attacker's rating to determine the Effectiveness Differential of the Close Action. (This may be a negative number.)
- Subtract the current Morale Rating of the topmost Defending unit from that of the topmost Attacking unit. Current Morale is the printed morale less one for each Strength point lost, plus the leader bonus (see Case 19.11) and modification for terrain, engineers, etc. The subtraction determines the Morale Differential of the Close Action (which also may be a negative number). Locate this differential on one of the Morale Differential Columns depending on the terrain of the Defender's hex.
- Crossreference the Effectiveness Differential to obtain the Close Action Value. In some cases this may locate a "D" which means the Attacker is immediately disrupted and the Close Action ceases. Otherwise the value is carried over to Table 8.72.
- Total the strengths of all the Attacking units, and then all the Defending units. Compare them as a ratio of Attacker to Defender, rounding off any fraction in favor of the Defender. Locate this odds ratio on the left hand side of Table 8.72. Roll one die. Crossreference the number rolled (under the appropriate odds column) with the Close Action Value. This will locate the results of the Close Action which are applied immediately. Note: A unit may execute only one Close Action per Movement Phase an an Attacker. However, a unit may be the subject of multiple Close Actions in sequence.
Note: A unit which begins the Movement Phase adjacent to an Enemy unit may always Close Assault that unit even if the total Movement expense exceeds 4 points (see Case 8.14).
[8.71] Retreat from a Close Action does not trigger Opportunity Fire.
[8.72] Close Action Value Table (see separate sheet)
[8.73] Close Action Results Table (see separate sheet)
[8.8] Static Units
All units marked with a "STAT" on the back of their counters are static units. They may not move or retreat, but function in all other ways as other units do (see Case 11.53).
[8.9] Movement of Armored Units
The following list gives the modes the various armor-type units may employ:
Armor ("pure" tank) may use Concentrated, Dispersed or Travel Mode.
Armored Infantry may use Concentrated, Dispersed or Travel Mode. Armored Infantry in Dispersed Mode moves as leg Concentrated Infantry.
Armored Reconnaissance (tank or car) may use Concentrated, Dispersed or Travel Mode.
Armored Artillery may move in Travel or Dispersed Mode. Armored Artillery moves as Dispersed Armor when in Dispersed Mode. Note that it can fire only in Dispersed Mode.
Tank Destroyer may move in either Concentrated, Dispersed, or Travel Mode — or Travel or Concentrated Mode — depending on the unit. The counter will indicate whether the Tank Destroyer unit can use Dispersed Mode. For Movement purposes, Tank Destroyer units move as Armored Artillery units.
9.0 Stacking
Commentary
Each hexagon on the game map represents a limited amount of physical space. Within this space a limited amount of troops, guns, and vehicles may be placed.
General Rule: During a Movement Phase (only), the Phasing Player may reorganize the units he controls by stacking or unstacking units which occupy the same hex, within the stacking limitations which are dependent upon terrain. The only exception to this rule is that units incapable of moving may not switch stacking positions with other units incapable of moving (e.g., Dispersed artillery, Flak units may not alter their stacking order.)
Cases
[9.1] Maximum Stacking Limitations
The total number of Strength Points which may be voluntarily stacked in a single hex at any given instant is limited according to the terrain in that occupied hex. These maximum Stacking limits, in current Strength Points, are prescribed as on the Terrain Effects Chart for the different kinds of terrain. Note that some terrain has no effect on stacking.
[9.11] The Stacking limit assigned to a given type of terrain is in effect at all times throughout all Phases. A unit may never enter a hex (even momentarily) in violation of the Stacking limit at any time during the game, without penalty.
[9.12] A unit's current Strength is counted for Stacking purposes. All Strength Points which are stacked in a hex count against the Stacking limit of that hex.
[9.13] Leader units do not possess a Combat Strength and do not count against the Stacking limit. An unlimited number of Leader units may theoretically be stacked in any given hex.
[9.14] Markers do not count against the stacking limit, per se.
[9.15] Friendly units may always stack in the same hex regardless of their nationality. All Allied units are considered Friendly to each other. All German (and Netherlands) units are considered Friendly to each other. No German or Netherlands unit is ever considered Friendly with an Allied unit.
[9.2] Stacking Effects on Movement
[9.21] Stacking and unstacking are only permitted during a Player's Movement Phase. During all other Phases, the order in which units are stacked may not be altered.
[9.22] There is never any additional Movement Point cost to stack or unstack units within a given hex.
[9.3] Stacking Effects on Mode
[9.31] All units in the same hex are automatically disrupted at the instant any unit in the hex is disrupted. In addition, any unit which enters a hex containing disrupted unit(s) is immediately disrupted. Therefore, whenever any unit becomes disrupted a Disrupted marker should be placed on the topmost unit in the same hex.
[9.32] The penalty for overstacking is immediate Disruption regardless of how the overstack was created.
[9.33] Whenever units become disrupted as a result of overstacking, the units moving into the hex and/or causing the overstacking are immediately displaced one hex where they remain disrupted. This displacement may trigger Opportunity Fire. If there is no hex to displace the unit(s) to, the units moving into the hex and/or causing the disruption are immediately eliminated. If the only option is to displace the units into a hex containing other Friendly units, the units must do so (even if this displacement creates another overstack), thereby disrupting all Friendly units in the hex. Disrupted units forced to retreat onto a bridge or a pontoon bridge hex (engineer-constructed) must be retreated one hex further, or be eliminated if they cannot do so.
[9.4] Stacking Effects on Fire Combat
[9.41] Only the topmost two Combat units stacked in a hex may engage in Direct Fire Combat. Combat units stacked beneath the top two units may never utilize Direct Fire.
[9.42] A unit's position in a stack of units has no bearing on its ability to engage in Indirect Fire Combat. Any and all Indirect Fire units in a stack may engage in Indirect Fire regardless of their position within a stack of units.
[9.43] Strength Point losses resulting from Direct Fire are inflicted upon the Attacking Player's choice of one of the top two Combat units in a stack. If either of the two topmost units is reduced to zero Strength Points, it is immediately removed from the map and any additional loss is inflicted on either of the current topmost Combat units. If a result calls for losses in excess of the total number of Strength Points in the target hex, all Strength Points in the Target hex are eliminated and the excess loss is ignored.
[9.44] Strength Point losses resulting from Indirect Fire are inflicted on each target unit individually. If the unit which is the target of the attack is reduced to zero Strength Points, it is immediately removed from the map and any additional loss ignored.
[9.45] If a Leader unit is the topmost unit in a hex, it neither protects nor hinders the units beneath it. Leader units never inhibit a Combat unit from firing or from suffering the result of fire directed at the hex (see Case 19.3).
[9.46] A stack of units may be fired upon if its stacking order is rearranged within an Enemy Zone of Control (see Case 8.4).
10.0 Terrain
Commentary
Though the Netherlands are considered part of the Lowlands — and as such, fairly flat terrain — the map graphically disproves this assumption. It is suggested that the Players familiarize themselves with the 24 different terrain types preparatory to play. Many terrain types are not what they would seem to be in reality, but the designer has interpreted the terrain as he saw fit on the map. Note that some of the waterways that are considered rivers by the Dutch and are labelled as such on the game-map are not rivers for game purposes, but rather the terrain type given on the map. Also, some terrain types (slopes are a good example) are largely cosmetic and have little or no effect on play.
General Rule: The terrain on the map affects Movement, because the kind of terrain in each hex determines the Movement Point expenditure a given unit must pay to enter the hex. Terrain along a hexside also affects Movement. Terrain affects combat first by affecting Observation and then by benefitting the target unit if fired upon. Terrain affects the ability of a unit to trace a supply path. Terrain affects the ability of an Observer unit to communicate with an Indirect Fire unit (and thus affects Combat again). Finally, terrain affects Close Action.
Cases
[10.1] Terrain Effects on Movement
Whenever a unit is moved, the owning Player uses the Terrain Effects Chart to determine the cost of entering each hex in the path of Movement. To use the chart, locate the type of unit and the Terrain in the hex being entered or crossed. Crossreferencing establishes the number of Movement Points or fraction thereof expended by the unit to enter the hex (see separate sheet).
[10.11] Roads and Trails
A unit in Concentrated or Travel mode may move from hex to contiguous hex along a connected road (or trail) using the road movement rate ignoring terrain. Units in dispersed mode do not benefit from a road or trail.
[10.12] Raised Roads/Trails/Railroads
These thoroughfares represent elevated causeways above low, usually swampy ground. Only units in Travel Mode benefit from them (otherwise they are ignored and other terrain in the hex controls movement). A unit in Travel Mode on a Raised Road may not change mode (the vehicles are in column and cannot descend off the road). Units in Travel Mode on a Raised Road/Trail/Railroad may not exit the thoroughfare except at the Raised Road/Trail/Railroad terminus, or onto a Road (not onto a Trail or Railroad). To enter a Road/Trail/Railroad, the Travel Mode unit must enter at the thoroughfare's terminus or from a road. Units not possessing Travel Mode may move across a bridge traversed only by a Raised Road/Trail/Railroad at a cost of 1 extra Movement Point. If this exceeds the unit's Movement Allowance, it may still cross as per Case 8.14.
[10.13] Bridges
Bridges negate stream, canal and river hexsides for purposes of Movement only.
[10.14] Engineers/Cross-River Movement
The presence of engineers may permit a unit to cross a canal or river or stream otherwise prohibited (see Case 18.4).
[10.15] Terrain Effects Chart for Movement, Stacking and Observation (see separate sheet)
[10.2] Terrain Effects on Observation
Certain types of terrain obstruct or otherwise affect line of sight (see Section 6.0). Note: Blocked hexsides (i.e., hexsides that block movement) do not block Line of Sight, since Blocked hexsides are lakes or swamps and, as such, do not block vision.
[10.3] Terrain Effects on Combat
When a unit is dispersed and is present in an entrenched, rough, city, town or forest hex it derives some protection from Enemy fire. This benefit is integrated on the Fire Results Table.
[10.4] Terrain Effect on Close Action
[10.41] If the defending units are in a rough, entrenchment, town, forest or city hex they gain two Morale Points for purposes of calculating the Morale Differential in Close Action.
[10.42] Units may not close assault into a hex they are otherwise prohibited from entering. For example, a unit could not close assault across a river except over a bridge or with the aid of bridging (ferrying) engineers.
[10.43] If a unit crosses a bridge to execute a close action, its strength is halved (rounding any fraction down) and its effectiveness is reduced by three.
[10.44] If a unit executes a Close Action across a dike, its combat strength is halved (rounding fractions down). If a unit executes a Close Action across a dike, only those units that could normally fire upon it may execute Opportunity Fire on that unit, plus the unit being Close Assaulted.
[10.5] Entrenchment
The "E" marker denotes an Entrenched hex. Any unit in an entrenched hex is entrenched and benefits thereby. Entrenchment may be removed during any Friendly Combat Phase by the possessing Player.
[10.51] The only units that benefit from entrenchments are infantry, heavy weapons, Headquarters, artillery, and armored infantry units. Armor may not.
[10.52] Note that the entrenchment benefit of 2 Morale Points is in addition to any terrain benefits (e.g., an entrenchment in a city would give the defending units a benefit of 4 Morale Points).
[10.53] Entrenchments may be removed in any Friendly Command Phase by the Owning Player, who merely states that he is destroying the entrenchment. The entrenchment marker is then removed from the map. At no other time may an entrenchment be removed. If the Enemy Player occupies an Entrenchment that was occupied by the Friendly Player at the beginning of the turn, the Enemy Player may use the entrenchment as he sees fit. Entrenchments are neutral; they are no Player's possession. Note that on Table 5.63 (Fire Results Table) only a dispersed unit benefits from entrenchments. Units in any mode benefit from entrenchments on Tables 5.61 and 5.62.
[10.6] Terrain Effect on Communication
To establish whether or not an Observer unit can Communicate with an Indirect Fire unit, trace a Line of Sight (LOS) between the Observer unit and the controlling HQ unit of the Indirect Fire unit. This LOS may not pass through a) two city or forest hexes, or b) three city, forest, town or fort hexes. Players will note that if two of the hexes in (b) are city and/or forest, the LOS falls under (a). Other than the limitation above about blocking terrain, the length of Communication is unlimited.
[10.7] Terrain Effects on Zones of Control
[10.71] Zones of Control do not extend into Forest or City hexes or across Dike hexsides. They do extend out of all terrain except when limited by a dike. They do not extend into hexes which the controlling unit cannot observe.
[10.72] If a unit Close Assaults from a Forest or City hex, it is subject to Opportunity Fire from the unit(s) in the hex that it is Close Assaulting. No other units may perform Opportunity Fire on units moving out of forest or city hexes.
[10.8] Terrain Effect on Artillery
Artillery type units (artillery, anti-tank, flak, rocket artillery, etc.) do not receive the benefit for Rough or City on Table 5.63. If such units are attacked in a Rough or City hex, then the attack is resolved on the Forest, Town or Broken line of the Table.
[10.9] Ferries
[10.91] Only German units may use the Permanent Ferries indicated on the map.
[10.92] Only units in Concentrated Mode (Travel Mode if the unit is Artillery) may cross a Ferry.
[10.93] Units on a Ferry receiving Opportunity Fire are always treated as if they were in concentrated mode, even if the unit(s) does not possess a concentrated mode. In any event, when calculating an Opportunity Fire against a unit on a Ferry, raise the Effectiveness Rating of the Opportunity Firing unit(s) by 1. An Effectiveness Rating of 9 remains a 9. Note that units on a Ferry form an exception to the rule that no ZOC may extend into a River hex.
[10.94] Units may Close Assault from a Ferry, but should they do so, their strength is halved (rounding down).
11.0 Command/Supply
General Rule: During his Command Phase, a Player determines the Supply Status of his chain of command to establish which of his Headquarters are in supply and which are unsupplied. Also during this phase a Player will attempt to cure any Disruption mode which may be affecting his units.
Cases
[11.1] Supply Sources
[11.11] German
The German Player's units may draw supply from any road leading to the north, east, or west edge of the map. They may not trace to any road which leads to an off-map area captured by the Allies. For supply determination, off-map areas (see Case 20.2) are considered to be captured before the first phase of each Game-Turn.
[11.12] Allied XXX Corps
All Allied non-Airborne Headquarters draw supply on the XXX Corps Supply Train (which lies south of Map D), and these units must trace to the roads that exit Map D at hexes D0109, D0120, and D0132. A unit is out of supply if it cannot trace back to one of the three hexes. Note that Airborne Headquarters may trace back to the XXX Corps Supply Train, if they can establish a proper line of supply.
[11.13] Allied Airborne Units
There are four Allied Airborne formations: the 1st (British) Airborne Division, the Polish Parachute Brigade, the 82nd (American) Airborne Division and the 101st (American) Airborne Division (all split into serials 1-58 group p-x on the formation displays). Each of these "divisions" has a supplyhead marker which the Allied Player places on the map. This supplyhead marker is the source of supply for its formation.
The Polish Parachute Brigade may draw supply from the British 1st Airborne Division supplyhead or the XXX Corps Supply Train, in addition to its own supplyhead. Although units are out of supply when a German unit is on a supplyhead, or when a German ZOC extends onto a supplyhead hex without being countered by an Allied unit or ZOC, the supplyhead is unaffected. All Allied Airborne units are in supply for the first 4 Game-Turns after they are dropped, after which they must trace supply normally.
Historical Aside: Supplyhead markers represent the agreed upon areas where Allied transports would drop daily supplies to the airborne troops. When Germans captured a supplyhead, they were likely to receive the supplies. The ammunition did not usually fit the German weapons, but the Germans valued one part of the supplies much more than ammo: Camel cigarettes and Hershey bars. If Players wish to be silly and reflect this, they can add 1 Morale Point to each German unit defending a supplyhead.
[11.14] If the Allied Airborne Headquarters have been out of supply for 10 consecutive turns for any reason except Disruption, the Allied Player may re-drop the Divisional supplyhead at a cost of one Lift Point. Note that all Headquarters in the division must be out of supply, and that a Headquarters can be voluntarily out of supply if it wishes. In dropping the supplyhead, use the initial drop procedure treating all results of "A" and "L1" as "S1."
[11.2] Tracing the Supply Path
[11.21] Divisional and "Independent" Headquarters
Divisional and Independent Formation (those which have no divisional subordination) Headquarters are in supply if they can trace a path of road, trail, city and/or town hexes to their supply source. The path may be of any length, but it must be traversable and free of Enemy units and Zones of Control. A Divisional or Independent Headquarters may trace along a railroad or along clear hexes in addition to road, trail, city and/or town hexes, provided they are not tracing off-map directly. Corps and Army Headquarters trace in the same manner as Divisional Headquarters.
[11.22] "Regimental" Headquarters
"Regimental" headquarters (identified as subordinate to a higher headquarters) are in supply if they can trace a supply path to their superior headquarters or to the source of divisional supply. Unlike the Divisional Headquarters path the regimental HQ path is limited in length. To describe the path the Player pretends he has a motorizable infantry company (one capable of travel mode). He pretends to move this imaginary unit from the "regimental" Headquarters to the superior Headquarters. This imaginary move may not cost more than eight Movement Points or the regimental Headquarters is unsupplied. The supply path may not traverse Enemy zones of control except through Friendly occupied hexes. In executing this imaginary move the Player can assume that his imaginary infantry company is either in a dispersed, concentrated, or travel mode for the duration of the move. The Player picks whichever mode best suits him for tracing the move. In this imaginary move the Player ignores stacking limits and costs for leaving Enemy controlled hexes, computing Movement expense on terrain cost alone. An independent regimental or brigade Headquarters may trace supply to the supreme command for its army (30xxx for the Allies, OBWxxx for the Germans) if the Player so wishes. The supply path to this source is also eight Movement points.
[11.23] If a Headquarters is unable to trace a valid Supply Path it is unsupplied. The Owning Player places a Depleted marker on the unsupplied Headquarters. This marker remains on the Headquarters unit until the next Command Phase (or later) when the Headquarters unit is able to trace a valid supply path. It may not Opportunity Fire until it is back in supply.
[11.24] If a supply path is traced by the Allied Player across a river or canal by engineers, the effective length of tracing the supply path is halved (an unlimited length is reduced to 50 hexes in length).
[11.3] Unit Supply Judgment
If a unit fires in its Fire Phases, the Owning Player must determine if the unit is in supply range of its Commanding Headquarters (not usually during Opportunity Fire or Close Action.) Artillery units must also roll for depletion when performing an Opportunity Fire.
[11.31] Supply Range
The supply range of a unit is defined as a path of no more than ten traversable hexes between the firing unit and its controlling Headquarters, not counting the hex the firing unit is in but counting the hex the Headquarters unit is in. It may not traverse Enemy controlled hexes except those occupied by Friendly units. The supply range of 10 hexes may not be traced through Prohibited Terrain and Blocked hexsides. Unless units fall under the provisions of Case 11.32, they must always trace through a Headquarters for supply.
[11.32] If a unit is in supply range of its Headquarters at the moment it fires it is said to be in supply, otherwise it is out of supply, assuming of course that the Headquarters to which it traces is not out of supply. If the Headquarters is out of supply, the firing unit is unsupplied regardless of the supply range. Should a unit's supply source be on the map, the unit is in supply as long as it is on or adjacent to its supply source (provided Enemy units do not prevent it). Off-map German units are always in supply.
[11.33] If a firing unit is out of supply, the Owning Player must roll the die immediately after executing the unit's fire. If he rolls a 1, 2, or 3 the firing unit is immediately depleted and a Depleted marker so placed. (A 4, 5, or 6 means no effect).
[11.34] Effect of Depletion
A Depleted unit may not fire. It may not fire in its Conditional Fire Phase, its Free Fire Phase nor may it Opportunity Fire. A Depleted unit may not participate as part of an attacking force in Close Action. Nor is its strength considered part of a Defending Force if it is attacked by Close Assault. In other words in a close assault it is a cypher, its Effectiveness Rating and strength equal to zero, and its morale is normal (though it may not be the top unit in a Close Assault). For all combat purposes, a depleted unit is worthless. Depletion does not affect Movement, a unit's ability to Observe Enemy units, or a Headquarters' ability to coordinate and communicate for artillery. Depleted units still count for stacking.
[11.35] Removing Depletion
Once a unit is depleted it remains depleted until the Owning Player's next Command Phase, at which time the Owning Player will judge if the unit is in supply range of its controlling Headquarters (which must be supplied). If this condition is met, the Depletion marker is removed, and the unit is restored to full combat capability.
[11.4] "Independent" Units
The German Player possesses a plethora of independent units (those which have no commanding Headquarters). These units may trace supply (ten traversable hexes) to any German Headquarters unit. The Allied Player has two independent units these may trace to any Allied Headquarters. "Independent" units may only change their subordination in the Owning Player's Command Phase.
[11.5] Disruption
During his Command Phase, a Player may attempt to remove disruption using the Disruption Removal Routine (see Case 11.53), separate sheet). While disrupted, a unit's Strength, Effectiveness and Movement Allowance are defined as zero.
The disrupted unit cannot perform any functions, with the exception of rolling for Disruption Removal (Recovery). This means that a Headquarters cannot be part of a supply chain, a unit cannot Observe — in short, no game functions can be performed. A disrupted unit's Morale is defined as its current Morale less three.
[11.51] All static units or dispersed artillery (with the obvious exception of Armored Artillery) forced to retreat as a result of disruption are eliminated, because they cannot move.
[11.52] A disrupted unit which successfully removes its disruption comes back in exactly the same state in which the unit was before it received the disruption. For all scenarios and the Campaign Game, German units that started the game disrupted come back in a dispersed mode. For any unit that does not have a dispersed mode (such as Headquarters), the unit comes back concentrated. If a Headquarters unit becomes disrupted in lieu of losing a strength point when it was unable to disperse, then the HQ unit is concentrated when disruption is removed.
[11.53] Disruption Recovery Table (see separate sheet)
[11.54] Adjustment to Disruption Recovery Die Roll (see separate sheet)
12.0 Communication
General Rule: An artillery unit can only fire Indirect Fire if it is stacked with or adjacent to a "controlling" Headquarters unit which in turn is in Communication with a unit Observing the Target (see Case 10.6).
Cases
[12.1] "Controlling" Headquarters
A Controlling Headquarters is one to which the artillery unit is subordinate or one which is subordinate to the same Headquarters to which the artillery unit is subordinate. For example artillery units identified as 43xx belong to the 43rd (British) Infantry Division. They are subordinate to the 43rd Division Headquarters. They may fire if they are stacked with or adjacent to the 43rd Division HQ unit or if they are stacked with or adjacent to any of the "Regimental" HQ units subordinate to the 43rd HQ (such as the Headquarters of the 129th Brigade HQ.)
[12.2] Observer Status
A unit may only observe for and communicate with its own Headquarters and/or with a Headquarters superior to its own. For example a unit belonging in the 129th Brigade could communicate with the 129th Brigade Headquarters unit and/or the 43rd Division HQ unit, or XXX Corps.
[12.3] Self-Observed-Communicated Fire
If an artillery unit can itself see a target it may fire on the target, regardless of the relative position of Headquarters units, etc. It is also a unit and may act as an observer for other artillery units within the strictures of Cases 12.1 and 12.2.
[12.31] Artillery unit fire is always Indirect Fire, including those attacks made by a unit which directly observes the target. The Player always uses the Indirect Fire Routine to execute an artillery unit's attack (Exception: see Case 5.51).
[12.32] A Heavy Weapons unit may execute Opportunity Fire only if it is one of the two topmost units in its stack. Artillery may only execute Opportunity Fire pursuant to Case 5.51. In any case, the Opportunity Fire unit must be able to see the target.
[12.4] Non-Divisional Headquarters and Artillery
Both the Allied and German Player have corps and army Headquarters units which may act as Controlling Headquarters.
[12.41] German Flak Brigade [FBx]
Artillery units of the German Flak Brigade may be controlled by any German Headquarters unit. For purposes of artillery fire and supply they would be deemed subordinate to whatever Headquarters they were controlled by when they fired.
[12.42] German Corps HQ
Fxxx, IIParaxxx, and OBWxxxx Headquarters units may control any German artillery unit and any German unit may communicate with these Headquarters units.
[12.43] Allied Airborne Corps HQ
This unit may control any Allied artillery unit belonging to the Allied Airborne formations. And any Allied airborne unit may communicate with it. The ABNxxx Headquarters may trace its supply to any airborne supplyhead or the XXX Corps supplyhead (even though it begins with the 82nd Airborne Division).
[12.44] Allied XXX Corps HQ
This unit may control any Allied Artillery unit and any Allied unit may communicate with it.
[12.5] Communication Restrictions
[12.51] An observer unit and controlling Headquarters are considered part of the Indirect Fire Process. Therefore, they may not perform these functions during a Conditional Fire Phase and then move in the immediately subsequent Conditional Movement Phase.
[12.52] A unit in travel mode or disrupted units may not function as an Observer or Controlling Headquarters.
Note: Most of the artillery units in the game are owned by divisions. A Player can keep these units stacked with the divisional Headquarters or parcel them out to regimental Headquarters. The first alternative provides him with maximum flexibility as the artillery could fire on a target observed by any unit of the division. The second alternative is best adopted when the division must fight on an extended front. The corps Headquarters units are particularly valuable allowing the Player to mass and use artillery units from different divisions.
13.0 Organization Modes
Commentary
Within certain restrictions, a Player is permitted to portray his units in various states or modes, corresponding to how the units are organized to fight and move, within the scale of the game. The various modes are meant to simulate the following:
Dispersed: The men and vehicles are spread out to take advantage of any cover offered by the terrain in the hex (signified by a "d" on the counter).
Concentrated: The men and vehicles are massed within the hex in a tight, easily controlled formation.
All things being equal, a dispersed unit offers less of a target to Enemy fire than a concentrated one, with the corollary that it takes more fire to inflict the same amount of casualties on a dispersed target as on a concentrated target. A concentrated unit on the other hand can bring more fire to bear more effectively than a dispersed unit, and in most cases a concentrated unit can move more quickly than a dispersed unit.
Disrupted: This is a special mode imposed on a unit as a result of a Close Action or overstacking. It simulates the shock effect of close personal combat, or the complete disorganization of too many men in the same area. The personnel are disoriented, scared, and confused. In short, the unit is incapable of any action until command has been reestablished.
Travel: The unit is massed in a column formation for quick movement. Armored units and armored cavalry units are capable of travel mode as a matter of choice. The Player places a Travel mode marker if needed to signify Travel. Artillery (always) and Headquarters units (usually) use Travel mode as means to move. Some infantry units are capable of travel mode. (They have trucks available to them.) Other infantry can never assume Travel Mode.
General Rule: During his Organization Phase a Player may freely alter the mode of any of his units. (Except, of course, he may not undisrupt a unit.) He may change a dispersed unit into a concentrated unit and vice versa. He may change a concentrated unit into one in travel mode and vice versa. However only an artillery unit may change from a dispersed mode directly to a travel mode. He may make only one mode change per Organization Phase. (Which means, in effect, that an infantry, armor, or HQ unit cannot go from a dispersed mode to a travel mode in one turn or vice versa.) Stacking order may not be changed.
Cases
[13.1] Artillery
An artillery, anti-tank or flak unit has a dispersed mode side and a travel mode side to its counter. It can be in one mode or the other. When dispersed it may fire, but not move. When in travel mode it may move but not fire. There is no such thing as a concentrated artillery unit.
[13.2] Headquarters
A Headquarters unit has a concentrated mode side and a travel mode side. A concentrated Headquarters unit may move and fight. A travel mode Headquarters unit may only move. There is no such thing as a dispersed HQ.
[13.3] Infantry
Infantry, heavy weapons, and engineer units have a dispersed side and a concentrated side. Some of these units are capable of assuming a Travel mode; if so they have a lower case "t" printed on their concentrated face. Other units are incapable of assuming Travel mode and do not have a "t" on their concentrated face.
[13.4] Armor
Armored units are capable (for the most part) of assuming dispersed, concentrated and travel mode. For a complete list, see Case 8.9.
[13.5] Changing Organization Modes
[13.51] At the conclusion of his conditional Movement Phase a Player may place his units in Travel Mode at a cost of one Movement Point. This is an exception to the General Rule. Note that the reverse is not permitted.
[13.52] During (and only during) his Command Phase, a Player may attempt to remove disruption from disrupted unit(s).
[13.53] As a result of Combat a unit may disperse or disrupt.
[13.54] Other than the above cases a Player may never change a unit's organization mode except during his Organization Phase. This means that during this phase he must project his requirements through the next turn's Organization Phase.
[13.55] Infantry (sic) and armor assume travel mode from concentrated mode; leaving travel mode they assume concentrated mode. They may not assume travel mode directly from dispersed mode. Instead they must assume concentrated mode first and then in a following Organization Phase assume travel mode.
[13.6] Disruption
All units are capable of assuming Disrupted Mode; however, none may do so voluntarily. A disrupted unit may do only two things: be attacked and get out of its predicament by successfully rolling for Disruption Removal.
Note: Historically, there is no conclusive evidence that a disrupted unit could not be resupplied while disrupted. We suggest that the Players formulate their own rule concerning this problem. The problem is that a depleted unit could become disrupted and, while it is still disrupted regain the ability to trace an appropriate path of supply. Since the unit was depleted and out of supply, it was also out of supply for Disruption Removal purposes. The question is whether the unit can be considered "in supply" when its supply path is regained and thereby gain the benefit on the Disruption Removal Roll. If the Players cannot decide between themselves, they should settle the matter with a roll of a die.
14.0 Air Landing Operations
Commentary
The essence of this game is the airborne operation executed by the Allied Player. Beginning on Game-Turn one he will be introducing some of his airborne units into play via the Air Landing Routine, simulating the air drops which occurred on the first day of Operation Market-Garden. On subsequent Game-Turns he will introduce the remainder of his airborne units via the same routine. (All German units and other Allied units either begin the game on the map or are brought into play from the map edges as subsequent reinforcements.) To understand what the following rules are attempting to simulate we will review briefly the conditions which prevailed during the Operation.
One: The Allied airborne units used in Market-Garden were quartered in southern England, which lies to the Northwest of the game-map. The position of the Air Transport bases (from which the airborne troops would depart) was such that two possible flight routes could be used by the transports to arrive at their various destinations. On one, the southern route, the flight path would pass south of the front line to a point to the east of Antwerp where it would turn northeast and cross the front on a path to the Eindhoven area. Transports using this route would fly over Allied-held territory for much of the way, and the final turn toward the drop destination would be identified by a radio beacon. The other route, the northern route, lay to the north of the front line. The path crossed the Dutch coast south of The Hague and proceeded west to s'Hertogenbosch where a final turn was made north to the drop zones around Arnhem and Nijmegen. Though the northern route was laid out to avoid the heaviest concentration of German flak, it lay entirely over enemy-held territory and flight accuracy would depend to a considerable extent on visual recognition of turning points. All in all it was a more dangerous approach route, but it was the shortest route for the troops who would be dropping on the northernmost targets. And on the first day, when the Allies wanted to insert the maximum number of troops as simultaneously as possible, both routes would have to be used to avoid traffic congestion.
Two: The Allies did not have enough air transport capacity to lift all of their airborne units at the same time. What is more, after the first lift the total capacity would shrink day by day in sustained operations reflecting direct losses from enemy flak and normal operational wastage. (To say nothing of the diversion of transports to supply air drop missions to the fuel-starved Allied ground forces.)
Three: Airborne operations on this scale were extremely sensitive to poor weather. Overcast clouds in England would hinder the formation of the transports after takeoff, overcast along the flight route and over the drop area could affect the integrity of the formations and their navigation, while wind if not compensated for could affect navigation and the actual drop. (A high wind could of course literally drag paratroopers to their death or disablement.) The effect of weather at night on flight operations was magnified.
Four: Given relatively good weather and daylight, the transport formations were usually capable of accurately delivering their loads to drop zones delineated by small pathfinder groups. Significant German flak along the route — or worse, near the drop zone — could affect operations by inflicting casualties or by causing the transport pilots to take disruptive evasive actions. German fighters did not have much effect on the operations as the Allies held air supremacy in the area.
General Rule: Air Landing operations are conducted by the Allied Player during any Allied Conditional Movement Phase. Each day the Allied Player will be allocated a number of Air Lift Points (see Daily Game-Turn Record Track). During any ensuing Game-Turn of that day he may use each Air Lift Point to "lift" one airborne battalion (or battalion-equivalent) from "England" to a drop zone (a designated hex on the map) which he will have determined by the prior placement of a Pathfinder Marker. Prior to executing a "lift," the Allied Player will have executed a Pre-Flight Routine to determine the "weather" conditions prevailing over the two flight routes he might select. With these conditions known, he will state for himself and the German Player the Flight Path of each battalion stack (or serial) he is lifting, tracing its path hex by hex from either the southern edge of the map or the western edge of the map to the designated drop zone hex. As he traces this path he will count the number of German flak (AA) units which lie along this path. Given the prevailing weather and the number of flak units he will then execute the Air Landing Routine to determine exactly where the battalion "drops" in relation to the designated drop zone hex. Having located the actual drop hex he will place the battalion in that hex. If there are German units adjacent to, in the near vicinity of or in the actual drop zone hex a series of Opportunity Fire and/or Close Action resolutions will be triggered.
To simulate the historical situation as much as possible, and to balance the game as much as possible, the Allied Player should designate the landing hexes for all serials before he rolls for the first drop in a given Game-Turn. This rule reflects the reality of the situation, since the Allies had no idea of what would happen to their troops as they landed (unless Montgomery had a crystal ball/radio). This designation process can be effected in one of two manners. First, Players may plot their landing hexes. Second the landing player can place all airborne units on the map and then resolve all landings from north to south.
Cases
[14.1] Preflight Routine [Weather]
Twice a day the Allied Player will roll two dice and determine the Weather Conditions prevailing over the northern flight route and the southern flight route. At the very beginning of each 0201-0600 turn he rolls the dice and consults the Weather Conditions Table. This gives a numerical flight condition rating for conditions over the Transport airfields and either the southern route or the northern route. This numerical rating prevails through the next four Game-Turns until 1201-1400 when the routine is executed again to determine the weather until 0201. In other words, the Player determines what the weather is in the morning and again what it is in the afternoon. Example: Let us assume it is 1201-1400 on Sept. 18. The Allied Player rolls the dice and reads 9. This means the weather rating for the southern route is 3 and for the northern route is 6. (The higher the rating the worse the weather. A P means no operation possible on that route.)
[14.11] On the first day (17 September), all units landing on Map A must use the northern route, while all units landing on Maps B, C and D must use the southern route.
[14.12] On subsequent days, the weather and the advance of the Allied units affect where the units may land. Until an Allied non-Airborne unit reaches a hex adjacent to the Maas, all units landing on the various maps must use the routes described in Case 14.11. After the aforementioned unit reaches the Maas in supply, the units on Map B have the option of using the northern or southern routes, while all other units are still bound to the restrictions of Case 14.11. With the capture of hex B3236 by a supplied Allied non-Airborne unit, the units on Map A have the same option as those on Map B. Under no circumstances may the units landing on Maps C and D use the northern route.
[14.13] For units using the southern route, complications arose when the weather was substantially different on the two weather zones of the map. If the Weather Condition on the Southern Weather Zone (Maps C and D) is 4 or more better than the weather on the Northern Weather Zone (Maps A and B), reduce the Air Landing Result by one. If the Weather Condition on the Southern Weather Zone is 4 or more worse (e.g., SWZ = 9, NWZ = 3) than the Weather Condition on the Northern Weather Zone, increase the Air Landing Result by one. If the Southern Weather Zone's Weather Condition is P, and the Weather Condition on the Northern Weather Zone is 3 or less, increase the Air Landing Result by 2.
[14.14] To reduce the Air Landing Result, an "A" becomes a "L1," an "L1" becomes an "S2," an "S2" becomes an "S1," and an "S1" becomes a "⊙." A "⊙" remains a "⊙." When increasing the Air Landing Result, simply reverse the procedure. However, if an "A" result is increased by 2, the Serial in question is destroyed on a roll of 2-6 (on two 6-sided dice).
[14.2] Air Landing Routine
The Allied Player announces that he is executing a battalion drop. He states what route (northern or southern) the battalion is taking and designates exactly which hex he will attempt to drop the battalion on. He then traces a path hex by hex from the drop hex to the map edge. This path must follow a "straight" line (see diagram). As he traces this path, he counts the number of German AA units which lie on the path or in hexes adjacent to the path from the map edge to the drop hex. He then adds up the total flight conditions. The total is the sum of the weather conditions prevailing over the route he has declared, the number of flak units he has counted on the path he has traced, plus five if it is a night turn. He rolls the dice and crossreferences this roll with the total flight condition on the Air Landing Table. This locates a result which he applies immediately to the battalion drop.
In determining the actual drop hex, if the unit drops and scatters off the map, it is placed in the last hex on the map which is not Prohibited Terrain. If a unit lands in an all-water hex (such as A0240), it drowns; that is, the unit is eliminated and removed from play.
[14.21] When tracing the northern route, a straight line of hexes must be traced from the west map-edge of Maps A or B to the drop hex. For tracing the southern route, a line (one hex right, one hex left, one hex right, etc.) must be traced from the south edge of Map D to the drop hex. If a straight line from Map D cannot physically reach the drop hex on Map A or B (i.e., the drop hex is on the far right-hand side of either of the two northernmost maps), then the Allied Player should "fly" the units of the Serial in question from the south edge of Map D to the village of Schaijk (B0115/B0116/B0117), continue along the B01xx hexrow (moving toward the east edge of Map B) until it is possible to draw a line from the B01xx hexrow to the drop hex. Players should note that the route must go exactly as all units taking the southern route must move, with the obvious exception of the dogleg in the B01xx hexrow.
[14.22] Flak that is in depleted, disrupted or travel mode does not count when determining the Air Landing Result.
[14.3] Pathfinder and Supplyhead Markers
Each Allied airborne regiment has a Pathfinder or Drop Zone marker identified with its subordination designation. In the scenarios the Allied Player will be told to place these in specific hexes. In the Campaign Game he will have some latitude in placement. In locating these Pathfinder Markers on the map, the Allied Player in effect defines a general drop zone for each of the regiments. Specifically, the Allied Player must designate as a drop hex — for each battalion belonging to a given regiment — some hex within three hexes of the regimental Pathfinder Marker (his choice). Division-asset units (those which are not subordinated to a specific regiment) may be designated to drop within three hexes of any Pathfinder Marker belonging to a regiment of the division. Each Airborne Division and the Polish Brigade has a Supply Source marker which must be placed in some hex within the drop zone of one of that Division's regiments.
[14.31] When Pathfinders Are Placed
The Allied Player may place Pathfinder Markers anytime he wishes at any point; prior to the start of play or during play. Once placed the markers may not be moved. Unless directed otherwise the Allied Player may place Pathfinder Markers on any hex he chooses. Normally, of course, the Allied Player will place his Pathfinder Markers immediately prior to dropping the first battalion belonging to the Pathfinder's regiment. Naturally this placement determines approximately where the rest of the battalions belonging to the regiment will drop.
[14.32] Other than defining an area in which the Allied Player may designate specific drop zone hexes, Pathfinder Markers have no effect on play. Their presence is otherwise ignored. German units cannot destroy Pathfinder Markers and they have no stacking weight for either side. If a German unit occupies a hex with a Pathfinder all it means is that there are Germans in the drop zone area. (If there are too many of them there it will be rather dicy for any Allied units which must drop in the area, which is all the more reason why the Allied Player shouldn't place a Pathfinder until he has to.)
(The Air Approach Routes diagram shows the two flight paths onto the map: the Northern Route runs a straight line in from the west edge of the northern maps to the designated drop hex; the Southern Route zig-zags in from the south edge of the southernmost map to its designated drop hex. A separate diagram shows a Pathfinder/Drop Zone marker — e.g., "502/101 DZ" — with the shaded hexes within three hexes of it forming the drop zone it delineates.)
[14.4] Pre-Game Airborne Deployment
Prior to the start of a game the Allied Player should deploy all his airborne units in the display labelled "England." This act will create the battalion stacks (and battalion-sized) stacks (called serials) that the Player will subsequently lift. Players will note that some of these stacks violate the 24-point stacking limitation. This is allowed since there is a procedure to cure this violation when the stack is finally lifted onto the map (see Case 14.51).
[14.5] Action Taken Upon Actual Drop
Having determined the actual drop hex (after scatter) for a battalion, the Allied Player places the battalion stack upon the hex. If there are German units adjacent to or in the vicinity of the battalion they may make a special one-time attack on the battalion stack. This attack is executed just as though it were a German Fire Phase. In other words, it is a special kind of Opportunity Fire because German Artillery units may participate. The units in the serial are considered to be concentrated and bereft of any terrain benefit for purposes of assessing the special German attack. In addition any German Flak units present may fire at double their range with no loss of effectiveness. Losses are immediately assessed as they occur.
When the Allies are curing an overstack of units in a particular hex, they must remove a minimum of units to correct the situation. This does not mean the units left in a stack must equal the stacking limit as nearly as possible, but that the violation is corrected by the removal of the least number of units.
Example: Five Allied units land in a clear hex. Their strengths are 8, 7, 5, 4 and 3. Since a stack of 24 Strength is the maximum allowable, and there are 27 Strength Points in the stack, the Allied Player must remove at least three Strength Points. The Allied Player can reduce the stack to 24 or fewer Strength Points by the removal of one unit. Therefore, he can remove no more than one unit, but he may remove any one of the five units in the hex he wishes. The excess unit(s) must move to a vacant hex or a hex with Friendly units. If there is no such hex, the entire Serial is disrupted in the hex that it landed in (see Case 9.33).
[14.51] If there are no German units in the drop hex, the Serial is considered to have landed. Each unit may move its full Movement Allowance in that Conditional Movement Phase. Before that, the Allied Player may move one or more units within the restrictions of Case 14.5 to correct any overstack. If it is necessary to enter a hex containing Friendly units, the hex is filled up to the stacking limit, at which point the Allied Player must have the entire Serial in the hex with the other Friendly units. If the stacking limit is exceeded, all of the units that were in the hex that the Serial is being moved to are displaced. The displaced units are then disrupted. The Allied Player has no option in this matter: should the landings occur such that a displacement is necessitated by an overstacked Serial, then the resulting disruption is unavoidable.
Note: Allied Players who wish to land many of their units close together are likely to find their units pulling a first-class Keystone Kops routine on them, as they all disrupt and become prime targets for German units attacking the non-combat-effective paratroop units. Between the time lost and the strength lost, the Germans should win the Western front by 1946, if the German Player doesn't die laughing by that time. Don't throw away most of an airborne division in a vain attempt to secure a key objective immediately, and free the German units to defend against the advance of the ground forces and the other airborne divisions. The reason the Allies knew not to drop their units close together was the disastrous German drop on Crete, 1941.
[14.52] Since artillery must land in dispersed mode, they may initiate displacement (as opposed to being displaced, in which case they are destroyed) at the cost of being disrupted. Of course, that means that all units with the artillery unit are also disrupted. All restrictions concerning disrupted units apply when artillery is retreated on a landing, except that the artillery is not automatically eliminated.
[14.53] If two or more Serials land in the same hex, all units are disrupted. Overstack (if any) must be cured immediately. If the overstack cannot be cured, the excess units are eliminated. Should a Serial land on Friendly units that have been in play for at least one Game-Turn, the Friendly units may move away one hex, but the Serial is disrupted. If it is impossible for the Friendly units to move away, they are disrupted also. Opportunity Fire may be triggered in all instances.
[14.54] When unstacking to meet the maximum stacking requirements, the unit(s) may perform a Close Action, provided they stay within the limits of Case 14.51. If the attack is successful, only the attacking units that were Close Assaulting because they were overstacked may advance — not any of the other units in the stack. If the attacking unit is unsuccessful (but not disrupted), the stack falls under the provisions of Case 9.33. Should the attacking unit(s) suffer a disruption result, the attacking unit(s) is eliminated, and the stack from whence it originated is disrupted.
[14.55] All other displacements and "cures" are handled exactly as in Case 9.33.
[14.56] If there are German units in the hex, the Allied Player must use his units to make a mandatory Close Action upon the German units (just as though the Close Action originated from an adjacent hex). This Close Action must succeed in disrupting the German units, forcing them to vacate the hex, or all Allied units are eliminated. If the attack is successful, and the hex is an overstack, treat exactly as above. Airborne units landing in a city, town, or forest hex that is occupied by German units are automatically eliminated.
[14.57] If airborne units landing on German units would be overstacked in the hex in which they are landing (the one that the German units are in), subtract 2 from the effectiveness rating of the stack, but calculate the strength exactly as printed on the counter. If forced to Close Action after successfully displacing the German units, the entire stack is eliminated.
[14.58] The special German fire is permitted by any German units within the three hex range, regardless of otherwise obstructing terrain. Range limitations are in effect. In other words, infantry units (for example) could not fire at the landing units, unless the units were landing on or adjacent to the infantry units. Indirect Fire may not be called in. Units with a two-hex range that are three hexes away from the landing units that are capable of doubling their range and halving their effectiveness rating may do so for the special German Fire.
[14.6] Restrictions on Airborne Operations
[14.61] On the first Game-Turn of every day the Allied Player receives a specific number of Lift Points. This is the maximum number of battalions or battalion-sized serials which he may then lift and drop during that day. He is never required to lift and drop anybody. Unless otherwise directed he may use all the lift points to make drops on the same Game-Turn or he may stagger drops between several different Game-Turns so long as in the course of a day he does not use more Lift Points than the number stated on the daily record track.
[14.62] Unless otherwise directed, the Allied Player may lift and drop battalions in any order he wishes. He may use either the northern route or the southern route in making a drop (unless instructed otherwise).
[14.63] The Allied Player may lift and drop battalions at any time during either of his two Conditional Movement Phases. Either before, after or during the time he is moving units under the conventional Movement Rules, in any sequence he wishes.
[14.64] The Allied Player may not designate a Forest, Rough, City or Town hex as a drop hex, nor may he designate a hex containing a part of a canal or river. If by chance (scatter) Allied units actually drop in one of these hexes they are immediately disrupted. A unit landing in an entirely water hex is eliminated. Units scattering off the map are placed in the last non-Prohibited Terrain hex that they passed over. No unit is ever lost off the map, as it were.
[14.65] Lift Points may not be saved from day to day. If a Player doesn't use all of his Lift Points in a given day he loses those he hasn't used. Exception: If weather conditions state 'No Flight' on both the AM and PM portions of the day for both the northern and southern routes such that the Player was prohibited from flight operations he may add a maximum of 3 of the Lift Points he couldn't use to those given him on the following day.
[14.7] Lifting Less Than a Battalion
[14.71] Though the "England" display groups the airborne units into battalion-sized serials the Allied Player may desire to drop only part of the battalion serial (why he would want this is immaterial). He may do this, though any lift less than a battalion still requires one Lift Point. In other words if a Player desires to split a battalion into two or more drops he can do so but he must use two or more Lift Points.
[14.72] The Allied Player may, if he wishes, rearrange the battalion serials we have defined on the England display. But he may not create less overall serials by so doing nor may he create serials in excess of 24 Strength Points. In other words if you want to fool around with the deployment as we've given it to you, go ahead (and good luck to you).
[14.8] Landing Unit Modes
No unit may ever land in Travel Mode. Infantry units may land in Concentrated or Dispersed Mode, at the owning Player's option. Artillery-type units may land only in Dispersed Mode.
[14.9] Air Landing Tables
[14.91] Weather Conditions Table (see separate sheet)
[14.92] Air Landing Table (see separate sheet)
15.0 Airstrikes
Commentary
World War II was the first war in which strategic airpower was used. When airplanes were used on the grand scale, they became an integral part of the armed forces of each nation. At first, airplanes were used to strafe targets, but soon the air forces of the world graduated to bombers. The bombers could wreak devastation upon seemingly safe areas of enemy territory from many miles away. During the Market-Garden operation, bombing figured prominently in the waging of the battle.
General Rule: Each day, the Players will consult their respective Turn Record charts, and will discover how many Airstrikes they have available for that day. The Allied Player will be able to use the allotment specified once in the AM turn, and once in the PM turn. The German Player may use the allotment specified in the AM segment and, on a roll of 1-4, once in the PM segment. The Germans were sometimes unable to get their small number of planes out from under Allied air cover. Once the target for an Airstrike has been determined, the Player consults the Airstrike Bombardment Table (ABT), compares the mode of the target unit to the ABT, and rolls for each Airstrike separately.
Cases
[15.1] Restrictions on Airstrikes
[15.11] No more than three Airstrikes may be placed on a single hex in a given turn.
[15.12] Airstrikes may not be accumulated from AM to PM turns and vice versa. They must be used in their designated segments. Each Airstrike represents several bombers that were to be used over and over again. Due to circumstances (maintenance, weather, etc.), the same amount of bombers may not be available at any one time.
[15.13] Airstrikes must be used in multiples of 2 on Night Game-Turns and Game-Turns in which the Weather Condition is P. On turns that both conditions exist, three Airstrikes must be used to obtain one attack. Leftover Airstrikes may not be accumulated. However, each group counts as only one.
[15.14] Airstrikes may not be used against any targets except combat units and Headquarters units. They in no way interfere with supply, communication, or any non-combat related function. They may not be combined with ground attacks. They may not observe in any way, except for themselves, and do not count for Victory Condition Observation.
[15.15] All Airstrikes are placed in the Command Phase of the owning Player after all mode changes have been made.
[15.16] All Airstrikes are resolved at the end of the owning Player's Conditional Movement Phase immediately following the Command Phase in which the Airstrike was placed. After Airstrikes are resolved, the counter representing the Airstrike (which is not in the HWTR countermix, use a blank counter) is removed. CAP markers (see below) remain on the map from the Command Phase in which they are placed to the end of the next Command Phase of that Player.
[15.17] The German Player may not use Airstrikes until Game-Turn 7.
[15.18] Airstrikes may only affect the top two units in a stack. Even should the top two units be disrupted, the units below them are not affected. Please note that since a unit moving into a stack must be the top unit, any unit moving into a stack with unit(s) disrupted by Airstrikes will become disrupted itself.
15.2 Resolving Airstrike Attacks
[15.21] Each Airstrike is resolved separately, except when it is necessary to combine Airstrikes as a result of Weather and/or night. All attacks are treated as the same, regardless of the number of Airstrikes necessary to obtain one attack.
[15.22] Determine the mode, and, if necessary, the terrain which the target is in. Roll two dice and determine the Bombardment Result. Apply any adverse results immediately. Proceed to the next attack (if any).
[15.3] Combat Air Patrol
Combat Air Patrol represents fighters that were used to ward off Enemy attacks over specified areas. Generally, this CAP was used to protect individual formations, but, as was the case with the Allies, it covered whole fronts.
[15.31] An Airstrike may not be used over an area in which a CAP is being used. In other words, if a unit is under CAP, it is invulnerable to Airstrikes.
[15.32] The Allied Player is assumed to have a CAP over the entire XXX Corps. This CAP extends in a five-hex radius from every Headquarters of 30th Corps formation. The Allied Player may extend this radius by two hexes for every Airstrike expended, up to a maximum of 11 hexes.
[15.33] The Allied Player may use Airstrikes no further than 30 (thirty) hexes away from the nearest XXX Corps formation Headquarters if the CAP option is being used. Also, only units that are in the command net of the XXX Corps (i.e., not the British 1st Airborne, for instance) may "sight" for Airstrikes, bringing Airstrikes down on units that could not be normally "sighted" (see ABT, Case 15.5). If the Allied Player wishes, this CAP can be removed, and the range of the Allied Airstrikes will become unlimited.
[15.34] The German Player may use the Airstrike allocated him to perform a CAP against an Allied airborne landing. The German Player must declare that he is using the CAP option the moment the Allied Player announces he is landing Serials. The German Player may use this against up to eight Serials within ten hexes of each other. To do so, the German Player rolls two dice. On a roll of 2 through 9, the landing has been intercepted and the Allied Player must compute all landings as if the Weather Condition is 11+ for all affected serials. On a roll of 10, the CAP does nothing, and is used up for the segment. On a roll of 11 or 12, the Airstrike CAP is destroyed by Allied quick reaction, and the Germans have no more Airstrikes for the duration of the game.
Note: Historically, the Germans were unable to provide Combat Air Patrol for their ground units, because the Allies had near total air supremacy. However, the remnants of the Luftwaffe were able to seriously disrupt the landing of the Poles by attacking the Serials as they came in for a landing.
[15.4] Explanation of Airstrike Bombardment Results
— = No result.
D = The target unit (only) is disrupted. If possible, retreat the disrupted unit out of the hex. If this is not possible, the target unit is not penalized (and the other units are not disrupted).
1* = If the unit is an armored unit or a Headquarters unit, treat as a D. If the unit is anything else, subtract one strength point and disrupt the unit (no retreat)
1 = Regardless of unit type, subtract one strength point and disrupt the unit.
[15.5] Airstrike Bombardment Table (see page 32)
16.0 Cross-River/Canal Movement
Commentary
The crux of the Market-Garden operation was the crossing of the waterways that would be normally impassable without an artificial means across (e.g., bridge). The ease with which the Allies were able to cross the major canals and rivers would determine the success of the campaign. Ideally, the Allies would be able to capture all the bridges intact, and take it from there. The following rules outline what to do when the bridges are not captured intact.
General Rule: Bridge engineers can be used to repair or destroy bridges. They can also perform a function similar to a bridge. The German Player is given the option of attempting to destroy bridges to slow the Allied advance.
Cases
[16.1] Bridge Engineers
Normally no unit may cross a canal or a river except at a bridge. However, a bridge engineer unit may "ferry" infantry, heavy weapons, Headquarters, combat engineers and Leaders (only) across an unbridged canal or river hexside.
[16.11] To execute a ferry action, both the bridge engineer unit and the unit(s) to be ferried must be stacked in the same river- or canal-side hex at the beginning of the Conditional Movement Phase in which the unit(s) is to be ferried. The combat unit or leader may then move across (i.e., ferry) any of the adjacent intervening canal or river hexsides or hexes to the opposite bank, expending two additional Movement Points (above and beyond terrain cost) in doing so. A unit may always be ferried as the entire Phase's movement, even if this requires a move of two hexes (a river/canal hex plus the opposite bank hex).
[16.12] To perform the ferrying function, the bridge engineer unit's strength must be equal to (or greater than) the strength of the unit or units that it is ferrying across the river/canal.
[16.13] The bridge engineer may not move in any Conditional Movement Phase that the ferrying function is performed.
[16.14] Bridge engineers may ferry themselves across a river/canal, just as they would ferry a normal unit, except that the bridge engineer unit itself is moved across a river/canal. Once across, the bridge engineer unit may undertake no further movement in that Phase. A bridge engineer unit may ferry no other units in the phase that it ferries itself across a river/canal.
[16.15] Units may Close Action when ferried by bridge engineers. The Close Action is resolved exactly as if the Close Action was performed across a bridge (see Case 10.42).
[16.16] German units (only) may cross rivers at permanent, on-map ferries at the cost of two additional Movement Points to the terrain cost.
[16.2] Fire Upon Ferrying Operations
If units being ferried are fired upon (Opportunity Fire), they are considered to be a concentrated target, with the exception of artillery-type units, which are considered to be in travel mode when fired upon. Note that the actual mode may be different than the "considered" target mode. The bridge engineers may not trigger Opportunity Fire, unless they are ferrying themselves.
[16.3] Bridges Across Streams
Railway, road and trail bridges across streams may not be destroyed (Exception: see Case 16.7).
[16.4] Road Bridges Across Rivers
Road bridges across rivers may not be destroyed. (The fact is that the Germans failed to destroy any of the road bridges across the rivers. There are many reasons for this failure, but it is just as well that they failed, otherwise the operation would have failed and the game would be quite dull.)
[16.5] Bridges Which Can Be Destroyed
Trail and railway bridges across canals and rivers, and road bridges across canals may be destroyed. Whenever an Allied unit enters a hex adjacent to a hex or hexside containing one end of one of the abovementioned bridges for the first time, the Allied Player must announce that an Allied unit is adjacent to a bridge eligible for destruction. The German Player then decides whether he will attempt to destroy the bridge. If the German Player chooses to attempt destruction of the bridge, the German Player declares that he is blowing the bridge, whereupon he rolls a die. On a roll of 1 or 2, the bridge is destroyed, and a Destroyed Bridge Marker is placed to note the fact. On a roll of 3 through 6, the attempt has failed, and the bridge remains intact.
[16.6] Repair of Destroyed Bridges
A bridge engineer unit in supply (or a stack of such units) with a strength of at least 5 which remains in a hex containing either end of a destroyed bridge for two consecutive complete Game-Turns repairs the destroyed bridge. To reflect the first Game-Turn of repair, simply flip the Destroyed Bridge marker over to the face showing "bridge under repair;" on the conclusion of the second turn of repair, remove the marker entirely. In order to effect the repair, no German units may be in or adjacent to either bridge-end hex. Also, all restrictions outlined in Case 3.41 apply. Please note that a repaired bridge may not be destroyed, unless done so by the provisions of Case 16.7. (Once the Allies repaired a bridge, they tended to take away all remaining charges so that the Germans would not be able to blow it immediately after the repair job was effected).
[16.7] Demolition of Bridges in the Course of Play
If a bridge engineer unit is adjacent to a bridge hex across a stream for 7 consecutive Game-Turns, the bridge is considered blown (no die-roll). During these 7 turns, the bridge engineer must remain in concentrated mode, and have at least 3 strength points. Should the engineer unit not fulfill the above conditions (e.g., the engineer is disrupted), the engineer unit may continue the cycle at the expense of an extra Game-Turn, or the owning Player may start the entire cycle over. To blow a railway bridge across a canal, the bridge engineer must spend 10 turns within the restrictions outlined above, and the owning Player must roll a 1 through 3 to successfully destroy the bridge. If a 4 through 6 is rolled, the bridge is intact.
17.0 Subordination
General Rule: Every Non-Headquarters Unit has a distinctive subordination designation printed on its counter which tells the Player exactly what higher formation (if any) "owns" the unit. Every Headquarters Unit has a subordination designation which tells the Player what formation the Headquarters controls and any higher formation to which it reports. Subordination is important because the supply path must follow a chain of subordination and subordination in some cases affects the ability of a Player to make multi-unit attacks on a common hex.
Cases
[17.1] Examples of Subordination
The following examples show the varieties of subordination found in the game.
[17.11] Subordination to Battalion/Regiment/Brigade
The overwhelming majority of infantry units of any kind are companies (armored units are platoons). The Heavy Weapons units are also companies. Most of these units have a two-part subordination designation, in the form of "000/000." The number before the slash identifies the battalion that the company or platoon belongs to and the number (we use the term "number" loosely — in some cases the number may be a letter designation) behind the slash identifies the regiment (or brigade) the battalion belongs to.
Thus a unit such as "1/501" with an Infantry symbol and values "6-3" is a parachute infantry company belonging to the 1st battalion of the 501st Regiment. In the British army, the brigade is the equivalent of the American or German regiment, and we say that an infantry or heavy weapons company belongs to a battalion which belongs to a brigade.
Thus a unit such as "5CG/32" with an Infantry symbol and values "5t4" belongs to the 5th Cold Stream Guards battalion of the 32nd brigade.
If we had room on the counter we would have identified the company (such as Company B), but the Player is not concerned with the actual "name" of a company, only what battalion/regiment it is subordinated to. (However, see Section 33.0).
[17.12] Headquarters Subordination
The smallest level headquarters in the game is the regiment (brigade) headquarters. Most of these regimental HQ's in turn are subordinate to a division. The designation takes the form "000/000" with the number before the slash identifying the regiment which the headquarters controls and the number following the slash identifying the division to which the regiment belongs.
Thus the unit "501/101" with values "7-T" is the HQ of the 501st regiment of the 101st division.
[17.13] Subordination Direct to Regiment
Some units are directly subordinate to a regiment; i.e., there is no intervening battalion formation, either because one didn't exist historically or because we didn't feel one was necessary. For example, the infantry of the 85th, 84th and 180th Germany Infantry Divisions are shown as companies subordinate directly to regiments as in the designation 1053/85. This is because the regiments in these divisions were much reduced in strength. In other cases, the direct regimental subordination reflects the actual TO as it existed. Some of the Engineer Companies, and some anti-tank and artillery batteries are shown subordinate to a regiment.
[17.14] Subordination to a Division
Most of the artillery, anti-tank, engineer and recon units are shown as directly subordinate to a division. While it is true that in most cases there was an actual battalion or regimental HQ interposed between the company or battery and the division, in most cases this was primarily an administrative organ with the division commander assigning these divisional "assets" to his line regiments on an ad hoc basis, or in the case of artillery using the artillery en masse, to support any of his front-line units. (The recon units of the British 43rd and 50th Infantry Divisions are so numerous that we have chosen to show a Recon Regt HQ to control these units.)
[17.15] Independent Regiments/Brigades
Some regiments and brigades have no divisional subordination — the Headquarters units of these formations simply bear a single subordination ID followed by the subscript 'iii' or 'x' to show that the formation is subordinated to a higher formation.
[17.16] Independent Companies or Battalions
Some units (particularly German) have no Headquarters unit to report to. They are labeled with their name and the subscript 'ind' meaning independent. When a Player sees a unit labeled 'ind' it means that it will have no specific headquarters to which it is subordinate.
[17.17] If a unit's Headquarters is destroyed, the owning Player has two choices of what to do with the surviving units: 1) The units may attach themselves to a Friendly Headquarters of their choice that operates on the same level as their former Headquarters. These units still count for multi-formation attacks, but function in all other ways as a unit of their new Headquarters command net.
Example: The 214/43 Headquarters is destroyed. The 5DL unit may hook up with the 130/43 or the 129/43 Headquarters.
- The surviving units may trace to higher formation headquarters, with the same restrictions as in (1).
Example (as in 1): The 5DL/214 may also trace directly to the 43xx Headquarters. The units may only transfer when their normal Headquarters is destroyed, not at any other time during play.
[17.18] If a Division/Corps Headquarters or an intermediary Headquarters (one that is between the highest HQ and regimental/battalion HQ) is destroyed, its step in the supply chain is eliminated, and bypassed.
Example: The 43xx headquarters is destroyed. The three Headquarters beneath it trace directly to the 30xxx Headquarters.
[17.19] Players will note that the restrictions of Case 17.18 may drastically shorten the supply lines of an advancing army. If and only if the Divisional Headquarters is destroyed, the owning Player may designate a Regimental Headquarters as the new Divisional Headquarters. All units that were previously subordinate to the Regimental cum Divisional Headquarters are still subordinate to it, as are all divisional artillery units. The only restriction is that the supply path of units tracing to the new Divisional Headquarters is now 7 hexes.
[17.2] Subordination Effect on Play
Whenever Direct Fire (or heavy weapons) units with different subordinations (i.e., from different battalions) fire on the same target unit, they are penalized. This is called a multi-formation attack. The penalty applies to any Conditional, Free or Opportunity Fire.
Example of a multi-formation attack: When computing the Fire Strength of the units involved in a multi-unit attack, reduce the effectiveness rating of each unit by 1 point for every different subordination involved in the attack. In other words, if units of 2 different battalions attack the same hex (even if they are firing on different units in the same hex) each firing unit's effectiveness rating will be reduced by 2 points. (If 3 different battalions, reduce by 3 points, etc.)
If units have no battalion subordination, the penalty for multi-formation attacks is not applied provided the units have the same regiment/brigade subordination. Should the units not also possess regiment/brigade subordination, then the units are not penalized for multi-formation attacks if they have the same division/corps subordination. This rule applies at any time that any one of the units does not have a battalion subordination.
The only time that a multi-formation attack penalty is assessed against multi-unit attacks is when fire is directed at the same target hex in the same phrase. If a unit triggers two Opportunity Fires at separate times in a phase, the Enemy Player could fire with units of different subordination at, for instance, a target changing mode and stacking, without penalty provided the units did not combine on any one attack. The Player in the above example could perform: a) two multi-formation attacks, b) one multi-formation attack and one non-multi-formation attack, or c) two non-multi-formation attacks depending on the number of units used in each.
Note: The many German independent companies force a multi-formation attack whenever they combine with any other unit that does not have the exact same designation. As the German Player has scads of these units, it may be wise to try and place his Leaders as near to concentrations of independent units as possible. The Allied 86ind also has this problem, but it can be attached to one Leader for virtually the whole game.
[17.21] Effect on Artillery Units
Artillery units are shown as subordinate to a division or corps (in the majority of cases), to a regiment/brigade, or (in a small number of cases) to a battalion. If they are subordinate to a division they may only fire if 1) They are stacked with or adjacent to the division (corps) HQ, or 2) If they are stacked with or adjacent to a regimental HQ belonging to their division.
They may only fire on a target which is observed by a unit in the chain of subordination of their division. In other words, if some infantry company belonging to a battalion and regiment of the 43rd Division observes a target, then any artillery unit subordinate directly to the 43rd division may fire on that target (assuming range, communication, etc. conditions are met). If an artillery unit is subordinate to a regiment/brigade it may fire only on targets observed by units in the chain of subordination controlled by that regimental Headquarters and it must be stacked with or adjacent to the regimental HQ. In the case of a battalion subordinated artillery, it may fire only on targets observed by units of the same battalion (and in this one exceptional case it need not be stacked with or adjacent to a headquarters).
Note: Artillery may always fire upon targets which it observes itself, regardless of presence of headquarters.
Artillery fire (Indirect Fire from artillery units) is not considered as establishing a multi-formation attack. Infantry of Division X may fire on the same hex that Division Y's artillery fires on, so long as some unit of Division Y can Observe the hex of the target.
Artillery units subordinate to regiment/battalion Headquarters may not be transferred to a division/corps Headquarters until the owning Headquarters is destroyed.
Artillery that has its printed owning Headquarters destroyed (i.e., not if a Headquarters that the artillery has been assigned to) may be resubordinated to any equivalent or lower level HQ in the same division/corps, but the artillery's effectiveness rating is permanently reduced by 1 in addition to any temporary losses in effectiveness rating. Should the artillery need to be transferred out of its division/corps group (i.e., all the Headquarters in that group have been destroyed), the penalty becomes a reduction of the effectiveness rating by 2. If an artillery unit has no higher subordination than regiment/brigade, the unit may be transferred at a penalty of the reduction of its effectiveness rating by 2. These penalties are not cumulative with each other.
Artillery subordinate to the XXX Corps may subordinate to any non-airborne divisional Headquarters.
Airborne units may Observe for non-airborne artillery units through the artillery unit's controlling Headquarters, and this does not constitute a multi-formation attack. Such Observation does not prevent fire from the Observing units. Non-airborne unit may not Observe for airborne artillery units.
[17.22] Anti-Tank and Flak Units
Anti-tank and flak units are Direct Fire units. Except in those occasional cases in which an AT unit and an infantry unit have the same subordination (i.e. belong to the same battalion), if they fire on the same unit it is considered a multi-formation attack.
[17.23] Notes on Multi-Formation
If a unit subordinated directly to a division/corps Headquarters attacks with a unit subordinated to a regiment/battalion Headquarters of the same division, it is not considered a multi-formation attack.
Unless German independent companies or the 86ind hook up to a division/corps Headquarters because of the elimination of their Headquarters, they will always cause a multi-formation attack when firing with units that are not of their independent formation.
[17.3] Effect on Close Action
Units of different divisions (or independent regiments/brigades) may not execute a close action against the same hex in the same phase. Infantry units and heavy weapons units of different regiments/brigades may not execute close actions against the same hex in the same phase.
For non-regiment/battalion-controlled units that are controlled by a division/corps Headquarters, a Close Action is allowed with a unit of a regiment/battalion Headquarters affiliated with the division/corps. Combat engineers, Headquarters (see Case 18.3), and Leaders (see Case 19.1) must co-ordinate with units of their organization to perform a Close Action.
[17.4] Subordination Effect on Movement
The chain of subordination is in effect the line of supply. By definition ultimate sources of supply exist for each Player's forces. (For the German it is the west, north or east edges of the map. For the Allies the various airborne divisional supply heads or the XXX Corps supply train.) To be in supply, every divisional HQ must be able to trace a path (of any length) to its ultimate source of supply. In turn, Regimental HQ's and units subordinate directly to the division must be able to trace a supply path to the Divisional HQ. Independent regiment/brigade HQs must trace to ultimate supply (or a defined higher HQ which in turn traces) while independent units (those having no HQ) must race to defined higher HQ, which in turn traces to ultimate supply (see Section 11.0)
As per Cases 11.22 and 18.31, regiment/brigade Headquarters may trace to a higher Headquarters or to a divisional supply source. Regiment/brigade Headquarters may bypass Divisional Headquarters to trace directly to Army/Corps Headquarters. Similarly, combat units may bypass Battalion Headquarters and trace to higher Headquarters (but not directly to the divisional supply source).
18.0 Special Units Effects
Cases
[18.1] Heavy Weapons Units
Heavy weapons companies possess properties of both Direct and Indirect Fire units. Specifically, they always attack using the Indirect Fire Value Table. But they attack as though they are Direct Fire units. That is, they may execute Opportunity Fire against a unit which triggers such in their Zones of Control (which is almost always two hexes in depth). They may fire from any position in a stack, however, just like Direct Fire. They may only fire at one of the topmost two units in the target hex. Unlike pure artillery units, they may not double their range nor halve their effectiveness.
Heavy weapons companies are meant to support line companies of the same battalion, particularly line infantry. The term "line infantry" means combat units that possess infantry qualities, such as combat engineers and like units (Players are asked to use their common sense here). Therefore, a heavy weapons company may always fire alone, but when heavy weapons companies fire or Close Action the same target hex, each heavy weapons company must have a corresponding line infantry unit of the same subordination to conduct an attack. As an example, if three heavy weapons units fire on the same target in the same Phase, there must be at least three infantry-type units firing at that same target.
All losses taken from an attack by a heavy weapons unit are treated as if they were taken from a Direct Fire unit.
A heavy weapons unit may participate in a Close Assault but not as the "top" attacking unit. It may be the top defending unit; it may not Close Assault alone.
A heavy weapons unit may only fire at a target observed by itself or by other units of its battalion.
[18.2] Anti-Tank Units
Anti-tank units (those displaying the anti-tank gun symbol) are Direct Fire units. They possess the properties of Direct Fire units, use the Direct Fire Strength Table in executing all fire and may fire only on the topmost two units in a stack. However they possess one property of an Indirect Fire unit in that they may fire from any position within a stack.
Anti-tank units may not fire on a hex they do not directly observe. When viewed as a target the overwhelming majority of anti-tank units are considered artillery. That is, they either are in a dispersed firing mode or in their flipped-over travel mode.
Anti-tank units may double their range and halve their effectiveness. They may Opportunity Fire. They may not participate in a close action as an attacking unit.
An anti-tank unit may only perform an Opportunity Fire if it is one of the top two units in a stack.
An Anti-Tank unit may participate in a Close Action attack, but it counts only for stacking purposes. Its offensive abilities become: no effectiveness rating, zero strength, and no morale value. It may not be the top unit in a stack attacking in a Close Action, but it may be the top unit in a defending stack, in which case the unit possesses its normal characteristics, but a zero strength.
[18.3] Headquarters
Headquarters units exist in two modes. The front side displays them in a concentrated mode with a parenthized effectiveness rating and a back side in a travel mode configuration. Headquarters units may not exist in a dispersed mode. Headquarters unit may not fire during the Player's Conditional or Free Fire Phase. They may not participate in a Close Action as an attacker. They may Opportunity Fire and may be considered a defender in a Close Action, hence their parenthesized strength.
Headquarters units have a role in determining Supply, in relieving disruption and in controlling Indirect Fire of artillery units.
[18.31] HQ Effect on Supply
If a Headquarters unit can trace a supply path to the Headquarters it is subordinate to (or to its divisional supply head) it is considered in supply (assuming of course that the higher Headquarters is in supply). Combat units subordinate to the Headquarters unit are in supply if they can trace a supply path to a supplied Headquarters. Headquarters in Travel Mode may not provide supply.
[18.32] HQ Effect on Disruption
A Headquarters unit aids in removing Disruption (see Case 11.51).
[18.33] HQ Effect on Artillery Fire
Artillery may not fire on targets observed by other units unless it is stacked with or adjacent to a Headquarters unit. It may only fire on targets which are observed by units subordinate to the HQ controlling the artillery. In other words, if an artillery unit was stacked with a Divisional HQ, it could fire on any target observed by a unit of that division (assuming, of course, Communications). If however it was stacked with a regimental HQ it could only fire on a target observed by a unit of that regiment. Headquarters in Travel Mode may not Control artillery (although they may still Observe for artillery).
[18.4] Engineers
There are two types of engineer units present in the game. The most common are the conventional combat engineers found in the forces of both Players. These units function as infantry with two exceptional characteristics. The other engineer units are the bridging units possessed by the British XXX Corps. These units have a Strength Rating but no Effectiveness Rating and thus may not fire. They have only two functions in the game.
- to repair destroyed bridges, and
- to ferry Allied units across unbridged canals and rivers (see Section 16.0).
[18.41] Effect of Combat Engineers on Close Action
When a combat engineer is the topmost or second from top unit in a stack defending or attacking in a Close Action, the morale of the stack the combat engineer is in is raised by 2 Morale Points. In addition, if the defending force is entrenched and the stack the combat engineer is in is attacking, the effect of the entrenchment is negated. In order for a Combat Engineer unit to have these effects, the Combat Engineer unit must have a strength of 2 and a Morale of +1. A combat engineer alone does not receive any of the above benefits, with the exception that it does negate entrenchment when attacking. If and only if the combat engineer unit is stacked with other units (even another combat engineer) does the combat engineer make full use of its abilities.
[18.42] Effect of Combat Engineers on Constructing Entrenchments
A combat engineer unit or units with a strength of at least 4 may construct an entrenchment. To do this the engineer unit must remain concentrated and undisrupted in the same hex for six consecutive Game-Turns. Upon expiration of the sixth Game-Turn the Player may place an Entrenched marker on the hex. The presence of enemy units does not interfere with the entrenching process except insofar as the enemy units may attack the engineers to kill or disperse them. Combat engineers building an entrenchment may not execute any form of fire, but they may Observe for artillery. If the combat engineers perform any function aside from that of building an Entrenchment or Observing, the cycle for building an Entrenchment must be started again.
[18.5] Flak Units
Flak units perform all their functions exactly as anti-tank units do, except that the German units have a special anti-air function (see Case 14.2).
[18.51] Static flak units do not count for stacking in a hex. If they are disrupted, they do not disrupt other units in the hex, except other static flak units. The disruption of other units in the hex will, however, disrupt static flak units.
[18.52] Any of the HFlak or LFlak units may subordinate to any Headquarters for purposes of supply and control without penalty. If the German Player wishes to switch their command, he may do so, but only if the flak unit spends a Game-Turn out of supply doing so.
19.0 Leaders
General Rule: Leader units represent historical personages, primarily division commanders, who can have a direct effect on the course of the battle.
Cases
[19.1] Effect of Leaders on Combat
[19.11] If a Leader is stacked with a unit executing or defending against a Close Action, the Morale rating of the unit(s) under the Leader is raised by 2 Morale Points. If Leaders are in the proper chain of command, they may combine their bonuses up to a maximum of a 4 Morale Point benefit for the unit(s) that they are stacked with. The proper chain of command is defined by the Headquarters subordination listed on the Formation Display. For the Germans, OBWxxxx Headquarters is considered supreme Headquarters; hence Model is the supreme commander for the Germans, and may combine with any other German Leader. Student and Bittrich may combine with any other Leader of the 7th Parachute Division and the II Panzer Corps (e.g., 9th and 10th Panzer Divisions), respectively.
[19.12] The presence of a Leader negates the operation of Cases 17.2 and 17.3, permitting multi-formation attacks without penalty. To negate these Cases, the Leader must be stacked with a unit subordinated to him, and all other units in the attack must be in Communications range.
[19.2] Effect of Leaders on Movement
Leaders have no stacking "weight" and their presence does not penalize movement, for either Player. Supply may be traced through a hex containing only an Enemy Leader.
[19.3] Loss of Leader
[19.31] A Leader is destroyed if the hex that he occupies is entered by an Enemy combat unit, if the Leader is the only Friendly unit in the hex. It is not possible for two Leaders to be on the same side in the same hex.
[19.32] Leaders may not be fired at. However, if a unit that a Leader was stacked with takes a loss (for any reason) the Leader is exposed to elimination as follows: the owning Player rolls two dice. If a 2 is rolled, the Leader dies. Leader elimination is rolled for each time 1 Strength Point is lost (so a loss of 2 Strength Points would call for 2 rolls of the dice).
[19.4] 'Reincarnation' of Leaders
If a Leader has been eliminated, he returns to life on the Player's next following Command Phase, being placed on his Headquarters unit (it is presumed that the second-in-command has taken over). If the Headquarters to which the Leader belongs is eliminated, the Leader is permanently dead (i.e., the Leader may not be reincarnated).
[19.5] Effect of a Lost Leader
If a formation is bereft of a Leader, none of the units in the formation may change mode during the period between the loss of the Leader and his reincarnation. In other words if the Leader of the 1st Airborne Division is eliminated none of the units comprising the 1st Airborne division may change mode until the Leader is reincarnated.
If a Leader is in the process of being reincarnated (or has been permanently eliminated), the units under his command do have the option to disperse after a Direct Fire or Indirect Fire attack. This rule is in effect for a maximum of three Game-Turns. If a higher formation Leader is eliminated, the units under him that do not possess their own Leader cannot change mode, but those with their own Leader do not lose the option to change mode. Similarly, if a lower formation Leader is eliminated, a higher formation Leader may give the units formerly under the command of the lower formation Leader the option to change mode, but the higher formation Leader may only replace one lower formation Leader at a time. Players should note that Leaders may not be killed by Airstrikes.
Note: A good German Player will pay special attention to this rule, because through the judicious employment of Model, Bittrich, and Student, the German Player can effectively negate the loss of lower formation Leaders. However, nothing can save anyone from a plethora of 2's. The Allied Player must be careful, as Browning is really the only "swing" Leader on the Allied side, and the Allied lower formation Leaders are usually a map apart.
[19.6] How Leaders Move
Leaders tool around in jeeps and command cars. They have four Movement Points. For purposes of assessing Movement costs, the owning Player may treat them as any variety of unit he wishes in any deployment mode convenient to the Player. In other words, to enter hex number one the Player could treat them as concentrated armor, hex number three as a unit in travel mode, etc., whatever is most beneficial to the owning Player.
[19.7] Restrictions on Leaders
Leaders may not stack with units that do not subordinate to them unless they have at least one of their own units in the same stack. Leaders cannot fire. Corps and Army Leaders may stack with any Friendly unit.
[19.8] Appearance and Affiliations of Leaders
All Leaders are attached to Headquarters. The following list summarizes where the Leaders enter the game, when they enter the game, and where Leaders go to be reincarnated. Unless specifically stated, the Headquarters listed is the one that the Leader enters the game with, and the one he goes to to be reincarnated.
British Leaders
| Leader | Headquarters | Entry |
|---|---|---|
| Major General Adair | GAxx Headquarters | (on Map D at start) |
| Lieutenant General Horrocks | 30xx Headquarters | (variable entry) |
| Major General Graham | 50xx Headquarters | (variable entry) |
| Major General Thomas | 43xx Headquarters | (variable entry) |
| Lieutenant General Browning | ABNxxx Headquarters | (Serial 25) |
| Major General Urquhart | 1xx Headquarters | (Serial 46) |
Polish Leader
| Leader | Headquarters | Entry |
|---|---|---|
| Brigadier General Sosabowski | Pol ind Headquarters | (Serial 58) |
United States Leaders
| Leader | Headquarters | Entry |
|---|---|---|
| Major General Taylor | 101xx Headquarters | (Serial 8) |
| Major General Gavin | 82xx Headquarters | (Serial 20) |
German Leaders
| Leader | Headquarters | Entry |
|---|---|---|
| Colonel General Model | OBWxxxx Headquarters | (starts at A2024) |
| Major General Walther | KGWltr ind Headquarters | (starts at D1616) |
| Major General Poppe | 59xx Headquarters | (Turn 7 C West) |
| Gruppenfuehrer Harmel | 10xx Headquarters | (Turn 8 A1954) |
| Gruppenfuehrer Harzer | 9xx Headquarters | (Turn 5 A3930) |
| Oberst Erdmann | 7xx Headquarters | (Turn 52 B East) |
| Lieutenant General Meindl | II Paraxx Headquarters | (Turn 41 B East) |
| Oberst Meltzhorn | 107x Headquarters | (Turn 18 C1033) |
| Major General Feldt | Fxxx Headquarters | (Turn 2 B East) |
| General Knaust | KGKnst ind Headquarters | (Turn 56 A3947) |
Major General Student
Enters with any 7th Parachute Division Headquarters. Reincarnates at OBWxxxx Headquarters.
Lieutenant General Bittrich
Enters with any II Panzer Corps Headquarters. Reincarnates at OBWxxxx Headquarters.
20.0 German Off-Map Movement
General Rule: In the Campaign Game (only) the German Player has the capability to make large-scale operational movement through areas not covered by the playing map itself. This activity is known as Off-Map Movement. Off-Map Movement takes place during the German Condition Movement Phase just as does regular Movement; only units in Concentrated or Travel Mode may undertake Off-Map Movement.
Procedure: The German Off-Map Movement Display is hidden from the Allied Player at all times. When German units exit the map, or when they are called for as reinforcements, they are placed in the appropriate area of the Display. Each of the 22 areas of the Display corresponds to a specific range of mapedge hexes on a specific map. For example, area 5W corresponds to the Western Mapedge hexes of Map C bordered by the 4000 and 2100 hexrows. Each of the borders is described on the Off-Map Movement Display. A unit in a given Off-Map Movement Area may enter the map between or on the two boundary hexrows corresponding to the given Off-Map Movement Area. Placement on the Mapedge hex from the Off-Map Movement Display consumes a number of Movement Points appropriate for the entering units type and mode. Stacking limitations may never be exceeded by entering units. If units whose total strength exceeds the stacking limitations attempt to enter the same hex they are simply divided into the appropriate number of stacks and are considered to be entering in column with each stack paying appropriately increasing Movement Point Costs.
Cases
[20.1] Restrictions on Off-Map Movement
[20.11] Only units in Travel or Concentrated Mode may move from one Off-Map Area to another and then only in concert with their (or a corps or army) Headquarters.
[20.12] Units may always enter and exit the map to and from the Off-Map Movement Areas regardless of Command status, although units which exit the map may not re-enter during the same Game-Turn, and Units which enter may not exit during the same Game-Turn.
[20.13] Units must occupy an Off-Map Movement Area for one complete Friendly Movement Phase before entering the map from that area.
[20.14] Units in Travel Mode require one complete Movement Phase to move from one Off-Map Movement Area to an adjacent Off-Map Movement Area. Units in Concentrated Mode require one complete Game-Turn to move from one Off-Map Movement Area to an adjacent Off-Map area. Movement must be from area to adjacent area.
[20.15] No more than 40 Strength Points may ever be moved from any Off-Map Movement Area to any other(s) during one Movement Phase. Up to 40 Points may be moved to a different area from each area. There is no limit to the total number of Strength Points that may be in an Off-Map Area at any one time. The only restriction is that no more than 40 Strength Points may be moved to or from a particular Off-Map Area in any one Game-Turn.
[20.16] No Movement may take place from one area to another during Clear Weather Day Game-Turns. For purposes of Off-Map Movement maps A and B are considered to have the Weather prescribed by the Northern Route weather status and Maps C and D that prescribed by the Southern Route status. Clear Weather is defined as "0" Weather flight conditions.
[20.17] Off-Map Movement is permitted to all units (regardless of the presence of Headquarters) during Night Game-Turns.
[20.18] Movement is allowed from an Off-Map Area in which the weather is not clear to an Off-Map Area in which the weather is clear. Movement is not allowed from an Off-Map area in which the weather is clear to an Off-Map Area in which the weather is not clear.
[20.2] The Allied Advance
During the course of the Game the Allied 8th and 12th Corps advancing on the flanks of the XXX Corps (off the map to the east and west) made certain Off-Map Areas untenable for German Movement. Any German Units in the listed Off-Map Areas on the Game-Turn they become "deactivated" are removed from play. 1W: G-T 8; 2W: G-T 48; 2E: G-T 8; 3E: G-T 28; 4E: G-T 48, 5E: G-T 68, 6E: G-T 88.
See Off-Map Movement Display (separate sheet)
21.0 The Formation Display
General Rule: Both Players are provided with formation displays. These have pictures of all the units used in the game and graphically show the subordination of these units to their various divisions, brigades, regiments, etc., or (in the case of the Allied Airborne formation) places the units in "battalion" sized Serials. Prior to the start of Play all the units should be placed on these displays. This serves to locate all units (and thereby establish if any are missing) and speeds subsequent play since the Reinforcement Track is keyed to the displays.
Cases
[21.1] German Formation Displays
There are thirteen German Displays labeled a through n. Displays a through m depict divisions, brigades and regiments. (For example, display b depicts all the units and the organization of the 9SS Panzer Division.) Display n depicts all of the various independent battalions, Kampfgruppen, companies, batteries, and headquarters, etc. It is the "independent" display.
[21.2] Arrangement of the Displays
[21.21] Each of these displays is schemed in a second color which serves to subdivide the formation into discrete groups. Each of these groups of units is coded to tell the Player when and where it appears as reinforcements in the game or to tell him where the units are placed initially.
[21.22] When possible the displays have been arranged chronologically reading from left to right. For example, the 9SS Panzer shows those units which are deployed at the start of the game on the left hand part of the display followed by units which enter as reinforcements on Game-Turn 3, 5 and 6.
[21.3] Allied Ground Formation Displays
There are two Allied Ground Formation Displays, labeled y and z. Display y depicts the Guards Armored Division, the 15th/19th Armored Brigade, the A/R recon Regiment and a battery of the 86 SPAT battalion, which are all deployed initially on Map D. Display z depicts all the remaining Commonwealth formations including the 43rd and 50th Infantry Divisions, various brigades and independent formations which are all available to the Allied Player as reinforcements beginning on the Game-Turns indicated in Case 31.17.
[21.4] Allied Airborne Formation Displays "England"
Unlike the German and Allied Ground formations the Allied Airborne formations are not depicted within an Organizational Framework. Rather the units of each formation are "boxed" in battalion-sized serials. For example, units comprising the 501st, 506th and 502nd Parachute Regiments of the 101st Airborne Division are packaged in serials numbered 1 through 9 and are part of group p.
22.0 Reinforcements
General Rule: The Game-Turn Record Track signals to each Player when reinforcements are due to arrive. Next to the number of the Game-Turn will be printed a lower-case letter corresponding to a formation display. That means that units of that formation arrive on that Game-Turn. The Player refers to the lettered display and finds the appropriately time-coded group of units. For example on Game-Turn Six the letters a, b, n appear. This means units from the 10th SS Panzer Division, the 9th SS Panzer Division and the "independent" display arrive as reinforcements on Game-Turn Six. The German Player would refer to each of these displays, and locate the groups of reinforcements coded for Game-Turn Six. He would then introduce them into play on Game-Turn Six. Reinforcements may enter in any of the modes they possess at the owning Player's discretion.
Cases
[22.1] German Reinforcements
All German Reinforcements are coded as to time of arrival (Game-Turn) and location of arrival (what map-section they will appear on and where on the map they will arrive). The code is in three parts, reading from left to right. The first part of the code indicates the Game-Turn of arrival, the second part lists the Map of arrival with an upper case letter; the final part of the code will either give a specific numbered hex on which the units must enter on the map or it will (in lower case) label an entire mapedge. For example the code 7A3930 means the units arrive on Game-Turn 7 onto Map A at hex number 3930. The code 10B East means that the units will arrive on Game-Turn 10 onto Map B anywhere along the east edge of the map.
[22.11] When Reinforcements Arrive
If reinforcements are due to arrive on a given Game-Turn the German Player may introduce them onto the map on either of his Conditional Movement Phases during that Game-Turn. He may delay arrival of reinforcements (see Case 22.15).
[22.12] Mode of Arriving Reinforcements
Entering Reinforcements may be in any mode the owning Player desires. Normally, of course, they would be in Travel Mode and some kinds of units would have to be in Travel Mode or they could not move onto the map.
[22.13] Movement onto the Map
When the Player moves a reinforcement onto the map he begins paying Movement costs when the unit enters the first mapedge hex. Note that roads and trails run off the map, and the Players can presume that they extend indefinitely off the map such that a unit could enter onto the map along a road.
[22.14] When a Player brings on a mass of units into the same hex in the same Movement Phase, he must imagine them arriving in successive stacks such that "later" arriving units pay Movement costs prior to arriving onto the map. (Hex A3930 is an example of this. On Game-Turn 22, most of the flak brigade is scheduled to enter this hex. If every unit in this bunch only paid an initial cost upon entering it would be an anomaly. So the German Player should line these units up in a column stretching along the hypothetical road off the map with all units except those in the first stack paying Movement costs for moving along the road prior to reaching the map.)
[22.15] Rather than introduce units onto the map when called for, the German Player may assume their presence in an appropriate Off-Map Movement Area. For example, units scheduled to appear in hex A3930 could be considered to arrive in Off-Map Area 2N instead (see Section 20.0).
[22.16] Units that have their starting entrance hex blocked may enter on an adjacent non-blocked hex. Should the adjacent hexes also be blocked, treat the units as if they were entering from anywhere in the Off-Map Area that abuts their entry hex. The owning Player does not have to bring them into play immediately.
[22.2] Allied Ground Reinforcements
Allied units displayed in box Z are available on a conditional basis. When the conditions have been met, they may be introduced anywhere along the Southern edge of Map D.
[22.21] The Allied Player is governed by the "column" theory outlined in Case 21.14. If he introduces more than the maximum stacking limit into a single hex in a single Movement Phase he must assume successive stacks.
[22.22] Practically speaking the Allied Player should introduce these reinforcements over a period of several Game-Turns as his initial on-map forces clear the way. Otherwise they will be nothing but an encumbrance to his play and a target for the German Player.
[22.23] Allied Reinforcements enter under the same restrictions as Case 22.16.
[22.3] Allied Airborne Reinforcements
The Allied Airborne units are introduced into play via the Airborne Rules (see Section 14.0).
[22.31] Scenario Reinforcements
The Scenario instructions will specify exactly where the Allied Player must place his various Pathfinder markers and will call for specific lettered drop-groups to be introduced on specific Game-Turns. Given the mandated placement of the Pathfinders the Allied Player will be practically forced to drop these units near their Pathfinders (within three hexes, etc.). He may not delay Airborne reinforcements in the scenarios.
[22.32] Campaign Game Reinforcements
In the Campaign Game the Allied Player is free to introduce his Airborne units when and where he desires. He is told on the Turn Record Track exactly how many "lift" points he has available each Day. Within this restriction (and, of course, the effects of weather, etc.) he can drop where he wants. He decides where to place his Pathfinders and when, and thus decides where his units will drop.
23.0 Optional Rules
Commentary
These suggested rules are meant as guidelines. None of the following rules is meant to be hard and fast. They are intended to add realism or explore "what ifs" of the Market-Garden campaign. Players should use the optional rules at their discretion, modifying where they feel necessary.
Cases
[23.1] German Ad Hoc Formations
[23.11] The German Player may declare that he is creating an independent battalion out of a battalion that has a formal subordination. For example, the II battalion of the 22nd Infantry Regiment of the 10SS Panzer Division can be declared an independent battalion. This permits the German Player to subordinate the battalion to any German Headquarters rather than just the 22nd Regiment HQ. The resubordination may only be done in the German Command Phase.
Note: Several SS battalions are initially deployed on Maps C and D, while the parent formations are deployed on Map A. Application of this rule is one of two ways that the problem can be resolved.
[23.12] As an alternate to Case 23.11: Any unit that begins the game out of command has several options to it: a) it may remain Headquarterless or b) the unit may attach to any Headquarters, but at the penalty of having the Effectiveness Rating of the unit reduced by 2 until reunited with its original command. If the unit makes a fire attack with a unit of its "new" command, it is still a multi-formation attack (at a minimum of −4 Effectiveness Rating). Players will note that this rule is included in the Campaign Game. It is mutually exclusive with Case 23.11.
Note: Of course, if Players wish, they may allow the German Player to totally reorganize the German Army. However, if they allow the Germans to do this, it gives the German a much more unified command, which besides being ahistorical, seriously unbalances play.
[23.2] Glider Drops
Glider units (symbol — ) must be designated to drop in a clear hex only. If by chance the glider units drop into any other type of terrain, they are automatically disrupted and each glider unit suffers a loss of 1 strength point. Players should remember that all units (specifically artillery) which are glider units are affected by this rule, even if the symbol is one of a parachute unit (see Case 3.41).
[23.21] Glider Headquarters landing in anything but clear terrain will be disrupted. However, if the Headquarters moves out of the hex immediately, the other units are not affected.
[23.22] The Headquarters of the 501st and 504th Parachute Regiments are exempt from the above provisions, as they were landed by parachute.
[23.3] Airborne Divisional Supply Markers
The supplyheads of the 82nd and 101st Airborne Divisions must be placed in a clear terrain hex, with at least three other clear terrain hexes adjacent. The supplyheads of the British 1st Division and the Polish Brigade may be placed in any clear terrain hex, or any woods hex with a road or trail in it.
[23.4] Independent Drops
The Allied Player may designate a Serial to drop outside the drop zone defined by its Pathfinder marker. If this is done, add 6 points to the prevailing Flight Conditions for purposes of resolving the Air Landing routine.
One company of the 82nd Division may make an independent drop within two hexes of Grave on the first landing without this counting as a Serial for Lift Point purposes. (Historically, one company of the 82nd did land just south of the Grave Bridge.)
(Sample unit "2IG/5" with values "4-7", Infantry symbol, illustrates a company of the Irish Guards referenced below.)
[23.5] Allied Ferocity
[23.51] When a company of the Irish Guards first takes a Strength Point loss, the morale of all units in the Irish Guards is raised to 5, regardless of losses. All units marked "IG" receive this benefit until the end of the succeeding Game-Turn after the first loss is taken.
[23.52] On the first Game-Turn that units of the 82nd Airborne Division make an assault crossing the Waal (i.e., cross the Waal by the aid of bridge engineers), the morale of all units participating in an assault crossing against the Waal is raised 6 (regardless of losses) for the duration of the Game-Turn.
Historical Aside: Both of the above rules reflect well-documented cases where the Allied units went berserk, and carried the day because of it.
[23.6] Traffic Jams
Throughout the Market-Garden campaign, the Allied advance was hampered by the use of only one road: to wit, the highway. To simulate this problem, the Allied Player should be allowed to enter only one battalion or battalion-equivalent of the 43rd or 50th Divisions per Game-Turn, until Game-Turn 36, at which point the units may be brought in by brigade or brigade-equivalent for the rest of the game.
[23.7] Artillery Defense in Close Action
Since the publication of the first-edition HWTR rules, many players have complained that artillery units are too powerful defending against a Close Action. For those who insist on weakening artillery units defending in a Close Action, the following rule should be used. When computing the effectiveness rating of an artillery-type unit being Close Actioned by a stack with an infantry-type unit on top, the Effectiveness Rating of the artillery-type units is considered to be 2 (two). This rule has no effect on Opportunity Fire.
Note: This rule is an alternative to Case 11.3 (q.v.).
24.0 Introductory Scenario: Hell's Highway, 22 Sept.
This Scenario serves to introduce Players to the mechanics of the game and simulates the strongest German attempt to cut the corridor in the 101st Airborne Division's section. This attempt was launched by components of 107th Panzer Brigade, and units of a German Kampfgruppe drawn from the 59th Infantry Division. The offensive succeeded in cutting the road and delaying the Allies for a further 24 hours.
24.1 Scenario Length and Maps Used
The Scenario begins with Phase 1 of the 1001 Game-Turn of September 22 and ends with the completion of the 2000 Game-Turn of the 23rd. The Scenario is 15 Game-Turns long and takes approximately 2½ hours to play. Only Map "C" is used for this Scenario and play is confined to an area described by the 2400 and 4400 hexrows. No units may move outside these boundaries.
24.2 Initial Deployment
Note: HQ's indicated in boldface.
Allied:
1/501 (all); 3/501 (all) within two hexes of 2709. 2/501 (all); 501/101 within two hexes of 3013. 2/506 6-3 (one only); 506/101 within two hexes of 4319.
German
2107P/107 (all); 2107/107 (all); 280/107 (all); 107x within two hexes of 3032. 1053/85xx (all); 85xx 7-9; 85xx 5-4; 85xx 5-8; 85xx 3-9; 85xx within two hexes of 3403, 1054/85xx (all); KGH within two hexes of 2601.
24.3 Reinforcements
Allied:
1201/22: 2/506 6-3 (x2); 2/506 6-6 (x1)' ICG/5 4-7 (x4); 3/506 (all); hex 2411
1401/22: 3/327 (a); 327/101xx 4-6 (x2); ICG/5 4-7 (x4): hex 2411
1601/22: 1/327 (all); 2/327 (all); 327/101: hex 2411
1601/23: 5CG/32 (all); 1WG/32 (all); 31G/32 (all); 32/GdA: hex 4419
German:
1201/22: II/9 (all); 1036/59xx; 1036/59: hex 2701
1401/22: 17/7 (all); 17/7; 7xx (one only): hex 2534
24.4 Rules of Engagement
Allied:
The Allied Player has available 6 full strength artillery batteries (Effectiveness Rating 8, Strength 8) off the southern map edge for the duration of the scenario. These units may only fire on targets spotted by British Units. Range for these units is counted from hexrow 2400 to hexrow 3400 (10 hexes).
24.5 Allied Supply
Players will note that neither the supply source of the 101st Airborne Division or the Headquarters of the 5/GA are present for the duration of the Hell's Highway scenario. All units that would normally trace to either of these two for supply purposes now trace to hex 2411 for supply. The HQ and the supply sources are assumed to be along the road.
24.6 Victory Conditions
[24.61] Historical Victory Conditions
The German Player receives a Decisive Victory for achieving all three of the following conditions; a Substantive for two and a Marginal for one:
-
Occupy hex 2914 or hex 2813 at any point in the course of Play for one complete Game-Turn.
-
Occupy any hex of the road which runs from 2411 to 4419 at the end of the 1201 Game-Turn of the 23rd.
-
Cause the Allied Player to suffer more than 25 Casualty Points.
The Allied Player wins by avoiding all German conditions and fulfilling the following:
Destroy 25 or more German Strength Points.
[24.62] Player Victory Conditions
The same as Case 24.61, except Victory Condition 1 becomes "Occupy both hexes 2914 and 2813 for three complete (not necessarily consecutive) Game-Turns at any point in the course of play." Victory Condition 3 becomes "Cause the Allied Player to suffer more than 40 Casualty Points," and the Allied Player must cause 40 or more casualties on the German units to fulfill the Allied Victory Conditions.
25.0 Scenarios
There are five scenarios listed in Sections 26.0 through 30.0. There are essentially mini-games permitting the Players to isolate the first couple of days' operations on individual maps.
25.1 Scenario Length and Map Used
Each scenario is played on a single map. For example scenario 27.0, the Drop of the 82nd Airborne Division, is played on Map B; scenario 28.0 is played on Map A, etc. The length of a scenario is stated in a number of Game-Turns, in terms of the Game-Turn Record Track. A scenario does not necessarily begin with Game-Turn one. For example the first turn of Scenario 30.0 is Game-Turn 2. At least two of the scenarios start in the middle of the Game-Turn sequence. The instructions state that play commences on Phase 13 of Game-Turn x. In other words, the first twelve phases of the first Game-Turn are ignored. All scenarios with the exception of the introductory Hell's Highway scenario, begin on Phase 13 (the Allied Conditional Movement Phase). The Campaign Game also begins on Phase 13.
25.2 Initial Deployment
[25.21] German Player
Under the heading German Deployment, the German Player will find a statement indicating what units of certain formations are deployed on the map. For example, "Units of the 9th SS Panzer Division, formation (b)." He would then refer to the formation display which are detailed to initially deploy on the map in use. These units will then be deployed on the map according to the deployment key on the display which will indicate the exact hex that units must be placed in or will indicate the exact hex that the units must be placed on or adjacent to. The key will also indicate whether the units are entrenched or disrupted when placed initially.
[25.22] Allied Player
Under the heading Allied Deployment, the Allied Player will find a statement describing exactly what formation he has available on the first Game-Turn. For example "Serials 1-10 group p." He would refer to his formation displays and locate the specified units (in the example these would be several regiments of the 101st Airborne division boxed in their battalion-sized stacks.) In the case of the scenarios dealing with the Allied Airborne the Allied Player will be told to place specific Pathfinder markers in specific hexes. Then during his first Conditional Movement Phase the Allied Player uses the Air Landing Routines to introduce his airborne units to the map. Given the mandated deployment of his Pathfinders he will be forced to drop the bulk of his serials within the drop zones delineated by the Pathfinders.
[25.23] Weather and Lift Points
In the scenarios no mention is made of weather or lift points. For these scenarios we define the weather as 0 during the first and second days the Allied Player is assumed to have sufficient lift points to introduce his initial airborne units and any subsequent reinforcements.
[25.24] German Flak
In the scenarios the Player should ignore German flak units when calculating the Air Landing Routine. In other words flak has no effect on flight conditions.
(Sample unit "HFlak" with "Stat" — a static German Flak unit counter.)
25.3 Reinforcements
Under the heading reinforcements each Player will find a listing of Game-Turns and formations. When play progresses to a listed Game-Turn the Player will refer to the formation display(s) specified locating the appropriately coded reinforcements (see Section 22.0). Note: that the Game-Turn listed is according to the Game-Turn Record Track. For example, in Scenario 30.0, Game-Turn 3 is the second Game-Turn of the scenario (because it began on Game-Turn 2). The reinforcement listing is merely a recap of the Game-Turn Record Track as a reminder to the Players. The German Player will obviously only use reinforcements detailed to arrive on the map in use. Allied airborne reinforcements would arrive via the Air Landing Routine.
25.4 Restrictions and Special Rules
The most common restriction is one requiring the Allied Player to locate his regimental headquarters on specific hexes by a specific time. This is the designer's method of imposing a historical course of action on the Allied Player. Given the benefit of hindsight, perfect reconnaissance and a free hand, the Allied Player would mop up the Germans in the 82nd and 101st scenarios. Thus the restriction. In some cases the scenario calls for either Player to exit units from the map. Scenario 28.0 is a case in point with the German Player required to exit the recon battalion of the 9th SS Panzer Division on the same turn that it arrives as reinforcements. This again is a historical event (the battalion shows up as German reinforcements in the 82nd Airborne scenario). It may come to pass that a Player finds it physically impossible to obey the letter of a restriction (for example, a Headquarters may be scattered on drop) in which case he must adhere as close to the spirit of the restriction as possible.
25.5 Victory Conditions
Determining victory in the scenarios and the Campaign Game is based on either Victory Point awards or Victory Objectives, which a Player will usually obtain for satisfying a given condition by or at the end of a scenario.
There are two types of Victory Conditions: Historical and Player. Historical Victory Conditions usually represent an approximation of the Allied objectives in game terms. Unfortunately for the Allied Player, these tend to give the German Player a good chance of winning. Player Victory Conditions are usually a modification of the Historical Victory Conditions, but are balanced in terms of the game, and it is by the Player Victory Conditions that Players can best judge themselves. The Historical Victory Conditions allow the Allied Player to compare his play with the Allied objectives, and see how ludicrous they were.
26.0 Drop of the 101st Airborne Division, 17-18 Sept., 1944
Historical Notes: This Scenario simulates the drop and pre-link-up action by the 101st Airborne along their assigned stretch of highway. The 101st was not particularly hard-pressed until the 18th of September, when the "missing" 59th Division of the Wehrmacht suddenly began a concerted push toward the all-important road from the vicinity of Best.
26.1 Scenario Length and Maps Used
The Scenario begins with Phase 13 of the 1201 Turn of September 17 (Game-Turn 1) and ends with the completion of the 2001 Game-Turn of the 18th. The Scenario is 14½ Game-Turns long and takes approximately 3 hours to play. Only Map C is used for this Scenario. Some units are required to exit the southern mapedge and may not return to play.
26.2 Initial Deployment
German: Various "independent" units (see display n).
Allied:
| Pathfinders | Hex Number |
|---|---|
| 506 | C0911 |
| 502 | C1110 |
| 501 | C2512 |
| 327 | C1010 |
| Supplyhead 101 | C1010 |
In England (available to drop on Allied Movement Phase — Serials 1-10, group p.
26.3 Reinforcements
German:
| Game-Turns | Formation Display |
|---|---|
| 2, 4, 7, 11, 13 | c |
| 8 | n |
Allies:
| Game-Turn | Formation Display |
|---|---|
| 12 | Serials 11-13, group q |
26.4 Rules of Management
-
All Allied Reinforcements arrive via Airlanding Procedure.
-
German units may enter any west mapedge hex south of the 4000 hexrow. (I.e., any hex ending in 01 south of hex 4001.)
26.5 Restrictions
[26.51] Allied Regimental Headquarters must be located on the following hexes at beginning of Game-Turn 3.
| Regt. HQ | Hex |
|---|---|
| 506/101 | C0715 |
| 502/101 | C1013 |
| 501/101 | C3013 |
The Headquarters of the 501st and 502nd regiments may not move from these hexes. Of course, should the Headquarters in question not land, the Allied Player does not have to put the units on the assigned hexes.
[26.52] By the conclusion of Game-Turn 8 all units of the 506th regiment must have exited from Map C at hex 0117. They may not return to play. (They appear in Scenario 30.0 as reinforcements at this time.)
26.6 Victory Conditions
[26.61] Historical Victory Conditions
At the conclusion of play, the German Player is awarded 1 Victory Point for achieving each of the three following conditions.
- Destroy fifteen or more Allied Strength Points.
- Occupy the hexes at both ends of any canal/river bridge on the road between hex C0117 and hex C6122.
- If a German artillery unit is capable of firing without doubling its range (remember that the road must be Observed for the German artillery unit to be capable of fire on the road!) on any hex of the aforementioned road or any Allied Pathfinder.
No Victory Points equals an Allied Victory, 1 Victory Point equals a German Marginal Victory, 2 Victory Points equals a German Substantive Victory, and all 3 Victory Points equals a German Decisive Victory.
[26.62] Player Victory Conditions
The same as Case 26.61, with the exception that Victory Condition 1 becomes "The Germans must inflict 35 or more Strength Point losses on the Allied units."
27.0 Drop of the 82nd Airborne Division, 17-18 Sept., 1944
This Scenario simulates the drop and pre-link-up activities of the 82nd Airborne around the city of Nijmegen and the Maas-Waal Canal. The 82nd has as its responsibility the capture and occupation of the Canal and River bridges to provide the XXX Corps troops with free movement through the area. The capture of all of these objectives was achieved save one; the all-important Bridge across the Waal at Nijmegen.
27.1 Scenario Length and Maps Used
The Scenario begins with Phase 13 of the 1201 Turn 17 September (Game-Turn 1) and ends with the completion of the 2001 Turn 18 September (Game-Turn 15). The Scenario is 14½ Game-Turns long and takes approximately 3 hours to play. Only Map B is used for this Scenario. Allied units may not exit the map. Every unit of the 504th Airborne regiment and all German units are out of supply as the scenario begins.
27.2 Initial Deployment
German: Various independent units (see display n)
Allied:
| Pathfinders | Hex Number |
|---|---|
| 504 | B1332 |
| 508 | B2549 |
| 505 | B2048 |
| Supplyhead 82 | B2548 |
In England (available to drop on Allied Movement Phase) — Serials 17-28, group s.
27.3 Reinforcements
German:
| Game-Turn | Formation |
|---|---|
| 2, 4, 7, 9, 10 | n |
The recon battalion of the 9th SS Panzer Division (b display) which is scheduled to enter Map A on Game-Turn 3 at hex A3930 has crossed Map A and now enters Map B at hex B3830 on turn 4.
Allied:
| Game-Turn | Formation |
|---|---|
| 12 | Serials 29-32, group t |
27.4 Restrictions
[27.41] At the conclusion of Game-Turn 3 Allied Regimental Headquarters must occupy the following hexes and remain there for the balance of the scenario:
| Regt HQ | Hex |
|---|---|
| 504/82 | B1332 |
| 505/82 | B2148 |
| 508/82 | B3044 |
[27.42] At the conclusion of the scenario all Allied units which are not in supply shall be considered destroyed for purposes of assessing German Victory Points.
27.5 Victory Conditions
[27.51] Historical Victory Conditions
At the conclusion of the scenario, the German Player is awarded a Victory Point for achieving each of the following three conditions:
- There is no Allied unit on or adjacent to hex B3336.
- Destroy 10 or more Allied Strength Points.
- Some German units (undisrupted) within two hexes of an Allied Pathfinder.
The Allied Player receives 1 Victory Point if he can trace a series of connected road hexes from hex B0122 to any hex of Nijmegen which is free of German units or Zones of Control.
Subtract the Allied Victory Point (if earned) from the German Points.
| Differential | Victory Level |
|---|---|
| 3 | Decisive German |
| 2 | Substantive German |
| 1 | Marginal German |
| 0 | Draw |
| −1 | Allied Victory |
[27.52] Player Victory Conditions
The same Victory Conditions as Case 27.51, with the exceptions that Victory Condition 2 becomes "Destroy 25 or more Allied Strength Points," and the Allied Victory Condition becomes "a series of connected road hexes from Grave (hex B0826) to any hex of Nijmegen which is free of German units or Zones of Control."
28.0 Drop of the British 1st Airborne Division, 17-18 Sept., 1944
Historical Notes: This scenario depicts the activity of the British 1st Division on the first two days of the operation. The British 1st was assigned the Arnhem highway bridge as its main objective, and when communications failed while the troops of the 1st Parachute Brigade began their march toward the bridge disaster began. Suddenly German tanks and armored cars appeared and when the sun set only a tiny band, part of the 1st Battalion occupied the north end of the bridge, and the following day's operations failed to reinforce this bridgehead.
28.1 Scenario Length and Maps Used
The Scenario begins with Phase 13 of the 1201 Turn of September 17 and ends with the completion of the 2000 Game-Turn of the 18th. The Scenario is 14 Game-Turns long and takes approximately 4 hours to play. Only Map A is used for this Scenario. There are German units which are required to exit the southern Mapedge; they may not return to play.
28.2 Initial Deployment
German: Units of the 10th SS Panzer division (see display a); Units of the 9th SS Panzer division (see display b); Various independent units (see display n)
Allied:
| Pathfinders | Hex Number |
|---|---|
| 1/1 | A1914 |
| 4/1 | A2409 |
| 1 AL/1 | A2316 |
| Supplyhead 1 | A2419 |
In England (available to drop on Allied Movement Phase) — Serials 38-47, group v
28.3 Reinforcements
German:
| Game-Turn | Formation |
|---|---|
| 3, 5 | b |
| 6 | a,b,n |
| 7, 8 | a,n |
| 9 | a,l,n |
| 10. 13 | n |
| 13 | a |
Allied:
| Game-Turn | Formation |
|---|---|
| 12 | Serials 48-54, group w |
28.4 Restrictions
[28.41] Allied units may not cross a ferry hexside. (In other words they can only cross the Neder Rijn at a bridge.)
[28.42] The German units which enter on Game-Turn 3 (the reconnaissance battalion of the 9th SS Panzer Division) exist only to cross the map and exit on the south edge at hex A0130 by the end of Game-Turn 3. The German Player may not use them for any other purpose.
Note: For Case 28.42, et al., where Players are required to exit and/or seize an objective in the special rules, and have no penalties attached for failure in the Victory Conditions, the Players are advised to keep to the spirit of the special rule(s). If enemy action prevents the reconnaissance battalion of the 9th SS Panzer Division from exiting the map (as an example), the German Player may engage in combat against those units preventing the recce battalion from reaching the edge of the map. The designer feels that no rule need be formulated for this situation, because most Players using common sense can figure the solution out. As an option, the Players can allow the German Player to do as he wills with the recce battalion, but they will find that this seriously imbalances the scenario.
[28.43] This is an optional rule. The British historically shifted their supplyhead in the midst of the operation. If the Allied Player wishes to take advantage of the historical shift, the supplyhead must be dropped A2419, and then is moved to A2528 on Game-Turn 8 automatically. After the British were placed out of supply by German maneuvers, the supplyhead was moved to A2324 (or somewhere very near that area). However, the decision as to whether the supplyhead is moved to the last historical position is up to an out of supply British Player.
[28.44] The SS infantry units adjacent to hexes A3445 and A3947 may not roll to remove disruption until Game-Turn 3.
28.5 Victory Conditions
[28.51] Historical Victory Conditions
The German Player is awarded a Victory Point for achieving each of the following conditions at the end of the scenario.
- Destroy 15 or more Allied Strength Points.
- Contain all Allied units in the NE quadrant of the map keeping them west of hexrow xx26 inclusive and north of the Neder Rijn.
- Have some German unit which can observe any Allied Pathfinder Marker.
The Allied Player receives one Victory Point if he has at least one unit in all of the following hexes: A1926, A2232 and A2528.
Subtract the Allied Victory Point from the German Victory Points. 3 = German Decisive Victory, 2 = German Substantive Victory, 1 = German Marginal Victory, 0 = Draw, −1 = Allied Victory.
[28.52] Player Victory Conditions
The German Player receives Victory Points as follows:
-
The German Player receives 2 Victory Points for inflicting twice as many losses of Strength Points on British units as the Germans sustain themselves. The British must lose at least 40 Strength Points. German armored AT, armored car, artillery, engineers, Headquarters and mechanized infantry count as two for every Strength Point lost, while infantry and Heavy Weapons with a morale rating of one or two (printed) do not count at all.
-
The German Player receives 1 Victory Point for inflicting three losses of Strength Points on British units for every 2 Strength Points he loses himself. Other restrictions as to unit type losses apply as in Condition 1. Note that Condition 1 and Condition 2 are exclusive of each other.
-
The German Player receives 2 Victory Points for a path free of British ZOC's along a road, railroad or trail from the north edge to the south. To do so, the German Player must control one of the two Rhine bridges. If the German Player controls both of the Rhine bridges, he receives 4 Victory Points.
-
Should the German Player not fulfill the conditions of Victory Condition 3, he may still garner 1 Victory Point for holding both sides of each bridge, for a maximum of 2 Victory Points. Note that one bridge could be considered part of an Enemy-free road, and the other could merely be in German hands, for a total of 3 Victory Points.
The Allied Player receives 1 Victory Point if there is at least one Allied unit in each of the following hexes: A1926, A2232 and A2528.
Victory Scale is as Case 28.51, with a German Victory Point score of over 3 equalling a German Decisive Victory.
29.0 Destruction of the British 1st, 19-21 Sept., 1944
Historical Notes: This Scenario extends the Drop of the British 1st Scenario (see 28.0) to the point where reinforcement and resupply were no longer possible. After the disastrous actions of the 17-18 the British position continued to deteriorate, and by the 21st, the day the Nijmegen bridge was finally forced, the British 1st was confined to a tiny perimeter centered on Oosterbeek.
29.1 Scenario Length and Maps Used
The Scenario is an extension of the Drop of the British 1st Scenario and thus begins with Phase 13 of Game-Turn 1 and ends with the completion of Game-Turn 44. The Scenario is 44 Game-Turns long and takes approximately 10 hours to play. Only Map A is used for this Scenario. There are German requirements regarding exiting the southern Mapedge; certain units may return to play.
29.2 Initial Deployment
Same as 28.2
29.3 Reinforcements
Same as 28.3, plus:
German:
| Game-Turn | Formation |
|---|---|
| 19 | n |
| 22 | l |
| 40,42,44 | n |
Allied:
| Game-Turn | Formation |
|---|---|
| 43 | Serials 55-58, group x |
(Pathfinder Polx may be placed anywhere.)
29.4 Restrictions
Same as 28.4
29.5 Victory Conditions
[29.5] Historical Victory Conditions
The German Player receives one Victory Point for each of the following:
- Destroy 45 or more Allied Strength Points.
- Place all Allied units out of supply (i.e., cut them off from hex A2419 which contains the 1st Division supply head).
- Eliminate all Allied units north of the Neder Rijn. The Allied Player is awarded two Victory Points if he occupies both ends of an intact bridge across the Neder Rijn or both ends of a ferry crossing and there are no German units north of the river within five hexes of the northern terminus.
Subtract the Allied Points from the German Points.
| Differential | Victory Level |
|---|---|
| 3 | Decisive German |
| 2 | Substantive German |
| 1 | Marginal German |
| 0 | Marginal Allied |
| −1 | Substantive Allied |
| −2 | Decisive Allied |
[29.52] Player Victory Conditions
German Decisive Victory: No British or Polish units may be north of the Rhine. The British and Poles must have suffered losses of at least 400 Strength Points, while the Germans must have suffered less than 100 Strength Point-equivalent (as in Case 28.52) in losses. Also, the road between hexes A3947 and A0130 must be free of Allied units and their ZOC's.
German Substantive Victory: There must be no British or Polish units north of the Rhine. The Germans must inflict at least 350 Strength Point losses on the British and Polish unit, while German units must not have taken more than 140 Strength Point-equivalent of losses (as per Case 28.52). The German Player must also control the road between hexes A3947 and A0130 exactly as above.
German Marginal Victory: The German Player must control both sides of the two Rhine bridges, plus control the road from A3947 to A2332 and from A2032 to A0130 as above. The Allied Player must have lost at least 300 Strength Points while the German units can suffer no more than 180 Strength Point-equivalents in losses (as per Case 28.52).
Any other result is considered a German loss.
The Allied Player gains a moral victory for playing the scenario through, as a competent German Player has no right to lose the game, even with extremely bad luck. However, the Allied Player should do such things as defiantly wave an umbrella in the face of the German Player, take a break for tea at every 1600 Game-Turn, and move the "lunatics escaped from the insane asylum counter" around the Oosterbeek perimeter, and quote lines from A Bridge Too Far. This may not improve the Allied Player's performance or the German Player's temper, but will give the Allied Player something to take his mind off the carnage going on on the map. This scenario simulates the disastrous situation that the British 1st Airborne Division was plunged into, and should not be played more than twice.
30.0 The Breakout of the XXX Corps
Historical Notes: This scenario simulates the attempt of the XXX Corps to smash through German resistance on the front line around the Meuse-Escaut Canal and drive up the road thus linking with the units of the 101st Airborne Division. German resistance proved to be much heavier than expected with both the number and caliber of German troops exceeding intelligence estimates. Among the real surprises was the presence of SS troops who were thought to be nowhere in the area.
30.1 Scenario Length and Maps Used
The Scenario begins with Phase 13 of 1401 Game-Turn of the 17th (Game-Turn 2) and ends with the completion of the 2001 Game-Turn of the 18th (Game-Turn 15). The scenario is thus 14 Game-Turns long and takes approximately three hours to play. Only Map D is used for this scenario. Both Players may receive points for exiting the map.
30.2 Initial Deployment
German:
| Unit | Display |
|---|---|
| Units of the 10th SS Panzer Div. | See display a |
| Units of the 9th SS Panzer Div. | See display b |
| Units of the 6th Paracht Rgt. | See display d |
| Units of the 2nd Paracht Rgt. | See display e |
| Units of the 7th Paracht. Div. | See display g |
| various independent units | See display n |
Allied: Group y (units of the Guards Armored, etc.) deployed anywhere south of the initial front line printed on the map.
30.3 Reinforcements
German:
| Game-Turn | Formation |
|---|---|
| 3 | k |
Allied:
| Game-Turn | Formation |
|---|---|
| 8 | 506th Regiment of the 101st Airborne Division enter on Hex D6117. These were required to exit Map C in scenario 26.0 |
30.4 Restrictions and Special Rules
[30.41] German units may not move south of the initial front line.
[30.42] All Allied units must begin the game in Travel Mode. No Allied unit may voluntarily leave Travel Mode until Game-Turn 3.
[30.43] On Game-Turns 1 and 2, the Allied Player has a special "infantry" bombardment at his disposal. To wit, the Allied Player may make 18 attacks spread over the Allied Fire Phases at the Allied Player's discretion. Once the 18 bombardments have been used up (it is suggested that the Allied Player keep a running tally of the bombardments on a separate sheet of paper), they disappear, never to be seen again. All attacks may be directed at German units south of the 23xx hexrow, and all attacks are automatically computed to have a Fire Value of 6. The bombardment attacks every unit in the hex separately. All bombardments must be sighted for by a British unit that can relay back to its Headquarters by the normal Communication rules. No more than one attack may be made per hex per phase.
Historical Aside: The "infantry" bombardments represent the heavy British shelling which had been pre-planned and coordinated with air bombardments. For the purposes of simplification, the Allied Player does not treat this attack as a normal Airstrike (see Section 15.0), but abstracts the massive air assault as artillery fire. During the Allied pursuit and and winning of the Westwall (a/k/a the Siegfried Line), the Allied High Command was to meet an enemy almost as formidable as the German Army in the West: the ever-lengthening supply lines. In fact, the German Fifteenth Army managed to escape near utter annihilation by escaping under the nose of a British Corps stalled by lack of fuel. It was not that the Allies lacked the supplies necessary, as was the case with the Germans, but they did not have the transport capability to move the supplies quickly enough to the front lines in any great quantity. The intensive bombardment that immediately preceded the Garden operation used up artillery rounds at a rate that the XXX Corps could not afford for the rest of the campaign, and used up all the reserve artillery rounds that the XXX Corps had at its disposal. When the Corps began its push on Arnhem, the various artillery units were down to their normally allotted rounds, and were not able to use the ammunition at the high rate they had sustained during the bombardment.
[30.44] All units normally attached to the II SS Panzer Regiment may become part of the FBx (Flak Brigade) Headquarters command chain, or they may trace to the north edge of the map for supply as if their Headquarters were one hex off the map. The units are treated as individual independent units if the second option is taken. Players should note that the second option will drastically reduce the effectiveness of the recce battalion.
[30.45] General Adair (Guards Armored Headquarters) does not appear for the scenario. This is a play-balance mechanism.
[30.46] This is an optional rule. The XXX Corps may not go more than three hexes away from the road, except to Close Assault a German unit four hexes away. German units five or more hexes from the main road must wait until the lead Allied unit is five hexes north before moving.
30.5 Victory Conditions
[30.51] Historical Victory Conditions
The German Player is awarded one Victory Point for achieving each of the following conditions, by the end of the scenario.
- Destroy 30 or more Allied Strength Points.
- Exit units totaling 30 or more German Strength Points off either the west or east edge of Map D above the 21xx hexrow.
- Prevent any unit of the Guards Armored Division from exiting off the north edge of Map D.
Two points equals a German victory.
The Allied Player is awarded a Victory regardless of German Victory Points if he exits "intact" units of the Guards Armored off the north edge of the map whose total Strength equals or exceeds 30. An intact unit is one that has not taken any Strength Point losses.
[30.52] Player Victory Conditions
The German Player receives one Victory Point for each of the following:
- Reducing any Allied engineer unit to 6 or fewer Strength Points.
- Inflicting more than 15 Strength Points losses on the XXX Corps.
- Inflicting more than 15 Strength Points of losses on the 101st Airborne Division.
- Exiting 13 or more Strength Points of armor off the west edge of hexrow 21xx.
- Exiting 28 or more Strength Points of motorized infantry off the east edge of the map north of the 21xx hexrow.
- Exiting 24 or more Strength Points of artillery and two Headquarters off the east edge of the map north of hexrow 21xx.
- Exiting 40 or more Strength Points of parachute infantry plus at least one Headquarters of the parachute regiment off the east edge of the map north of the 21xx hexrow.
- One Victory Point per turn after Game-Turn 10 in which 30 or more Strength Points of the Guards Division, in supply, have not exited off the north edge of the map.
The British Player receives one Victory Point for each turn before Game-Turn 10 in which any British unit exits the north edge of the map within three hexes of the road.
Subtract the British points from the German points. The German Player wins a decisive victory if he has eight or more Victory Points. The German Player wins a Substantive Victory with 6 or 7 Victory Points, a Marginal Victory with 4 or 5 Victory Points. The scenario is a draw if the German Player has accumulated 2 or 3 Victory Points. It is an Allied Victory if the German Player has 1 or no Victory Points.
30.6 German Preparedness Scenario
The German units may set up anywhere north of the start line provided there is a solid line of German Zones of Control extending from D0711 and D1033. The German Player also has 19 entrenchments to place as he wishes on the front line. In this scenario, the XXX Corps should be allowed to advance on as large a front as it wishes, and General Adair should be used.
31.0 The Campaign Game
Historical Notes: While the scenarios are fun to play, Highway to the Reich is best appreciated in its entirely as a Campaign Game. The objective of Operation Market-Garden was to gain a viable bridgehead across the Rhine (Neder Rijn) so that Montgomery's Army Group could blitz the North German Plain in subsequent operations, and thereby end the war before winter. It was a daring conception that almost succeeded. If the operation had not been attempted in Holland, then the airborne troops would have probably been used elsewhere, but not necessarily in one large drop, as with Operation Market. Hindsight has shown historians that the plan had certain deficiencies, mainly in that the 1st Airborne had been dropped "a bridge too far." But then again, the Allied High Command did not have the benefit of this game in making their preparations.
31.1 Preparation
The four maps should be laid out according to the diagram in Case 3.8. Both Players should set up their Formation Displays. The Game-Turn Marker should be set on Game-Turn number 1. The time is now 1201 hrs., 17 September 1944.
[31.11] Initial German Deployment
The German Player should examine all the German Formation Displays, locate all units to be deployed, and place the units where called for. Some units will be disrupted or entrenched (see key); the remainder may be placed on the map in concentrated mode, or, if the unit does not possess that mode, dispersed.
[31.12] Initial Allied Deployment
The Allied Player places the lead elements of the XXX Corps (group y) on Map D anywhere south of the initial front line. All these units must be in Travel Mode. Allied Airborne units are located in "England" on the Formation Display, boxed in Serials. All of these units are considered available to the Allied Player. Checking the Game-Turn Record Track the Allied Player will find that his Lift Point allowance is 32 on the first day. When play commences, the Allied Player may introduce 32 Serials into play during 17 September.
[31.13] Special Flak Suppresion
Prior to the actual drops on 17 September, the Allies devoted hundreds of aircraft sorties in an attempt to suppress known German flak emplacements near the transport flight routes. These missions had a large degree of success. To simulate this effort, the Allied Player will roll a die over each German Flak unit (regardless of terrain, entrenchments and stacks, etc.) on the map prior to play beginning, with a roll of 1-4 indicating that the flak unit is disrupted. The German Player may not roll to remove disruption on these units until Game-Turn 2.
[31.15] Allied Objective Hexes
In planning for airborne operations, each airborne division was assigned a particular set of objectives. In the game, each airborne division will be assigned four objectives. These objectives have a direct bearing on the attainment of Allied victory; these objectives were chosen with the idea in mind that the capture of these objectives would facilitate the Allied XXX Corps advance.
101st Airborne Division Objectives: D5218; C0615; C1608; C2913
82nd Airborne Division Objectives: B1025; B1539; B2530; B3336
1st Airborne Division Objectives: A2232; A1926; A2331; A1822
[31.16] Multi-Player Schedule
| No. of Players | Forces Controlled |
|---|---|
| 2 | 1. Allied 2. German |
| 3 | 1. Allied Airborne 2. Allied Ground 3. German |
| 4 | 1. Allied Airborne 2. Allied Ground 3. German West Forces 4. German East Forces |
A further Commanders are added, we suggest that discrete Allied Divisions be given separate commanders; first the Airborne Divisions, then the Ground Divisions.
[31.17] Release of Off-Map Allied Units
Allied Ground units which begin the game off-map are released for play when the Allied Ground Forces achieves certain Objectives as follows:
The Allied 43rd Division and 30th Corps troops are released on the seventh Game-Turn after a supplied Allied Ground unit crosses (e.g. goes north of the Maas River).
The Allied 50th Division and the 8th Armored Brigade are released on the fifth Game-Turn after a supplied Allied Ground unit crosses (e.g. goes north of) the Neder Rijn.
The remainder of the Allied Ground Forces are released for play on the 13th Game-Turn.
Released units enter on the south edge of Map D. Players should note that even should the units fulfilling the Release Conditions later be put out of supply or eliminated, the Released units still enter the game on schedule (the orders have been sent back already).
31.2 Special Rules and Restrictions
[31.21] The following special and optional rules are included in the play of the Campaign Game: Cases 23.11, 30.41, 30.42, and 30.43.
[31.22] The Allied Airborne Supplyheads may be placed at any time during the game using the procedure outlined for Pathfinders in Case 14.31.
[31.23] No airborne unit may voluntarily move more than fifteen hexes from a drop zone or Objective hex.
[31.24] This is an optional rule. During the Garden operation, the Allied High Command did not use their ground troops in the best manner possible. Allied Players in HWTR have an immense tactical edge over the historical Allied commanders in that they are aware of the nature of the surrounding terrain, the exact disposition and size and strength of the German troops, and are not bound by the narrow-front doctrine used throughout the operation. To simulate the historical situation, there are two options open to the Players: either the Allied Ground Forces Player (and there must also be an Allied Airborne Player who can only talk to the Ground Forces Player when in communication range) has the map hidden from him until he comes in sighting range of each hex, and all German units are concealed by a dummy counter. When an Allied unit Observes a German unit, the Allied Player is informed as to whether the unit is armor, artillery, infantry, etc. When an Allied unit comes within one hex of a German unit (provided there is not a Dike hexside intervening), the Allied Player is informed of the exact nature of the German unit. Players who wish to spend the next ten years of their life doing something a bit more constructive than a highly accurate reconstruction of Operation Market-Garden may use the rules below for an accurate representation of the Allied historical doctrine. The Allied Ground Forces must be spread along a front no longer than five hexes. Any Allied units outside this front must be at least 10 hexes south of the lead Allied ground unit. Therefore, only the Allied units on the actual front will be able to fire at German units that are directly in the way of the advance of the XXX Corps (unless, of course, a German unit has managed to secure the highway behind the Allied lines). To shift the front, one of the lead units moves to where the new front will be, and the other units must immediately follow suit. When the Allied advance reaches Map B, the Allied Player may form two four-hex fronts in lieu of one five-hex front. Players who wish to be as accurate as possible without recourse to the first option should form the front on the main highway.
31.3 Victory Point Schedule
Victory in the Campaign Game is judged at the end of the game on the basis of Victory Points. Victory Points are awarded to both Players, and their totals compared to judge the overall Victory achieved by one side. Victory Points are awarded to all Players for territorial Objectives as well as to the German Player for Allied Strength Points destroyed or Allied units unable to trace an appropriate Line of Supply. Again, there are Player Victory Conditions and Historical Victory Conditions. In the Campaign Game, these are detemined by either using the Historical German Victory Points awarded or the Player German Victory Points awarded. This is a choice left up to the Players.
[31.31] Allied Victory Points Awarded
The Allied Airborne Player receives 1 Victory Point for each Allied Objective, Supplyhead, Pathfinder, or Headquarters not in Observation by a German unit at the end of each Game-Turn. For purposes of garnering the Victory Points for an Objective or Supplyhead, an Allied unit must be in the hex that the Objective or Supplyhead is in to garner the Victory Point.
The Allied Airborne Player receives one Victory Point for each German unit destroyed (removed from play due to casualties). Note that the Allied Airborne Player receives these Victory Points regardless of whether or not the Allied Airborne units do the destroying.
The Allied Ground Forces Player receives one Victory Point for every Allied non-Airborne unit in supply north of the Neder Rijn at the end of Game-Turn 106 (at the end of the game).
or
The Allied Ground Forces Player receives ten Victory Points for every Allied non-Airborne unit in supply north of the Neder Rijn at the end of the game which is part of a Brigade in which none of the units have suffered any Strength Point losses (i.e., that the unit is part of a Brigade that is completely fresh: all units are at the original assigned strength). Only units from the Guards Armored, 43rd Division, 50th Division, and the 8th Armored Brigade are eligible for this award. Players should note that Conditions 3 and 4 are exclusive of each other.
[31.32] Historical German Victory Points Awarded
The German Player receives 1 Victory Point for each Allied Strength Point destroyed.
The German Player receives 1 Victory Point for each Allied Objective, Supplyhead, Pathfinder or Headquarters that can be Observed by a German unit at the end of a Game-Turn.
The German Player receives 1 Victory Point for each unsupplied Allied unit at the end of each Game-Turn.
[31.33] Player German Victory Points Awarded
The German Player receives 1 Victory Point for each Allied airborne Strength Point destroyed and 10 Victory Points for each Allied XXX Corps Strength Point destroyed.
The German Player receives Victory Points as per Condition 2 of Case 31.32, but does not receive Victory Points for Observation of Headquarters or Pathfinders of the British 1st Airborne Division.
The German Player receives 1 Victory Point for each unsupplied Allied unit at the end of each Game-Turn.
31.4 Victory Levels
Victory is determined by comparing the total Victory Points awarded to each Player stating the comparison as a ratio (German Player to Allied Player) and evaluating the ratio in comparison to the schedule below:
| Victory Point Ratio | Level of Victory |
|---|---|
| 3.0 or more to 1 | German Decisive |
| 2.5 to 2.99 to 1 | German Substantive |
| 2.01 to 2.49 to 1 | German Marginal |
| 2.0 to 1 | Draw (neither side gains a victory) |
| 1.5 to 1.99 to 1 | Allied Marginal |
| 1.01 to 1.49 to 1 | Allied Substantive |
| 1.0 or less to 1 | Allied Decisive |
32.0 Game Notes
Maintaining Battalion Integrity: In most wargames, a unit is a unit. Actual historical designations have little bearing on play and the Player will move his units around mixing them freely to achieve optimum strength ratios as needed. In Highway, historical designations are extremely important. A Player must constantly be aware of what battalion (sic) a unit belongs to. This awareness if necessary by virtue of rules 17.2 and 17.3 which penalize a Player when he uses units of different formations to make attacks. Practically speaking, a Player should keep his units grouped in battalions, not necessarily stacked together but geographically together. There are many obvious and not-so-obvious problems with mixing units of different battalions, the most obvious of which is evident in a multi-formation direct fire attack. The firing units will lose one point of effectiveness for every unit of different subordniation involved in the attack. In most cases, this penalty is sufficient to reduce every attacking unit's firepower beyond any chance of inflicting damage on the target. While this sounds like it is mainly a burden on the "attacking" (usually the Allied) Player, it is also a constraint on the "defending" Player. If he mixes his formations, he will reduce his chances for effective Opportunity Fire (which by definition is a variant of Direct Fire). It is really painful when a mixed stack is subjected to a close action attack, and the defending Player finds that he cannot bring strong Opportunity Fire to bear on the assaulting stack.
The result of these constraints is to force both Players to maintain discrete battalion fronts and fight the battle with distinct battalion groupings. Given a defending front segmented into battalion frontages, the offensive Player should select the "joints" in the line as points of attack and close action, because — all things being equal — his assaulting units will be less exposed to Opportunity Fire. As the units in a battalion take losses, the Players will in effect relieve the "used" battalion with a "fresh" battalion, finding it more beneficial to attack with fewer but more effective units.
Note that there is a difference between a multi-formation Direct Fire attack and a multi-formation Close Action attack. In the first pcase, units of different battalions are penalized. In the second case, units of different battalions may attack without penalty so long as they belong to the same division (or independent regiment/formation in the case of those units which have no ultimate divisional affiliation.
Using Leaders: Leaders are used to implement multi-formation attacks without penalty and to allow units of different divisions to execute a Close Action attack. This is really their sole purpose — to negate the operation of rules 17.3 and 17.2. There is a risk in exposing a leader. The risk is that he may be killed. This will result in a temporary paralysis of the Player's ability to alter unit operational modes, which may or may not be an embarassment to the Player. The main point is that there aren't many leaders; one per major formation plus a couple of odd corps commanders. And while they have exceptional mobility, they still can't be everywhere at once. Their place is at the "schwerpunkt" of a divisional attack where they can aid the attacking Player in combining the undiluted firepower of multi-formations.
Maintaining Higher Formation Integrity: Just as it pays a Player to keep his battalions together, so does it pay him to keep his battalions of the same regiment togehther and regiments of the same division together for supply reasons. If a regimental headquarters strays too far from its divisional headquarters, it will be unsupplied, and any lower tracing to it will also be unsupplied.
Now, being unsupplied is no crime, and the Allied Player in particular should accept the risks of being unsupplied if the potential gain is sufficient. And what are the risks? An unsupplied unit does not suffer any mobility loss. The only difficulty that an unsupplied unit has is that it is exposed to depletion if it fires during its Conditional or Free Fire Phases. This is a fifty percent chance, each time it fires in an unsupplied condition. And a depleted unit is worthless for combat. Please note that an unsupplied unit can execute Opportunity Fire and can execute a Close Action with no risk of depletion, except artillery-type units. A depleted unit, on the other hand, can't Free Fire, Conditional Fire, Opportunity Fire or execute a Close Action. And it is terribly vulnerable to an Enemy Close Assault.
Thus a Player can reasonably expect to send units out of supply to exploit a sudden opportunity, say to sieze a road junction behind the enemy positions. Once in position on the ground, they seek to hold. Unsupplied units can be tenacious defenders. What a Player can't expect to do is send a column out of supply and have it fight to gain ground. Too many units will become depleted.
Another reason for maintaining regimental/divisional integrity is implicit in the rules for artillery (indirect fire) which require the observer unit to be within ten hexes of Headquarters unit controlling the artillery unit. This means that the maximum frontage of a formation over which one Headquarters can have complete indirect fire control, is about twenty hexes.
Stacking Restrictions are another critical play factor. In many games, a Player worries about stacking limits only when he is grouping for an attack. If he inadvertantly creates an overstacked situation, it is remedied by simply moving units to another adjacent hex. Not so in Highway. As rule 9.11 states, the Stacking limits are in effect at all times. A Player may freely move a unit or other units through a hex containing other units. But when he does so he is creating, if for only a moment, a stack of units on the given hex. If this temporary stack violates the stacking limit... bingo. The entire stack is immediately disrupted. But wait — it gets worse. Stacking limits depend on the terrain in the hex. Some terrain permits 24 strength points; most of it only allows 12 strength points. Okay, you say, but there is another kicker. Roads and trails have no bearing on any stacking. One of the most common rules violations sees a Player moving a stack of 24 points along a rode in Travel mode, blithely ignoring stacking limits in the hexes he traverses. By the rules, if he enters a 12 point limit hex, his stack is immediately disrupted in that hex. Thus, whenever a Player moves his units, his opponent should observe closely and call any stacking violation. Another common violation occurs in a close action where the attacking Player masses over 12 points in (say) a clear hex and assaults (say) a city hex. This act is technically movement into the city hex and the attacking squad should be immediately disrupted as soon as the Attacking Player states what he is doing. Given the problems of stacking, both Players would be wise to practice keeping stacks at 12 or fewer points as a matter of course.
Design Aside: Throughout the course of development of Highway, the argument has raged that the application of the stacking restrictions is too onerous — that they are in effect make-work "dirt" for the Players, adding unnecessary "dirt" to play. There is something to this. Careful Players will not create inadvertant overstacks as frequently as careless Players. However, the hours of testing showed that the application of the restrictions actually produced quicker play in the end. We found that if we permitted a Player to repeat a move to remedy a stacking violation, it proved in many cases impossible to do fairly, to say nothing of the time wasted in so doing. And we found no matter how careful a Player was, he would at some point in the heat of play violate stacking, be called for it and suffer accordingly. In fact when we were contemplating some form of involuntary command control to randomly deprive a Player of control of his units, all concerned realized it wasn't necessary since a Player would eventually snafu himself someplace, sometime by overstacking. Usually where he least desired it.
The Dynamics of a Close Action and particularly the alternatives available to the Players are interesting. The first thing that happens is that the Defending Player has an Opportunity Fire upon the Attacking stack. By definition this must be a Direct Fire attack. So that at least the two topmost units in the defending stack (plus units from nearby hexes who might also have a shot) get to fire on either of the two topmost units in the Attacking stack. Actually the Defending Player is insane if he doesn't concentrate all his fires solely on the topmost Attacking unit. His objective is to kill strength points of the Attacking unit. This lowers its morale rating (at the very least) and probably frees the Attacking Player to disperse the topmost unit. (Here we assume that the Attacking Player is leading with a concentrated unit.) The Attacking Player must decide to disperse his topmost unit or not. (Remember a concentrated unit which takes a loss must disperse or suffer an additional strength point loss.) He can only make this decision by referring to the Close Action Value Table (8.71) which will give him the trade off between losing a strength point (and thus lowering his morale rating) or dispersing the unit (thereby reducing the unit's effectiveness rating). After the Defender has completed all his Opportunity Fires the Attacker must look at what remains of his topmost unit and decide whether it now possesses moral and effectiveness sufficient to attain a workable Close Action Value or whether he (the Attacker) must restack putting some new unit on top to lead the Close Action. (We are assuming for purposes of exposition that Close Action is stack versus stack. If there is just one Attacking unit the question is moot.) If he adopts the restacking alternative the new top unit will have to undergo another round of the Defender's Opportunity Fire. So in adopting this alternative the attacker is betting that the Defender will have less success on the new top unit than he had on the original unit.
Design Aside: The rules do not address the right of a Player to examine his opponent's units, particularly as to the composition and strength of a stack. When executing Direct Fire, a Player may shoot at either of the two topmost units in a stack. Implicitly, then, he can examine the topmost and second topmost unit in a stack for purposes of determining which he wishes to fire at. Indirect Fire permits him to fire at any unit in a stack; thus he could examine the entire stack. In a close action, the topmost (and thereby visible) units in the attacking and defending stacks determine the Close Action Value, but the ultimate strength of the defending stack enters into the resolution. The question is when does the firing Player get to examine the target stack? Before he declares he is shooting at the stack, or after he has committed himself to fire? In a Close Action, can the Attacking Player examine a stack for its strength before he declares the action, or only at the point in the resolution when the strength ratios must be computed? Generally speaking, can a Player examine his opponent's deployment at will beyond what is physically visible, or is he limited to examine only what is necessary to compute an attack? Total intelligence versus need-to-know intelligence? The designer leaves the answers to those questions to the Players. This is not a cop out. Playtesting established that it made very little difference which approach was adopted so long as it was adhered to consistently throughout the game.
Obviously a need-to-know approach introduces an element of uncertainty into play that doesn't exist with total free intelligence. Some Players enjoy the uncertainty, while others find it unbearable. While on the surface, playing need-to-know might seem more "realistic," that is not really the case. The fact that a Player can't see what the bottom units in a stack are does not simulate the problems of battle zone intelligence except on a very abstract level. In the end you, the Players, must decide what approach is most comfortable and the most fun. Personally I tend toward a restrictive need-to-know approach because I become exasperated with an opponent who spends literally hours examining his units in detail so that he might calculate his move to the last decimal place. If the Players cannot agree on what approach to take, they should not attempt to play the game. They will never get through the first turn.
Close Action assaults can be very deadly if the Attacker can stage two attacks in sequence against the same enemy unit(s). If the first close action disrupts the Defender, the Defender must vacate his hex. The attacking units occupy the hex. The Attacking Player then uses another unit(s) to close assault the now disrupted Defender(s). A second disruption eliminates the Defenders entirely. The theory is neat, but the execution can be tricky. Often the second assault unit(s) can only reached the disrupted stack by stacking on top of the first assault group (stacking limits!).
Whether a unit should be dispersed or concentrated has to be determined by the Owning Player every Game-Turn during his Organization Phase. The Player has to project for his units what he intends using them for and what threats exist toward them until his next Organization Phase.
A dispersed unit is much less exposed to loss from fire than a concentrated unit, particularly a dispersed unit in the right terrain. Look at a dispersed infantry unit entrenched. The strongest artillery unit in the game is an 8-9 (strength-effectiveness) combination. Against the entrenched defender, the combination yields a Fire Value of 6. Moving to the Fire Results Table, we plug that 6 into the top line of the table and you see that the fire has only 3 chances in 36 of inflicting a strength point poss. Even if the unit was not entrenched, its chances of loss are much less than the undispersed unit. Assume a Direct Fire attack from say a 4-8 armor unit or a 6-5 infantry unit. Again the dispersed unit, particularly if entrenched, is much less vulnerable than the undispersed unit.
On the other side of the coin, the dispersed unit is more vulnerable to a close action because, all things being equal, its effectiveness rating is less on its dispersed face than on its concentrated face. (Back to close action again. Theoretically a unit in travel mode could close-action somebody. Its effectiveness rating would of course be zero. In fact, a real kamikaze could use Travel unit to close-action a tank unit. Assuming the tank unit had taken losses or was already dispersed, the effectiveness differential might by only minus 6 or minus 3, and with a good positive morale differential — say +3 or 4 — the attacker could get a low Close Action value.) A unit can dish it out when concentrated better than it can dispersed because its higher effectiveness rating garners a higher Fire Value. And of course, in a close action, being concentrated is essential to establish a decent effectiveness differential. For movement, the concentrated mode is almost always preferred, unless you want to move an armor unit through broken or forest terrain, in which case the unit must be dispersed. (Moving in Travel mode is the fastest of all methods, but a Player must take care that he doesn't leave Travel mode units where they can be shot at or overrun. They die so quickly that way.) The best of all possible worlds is to be able to retain units in dispersion that still produce sufficient fire value or close action value to overcome enemy resistance. Heavy weapons units probably suffer the least degradation in effectiveness when dispersed (as a percentage of their concentrated effectiveness) though they can't be used to lead a close action.
There is an interesting phenomenon that arises with armored units when they are targets of Direct Fire. When the Fire Value is calculated, it will vary according to the mode of the target armor unit. Assume the target is a Tiger Platoon (that's the 4-9 range 2 armored units with the 506th Panzer bn.) When concentrated they have an effectiveness of 9, dispersed an effectiveness of 7. If a British Sherman (4-7) fires at the concentrated Tigers, the value will be 4; if the Tigers are dispersed, the value will be 5. This plugs into the same column on the Fire Results Table whether the Tigers are in mixed or clear terrain. This equivalency doesn't work in all cases, but it comes close. So as a general rule, armor in the open might as well stay concentrated. Concentrated — but not in Travel mode if they are in a position to be shot at. Remember, a unit in Travel mode has a zero Effectiveness rating. Ergo, Tigers in Travel mode have a 6 or less Effectiveness Rating which raises their chances of taking a loss from 7-in-36 to 25-in-36. (While the Fire Value would rise only from 4 to 5 when the Shermans shot, units in Travel mode are denied the right to disperse, ergo the D results would be losses.) And heaven help the stack in Travel Mode caught in a close action. Allied armor carelessly left in this state can be easy meat for German infantry. A couple of those SS infantry units loose on a Travel column of the Guards Armored can wreak havoc, particularly if they can catch the British for two Movement Phases before the British can change mode. Juicy.
Opportunity Fire is worth a look. Opportunity Fire is executed when a unit leaves an Enemy-Controlled hex. Entering a controlled hex doesn't trigger anything. Leaving one controlled hex to enter another controlled hex is the same as leaving a controlled hex to enter an uncontrolled hex. It is the act of leaving that triggers fire. Once again, close action. The assaulting units trigger Opportunity Fire from all Defending units which control the hex from which the close action is launched, these are not necessarily the same units which control the assaulted hex. Opportunity Fire is also triggered when a unit changes mode in an controlled hex. The fire is incurred before the unit changes its mode. When a Player changes the arrangement of units in a stack, Opportunity Fire is triggered and falls on the new topmost unit or second topmost unit. Note that rearranging stacking order is not the same as augmenting or reducing a stack. When units are moved into a hex and stacked on top of existing units, this does not constitute rearranging a stack and does not trigger Opportunity Fire. If units on the bottom (below the two topmost) of a stack leave an Enemy controlled hex, they trigger Opportunity Fire upon themselves, ignoring as it were the presence of the topmost two units.
Highway boils down to a battle for bridges, particularly bridges across canals and rivers. Without intact bridges the Allies cannot expect to win the game. All bridges start intact. Bridges across streams and road bridges across rivers are permanent. The question is will the canal (and rail/river) bridges be blown or not, and if so, when? The Allied Player controls the answers to this question. The attempt to blow a bridge is made the instant an Allied unit moves adjacent to a hex containing either end of a bridge. The attempt to blow either succeeds or fails. Thus the Allied Player can adopt a policy of sending units on "raids" with the sole purpose of seeing what bridges blow or stand early in the game. Or he can stay away from bridges until he is ready to cross them. There are advantages and disadvantages to both strategies.
32.2 Campaign Game Notes
Because of the sheer size and scope of Operation Market-Garden, Highway to the Reich does not cover all the complexities of the situation, nor the myriad options that were available to the Allies and Germans at the various levels of command. We have received many suggestions from people who have played the game, and the designers have added several options which are provided below.
Should the Players desire more freedom, they may exclude or modify the rules as they wish. A good example is allowing the Allied Player to alter scenario drop zones or campaign game restrictions (clearly advantageous to the Allied Player), but Players are warned to take a modicum of care in choosing the rules they wish to play with; in the above example, the Allied Player is constrained by the limits of rule 31.15: the Allied Player would be foolish to drop the 101st to aid the British at Arnhem because he would lose all the victory points for the Nijmegen area. Another interesting variant is to allow the Allied Player to secretly designate his airborne objectives (all on separate mapsheets, and at least 25 hexes apart), and also secretly designate his drop zones. After he has done so, the German Player chooses his deployment, positioning his units where he thinks they will be most effective. It is recommended that roughly the same number of units start the game disrupted (perhaps a die-roll for each unit — certainly would keep the uncertainty that bedeviled the respective High Commands), and the reinforcement schedule be roughly the same. Continuing in the same vein, the entrenchment hexes should remain roughly the same, and it might not be a bad idea to keep all units on the same map.
Another option is to allow for the Allies to lose some control of the air. Instead of using the historical Airstrike Availability Schedule (see Section 15.0), the Players may boost the Luftwaffe sorties performed over the drop area. The Players will be required to work out an air-to-air combat system, plus an option to shoot down the troop transports. The Allied Player would be allowed to convert some of his artillery and anti-tank units into flak, and probably should have a stepped up reinforcement rate (perhaps allowing the release of reinforcements a couple of turns before specified in the rules). For a simple air-to-air combat system, we suggest that each player secretly write down the amount of airstrikes he is sending to each map, compare number of planes, and use a simple CRT to resolve combat (the players will have to provide that). It is suggested that all such options be kept as simple as possible, else the game becomes hellishly long and complex.
While the included Command and Control rules do more accurately reflect the confusion generated by mounting a large-scale operation, they may be too abstract for the grognard Player. That being the case, Players might institute a panic/paralysis system that would reflect botched orders, insubordination, leaderless troops, and just plain fear of the enemy. To simplify the command routine a bit, the initial check could be made at division level, but if the German independent formations become too much of a hassle, one might resolve it at company level. The designers suggest that the Allies be given slightly better command control overall, but the crack German formations should be the best to compensate for the Allied strategic advantage. A good way to simulate the command and control problems is to tie the system into the Morale Values, Leaders, and Headquarters.
In the interest of simplification, an outside player has suggested that the split-fire option be dropped. The split-fire option is always the best used when a multitude of targets are presented. Usually, the use of split-fire gives the user a better edge in his fire combat, but often its value will be negated by the multi-formation attacks it forces. However, it would be a good idea to limit the amount of separate artillery attacks to two per unit. Artillery and Heavy Weapons did not take on nine different targets at once except in the Grade B Hollywood movies on the war (and then only when the star was at the guns). But if Players want to, they can tie "mega-" split-fire with the Command and Control Options they have cooked up.
In a more serious vein, the Players should consider the plight of the German "Independent" formations. These represent the remnants of many German divisions that had been destroyed in the fighting over the years. The German Player might be given the option to form them as one division, and in compensation the Allies should be awarded victory points.
A lot of people have remarked that the game is "unfair" in that it limits the Germans to their mistakes during the campaign. Players have argued that the Germans should have the option to try to blow up the Nijmegen bridge, and thereby slow the Allied advance. While history tells us that they did try to blow up the bridge, playtesting has shown that German success in the demolition attempt will doom the Allied side to failure. Of course, if the Players allow the Germans to attempt the destruction of bridges indiscriminately, they might as well allow the Allies to not drop the British 1st Airborne "a bridge too far." The game is an historical simulation, and as such is expected to have some resemblance to the actual situation.
33.0 Explanation of Counter Designations
Commentary
When doing counter designations for a game, the Art Department is limited to eight characters per designation. Therefore, a lot of the long designations have been abbreviated to the point that they are incomprehensible. Also, while a general unit type may be given (e.g., armor, artillery, anti-tank, etc.), the unit's actual weapon is not. For Players who wish an explanation of all the designations and the unit's main weapon, consult the list below.
How to Read the List:
The material in bold face indicates the counter designation for the unit; the actual designation follows, with the material in parentheses indicating the major firepower component of that unit.
British Units:
30xxx: 30th Corps; GAxx: Guards Armored Division; 5/GA: 5th Guards Armored Brigade; 1CG/5: 1st Battalion, Coldstream Guards (Sherman M-4's); 2GG/5: 2nd Battalion, Grenadier Guards (Sherman M-4's); 2IG/5: 2nd Battalion, Irish Guards (Sherman M-4's); 1MGG/5: 1st Battalion, Motorized Grenadier Guards (6-pounder Anti-Tank Guns); 32/GA: 32nd Guards Infantry Brigade; 5CG/32: 5th Battalion, Coldstream Guards (6-pounder Anti-Tank Guns); 1WG/32: 1st Battalion, Welsh Guards (6-pounder Anti-Tank Guns); 3IG/32: 3rd Battalion, Irish Guards (6-pounder Anti-Tank Guns); 2W/GAxx: 2nd Battalion, Welsh Guards Reconnaissance; GAxx: 14th Field Squadron Royal Engineers; 615th Field Squadron Royal Engineers; 11th Bridge Engineers Troop; 55th Field Artillery Regiment (105mm Howitzers); 153rd Field Artillery Regiment (105mm Howitzers); 21st Anti-Tank Regiment (6-pounder Anti-Tank Guns, 17-pounder Anti-Tank Guns); 43xx: 43rd Infantry Division; 129/43: 129th Infantry Brigade; 4SL/129: 4th Battalion, Somerset Light (6-pounder Anti-Tank Guns); 4W/129: 4th Battalion, Wiltshire (6-pounder Anti-Tank Guns); 5W/129: 5th Battalion, Wiltshire (6-pounder Anti-Tank Guns); 130/43: 130th Infantry Brigade; 7H/130: 7th Battalion, Hampshire (6-pounder Anti-Tank Guns); 4D/130: 4th Battalion, Dorsetshire (6-pounder Anti-Tank Guns); 5D/130: 5th Battalion, Dorsetshire (6-pounder Anti-Tank Guns); 214/43: 214th Infantry Brigade; 5DL/214: 5th Battalion, Duke of Cornwall Light (6-pounder Anti-Tank Guns); 7SL/214: 7th Battalion, Somerset Light (6-pounder Anti-Tank Guns); 1WR/214: 1st Battalion, Worcester Rifles (6-pounder Anti-Tank Guns); 43/43xx: 43rd Reconnaissance Regiment; 43xx: 204th Engineer Company; 260th Engineer Company; 553rd Engineer Company; 13th Bridge Engineer Platoon; 94th Field Artillery Regiment (105mm Howitzers); 112th Field Artillery Regiment (105mm Howitzers); 179th Field Artillery Regiment (105mm Howitzers); 59th Anti-Tank Regiment (6-pounder Anti-Tank Guns, 17-pounder Anti-Tank Guns); not included: 8th Battalion, Middlesex (Machinegun); 50xx: 50th Infantry Division; 69/50: 69th Infantry Brigade; 5EY/69: 5th Battalion, East Yorkshire (6-pounder Anti-Tank Guns); 6GH/69: 6th Battalion, Green Howards (6-pounder Anti-Tank Guns); 7th Battalion, Green Howards (6-pounder Anti-Tank Guns); 151st Infantry Brigade; 6th Battalion, Durham Light (6-pounder Anti-Tank Guns); 8th Battalion, Durham Light (6-pounder Anti-Tank Guns); 9th Battalion, Durham Light (6-pounder Anti-Tank Guns); 231st Infantry Brigade; 2nd Battalion, Devonshire (6-pounder Anti-Tank Guns); 1st Battalion, Dorsetshire (6-pounder Anti-Tank Guns); 1st Battalion, Hampshire (6-pounder Anti-Tank Guns); 61st Reconnaissance Regiment; 233rd Royal Engineers Field Company; 295th Royal Engineers Field Company; 505th Royal Engineers Field Company; 15th Bridge Platoon; 74th Field Artillery Regiment (105mm Howitzers); 90th Field Artillery Regiment (105mm Howitzers); 124th Field Artillery Regiment (105mm Howitzers); 102nd Anti-Tank Regiment; (6-pounder Anti-Tank Guns, 17-pounder Anti-Tank Guns); 2nd Battalion, Cheshire (Machinegun); 15/19th King's Royal Hussars (Sherman M-4's); 8th Armored Brigade; 4/7th Royal Dragoon Guards (Sherman M-4's); 13/18th Royal Hussars (Sherman M-4's); Nottinghamshire Yeomanry (Sherman M-4's); 12th Battalion, King's Royal Rifle Corps; 44th Royal Tank Regiment (Sherman M-4's); A Squadron, Royals ; C Squadron, Royals ; 1st Airborne Division; 1st Parashute Brigade; 2nd Parachute Battalion; 3rd Parachute Battalion; 4th Parachute Brigade; 10th Parachute Battalion; 11th Parachute Battalion; 156th Parachute Battalion; 1st Battalion, Borderers; 2nd Battalion, South Staffords (6-pounder Anti-Tank Guns); 7th Battalion, King's Own South Borderers; 1st Air Landing Reconnaissance Squadron; 9th Field Company, Royal Engineers; 1st Parachute Squadron, Royal Engineers; 4th Parachute Squadron, Royal Engineers; 1st Air Landing Light Artillery Regiment (75 Pack Howitzers); 1st Air Landing Anti-Tank Battery (6-pounder Anti-Tank Guns); 2nd Air Landing Anti-Tank Battery (6-pounder Anti-Tank Guns); 21st Independent Parachute Company ; Glider Pilots
United States:
82xx: 892nd Airborne Division; 504/82: 504th Airborne Regiment; 1/504: 1st Battalion, 504th Airborne Regiment; 2/504: 2nd Battalion, 504th Airborne Regiment; 3/504: 3rd Battalion, 504th Airborne Regiment; 505/82: 505th Airborne Regiment; 1/505: 1st Battalion, 505th Airborne Regiment; 2/505: 2nd Battalion, 505th Airborne Regiment; 3/505: 3rd Battalion, 505th Airborne Regiment; 508/82: 508th Airborne Regiment; 1/508: 1st Battalion, 508th Airborne Regiment; 2/508: 2nd Battalion, 508th Airborne Regiment; 3/508: 3rd Battalion, 508th Airborne Regiment; 325/82: 325th Glider Regiment; 1/325: 1st Battalion 325th Glider Regiment; 2/325: 2nd Battalion, 325th Glider Regiment; 3/325: 3rd Battalion, 325th Glider Regiment; 82xx: 307th Airborne Engineers Battalion; 80th Anti-Tank Battalion (57mm Anti-Tank Guns); 319th Glider Field Artillery Battalion (75 Pack Howitzers); 320th Glider Field Artillery Battalion (75 Pack Howitzers); 376th Parachute Field Artillery Battalion (75 Pack Howitzers); 456th Parachute Field Artillery Battalion (75 Pack Howitzers); Reconnaissance Platoon, 82nd Airborne Division; 101xx: 101st Airborne Division; 501/101: 501st Airborne Regiment; 1/501: 1st Battalion, 501st Airborne Regiment; 2/501: 2nd Battalion, 501st Airborne Regiment; 3/501: 3rd Battalion, 501st Airborne Regiment; 502/101: 502nd Airborne Regiment; 1/502: 1st Battalion, 502nd Airborne Regiment; 2/502: 2nd Battalion, 502nd Airborne Regiment; 3/502: 3rd Battalion, 502nd Airborne Regiment; 506/101: 506th Airborne Regiment; 1/506: 1st Battalion, 506th Airborne Regiment; 2/506: 2nd Battalion, 506th Airborne Regiment; 3/506: 3rd Battalion, 506th Airborne Regiment; 327/101: 327th Glider Regiment; 1/327: 1st Battalion, 327th Glider Regiment; 2/327: 2nd Battalion, 327th Glider Regiment; 3/327: 3rd Battalion, 327th Glider Regiment; 101xx: 321st Airborne Artillery Battalion (75 Pack Howitzers); 377th Airborne Artillery Battalion (75 Pack Howitzers); 907th Glider Field Artillery Battalion (105mm Howitzers); 326th Airborne Engineers Battalion; ? Airborne Anti-Tank Battalion (57mm Anti-Tank Guns); Reconnaissance Platoon 101st Division
German Units:
10xx: 10th SS Panzer Division; 10/10: 10th SS Panzer Regiment; I/10: 1st Battalion, 10th SS Panzer Regiment (Panthers); II/10: 2nd Battalion, 10th SS Panzer Regiment; 21/10: 21st SS PanzerGrenadier Regiment; I/21: 1st Battalion, 21st SS PanzerGrenadier Regiment; II/21: 2nd Battalion, 21st SS PanzerGrenadier Regiment; 10xx: 10th SS Panzer Reconnaissance Battalion (75mm & 105mm Guns); 10th SS Panzer Artillery Regiment (105 & 150mm Guns); 10th SS Panzer Jaeger Battalion (Mk-IV Panzer Jaegers); 10th SS Panzer Pioneer Battalion; 10th SS Panzer Flak Battalion (20 & 88mm Guns); 9xx 9th SS Panzer Division; 9/9: 9th SS Panzer Regiment; I/9: 1st Battalion, 9th SS Panzer Regiment (Panthers); II/9: 2nd Battalion, 9th Panzer Regiment (Panthers); 19/9: 19th SS PanzerGrenadier Regiment; I/19: 1st Battalion, 19th SS PanzerGrenadier Regiment; II/19: 2nd Battalion, 19th SS Panzer-Grenadier Regiment; 20/9: 20th SS Panzer-Grenadier Regiment; I/20: 1st Battalion, 20th SS PanzerGrenadier Regiment; II/20: 2nd Battalion, 20th SS PanzerGrenadier Regiment; 9xx: 9th SS Panzer Reconnaissance Battalion (Mk-IV Panzer Jaegers); 9th SS Panzer Artillery Regiment (none); 9th SS Panzer Jaeger Battalion (Mk-IV Panzer Jaegers); 9th SS Panzer Pioneer Battalion; 9th SS Panzer Flak Battalion (20 & 88mm Guns); 59xx: 59th Infantry Division; 1034/59: 1034th Infantry Regiment; I/1034: 1st Battalion, 1034th Infantry Regiment; II/1034: 2nd Battalion, 1034th Infantry Regiment; 1035/59: 1035th Infantry Regiment; I/1035: 1st Battalion, 1035th Infantry Regiment; II/1035: 2nd Battalion, 1035th Infantry Regiment; 1036/59: 1036th Infantry Regiment; I/1036: 1st Battalion, 1036th Infantry Regiment; II/1036: 2nd Battalion, 1036th Infantry Regiment; 59xx: 59th Fusilier Battalion; 159th Artillery Regiment (105 & 150mm Guns); 159th Pioneer Battalion; 6iii ind: 6th Parachute Regiment (75, 105, 150mm Howitzers); I/6iii: 1st Battalion, 6th Parachute Regiment; II/6iii: 2nd Battalion, 6th Parachute Regiment; 2ii ind: 2nd Paracute Regiment (88mm Anti-Tank Guns); I/2iii: 1st Battalion, 2nd Parachute Regiment; 7iii ind: 7th Parachute Regiment; 1st Battalion, 7th Parachute Division; 7th Parachute Division (105mm Howitzers); 16th Parachute Regiment; 17th Parachute Regiment; 18th Parachute Regiment; 84th Infantry Division; 1051st Infantry Regiment; 1062nd Infantry Regiment; 1063rd Infantry Regiment; 85th Infantry Division; 1053rd Infantry Regiment; 1054th Infantry Regiment; 180th Infantry Division; 1221st Infantry Regiment; 1222nd Infantry Regiment; 1223rd Infantry Regimnet; Flak Brigade, Ladewig Battalion (88mm Guns); Neuman Battalion (88mm Guns); 19th Flak Battalion (37 and 88mm Guns); Kampfgruppe Kruger (20 & 88mm Guns); 102nd SS Flak Battalion (20mm Guns); 2107P/107; 280/107: 280th Assault Gun Brigade (Sturm 75mm's); Garrison units; 1st SS Dutch Battalion; 4th SS Training and Depot Battalion; 12th SS Training and Depot Battalion; 16th SS Training and Depot Battalion; 406th Landshutzen Regiment; 6th Penal Battalion; Kampfgruppe Walter; 100th Training and Depot Battalion; 101st Training and Depot Battalion; 105th Training and Depot Battalion; 60th Independent PanzerGrenadier Battalion; Schaffstam Battalion; Bochelt PanzerGrenadier Training and Depot Battalion; 42nd and 908th Naval Security Regiments; Kampfgruppe Brahams; 85th Independent Infantry Regiment; 88th Independent Infantry Regiment; 159th Independent Infantry Regiment; 502nd Army Tank Battalion (Tigers); 506th SS Heavy Tank Battalion (Tigers); 642nd Marine Kampfgruppe; Kampfgruppe Knaust; Kampfgruppe Kauer; Kampfgruppe Schorken; 47th Machinegun Battalion; Herman Gopering Depot Battalion; Security Unit; Flak Battery (88mm Guns); Flak Battery (20mm Guns)
Notes: Not all units have their weapons listed because the infantry weapons are not that essential at this level. The weapon listed is the predominant weapon used, not the only one. Generally the range or effectiveness rating gives the information as to the weapon involved. The German Tanks with a 7 effectiveness are Mk IV's. The 8 effectiveness units are Mk V "Panthers" and the 9 effectiveness units are Mk VI "Tigers." The British Anti-Tank Guns with an effectiveness of 6 are 6-pounder guns. The Anti-Tank guns with an effectiveness of 9 are 17-pounders, etc. For most infantry units, the predominant weapon is not given, since all rifles have the same relative "killing" power. To determine the specific rifle and/or small arms used by each infantry, parachute, etc. company would have required a tremendous amount of research to discover that units have basically the same weapons.
Course of the Battle
Basic Background
On D-Day, June 6, 1944, the Allies invaded Europe. The Germans contained the invasion for a while, but the Allies broke out and literally started racing across France, annihilating all German forces in their path. In fact, "the truth was, that the Germans were losing faster than the Allies could win."¹ Cut-off German units managed to hang onto important ports, forcing the Allies to bring in the massive supplies needed to keep the invasion rolling through France. On Sept. 4, Allies captured Antwerp, a major deep-water port, but were unable to use its facilities because General Von Zangen's Fifteenth Army controlled the western approaches, although pocketed against the coast.
The front began to stabilize. In the east, the Allies began to reach the German West Wall, a fortified zone known to the Allies as the Siegfried Line. In the north, Field Marshal Von Runstedt managed to extricate part of General Von Zangen's men and equipment while General Student, with magnificent help from General Chill, managed to form a defensive line on the Albert Canal. The fateful order: General Bittrich's battered II SS Panzer Corps to the Arnhem area for rest and refit.
The Plan
On Sept. 10, General Eisenhower met with Field Marshal Montgomery. Montgomery once again raised his plan for a single main thrust of Allied divisions aimed at cracking the German lines and racing for Berlin. The plan was again turned down. Montgomery put forth a second proposal: a massive combined airborne and ground force assault to get over the Rhine and reach the industrial Ruhr in a single backdoor maneuver. Eisenhower was enthusiastic. The plan would give the Allies a bridgehead over the Rhine, making worthwhile all of the additional strain on the stretched supply lines the attack would incur.
The airborne commanders were approached and they were also enthusiastic. The elite airborne troops were beginning to be disgusted at sitting around with nothing to do. The German retreat had been so rapid that by the time an operation could be planned, the ground troops had taken the objective. Operation Market (airborne) -Garden (ground forces) was given the go-ahead.
The entire operation was planned in the seven days between its presentation to Eisenhower and the actual attack. The planners were so anxious to get the airborne units into action that the scattered (but accurate) discouraging reports were disregarded and/or glossed over.
Three and one-half airborne divisions and an armored corps would make the assault. The airborne divisions would grab the bridges between the Dutch border and Arnhem (on the other side of the Rhine) and hold them until the ground forces arrived. When Montgomery discussed this plan with General Browning (who was later placed in overall command of the airborne units), Montgomery was asked how long it would take the armor to reach the northernmost bridge at Arnhem. He answered two days, to which General Browning replied "We can hold it for four. But sir, I think we might be going a bridge too far."²
The Attack
The First Day: Sept. 17th The world's largest daylight airborne operation started perfectly. The weather cooperated, the Allies had air superiority, the airlift took the Germans by surprise, there was negligible scatter of the divisions, and few casualties were incurred in the landing.
General Urquhart's 1st Airborne ("Red Devils") Division was dropped 6-8 miles west of Arnhem. The soft polder south of the city accommodated only a small paratroop force, and there was no closer area on the northern bank that could accommodate the needs of the division.
Major Gough's recon jeeps sprinted for the bridge and were followed by three battalions moving in columns parallel to the river. The jeeps and the two northern battalions were stopped by Major Kraft's Panzer Grenadier Training and Reserve Battalion and Lieutenant Colonel Harzer's 9th SS Panzer ("Hohenstaufen") Division of Bittrich's II SS Panzer Corps. Captain Grabner's recon battalion was ordered to leave a company at the Arnhem bridge and scout the area between Arnhem and Nijmegen for airborne activity. Inexplicably, he did not guard the bridge.
Colonel Frost's battalion, moving along the river, destroyed the railway bridge in front of them and found the pontoon bridge incomplete. They took the northern approaches of the Highway bridge, but were stopped from capturing the southern side by Panzer Grenadiers. Grabner and Frost missed each other by about one hour. Later that evening, Gough's jeeps and some men from the other two battalions managed to reach Frost.
Unfortunately for the British, their communications started to break down. The 1st was given two ultra-high frequency radio sets in order to enable it to call down airstrikes. These were worthless as they turned out to be tuned to the wrong frequency. Worse, the regular inter-division and inter-brigade radios functioned poorly. General Urquhart set out to determine the progress of the battalions advancing on the bridge.
Bittrich ordered General Harmel's 10 SS Panzer ("Frundsberg") Division to recapture the Arnhem bridge and gave him responsibility for the Arnhem-Nijmegen region. With the Arnhem bridge in British hands, Harmel was forced to use the ferry near Pannerden to get his units across the Rhine. However, the ferry would not support armored vehicles, and the main punch of his division was stuck on the northern bank until rafts could be built, an operation that would take days.
General Gavin's 82nd ("All-American") Division got off to a good start. A lightning assault by the 504th Regiment captured the Grave bridge. The 505th and 508th Regiments cleared the Germans from the Groesbeek Heights and secured the area between it and the Reichswald. The 82nd also captured a crossing over the Maas-Waal Canal but the main prize, the Nijmegen bridge, was not taken. General Browning (whose headquarters was lifted in with the 82nd) gave the Nijmegen bridges a low priority, and no attempt was made to capture them until later in the day. The advance was directed through Nijmegen rather than from the open area to the east, further slowing the operation. Unfortunately for the Americans, this gave Captain Grabner time to reinforce the men defending the southern approaches, and they could not be dislodged.
General Taylor's 101st ("Screaming Eagles") Division landed jeeps instead of artillery. He was counting upon fire support from the advancing armor before he expected to need artillery, and the added mobility would be a tremendous asset in the early assaults. The division captured the crossing at Veghel but the Son bridge was blown.
A small force had been sent west toward the bridge at Best which the Allied command thought was lightly held. However, the Best bridge was strongly defended by men from the rescued Fifteenth Army. Reinforcements were sent, and fighting for the bridge continued throughout the day.
General Horrocks' XXXth Corps moved out in mid-afternoon and was immediately stopped despite the terrific pounding of German positions by artillery and airstrikes. It had been expected that the lead elements would reach Eindhoven in 2 or 3 hours. Instead, they had covered only half that distance by nightfall of the first day.
The worst Allied setback was the discovery of the entire top-secret Market-Garden plan in a crashed glider. General Student sent the plan to Field Marshal Model. Model was coordinating the German defenses. He initially refused to believe his incredibly good luck, and did not inform higher command of the documents.
The Second Day: Sept. 18th Britain was covered by fog, and the entire second lift was delayed for four hours. The lift was successful but more than half of the cargo lost was bound for Arnhem.
The 1st Airborne continued to try and reach the men of Frost's battalion at the bridge, but were beaten back. In addition, General Urquhart became trapped behind enemy lines. However, the Dutch slowed Harmel's tanks by blocking Arnhem's streets with the dead. Bittrich was unsuccessful in his attempts to convince Model to destroy the Nijmegen bridge and isolate the 1st Airborne.
Captain Grabner left some men and equipment at Nijmegen and attempted to smash his way past Frost's men. He was killed during the unsuccessful attack. Worse, wrecked vehicles from his destroyed column blocked the bridge. Frost stood off attacks fom the north for the second day.
The 1st Airborne was beginning to be squeezed out of its landing and supply zones by Harzer's 9th SS in the east, and in the west by General Von Tettau commanding garrison and training forces stationed in the Netherlands. Communication problems prevented Allied command from being informed of the problems besetting the British.
The 82nd continued to hold the Grave bridge and captured a second crossing over the Maas-Waal Canal. However, the SS infantry of Captain Euling's battalion of Grenadiers were now dug in on the southern side of the Nijmegen bridges, and no progress was made. In addition, the 82nd was now subjected to attacks from the east and south as Model sent his reinforcements in the first of many assaults aimed at cutting off the northern forces. The 101st managed to get close to the bridge at Best, only to have it destroyed.
Tankers of the XXXth Corps were first slowed up by German resistance, and then by celebrating Dutch. They did not reach the Son bridge until 7:00 pm, but could not cross as it had not yet been repaired.
The Third Day: Sept. 19th Frost and his men continued to hold the bridge at Arnhem. Urquhart rejoined his division HQ after an absence of almost forty hours. Fog prevented General Sosabowski's 1st Polish Airborne Brigade from taking off, but the supply lift arrived on schedule. However, the stores were dropped in supply zones which had been overrun by the Germans, and little reached the beleaguered paratroopers.
Thirty-six hours behind schedule, the first British armor crossed the Son bridge, moved rapidly along the road, and reached Grave by 8:30 am and the Nijmegen suburbs by noon. Horrocks first learned that the 82nd had not captured the Nijmegen crossing. The fog had also prevented Gavin from receiving another regiment of infantry on the third lift. However, in mid-afternoon, 82nd infantry and XXXth Corps tanks attacked Euling's battalion. Euling's men had been sent across the ferry at Pannerdon and told to protect the bridge at all costs; and the Allies were stopped. Gavin proposed that the 82nd make an amphibious assault across the Waal River; his proposal was accepted, and the operation was scheduled for the following afternoon.
Taylor, with the aid of British armor, attacked the Germans at Best and cleared the area. Only a few hours later, German armor attacking from the east almost reached the Son bridge before being stopped.
The Fourth Day: Sept. 20th The 1st Airborne was forced to pull back into the Oosterbeek area. Plans were first made to take advantage of the Driel ferry, with the Polish Brigade being directed to drop near it. However, bad weather again prevented them from taking off. Later this day, the ferry was put out of action for the duration of the battle.
Harmel recaptured the Arnhem bridge in the late afternoon but could not move vehicles over it until early the next day. However, engineers managed to construct a ferry capable of transporting his troops across the Rhine.
At 3:00 pm, the 3rd Battalion of the 504th Regiment, aided by Horrocks' engineers, made a successful amphibious assault across the 400-yard wide Waal River, capturing the railroad bridge. During this action the southern end of the main highway bridge was taken. When British tanks forced their way onto the highway bridge, Harmel ordered the heavily mined bridge destroyed, but nothing happened. By 7:00 pm the British had linked up with the 3rd Battalion infantry. However, the tankers, short on ammo, gasoline, and infantry support, had not yet reached the Grave bridge. The British stopped for the night.
The Fifth Day: Sept. 21 Urquhart finally had some effective communication with the relieving forces and was able to call in artillery support. He learned that the ferry had vanished, making quick reinforcement impossible. The weather finally cleared and Sosabowski's Poles were dropped at 5:00 pm onto the positions of the waiting Germans. One battalion was forced to abort due to bad weather, and Sosabowski could only muster 750 men out of the planned drop of 1,500. In addition, most of the Polish supplies and heavy equipment were on the north side of the river.
At 11:00 am, tanks of the Irish Guards moved out up the raised highway toward Nijmegen and were stopped half an hour later. The road, which formed an island out of the polder, was only one tank wide, and the soft polder would not support heavy vehicles. A single well-positioned German self-propelled gun stopped the British six miles from Arnhem.
The Sixth Day: Sept.22 Urquhart dispatched Colonel Mackenzie and Lt. Colonel Myers to explain the plight of the 1st Airborne to the apparently uncomprehending Horrocks and Browning.
Reconnaissance units of the XXXth Corps left Nijmegen and moved over secondary roads west of the main highway, reaching Driel and the Poles at 8:00 am, but the Germans closed the route behind them. Mackenzie and Myers reached Sosabowski and notified Horrocks by radio that Urquhart believed the division could not last another 24 hours.
Browning turned down General Smith's offer of risking part of his 52nd Lowland Division (the division consisted of gliderborne and air-transported infantry but no paratroopers) in an attempt to reinforce the 1st Airborne. It was never committed during Market-Garden.
The 43rd Essex (infantry) Division broke out from Nijmegen to aid the Guards stopped near Elst. Delays by both British and German troops prevented the 43rd from taking Oosterhout until late afternoon.
At 5:30 pm, Lieutenant Colonel Taylor's 5th Duke of Cornwall's Light Infantry plus some armor support reached the Poles at Driel. Later that evening an attempt to reinforce the 1st Airborne was a disastrous failure, and the operation stopped at 3:00 am with only fifty men and virtually no supplies across the river.
Model's forces succeeded in cutting the corridor just north of Veghel. The infantry of the XII and VIII Corps, which were following the XXXth Corps, only reached the Son bridge, and Horrocks was forced to send the 32nd Guards Brigade back to aid the 101st in opening the corridor again. They succeeded, but nothing was able to move north for another 24 hours.
The Seventh Day: Sept. 23rd Mackenzie reached Browning in the morning, finally giving him a clear picture of the problems facing the 1st Airborne. He was sent back to Urquhart with a request for them to hold on as long as possible.
The weather cleared with the 101st and 82nd each receiving 3,000 more men and supplies, but the remaining Polish battalion was forced to drop in the 82nd's area, and once again the 1st received few supplies.
The corridor was reopened and men and supplies start moving north from Veghel again. Sosabowski again attempted to put men and supplies across in the evening, but only some 250 men made it to the north bank.
The Eighth Day: Sept. 24th Mackenzie reached Urquhart, who now had fewer than 2,500 men, with Horrocks' request that he hold onto the bridgehead. However, Horrocks was finally ordered to evacuate the 1st Airborne. Lieutenant Colonel Tilly and 400 men of the 4th Dorsets were ordered to make an evening diversionary attack across the Rhine to aid in the evacuation.
The Ninth Day: Sept. 25th The 4th Dorsets were unable to cross until early morning and were prevented from linking up with Urquhart's men. Preparations had been made and the evacuation took place that night.
The Tenth Day: Sept. 26th By morning the evacuation was over. Urquhart returned with "2,163 troopers, 160 Poles and 75 Dorsets."³
The battle for Arnhem was over. The Allies had a fifty-mile salient leading nowhere. The Germans would hold Arnhem until early April, 1945.
All references are to Cornelius Ryan's novel A Bridge Too Far, Popular Library, 1974, 670 pp. 1: p. 59; 2: p. 89; 3: p. 91.
First Edition Component Errata
What follows is a list of corrections to various game components which were partially in error in the first edition of Highway to the Reich.
Countermix
The British anti-tank units attached to the GP/1xx consist of the three listed on the Allied Formation Display only. One extra unit with this designation was inadvertently included in the countermix; it should be ignored.
The airborne 4/1 Engineer of the British 1st Airborne is incorrectly labeled on the back of the countersheet. The designation should read 4/1 rather than 4/4.
The three Dutch SS units (NdrInd in countermix) should have a strength of 4-1 on the back of the countersheet rather than 2-1.
A 30th Corps 5-4 units is mistakenly labeled 3I6/32; it should read 3IG/32. The unit is listed correctly on the Allied Formation Display.
The second German 935ind 2-4 unit in the countermix should read 2d2 on the back rather than 2dl.
Map (Terrain)
Hexes C0811 and C0813 should be Forest hexes; the mixed terrain in the hex is ignored, as it was an error.
The bridge on the Meuse L'Escaut Canal connects at D0711 to D0611, and the Germans may attempt to blow it on the first game-turn.
The hexside between A1444 and A1545 is a blocked hexside. However, units in those hexes do pay the extra one Movement Point cost for entering a hex containing a small body of water.
15.5 Airstrike Bombardment Table
| Dice Roll | Any (Disp) | Any (Conc) | Any (Dsrp) | Forest and City (Trav) | Any except Forest and City (Trav) |
|---|---|---|---|---|---|
| 2 | D | 1* | 1* | 1 | 1 |
| 3 | D | D | 1* | 1* | 1 |
| 4 | D | D | D | 1* | 1* |
| 5 | — | D | D | D | 1* |
| 6 | — | — | — | D | D |
| 7 | — | — | — | — | D |
| 8 | — | — | — | — | — |
| 9 | — | — | — | — | — |
| 10 | — | — | — | D | D |
| 11 | — | D | D | D | 1* |
| 12 | D | 1* | D | 1* | 1* |
Key: — = No result. D = Target unit (only) is disrupted. If possible, retreat disrupted unit out of the hex. If this is not possible, the target unit is not penalized (and the other units are not disrupted). 1* = If unit is an armored unit or a Headquarters unit, treat as a D. If the unit is anything else, subtract one Strength Point and disrupt the unit (no retreat). 1 = Regardless of unit type, subtract one Strength Point and disrupt the unit.
Abbreviations: Disp = Dispersed Mode; Conc = Concentrated Mode; Dsrp = Disrupted Mode; Trav = Travel Mode.
Highway to the Reich Errata (As of December 1978)
These errata apply to the second-edition rules only.
Charts
[5.61] (addition) Note 3 should now read "Units that are Disrupted, Depleted or in Travel Mode (with the exception of "pure" armor) cannot fire and their Effectiveness Rating is zero."
[8.72] (addition) The third line of Note 3 should read "0 Effectiveness Rating (with the exception of "pure" armor); Current Strength..."
[14.11] (change) The Weather Condition Table below replaces the one printed in the game:
0201-0600
| Dice | North | South |
|---|---|---|
| 2 | 0 | 0 |
| 3 | 9 | 10 |
| 4 | 6 | 7 |
| 5 | 3 | 3 |
| 6 | 0 | 0 |
| 7 | 6 | 6 |
| 8 | 0 | 0 |
| 9 | P | 6 |
| 10 | 3 | 0 |
| 11 | 11 | 8 |
| 12 | 3 | 0 |
1201-1400
| Dice | North | South |
|---|---|---|
| 2 | 3 | 6 |
| 3 | 9 | 10 |
| 4 | 3 | 3 |
| 5 | P | 7 |
| 6 | 6 | 6 |
| 7 | P | P |
| 8 | 0 | 0 |
| 9 | 6 | 3 |
| 10 | 3 | 6 |
| 11 | 0 | 0 |
| 12 | 11 | 8 |
Displays
Allied Formation Display (deletion) Delete the paragraphs starting with "Group z: ..." to "...on or after Game-Turn 3." The actual Turns for the release of off-map units are given in Case 31.17.
Rules
[3.6] (omission) The third sentence in this Case should read "Each Armor unit represents a platoon and each Artillery unit represents a battery."
[5.22] (addition) An exception to this Case is Case 5.29.
[5.23] (deletion) In the fifth line of the Case, strike the phrase "and Heavy Weapons", as Heavy Weapons units are not Indirect Fire units, per se.
[5.29] (addition) "Pure" Armor units (i.e., those with just the armor symbol and nothing else) have 5 (five) deducted from their Effectiveness Rating when in Travel Mode. They may fire when in Travel Mode.
[5.32] (addition) The second-to-last sentence should read "If the target is in Travel Mode the unit must take an additional one Strength Point loss, and the owning Player may place it in Dispersed or Concentrated Mode immediately. However, if he elects to change the Mode of the target unit, it is automatically Disrupted at the end of the Fire Phase." Ignore the parenthesized remark, as it no longer applies.
[5.7] Special Armored Unit Rules (clarification)
[5.71] Tank destroyer units possessing both Travel and Concentrated Mode defend as armored artillery (which defends as it moves). The other tank destroyer units defend as normal armor.
[5.72] Armored infantry in Dispersed Mode defends as regular infantry. In any other Mode, armored infantry defends as regular armor.
[6.0] Procedure (clarification/deletion) Delete the last sentence and replace it with the following: "Note that the target unit's hex is considered for blocking purposes (of Line of Sight), and the Observing unit's hex has no effect whatsoever on the Line of Sight."
[6.14] (addition) A unit may always observe a directly adjacent unit, regardless of the intervening terrain or the terrain of the hex in which the adjacent unit is situated.
[6.4] (clarification) Exception (a) should read "any dispersed unit in a City or Forest hex not adjacent to a unit Friendly to the Airstrike."
[6.63] (correction) Since there is no Weather Condition 12, ignore all references to that Weather Condition.
[7.62] (addition) Insert "(exception: "pure" Armor units)" between "...Travel Mode" and "exert no Zone of Control."
[8.6] (clarification) At the end of the sentence in the eleventh line, add the phrase "but do not necessarily have to begin the Conditional Movement phase adjacent to the Close Assaulted unit."
[8.6] (addition) A unit may not be prevented from performing a Close Assault by a Mode change caused by Opportunity Fire triggered as a result of the Close Assault.
[8.9] (addition) Armored Infantry units are prohibited from crossing a Stream or a Dike in and of themselves (an Engineer may still aid them across a Stream).
[10.5] (correction) The reference to Friendly "Combat" Phase should read Friendly Command Phase.
[10.51] (clarification) The Case should read "Armor (with the exception of Armored Infantry) is prohibited from ever using Entrenchments. All other units may benefit from Entrenchments (including the aforementioned Armored Infantry)."
[10.6] (clarification) When determining Line of Sight, the hex in which the Headquarters is located matters for the Line of Sight, but the hex in which the other unit is located has no effect on the Line of Sight whatsoever.
[10.6] (note) The City hexes A2338 and B3533 are treated as Forts for Line of Sight purposes only.
[10.71] (clarification) Therefore, if a unit performs Movement in one of the above-mentioned hexes, it does not trigger Opportunity Fire.
[10.73] (addition) If a unit Close Assaults from a Forest or City hex or through a Dike hexside, the unit still pays the Movement cost for leaving a Zone of Control, even though such a unit is not technically in a Zone of Control. The Movement cost is a standard penalty for performing a Close Assault.
[10.93] (deletion) The last sentence in this Case should be ignored, as it serves only to confuse the Players.
[13.51] (correction) The opening sentence should read "At the conclusion of his Conditional Movement Phase a Player may remove his units from Travel Mode at the cost of one Movement Point."
[14.1] (clarification) When rolling for the Weather Condition, the Players roll first for the Northern Weather Condition, and then for the Southern Weather Condition.
[14.11] (change) On the first day (17 September), all units landing on Maps A, B and D must use the northern route, and all units landing on Map C must use the Southern route.
[14.12] (deletion/change) The last sentence should be deleted and the second-to-last (and now last) sentence should read "...the units on Maps A, C and D have the same option as the units on Map B."
[14.5] (clarification) If a unit or group of units lands in a hex causing overstacking, one (or more) units in that stack must immediately be moved to an adjacent hex. Artillery units may not be displaced (the owning Player may eliminate them and, should he have no choice, he must eliminate an artillery unit in an overstack). If a unit displaced from one stack in turn displaces a unit in another stack, the second unit is Disrupted.
[14.51] (deletion/change) The second sentence in the Case should be deleted. With the exception of displacement, a unit may not be moved in the Turn that it lands. There are no other exceptions to this rule.
[14.52] (deletion) The last sentence should be deleted.
[15.18] (change) A Disruption result has absolutely no effect on a previously Disrupted unit. Similarly, a "1*" result only forces a non-Armor or non-Headquarters to lose one Strength Point; the Disruption has no effect whatsoever.
[17.21] and [17.22] (clarification) An artillery unit (with the exception of anti-tank and flak) does not cause a multi-formation attack so long as it is firing with can trace a line of subordination to the artillery unit's commanding headquarters. If the units are not commonly subordinated it is a multi-formation attack. Anti-tank and flak units fall under the rules for Direct Fire units, with the exception that they may fire with a unit that can trace a line of subordination to the Headquarters they are directly subordinated to and not cause a multi-formation attack.
[18.1] (correction) The reference in the ninth line to Direct Fire should read "Indirect Fire." Under no circumstances may a Direct Fire unit fire from a position that is not one of the top two in a stack.
[18.41] (clarification/addition) The reference in the tenth line to "a Morale of +1" should read "a Morale greater than zero (i.e., positive)." In addition, a Combat Engineer must be in Concentrated Mode (though it may be any position in a stack) to perform any of its special functions.
[18.6] Artillery Units (addition)
Artillery units in a Close Assault perform in all ways as an Anti-Tank unit.
[19.12] (clarification) The Case should read (in the second sentence) "...the Leader must be stacked with a unit involved in the attack subordinated to him, and all other units..."
[23.0] (note) Should the Players choose to implement one or more of the optional rules enumerated in this Section, they must interpret the rules should apparent contradictions occur.
[23.0] (note) Though elements of the 9th SS Recon Battalion were sent to the scene of the battle, and part of the 10th SS Panzer Division were sent to Nijmegen area, the Players must work with the hand they were dealt, as it were. The Players may only recreate this situation in the Campaign Game, and are under no obligation to do so.
[30.43] (correction) The Allied bombardment may be used on Game-Turn 2 before the start of play, or it may be used on Game-Turn 3.
[30.44] (correction) The units subordinated to the II SS Panzer Division may become part of the KG Wltr ind HQ supply net (the HQ begins the game at D1616). The FBx Headquarters does not enter this scenario, nor is it situated anywhere near the XXXth Corps (as anyone can tell from looking at the German Formation Display). In addition, the reference to the "recce battalion" in the last sentence should be ignored; Players should mentally substitute "units of the II SS Panzer Division".
[30.47] (addition) All bridges on the start line are eligible for demolition at the beginning of Phase 13. The German Player must immediately decide whether he wishes to blow the bridges.
[31.21] (addition) Case 30.47 is also used in the Campaign Game.
Charts and Tables
5.61 Fire Value Matrix: Direct Fire
(Used by Infantry, Engineers, Armor, AT, Flak, Cavalry, and HQ)
Firing Unit's Effectiveness Rating vs Target, by target category — each row gives the column to use in the Strength table below:
| Target category | col.1 | col.2 | col.3 | col.4 | col.5 | col.6 | col.7 | col.8 | col.9 | col.10 |
|---|---|---|---|---|---|---|---|---|---|---|
| Armor with 8 or 9 Eff. Rating | 2 | 3 | 4 | 5 | 6 | 7 | 8 | 9 | na | na |
| Armor with 7 Eff. Rating; Entrenched Non-Armor | na | 2 | 3 | 4 | 5 | 6 | 7 | 8 | 9 | na |
| Armor with 6 or less Eff. Rating | na | na | 2 | 3 | 4 | 5 | 6 | 7 | 8 | 9 |
| Unentrenched Non-Armor | na | na | na | 1 | 2 | 3 | 4 | 5 | 6 | 7-9 |
Strength of Firing Unit (rows) crossed with the column located above (columns 1-10):
| Strength | 1 | 2 | 3 | 4 | 5 | 6 | 7 | 8 | 9 | 10 |
|---|---|---|---|---|---|---|---|---|---|---|
| 1 | • | • | • | 1 | 1 | 2 | 2 | 3 | 4 | 5 |
| 2 | • | • | 1 | 1 | 2 | 2 | 3 | 4 | 5 | 5 |
| 3 | • | 1 | 1 | 2 | 3 | 3 | 4 | 5 | 5 | 6 |
| 4 | 1 | 1 | 2 | 2 | 3 | 4 | 5 | 5 | 6 | 7 |
| 5 | 1 | 2 | 2 | 3 | 4 | 4 | 5 | 6 | 6 | 7 |
| 6 | 1 | 2 | 3 | 4 | 4 | 5 | 5 | 6 | 7 | 8 |
| 7 | 1 | 2 | 3 | 4 | 5 | 5 | 6 | 7 | 7 | 8 |
| 8 | 2 | 3 | 4 | 4 | 5 | 5 | 6 | 7 | 8 | 9 |
| 9 | 2 | 3 | 4 | 5 | 5 | 6 | 7 | 8 | 9 | 9 |
Key: • = fire value ineffectual; na = not applicable; # = fire value.
Notes: 1. Fire is executed during the Player's Conditional and Free Fire Phase or when triggered as Opportunity Fire. 2. Only the two topmost units in a stack may fire and only at either of the two topmost units in a target stack. Units beneath the top two units in a stack cannot fire or be fired on. 3. Units that are Disrupted, Depleted, and in Travel Mode cannot fire and their Effectiveness Rating is zero.
5.62 Fire Value Matrix: Indirect Fire
(Used by Artillery and Heavy Weapons)
| Target category | col.1 | col.2 | col.3 | col.4 | col.5 | col.6 | col.7 | col.8 | col.9 | col.10 | col.11 |
|---|---|---|---|---|---|---|---|---|---|---|---|
| Armor; Entrenched Non-Armor | 3,4 | 5,6 | 7 | 8 | 9 | na | na | na | na | na | na |
| Unentrenched Non-Armor | na | na | 1 | 2 | 3 | 4 | 5 | 6 | 7 | 8 | 9 |
| Strength | 1 | 2 | 3 | 4 | 5 | 6 | 7 | 8 | 9 | 10 | 11 |
|---|---|---|---|---|---|---|---|---|---|---|---|
| 1 | • | • | • | 1 | 1 | 2 | 2 | 3 | 4 | 5 | 6 |
| 2 | • | • | 1 | 1 | 2 | 2 | 3 | 4 | 5 | 6 | 7 |
| 3 | • | 1 | 1 | 2 | 2 | 3 | 4 | 5 | 6 | 6 | 7 |
| 4 | 1 | 1 | 2 | 2 | 3 | 4 | 5 | 6 | 6 | 7 | 7 |
| 5 | 1 | 2 | 2 | 3 | 3 | 4 | 5 | 6 | 7 | 7 | 8 |
| 6 | 1 | 2 | 3 | 4 | 4 | 5 | 6 | 7 | 8 | 8 | 9 |
| 7 | 1 | 2 | 3 | 4 | 5 | 5 | 6 | 7 | 8 | 9 | 9 |
| 8 | 2 | 3 | 4 | 5 | 6 | 6 | 7 | 8 | 9 | 9 | 9 |
| 9 | 2 | 3 | 4 | 5 | 6 | 7 | 8 | 9 | 9 | 9 | 9 |
Key: • = fire value ineffectual; na = not applicable; # = fire value.
Notes: 1. Artillery may fire against an observed unit regardless of its own position in its stack or the position of the target in a stack. Heavy Weapons may fire from any position in a stack but only at the two topmost units in a stack. 2. Heavy Weapons units may execute Opportunity Fire but only against units they observe in hexes they contol. 3. Artillery-type units may execute Opportunity Fire only when Close Assaulted.
5.63 Fire Results Table
Fire Value vs. Target, by target category:
| Target category | col.1 | col.2 | col.3 | col.4 | col.5 | col.6 | col.7 | col.8 | col.9 |
|---|---|---|---|---|---|---|---|---|---|
| Dispersed in City, Rough, or Entrenched | 4 | 5 | 6 | 7 | 8 | 9 | na | na | na |
| Dispersed in Forest, Town or Broken | 3 | 4 | 5 | 6 | 7 | 8 | 9 | na | na |
| Dispersed in Other Terrain | 2 | 3 | 4 | 5 | 6 | 7 | 8 | 9 | na |
| Undispersed in Any Terrain | 1 | 2 | 3 | 4 | 5 | 6 | 7 | 8 | 9 |
| Dice Roll | 1 | 2 | 3 | 4 | 5 | 6 | 7 | 8 | 9 |
|---|---|---|---|---|---|---|---|---|---|
| 2 | 1 | 1 | 1 | 1 | 2 | 2 | 3 | 3 | 3 |
| 3 | D | 1 | 1 | 1 | 1 | 2 | 2 | 2 | 3 |
| 4 | • | D | D | 1 | 1 | 1 | 1 | 2 | 2 |
| 5 | • | • | D | D | 1 | 1 | 1 | 1 | 2 |
| 6 | • | • | • | D | D | 1 | 1 | 1 | 1 |
| 7 | • | • | • | • | • | • | • | D | 1 |
| 8 | • | • | • | • | • | D | D | 1 | 1 |
| 9 | • | • | • | • | D | D | 1 | 1 | 2 |
| 10 | • | • | • | D | D | 1 | 1 | 2 | 2 |
| 11 | • | • | D | D | 1 | 1 | 2 | 2 | 3 |
| 12 | • | D | D | 1 | 1 | 2 | 2 | 3 | 3 |
Key: • = No Effect; D = Disperse; # = Target loses indicated number of strength points; na = not applicable.
Notes: 1. Fire Value is derived from either 5.61 or 5.62 depending on the type of the firing unit. 2. Fire Value must "read" as a numerical result on the appropriate Fire Value Matrix or the attack is ineffectual. (I.e., you cannot fire at a dispersed target in a city with 3 or less Fire Value.) 3. A result of D on an already dispersed unit results in no effect; a D result on a non-dispersed unit calls for the unit's dispersal (if possible) or the loss of one Strength Point. 4. If a number loss results, a unit must lose the stated number of Strength Points and, if undispersed, must disperse or lose an additional point.
8.72 Close Action Value Table
Morale Differential (Attacker minus Defender) when Defender is in the terrain given by the leftmost populated column, crossed with the Effectiveness Differential (Attacker minus Defender):
| Rough, City, Entrenchment | Forest, Town | Open, Mixed, Woods, Broken | −9 to −7 | −6 to −4 | −3 to −2 | −1 | 0 | 1 | 2 | 3 | 4 | 5 | 6 | 7 | 8 | 9 |
|---|---|---|---|---|---|---|---|---|---|---|---|---|---|---|---|---|
| 4 | 2 | 3 | 4 | 5 | 5 | 6 | 6 | 7 | 7 | 8 | 8 | 9 | 9 | 9 | ||
| 3 | 1 | 2 | 3 | 4 | 5 | 5 | 6 | 6 | 7 | 7 | 8 | 8 | 9 | 9 | ||
| 4 | 2 | D | 1 | 2 | 3 | 4 | 5 | 5 | 6 | 6 | 7 | 7 | 8 | 8 | 9 | |
| 3 | 1 | D | D | 1 | 2 | 3 | 4 | 5 | 5 | 6 | 6 | 7 | 7 | 8 | 8 | |
| 4 | 2 | 0 | D | D | D | 1 | 2 | 3 | 4 | 5 | 5 | 6 | 6 | 7 | 7 | 8 |
| 3 | 1 | −1 | D | D | D | D | 1 | 2 | 3 | 4 | 5 | 5 | 6 | 6 | 7 | 7 |
| 2 | 0 | −2 | D | D | D | D | D | 1 | 2 | 3 | 4 | 5 | 5 | 6 | 6 | 7 |
| 1 | −1 | −3 | D | D |
Key: D = Attacker disrupted; cease Close Action. # = Close Action Value; index on 8.73. Attacks at 0-any value are treated as 1-3; attacks at any value-0 are treated as 4-1.
Notes: 1. A unit's current morale is defined as its printed Morale Rating less one point for each Strength Point it has lost (may be a negative number). 2. Current morale is modified by terrain (see Case 10.4), engineers (see Case 18.41), and leaders (see Case 19.11). Also, a currently disrupted defender loses 3 morale points. 3. Units involved in a Close Action while in Travel Mode have the following values: 0 Effectiveness Rating; Current Strength; Current Morale. Units involved in a Close Action while Disrupted have the following values: 0 Effectiveness Rating; 0 Strength; 3 less than Current Morale. Units involved in a Close Action while Depleted have the following values: 0 Effectiveness Rating; 0 Strength; Current Morale. 4. When executing a Close Action against a defender who occupies a Hilltop hex, shift left one column on the Effectiveness Differential line (attacks at less than −9 are treated as −9).
8.73 Close Action Results Table
Find the row for the Combat Strength Ratio, then roll one die: the die roll selects a row of the shared 16-row result table below, offset per ratio as follows — 1 to 3: die roll = row (rows 1-6); 1 to 2: rows 3-8; 1 to 1: rows 5-10; 2 to 1: rows 7-12; 3 to 1: rows 9-14; 4 to 1: rows 11-16. Then read across to the column matching the Close Action Value (1-9).
| Row | CAV 1 | CAV 2 | CAV 3 | CAV 4 | CAV 5 | CAV 6 | CAV 7 | CAV 8 | CAV 9 |
|---|---|---|---|---|---|---|---|---|---|
| 1 | 3/• | 3/• | 3/• | 3/• | 3/• | 2/• | 2/• | 1/• | 1/• |
| 2 | 3/• | 3/• | 3/• | 3/• | 2/• | 2/• | 1/• | 1/• | D/• |
| 3 | 3/• | 3/• | 3/• | 2/• | 2/• | 1/• | 1/• | D/• | D/D |
| 4 | 3/• | 3/• | 2/• | 2/• | 1/• | 1/• | D/• | D/D | D/D |
| 5 | 3/• | 2/• | 2/• | 1/• | 1/• | D/• | D/D | D/D | •/• |
| 6 | 2/• | 2/• | 1/• | 1/• | D/• | D/D | D/D | •/• | •/D |
| 7 | 2/• | 1/• | 1/• | D/• | D/D | D/D | •/• | •/D | •/D |
| 8 | 1/• | 1/• | D/• | D/D | D/D | •/• | •/D | •/D | •/1 |
| 9 | 1/• | D/• | D/D | D/D | •/• | •/D | •/D | •/1 | •/1 |
| 10 | D/• | D/D | D/D | •/• | •/D | •/D | •/1 | •/1 | •/2 |
| 11 | D/D | D/D | •/• | •/D | •/D | •/1 | •/1 | •/2 | •/2 |
| 12 | D/D | •/• | •/D | •/D | •/1 | •/1 | •/2 | •/2 | •/3 |
Key: • = No Effect. D = All units in the indicated stack are disrupted. # = Stack suffers indicated losses and is disrupted. The opposing Player always determines the distribution of opponent's losses.
Explanation of Close Action Results: The symbol to the left of the slash is the result inflicted upon the attacker. The symbol on the right of the slash is the result inflicted upon the defender. A disrupted defender must retreat one hex or be eliminated. It may not retreat into an Enemy-controlled hex unless a Friendly unit is present. If a disrupted unit suffers a second disruption, it is destroyed. A disrupted attacker remains in place. Undisrupted attacking units must occupy hex vacated by disrupted defenders. Note: Attacks at less than 1-3 (greater than 4-1) or at 0-any value (any value-0) are treated as 1-3 (4-1).
10.15 Terrain Effects Chart for Movement, Stacking and Observation
Movement Costs (by Mode):
| Terrain Type | Stacking Limit (SP's) | Disp Inf/HW/HQ/Eng | Disp Armor/Recon | Conc Inf/HW/HQ/Eng | Conc Armor/Recon | Trav All | Obs. Range (hexes) | Blocked by (terrain types) |
|---|---|---|---|---|---|---|---|---|
| Clear | 24 | 1 | 1 | 1/2 | 1/4 | 1/8 | 5 | 1-9 |
| Mixed | 24 | 2(3) | 2(3) | 1(3) | 1(3) | 1/2 | 6 | 1-9 |
| (1) Woods | 24 | 3 | 3 | 2 | 2 | 1 | 6 | 2-9 |
| (2) Town | 12 | 2 | 2 | 1 | 1 | 1/4 | 7 | 2,4-9 |
| (3) Broken | 12 | 2 | 3 | 2 | P | P | 7 | 2,4-9 |
| (4) Forest | 12 | 3 | 3 | 2 | P | P | 8 | 2,4-9 |
| (5) Rough | 12 | 4 | P | 3 | 4 | 1/4 | 8 | 2,4,6-9 |
| (6) City | 12 | 3 | 4 | 2 | 3 | 1/4 | 9 | 6-8 |
| (7) Hilltop | • | • | • | • | • | • | 10 | 6-8 |
| Stream/(8) Dike | • | +2 | P | +1 | P | P | • | • |
| Canal/River/Blocked | • | P | P | P | P | P | • | • |
| Road | • | • | • | 1/2 | 1/4 | 1/8 | • | • |
| Trail/Railroad | • | • | • | 1 | 1/2 | 1/4 | • | • |
Key: • = Terrain has no effect. Other terrain in hex controls Movement or Observation; e.g., a dispersed unit gains no benefit for travelling along a Road. P = Prohibited, units may not enter. Every unit has a four-point Movement Allowance. #(#) = Movement cost on Maps C and D (A and B), respectively. * = Only artillery-type units may move across a ferry in Travel Mode. All other units must cross in Concentrated Mode. Note that only German units may use Ferries. Numbers in the Blocked By column refer to numbers to left of terrain types.
11.51 Disruption Recovery Table
Note that the Morale Rating used in this procedure is always the original rating printed on the unit.
| Die Roll | Morale 1 | Morale 2 | Morale 3 | Morale 4 |
|---|---|---|---|---|
| −2 | • | • | • | • |
| −1 | • | • | • | • |
| 0 | • | • | • | • |
| 1 | • | • | • | • |
| 2 | • | • | • | R |
| 3 | • | • | R | R |
| 4 | • | R | R | R |
| 5 | R | R | R | R |
| 6 | R | R | R | R |
Key: • = Disruption not removed. Disruption persists until the Player's next Command Phase when he may again attempt to remove it. R = Disruption removed. Marker is removed, and unit or stack of units is no longer disrupted. If the stack of units was disrupted because it exceeded Stacking Limits, the Owning Player has until the end of his next Movement Phase to cure the overstacking. When removing Disruption from a stack of units, the Player concerns himself with the topmost unit in the stack only. If he succeeds in removing disruption from this unit, then he has removed disruption from all the units in the stack.
11.54 Adjustment to Disruption Recovery Die Roll
When rolling for Disruption Removal, the Player should adjust the value of the roll according to the following situations.
- Add one to the roll value if the unit is stacked with (or is itself) a Friendly armor unit.
- Add one to the roll value if the unit is stacked with (or is itself) any Friendly HQ or Leader unit.
- Subtract one from the roll value if the unit is adjacent to enemy armor units.
- Subtract one from the roll value if the unit is out of supply.
- Subtract one from the roll value if the unit is adjacent to another Friendly disrupted unit or stack of units.
These adjustments are cumulative. An adjusted die roll greater than six counts as six. All modifications are applied at the instant of the die roll.
14.11 Weather Conditions Table
| Dice Roll | 0201-0600 North | 0201-0600 South | Dice Roll | 1201-1400 North | 1201-1400 South |
|---|---|---|---|---|---|
| 2 | 0 | 0 | 2 | 3 | 6 |
| 3 | 6 | 6 | 3 | 6 | 6 |
| 4 | 6 | 6 | 4 | 3 | 3 |
| 5 | 3 | 3 | 5 | P | 6 |
| 6 | 0 | 0 | 6 | 6 | 6 |
| 7 | 6 | 6 | 7 | P | P |
| 8 | 0 | 0 | 8 | 0 | 0 |
| 9 | P | 6 | 9 | 6 | 3 |
| 10 | 3 | 0 | 10 | 3 | 6 |
| 11 | 6 | 6 | 11 | 0 | 0 |
| 12 | 3 | 0 | 12 | P | P |
On night Game-Turns, add five (5) Weather Condition points. P = No air operations permitted.
(Note: the errata's replacement Weather Condition Table, transcribed above under "Highway to the Reich Errata," supersedes this table for the 1201-1400 turn — see Case 14.11 errata.)
14.92 Air Landing Table
Total Flight Condition Points (Weather, plus night, plus flak):
| Dice Roll | 0-3 | 4-6 | 7,8 | 9,10 | 11+ |
|---|---|---|---|---|---|
| 2 | A | A | A | A | A |
| 3 | S1 | S2 | S2 | S2 | S2 |
| 4 | • | S1 | S2 | S2 | S2 |
| 5 | • | • | S1 | S2 | S2 |
| 6 | • | • | • | S1 | S1 |
| 7 | • | • | • | • | S1 |
| 8 | • | • | • | • | • |
| 9 | • | • | • | • | L1 |
| 10 | • | • | • | L1 | S1 |
| 11 | • | S1 | L1 | S1 | S2 |
| 12 | L1 | L1 | S1 | S2 | A |
Key: • = Serial lands in designated hex. Place units in hex Allied Player has defined as the drop hex. S1 = Serial scatters and lands in some hex, other than the designated drop hex. Allied Player rolls one die to determine direction of scatter away from designated hex. (See scatter diagram on map.) He then rolls another die. The number of the die roll is the number of hexes away from designated drop hex which the units are actually placed. S2 = Serial scatters. Same procedure as S1 except the Allied rolls two dice to determine the distance of scatter. L1 = Serial lands in designated hex. Each unit in the serial suffers a loss of one strength point. A = Serial aborts. Units do not land. Allied Player rolls two dice. If he rolls a 2, 3, or 4 the units are eliminated. With a roll of five or higher the serial is returned to formation display. The Allied Player may attempt to land them into play on some subsequent day.
Allied Turn Record / Reinforcement Track
The Allied Turn Record / Reinforcement Track numbers every Game-Turn of the Campaign Game sequentially from 1 (1201-1400 on 17 September) through 106 (2201-0200 on 27 September), arranged in ten daily columns (Sept. 17th through Sept. 27th), each column split into eight two-hour (or four-hour night) Game-Turn boxes — 0201-0600, 0601-0800, 0801-1000, 1001-1200, 1201-1400, 1401-1600, 1601-1800, 1801-2000, 2001-2200, 2201-0200 (the 0201-0600 and 2201-0200 boxes are tinted to show they are Night Game-Turns). A blank counter is placed on box 1 and advanced one box per Game-Turn. Lower-case letters printed in a box tell the German Player which Formation Display group(s) arrive as reinforcements that Game-Turn (see Section 22.0); reinforcement letters occur at Game-Turns 7 (q,t,w), 17 (r), 37 (x), and 57 (u), among others printed on the full track.
Daily Airstrike/Lift Points (Allied Airstrikes / Allied Lift Points available that day):
| Day | Sept 17 | Sept 18 | Sept 19 | Sept 20 | Sept 21 | Sept 22 | Sept 23 | Sept 24 | Sept 25 | Sept 26 | Sept 27 |
|---|---|---|---|---|---|---|---|---|---|---|---|
| Airstrike/Lift Points | 8/32 | 7/14 | 5/3 | 4/3 | 2/4 | 0/3 | 0/5 | 0/3 | 2/3 | 2/3 | 2/3 |
Scenario start/end markers printed on the track: Start of Scenarios 26.0, 27.0, 28.0, 29.0 and 31.0 (Campaign Game) at Game-Turn 1; start of Scenario 30.0 at Game-Turn 2; end of Scenario 28.0 at Game-Turn 14; end of Scenarios 26.0, 27.0 and 30.0 at Game-Turn 15; end of Scenario 29.0 at Game-Turn 44; start of Scenario 24.0 at Game-Turn 50; end of Scenario 24.0 at Game-Turn 64; end of the Campaign Game (Scenario 31.0) at Game-Turn 106.
How to Use the Turn-Record Reinforcement Track: Place this sheet on a flat surface, handy to the maps. Use a blank counter as a marker. Start it in the number 1 box (for most scenarios) and advance it one box to record the passage of each Game-Turn. The lower case letters in the boxes refer the Player to his Formation Display (see the explanation associated with that Display). The track shows the starting and ending Game-Turns of the various scenarios. Each vertical column on the track represents a day (indicated by the date at the head of the column). Note that the starting and ending Game-Turns of each complete day are Night Game-Turns (as indicated by the tint in those boxes).
German Turn Record / Reinforcement Track
The German track uses the same 106-turn/ten-day layout as the Allied track, with its own Airstrike Points allotment per day and its own reinforcement letters (keyed to the German Formation Displays a-n, see Section 21.1).
Daily Airstrike Points:
| Day | Sept 17 | Sept 18 | Sept 19 | Sept 20 | Sept 21 | Sept 22 | Sept 23 | Sept 24 | Sept 25 | Sept 26 | Sept 27 |
|---|---|---|---|---|---|---|---|---|---|---|---|
| Airstrike Points | 0 | 1 | 1 | 1 | 2 | 1 | 0 | 0 | 1 | 1 | 0 |
Reinforcement letters and scenario markers by Game-Turn:
| Turn | Letters/Markers | Turn | Letters/Markers |
|---|---|---|---|
| 1 | Start 26, 27, 28, 29, 31 | 30 | f, j, n |
| 2 | c, n; Start 30 | 34 | d, g, j |
| 3 | b, k | 40 | n |
| 4 | c, n | 41 | n |
| 5 | b | 42 | n |
| 6 | a, b, n | 44 | n; End 29 |
| 7 | a, c, n | 50 | Start 24 |
| 8 | a, n | 51 | k |
| 9 | a, l, n | 52 | g |
| 10 | n | 56 | n |
| 11 | a, c | 59 | n |
| 12 | c, n | 61 | k |
| 13 | c, n | 63 | h |
| 14 | End 28 | 64 | End 24 |
| 15 | End 26, 27, 30 | 69 | n |
| 16 | c | 106 | End 31 |
| 18 | m, n | ||
| 19 | c, n | ||
| 20 | c | ||
| 22 | l | ||
| 23 | c, n |
All other Game-Turns carry no reinforcement letter.
German Off-Map Movement Display (see Rules Section 20.0)
The display shows the 22 Off-Map Movement Areas arranged around the four playing maps, each area labeled with the range of mapedge hexes it borders:
North edge (above Map A): 1N borders hexes 3902 thru 3920; 2N borders 3921 thru 3940; 3N borders 3941 thru 3953/3954.
West edge, top to bottom: 10W borders Map A hexes 2101 thru 3901; 9W borders Map A hexes 0101 thru 2001; 8W borders Map B hexes 2101 thru 3801; 7W borders Map B hexes 0101 thru 2001; 6W borders Map C hexes 4101 thru 6001; 5W borders Map C hexes 2101 thru 4001; 4W borders Map C hexes 0101 thru 2001; 3W borders Map D hexes 4101 thru 6001; 2W borders Map D hexes 2101 thru 4001 (Prohibited on and after Game-Turn 48); 1W borders Map D hexes 0101 thru 2001 (Prohibited on and after Game-Turn 8).
East edge, top to bottom: 10E borders Map A hexes 2154 thru 3954; 9E borders Map A hexes 0154 thru 2053; 8E borders Map B hexes 2154 thru 3853; 7E borders Map B hexes 0253 thru 2053 (continuing thru 0154 at the Map B/C boundary); 6E borders Map C hexes (near 4134) (Prohibited on and after Game-Turn 88); 5E borders Map C hexes 2134 thru 4033 (Prohibited on and after Game-Turn 68); 4E borders Map C hexes 0134 thru 2033 (Prohibited on and after Game-Turn 48); 3E borders Map D hexes 4134 thru 6033 (Prohibited on and after Game-Turn 28); 2E borders Map D hexes 2134 thru 4033 (Prohibited on and after Game-Turn 8).
(The prohibition Game-Turns printed on this display match Case 20.2, "The Allied Advance.")
German Formation Display
The German Formation Display is printed as thirteen boxed organization charts, lettered a through n (Displays a-m each depict one division, brigade or regiment — 10th SS Panzer Division, 9th SS Panzer Division, 59th Infantry Division, 6th Parachute Regiment, 2nd Parachute Regiment, 7th Parachute Division, 84th Infantry Division, 85th Infantry Division, 180th Infantry Division, Flak Brigade, 107th Panzer Brigade, and the remaining lettered divisions; Display n is the "Miscellaneous 'Independent' Formations" display, gathering all the units with no divisional Headquarters). Within each display, boxes for every combat unit and Headquarters are connected by lines showing their chain of subordination exactly as explained in Section 17.0, and each unit box carries its counter's printed values plus a position code (map letter and hex number, or a Game-Turn/mapedge reinforcement code) showing where it deploys or enters play.
The Formation Display has four functions:
- A manifest of all the combat units and headquarters in the game.
- An organization diagram showing how the various units relate to each other with regard to subordination.
- A set-up key showing which units start the game on the map.
- A reinforcement chart keyed to the Turn-Record Track by letter code. The subdivisions of the organizations show which parts of which organizations are to be brought into play at a given time.
How to Set Up the Display: On a flat surface, spread out the Display, after backfolding it along the machine creases to make it lie flat. Place each unit on its appropriate picture paying close attention to the unit designations. In many cases a single unit picture will represent more than one unit — this will be signalled by a multiple-number, for example "x3" would indicate that three units identical to one picture are to be placed in that position on the display.
Starting Units: Those units that start the game in play, on the map, are distinguished by the position codes associated with their pictures on the display. In those cases that unit starts on Map D in hex D0712 indicates that unit starts on Map D in hex D0712. (In those cases where multiple units share a picture, several position codes are listed under a group of units, each position should have one unit placed in it. Note: "[E]" indicates an entrenched unit.
Reinforcements: On any given Game-Turn, the Turn-Record/Reinforcement Track may show a key letter(s) corresponding to one or more of the formations on the display. Looking at the display, the Player will see reinforcement codes associated with these codes. These codes are of two types: one specifies a specific hex; the other, the whole map edge. For example "9 A3930" indicates a unit group entering on Game-Turn Nine, Map A, hex 3930. "34 C West" indicates a unit group arriving on Game-Turn 34, Map C, anywhere along the west (i.e. lefthand) edge. Note that the reinforcement compass directions of the map edges are approximations, not true compass directions — if we look at the map assembly with Map A at the head and D at the foot then the top edge is the "North" edge, the lefthand edge the "West" edge, etc. When a list of hexes is given under a display of units, one Owning Player may deploy these units as he sees fit. For historicity, the Players should deploy the units in the order that they are listed on the display.
Allied Formation Display
The Allied Formation Display shows the three Airborne Divisions and the Polish Parachute Brigade boxed into lettered/numbered Serials (Serials 1-16 group p/q/r, 101st Airborne Division; Serials 17-32 group s/t/u, 82nd Airborne Division; Serials 38-58 group v/w/x, 1st Airborne Division and Polish Parachute Brigade — matching Section 21.4), and the Allied Ground formations as organization diagrams (Guards Armoured Division and 15th/19th King's Royal Hussars, group y; 43rd Infantry Division and 30 Corps Troops, 50th Infantry Division, and 8th Armoured Brigade with the 44th Royal Tank Regiment, group z — matching Section 21.3). Its four functions and set-up procedure are the same as described above for the German Formation Display.
Starting Units: The airborne unit serials contained in groups p, s and v are available for dropping from the start of the game. The other serials become available as per the key letters on the Turn-Record/Reinforcement Track. The number of serials dropped is limited by the number of airlift points available (see Section 14.0). Note that the three major boxes containing the airborne divisions are considered to be located in England.
Group y (consisting of the entire Guards Armoured Division and the King's Royal Hussars) starts the Campaign Game on Map D, anywhere south of the front line.
Group z: Campaign Game, this group's formations are released onto the map (south edge of Map D) under the following conditions: 43rd Infantry Division: May enter any Game-Turn(s) after the Game-Turn in which any Allied ground unit (i.e., non-airborne) is supplied north of the Maas River. 50th Infantry Division and 8th Armoured Brigade: May enter any Game-Turn(s) after the Game-Turn in which any Allied ground unit is supplied north of the Neder Rijn River; 44th Royal Tank Regiment: May enter any Game-Turn on or after Game-Turn 3.
All units marked C/Rii, A/Rii, 15*19ii, 44ii and all Headquarters controlling said units are considered regiments. None of the independent regiments on this display is considered subordinate to another, despite appearances on the display (i.e., 44ind does not control C/Rii, etc.)