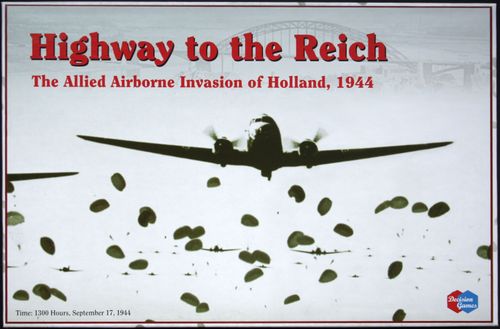
Highway to the Reich: The Allied Airborne Invasion of Holland, 1944 (Third Edition)
Highway to the Reich: The Allied Airborne Invasion of Holland, 1944 (Third Edition) Rulebook
Table of Contents
Table of Contents
- System Rules
- 1.0 Game Rules
- 2.0 Game Equipment
- 3.0 Glossary
- 4.0 Sequence of Play
- 5.0 Organization Modes
- 6.0 Fire Combat
- 6.1 General Comments
- 6.2 Direct Fire
- 6.3 Direct Fire (Conventional Target)
- 6.3.3 Modification of DF Fire Strengths
- 6.3.4 Modification of DF Effectiveness Ratings
- 6.3.5 Modification of DF Fire Values
- 6.4 Direct Fire (AT Fire Combat)
- 6.4.2 Direct Fire Attack Procedure (AT Fire)
- 6.4.3 Modifiers of the AT Fire Strength
- 6.4.4 Modifiers of the ATFV
- 6.4.5 AT Fire Procedure Summary
- 7.0 Observation
- 8.0 Zones of Control
- 9.0 Movement
- 10.0 Close Action
- 11.0 Stacking
- 12.0 Terrain
- 13.0 Command & Supply
- 14.0 Using Command Points
- 15.0 Artillery Supply and Ammunition Points
- 16.0 Morale
- 17.0 Subordination
- 18.0 Special Unit Effects
- 19.0 Leaders
- 20.0 Night Turns
- 21.0 Optional Rules
- Scenario Rules
System Rules
Note: Owners of previous editions of HTTR should carefully read these rules as some additions and changes have been incorporated into this 2024 revision.
1.0 Game Rules
The system rules are divided into major sections. Each major section is numbered with a whole number (for example, 1.0, 2.0, 3.0, etc.). Rules cases are numbered decimally as subdivisions of the number of the major section. For example, cases 5.1, 5.2 and 5.3 are all parts of major section 5.0. In some instances, the cases themselves are subdivided into secondary cases (for example, 5.1.1, 5.1.2 and 5.1.3 are all subdivisions of case 5.1). Italicized font is used for text referring to optional rules.
Whilst reading the rules, players should also examine all the components of the simulation. Examine the playing pieces, the map sheets, and the charts, tables and tracks as they are referred to. Continued rules refinement means there may be some conflicts between the supporting information on the charts and this rule set. These rules are now regarded as comprehensive and take precedence. Any conflicting statements on the charts should be ignored.
Players should initially skim the system rules paying particular attention to the sequence of play. Then the system rules should be read through in detail and understanding of each activity should be tested using the components and the examples of play. Once you are familiar with the system rules it would be useful to play an introductory scenario which is designed to exemplify the core mechanics before engaging with the optional and scenario rules and the more advanced scenarios.
2.0 Game Equipment
2.1 The Game Map
A numbered hexagonal grid is superimposed on the game map to regulate movement, to assist measurement of firing ranges and to assess sighting abilities of the units. A list of each of the types of terrain depicted on the map is displayed on the Terrain Key section of the map. The effects of terrain are explained in the rules and integrated into the various charts and tables.
2.2 Game Charts & Tables
The game makes use of various tables, charts and tracks to facilitate play and to organize data in an easily retrievable form. The use of the graphic aids is explained in the appropriate rule section. Players should examine the charts and tables when they are referred to in the rules. Note the various locations of the tables on the player aid cards. There are errors on the player aid cards originally supplied with the game and corrections to the tables are summarized at the end of these rules. Note that the outcome of "D" on the original Fire results table and Close Action results table mean different things (Defilade after fire combat and Disruption after Close Action). The original "D" result has been changed to DEF and DIS on the player aid tables supplied with this rules version to avoid any confusion.
2.3 The Playing Pieces
The die-cut counters represent the two basic kinds of pieces in the game which are "units" and "markers."
Units represent the actual companies, platoons and batteries that participated in this battle, or those that could have. The units are further categorized by type and nationality or branch of service (depicted by color schemes).
Most markers are used to provide information about unit status (such as strength or mode) or key terrain features such as bridge integrity. Some markers are used on game record tracks (such as the Game Turn Record Track).
2.4 Rounding Rule
[2.4.1] In most cases when numerical calculations result in a fraction, round up from a fractional number to the next highest whole number unless a rule specifically states otherwise. For example, round 2.4 up to 3.
Exceptions: Rounding down is used when calculating the Close Action combat strength ratio, extended artillery range, weather effects and when evaluating the ATFV in anti-tank fire.
[2.4.2] When halving combat strength for various effects (disruption, bridge assault, etc.), halve units individually rather than halve the entire stack, fire packet or other group. In some cases, that involves using a minimal strength of one for a unit.
2.5 Game Scale
Each hexagon on the map represents approximately 600 meters of terrain from side to side. Each infantry unit represents a company. Each armor unit represents a platoon, and each artillery unit represents a battery. Day time consists of five game turns each representing three hours. Each of the night game turns represents four and a half hours.
2.6 Unit Counters
[2.6.1] Each unit has a unique identity (ID) which usually lists the battalion, regiment or brigade and division to which the unit belongs. That ID is printed at the top of the counter above the unit-type box or vehicle symbol. Additional information representing the unit's company designation may be printed just to the left of the unit-type box or vehicle symbol. The unit designation is important in identifying the appropriate chain of command/supply for a unit.
[2.6.2] All units are printed on both sides. Most combat units have a "concentrated" side and a "defilade" side. The defilade side is depicted by a dashed circle surrounding the unit type box or vehicle silhouette. Headquarters (HQ), towed artillery and anti-tank (AT) units do not possess a concentrated side, but instead have a "Travel Mode" side signified by a "T". Additionally, the defilade side of an artillery/ AT unit also means the unit is "in-battery" (ready to fire). These modes are explained in the appropriate sections of the rules.
[2.6.3] If a unit loses strength, the player places an appropriate strength loss marker under the unit to reflect the loss. A unit's current strength is equal to its printed strength minus that of any strength point loss marker under the unit. When a unit loses its last strength point, it is eliminated and removed from play. Depleted and disrupted markers are placed on top of a unit as required. Travel markers are placed on top of units when they are in Travel Mode unless they have an intrinsic Travel Mode side. Some units may be marked with a dismounted marker to show they are not currently using vehicular transport.
[2.6.4] Note that movement allowance is not printed on the unit counters.
2.7 Unit Type Classes
Every unit is identified by the symbols printed on the counter face. Table (1) shows the wide range of unit types present in the game. Familiarity with this table is very helpful when reading the rules and playing the game. For this reason, a full-sized chart is appended as a player aid.
Movement Class
Units are classed as Leg or Vehicular.
Vehicular units are:
- All AFV (armor silhouette).
- All units showing an oval armored symbol.
- All units showing wheels on either front or back (towed units and motorized infantry).
- All personnel transported in trucks or half-tracks (indicated by a Travel Mode marker placed on the unit or the display of Travel Mode on the reverse of the unit counter).
Leg units are:
- All personnel units not qualified as above.
- Mechanized or motorized personnel units under a Dismounted Marker.
Fire Class
There are two methods to engage in Fire Combat to inflict losses on enemy units:
- Indirect Fire [6.5].
- Direct Fire, further subdivided into Conventional Fire, against Leg and some vehicular class units [6.3], and Anti-Tank Fire against AFVs and armored units [6.4], some vehicular units and against Leg units in buildings (towns and cities) [18.3].
All units are assigned a Fire Class based on their weapon systems. For a complete overview, players should consult the Unit Type Chart in Table 1 but in general:
- All units can engage using Conventional Fire.
- Only units with a range of 2 or greater can engage in Indirect Fire.
- Only units with an AT dot are capable of AT Fire.
- Units capable of AT fire (those displaying AT dots) are graded as light, medium or heavy and this is indicated by the color of the AT dot displayed by the unit.
Exception: See special AT fire ability of engineers and infantry [10.2].
Exception: Some units capable of AT fire lack the dots on the counters. See errata in Player Aids.
Target Class
AFVs, armored and motorized units are classed from very light to very heavy AFV targets. Leg units are classed as conventional targets. Towed units are considered as either conventional or Very Light AFV target class when fired on depending on the enemy unit Fire Class.
2.8 Examples of Main Unit Types
Examples of the main unit types follow but more detail can be found later in the rules.
- AFVs: M4 Sherman and Tiger VI units. AFV units have silhouettes instead of a unit-type box. They are equipped with tanks (Panzers), tank destroyers (Jagdpanzers) and assault guns.
- Armored units: Armored flame thrower and AA/Flak units. These have an oval armored symbol in unit-type box. The main sub-types are: (1) Armored Reconnaissance; (2) Armored Artillery; (3) Armored Infantry/Engineer.
- Non-Armored Vehicular (Motorized): Wheels under the unit-type box indicate the unit is motorized. Examples include jeep reconnaissance units (shown here) and motorized infantry.
- Leg:
- Airborne: Paratroopers and glider-borne artillery units. Note: some Allied units bear either a parachute symbol or glider symbol in addition to their basic symbol. They are airborne units. Some German units bear this symbol, but that is only for historical purposes. Those units generally were not jump-capable. The parachute symbol or the glider symbol is relevant only when the unit is landing on the map. For normal movement, combat, etc., there is no functional difference between an ordinary infantry unit, for instance, and a parachute or glider unit.
- Engineer:
- Bridging engineer:
- Heavy Weapons Units: These units represent the machinegun and mortar units that support the infantry companies of a battalion.
- Towed Artillery: Artillery unit in "in-battery" mode ready to fire. Towed artillery includes rocket and Nebelwerfer units.
- Flak/Anti-Air: Light or heavy anti-aircraft weapons.
2.9 Markers
Various markers are used to facilitate game play.
3.0 Glossary
- 1d6: means a die roll using one six-sided die is required.
- 2d6: means a die roll using two six-sided dice is required.
- AA: Anti-aircraft fire.
- AFV: Armored fighting vehicle. These units have silhouettes instead of a unit-type box.
- AFV Target: any unit whose unit-type box contains an armored oval, or which possesses an armored silhouette in place of a unit-type box. Motorized units can also have an AFV target class.
- Airstrikes: Air combat against ground forces.
- Ammunition Point (AmP): A point that roughly measures artillery ammunition usage and stockpiling.
- Anti-Tank (AT) fire: a form of Direct Fire used mainly against AFV targets.
- Armored units: These have an oval armored symbol in unit-type box.
- Assets: Supporting units of various kinds that usually have a corps, divisional or lesser formation assignment printed on their unit counter but which are not a fixed part of a formation. As such they do not have a colored formation band on the unit counter.
- Attenuation: the effect of supply path length on the transfer of CP between HQs.
- AT: Anti-tank.
4.0 Sequence of Play
The sequence of play (SOP) controls the order of each activity during the game turn. Each turn is subdivided into phases. During each phase, the "phasing player" is active while the opponent, who is not active, is the "non-phasing player." Each game turn must proceed strictly according to the sequence of play. The sequence of activity is reciprocating with the opposing sides alternately considered the "active" or "phasing" player in each half of the turn. Each scenario lists a starting point in the sequence outline on the first turn.
In each 24-hour game day there are five three-hour daylight game turns starting at 0601-0901 and two four and a half-hour night turns (2101-0130 and 0131-0600).
4.1 Game Turn Sequence Outline
To describe the sequence of play (SOP) assume the opposing forces are the Allies and the Germans.
- Weather Determination Phase: During the 0601/0901 and 1501/1801 GTs of each day the Allied player must determine the weather conditions. Conditions may vary on different sections of the maps. See scenario rules for details.
- CP and Logistic Phase: During the 0601/0901 and 1501/1801 GTs of each day both players must determine how many CPs and AmPs are received by each division. This is recorded by adjusting the CP and AmP totals on the record tracks.
- German Reaction Phase: German units may conduct Direct fire (conventional or AT) or perform limited movement. Leg units may never move more than two hexes, and other units a maximum of four hexes. German units may perform CA. Allies may return fire, OF or ambush fire as appropriate.
- Allied Command Phase: The Allied player determines the supply status of all units under Allied command. CPs are then allocated to those subordinate HQs that are in supply and Divisional record tracks are adjusted appropriately. The Allied player may then try to recover any disrupted and depleted units. Construction of entrenchments and bridges occurs in this phase, as does demolition of bridges.
- Allied Fire Phase: Airstrikes are declared and markers placed. The Allied player conducts Indirect Fire and Direct Fire against German occupied hexes in any order. German units subject to AT fire may return fire. Airstrikes are executed.
- Allied Movement Phase (and Close Action): Allied units that did not fire in phase 5 may move up to their full MA. SP artillery may move half of its MA even if it fired in phase 5.
- Allied Organization Phase: The Allied player chooses which organizational mode each of the Allied units should be in until the Allied Organization Phase of the next game turn. Note: to speed play, this may be combined with the end of a unit's movement in phase 6 above if no German unit is within OF range.
Note: Phases 8 through 12 flip-flop phases 3 through 7, with the Germans, for the most part, being the active side.
A more detailed SOP is enclosed with the Player Aids appendix document. A modified SOP is often used at the beginning of a scenario. If so this will be covered in the relevant section of the scenario rules.
5.0 Organization Modes
5.1 Unit Modes
Units can adopt different modes to reflect their state of organization on the battlefield. The number of modes available to a unit depends on its type. The modes include the following.
- Defilade. The men and vehicles are spread out to take advantage of any cover offered by the terrain in the hex. This mode is signified by a dashed circle watermark on one side of the unit counter. Artillery units displaying this symbol are unlimbered, optimally deployed and ready to fire. HQs in defilade are considered configured for optimal command and supply capacity.
- Concentrated. The men and vehicles are massed within the hex in a tight, easily controlled formation. A concentrated unit can bring fire to bear more effectively than a defilade unit, and in most cases a concentrated unit can move more quickly than a defilade unit.
- Disrupted. This is a special involuntary mode imposed on a unit by CA or airstrike. All units can assume disrupted mode; however, none may do so voluntarily. It simulates the shock effect of close combat and strafing/bombardment. The personnel are disoriented, scared, and confused. On recovery they revert to their previous mode.
- Travel. The unit is in a column formation for quick displacement utilizing vehicular movement. The player places a Travel Mode marker on the relevant units to indicate this mode.
Exception: towed units (artillery, AT and flak) and headquarters units indicate Travel Mode by flipping the counter.
Exception: most infantry units are capable of Travel Mode, as they have trucks available to them, but some infantry units do not and cannot assume Travel Mode. Specific details are found in the scenario rules.
5.2 Changing Organization Modes
There are some restrictions on changing mode.
[5.2.1] One voluntary change of mode is allowed per turn in the Organization Phase only.
Exception: Any unit that is fired at or has completed a CA may voluntarily go into Defilade Mode with immediate effect.
Exception: a unit may change from Travel Mode to Concentration mode at the conclusion of its Movement Phase, at a cost of two movement points. This is useful for some units as it will enable a further mode change in the subsequent Organization phase from concentrated to defilade if so desired.
[5.2.2] During the Organization phase, a unit may switch from Defilade to Concentrated Mode. A unit may also change from Concentrated to Travel Mode. However, only units without a concentrated mode such as an artillery unit or HQ unit may change from Defilade Mode directly to Travel Mode or from Travel Mode directly to Defilade Mode.
[5.2.3] An infantry or AFV unit may not go directly from Defilade Mode to Travel Mode in one turn or vice versa but may take advantage of the second exception to [5.2.1] to change from Travel mode to Defilade in one turn in two stages.
[5.2.4] Stacking order may not be altered as part of a mode change.
[5.2.5] Recovery of a unit from Disruption Mode during the Command Phase requires the unit to pass a morale check.
6.0 Fire Combat
Fire Combat involves the use of ranged fire by an attacker to inflict casualties on the targeted enemy units.
There are three methods of executing fire combat.
- Conventional fire uses low trajectory small arms weapons, requires direct observation of a conventional target class unit and has a range of a single hex.
- Anti-tank (AT) fire uses armor piercing ammunition, requires direct observation of an AFV class target and has a range of up to two hexes. Both conventional and AT fire require direct observation of the target unit so are often referred to together as Direct Fire (DF).
- Indirect Fire (IF) uses high trajectory, high explosive ammunition to fire at any target class unit using direct observation of the enemy or using a controlling HQ and spotting unit if it has no direct line of sight to the enemy.
Combat units may be capable of using one or more of these methods and the best method to employ will depend on the target unit. For example, all combat units can use conventional fire. Only artillery and HW units can use IF. Artillery can employ all three methods.
Fire combat performed by each player occurs in their Reaction phase (DF only) and their main Fire phase (All three methods). Each unit may use one firing method in each phase. Each unit therefore has two opportunities for Direct fire and one opportunity for IF (if capable) in each turn.
Fire combat is resolved using one of three different fire matrix tables depending on the firing method used.
The phasing player can perform DF and IF against target hexes in any order they choose during the Fire Phase. Pre-designation of all intended targets at the start of the phase is not required. To avoid overlooking possible firefights, it would be advisable to be systematic in approach. Whatever method is adopted, it must satisfy the requirements of [6.1.3] and [6.1.4]
Fire combat performed by a non-phasing player includes opportunity fire, return fire and ambush fire. Each occurs at different times in the sequence of play depending on when it is triggered by the enemy.
6.1 General Comments
[6.1.1] Fire combat is voluntary. A player may use any eligible friendly units to fire on enemy units in any order the player chooses.
[6.1.2] Fire from multiple units can be combined to form fire packets (FP).
[6.1.3] A player is not required to indicate all the fire packets directed against a target unit in a phase before any fire against that target is resolved. Each FP resolves its fire in the order chosen by the firing player. A FP's fire must be fully resolved before initiating the fire of another FP.
[6.1.4] In a given phase, all fire against units in a target hex must be resolved before declaring fire against units in a new target hex.
[6.1.5] If more than one target unit is present in a hex, fire against the first-choice unit must be completed before executing fire against the next unit and so on until all fire against all the desired target units in the hex is complete.
[6.1.6] Unless otherwise specified, fire is sequential in its execution and effect and is not treated as simultaneous.
Exception: return fire is treated as simultaneous unless certain terrain or other considerations apply. See [6.6.7.4]
[6.1.7] Units stacked together are not required to fire at the same target.
[6.1.8] No unit may fire further than its defined range unless using extended range for artillery.
[6.1.9] Units that fire in the fire phase preceding a friendly movement phase should be marked as "fired" as they will be prohibited from moving. The markers should be removed at the end of the upcoming movement phase.
[6.1.10] Units that are depleted may not fire.
[6.1.11] When a unit is in defilade mode it derives variable protection from enemy fire depending on terrain. That benefit is integrated into the Fire Results Table.
Each combat fire method is now explained in detail before describing the possible outcomes which are common to each.
6.2 Direct Fire
DF is subdivided into two categories depending on the target class. DF against those units with a Target Class of AFV on the unit-type table is conducted using Anti-tank (AT) Fire. DF against all other targets is called Conventional Fire.
Exception: Units in Travel Mode with a very light AFV target class can be subject to either conventional or AT DF (attacker's choice). This applies to towed artillery, AT and flak units as well as leg infantry.
[6.2.1] A unit may fire once in each of its friendly Fire Phases. For example, a unit that uses AT fire may not use conventional fire later in the same Fire Phase.
[6.2.2] DF may not be directed against targets that the firing unit cannot observe.
[6.2.3] DF against conventional targets has a range of one hex so direct observation is not usually an issue. DF using AT against AFV target class units may have a range up to two hexes so direct observation could be blocked by terrain. For example, any DF passing through a dike hex side automatically has a range of only one hex.
6.3 Direct Fire (Conventional Target)
[6.3.1] Overview
DF against conventional target class units is performed in the Reaction and the main Fire Phases. This section explains coordination of DF attacks, the importance of stack position and the possible influence of unit type and mode.
[6.3.1.1] Target hexes attacked by Direct Fire do not need to be pre-designated at the beginning of the phase before any DF is begun.
[6.3.1.2] All units directing fire at the same target hex with the same fire effectiveness must combine in one fire packet using that fire effectiveness. A unit may combine with other units that have a lower effectiveness rating (ER), but the lower ER would be used to determine the outcome.
[6.3.1.3] A player may see the results of one DF FP before committing another DF FP against the same target hex. Thus, fire against a target hex is sequential in its execution and effect.
Figure 2. Example: British companies A and B combine in a packet to DF the 3SS unit. The 1/504 US company fires as a separate packet as it has a different ER. 5DC/214 can use DF but has a low ER and fire strength so is not very effective against conventional targets. Depending on the result of the first packet fire, the player may decide to direct the 1/504 fire at the 1 Flgr unit instead.
[6.3.1.4] Only the top two units in a stack may conduct Conventional DF.
[6.3.1.5] When conventional DF is directed against a stack, only one of the top two units may be targeted. Note that one DF attack could first eliminate enough strength points such that units initially screened from DF could be fired on later in the same phase.
[6.3.1.6] If either of the two top target units is reduced to zero strength points, it is immediately removed from the map and any additional loss is inflicted on either of the two new top combat units.
[6.3.1.7] If a result calls for losses more than the total number of strength points in the target hex, all strength points in the target hex are eliminated and the excess loss is ignored.
[6.3.1.8] If an artillery unit or other towed unit (AT or flak) wishes to use DF against a conventional target that it can observe directly, it must be one of the top two units in the stack and it must use the Direct Fire Matrix.
Note: In such cases the ER used by artillery is 2 and not the printed value. AT and Flak units use their printed value.
[6.3.1.9] If an artillery unit is capable of AT fire, then it also has the option to fire at a directly observed AFV (within its range of two hexes). In which case it must be one of the top two units in a stack and use the AT fire table. See [6.4].
[6.3.1.10] HW units may employ DF Fire when adjacent to enemy units, and if so they use the DF value matrix to ascertain the Fire Value. As such they can fire alone or they may form part of a conventional DF packet with other units of the same battalion. In this latter case they add their printed fire strength in support (see [18.1.1.3]) using the same lower ER value as them.
[6.3.1.11] A unit in Travel Mode may not fire unless it has an AFV silhouette or is an armored reconnaissance unit.
[6.3.1.12] If more than one unit is in Travel Mode in the same hex, only one of those units may DF into a single target hex. They may, however, fire into different hexes. That represents frontage restriction when firing from a road column.
[6.3.2] Direct Fire Attack Procedure (Conventional Target):
The key factors to consider in executing a Direct fire attack against a conventional target are the number of strength points being committed, the effectiveness rating of the firing units and how these are organized into fire packets.
[6.3.2.1] Fire directed against a target hex must be fully resolved before considering the next target hex. This includes DF against conventional targets (considered here) and AFV class targets (considered in the next section under AT fire). Resolution of the conventional target fire attack may involve multiple fire packets incorporating an assortment of units of different ER values.
[6.3.2.2] The following procedure outlines how each fire packet attack is resolved. Refer to the Fire Value Matrix (Direct Fire) and the Fire Results Table on the Player Aid card.
Determine the target unit and which friendly units are firing on that target. Segregate the firing units into discrete "fire packets" based on their fire effectiveness. Each fire packet will resolve its DF against the target unit separately using the appropriate fire table. First, determine the total firing strength of each fire packet and cross-reference that value with the fire effectiveness on the Fire Value Matrix Table. Strength values greater than nine are treated as nine. The resulting number is the Fire Value for that fire packet.
Refer to the Fire Results Table and use the Fire Value obtained above taking into consideration any modifications for defender terrain or unit mode.
Roll two dice to resolve the fire packet's attack on the target unit. Cross-reference the number rolled with the Fire Value. This locates a result that is immediately applied to the target unit.
Strength point losses are inflicted on the attacking player's choice of one of the top two units in a stack. If either of the two top units is reduced to zero strength points, it is immediately removed from the map and any additional loss is inflicted on either of the two new uppermost conventional target units. If a result calls for losses more than the total number of strength points in the target hex, all strength points in the target hex are eliminated and the excess loss is ignored.
Excess hits on a leg unit from conventional DF cannot be allocated to an AFV target type unit.
6.3.3 Modification of DF Fire Strengths
The following modifications due to mode or unit type are applied to a unit's firing strength when conducting DF against conventional target types.
[6.3.3.1] The fire strengths of all silhouetted AFVs are doubled when firing at conventional target class units. This doubling also applies to German Armored Reconnaissance units.
[6.3.3.2] All unlimbered artillery and AT units use their printed fire strength when using conventional DF. In such circumstances they have an ER of 2. Flak units use their printed fire strength and ER in conventional DF.
[6.3.3.3] The fire strength of a unit in Defilade Mode is halved (round up) unless the firing unit is entrenched. A unit's fire strength is never reduced below one due to this rule.
Important note: the halving of the fire strength for units in defilade does not apply to artillery/AT and flak units for whom the defilade mode represents an optimal unlimbered firing state.
[6.3.3.4] A unit in Travel Mode may never fire with more than one strength point into a defending hex, regardless of how many targets there may be in that hex. Note only AFV and armored units may employ DF when in Travel Mode.
[6.3.3.5] A disrupted unit's fire strength is halved (but never reduced below one).
6.3.4 Modification of DF Effectiveness Ratings
The following modifications are applied to a unit's Effectiveness Rating (ER) when conducting DF against conventional target types. The maximum ER value allowed is 9.
Important note: Users who have employed previous rule sets should note that no change to ER occurs in DF because of disruption. Ignore comments on the player aid card regarding reduction of ER value by four.
[6.3.4.1] Dismounted armored infantry and engineers reduce ER by one.
[6.3.4.2] In OP fire, if the target unit is using a ferry the ER is increased by one.
[6.3.4.3] Artillery ER is reduced to 2 in DF.
[6.3.4.4] If the firer is in Travel Mode, the ER is reduced by one.
6.3.5 Modification of DF Fire Values
[6.3.5.1] If the number of DF strength points is greater than nine, shift the fire value one column to the right on the Fire Results table for each incidence of nine strength points more than the initial nine points. The fire value for DF can never exceed a value of 9 on the Fire Results table.
[6.3.5.2] If the 9 column on the Fire Results Table has already been reached, the firing player may add or subtract one (player's choice) from the fire result die roll for each remaining unused increment of nine fire points.
Example: a player is firing with 31 points of DF. The firing units have an effectiveness rating of six and the target is entrenched. The first nine points would be cross-referenced on the Fire Value Matrix with the number 6 on the Entrenched line. That yields a fire value of five. The remaining 22 points of fire contain two increments of nine fire points. (The remaining four firing points are redundant.) For each 9-point increment, the fire value is shifted to the right by one column on the Fire Results Table, giving a final fire value of seven. If the target unit had not been entrenched and not been in defilade, the initial fire value would have been eight, so the first additional 9-point increment shift on the Fire Value Matrix gives a final fire value of nine. The remaining unused 9-point increment is reserved to alter the die roll on the Fire Results Table. Looking at the Fire Results Table, the target is not in defilade, so the 9 column is initially used. The modifiers would allow the firing player to add or subtract one (for the remaining increment of nine) to whatever the die roll was on the Fire Results Table.
[6.3.5.3] If there are units whose fire does not generate a Fire Value that is large enough to register on the Fire Results Table, the owning player may make one Minimal Fire Attack (against conventional target types only). Roll a 2d6, and if the result is "2", the target unit must make a morale check. If it fails, the result is a "1". If the unit passes, the result is a D.
[6.3.5.4] Targeted towed artillery type units (artillery, antitank, FLAK, rocket artillery, etc.) do not receive the benefit for being in rough or city terrain on the Fire Results table. If such units are attacked in a rough or city hex, the fire attack is resolved on the "forest, town, or broken" line of the table.
Exception: Anti-tank units can receive the higher benefit of rough or city hexes on the Fire Results table if they occupy an entrenchment.
6.4 Direct Fire (AT Fire Combat)
[6.4.1] Overview
[6.4.1.1] Units capable of AT fire include AFV, artillery, AT units, some AA/flak units (German 88mm guns) and in certain circumstances, leg infantry and engineers. This section outlines the conditions under which such fire can occur.
[6.4.1.2] AT DF is used against AFV Target Class units during either friendly Fire phase. The firing unit must have a line of sight (LOS) to the target.
[6.4.1.3] Only the top two units in a stack may be targeted by AT DF.
[6.4.1.4] Units capable of Direct AT fire may fire only if they occupy one of the top two positions in their stack.
Exception: For each infantry unit occupying one of the top two places in a stack, an AT unit in defilade (unlimbered) mode may use AT fire regardless of their position in the stack. See [18.2.3].
[6.4.1.5] The maximum range for AT Direct fire is two hexes, regardless of the range printed on an artillery unit. AFV units without a printed range of two may only conduct AT fire into adjacent hexes.
[6.4.1.6] All enemy units in hexes adjacent to the firing unit are spotted. Any unit two hexes away is spotted if it is not in covering terrain and a valid LOS exists between the firing unit and the target. If a unit in that type of terrain fires, it reveals itself and is considered spotted during the phase in which the fire combat occurs and until such time that the observed unit moves into new covering terrain, or the LOS becomes blocked.
[6.4.1.7] An AFV target class unit may be fired at once in a Fire Phase by each type of AT fire (light, medium or heavy). The kind of AT fire conducted by a unit is indicated by the type of AT dot on the unit counter.
[6.4.1.8] A black AT dot signifies heavy AT fire capability. A white or red AT dot indicates medium AT fire. A hollow AT dot indicates light AT capability. The AT Fire Table lists the target type of all units.
Exception: Artillery units with an ER of seven are considered to have a light AT fire rating; if an artillery unit's ER is eight or nine its AT fire rating is medium.
Exception: Special AT fire allowed in CA means infantry and engineers can sometimes use AT fire. See [10.2].
Exception: Some engineer units do not display AT fire dots. This is a counter printing error. All combat engineer units should be considered to possess a single medium dot.
[6.4.1.9] Engineer units may only use AT fire when they are close assaulting or defending against a close assault involving AFVs but not during a Direct fire phase.
[6.4.1.10] If a unit uses its AT Fire, it may be subject to return fire in that phase from all eligible units in the target hex. See [6.6.7].
[6.4.1.11] In Return fire, the fire of all units is considered simultaneous and is resolved before moving on to a new target hex. For example, AFVs may return fire with conventional fire against towed AT or artillery units that have just conducted AT fire against them. In this example, given range considerations, the AFV unit would necessarily have to be adjacent to the enemy firing at it. See [6.6.7.4] for an exception to simultaneous fire.
[6.4.1.12] Return fire can be employed for each AT fire type attack (Light, Medium or Heavy) that is made against it.
[6.4.1.13] It is possible to direct AT fire against leg units in city and town hexes. See [18.3].
Example of DF (Figure 3). In the Allied fire phase, the stack of British units in hex 2648 (2 inf companies and 1 AT unit) and the US infantry company in hex 2449 engage the German units (1 infantry company and one AFV unit) in hex 2549 with Direct fire. There can be up to three separate fire procedures which could be resolved in any order. The British and US units could fire against the 3SS infantry unit as separate fire packets because they have different ER values but if they chose to combine as one packet then the ER would take the lower value of 3. The British AT company takes aim at the AFV stacked below the 3SS company and fires as a separate procedure. Immediately after resolving AT fire, the German AFV could return fire against the British AT unit treating the return fire as simultaneous. Note if by chance the British infantry firing as a single fire packet eliminated the 3SS then the US unit would have no conventional target to fire at. It could hold fire and contribute to a DF attack against the next target in hex 2448 either combined with British companies C and D or as a separate packet.
6.4.2 Direct Fire Attack Procedure (AT Fire)
[6.4.2.1] The procedure for resolving AT DF is as follows:
- The firing player announces which enemy unit is the target (AT fire is directed at individual units).
- The firing player declares which friendly units are firing at the enemy unit; the firing units are segregated into separate groups according to their AT fire rating (Light, Medium, Heavy). Each rating group will resolve its AT fire separately from the others.
- The firing unit may choose to split its fire strength to fire against more than one unit.
- To evaluate the total AT fire power, two factors need to be calculated then added together.
- First, identify the primary AT fire value (ATFV) by comparing the fire class of the attacker with the AT defense value of the target unit using the AT Fire Table.
- Second, calculate the secondary ATFV by identifying the AT fire strength of the attacker (strength points multiplied by the number of AT dots). A unit with two dots has its current strength multiplied by two to calculate its AT fire strength. For example, a German MKVIb (King Tiger) unit has two strength points and has two heavy dots printed on its counter. Such a unit fires AT fire with a total strength of four (2 x 2).
- The calculated AT fire strength value is reduced by one before multiplying by the modifier located immediately below the primary ATFV on the AT fire table. This final value is the secondary ATFV.
- The primary and secondary factors are now added together to give a total AT fire power. Terrain and mode modifiers can now be applied.
- The final value is compared to a 2dS [sic; 2d6] dice roll. If the roll exceeds the total ATFV, the AT fire has missed and there is no further result. If the roll is equal to or less than the total ATFV but is greater than half (round up) of the total ATFV, a strength point loss is inflicted on the target unit. If the dice roll is equal to or less than half of the total ATFV, the target unit must lose two strength points - which will eliminate most AFV units. A roll of 12 always misses.
Note: an AFV's AT fire type is not always equal to its own AFV target type. For example: British Sherman Firefly tanks are categorized as heavy for purposes of executing AT fire against enemy units, but they are considered medium targets when fired on. That is because the Fireflies were armed with 17-pounder AT guns mounted on Sherman tank chassis (a medium target).
6.4.3 Modifiers of the AT Fire Strength
[6.4.3.1] An AFV unit performing AT fire in Defilade Mode has its AT firing strength halved (round up). An eligible artillery unit performing AT fire has its fire strength halved. The total combined AT fire strength against a target is never reduced below one (round any half point up to one).
[6.4.3.2] A Towed AT unit fires with its printed fire strength when fully deployed and displaying the defilade side symbol. Its fire strength is doubled if entrenched.
6.4.4 Modifiers of the ATFV
[6.4.4.1] If any firing unit in an AT Fire Packet is Disrupted, the total ATFV is reduced by two.
[6.4.4.2] If the target is in Travel Mode, then add two to the final ATFV.
[6.4.4.3] If the target is in defilade and not in covering terrain, then reduce the ATFV by one.
[6.4.4.4] If the target is in defilade and in covering terrain, then reduce the ATFV by two.
Exception. See AFV defending in CA [10.2.11].
6.4.5 AT Fire Procedure Summary
- Compare the AT fire type with the AFV target type on the AT fire table to obtain the primary ATFV.
- Determine the number of attacking strength points and multiply by the number of AT fire dots to give the total fire power. Subtract one from this value and multiply by the modifying factor listed on the AT fire table to determine the secondary ATFV. Round fractions down. Add the calculated value to the primary ATFV then allow for any modifiers for mode or terrain.
- Use a 2D6 die roll to compare against the total ATFV value to determine the outcome. A roll of 12 is always a miss.
Figure 4.
Example 1: suppose two Panther tank platoons of two strength points each fire at a M4 Sherman platoon with two strength points (see fig 4). Heavy AT fire class vs Medium AFV target results in a primary ATFV of 8 on the AF fire Table. Each Panther has a total fire strength of 2 heavy dots (2 x 1) firing on the M4. The secondary ATFV is calculated using the AT fire strength of 4 (2 x 2) which is reduced by one before multiplying by the AT table modifier. This equates to 3 (4 points less one) x 1.5 (table modifier) = 4.5 rounded down to 4 giving a total ATFV of 8 + 4 = 12. This means that the M4 unit will lose two strength points on a roll of 6 or less and be eliminated. On a roll of 7 thru 11, one strength point will be eliminated, and on a roll of 12, the result will be a miss. Now when the M4 returns fire, it will be a Medium AT Fire type vs Heavy AFV target type giving a primary ATFV of 5 and a secondary ATFV of 1 x 0.75 (for the additional M4 Strength point above one) which rounds down but cannot be less than one so equals a total ATFV of 5 + 1 = 6. A 3 or less will eliminate two MkV strength points, and a 4 thru 6 will eliminate one strength point. Anything else is a miss. Now if you had 3 M4 units at full strength you could fire all three at one of the MkVs and your total ATFV would have been 5 + (6-1) x 0.75 = 8.75 for a final value of 8 (rounded down).
Figure 5.
Example 2: Figure (5) shows a Sherman tank unit potentially receiving AT fire from two Panther V tank units, an artillery unit with an ER of 9 and an AT unit. The Panthers are Heavy AT fire types and the AT and artillery units are medium AT fire types. DF from each fire type category should be resolved separately in any order decided by the phasing player. Note the fire strength of the artillery but not the anti-tank unit would be halved for AT fire.
6.5 Indirect Fire
[6.5.1] Overview
Indirect Fire (IF) uses high trajectory, high explosive ammunition to fire at any target class unit. IF may be conducted by an artillery or HW unit in one of three ways:
- When the firing unit cannot see the target but uses another friendly spotting unit to observe it indirectly.
- When the artillery or HW unit can self-spot the target within its firing range.
- As an unobserved barrage by artillery against a hex to which it has no LOS.
[6.5.1.1] The following three criteria must all be satisfied to allow IF against a nominated hex that is outside the line of sight of the firing unit.
- An artillery unit needs to be close to a suitable "controlling" HQ.
- The distance between the spotting unit and the controlling HQ can be up to 36 hexes provided terrain criteria for the line of communication are met (see section 7).
- The target hex must be within firing range of the artillery/HW unit.
[6.5.1.2] In any given turn, artillery and HW units can only use IF capability once during a player's Fire Phase and, if required, once when performing OF during enemy movement. They attack using the IF procedure (see also [18.1.1]).
[6.5.1.3] It is possible for artillery perform an unobserved barrage but there are associated penalties and restrictions described below.
[6.5.1.4] No more than two friendly artillery units may combine in an Unobserved Barrage.
Exception: scenario rules may modify this restriction.
[6.5.1.5] HQs or any unit in Travel Mode cannot be subject to Unobserved Barrages. Note that some scenario instructions may temporarily suspend this restriction.
[6.5.1.6] If an artillery unit can see a target, it may fire at the target independently without requiring a spotter or controlling HQ. In such a case, the unit uses IF procedure to attack the observed hex.
[6.5.1.7] Units using IF may fire at any individual unit in the target hex, regardless of stacking order.
[6.5.1.8] Artillery and HW units may use IF from any position in a stack.
[6.5.1.9] Towed artillery, SPA, and HW using IF always use the Indirect Fire Matrix whatever the range.
[6.5.1.10] Multiple units performing IF against a single target unit can combine their fire strength provided they have the same ER.
[6.5.1.11] Disrupted units may not conduct Indirect Fire or act as spotting units.
[6.5.1.12] Units in Travel Mode may not function as observers or controlling headquarters.
[6.5.1.13] An artillery unit may act as an observer for other artillery units provided normal communication requirements are met.
[6.5.1.14] Depleted units have a fire strength of zero and cannot fire.
[6.5.2] Communication Requirements for IF
[6.5.2.1] An artillery unit may only conduct observed IF provided it is stacked with, or within two hexes of, a "controlling" HQ unit, which in turn is in communication with an eligible unit observing the target (see section 7). HW units may only use a spotting company from the same battalion as a "controlling" HQ for the purpose of this rule.
[6.5.2.2] A controlling HQ is one to which the artillery unit is subordinate or one that is subordinate to the same HQ to which the artillery unit is subordinate. See [17.5] for more information.
Example: artillery units identified as 43xx belong to the 43rd (British) Infantry Division. They are subordinate to the 43rd Division HQ. They may fire if they are stacked with or adjacent to the 43rd Division HQ unit or its corps HQ and in addition if they are stacked with or adjacent to any of the "regimental" HQ units subordinate to the 43rd HQ (such as the headquarters of the 129th Brigade.)
[6.5.2.3] A spotting unit must be able to observe the target and be subordinate to the controlling HQ. For example, a unit belonging in the 129th Brigade could communicate with 129th Brigade HQ unit or 43rd Division HQ unit or 30th Corps HQ. On this basis the higher the level of command of the controlling HQ, the more units are eligible to spot for IF.
[6.5.2.4] To establish whether an observer unit can communicate with an IF unit, see section [7.4] for criteria of a valid line of communication.
Figure 6. Example: the 55/GA SPA can conduct IF against the StS 6/14 infantry company because the target is a) within its 12-hex firing range and b) in the LOS of the spotting 5CG/GA company which in turn is in communication with the controlling HQ and c) the SPA is within 2 hexes of the controlling HQ.
[6.5.2.5] A controlling HQ contributing to an Indirect Fire episode cannot move in the immediately following Movement Phase. Signify this with a "used" marker.
[6.5.3] Indirect Fire Procedure
Refer to the Fire Value Matrix (Indirect Fire) Table.
- Determine the target unit (enemy unit being fired on), and which friendly units (grouped into fire packets with the same ER) are firing on that target.
- Determine the final Fire Value of any barrage directed against the target unit using the Fire Value Matrix (Indirect Fire) Table.
- Now refer to the Fire Results table.
- Insert the final Fire Value using the appropriate line at the top of the table, referring to the target unit's mode, type and the terrain in the target hex.
- Roll two dice. Cross-reference the number rolled with the final fire value.
- If there are more than 18 strength points in the barraged unit's hex, the die roll result is modified by two in favor of the barraging player.
- If the Indirect Fire strength exceeds 16 then the firing player may increase or decrease the Fire Results die roll by one for every 12-point increment greater than the original 16 fire strength points. The maximum allowable increase or decrease to the die roll using both these modifiers in cases 6 and 7 is plus or minus three.
- The result is immediately applied against the target unit.
[6.5.3.1] Strength point losses resulting from IF are inflicted on each target unit individually.
[6.5.3.2] If the unit that is the target of the attack is reduced to zero strength points, it is immediately removed from the map and any additional loss must be taken by other units in the hex. This should be determined randomly by die roll but a unit type cannot take a second hit before a different type takes one hit.
Example: a stack containing an infantry unit and a Flak gun subject to spill-over loss would randomly determine which of the two units takes the first hit; the second hit would automatically affect the other unit type. Then randomly determine the next hit and repeat the pattern.
[6.5.4] Modification of IF Fire Strengths
The following modifications are applied to a unit's strength when firing indirectly.
[6.5.4.1] Towed artillery units and SPA are doubled in strength when they conduct Indirect Fire at conventional targets but not when firing IF at AFVs.
[6.5.4.2] The fire strength of a HW unit in Defilade Mode is halved (round up) unless the unit is entrenched when unmodified fire strength is used. A unit's fire strength is never reduced below one due to this rule. This adjustment does not apply to towed artillery (see [6.3.3.3]).
[6.5.4.3] An artillery unit may opt to fire at up to 33% increased range (round down) but if it does, it cannot double its IF strength against a conventional target and fire strength against AFVs is halved.
[6.5.4.4] Artillery units conducting an Unobserved Barrage have their fire strength quartered (round up). If the target hex suffers a loss, randomly choose which unit in the hex is hit (use a die roll). In all other respects, this IF is conducted in the same way as observed fire.
[6.5.5] Modification of IF Fire Effectiveness Ratings
The following modifications are applied to a unit's ER when conducting IF. The maximum ER value cannot exceed 9.
[6.5.5.1] If the target unit is using a ferry the ER is increased by one (OF only).
[6.5.5.2] If the artillery unit IF is controlled by a HQ to which it was not originally attached, then reduce ER by 2.
[6.5.6] Modification of IF Fire Value
[6.5.6.1] If the target is non-AFV, entrenched and in defilade then reduce fire value by four.
[6.5.6.2] If the target is light AFV reduce fire value by one. If medium AFV reduce fire value by two and if heavy or very heavy AFV then reduce by four.
6.6 Opportunity Fire
The non-phasing player may conduct Fire Combat as a response to certain enemy actions occurring within its zone of control or when it is subject to CA. This is called Opportunity Fire (OF) and may occur outside the designated fire phases. In some specific situations the OF is referred to as return fire or ambush fire depending on circumstance. These variants are described at the end of this section.
[6.6.1] Overview
[6.6.1.1] OF may only be executed against the units that triggered the response. The presence of other units is ignored. This provision takes precedence over any restriction that only the top two units may be subject to fire combat. For example, if the third unit in a stack moves and triggers OF, and the top two units remain in position, only the triggering unit may be fired on.
[6.6.1.2] A player undertaking any activity that triggers OF should declare the intention and give the opponent a chance to fire at the unit in its present position and mode before the triggering unit's activity is executed.
[6.6.1.3] OF is performed by single units only. Multiple eligible units cannot combine to perform OF. They must fire separately.
[6.6.1.4] Opportunity fire may take the form of DF or IF depending on circumstance.
[6.6.2] Triggers of Opportunity Fire
[6.6.2.1] When a unit or stack moves out of an enemy controlled hex (see [8.1]), it triggers OF from eligible controlling enemy units. This occurs before the actual exit of the enemy from the hex. It is more advantageous to move a stack of units out of an EZOC (which triggers a single OF from each controlling enemy unit) than to move the units individually. If they are moved one by one, each in turn will trigger a new OF from every enemy unit exerting a ZOC into the hex.
[6.6.2.2] When a unit changes mode or position in a stack or if motorized infantry dismount/mount in an enemy controlled hex. When a mode change triggers OF from an enemy unit, it is executed with the target unit in its original mode.
[6.6.2.3] Only a voluntary change in mode renders a unit susceptible to OF.
[6.6.2.4] Multiple instances of OF may be triggered in a hex. For example, if a unit in an enemy controlled hex changes both its stacking order and its mode in its movement phase, then the unit triggers enemy OF twice, once for changing stacking order and again for changing mode.
[6.6.2.5] If an entire stack changes both mode and stacking order, only the two uppermost units at the moment of firing may be the targets of OF. [6.6.2.6] Recovery from disruption is considered an involuntary mode change and does not trigger OF.
[6.6.3] Close Action and Opportunity Fire
[6.6.3.1] All units in a defending stack including disrupted units may individually fire against CA assaulting units.
Exception: see 6.6.3.3 and 11.5.3 for artillery.
[6.6.3.2] Disrupted units do not exert a ZOC so the only time they may conduct OF against enemy units is when being Close Assaulted.
[6.6.3.3] Artillery units may execute OF using DF with an ER value of 2 when they are defending in a CA. To do so, the artillery unit must be one of the top two units in its stack. The owning player conducts that OF using the DF procedure and fire value matrix.
[6.6.3.4] When conducting OF using DF in a CA, an artillery unit fires with its printed strength.
[6.6.3.5] Artillery units have their Fire Strengths halved if performing OF using Indirect Fire immediately prior to a CA.
[6.6.3.6] The only time a unit may choose to split its fire against more than one opposing unit is when it is firing OF against enemy units attempting to CA that unit, or it is conducting AT fire (see 6.4.2.1. paragraph 3). However, a unit may never split its fire if any resulting fire values are less than one.
[6.6.4] Opportunity Fire as Direct Fire
[6.6.4.1] Any unit exerting a ZOC into the hex in which the OF was triggered can use DF.
Exception: disrupted units subject to Close Action.
[6.6.4.2] There is no limit to the number of times a unit may use DF OF (unless the unit is subject to depletion). It may be executed every time it is triggered, but only when it is triggered. It is theoretically possible for a player to move a unit through three hexes adjacent to an enemy unit that exerts a ZOC. As he executes that movement, he would be triggering OF from the enemy unit in each of the adjacent hexes out of which the unit moves.
Example of Opportunity Fire (Figure 7). Two companies E and F of the 501st PIR in hex 4020 are trying to carry Weeg, a town defended by a German line company and HW company from the II/1053 battalion. They have been ordered to assault through the 2/501D Company. There are 3 triggers of Opportunity Fire by the defenders. A when the Assault companies attempt to leave the EZOC exerted by the German HW company to enter the hex next to the town (hex 4021). B when they move from underneath the D company to the top of the stack. C just before they resolve the CA.
[6.6.4.3] OF is the only type of fire that HQ units may execute.
[6.6.5] Opportunity Fire as Indirect Fire
[6.6.5.1] Indirect Fire may be conducted as OF on an enemy unit that has moved more than two contiguous hexes using infantry movement, or more than four contiguous hexes using vehicular movement (the unit is an AFV or in Travel Mode), while being under continuous observation by the same spotting unit. The spotting unit must be able to observe the moving unit in every hex required to trigger the OF. This spotting unit must be in Communication with the firing artillery unit via a controlling HQ as usual for IF. Such fire is immediately allowed.
[6.6.5.2] Artillery and HW units may only initiate OF using IF once per Movement Phase. Mark the firing unit with a "Used" marker and remember to remove the marker at the end of the phase.
[6.6.6] Opportunity Fire and Heavy Weapons
[6.6.6.1] A heavy weapons unit may execute OF using IF once per movement phase from any position in a stack. Only companies from the same battalion can act as spotters for such attacks.
[6.6.6.2] A HW unit can OF fire using DF as many times as it is triggered. When using DF Opportunity Fire, it calculates its Fire Value on the DF table.
[6.6.6.3] A HW unit may conduct ambush fire indirectly if the spotter is a company from the same battalion.
[6.6.7] Return Fire
[6.6.7.1] Return Fire is a form of OF that may be conducted by units of a non-phasing player immediately after they have been subject to AT fire. This Return Fire takes the form of DF (AT or conventional) and the normal DF procedure is used to conduct Return Fire.
[6.6.7.2] During a Fire Phase, any time a unit uses AT fire, both top two enemy units in the targeted hex are eligible to fire back using the standard fire combat rules and the results of both side's fire are applied simultaneously.
[6.6.7.3] Indirect Fire and OF do not trigger such return fire.
[6.6.7.4] Return fire is considered simultaneous unless the phasing player's units are AFV or are firing from covered terrain. In these circumstances, the phasing player is regarded as firing first.
[6.6.7.5] Return Fire can be conducted against any type of unit that used AT fire against it.
[6.6.7.6] A unit cannot return fire more than once per phase including when defending in CA.
[6.6.8] Ambush Fire
[6.6.8.1] A unit not in Defilade Mode which enters a hex with no covering terrain adjacent to an enemy unit may also trigger OF if that hex has an EZOC exerted into it - this form of Opportunity fire is called Ambush Fire.
[6.6.8.2] Only units that exert a ZOC into the hex and are themselves in covering terrain themselves may conduct ambush fire.
[6.6.8.3] Units may not conduct Ambush fire if there are any enemy units already adjacent to the hex the ambusher is in.
[6.6.8.4] If an AFV moves into open terrain adjacent to an enemy infantry or engineer unit which lies in covering terrain or an entrenchment then that enemy unit may perform ambush fire using its infantry AT capability (see section [10.2]).
Example of Ambush Fire (Figure 8). When the German company enters 2725 on the trail it will be subject to ambush fire from the US D company because the German unit is in mixed terrain and the US unit is in cover.
Figure 9. In this case, ambush fire is not possible as a German unit is adjacent to D company when 7th company makes its move.
6.7 Effects of Fire
The Combat Results Table displays three possible results. One result is "No Effect." meaning the fire failed to generate any effect. The second possible result is "DEF" (defilade), which means the fire is close and intense enough to cause the target to disperse into Defilade Mode to reduce casualties. The last possible result is the number (1, 2, 3, etc.) of any strength points lost.
[6.7.1] No Effect: the firing unit has shot and missed. Nevertheless, following DF, the defender may choose to immediately place the targeted unit into Defilade Mode. If the fire was IF, the owning player may choose to put any of the units in the hex into Defilade Mode immediately. Play proceeds to the next action. No opportunity fire is provoked by adopting defilade under fire.
[6.7.2] If the result is "DEF" then the target unit is defiladed.
[6.7.2.1] If already in defilade or disrupted, there is no further effect.
[6.7.2.2] The effect of a "DEF" (defilade) result is applied immediately. If the target is fired on again, the target is in defilade and the combat is resolved as such.
[6.7.2.3] If the target becomes defiladed because of fire, it does not trigger OF as the change is involuntary.
[6.7.3] 1, 2, 3, etc.: the target unit's strength must be immediately reduced by the number given on the table. For example, if the result is "2," the target unit loses two strength points. The owning player puts a loss marker under the unit to record strength point losses. Any unit taking a strength loss adopts defilade mode immediately if not already in that mode.
In certain circumstances, there may be additional considerations and the defending player may have options to modify the effect of fire. For example,
[6.7.6] Headquarters and artillery units displaying the defilade symbol must make a morale check if they suffer a D result on the Fire Results Table. If they fail that check, the owning player has two choices: he can either disrupt the unit or inflict a strength point loss. This does not apply to flak or AT units.
[6.7.7] If the target is concentrated and the result is worse than "no effect", the owning player must: 1) place it in defilade; or 2) take an additional strength point loss while retaining the unit in the Concentrated Mode, provided there is a successful morale check. If the morale check is failed, then the unit adopts Defilade Mode and takes the extra loss in addition.
[6.7.8] A defending unit in Travel Mode which suffers a lost strength point on the fire results table is automatically disrupted at the end of the Fire Phase. If there are two units in a hex in Travel Mode, the loss is taken from the top unit. A unit suffering a strength point loss that is in Travel mode but does not have a concentrated mode will remain in Travel mode but take an extra strength point loss.
[6.7.9] When a unit's strength reaches zero, it is eliminated. Losses more than the number of strength points in the target hex are ignored unless the fire was indirect, in which case the remaining strength point losses must be inflicted on any remaining units randomly using a die roll (See [6.5.3.2]).
[6.7.10] In a hex subject to IF, if the target unit suffers a D or "1,2,3" result, the other units in the stack have the option to adopt defilade mode.
7.0 Observation
A unit must be observed before fire combat may be directed against it. All units conducting DF must be able to directly observe the units at which they are firing. Units conducting IF must be able to either directly observe the target or be in communication with a unit that can observe the target and is eligible to "spot" for the unit conducting the IF.
7.1 Determining Line of Sight (LOS)
[7.1.1] A LOS is valid if there is no intervening blocking terrain between the observer and the target AND the LOS does not exceed the maximum observation range. The terrain in the observer's hex never blocks LOS. The influence of terrain on the observation range is shown on the Terrain Effects Chart (TEC).
[7.1.2] If an IF unit needs a spotter because it cannot directly observe a target, the spotter must have an unobstructed LOS to the target, and it must also be in communication with the IF unit via a controlling HQ (see [6.5.2]).
[7.1.3] If an imaginary straight line drawn between the centers of the target and observer hexes intersects any part of a hex containing blocking terrain then the LOS is obstructed. Each type of terrain that could potentially block the LOS has been numbered on the far-right column with a blocking value next to its name on the Terrain Effects Chart (TEC). Clear and mixed terrain have no value, as they never block LOS by themselves.
[7.1.4] If an unblocked LOS exists from the observer unit to the target unit, then the target unit is visible provided it is not in covering terrain (woods, forest, town and city) and the target hex is within Observation Range of the observer.
[7.1.5] A disrupted unit may not observe for another unit.
[7.1.6] A unit may always observe a unit directly adjacent to it, regardless of the intervening hex side terrain or the terrain of the hex in which the adjacent unit is located.
7.2 Observation Range Limits
The "observation range" is the maximum distance measured in hexes along the LOS that the observer can see the target (not counting the hex the observer is in). This range is limited by the factors listed below.
[7.2.1] The terrain in the observer's hex determines observation range. The TEC lists observation range limits for every type of applicable terrain an observer could occupy. A LOS may never exceed those limits.
[7.2.2] All range limits are reduced to two hexes during night turns.
[7.2.3] Weather condition "P" reduces all daytime ranges by half (round down) and reduces to one hex at night.
[7.2.4] If sighting occurs between maps with different weather conditions, use the condition of the map on which the observer is located.
7.3 Terrain Effects & Observation
[7.3.1] Dikes are drawn in a natural manner and if a LOS passes through any dike, it is blocked unless: 1) the observing unit is adjacent to the dike; or 2) the observing unit is occupying a hilltop or city hex. Even if the dike runs through part of an unplayable hex or hex side (grayed-out hexes), it still blocks LOS. These criteria also apply to raised roads, raised trails and railroad embankments. Treat the entire hex, not just the printed feature, as blocking terrain.
[7.3.2] The LOS number 9 appearing next to the Stream/Dike terrain type on the TEC applies only to Dike terrain features. Streams have no effect on a LOS. This is corrected on the player aid sheets.
[7.3.3] Forest, city and rough hexes constitute covering terrain so units in such terrain are only observable by adjacent units. Woods and town hexes are also covering terrain but units in such terrain can be seen from one or two hexes away.
[7.3.4] If a previously unobserved unit conducts fire combat from covering terrain and thereby reveals its location, that covering terrain effect is negated for LOS purposes during the phase in which the fire combat occurs and until such time that the observed unit moves into new covering terrain, or the LOS becomes blocked.
[7.3.5] Units that sight through an adjacent slope hex side may increase all range limits by two if they occupy the higher side of the slope. Ignore this rule if the unit occupies a hilltop or city hex.
Example: In Figure 10, unit "A" would not increase its observation range, as it is not adjacent to the slope hex side looking down. Unit "B" would increase its observation range in the direction of the arrow, but unit C would not, since it is occupying a hilltop hex.
Figure 10.
7.4 Line of Communication and IF
[7.4.1] To establish whether an observer unit can communicate with an IF unit, trace a line of communication (LOC) between the observer unit and the controlling HQ of the IF unit. The LOC is valid if:
- a) the line does not traverse more than three city or forest hexes combined or
- b) more than four city, forest, town or woods hexes combined or
- c) an observer is on a hilltop hex and the LOC passes through no more than four city and/or forest hexes combined or
- d) the observer and controlling HQ are both on hilltops, and no other hilltop intervenes.
Players should note that if three of the hexes in (b) are city and/or forest, the LOC falls under (a).
[7.4.2] No LOC between spotter and controlling HQ may be longer than 36 hexes, irrespective of the intervening terrain.
[7.4.3] When determining LOC, the hex in which the HQ is located matters for the LOC, but the hex in which the other unit is located has no effect on the LOC unless it is on a hilltop hex.
8.0 Zones of Control
Figure 11.
All combat units including HQs normally exert a zone of control (ZOC) in the six hexes surrounding them (Figure 11). Any combat unit with a printed fire range of two or more exerts a ZOC extending outward of two hexes from the hex it occupies e.g. HW units, 88mmFlak units and Tiger tank companies. A hex in a ZOC is said to be a "controlled hex."
8.1 Effect of ZOC on Movement
When a friendly unit leaves an enemy zone of control (EZOC) it must expend three MPs in addition to any other movement costs; this cost applies to units of all movement classes. There are no extra MP costs to enter an EZOC, only to leave it.
8.2 Effect of ZOC on Opportunity Fire
When a friendly unit in an EZOC attempts to leave the hex, alter its stacking position, change its operational mode, or execute a CA, it triggers enemy OF.
8.3 Effect of ZOC on Supply
A supply path may not be traced through an EZOC unless the hex is occupied by a friendly unit.
8.4 Effect of Terrain on ZOC
[8.4.1] Units never exert a ZOC into a Forest or City hex. Units exert ZOCs into Woods or Town hexes only if they are adjacent to these hexes. In all other cases, a unit with a printed fire range of two or more exerts a ZOC out to a range of two hexes into any hex it can observe (See Observation rules 7.0). A HW unit with a range of 2 does not exert a ZOC into a Woods or Town hex two hexes away but it can see into the hex if there is no blocking terrain between the two (see 7.3.3).
[8.4.2] A unit's ZOC extends through a dike hex side only if that unit is adjacent to that hex side.
[8.4.3] ZOCs extend across river, canal and stream hex sides. As a result, a unit may exert control over a hex it cannot move into.
[8.4.4] If a unit performs CA from a forest or city hex, it is subject to OF from the unit(s) in the hex it is assaulting. In no other case may units perform OF on units moving out of forest or city hexes.
[8.4.5] If a unit performs CA from a forest or city hex or through a dike hex side, the unit still pays the movement cost for leaving a ZOC.
8.5 Effect of Friendly Units on ZOCs
The presence of friendly units does not influence an EZOC except for the purpose of tracing a friendly supply path.
8.6 Units Without ZOC
[8.6.1] Units without an effectiveness rating do not exert a ZOC.
[8.6.2] Units that are disrupted, depleted or in Travel Mode do not exert a ZOC.
9.0 Movement
9.1 General Considerations
[9.1.1] During a movement phase, a player may move any friendly units that did not fire in the immediately preceding Fire phase.
[9.1.2] One unit or one stack of units is moved at a time.
[9.1.3] Each moving unit expends movement points (MP) from its normal movement allowance (MA) according to the TEC tariff to enter each hex. The exact cost depends on the terrain traversed, the mode of the unit, the unit type, and the presence of EZOC.
[9.1.4] Movement during a Reaction Movement Phase is limited compared to the main Movement phase. Although full movement point allocation is available, movement is limited to two hexes maximum for leg units and 4 hexes maximum for all others.
[9.1.5] To move a unit or stack of units, a player displaces it across the hex grid, hex by contiguous hex. To calculate the MP cost to enter each hex, cross-reference the unit's mode, type and the terrain it encounters on the Terrain Effects Chart (TEC). EZOC costs must also be paid if they apply (see [8.1]).
9.2 Restrictions on Movement
[9.2.1] Movement of a unit or stack must always be continuous. In moving a stack, units may be picked up and dropped off from the moving stack provided each individual unit's movement is continuous (units that are dropped off must cease their movement for the remainder of the phase).
[9.2.2] A unit using ground movement may never enter a hex containing an enemy unit.
[9.2.3] A unit may spend some, all, or none of its MA before ending its move, but it may not save MP from phase to phase, nor may it transfer MP to other units.
[9.2.4] A unit may not exceed its MA. However, a unit may always move at least one hex during any type of friendly Movement Phase, even if the cost of doing so exceeds its MA. However, a unit using this rule may not enter or cross prohibited terrain or cross blocked hex sides.
[9.2.5] A unit may not voluntarily enter a hex in violation of stacking limits (see section [11.2]).
9.3 Effect of Unit Type on Movement
The type of unit (AFV, Leg, etc.) determines how many points, or fractions of MP it must expend to traverse a given type of terrain. For example, in most cases an AFV unit will expend far fewer MP to enter open terrain or road hexes than a leg unit. Those effects are summarized on the TEC. Before moving a unit, a player must note the unit type and its mode to calculate the MP cost for entering each hex.
[9.3.1] Every unit in the game that is not a static unit, reconnaissance-type, or King Tiger II has a MA of 12 MP. Static units may not move or retreat. Reconnaissance units (those with any type of reconnaissance symbol or armored cars or M5 Lt tanks) have an MA of 14 MP. German King Tiger IIs have a MA of 9 MP.
Figure 12. King Tiger II tank unit.
[9.3.2] Units move using either vehicular movement or leg movement. On the TEC, under the Defilade Mode and Concentrated Mode movement cost listings, there are two sub-columns: one each for Leg Movement or Vehicular Movement. A moving unit uses the costs listed under the column that corresponds to the unit's movement type. There is only one column under Travel Mode, because units in that mode are only using vehicular movement when they move. Units with an AFV silhouette always use vehicular movement. Additionally, a unit with a mechanized oval or motorized wheel symbol as part of its unit-type box uses vehicular movement.
[9.3.3] Any infantry, combat engineer, or machinegun unit that has a mechanized oval or motorized wheel symbol can be dismounted and then moved like a leg unit.
[9.3.4] Armored Infantry or Panzer grenadiers that are dismounted have their ER reduced by one.
[9.3.5] A unit must expend two MP to dismount and the new status is indicated with a "Dismounted" marker.
[9.3.6] A unit may remount and remove a Dismounted marker by simply expending two MP.
[9.3.7] A unit may only mount or dismount once per phase.
[9.3.8] To remount, a unit must be able to trace a valid supply line along roads or trails back to its controlling HQ.
[9.3.9] Headquarters in Defilade Mode are considered leg units and move as such.
[9.3.10] All towed artillery, anti-tank and anti-aircraft (FLAK) units have only in-battery and Travel Mode sides. They may not enter Concentrated Mode. Those units may normally only move in Travel Mode and, conversely, they may only fire when in-battery and displaying the defilade symbol. Such units require to be placed in Travel Mode during their Organization Phase before moving them using the Travel Vehicle rate. This requirement effectively prohibits such units from entering certain kinds of terrain (forest, broken, etc.) except via road or trail.
Note these units can move one hex while in-battery if required, provided terrain prohibitions are respected. See also [9.5.2.2] for the effect of EZOC for some units.
[9.3.11] For movement purposes, machine gun, heavy weapons, engineer and HQ units without an armor or motorized wheel symbol function as leg units.
9.4 Terrain and Movement
[9.4.1] Roads and Trails
[9.4.1.1] A unit in concentrated or Travel Mode may move from hex to contiguous hex along a connected road or trail using the appropriate road movement rate and ignoring normal terrain costs.
[9.4.1.2] Units in Defilade Mode do not benefit from roads or trails.
[9.4.1.3] For graphics purposes, trails are not drawn through city hexes, but every city hex is considered to contain a trail through all six of its hex sides. That means adjacent city hexes are connected by trails if no better road exists, and trails leading up to city hexes are connected by trails to those city hexes.
[9.4.2] Raised Roads, Trails or Railroads
[9.4.2.1] These thoroughfares represent elevated causeways above low swampy ground. For vehicular units, only those in Travel Mode benefit from them; they are otherwise ignored and other terrain in the hex determines movement. Leg units in concentrated mode use the normal road rate. [9.4.2.2] A unit in Travel Mode on a raised road may not voluntarily change mode because the vehicles are in column and cannot descend off the road.
[9.4.2.3] Units in Travel Mode on a raised road, trail or railroad may not enter or exit the thoroughfare except at the raised road or trail or railroad terminus, a road or trail or railroad intersection, or a clear terrain hex.
[9.4.2.4] Leg units which cannot adopt Travel Mode may move across a bridge traversed only by a raised road or trail or railroad at a cost of one extra MP.
[9.4.2.5] A road or trail or railroad intersection is identifiable by a break in the elevated hash marks of the embankment where the intersecting thoroughfares meet. In some cases, a small bridge symbol will indicate two roads (one being raised) do not meet and units may not be moved from one to the other of those roads. See Figure (13).
Figure 13.
9.4.3 Bridges
Bridges negate stream, canal and river hex side movement costs.
Exception: see 9.4.2.4 for infantry that cannot use Travel Mode.
9.4.4 Engineers and Cross River Movement
Engineer units may permit a friendly unit to cross a canal or river or stream when otherwise prohibited (see scenario rules for details).
9.4.5 Unplayable Land Areas
To present a more natural look, many waterways are drawn just the way they existed. That means there may be pieces of hexes that are not playable as land features. (Figure 14a)
Figure 14a.
Those areas are "greyed out." One should imagine they are really all water for game purposes, and that a water hex side exists there. In Highway to the Reich, Map B hex 0850 is an example of this (Figure 14b). The entire bit of land south of the river in that hex is unplayable, and the river is considered to run between 0750/0850 and 0751/0850 hex sides.
Figure 14b.
9.4.6 Marsh Hexes
Marsh is a terrain type like broken terrain with the following exceptions: 1) it never blocks any LOS; and 2) an AFV or unit in Travel Mode may only enter and leave this type of terrain using a road, trail or railroad, and the unit must remain in Travel Mode while in the hex.
9.5 Effect of Mode on Movement
The mode of a unit affects its ability to move. These effects are summarized for all types of terrain on the TEC.
[9.5.1] Travel Mode
[9.5.1.1] Only a unit capable of vehicular movement may enter Travel Mode. A Travel Mode marker is placed on a unit when it enters this mode except for HQ and towed artillery units which assume Travel Mode by flipping over to their Travel Mode face. The front side of those units represents the unit in Defilade Mode or in-battery respectively; they have no Concentrated Mode side.
[9.5.1.2] All HQ and towed AT, FLAK and artillery units may assume Travel Mode.
[9.5.1.3] Units in Travel Mode may not voluntarily leave that mode when located on a raised road or railroad (RR).
[9.5.1.4] A player may remove a unit from Travel Mode at the conclusion of its movement at the expense of two MP (this is an exception to the rule limiting voluntary mode change to the Organization phase).
[9.5.1.5] A phasing player may dismount or remount a unit at the end of its movement at a cost of two MP.
[9.5.2] Defilade Mode
[9.5.2.1] Towed artillery, AT and AA/Flak units can be moved one hex while in battery and displaying the defilade symbol provided there are no terrain prohibitions.
[9.5.2.2] Towed AT/Flak units in-battery and displaying the defilade symbol that wish to move one hex into an EZOC may only do so if they pass a morale check first (for which an AT/Flak unit may use the Morale rating of any accompanying Leg unit if present).
[9.5.3] Disrupted Mode
A disrupted unit may move only one hex.
9.6 Stacking & Movement
[9.6.1] A unit may freely enter a hex containing other friendly units, either to pass through the hex or to terminate its movement stacked with those other units. There is no extra movement cost to enter a hex containing a friendly unit.
[9.6.2] A player may choose to reposition units in a stack without penalty when movement has completed provided the hex is not in an EZOC.
[9.6.3] If a move ends in an EZOC, any unit joining the stack is placed at the bottom. If they are then moved up the stack, they are subject to OF like any other unit voluntarily changing stack position in an EZOC.
[9.6.4] Rather than move one unit, a player may move a stack of units; however, he must take care no unit in the stack exceeds its MA or violates any movement restriction. As he moves, a player may accumulate a stack of units or, conversely, reduce a stack by dropping off units, provided no unit exceeds its MA or violates a restriction.
[9.6.5] No more than two units in a moving stack can be in Travel Mode if the stack is on a road, trail or railroad. Also, no more than eight strength points may ever be in Travel Mode in the same hex at the same time.
[9.6.6] Units in Travel Mode may not move through other units in Travel Mode on any kind of thoroughfare, including railroads. Such units must stop if they enter such a hex already containing other units in Travel Mode.
[9.6.7] No more than two Leg units may be moved as part of the same stack if they are using the road movement rate.
Example: in Figure 15, three infantry companies from 3 Flgr wish to travel to Keldonck. The most direct route in concentrated mode (marked in red numbering) is too slow and will require two turns to complete. The secondary road route (marked in blue) via Erp can be completed in a single phase using 12 MP at the road movement rate in concentrated mode. However, they cannot move as a stack of three companies due to the two unit stacking limitation for leg units using road movement rates (see [9.6.7]). Movement in travel mode is also possible and will require 6 movement points but the two-unit limitation also applies. An additional consideration in this last case is that stacking limitations operate instantaneously so the presence of any other unit in travel mode along the route would block their path (see [9.6.6]).
Figure 15.
[9.6.8] A dismounted motorized unit when moving as a leg unit must follow the restriction in [9.6.7], and when moving as a vehicle must follow the vehicular movement restriction in [9.6.5].
10.0 Close Action
10.1 Overview
[10.1.1] CA is a type of combat that occurs at the end of a unit's movement during any friendly Movement Phase.
[10.1.2] CA by a unit or stack is resolved immediately after movement and the results are implemented before movement of another unit or stack is begun.
[10.1.3] A unit may execute only one CA per Movement Phase as attacker.
[10.1.4] CA combat may only occur between adjacent opposing units.
[10.1.5] CAs initiated from different hexes against the same hex are resolved separately. Units from different hexes are never combined in a single CA attack.
[10.1.6] Units combining in CA may be restricted as follows:
- Units of different divisions, or independent regiments/brigades, may not execute a close action against the same hex in the same phase.
- Infantry units and heavy weapons units of different regiments/brigades may not execute close actions against the same hex in the same phase.
- Division/Corps assets may only combine with units of a regiment/battalion headquarters affiliated with the division/corps.
- Combat engineers, headquarters and leaders (see [19.1]) must coordinate with units of their organization to perform a CA.
[10.1.7] Multiple opportunities to perform movement of a unit or stack followed by CA can be resolved in any sequence the phasing player desires during the movement phase.
[10.1.8] Once a CA is announced, it must be executed.
[10.1.9] CA is considered movement, therefore a unit that fired in the immediately preceding friendly Fire Phase may not execute a CA attack.
[10.1.10] A unit that has not yet moved may always CA an adjacent hex regardless of the MP cost, but that unit's movement is considered finished after that CA has been resolved (the unit may advance into the hex it attacked if no enemy unit still occupies the hex).
[10.1.11] An attacker does not have to begin the Movement Phase adjacent to the unit being assaulted in CA. After the attacker moves adjacent to the enemy hex it must expend the MP cost to enter the terrain of the enemy hex, including the cost of leaving an EZOC. In addition to that expenditure, it must pay a further 3MPs for the CA. Note that the full cost of the terrain in the assaulted hex must be met even if entering through a road hex side.
Example: in Figure 16, both US units can CA the German infantry company in this movement phase. F company requires three MP to become adjacent, 3MP for close action, 3 MP to enter the attacked hex (ignore the road) and three MP to exit the ZOC of the attacked unit. This totals 12 points. Similarly, if E company is attacking via mixed terrain in hex 3609 it also requires 12 MP to CA this phase (3+3+3+3). Assault from a distance is possible but requires a minimum of 6 MP overhead for EZOC and initiation of CA before factoring in actual movement costs. Note that if a unit's HQ is stacked with a leader, the bonus MP could have facilitated the attack if required (see [19.6.2]).
Figure 16.
[10.1.12] If units performing CA began their movement in a hex that is not adjacent to the defending hex, no more than two units may participate in that CA.
[10.1.13] Units may not CA into a hex they are otherwise prohibited from entering. For example, a unit could not CA across a river except over a bridge or with the aid of bridging (ferrying) engineers.
[10.1.14] All units in a hex subject to CA are included in the defending force and must defend if attacked, with no unit granted the opportunity to retreat before CA combat is resolved.
[10.1.15] Though CA combat is executed and resolved while opposing units occupy adjacent hexes, the attacking units are attempting to enter the hex occupied by the defending units. Thus, a unit that initiates a CA in an EZOC may be subject to OF from the defenders and any other eligible units before that CA is resolved. The attackers are fired on in the hex they are attacking from (even if fighting out of a city or forest hex) and not the hex occupied by the defenders.
[10.1.16] Retreat following CA and advance into the defender's hex following successful CA do not trigger OF as this is regarded as involuntary movement.
[10.1.17] Artillery units may not attack using CA. If they are in a hex from which a CA originates, their presence is ignored (except, of course, if they are the top unit in the stack, in which case the stack cannot attack).
10.2 Preliminary OF and Special AT Fire
[10.2.1] Opportunity Fire against the attackers by defenders and any other eligible units is permitted prior to resolving CA as stated in [6.6.3].
[10.2.2] As an alternative, infantry and engineer units that are involved in a CA against AFVs may be eligible conduct a special kind of AT fire against those AFV units before beginning the CA procedure. For all units except engineers, this fire is of a defensive nature and may only be used by infantry units if they are defending a CA against enemy AFVs. Engineers may conduct this type of AT fire both offensively and defensively, which means that they may conduct this AT fire against defending enemy AFVs during a CA initiated by the engineer unit's side. Units can contribute irrespective of stack position.
[10.2.3] Defending units of the same AT fire class can combine firepower e.g. medium AT fire capability engineers can combine with medium AT capability infantry in defensive AT fire, but medium and light AT capability units must fire as separate events.
[10.2.4] This special AT fire is considered simultaneous, with the AT fire of one side being completely independent of any from the opposing side.
[10.2.5] The AT capability of infantry units varies:
- All German infantry with a printed morale of 6 or more has medium AT fire capability.
- All German infantry with printed morale of 5 or less have a light AT fire capability.
- All Allied infantry (airborne included) has light AT fire capability.
- All eligible infantry units are considered to have a single AT dot.
- Engineer units of both sides possess medium AT fire capabilities regardless of their printed morale. Note that all combat engineer units should be considered to have a medium AT dot printed on the counter. This AT dot signifies an offensive AT fire capability during CA.
[10.2.6] Special AT fire by attacking engineers. If the attacker includes combat engineers in the CA and the defender includes AFV then an AT fire attack can be performed by the engineers. Once the primary ATFV has been determined, the secondary ATFV is calculated. In the case of a CA, the number of engineer strength points allowed to contribute depends on the relative numbers of infantry strength points committed to the action. If there is an excess of infantry strength in favor of the attacker, the excess value sets a limit on the number of engineer strength points that can be used as a multiplier. If there are equal or fewer attacking infantry SP than defending infantry SP, then no secondary ATFV can be generated for the engineers.
Example: A stack containing two M4 Shermans, two engineer units with a strength of four, and three infantry units each with a strength of five, CAs an enemy stack that contains a MkV AFV unit, and two infantry units with a morale of seven and three strength points each. Before the CA is resolved, each side conducts a special AT fire using the infantry and engineer units present for both sides. The Allied engineer units may fire offensively, while the German units can only conduct a defensive AT fire. First, the engineer units target the MkV AFV with a primary ATFV value of five. Because there are more Allied infantry strength points than German (15 to 6) the Allied player may use the excess infantry points to generate a secondary ATFV for that AT fire. According to the AT fire table, each medium strength point adds .75 to the secondary ATFV. Based on the excess infantry numbers, up to 15-6=9 SP could be made available. In fact, only 8 engineer strength points are available and so the secondary ATFV is calculated using a multiplier of 7 (a value of one is always subtracted from the AT fire strength in this calculation). Therefore, the AT fire is conducted with a total ATFV of 5+ (7x0.75) = 10.25 rounded down to 10. (Had only two Allied infantry units been present, the excess infantry points in favor of the attacker would have been 10-6=4. In which case only 4 of the available 8 engineer SPs would be allowed to contribute.) In reply, the German infantry may make one AT fire with a primary ATFV of six but may not use other infantry strength points to modify this value because there are more Allied infantry strength points in this CA than German.
[10.2.7] Special AT fire by defending engineers. If a defending hex in a CA contains engineers and the attacker includes AFVs then the engineers can contribute to defensive AT fire in a similar fashion to 10.2.4 provided the defender has an excess of infantry SP compared with the attacker.
[10.2.8] If both attacker and defender possess engineer units, then the side with fewer engineer SPs is considered negated and the side with more can use the excess engineer SPs as described above in either 10.2.4 or 10.2.5. For example, in the scenario described above, if the German defender possessed a 4 SP engineer unit in addition to the two 3 SP infantry units, then 4 of the Allied engineer SP would be negated and only a maximum of 7-4=3 would be available in the calculation of the secondary ATFV.
[10.2.9] Special AT fire by defending infantry. If an AFV attacks infantry in a CA, then the defender may conduct infantry AT fire in the same manner as regular AT fire using any excess infantry strength points, but only if the defenders are entrenched or in town, forest or city hexes. These additional strength points may be used to modify the ATFV in the same manner as regular AT fire.
Example: an M4 Sherman and an infantry company of five strength points engages in CA against three German infantry companies of three strength points each and morale of 7 in a town hex. The primary ATFV for defensive fire is medium fire type v medium target type = 6. The excess infantry for the defender (9-5=4) can be used with the multiplier of 1 once the first point has been discounted as in the normal AT firing process. So, the total ATFV is 6+ [(4-1) x 1] = 9. If instead a 2SP engineer unit was present in the defending hex with two German infantry companies of three strength points each then the infantry contribution would be one point (6-5) and the engineer would be two points making a total of three altogether. The addition to the primary ATFV value of 6 (med v med) would be (3-1) x 1 =2 making a total of 6 + 2 =8. If the defenders were in open terrain then no infantry contribution to special AT fire could be made.
[10.2.10] In summary, if a side has infantry/engineers present in a CA that includes AFV, then it has the option of an AT shot and may modify the ATFV of that shot depending on the relative number of engineers and infantry present in that CA.
[10.2.11] If a CA occurs into covering terrain, and special AT fire is used against defending AFV, any targeted AFV units do not receive the benefit of the defilade modifier for the total ATFV (See 6.4.4.4).
[10.2.12] A unit must continue with a CA even if there is a mode change caused by OF or special AT fire immediately preceding it.
[10.2.13] If a leg unit is attempting a CA in combination with a friendly AFV unit, and the AFV is either eliminated or goes into defilade mode because of fire combat preceding the CA, then the attacking leg unit must take a morale check and if the unit fails, it may not continue the attack. No additional penalty applies.
10.3 Close Action Combat Resolution
In summary, lead units for the attacker and defender are chosen from one of the top two units in the attacking and defending stacks respectively. The lead units are nominated at the time a CA is declared and before any damage from OF or special AT fire has been sustained. Comparison of the relative effectiveness and morale ratings of the lead units yields a Close Action Value on the Close Action Value Table which is then compared with a die role on the Close Action Results Table, and adjusted for the combat strength ratio, to determine the outcome.
The procedure is described in more detail below and multiple factors affecting the calculations at each stage are listed afterwards.
- Determine the effectiveness rating of the lead attacking unit and the lead defending unit, which is the printed fire effectiveness rating plus or minus any modifications for cross-river attack, mode, etc. (see [10.4.1]). Subtract the defender's modified effectiveness rating from the attacker's rating to determine the effectiveness differential of the CA. It may be a negative number.
- Subtract the current morale rating of the top defending unit from that of the top attacking unit. A unit's current morale (see [16.1]) is the printed morale minus adjustments due to strength point losses, plus the leader bonus (see [19.1.1]) and any modifications for terrain, engineers, etc. (See [10.4.2]). The subtraction determines the morale differential of the CA, which may also be a negative number. Locate that differential on the column corresponding to the terrain type of the defender.
- Cross-reference the effectiveness differential with the morale differential to obtain the Close Action value. The value is carried over to the Close Action results table.
- If the CA value is a "DIS," the attacker is immediately disrupted and the CA ceases. No strength point loss occurs if the CA ceases at this point. However, the attacker can ignore the "DIS" and attempt to proceed with the CA if they have at least a three-to-one combat ratio (attacker to defender strength) and the lead unit passes a morale check. If successful, they take one strength point loss and proceed with a CA value of one without disruption. If they fail the morale check the CA ceases and all the attacking units are disrupted and the lead unit takes a step loss.
- Total the strengths of all the attacking units, and then all the defending units. Compare them as a ratio of attacker to defender, rounding down any remainder in favor of the defender. Locate that odds ratio on the left side of the Close Action results table. Roll a die. Cross-reference the number rolled, under the appropriate odds column, with the CA value. That will give the results of the CA, which are applied immediately.
Note: if you use the original charts/tables supplied with the game the "D" result has a different meaning to that of the Fire Table results table. This confusion is avoided by using the otherwise identical tables found in the Player Aids accompanying these rules.
10.4 Factors Affecting the Calculation of the Close Action Value
[10.4.1] Effectiveness rating
[10.4.1.1] Depleted units defend with an ER of one.
[10.4.1.2] Units in Travel mode and disrupted units (when defending) halve their ER value (round up).
[10.4.1.3] AT, AA/FLAK and artillery units always defend against a CA with an ER of two regardless of such units' printed ER values. The strengths of these units are not doubled for CA combat. Artillery units in a close assault perform as an anti-tank unit.
[10.4.1.4] Dismounted Armored Infantry and Armored Engineers reduce ER by one.
[10.4.1.5] If airborne units landing on enemy units would be over stacked in the hex in which they are landing (the one the enemy units are in), subtract two from the ER of the stack.
[10.4.2] Morale values
[10.4.2.1] If the defending units are in defilade and occupy an entrenchment, forest or city hexes they gain two morale points for purposes of calculating the morale differential in a CA. If the defiladed units occupy rough, towns or wood, the morale benefit is one point. Entrenchment and terrain benefits are cumulative. For example, an entrenchment in a city would give the defending units a benefit of four morale points.
[10.4.2.2] When a combat engineer is one of the top two units in a stack defending or attacking in a CA, the morale of the stack is raised by two points.
[10.4.2.3] If a defending force is entrenched, and the attacking stack includes a combat engineer at any position in the stack, the effect of the entrenchment is negated.
[10.4.2.4] For a combat engineer unit to have those effects stated in [10.4.2.2] and [10.4.2.3], the combat engineer unit must have a strength of two and a morale greater than zero (that is, positive). Note the engineer must be stacked with at least one other combat unit and be in concentrated mode to gain the morale benefits although it can still negate the benefit of entrenchment when acting alone.
[10.4.2.5] If a leader is stacked with a unit executing or defending against a CA, the morale rating of the subordinate unit(s) under the leader is raised by two points.
[10.4.2.6] The morale value of a disrupted unit is reduced by four.
[10.4.2.7] Adjust morale ratings for previous strength point losses when calculating the morale effectiveness differential. See [16.1].
[10.4.2.8] If one side in a CA possesses silhouetted armor units in addition to infantry or engineers, that side gains a morale differential bonus equal to the AT value of one of the participating armor units. A heavy AT capable unit awards a plus two, while all other types of AT capable unit award a plus one. If the opposing side has AT units with similar AT dots, no bonus is awarded.
[10.4.2.9] If armor initiates a CA alone with no friendly infantry type units stacked in the same hex and the defender's terrain is woods, rough, forest, town or city, the defender's morale is increased by three points.
[10.4.2.10] The morale level of a depleted unit is reduced by two.
[10.4.2.11] Artillery defending in CA suffer a reduction in morale of two points.
Important note: Morale level used to calculate the morale differential for CA purposes can be less than zero.
[10.4.3] Close action value table column shifts
[10.4.3.1] If the defender is on a hilltop there is a one column shift in their favor to the left on the CA Value Table.
[10.4.3.2] If the attacker begins the movement phase adjacent to the defending hex of a CA, the CA Value is shifted one column to the right in favor of the attacker.
[10.4.3.3] In the case of a minimum CA where the attacker had 3:1 odds and manages to override the D result on the CA Value table, the CA value is also shifted one column to the right on the Close Action Results table.
[10.4.4] Unit combat strength modification
[10.4.4.1] A disrupted unit cannot attack and current strength is halved when defending.
[10.4.4.2] A depleted unit cannot attack and current strength is halved when defending.
[10.4.4.3] If a unit crosses a bridge to execute a CA, its strength is halved (rounding up).
[10.4.4.4] If a unit attacks across a map ferry its combat strength is quartered.
[10.4.4.5] If a unit executes a CA across a dike, its combat strength is halved (rounding up).
[10.4.4.6] If a unit executes a CA across a dike, only those units that could normally fire on it may execute OF on that unit in addition to the unit being close assaulted.
[10.4.4.7] The combat strength of an attacking unit in Defilade Mode is halved (round up).
[10.4.4.8] Defending units in Defilade Mode do not halve their combat strengths in a CA.
[10.4.4.9] Defenders in Travel Mode halve their combat strength values.
[10.4.4.10] AFV strengths are doubled for CA if there are accompanying infantry/engineers but not if the defending unit terrain is woods, forest, town, city or rough.
10.5 Results of Close Action
Close action affects both attacker and defender and may result in no effect, disruption, or strength point loss with accompanying disruption.
[10.5.1] When disruption is caused following CA, the defending units must also retreat one hex or be eliminated. They may not retreat into an enemy controlled hex unless a friendly unit is present.
[10.5.2] If a disrupted defending unit receives a second disruption result, then it remains disrupted and loses half of its current strength and retreats one hex. If only 0.5 strength points remain following this additional strength point loss, then eliminate the unit.
[10.5.3] A disrupted attacker remains in place.
[10.5.4] Any undisrupted attacking units must advance to occupy the hex vacated by any retreating disrupted defending units.
[10.5.5] Artillery units in-battery and displaying the defilade symbol that are forced to retreat are eliminated instead.
[10.5.6] AT and Flak units may however retreat one hex while in Defilade Mode provided, they pass a morale check and terrain constraints are met. For example, not up slopes or across streams or dikes. The morale check does not involve the minus four modifier for this purpose. If any Leg unit is stacked with them, then the Morale rating of the Leg unit may be used. Failing the morale check results in unit elimination.
[10.5.7] At the conclusion of CA, a unit can voluntarily go into Defilade Mode if desired.
Figure 17. Example: In Figure 17A, 3SS infantry company is caught in the open by British infantry who initiate a fire fight and then follow up with a CA across the stream. First, the HW company from 6GH/69 rains down fire on 3SS using D company from 6GH as a spotter. The Indirect Fire strength is 6 and the fire effectiveness is 7 so by the IF Fire Value Matrix table, the fire value is 7. The 2D6 die roll is 8 so on the fire results table, using the lowermost line to account for terrain, the result is "DEF". The 3SS is now defiladed. Both 6GH companies follow up with Direct fire and have a fire strength of 8 and an effectiveness of 4. 3SS is not entrenched so the fire value on the Direct Fire Value Matrix table is 6. The die roll is an unlucky 7 so there is no result. Finally, in the movement phase, the two infantry companies stacked below an engineer company from the same division assault the defiladed 3SS. The assault factors derive from the uppermost unit, so the effectiveness differential is 5-2 =3 and the morale differential is 8+2(engineer bonus)-4=6. For open terrain this yields a Close Action Value of 8 on the CA Value table which is then modified to 9 by a one column shift to the right for the attackers starting adjacent to the defenders. The combat strength ratio is 13 (all units count when CA initiated from adjacent hex) divided by 3 (defenders in defilade do not halve combat strength) =4:1 rounded down. The outcome on the results table after a single 1D6 roll of 4 is 3 strength point losses. The 3SS is therefore eliminated. The three attacking infantry and engineer companies cross the stream into the defender's hex.
10.6 Disruption
When a unit becomes disrupted by CA or airstrike (see scenario rules), place a disrupted marker on the unit counter to signify this new mode.
[10.6.1] During the Command Phase, a player may attempt to remove disruption from affected units by passing a morale check ([10.6.4]).
[10.6.2] While disrupted, a unit suffers the following effects.
- It cannot participate in a CA attack and its current strength and effectiveness are halved (but never reduced below one) when defending.
- No OP fire allowed unless defending in CA.
- The disrupted unit may not perform or spot for any barrages.
- An HQ's supply range is halved, and it may not be used to communicate or coordinate IF.
- A disrupted unit's morale is defined as its current morale less four.
- Its AT Fire suffers a -2 DRM.
- No ZOC is exerted.
- Engineer functions are lost.
- A disrupted unit may still move at least one hex if desired provided normal terrain rules are observed.
[10.6.3] Disrupted units are subject to normal supply considerations.
[10.6.4] During the Command Phase, if a unit passes a morale check, it recovers from disruption and the marker is removed. Roll a 2d6 for each disrupted unit. Use the unit's printed morale value adjusted for losses, but do not apply the minus four disrupted modifier to morale when making this check. Instead, use the following die roll modifiers which are cumulative.
- -2 if stacked with or adjacent to any leader or HQ unit.
- +1 if adjacent to an undisrupted enemy unit.
- +1 if out of supply.
The modified roll should be equal to or less than the current morale level to recover from disruption. When rolling for a disrupted stack of units, roll once and apply the result to each unit separately.
[10.6.5] If a unit has not moved or been adjacent at any time to an enemy unit for two consecutive night GTs, that unit automatically recovers from disruption on the first friendly daylight Command Phase.
[10.6.6] In recovering from disruption, a combat unit reverts to the same mode it was in before it became disrupted except for disrupted HQs which always adopt defilade mode.
11.0 Stacking
Each hexagon on the map represents a fixed amount of space within which a limited number of troops, guns and vehicles may be placed.
11.1 Stack Position
[11.1.1] During either Movement Phase, the phasing player may reorganize the position of units within a stack.
[11.1.2] Artillery and FLAK units in battery (displaying the defilade symbol) may not alter their stack position themselves but may be subject to a change in position due to the actions of other units.
[11.1.3] Static units must always be at the bottom of a stack of units.
11.2 Maximum Stacking Limits
[11.2.1] The total number of strength points that may be voluntarily stacked in a single hex at any given time is limited according to the terrain in that hex (see the TEC).
[11.2.2] The stacking limit is always in effect throughout all phases. A unit may never voluntarily enter a hex, even momentarily, in violation of the stacking limit.
[11.2.3] If units are over stacked (even momentarily), then all units in the hex become disrupted. If the situation persists at the end of movement, a minimum number of units is displaced one hex so that stacking requirements are met. If any units were already disrupted prior to the stacking violation, they are retreated one hex and half their current strength points are lost (round losses down).
[11.2.4] A unit's current strength is counted for stacking purposes.
[11.2.5] All strength points stacked in a hex count against the stacking limit of that hex.
[11.2.6] Game markers and Leader units do not have a combat strength and do not count against the stacking limit.
[11.2.7] Friendly units may always stack in the same hex regardless of their nationality.
[11.2.8] On the TEC certain kinds of terrain limit the number of AFV strength points that may be in a hex (for example, woods). That limit means that of the 28 strength points allowed in a hex, the AFV/vehicular strength point component may not exceed the vehicular stacking limit.
11.3 Stacking Effects on Movement
[11.3.1] Stacking, unstacking and stack rearrangement are only permitted during Movement Phases.
[11.3.2] During other phases, the order in which units are stacked may not be altered. Retreats and advances after CA are not restricted by this rule.
[11.3.3] There is no MP cost to stack or unstack units within a given hex.
[11.3.4] A unit must be placed at the bottom of a stack when it enters a hex already containing friendly units if that hex is in an EZOC.
[11.3.5] No more than two units in Travel Mode may move as a single stack, and they may not move through other units in Travel Mode along any kind of roads or railroads.
[11.3.6] No more than eight strength points may ever be in Travel Mode in the same hex at the same time. See [9.6.5].
[11.3.7] Leg units in Concentrated Mode moving along a road or trail cannot move through or stop in a hex containing Leg units in Concentrated Mode using the road or trail Movement Point Rate if the combined total of leg units exceeds two.
[11.3.8] If the top unit changes mode to Defilade for any reason, the stack must move at Defilade movement rates until stacking order is addressed. As usual with stacking changes, this could provoke OF.
11.4 Stacking Effects on Mode
[11.4.1] All units in a stack do not have to be in the same mode.
[11.4.2] Units that occupy the same hex as a disrupted unit are not affected by that unit's disruption. Place the disrupted unit underneath any undisrupted units in the hex. This is an involuntary rearrangement and does not provoke OF.
[11.4.3] The penalty for over-stacking is disruption and with it, reduction in MA for all units that begin a phase over-stacked. Reduce the MA of all affected units to one hex, even if the offending units are moved out of the hex that movement phase.
[11.4.4] Disrupted units forced to retreat onto a hex containing a bridge (including an engineer constructed pontoon bridge hex) must be retreated one hex farther or be eliminated if they cannot do so.
11.5 Stacking Effects on Fire Combat
[11.5.1] The two topmost units may always fire and be fired upon as part of a single stack.
[11.5.2] Eligible AT units (see exception note in [6.4.1.4] for eligibility) may fire DF AT fire from any position in a stack and return fire may always be directed back at them.
[11.5.3] Artillery units may conduct IF from any position in a stack, but if they use DF as OF against CA enemy units, they must be one of the two topmost units in a defending stack.
[11.5.4] Any HW unit in a stack may also engage in IF regardless of their position within the stack.
[11.5.5] The presence of a leader unit at the top of a stack does not affect any stacking or fire restrictions on the units below them.
[11.5.6] A stack of units may be subject to OF if its stacking order is rearranged within an EZOC. See [6.6.2.2] and [6.6.2.5].
12.0 Terrain
The MP cost to enter a hex is determined by terrain within the hex and along a hex side. Terrain affects combat in several ways due to its effect on observation, communication in IF, stacking and modifiers in fire combat and CA. Terrain also affects the ability of a unit to trace a supply path. In many cases forest, woods, towns, and mixed terrain are present in the same hex. That is done to preserve a natural look on some areas of the map. In those cases, forest always take precedence for stacking and movement cost purposes, followed by towns, then woods, and then mixed terrain. The reverse order would apply for impact on observation and combat i.e. hexes with multiple terrain types would be treated as "worst case" for stacking limit and movement cost (roads being an exception), and as "best case" for observation and combat terrain. This is the case even if the terrain type that takes precedence forms only a small part of the hex area.
12.1 Entrenchment
See section [18.4.3] for details on entrenchment construction.
[12.1.1] The Entrenchment markers denote an entrenched hex. Entrenchments do not provide any benefits to units that are currently conducting any kind of movement function.
[12.1.2] AFV and armored units, or any unit in Travel Mode, are prohibited from ever benefiting from entrenchments. All other units benefit from entrenchments provided they are in defilade mode.
[12.1.3] Entrenchments may be removed in any Friendly Command Phase by the owning player, who merely states he is destroying the entrenchment. The entrenchment marker is then removed from the map. [12.1.4] An entrenchment is removed if an enemy unit occupies the hex.
[12.1.5] An attacking unit executing a CA never benefits from entrenchments.
13.0 Command & Supply
13.1 Overview
To move and fight effectively, combat units must be in command and supply. The HQs of the various corps, divisions, regiments and brigades provide the command and logistical infrastructure necessary for units to meet these requirements. Command and supply are closely linked as both involve a unit or HQ tracing a path of hexes. This path of hexes will be referred to as the supply path for both command and supply purposes. Units without an intact supply path to their controlling HQ are referred to as out of supply. Although the supply path to the controlling HQ is a prerequisite for command and supply purposes, it is not sufficient on its own. For maximum effectiveness, combat units must also have access to Command Points (CP) held by their controlling HQ.
During a friendly Command Phase, a player determines the integrity of the chain of command (supply path) for each unit and each HQ. Units with an intact supply path to their controlling HQ can receive orders and supply by using CP. If a unit does not have a valid supply path or if its HQ has less than two CP, then that unit is at risk of ammunition depletion and suffers reduced movement allowance.
Each division receives CP and Ammunition Points (AmP) during the CP/logistic Phase of Game Turns 0601/0901 and 1501/1801.
The CPs are subsequently distributed to the relevant regimental and brigade commands within each division during the side's next Command Phase.
Any HQ without an intact supply path will be unable to receive CPs which will in turn adversely affect the performance of their subordinate combat units.
In summary, normal functioning of combat units requires both a valid supply path and the availability of CP at their controlling HQ.
13.2 Supply Sources
A supply path is traced from a combat unit to a controlling HQ and then through higher HQs until it finally reaches a supply source. The location of supply sources is detailed in the scenario rules.
[13.2.1] Combat Unit Supply
[13.2.1.1] The immediate point of access for supply for all combat units (non-HQs) is the HQ they are directly subordinated to.
[13.2.1.2] Some units may arrive as independent battalions and companies. These units must be subordinated (by either verbal declaration or written record) to a specific HQ of Regimental, Brigade, or KG size.
[13.2.2] Tracing the Supply Path
[13.2.2.1] A supply path is a path of contiguous hexes traced from a unit or HQ to its next higher controlling HQ or supply source.
[13.2.2.2] If any segment along the supply path from a combat unit to its supply source is either blocked or too long, then the supply path is considered invalid and all HQs and units subordinate to that point in the command chain will have their supply impacted.
[13.2.2.3] The supply path must not enter hexes containing enemy units or their un-negated ZOC. (A friendly unit negates EZOC in the hex it occupies.)
[13.2.2.4] The terrain traversed by the path must not be prohibited for movement to the unit making the supply path trace.
[13.2.2.5] The length (in hexes or MP) of the supply path will depend on the type of unit or HQ tracing the path.
[13.2.2.6] The required path length (in hexes or MP) of the supply path is halved if the HQ being traced to is in Travel Mode or disrupted.
[13.2.2.7] When tracing the supply path from an HQ, a player must trace it as though he were moving a vehicular unit in Travel Mode.
[13.2.2.8] When tracing the path from a combat unit to a HQ, the length is simply measured in hexes rather than movement points.
Exception: See [13.2.6.3].
[13.2.3] Corps Headquarters
[13.2.3.1] Corps HQs are in supply if they can trace a path of any length, entirely along primary and secondary roads, to their designated supply sources.
[13.2.4] Divisional and "Independent" Headquarters
[13.2.4.1] Divisional HQs are in supply if they can trace a supply path up to 18 MP to the Corps HQ they are subordinated to.
[13.2.4.2] Some divisions have two HQ, one being a forward HQ and the other the main HQ. If they have a supply path to each other, and one of them is in supply, then all units of the division can trace to either HQ counter.
[13.2.4.3] Most independent HQs in the game must be attached to a divisional-sized formation and must trace supply to that formation's HQ. The scenario rules may list exceptions.
[13.2.5] Regimental, Brigade, and KG Supply Paths
[13.2.5.1] Regimental headquarters are in supply if they can trace a supply path to their Divisional HQ. (The terms "brigade" and KG is considered identical to regiment for this rule.) The regimental HQ supply path is up to 12 MP in length.
[13.2.5.2] The same path length also applies to Independent HQs.
[13.2.6] Combat Unit Supply Path
[13.2.6.1] The supply path of a combat unit is up to 12 hexes between the unit and its controlling HQ, not counting the hex the unit is in but counting the hex the HQ unit is in.
[13.2.6.2] Combat units must always trace through a headquarters for supply.
Exception: see [13.2.6.5].
[13.2.6.3] If a vehicular unit is separated from its HQ by more than 12 hexes but can reach the HQ using less than 12 MP by road then the supply path is considered intact.
[13.2.6.4] If a regimental level HQ's supply path becomes invalid, its subordinated combat units are unsupplied regardless of the length of each individual unit supply path.
[13.2.6.5] If a unit's supply source is on the map, the unit is in supply if it is on or adjacent to its supply source. This is an exception to routing supply via an HQ.
[13.2.7] Unit Supply Assessment
The supply and command status of each HQ and unit is determined in the Command Phase.
[13.2.7.1] If a headquarters is unable to trace a valid supply path, it is unsupplied and unable to receive more CP or Amp. The owning player places an out of supply (OOS) marker on the unsupplied headquarters. That marker remains on the headquarters unit until re-assessed at the next Command Phase. It may not perform OF until it has been put back in supply.
[13.2.7.2] At HQ level, there is some flexibility in the provision of a valid supply path. The supply path does not have to be with the controlling HQ and could be through a higher HQ in the same command chain if necessary. For example, a Brigade that has an interrupted supply path to its Divisional HQ may trace a supply path directly to a Corps HQ. It can use the CPs that its controlling division HQ has received provided the supply path between the corps HQ and the divisional HQ is intact.
[13.2.7.3] A unit is fully in command and supply if it can trace a valid supply path to its controlling HQ and that HQ has two CP.
[13.2.7.4] Whenever a unit moves or fires, the owning player must assess its supply status. If either the supply path is invalid or the controlling HQ has only one or no CP points then movement will be reduced and the units will be vulnerable to depletion of ammunition.
[13.2.7.5] If at the beginning of its move, a unit can trace a valid supply path but the controlling HQ has only 1 CP then movement allowance is determined by the roll of 2D6, the result of which applies to all subordinate units. If the unit fires or is involved in CA it must roll immediately afterwards to check for ammunition depletion (see [13.3.1]).
[13.2.7.6] If at the beginning of its move, a unit can trace a valid supply path but the controlling HQ has no CP then movement allowance is determined by the roll of 1D6, the result of which applies to all subordinate units. If the unit fires or is involved in CA it must roll immediately afterwards to check for ammunition depletion with a +2 modifier to the die roll (see [13.3.1]).
[13.2.7.7] If at the beginning of its move, a unit cannot trace a valid supply path then irrespective of the number of CP held by the controlling HQ, movement allowance is determined by the roll of 1D6. If the unit fires or is involved in CA it must roll immediately afterwards to check for ammunition depletion with a +2 modifier to the die roll (see [13.3.1]).
Important note: the depletion check is not required following defensive fire in CA or OF.
Important note: as per 19.6.1, the effects of reduced CP are negated for any affected units whilst they are stacked with a leader counter.
13.3 Ammunition Depletion
[13.3.1] Check for depletion
A unit becomes ammunition depleted if its ER is four or less and it rolls one on a 1d6. If the unit's ER is five or six, it depletes on a roll of one through three, and if the ER is higher than six, the unit depletes on anything but a six. Use a marker to indicate depletion.
Exception: artillery units with an ER rating of seven or more, use the procedures outlined under the AmP rules (see Section [15.2]).
[13.3.2] Effect of Depletion
[13.3.2.1] A depleted unit may never conduct any kind of fire. [13.3.2.2] A depleted unit may not participate as part of an attacking force in CA. A CA cannot proceed if the top attacking unit is depleted.
[13.3.2.3] A depleted unit defends at half-strength (round up) without affecting morale if subject to CA unless it is the lead unit when its morale is also reduced by two.
[13.3.2.4] A depleted unit defends a CA with an ER of 1.
[13.3.2.5] Depletion does not affect movement, a unit's ability to observe enemy units, or the ability of a HQ to coordinate and communicate for artillery.
[13.3.2.6] Depleted units still count towards stacking limits.
[13.3.3] Recovering from Depletion
[13.3.3.1] A unit remains depleted until the owning player's next Command Phase. If at that point the unit is in supply (with a valid supply path and access to 2 CP), the Depletion marker is removed and the unit is restored to full combat capability.
[13.3.3.2] For an artillery unit with an ER of seven or higher the procedure is different. Expenditure of an AmP from the owning division's Ammunition Point Record Track is required in addition to the requirement to be in supply. See important note following [15.2.5].
13.4 "Independent" Units
[13.4.1] Independent battalions are assigned to regimental/ KG HQ, while independent regiments/ KG are assigned to division HQ.
[13.4.2] Independent units may be reassigned during any Command Phase, while independent formations such as battalions or regiments may only be reassigned during the Command Phase of the 0601/0901 or 1501/1801 Game Turns.
[13.4.3] A regiment/brigade/KG HQ may never have more than four battalions (any number of companies within the battalion) operating under it at any one time.
[13.4.4] A regiment/brigade/KG HQ may never have more than eight independent companies attached to it at any one time.
[13.4.5] An independent HQ out of supply range from its nominated divisional HQ may use a valid supply path to the Corps HQ instead if available. The Corps HQ effectively extends the supply path by acting as a conduit for access to the Divisional CP.
13.5 Out of Supply
In summary, combat units lacking an intact supply path to their controlling HQ or whose controlling HQ has less than 2 CP, are considered out of supply and are affected as follows:
- MA is reduced and determined by die roll.
- Depletion die roll is required immediately after firing or CA.
14.0 Using Command Points
During a CP/Logistic Phase, a division receives CP from a designated supply source and then later in the turn assigns those CP to its subordinate HQs in the Command phase.
Some CP may be left unassigned at divisional level for future use.
The tables used to determine divisional CP allocation are specific to each game and are described in the scenario rules.
Each division has a corresponding CP Record Track, which is used to record any newly acquired CP and those that have accumulated and are yet to be assigned.
CP allocated to HQs below divisional level can be recorded on the space for each HQ on the Formation Display. Alternatively, colored strength point counters with values of 1 and 2 placed next to the HQ counter on the map may be more convenient.
14.1 Receiving Command Points
[14.1.1] Command points are received by each divisional formation twice each day during the CP and Logistic Phase of the 0601/0901 Game Turn and the 1501/1801 Game Turn. The method and quantity of CP acquired depends on the nationality and type of the division receiving the CPs. Details are outlined in the scenario rules for a game. To receive CP, players consult the appropriate CP Logistic Table for each friendly division in play. Once the number of CP received has been determined for a division, the CP Record Track should be adjusted to reflect the new totals for the current turn.
[14.1.2] Corps and Divisional HQs must be in Defilade Mode to receive/expend/allocate CPs.
[14.1.3] All HQs in Travel Mode can maintain a supply path but with reduced supply path length. See [13.2.2.6].
[14.1.4] If a division HQ cannot trace a valid supply path, it cannot receive new CP but is able to dispense CP and AmP from its stockpile if they are available and the supply path to the subordinate HQ is intact during the next Command Phase.
[14.1.5] A disrupted HQ cannot receive or dispense CP and AmP.
14.2 Using Command Points
After the number of CP received by a division has been recorded, the owning player has options. First, a player can allocate CP to any of the division's subordinate HQs during the Command phase of the same turn. Second, some CP may also be saved for use in later Command phases that occur before the next CP/Logistics turn.
14.3 Subordinate HQ CP Allocation
[14.3.1] Players may allocate up to two CP to a HQ below divisional level during any Command Phase if those points are available to expend from the controlling division's CP Record Track.
[14.3.2] The subordinate HQ must still trace a supply path to its Divisional HQ and must not be disrupted.
[14.3.3] If the distance to the subordinate HQ is four MP or less, all allocated CPs are received.
[14.3.4] If the distance to the subordinate HQ is more than four MPs, the owning player must roll a 2d6. If the result is greater than eight, only half the number of CP allocated are received. Round up remainders. That die-roll is modified by distance from the subordinate HQ to the Division HQ. For every two MP in length over the first eight, the player must add one to the die-roll.
[14.3.5] The reduced CP allocation due to distance using this method is referred to as attenuation.
[14.3.6] The CP total recorded on the divisional record track should be reduced as points are allocated to the subordinate HQ. Reduction should reflect the initial allocation and not the final allocation resulting from the effects of attenuation.
[14.3.7] If a subordinate HQ has two CP allocated, place a two-strength point loss marker on its box on the Formation Display. If it was allocated only one CP, place a single strength point loss marker on its box on the Formation Display. If an HQ has no CP allocated to it, leave its box empty on the Formation Display. Alternatively, use colored markers placed adjacent to the subordinate HQs on the map. Player's choice.
[14.3.8] CP allocations to subordinate HQs remain in effect until the next 0601/0901 or 1501/1801 CP Phase i.e. CPs assigned to subordinated HQs last several game turns (including night turns).
[14.3.9] Up to four CP can be saved between game turns. Record these on the Divisional CP Record Track using an appropriate strength point loss marker.
[14.3.10] There are no mandatory allocations of CP. A player can choose to leave an HQ unsupplied.
14.4 Divisional Expenditure of CPs
A division HQ must also expend CP to enable attached division-level assets to operate more efficiently. If two CP are expended, the division assets function normally. If only one CP is expended, the divisional assets suffer the same effects (see below) as units whose subordinate HQ has received only one CP. The same applies if no CP were expended. The CP status of the divisional assets can be recorded using a strength loss marker on the Divisional HQ box on the Formation Display as described for subordinate HQs.
14.5 Saving Command Points
[14.5.1] At the start of either a 0601/0901 or 1501/1801 CP Phase, before any new CP are received, the current totals must be adjusted on each division's record track.
[14.5.2] No more than four CP may be saved (to be added to the incoming CP) from the previous game turn.
[14.5.3] A Division Record Track may never have more than eight CP remaining after allocations to subordinate HQ have been made; any excess is eliminated.
14.6 Command Point Effects
[14.6.1] No unit in a formation without access to any CP may initiate CA.
[14.6.2] When moving during a Reaction Phase, the die rolls are still required if an HQ possesses less than two CPs. If the resulting MA is less than one-half of the unit's normal MA, a leg unit may only move one hex and a vehicular unit only up to two hexes.
[14.6.3] Subordinate HQs can increase their CP level to two in subsequent Command phases prior to the next CP and logistics phase if the divisional HQ has any saved CPs available.
Example: if a subordinate HQ received only a single CP in a Command phase in turn 0601/0901, it could top up to two CP in the next Command phase (if the Divisional HQ had CP to spare) rather than wait until the allocation after the next CP/Logistics phase on turn 1501/1801. Top up is subject to attenuation as normal.
14.7 Command Point Attenuation
Attenuation of supplied CP and AmP may occur in other specific circumstances outlined in the scenario rules.
15.0 Artillery Supply and Ammunition Points
These rules affect artillery units with an ER of seven or more and govern their ability to conduct fire combat (indirect or direct). Once such a unit is depleted, it is no longer able to conduct fire combat.
The instructions in the scenario rules specify the delivery rates of AmP for each side's divisions, and how they change over the course of the game.
15.1 Receiving Ammunition Points
[15.1.1] AmP are received by each divisional formation twice each day during the CP and Logistics Phase of the 0601/0901 Game Turn and the 1501/1801 Game Turn.
[15.1.2] If a division cannot trace a valid supply path, it cannot receive new AmP.
[15.1.3] To receive AmP, players consult the appropriate Logistic Table for each friendly division in play. Once the number of AmPs a division has received has been determined using a 2D6 die roll, the relevant Record Track for that division should be adjusted to reflect the new totals for the current turn. The method and quantity of AmP acquired depends on the nationality and type of the division receiving the AmPs. (See scenario rules)
15.2 Using Ammunition Points
[15.2.1] After AmP have been allocated to a Division HQ, they remain on that HQ's Ammunition Record Track; unlike CP they are not further distributed to subordinate HQ. Instead, each time an artillery unit with an ER of seven or more controlled by or attached to that division fires, it checks for depletion and, if it fails, it can either reduce by one the number of AmP on the record track, or the unit can be marked with a Depletion marker (owning player's choice). Once the number of AmP on the track reaches zero, there is no longer a choice and artillery units that fail a depletion check must be marked with a Depletion marker.
[15.2.2] Artillery units with an ER of seven or eight fail the depletion check if they roll a one on a 1d6. Artillery units with an ER of nine fail on a roll of one or two.
[15.2.3] During a Command Phase, for every AmP expended, two friendly artillery units may have their ammunition depletion removed if they are in supply.
[15.2.4] The AmP expended is removed from the total number currently on that division's AmP Record Track.
[15.2.5] In addition to expenditure on reversing ammunition depletion, the number of AmPs on the division AmP Record Track is always reduced by one every friendly Command Phase.
Important note: Artillery units with an ER of 7 or more are still subject to normal supply rules. If available, AmP can prevent ammunition depletion in units with a normal supply state. They cannot be used to remove depletion in the Command Phase if the artillery unit does not have a valid supply path to its controlling HQ or if that HQ does not have any CP.
15.3 Saving Ammunition Points
During either an 0601/0901 or 1501/1801 CP Phase, the current number of AmP must be adjusted on each division's record track to reflect the addition of new AmP received. Any AmP already on the record track are retained. A division's record track may never have more than twelve AmP on it at the end of a Command Phase. For example, after spending AmP to convert the depletion status of units to normal, any excess AmP are lost if the total exceeds twelve on the Record Track.
15.4 Effects of Cutting CP & AmP Supply
The following rules deal with the consequences of interruption to the flow of CP and AmP by a blocked supply path.
[15.4.1] If a division HQ cannot trace to a supply source during the joint Logistics Phase, it does not conduct the procedure used to acquire new CP and AmP. Instead, it retains whatever CP and AmP levels it had left over after the preceding Command Phase. These can still be passed down to subordinate HQs in the Command phase if a valid supply path is maintained between the HQs.
[15.4.2] HQs below divisional level retain CP and AmP allocations from their last Command Phase even if their supply path subsequently becomes compromised. However, in such circumstances the divisional AmP cannot be used to remedy depletion and CP is reduced by one at the start of the next joint Logistics Phase.
[15.4.3] If a player has unused CP on a record track, he may expend those normally to keep units operating optimally. Once a formation goes to zero CP, it is considered out of supply.
16.0 Morale
Certain activities require units to check morale.
A unit's initial morale rating is printed in the bottom right corner of the counter representing the unit. Morale values range from two (the lowest) through nine (the highest).
[16.1] A unit's morale decreases as the unit suffers strength point losses.
- If the printed morale is six or higher, the unit loses one level of morale for every two strength point losses it has suffered.
- If the printed morale is five or less, the unit loses one level of morale for every strength point loss it has suffered.
- A unit's morale is never reduced below zero due to strength point loss.
[16.2] Whenever a morale check is required, the affected player must roll 2d6 dice. If the total exceeds the unit's current morale level, the unit has failed its morale check.
Example: a unit with a current morale of seven suffers a D (defilade) result due to DF. The owning player wants to keep the unit in Concentrated Mode and take a strength point loss instead. A morale check is required, and the result is a seven. Since that is not greater than the unit's current morale of seven, the unit has succeeded in passing the morale check.
[16.3] A leader or HQ stacked with or adjacent to a unit adds 2 to the unit's morale level (maximum value 9) during CA whether the unit is subordinated or not.
[16.4] Instances in which a unit must make a morale check are as follows.
- The owning player wants to take a strength point loss instead of placing the unit in Defilade Mode.
- A non-AFV unit is attempting a CA combined with friendly AFV units, and all the AFV are either eliminated or go into Defilade Mode. If the top non-AFV unit fails, the CA is stopped.
- The unit has received a disrupted result on the Close Action Value Table and the player wants to attempt to continue the CA (see 10.3 bullet 4 for details).
- The unit is an HQ or artillery unit already on its defilade (in-battery) side has suffered a D result on the Fire Results Table (see 6.7.6).
- The unit is attempting to rally from disruption (see 10.6.4).
[16.5] If a unit is stacked with a leader, its current morale is increased by one when checking morale.
17.0 Subordination
Every non-HQ combat unit has a distinctive subordination designation printed on its counter that tells the player exactly which higher formation (if any) controls it. Every headquarters unit has a subordination designation that tells the player what formation the headquarters controls and any higher formation to which it reports. Subordination is important because any supply path must follow a chain of subordination.
The lines of command can be flexible or rigid depending on nationality. Freedom to re-assign units between HQs is covered in section [17.4] and in the scenario rules for a game.
17.1 Subordination Direct to Regiment
Some units are directly subordinate to a regiment so there is no intervening battalion formation. Typically, some engineer companies, and some antitank and artillery batteries, can be shown subordinate to a regiment.
17.2 Subordination to a Division
Most of the artillery, antitank, engineer and reconnaissance units are directly subordinate to a division.
17.3 Independent Regiments or Brigades
Some regiments and brigades have no fixed divisional subordination; the headquarters of those formations simply bear a single subordination ID. Those formations must be attached to divisions as they enter play.
17.4 Independent Companies or Battalions
[17.4.1] Some units, particularly German, have no headquarters to which to report. They are labelled with just their name. Such a unit must be attached to a higher HQ (KG or regiment or brigade) to satisfy command and supply requirements.
[17.4.2] No more than 8 independent companies may be assigned to a Regiment/Brigade/KG HQ.
[17.4.3] If a unit's regiment/brigade/KG headquarters is destroyed, the owning player has a choice of options.
- The surviving units may attach themselves to a friendly headquarters of their choice that operates at the same level as their former headquarters.
- The surviving units may trace to higher formation headquarters with the same restrictions as in (1).
- Units may only transfer in this way when their normal headquarters is destroyed, not at any other time during play.
[17.4.4] If a division/corps headquarters or an intermediary headquarters (one that is between the highest HQ and regimental/ battalion HQ) is destroyed, the owning player rolls a 2d6. The result is the number of game turns that must elapse until the destroyed HQ may be brought back. During the Command Phase of that game turn, the owning player may simply bring the destroyed HQ back into play as a reinforcement that appears adjacent to any unit subordinate to that HQ.
17.5 Effect on Artillery Units
Most artillery units are shown as subordinate to a division or corps and less frequently to a regiment/brigade, or (in a small number of cases) to a battalion.
[17.5.1] If artillery units are subordinate to a division, they may only use IF if: 1) they are within two hexes of the division/corps HQ; or 2) if they are within two hexes of a regimental HQ belonging to their division.
[17.5.2] An artillery unit may only fire on a target observed by a unit in the chain of subordination of their division. In other words, if an infantry company belonging to a battalion and regiment of say the 43rd Division observes a target, any artillery unit subordinate directly to the 43rd Division may fire on that target (assuming range and communication conditions, etc., are met).
[17.5.3] If an artillery unit is subordinate to a regiment/brigade, it may fire only on targets observed by units in the chain of subordination controlled by that regimental headquarters, and it must be stacked with or adjacent to the regimental HQ.
[17.5.4] In the case of a battalion-subordinated artillery, it may fire only on targets observed by units of the same battalion, and it must be within three hexes of any other unit in the same battalion.
[17.5.5] Artillery units may always fire on targets that are self-observed, regardless of the proximity of a controlling headquarters.
[17.5.6] IF and DF can be directed at the same target in a game turn. For example, infantry of division X may fire on the same hex at which division Y's artillery conducts IF, provided some unit of division Y can observe the hex of the target. [17.5.7] Artillery units subordinate to a regiment/battalion headquarters may not be transferred to a division/corps headquarters unless its headquarters is destroyed.
[17.5.8] Artillery that has its assigned regimental/battalion HQ destroyed may be re-subordinated to any equivalent or lower-level HQ in the same division/corps; however, the artillery's effectiveness rating is permanently reduced by one in addition to any temporary losses in effectiveness rating.
[17.5.9] Should the artillery need to be transferred out of its division/corps group (that is, all the headquarters in that group have been destroyed), the penalty becomes a reduction of the effectiveness rating by two.
[17.5.10] The penalties in [17.5.8] and [17.5.9] are not cumulative with each other.
17.6 Antitank & Flak Units
If a unit subordinated directly to a division/corps headquarters, such as an AT or flak unit, it could attack with a unit subordinated to a regiment/battalion headquarters of the same division.
17.7 Effect on Close Action
[17.7.1] Units of different divisions, or independent regiments/brigades, may not combine to execute a CA against the same hex in the same phase whether from the same or a different hex.
[17.7.2] For assets attached to a division/ or corps headquarters, a CA is allowed with a unit of a headquarters affiliated with that division or corps.
[17.7.3] To contribute to a CA, HQs (see [18.3]) and leaders (see [19.1]) must coordinate with units under their command and independent units such as combat engineers must fight with units of the organization to which they are attached.
18.0 Special Unit Effects
18.1 Heavy Weapon Units
Heavy Weapons Units represent the machinegun and mortar units that support the infantry companies of a battalion. These units have DF and IF capability. They exert a zone of control extending up to two hexes and may have a firing range up to three hexes.
[18.1.1] HW units and firing
[18.1.1.1] A heavy weapons unit may fire at a target observed either by itself or by other units of its own battalion.
[18.1.1.2] Heavy weapons companies use the appropriate Fire Value Table when resolving the outcome of a fire attack depending on which method (DF or IF) is used.
[18.1.1.3] Only one method (DF or IF) is used in any given fire phase (see [18.1.1.7] below). This could be one of the following:
- IF against a target it cannot see but only if using a company from the same battalion as a spotter.
- IF against a target it can see by self-spotting.
- If adjacent to a target it can contribute its fire strength to a DF fire packet using a reduced ER (the same value as other firing units from the same battalion in that packet) or if firing alone with an ER of 4 rather than the printed value.
[18.1.1.4] A HW unit can Opportunity fire using DF as many times as it is triggered. It can only Opportunity fire once per movement phase using IF.
[18.1.1.5] HW units have added benefits in fire combat including:
- They can fire using either DF or IF methods.
- They may execute OF against a unit in their extended ZOC (two hexes).
- They may use IF from any position in a stack.
- Most HW companies have a firing range of three hexes.
[18.1.1.6] HW units may only fire at one of the top two units in the target hex when using DF but any unit in a targeted stack when using IF.
[18.1.1.7] Use of DF in the reaction phase does not preclude the use of IF in the main fire phase of the same game turn.
[18.1.2] HW units and Close Action
[18.1.2.1] A HW unit may not CA alone. When attacking as part of a CA, each HW company must be accompanied by a line infantry unit of the same subordination.
[18.1.2.2] A HW unit cannot attack in a CA as the top unit in the stack.
[18.1.2.3] To participate in CA, a HW unit must not have moved more than one hex to be adjacent to the attacked hex.
[18.1.2.4] A HW unit can be the top defending unit in a CA if the circumstance arises. Its ER is capped at four for CA when defending in such a case.
[18.1.2.5] When multiple attacking HW companies are involved in CA against the same target hex, each HW company must be accompanied by a line infantry unit of the same subordination to conduct an attack.
18.2 Anti-tank Units
Anti-tank units (those with the AT symbol and AT fire dot) use AT Direct Fire to engage AFV targets and use conventional DF against non-AFV targets.
[18.2.1] Anti-tank units have a target type of very light AFV when in Travel Mode. Unlike heavier categories of AFV target types, they can be subjected to either conventional DF or AT fire (attacker's choice) when in this mode.
[18.2.2] AT units may only fire when displaying the defilade symbol indicating they are in battery.
[18.2.3] For each infantry unit occupying one of the top two places in a stack, an AT unit in defilade (unlimbered) mode may use AT fire regardless of their position in the stack.
[18.2.4] AT units use printed strength points when firing AT at AFV targets or DF at conventional targets. Their fire strength is doubled when firing at AFV from an entrenched position.
[18.2.5] An anti-tank unit may only perform OF if it is one of the top two units in a stack.
[18.2.6] An anti-tank unit cannot contribute to an attack in a CA, but it may be the top unit in a defending stack.
[18.2.7] When defending as the lead unit in CA, an AT unit has an ER of two.
18.3 AT Fire Against Leg Units
[18.3.1] AT Fire can be directed against Leg units in Towns or Cities provided the target units are in Defilade and not Concentrated Mode. AFVs and AT/Flak units may use AT Fire instead of Conventional fire in such situations. Consider the leg units to be Heavy AFV targets if they are in a City hex, or Medium AFV targets if they occupy a Town hex. If such a unit is Entrenched, then the units should be considered Very Heavy and Heavy respectively.
[18.3.2] If fired upon by AT fire in this circumstance, the target leg unit can return fire.
[18.3.3] No more than half the strength points of the defending infantry can be lost to AT fire in these circumstances in any given fire attack.
18.4 Engineers
There are two types of engineer units.
[18.4.1] Engineer types
[18.4.1.1] More common are the combat engineers. These units function as infantry and can improve the execution of CA in two ways by either enhancing morale or negating the benefits of enemy entrenchment.
[18.4.1.2] Combat engineers may move and fire like normal infantry units. They may adopt different modes at the owning player's discretion but for some of their special functions they need to be in Concentrated Mode.
[18.4.1.3] The other engineer units are the bridging units. Bridge Engineers are differentiated from combat engineers by a capital "B" in place of an effectiveness rating. As they have no effectiveness rating, bridge engineers may not conduct fire of any kind.
[18.4.1.4] Bridging engineers have only two functions in the game: 1) to repair destroyed bridges; and 2) to ferry units across unbridged canals and rivers (see game specific Scenario rules).
[18.4.2] Effect of Combat Engineers on Close Action
A Combat Engineer may influence morale and/or the effect of entrenchment during combat as follows.
[18.4.2.1] When a combat engineer is one of the top two units in a stack which is defending or attacking in a CA, the morale of units in that stack is increased by two. It does not have to be in Concentrated Mode and a single strength point will suffice.
[18.4.2.2] If a defending force is entrenched and the attacking stack contains a combat engineer, the effect of the entrenchment is negated. The engineer can be in any position in an attacking stack to negate benefits of entrenchment but must be concentrated with strength of two or more and a morale greater than zero.
[18.4.2.3] Armored engineers must be dismounted to perform the functions in [18.4.2.1] and [18.4.2.2].
[18.4.2.4] An engineer unit can negate the effect of entrenchment even if attacking alone.
[18.4.2.5] Only if a combat engineer unit is stacked with other units (even another combat engineer), may the combat engineer affect morale levels in a stack.
[18.4.2.6] Combat engineers may use AT fire offensively when they participate in CAs. See the special AT fire rules [10.2] for details on this.
[18.4.3] Effect of Combat Engineers on Constructing Entrenchments
[18.4.3.1] Combat engineer units with a total strength of at least two, may construct an entrenchment. The engineers must remain concentrated and undisturbed in the same hex for three consecutive game turns with construction initiated and completed in the Command Phase. After the time has elapsed and if all conditions have been met, an entrenched marker can be placed in that hex. The presence of enemy units does not interfere with the entrenching process unless those enemy units attack the engineers and eliminate them, cause them to disrupt or place them in Defilade Mode in which case that entrenchment must be started again.
[18.4.3.2] Combat engineers building an entrenchment may not execute any form of fire, but they may observe for artillery. If combat engineers perform any other function aside from building an entrenchment or observing, the cycle for building that entrenchment must be started again.
18.5 Flak Units
[18.5.1] Flak units are towed units that can fire conventional weapons as well as anti-aircraft fire. They are conventional targets when defiladed and vehicular targets (very light AFV target class) when in travel mode. German 88m anti-aircraft units also have AT capability.
[18.5.2] Static flak units do not count toward stacking in a hex. If disrupted, they do not cause disruption to other units in the hex apart from other static flak units. However, the disruption of other non-flak units in the hex will also disrupt static flak units.
[18.5.3] Any flak unit may be subordinated without penalty to any headquarters for purposes of supply and command. If the player wants to switch their command, he may do so, but only if the flak unit spends a game turn out of supply.
[18.5.4] As stated in [18.5.1], flak units have a target type of very light AFV when in Travel Mode. Unlike heavier categories of AFV target types, they can be subjected to either conventional DF or AT fire (attacker's choice) when in this mode.
18.6 Towed Artillery
[18.6.1] A towed artillery unit has an in-battery side (indicated by the defilade symbol) and a Travel Mode side on its counter. It can be in one mode or the other. When in-battery it may fire but not move more than one hex. When in Travel Mode it may move but not fire.
[18.6.2] Artillery units may fire using either DF or IF, depending on LOS and range.
[18.6.3] Artillery units that self-spot and are firing at a range of one hex can use conventional DF with a reduced ER of 2 and use the DF fire value matrix. If capable, (ER =7,8 or 9), they may also DF AT up to a range of 2 hexes. However, only one method of firing can be employed in each phase.
[18.6.4] Artillery firing at greater than two hex range must use IF methodology including using the Indirect Fire Value matrix table. This applies for both self-spotting IF and IF facilitated by a controlling HQ/ spotting unit.
[18.6.5] Artillery may fire IF or DF in the main Fire Phase and DF in the Reaction Phase. They may also OP fire once per enemy movement phase if the occasion arises.
[18.6.6] Artillery has a target type of very light AFV when in Travel Mode. Unlike heavier categories of AFV target types, they can be subjected to either conventional DF or AT fire (attacker's choice) when in this mode.
18.7 Headquarters
[18.7.1] A headquarters unit has a Defilade Mode side and a Travel Mode side. It does not have a Concentrated Mode.
- An HQ in Defilade Mode may move and can defend itself and is treated like leg infantry.
- A HQ unit in Travel Mode may only move.
[18.7.2] Units that trace a supply path to an HQ in Travel Mode have their required supply path distance requirement halved.
[18.7.3] Some divisions possess two HQ units. Both are HQ for the division. If they have a supply path to each other (up to 12MP) and one is in supply, all units of the division may trace supply to either HQ unit.
18.8 Leg Infantry
[18.8.1] Leg infantry, heavy weapons and engineer units have a defilade side and a concentrated side. Some of those units can assume Travel Mode (see Scenario rules). All other leg units must always walk.
[18.8.2] They represent conventional targets unless they are in Travel Mode when they are Very Light AFV target class. Unlike heavier categories of AFV target types, they can be subjected to either conventional DF or AT fire (attacker's choice) when in this mode.
[18.8.3] Airborne infantry units do not have access to trucks and cannot adopt Travel Mode unless scenario rules allow.
18.9 Armored Units
[18.9.1] Armored artillery consist of self-propelled artillery (SPA) units which unlike towed artillery can be in Concentrated Mode. Their counters have an in-battery and concentrated side and require a marker to note when they are in Travel Mode.
[18.9.2] These units may move up to half their current MA after firing while in Concentrated Mode. However, being mobile means that they lose the ability to double their fire strength (see [6.5.4.1]) if they fire in Concentrated Mode.
[18.9.3] These self-propelled artillery units (SPA) can therefore function in two modes as stationary units at full barrage strength or with limited mobility and half barrage strength.
[18.9.4] SPA units can go directly from in-battery to travel mode.
[18.9.5] Armored HQ are considered AFV for movement purposes. They have only a defilade and Travel Mode sides.
[18.9.6] Armored Infantry and Armored Engineers are considered AFV for movement purposes if they are not dismounted. As soon as they dismount, they are treated exactly like leg units with an ER of one less than that printed on their counters. They may mount or dismount once per friendly movement phase at a cost of two extra MPs. They may also dismount after any fire combat against them has been resolved - this does not cost any MPs. Armored infantry units have conventional fire class. If they are not dismounted, they are considered as AFV (light) targets. If they are dismounted, they move as Leg units and are conventional targets.
[18.9.7] Armored Reconnaissance (specific light tanks or armored car) may use concentrated, defilade or Travel Modes. These unit types may be represented as silhouettes on the unit counters or display an armor symbol with a cavalry slash in their unit type box. Even without the AFV silhouette, they are considered AFV units. Each type of armored reconnaissance unit has an MA of 14 and generally they all operate in the same way. Reconnaissance armored units have light AT fire class. As such they may conduct light AT fire whether they display an AT Dot or not. Those units depicted
18.10 Static Units
All units marked with a "D" on the back of their counters are static units. They may not move or retreat, but function in all other ways as other units do. The "D" side is used to indicate that the unit is disrupted (no need to use a Disruption marker). They do not count towards stacking and are always at the bottom of a stack.
18.11 AFV (Armored Fighting Vehicle)
These units can conduct AT fire as well as Conventional Fire. AT Dots adjacent to the silhouette represent the AT Fire Value.
AFV/Armor ("pure" tank) may use concentrated, defilade or Travel Modes.
18.12 Non-Armored Vehicular Units
These units (e.g. motorized infantry, jeeps) have a target class of Very Light AFV when mounted and conventional targets when dismounted. As with towed vehicular units they may be fired on as conventional targets as an alternative to very light AFV class units- attacker's choice.
19.0 Leaders
Leader units represent historic personages who can have a direct effect on the course of the battle. They arrive on the battlefield with their associated HQ. They cannot fire but have the following effects on play.
19.1 Effect of Leaders on Combat
[19.1.1] If a leader is stacked with subordinated units involved in a CA, the morale rating of the unit(s) stacked under the leader is raised by two.
[19.1.2] Leaders may not combine their bonuses with other leaders. The proper chain of command is defined by the headquarters subordination listed on the Formation Display.
[19.1.3] The presence of a leader negates restrictions on multi-formation attacks in CA. The leader must be stacked with a unit that is subordinated to him. This means the prohibitions of [17.7.1] and [10.1.6] no longer apply.
[19.1.4] Leaders may not act as spotters in IF.
19.2 Effect of Leaders on Movement
[19.2.1] Leaders do not count towards the stacking limit of a hex and their presence does not penalize movement for either player.
[19.2.2] Supply may be traced through a hex containing only an enemy leader.
[19.2.3] If a leader is stacked with his HQ, add one MP to the MA of all units subordinate to that HQ.
19.3 Loss of a Leader
[19.3.1] A leader is eliminated if alone in a hex which is entered by an enemy combat unit.
[19.3.2] It is not permitted for leaders of opposite sides to be in the same hex at the same time.
[19.3.3] Leaders may not be fired at; however, if a unit with which a leader is stacked takes a loss, then the owning player rolls 2d6 and if a two is rolled, the leader dies. Leader elimination is rolled for each time one strength point is lost. For example, a loss of two strength points would require two separate rolls of the 2d6.
19.4 Effect of a Lost Leader
A killed leader is removed from the battlefield and not replaced. Other than losing a leader's combat benefits, there is no further effect if a leader is lost.
19.5 How Leaders Move
Leaders move around in jeeps and command cars and have 12 movement points. For purposes of assessing movement costs, the owning player may treat them as any variety of unit he wishes in any deployment mode convenient to the player. In other words, to enter hex number one the player could treat them as concentrated armor, hex number three as a unit in Travel Mode, etc., whatever is most beneficial to the owning player.
19.6 Leaders and CPs
[19.6.1] All units stacked with a controlling leader may always operate without suffering the effects of insufficient CPs being allocated to their HQ.
[19.6.2] If a leader marker is stacked with its HQ, add one MP to the MA of all units subordinate to that HQ. This effect is cumulative for other leaders and HQs within the same division.
19.7 Leaders and Recovery from Disruption
Leaders add 2 to the removal of disruption morale check. They need only be adjacent to the disrupted unit which also need not be subordinated to it.
20.0 Night Turns
[20.1] Observation range limits are reduced to two hexes during night turns unless a "P" weather condition reduces this to one hex.
[20.2] Recovery from disruption occurs automatically if a unit has not moved or been adjacent to enemy units for two consecutive night turns.
[20.3] Movement is penalized by adding 1 MP per hex for off road movement or doubling the normal rate for road users (concentrated or travel mode).
[20.4] Close Action at night attracts a 2 left column shift and is only allowed if attacking units start adjacent to the enemy being assaulted. Beginning CA adjacent to the enemy also allows a column shift to the right as normal so the net offset is a single left column shift.
[20.5] Night turns affecting other functions are outlined in the scenario rules.
21.0 Optional Rules
[21.1] Multi-formation fire attacks
This optional rule introduces a penalty whenever units of different battalion subordinations perform DF or IF on the same target unit or hex.
[21.1.1] Whenever units with different battalion subordinations combine to fire on the same target hex, they are penalized. This is called a "multi-formation attack."
[21.1.2] Reduce the ER of each unit by one for each different subordination involved in that attack. In other words, if units of two different battalions attack the same hex, even if they are firing on different units in the same hex, each firing unit's effectiveness rating will be reduced by two points. If three different battalions are involved, reduce by three points, etc.
[21.1.3] If a unit does not form part of a battalion because it is assigned directly to a regiment, brigade or corps HQ, the penalty for multi-formation attacks is not applied, provided the other participating units have the same regiment/brigade/KG subordination.
[21.1.4] If the units are assigned directly to a division, they are not penalized for multi-formation attacks if they have the same division/corps subordination as the other attackers.
[21.1.5] The only time a multi-formation attack penalty is assessed against multi-unit attacks is when multiple instances of fire are directed at the same target hex in the same phase.
[21.1.6] If a unit triggers two opportunity fires at separate times in a phase, the enemy player could fire separately with units of different subordination at, for instance, a target changing mode and stacking, without penalty provided the units did not combine on any one attack.
[21.1.7] The presence of a leader negates a multi-formation penalty. The leader must be stacked with a unit involved in the attack subordinated to him, and all other units in the attack must be in communication range.
[21.1.8] Artillery IF is not considered as establishing a multi-formation attack as long as the IF unit with which it is firing can trace a line of subordination to the same HQ.
[21.1.9] If a unit subordinated directly to a division/corps headquarters attacks with a unit subordinated to a regiment/battalion headquarters of the same division, it is not considered a multi-formation attack.
[21.1.10] Anti-tank and flak units are DF units. Except in those occasional cases in which an AT unit and an infantry unit have the same subordination, if they fire on the same unit or hex it is considered a multi-formation attack.
Examples: In Figure 19, the units are spread out for clarity.
- Pio and Fus/6FJ are both in hex C2908.
-
- and 2/6FJ are both in hex C2807.
-
- and 7/6FJ are both in hex 2708.
- A, C and HW/1/506 are all in hex C2808.
Figure 19.
Direct Fire Example: If any unit belonging to I/6FJ combines with any unit of II/6FJ to attack the US infantry, they will do so with a multi-formation penalty resulting in an Effectiveness Rating of 2.
I/6FJ or II/6FJ could combine with both the Pioneer and Fusilier units to attack a US airborne unit with no Multi-Formation penalty as neither Pio/6FJ or Fus/6FJ have a battalion subordination. Note the Pioneer unit could attack by itself with its ER of 5 or join the Fire Packet with a reduced ER of 4.
Opportunity Fire Example: Suppose it is the Allied Movement Phase and the Americans decide to redeploy two of their companies. HW/1/506 pulls back to C2810 and C/1/506 moves to C2709. All Opportunity Fire will occur against hex C2808 during the Allied Movement Phase and is therefore subject to multi-formation attack penalties.
- Example 1: all the German units attack as each American unit moves out of the hex; ER is "2".
- Example 2: Pio/6FJ and Fus/6FJ attack the first American unit as it moves out of the hex; I/6FJ and II/6FJ attack the second American unit as it moves. The first attack is at ER "4" and the second attack is at ER "2".
- Example 3: 1/6FJ attacks the first American unit as it moves out of the hex; 2/6FJ attacks the second American unit as it moves. All attacks are at ER "4" (i.e., no multi-formation attack penalties). Alternatively, 1/6FJ and Fus/6FJ could attack the first unit and 2/6FJ and Pio/6FJ could attack the second American unit without penalties.
[21.2] Artillery FS and ER values in conventional DF
In the QA version of the rules, artillery fire strength is doubled for direct fire at conventional targets and ER is unchanged. Players can opt to use these factors if they wish but they are not reflected in the modifier's table found in the Players Aid document.
[21.3] Stack position and direct fire
The QA rules introduced a new rule allowing the top two units of AFV and the top two non-AFV units in a stack to use DF fire and be fired at. This rule applied whatever the stack position of the eligible units. This rule has been simplified to the top two units in the main system rules, but the QA rule can be re-instated if players agree.
[21.4] Inspection of enemy units
As an option, players can opt to restrict the ability to inspect units within an opponent's stack. For example, inspection of an enemy stack could be confined to the top two units provided the stack is within the LOS of a friendly unit. If opposing stacks are adjacent, all units in the stack can inspected unless the enemy stack is within a forest, wood, town or city hex when only the top two units need be declared.
[21.5] Fatigue
[21.5.1] If units move more than half of their movement allowance during one of the night turns or any distance during both night turns then they suffer fatigue.
[21.5.2] If units participate in fire combat or CA (attack or defense) during a night turn then they suffer fatigue.
[21.5.3] Units are exempted from fatigue on the first night of a scenario.
[21.5.4] Fatigue status is indicated by placing a fatigue marker on the unit when fatigue is triggered. Whilst the marker is in place, the units will suffer a reduction in morale of 1 and will halve their combat strength (rounded up). Engineers who are fatigued cannot ferry troops or build bridges or entrenchments.
[21.5.5] Units bearing a fatigue marker may remove it in their organization phase during a turn in which they have rested (not moved, fired or been involved in CA).
Scenario Rules
Note: Owners of previous editions of HttR should carefully read these rules, as many changes have been incorporated into this edition.
1.0 Introduction
Highway to the Reich is a tactical, company/troop-level simulation of the action that took place during the critical ten-day period of Operation Market-Garden: 17 through 26 September 1944. Market-Garden was the code name for the Allied attempt to outflank the German West Wall fortifications and cross the Rhine River. The operation involved the capture of a 43 mile (70 kilometer) stretch of highway by Allied airborne forces. Over that airborne carpet the troops of British 30th Corps would pass. The primary concern of 30th Corps was the capture of the crossings of all major water obstacles on the route.
Throughout the course of the game, players will be presented with problems like those faced by the historical leaders at all levels of command. Each of those problems will require a decision on the part of the player. That decision making process is the core of the simulation, and the players' levels of skill in the process will determine the outcome of the game.
2.0 General Course of Play
Highway to the Reich (HttR) is designed for two or more players. Solo play is possible but in the campaign game, team play is recommended.
Sections 4.0 to 13.0 introduce concepts and rules which supplement the system rules and are specific to HttR. Sections 14.0 to 21.0 outline the various scenarios and their specific rules.
Players may play scenarios in which a specific section of the operation is recreated, or they may choose to play the entire campaign. The description of each scenario including the full campaign itemizes the opposing forces and the conditions under which they engage. Victory conditions are included in the scenario and campaign listings.
3.0 Game Equipment
[3.1] The Game Map
The game map is composed of four separate 34x22" map sheets, which form the operational area of Market-Garden from the border of Belgium to the Neder Rijn.
[3.2] Inventory of Game Parts
A complete game of Highway to the Reich includes:
- one rule booklet also containing details of scenarios.
- one campaign study.
- five counter sheets (1-5).
- four marker sheets (6, 7, 8, 8).
- four 34x22" map sections (A, B, C, D).
- two Player Aid cards.
- three German Formation Displays.
- three Allied Formation Displays.
- one 8x10" map blow-up of Arnhem.
- two six-sided dice.
- one game box.
If any parts are damaged or missing, write Decision Games, Inc. PO Box 21598 Bakersfield, CA 93319. In addition to the parts supplied with the game, various play aids are appended to these rules. Play benefits from additional markers which are not supplied with the game. A list of such markers is available in [25.0].
[3.3] Preparation for Play
The four map sections have been designed so they overlap each other when placed together. Players should note certain scenarios may be played on one map section, thus requiring less space for play. The four map sections are identified by letter codes: A, B, C or D. Section A is the northernmost (top) map section. Section B is the next lowest, followed by C and then D. When setting up all map sections, overlap the southernmost (0100) hex row of A on the northernmost (3900) hex row of B. (Refer to the compass rose on the maps for orientation.) Similarly, the southernmost hex row of C is overlapped on the northernmost hex row of D. The map sections are then oriented as shown in the diagram, and the southernmost hex row of B is overlapped on the northernmost hex row of C. Note that hex 0101 on B should overlap hex 6101 on C, and hex 0134 on B should overlap hex 6134 on C. Check that the various roads and terrain features match in the overlap hexes.
Note that all hexes are identified by Map Section letter and hex number; thus, the city of Arnhem is located around hex A2332, and the town of Zon is in hexes C0715, C0814 and C0815.
Before playing it is helpful to arrange the unit counters on the formation display charts as this facilitates set up and is a helpful guide for counter storage solutions. The formation display also demonstrates the hierarchical command structure and informs rules related to subordination.
The units are divided into two major national groupings: the Germans and the Allies. Each group is further subdivided. The Germans are divided into branches of their armed forces, and the Allies are divided into nationalities, and in the case of the British are subdivided into airborne and non-airborne. All those groupings are distinguished by different color backgrounds to the unit counters.
The Netherlands is generally considered to be flat terrain; the map graphically disproves that assumption. It is suggested that the players familiarize themselves with the 25 different terrain types prior to play. These are illustrated in a table on Map B.
Figure 1.
4.0 Subordination
[4.0.1] Allied lines of command have limited flexibility. For example, a battalion from an airborne division cannot be assigned to a different regiment within the Division. Also, a 101st regiment cannot be assigned to the 82nd Division.
[4.0.2] German lines of command are much more flexible, and Division and KG formations can be re-assigned to other corps and divisions respectively during the German command phases of the 0600 and 1500 turns.
[4.1] Subordination to a Battalion, Regiment, or Brigade
The overwhelming majority of infantry units are companies and most AFV units are platoons. The heavy weapons units are also companies. Most of those units have a two-part subordination designation, in the form of "000/000." The number before the slash identifies the battalion to which the company or platoon belongs, while the number (we use the term "number" loosely; in some cases, the number may be a letter) behind the slash identifies the regiment (or brigade) to which the battalion belongs.
Thus, a unit such as the one shown above is a parachute infantry company belonging to the 1st battalion of the 504th Regiment. In the British Army, the brigade is the equivalent of the American or German regiment, and so an infantry or heavy weapons company that belongs to a battalion, in turn belongs to a brigade. Thus, the following unit belongs to the 5th Cold Stream Guards battalion of the 5th brigade.
[4.2] Headquarters Subordination
[4.2.1] The lowest-level HQ in the game is the regiment (brigade) headquarters. Most of those regimental HQ, in turn, are subordinate to a division. The designation takes the form "000/000," with the number before the slash identifying the regiment that the HQ controls and the number following the slash identifying the division to which the regiment belongs. Thus, this unit is the HQ of the 501st Regiment of the 101st Division.
[4.2.2] The reconnaissance units of the British 43rd and 50th Infantry Divisions are so numerous that a Reconnaissance Regiment HQ is provided to control them.
[4.2.3] On the German side, many of those ad hoc formations (usually called Kampfgruppen or KG for short), arrive with various units of different branches attached. Some KG do not initially possess their full command capacity of subordinated units. A KG may control up to four battalions comprising as many as 16 company-sized units (not counting weapon units). Players may rotate different battalions in and out of control of a KG to manage the plethora of such units on the German side.
[4.2.4] Units belonging to the same regiment, brigade or Kampfgruppen usually have a color band of the same color as their controlling HQ.
[4.3] Flak Units
[4.3.1] Any flak unit may be subordinated without penalty to any headquarters for purposes of supply and command.
[4.3.2] If the German player switches the command of a flak unit, it must spend a game turn out of supply.
[4.4] Communication Requirements
[4.4.1] German Swoboda Flak Brigade. Artillery units of the German Swoboda Flak Brigade may be controlled by any German divisional HQ unit. For purposes of supply, they would be deemed subordinate to the headquarters they were controlled by when they fired.
[4.4.2] German Corps HQ. German Corps HQs may directly control up to nine German artillery units, and German Corps HQs may communicate with any spotting German unit.
[4.4.3] Allied Artillery Assets. Corps level artillery assets subordinate to 30th Corps may attach to any non-airborne divisional HQ.
[4.4.4] Allied 30th Corps HQ. Any British artillery unit not attached to a division that is located within two hexes of the Allied 30th Corps HQ unit is automatically in communication with any 30th Corps unit acting as a spotter.
[4.4.5] Airborne units may observe for non-airborne artillery units through the artillery unit's controlling headquarters. The act of making an observation does not preclude observing units from being able to fire themselves in the same fire phase.
[4.4.6] Non-airborne units may not observe for airborne artillery units.
[4.4.7] The British 52nd Artillery Regiment (2x 4-9-5s) is identified as the 52/GA but they are listed on the 30Corps Display as being with 30th Corps. They may be controlled by 30th Corps directly or by either of the Brigade HQs or either of the Division HQs belong to Guards Armored Division.
5.0 Supply
[5.1] Supply Sources
[5.1.1] German Supply Sources
[5.1.1.1] The German player's units can maintain a supply path along any road leading to the north, east or west edges of the map.
[5.1.1.2] They may not trace to any road that leads to an off-map area captured by the Allies. For supply determination, off-map areas are considered captured immediately before the first phase of the game turn in which they are listed as being captured.
[5.1.1.3] The ferry at Pannerden (map A 1049) becomes a German supply source if a German engineer unit occupies either side of the ferry. A single step engineer will suffice for this.
[5.1.1.4] The partial command of KG von Erdmann (7th FJ XX) is in supply and command if it can trace a supply path of 8 hexes or fewer to a friendly E map edge. Once the Divisional HQ arrives, the units trace to that unit for supply normally.
[5.1.2] Allied 30th Corps HQ Supply Source
All Allied non-airborne divisional headquarters draw supply from the 30th Corps supply train (which lies south of Map D) or any major city hex of Eindhoven, Grave, Nijmegen, or Arnhem after 30th Corps ground units have moved through them. The city hex must still be connected by a valid supply path back to the south map edge of map D. The 30th Corps supply source is initially located exclusively at hex D0119.
[5.1.3] Allied Airborne Supply Sources
There are four Allied airborne formations: the 1st (British) Airborne Division, the Polish Parachute Brigade, the 82nd (American) Airborne Division and the 101st (American) Airborne Division.
[5.1.3.1] Each of those formations has a supply head marker that the Allied player places on the map. That supply head marker is the source of supply for its formation.
[5.1.3.2] The "LZ N Supply" marker in B2348 acts as the supply head for the 82nd Airborne division. "LZ W Supply" in C1111 acts as the supply head for the 101st Airborne division.
[5.1.3.3] The "DZ L Supply" marker in A2420 acts as the supply head for the 1st Airborne division.
[5.1.3.4] The Polish Parachute Brigade may draw supply from any of the other airborne divisional supply drop zones in addition to its own supply head.
[5.1.3.5] Though units are out of supply when a German unit occupies a supply head hex, or when a German ZOC extends onto a supply head hex without being countered by an Allied unit or ZOC, the supply head itself is unaffected.
[5.1.3.6] All Allied airborne units are in supply for all the September 17th Game Turns and, for four GT after they are dropped. After this they must trace supply normally.
[5.1.3.7] All other units (Allied and German) are automatically in Supply until the start of the 0601GT of Dec 18, after which they must start tracing normal supply.
[5.1.3.8] Airborne HQs must use 30th Corps Supply Sources to supply 30th Corps units that have been attached to their command. In effect, an attached 30th Corps unit is receiving command from the Airborne Divisional HQ, which must be tied into a 30th Corps supply source to provide fuel and ammunition.
[5.1.3.9] All HQs arriving on the map as reinforcements are considered to have 2 CPs until their next command phase allocation. Other units arriving will be normally supplied on their first turn then they must comply with the supply status of the HQ to which they are attached thereafter.
[5.1.4] Moving the Supply Head
[5.1.4.1] If any of the Allied airborne divisional headquarters have been out of supply for seven consecutive turns, the Allied player may relocate the divisional supply head.
[5.1.4.2] In relocating a supply head, do not use the drop procedure again. Simply designate one of any two contiguous open terrain hexes and roll 2d6 dice.
[5.1.4.3] If the supply head is American, the relocation succeeds on a roll of eight or less; if it is British or Polish, it succeeds on a roll of six or less.
[5.1.4.4] Supply head relocation attempts may be made once per day during any daylight game turn command phase.
[5.1.5] Non-Airborne Divisional or Independent Supply Sources (Allied and German)
[5.1.5.1] All non-Airborne Divisional and Independent HQs of both sides trace to their controlling Corps HQs as their supply source.
Exception: An Allied non-airborne divisional HQ is out of supply if it either cannot trace back to D0119 via the XXX corps HQ OR to a major city hex in Grave, Nijmegen, or Arnhem (once these cities are "activated" for supply purposes by 30th Corps units entering them).
Exception: Division von Tettau may trace supply via any primary or secondary road that leads off the west edge of the map north of the Rhine River. Its higher controlling HQ was part of the Holland rear area German command and is not represented by any counter in the game.
[5.1.5.2] If its corps HQ is not yet in play, a division HQ traces from the nearest map edge as though the corps HQ was 10 primary road hexes away from the edge. This rule also applies to KG Walther.
[5.1.5.3] The divisional HQs of the 82nd and 101st Airborne Divisions may also trace supply to 30th Corps supply sources to provide supply for any British 30th Corps ground formations that have been attached to those two divisions. The American component of those divisions must still trace supply to their own respective supply heads.
[5.1.6] Regimental, Brigade, and KG Supply Sources
[5.1.6.1] The supply source of each Regiment, Brigade, and KG HQs that is attached to a division is that Divisional HQ to which they are subordinated.
[5.1.6.2] If these units are independent, the supply is sourced from the nearest Corps HQ (or Corps supply source if there is no Corps HQ).
[5.1.6.3] Note that the Guards Armored Division is a peculiarity in this regard. It has two Brigade HQs (5th & 32nd) and four Guards Group HQs (Irish, Welsh, Coldstream, and Grenadier Guards). Treat the Guards Group HQs like Regimental HQs. The Allied Player does not expend CPs for either of the two Brigade HQs to supply the Guards Group HQs. The Brigade HQs act as conduits for CPs, but the CPs must be expended for each of the Guards Group HQs to fully supply their subordinate units.
Normally you would spend two CPs for the Division (thus supplying all the asset units) and two CPs for each of the two Groupings under 5th and 32nd Gds. The 5th and 32nd act as "extenders" between the Group HQs and the Divisional HQ. Thus 10 CPs would be needed to run this division optimally.
[5.1.6.4] The Household Cavalry can trace supply to any HQ within the Guards division and make use of their CP.
Example: The British player gets 2 CPs to the Division and 2CPs to each to IG/Gds and CG/Gds HQs. The Household Cavalry has Troop A in command range of IG and Troop B in command range of CG. Thus, All of IG and CG could be at full operational level, and each of the two troops from HH Cav could trace to IG and CG and be fully operational. In this model, range attenuation of CP delivery is in effect between the Brigade/Forward HQ and the Regimental HQ but not between the division HQ and brigade HQ.
[5.1.7] Supply Sources for Divisional Assets
Divisional assets may trace supply to any divisional HQ or Rgt/Brigade/KG HQ belonging to their division.
[5.1.8] Combat Unit Supply Path Additional Special Cases
[5.1.8.1] A non-Airborne combat unit is always in supply if its supply source is on the map and the unit is in or adjacent to the hex containing the supply source.
[5.1.8.2] If a supply path is traced by the Allied player across a river or canal by engineers, the effective length of tracing the supply path is halved. (An unlimited length from a Corps HQ is reduced to 50 hexes in length.) Supply paths can be traced normally over bridges.
[5.1.8.3] Off-map German units are always in supply.
[5.2] Command Points and Ammunition Supply
Normal supply and command rules are not implemented until the 0601 Game Turn on 18 September (Turn 6). Units are considered in supply for the first five moves from 1200 on September 17th. (See [5.1.3.6] and [5.1.3.7])
AmP are acquired in a similar way to CP and the availability of AmP is checked at the same time as that for CP. For the Allies, the delivery rates of CP and AmP are interrelated. The more you attempt to receive of one, the less you will get of the other.
The German AmP delivery rate is independent of the delivery rate of CP to a division. [5.2.1] German Divisional CP Acquisition
[5.2.1.1] German divisions use the German Divisional Logistic Table to determine how many CP are received. There are three levels of CP delivery: low, normal and intense. Scenario rules describe what delivery level a division uses for the current game turn. The German player rolls 2d6 dice and cross references the result with the appropriate delivery level. The result is the number of CP the division has received.
The German player uses the following timetable to gradually increase supply capacity:
- 18 September: All divisions operate with low AmP/CP apart from one division operating on Map A or B which may use normal AmP/CP levels.
- 19 September: 9th and 10th SS Panzer start using normal AmP/CP levels for the remainder of the game. The division that the Flak Brigade Swoboda is attached to has its CP and AmP levels raised to "intense" for that turn only. Subsequently it follows instructions in [5.2.1.2].
- 20 and 21 September: The two SS Panzer Divisions and any two other divisions may use normal AmP/CP levels.
- 22 September: The two SS Panzer Divisions and any three other divisions may use normal AmP/CP levels. Important Note: If the weather condition is P, the German player may choose to raise one additional division to a normal Amp/CP level, but only while the weather is P. The division must be located on the map where the weather is P.
[5.2.1.2] On the game turn after the Swoboda Flak Brigade's HQ arrives until the end of Turn 33 (AM 23rd Sept.), the German player may increase the AmP and CP Delivery Levels for the division to which that formation is attached by one level (i.e. Low to Normal, Normal to Intense). The German player may change which division the Swoboda Flak Brigade is attached to during the CP and Logistic Phase (0601/0901 and 1501/1801 GTs) while this rule is in effect. The change of attachment must be made prior to rolling for AmP/CPs.
[5.2.2] Allied Airborne Divisional CP Acquisition
Allocation of CP/AmP reflects an air drop of supplies on the supply landing zone hex.
[5.2.2.1] Allied airborne divisions use the Allied Airborne Divisional Logistic Table to determine how many CP are received. The Allied player chooses a percentage delivery level for both CP and AmP. The combined percentage delivery level must equal 100 percent. For example, the Allied player might choose a 30 percent level for CP and a 70 percent level for AmP. The Allied player rolls a 2d6 and cross-references the result with the chosen delivery level. The resulting number equals the number of CP the division has received. Note a 2d6 is made separately for CP and another 2d6 is made for AmP.
[5.2.2.2] The German player may interfere with this procedure if he has units within fire range of the divisional supply drop zone. The German player may fire flak units up to twice their normal range (from the unit to the drop zone), with each unit firing individually as though there was a concentrated leg infantry unit landing on the DZ. Observation via a spotter is not required for IF in this special case.
[5.2.2.3] For every step loss inflicted, one is subtracted from the original number of CP received.
[5.2.2.4] For each D result, the Allied player must roll for the scatter of one CP. If the CP lands on a German unit, it is added to that unit's current divisional CP total. If it lands in an all-water hex, or adjacent to a major river hex side, or in a forest hex, it is lost. If it lands on an Allied unit, it is received normally if the terrain in the hex does not require it to be lost. If it lands and survives but is not in a hex containing a unit of either side, it is placed on the map (use a strength point marker) and is awarded to the side that first enters that hex.
[5.2.2.5] If the weather condition is "P", then an airborne division receives only half of the normal CP and AmP allocation.
[5.2.3] 30th Corps Divisional CP Acquisition
[5.2.3.1] Allied 30th Corps divisions use the Club Route Divisional Logistic Table to determine how many CP are received. The Allied player has three variables to consider when making a CP delivery level choice: delivery rates for CP and AmP and movement allowances for units transiting Club Route. Delivery and MA rates have been broken down into four fractions of 100 percent, and the Allied player must choose one of the four values for each variable. The sum of all three chosen rates may not exceed 100 percent. The Allied player may choose to not use one of the columns and may instead receive a +2 die roll modifier (drm) to use on the other columns. This drm may be split between the other two, or the entire drm may be applied to a single column. Once the numbers of CP and AmP have been calculated, the Allied player must allocate those points to each of his active divisions. 30th Corps ground units attached to airborne divisions may have points allocated by 30th Corps if their HQ can trace to a 30th Corps supply source. The CPs are recorded on the relevant Airborne Division's Track.
[5.2.3.2] 30th Corps HQ may also be allocated CPs for the purpose of saving them for future use. Up to eight CPs and eight AmPs may be saved by this HQ. Use the 30th Corps Record track to record this.
[5.2.3.3] The 30th Corps HQ may freely transfer CPs to a divisional HQ at the beginning of a Command Phase without an attenuation die roll. They cannot go directly to a brigade HQ.
[5.2.3.4] As in Allied airborne divisional CP acquisition, the German player may interfere with delivery by performing fire combat against Club Route. Any German unit within normal fire range of any road hex of Club Route may conduct direct fire against that hex as though it contained a vehicular unit in Travel Mode. For every hit suffered, the Allied player loses one CP or one AmP. Alternate the losses in each category. Unobserved Barrages may not be used for this purpose.
[5.2.4] 30th Corps Movement Allowance
Normal movement rates of 30th Corps ground combat units are affected by the huge logistical challenge of using a single highway.
[5.2.4.1] 30th Corps units moving exclusively along the Club Route expend MPs per the Club Route Log Table regardless of how many MPs could be expended with CPs.
[5.2.4.2] Units not moving exclusively on the Club Route expend MPs in normal fashion based on a MA informed by supply status and the current CP allocation, but they cannot expend more MPs on the Club Route than allowed by the Club Route Movement Table roll (to reflect flow of traffic).
[5.2.4.3] All units on Club Route, except for the spearhead brigade, have their MA determined by the Log Table. The spearhead formation is whichever regiment/brigade formation of the Guards Armored or 43rd Infantry division takes up the first 12 hexes of the northernmost Allied occupation of the Club Route.
[5.2.4.4] Once supply rules commence on turn 6, units on Club Route may not leave the highway or Travel Mode unless their HQ has been allocated at least one CP in which case, they will be able to conduct operations off the highway if required.
[5.2.4.5] No 30th Corps unit in Travel Mode may ever move south on the Club Route unless its formation that has been assigned CPs and it will be operating away from the Club Route.
[5.2.4.6] No 30th Corps formation may voluntarily be taken out of Travel Mode unless either it has been fired upon (at least one unit of the formation is shot at) or it can spot a German unit within four hexes from the Club Route. Do not count German units set up along the front line for this purpose.
Exception. Spearhead units do not require access to CP to be taken out of Travel Mode at any time nor need they satisfy the requirements of either being shot at or being able to spot German units within four hexes.
[5.2.4.7] If 30th Corps units on Club Route are fired at and suffer step loss, then they suffer an involuntary mode change (See effects of fire). They must attempt to re-enter Travel Mode and advance on Club Route as soon as possible when they can no longer observe any enemy units.
[5.2.5] Command Point Attenuation
[5.2.5.1] When 30th Corps CP are used, there is an attenuation of CP if they are used north of the Maas (Grave Bridge) River or farther than 12 hexes from Club Route. That attenuation represents the extra resources required to get the CP to HQ in those locations or conduct operations in an area in which 30th Corps is unprepared. As a result, there are additional CP requirements that must be met to maintain supply and allow normal operational performance.
[5.2.5.2] If a 30th Corps HQ is on map C or south of the Maas River on map B, one extra CP must be expended per HQ. If the HQ is between the Maas and Waal Rivers, one and a half extra CPs must be expended. Any HQ north of the Waal River must expend two extra CPs.
[5.2.5.3] This increased requirement also applies to the Division HQ.
[5.2.5.4] If any combat units wish to conduct operations farther than 12 hexes from Club Route, then the relevant HQ must expend an extra point of CP. Fire directed at targets beyond the 12-hex limit does not count for this purpose.
Example: Suppose the British IG brigade HQ is on the Club Route south of the Maas River on map B. It has been allocated 2CP for this turn, but its subordinated units must operate as if they only had access to 1 CP because of command point attenuation described in [5.2.5.2].
6.0 Air Landing Operations
Refer to the Air Landing Table and Weather Conditions Table for this section.
[6.1] Pregame Airborne Deployment
Prior to the start of a game the Allied player should deploy all his airborne units in the Formation Display. The units are grouped into serials which will be used in the airlift as separate air drops. Each serial is roughly battalion size. Players will note some of those stacks will violate the 28-point stacking limitation. This is allowed as there is a procedure to resolve the violation when the stack is placed onto the map.
Note. Airborne Artillery and Antitank units all possess the parachute symbol but in almost every case they were glider-delivered units. There is no implication for game play.
[6.2] Pathfinder & Supply Head Markers
[6.2.1] Each Allied airborne regiment has a Pathfinder Drop Zone (DZ) marker which is identifiable by its subordination designation. In the scenarios the Allied player will be told to place them in specific hexes. In the Campaign Game there is an optional free drop zone placement.
[6.2.2] The Allied player defines a general drop zone for each of the regiments by placing Pathfinder markers on the map.
[6.2.3] The Allied player must designate a drop zone hex for each serial belonging to a given regiment within three hexes of the regimental Pathfinder marker.
[6.2.4] Division asset units (those which are not subordinated to a specific regiment) are designated to drop within three hexes of the Pathfinder marker belonging to their assigned division.
[6.2.5] Each airborne division and the Polish Brigade also have a supply DZ marker that acts as that formation's supply source. It must be placed in either a specially designated hex or within the drop zone of one of the other pathfinders of the division.
[6.3] When Pathfinders Are Placed
[6.3.1] The Allied player may place pathfinder markers anytime he wishes either prior to the start of play or during play. Once placed, the markers may not be moved.
[6.3.2] Unless directed otherwise, the Allied player may place Pathfinder markers on any hex he chooses.
[6.3.3] Normally the Allied player will place his pathfinder markers immediately prior to dropping the first battalion belonging to the pathfinder's regiment.
[6.3.4] Other than defining an area in which the Allied player may designate specific drop zone hexes, Pathfinder markers have no effect on play. Their presence is otherwise ignored. German units cannot destroy Pathfinder markers, and they have no effect on stacking. If a German unit occupies a hex containing a Pathfinder marker, all it means is there are Germans in the DZ area.
[6.4] Pre-flight Routine [Weather]
[6.4.1] At the beginning of each 0601/0901 Game Turn, the Allied player rolls a 2d6 and consults the Weather Conditions Table. That gives a numeric rating for conditions over the transport airfields for either the southern route or the northern route. That rating prevails through the next three game turns, until 1501/1801, when the routine is executed again to determine the weather until 0601. When rolling for the weather condition, the Allied player rolls first for the Northern Weather Condition and then for the Southern Weather Condition.
Example: Assume it is 0601/0901 on 19th September. The Allied player rolls a nine on the dice. That means the weather rating for the southern route is six, and for the northern route is P. A "P" means no air operation is possible on that route.
[6.4.2] On the first day (17 September), all units landing on Map A, B and D must use the northern route, while all units landing on Map C must use the southern route.
[6.4.3] On subsequent days, all units landing on the various maps must use the routes described in 6.4.2 until an Allied non-airborne unit in supply reaches a hex adjacent to the Maas. Subsequently, the units on Map B have the option of using the northern or southern routes, while all other units are still bound to the restrictions of 6.4.2.
[6.4.4] With the capture of hex B3235 by a supplied Allied non-airborne unit, the units on Maps A, C and D have the same option as those on Map B.
[6.5] Air Landing Routine
[6.5.1] When executing a serial drop the following sequence is adopted. The Allied player announces which route, northern or southern, the serial is taking and designates which hex in the landing zone it will attempt to drop into.
The number of flak units along the flight path is counted and the number is indicated on the serial by a step loss marker before the serial is then placed in the intended landing hex with a dismounted marker on top.
Once all the serials scheduled for this turn have been placed, the scatter procedure is performed incorporating modifiers for weather and German flak.
When the actual destination hex is determined, the dismounted marker and SP counter for flak can be removed. Any losses, stacking issues, special German fire or Close Action triggered by the landing are then resolved before moving to process the next serial.
Each of these steps is now described in more detail.
Figure 2. Scatter plot.
[6.5.2] A flight path is traced hex by hex from the intended drop hex to the map edge. That path must follow a "straight" line (see Figure 3). When tracing the northern route, a straight line of hexes must be traced from the west map edge of Maps A or B to the drop hex. For tracing the southern route, a line (one hex right, one hex left, one hex right, etc.) must be traced from the south edge of Map D to the drop hex. If a straight line from Map D cannot physically reach the drop hex on Map A or B (that is, the drop hex is on the far right hand side of either of the two northernmost maps), the Allied player should "fly" the units of the serial in question from the south edge of Map D to the village of Schaijk (B0115/B0116), continue along the B01xx hex row, moving toward the east edge of Map B, until it is possible to draw a line from the B0lxx hex row to the drop hex. Players should note the route must go exactly, as all units taking the southern route must move, with the obvious exception of the dogleg, in the B0lxx hex row.
[6.5.3] As the Allied player traces the flight path, the number of German AA units that lie directly on the path and in hexes adjacent to the path, from the map edge to the drop hex is counted. The total number of undisrupted German flak/AA units passed over can be noted using a step loss marker applied to the top of the serial stack. The total flight conditions are calculated as the sum of the weather conditions rating prevailing over the route declared, the number of flak units counted on the path traced, and add five if it is a night turn.
Figure 3. Air approaches and drop zones.
Once all serials are placed on the map with dismounted markers, an Air Landing Result is determined for each serial using a 2d6 dice roll, the total flight condition score, and the Air Landing table. This is determined for each serial in any order chosen by the Allied player. The result is applied immediately to the serial and any stacking issues, special German fire and CA are resolved before proceeding to the next serial stack.
[6.5.4] Flak that is depleted, disrupted or in Travel Mode does not count when determining the air landing result.
Air Landing Table. The label for the first row is not printed in the extracted text, so it is shown unlabelled. (The rules refer to an "A" result in [6.5.9].)
- (label not printed) Serial lands in the designated hex. All units of the serial are placed in the defined drop hex.
- S1: Serial scatters and lands in a hex other than the drop hex. The Allied player rolls a 1d6 for each unit within the serial to determine the direction of scatter away from the defined drop hex (see Figure 2). He then rolls another 1d6. On a roll of one or two, the unit scatters one hex; on a three or four, it scatters two hexes; on a five or six, it scatters three hexes.
- S2: Same procedure as S1, except the scatter distance is increased by one.
- L1: On a roll of one or two, the unit loses a step; on a three through five, it scatters one hex; on a roll of six, it scatters and loses a step.
[6.5.5] Air Landing Results are found on the Air Landing Table (above).
[6.5.6] For units using the southern route, complications arise when the weather is substantially different on the two weather zones of the map. If the flight condition rating on the Southern Weather Zone (Maps C and D) is four or more better than the weather on the Northern Weather Zone (Maps A and B), reduce the air landing result by one level on the results table above. See [6.5.8].
[6.5.7] If the weather condition on the Southern Weather Zone is four or more worse (for example, SWZ = nine; NWZ = three) than the weather condition on the Northern Weather Zone, increase the air landing result by one. If the Southern Weather Zone's Weather Condition is P, and the weather condition on the Northern Weather Zone is three or less, increase the air landing result by two.
[6.5.8] To reduce the air landing result, an "L1" becomes an "S2", an "S2" becomes an "S1," and an "S1" becomes a "no effect." When increasing the air landing result, simply reverse the procedure.
[6.5.9] If an "A" result is obtained as an Airlanding result, and the weather complication demands an increase of one or two, one company in the serial is destroyed (owning player's choice).
[6.5.10] In determining the actual drop hex, if the unit drops and scatters off the map, it is placed in the last hex on the map that is not prohibited terrain.
[6.6] Action Taken After Drop
[6.6.1] Overview
Having determined the actual drop hexes (after any scatter) for the units in a serial, the Allied player places the units on the map and addresses any German fire, stacking issues or any CA if required. The dismounted marker previously used to indicate the proposed serial landing hex and the numerical marker for AA fire can be removed.
[6.6.2] Special German Fire
[6.6.2.1] If there are German units adjacent to or within firing range of the battalion, they may make a special kind of OF. This Special German fire is permitted by any German units within three hex range of landing Allies, regardless of otherwise obstructing terrain. Range limitations are in effect. In other words, infantry units (for example) could not fire at the landing units, unless the units were landing on or adjacent to the infantry units. The following modifications apply.
- a) Flak units double their range and there are no LOS requirements (no reduction in ER).
- b) Artillery can OF if they have a direct LOS to the target hex. Artillery units double their Strength-Points. They self-spot and use the IF table.
- c) HW units that self-spot can IF within their normal range subject to LOS.
- d) Other units within DF range can also fire.
- e) Units can conduct OF as many times as there are hexes to attack.
- e) IF using spotters may not be used.
[6.6.2.2] Note that although firing requires a direct LOS, both artillery and HW units use the IF table for fire resolution and as this is IF, their results are applied to any unit in the target stack. Casualties from DF apply to the top two units only as normal.
[6.6.2.3] The target units in the serial are considered in Concentrated Mode (except artillery which are in defilade) and none receive any terrain benefits against fire combat. Losses are implemented immediately as they occur. A "D" result causes a single unit to change to defilade mode.
[6.6.3] Over-stacking
[6.6.3.1] When the Allied player is fixing an over-stack of units in a hex arising from a single serial, the minimum number of units must be displaced to correct the situation. That does not mean that units remaining in a stack must equal the stacking limit as nearly as possible, but that the violation is corrected by the removal of the least number of units.
[6.6.3.2] Artillery units may not be displaced if the landing hex is over-stacked. They are eliminated if accompanying units in the stack cannot displace. If successful displacement has occurred, then the artillery and any other units remaining in the hex are disrupted.
[6.6.3.3] If a unit displaced from one stack in turn displaces a unit in another stack, the second unit is disrupted.
Example: Five Allied units land in an open terrain hex. Their strengths are 8, 7, 5, 4 and 5. Since a stack of 28 is the maximum allowable, and there are 29 strength points in the stack, the Allied player must remove at least one strength point. The Allied player can reduce the stack to 28 or fewer strength points by the removal of one unit. Therefore, he can remove no more than one unit, but he may remove any one of the five units in the hex. The excess units must move to a vacant hex or a hex with friendly units. If there is no such hex, the entire serial is disrupted in the hex in which it landed.
[6.6.6.4] It may be that the entire serial lands in a hex with the other friendly units who have landed in the same movement phase. If the stacking limit is exceeded, all the units that were in the hex into which the later serial is landing are displaced. Both the displaced units and the units in the later serial are then disrupted.
[6.6.6.5] Should a serial land on friendly units that have been in play for at least one game turn, the friendly units may move away one hex, but in these circumstances only the newly arrived serial is disrupted. If it is impossible for the friendly units to move away, they are also disrupted. Opportunity fire may be triggered in all instances.
[6.6.4] Close Action
[6.6.4.1] When displacing to meet the maximum stacking requirements, displaced units may choose to perform a Close Action against any enemy units they landed adjacent to. If the attack is successful, only the attacking units that were close assaulting because they were over-stacked may advance—not any of the other units in the stack. Should the attacking unit(s) suffer a disruption result, the attacking units are eliminated, and the stack from whence they came is disrupted.
[6.6.4.2] If there are German units in the landing hex, the Allied player must use his units to make a mandatory Close Action on them, just as though the Close Action originated from an adjacent hex. See [6.6.4.3] for modifiers. That Close Action must succeed in disrupting the German units thereby forcing them to vacate the hex, or all Allied units are eliminated. If there was an over-stack on landing, then even if successful in displacing the Germans during the CA, then all the allied units that landed are disrupted.
[6.6.4.3] If airborne units landing on German units would be over stacked in the hex in which they are landing (the one the German units are in), subtract two from the effectiveness rating of the stack for the purposes of the compulsory CA, but calculate the strength exactly as printed on the counter.
[6.6.4.4] Artillery and AT units landing on German occupied hexes are eliminated.
[6.6.4.5] Airborne units landing in a city or forest hex occupied by German units are automatically eliminated.
[6.6.5] Movement after landing
[6.6.5.1] Immediately after landing on the map, the Allied units may use limited movement on the turn that they land, with a single 2d6 die roll being used to determine the MA for each unit in the serial that turn. Note reconnaissance units that normally have a MA of 14 are still limited to a maximum of 12 MP in this situation. Whatever MA is rolled for, the maximum movement allowed is two hexes for leg units and four hexes for vehicular units.
[6.6.5.2] Additionally, roll once for all units of Frost's battalion (2/1P) but use three dice for this battalion - and add +1 for Frost to the resulting MA. Note the first move limitation to a maximum of two hexes for infantry still applies however (see [8.3.5]).
[6.6.5.3] During the Reaction Phase, leg units may move up to two hexes and Vehicular units up to four as usual. A unit is not required to move but, the units that use their movement allowances and move normally may not exceed the stated number of hexes.
[6.7] Restrictions on Airborne Operations
[6.7.1] On the 0601/0901 Game Turn of every day, the Allied player receives a specific number of lift points. That is the maximum number of serials that may be lifted and dropped during that day. There is never a requirement to lift and drop anybody. Unless otherwise directed, the Allied player may use all the lift points to make drops on the same game turn, or stagger drops between several different game turns, provided no more lift points are used than the number stated on the daily record track. [6.7.2] Unless otherwise directed, the Allied player may lift and drop battalions in any order. Either the northern route or the southern route may be used in making a drop, unless instructed otherwise.
[6.7.3] The Allied player may lift and drop serials only during a friendly Movement Phase. The air drop may occur before, during or after regular movement has occurred. No air drops are allowed in the Reaction Movement phase.
[6.7.4] The Allied player may not designate a forest, rough, city or town hex as a drop hex; nor may a hex containing a part of a canal or river be designated. If Allied units drop in one of those hexes due to scatter, they are immediately disrupted.
[6.7.5] A unit landing in an all-water hex is eliminated.
[6.7.6] Units scattering off the map are placed in the last nonprohibited terrain hex they passed over. No unit is ever lost off the map.
[6.7.7] Lift points may not be saved from day to day. Unused lift points on a given day are lost.
Exception: If weather conditions state "No Flight" on both the AM and PM portions of the day for both the northern and southern routes, such that the player was prohibited from flight operations, it is permissible to add a maximum of three lift points to the total allowed on the following day.
[6.7.8] Though the Formation Display groups the airborne units into battalion sized serials, the Allied player may want to drop only part of the battalion serial. Any lift less than a battalion still requires a lift point. In other words, if a player wants to split a battalion into two or more drops, two or more lift points must be used.
[6.7.9] The Allied player may rearrange the battalion serials defined on the Formation Display but may not create fewer overall serials by so doing.
[6.7.10] No serials can be created with more than 28 strength points.
[6.8] Landing Unit Modes
A unit may never land in Travel Mode. Infantry units may land in concentrated or Defilade Mode, at the owning player's discretion. Artillery units may land only in Defilade Mode. Jeep reconnaissance and other motorized units land in Defilade Mode.
7.0 Airstrikes
Refer to the Turn Record Chart and the Airstrike Bombardment table for this section.
[7.1] Overview
[7.1.1] Players consult their respective Turn Record Charts to find how many airstrikes they have available for that day.
[7.1.2] The Allied player will be able to use the specified allotment in one of the AM turns and again in one of the PM turns.
[7.1.3] The German player may use the allotment specified in one of the AM turns and, on a 1D6 die roll of 1-4, in one of the PM turns.
[7.1.4] Airstrikes may be targeted against any unit in a stack regardless of position.
[7.1.5] Airstrikes are designated against specific units as the first action of the friendly fire phase. The phasing player then waits until IF and DF are completed before using the Airstrike Bombardment Table (ABT) to execute each strike.
Note: before consulting the ABT, roll a 1D6 die for each airstrike, and if that result is 1-5, proceed to the ABT. If a 6 is rolled, no air strike resolution occurs.
[7.2] Restrictions on Airstrikes
[7.2.1] Airstrikes may attack any legitimate target (see [7.2.8]) with the following exceptions: a) any unit in defilade in a city or forest hex that is not adjacent to a friendly unit, and b) any leader unit alone in a hex.
[7.2.2] No more than three airstrikes may be placed on a single hex in each turn.
[7.2.3] Airstrikes may not be accumulated from AM to PM turns or vice versa. They must be used in their designated segments.
[7.2.4] Airstrikes must be used in multiples of two for each strike on night game turns and game turns in which the weather condition is P. On turns when both conditions exist, three airstrikes must be used to obtain one attack. Unused airstrikes may not be accumulated.
[7.2.5] Airstrikes may only target combat units and headquarters. They do not interfere with supply, communication, or any non-combat related function. They may not be combined with ground attacks.
[7.2.6] Airstrikes may not observe on behalf of other units.
[7.2.7] Airstrikes can only take place against enemy units that can be observed by units in non-Airborne divisions.
[7.2.8] No Airstrike can be called down against a hex that is more than 30 hexes from the Spearhead units of 30 Corps. Exception: see single airstrike against ferry allowed [9.2.7].
[7.2.9] All airstrikes are designated at the beginning of the Fire Phase following the Command Phase of the owning player and are indicated with a marker.
[7.2.10] All airstrikes are resolved at the end of the Fire phase in which the airstrike markers were placed.
[7.2.11] Optional CAP markers if used (see [15.10]) remain on the map from the Command Phase in which they are placed to the end of the player's next Command phase.
[7.2.12] The German player may not use airstrikes until Game Turn 6.
[7.2.13] A disruption result has no effect on a previously disrupted unit. A "1*" result causes a non-armor or non-headquarters to lose one strength point and become disrupted. Armored and HQ units receiving this result are disrupted only and do not suffer strength point loss.
[7.3] Resolving Airstrike Attacks
[7.3.1] Each airstrike is resolved separately, except when it is necessary to combine airstrikes because of weather and/or night. All attacks are treated the same, regardless of the number of airstrikes necessary to obtain one attack.
[7.3.2] Determine the mode of the target unit and, if necessary, the terrain in which the target is located. Roll two dice and consult the Airstrike Bombardment table to determine the bombardment result. Apply any adverse results immediately. Proceed to the next attack, if any.
[7.4] Explanation of Airstrike Bombardment Results
Table 1. Airstrike results
- – No result.
- D: The target unit only is disrupted and retreats one hex. The other units in the hex are not disrupted. Target units that are already disrupted suffer no additional effect.
- 1*: If the target unit is an armored unit or a HQ, treat as a D. If the unit is anything else, subtract a strength point and disrupt the unit. Unlike the D result above there is no requirement to retreat.
- 1: Regardless of unit type, subtract a strength point and disrupt the unit. No retreat required.
8.0 Movement
The terrain east of the main highway on Map A between Nijmegen and Arnhem consisted of soft polder with a high water table. Accordingly, no unit in Travel Mode may enter a mixed terrain hex in this location unless using a road or railroad.
[8.1] First Day German Movement Restrictions
[8.1.1] All German units set up in defilade.
[8.1.2] All German units that start any scenario (including the Campaign game) on the map, including artillery and HQs, must stay in defilade until the Organization phase of Turn 2.
[8.1.3] The German player should examine all the German Formation Displays, locate all units to be deployed, and place the units as directed. Some units will be disrupted or entrenched (see key); the remainder may be placed on the map in defilade.
[8.1.4] HQs and artillery that start in defilade may change mode in the first two turns if they are assaulted and are forced to retreat.
[8.1.5] German units starting on the map must roll a 1d6 to determine their movement allowances (unit by unit) for Game Turns 1 and 2. On Game Turn 3, those units roll a 2d6 to determine their MA. German units entering as reinforcements may operate normally with no restrictions.
[8.1.6] All units normally attached to the II SS Panzer Regiment may become part of the KG Walther HQ supply net, or they may trace to the north edge of the map for supply as if their headquarters were one hex off the map. The units are treated as individual independent units if the second option is taken.
[8.1.7] KG Walther (Southern group, force "O") becomes active on Phase 6 of GT 2.
[8.1.8] German units on map D may not move south of the initial front line. All bridges over the Meuse L'Escaut Canal are considered destroyed except those within British lines.
[8.1.9] The German units that enter on Game Turn 2 (the Reconnaissance Battalion of the 9th SS Panzer Division) exist only to cross the map and exit on the south edge at hex A0130 by the end of Game Turn 3. The German player may not use them for any other purpose until they have spent one turn south of the Waal. After this they are released from any restrictions.
[8.1.10] German units that start on map D east of Club Route and six or more hexes away from Club Route may not fire on Club Route and exist only to be exited off the map edges by the end of the 18th of September. They can return later after using off the map movement. This restriction does not apply to 6th FJ units.
[8.1.11] Any unit that begins the game out of command has two options: a) it may remain without an HQ; or b) the unit may attach to any headquarters, but at the penalty of having the effectiveness rating of the unit reduced by two until reunited with its original command.
[8.1.12] All infantry units of 9th and 10th SS Panzer Divisions may assume Travel mode.
[8.1.13] For all scenarios and the campaign game, any German units that start on the map on Turn 1 and later become disrupted, adopt Defilade Mode after recovery. [8.2] Allied 30th Corps Movement Restrictions
Movement of 30th Corps units along the Club Route is subject to various restrictions. In addition to the limitations imposed by stacking rules for units in Travel mode (System Rules [9.6.5], [9.6.6] and [9.6.7]), there are additional restrictions related to staying in Travel mode, staying within specified distances of the Highway [8.2.2.3], a variable cap on Movement Allowance for units moving on the highway (See [5.2.4]) and limitations imposed by CP allocation. These restrictions are covered in the following sections and a summary for different unit types is included at the end.
[8.2.1] Unit modes and set up.
[8.2.1.1] The Allied player places the lead elements of the 30th Corps (Group Y) on Map D anywhere south of the initial front line. All those units except for 30th Corps artillery and the attached 231st Brigade must be in travel mode at set up.
[8.2.1.2] All 30th Corps artillery and Guards Armored Division artillery are in Defilade Mode (In Battery) and begin anywhere south of the canal. They are all considered to be in communication with 30th Corps HQ. Once these artillery units move from these positions, the normal rules of Communication are in effect.
[8.2.1.3] The 231st Brigade of the 50th British Division is set up on or adjacent to the front line within 3 hexes of D0917. The units must be north of the Meuse L'Escaut Canal and they may start in any mode the Allied player desires.
[8.2.1.4] The 231st Brigade may advance as far North as Valkenswaard and may move and fight without any restrictions within 3 hexes of Club Route until the end of GT 4. After that, they must halt and await the activation of the rest of 50th Division.
[8.2.1.5] All units of 30th Corps are capable of assuming Travel Mode.
[8.2.1.6] Units of 30th Corps can begin moving on Phase 6 of GT 2.
[8.2.1.7] The 30th Corps may also place up to four companies of each airborne division into Travel Mode if those companies can trace a supply path to an HQ unit within the 30th Corps chain of command.
[8.2.2] 30th Corps Spearhead
30th Corps was operationally restricted to just the area around the main highway (the Club Route), as it advanced north toward Arnhem. The VIII and XII Corps of 2nd British Army were tasked to clear the areas farther out on each side of the road. Club Route is always the primary road running from hex D0618 to D5515, then to C0815, then all the way north to B1126. From that hex the Allied player may trace the route to B1639 or B2631, and then into Nijmegen and across the Waal using primary roads. Once across the Waal, Club Route must proceed on a primary road directly to Arnhem and hex A2232.
[8.2.2.1] Spearhead units are those that belong to either the 5th or 32nd Brigade of Guards Armored division and which occupy the most advanced twelve hexes heading north on Club Route.
[8.2.2.2] Units of the spearhead formation may voluntarily leave travel mode at the end of the movement phase of phase 6 of Turn 2 (when exiting Travel mode is allowed at a cost of 2MP).
[8.2.2.3] The spearhead lead units are not allowed to voluntarily move more than three hexes away from Club Route but may operate freely within this envelope. If they are forced to retreat further from the Route than that, the Allied player must make every effort to get them back where they belong. This restriction applies from the northernmost 30th Corps unit to 12 hexes south along Club Route. From the 13th hex behind the lead 30th Corps unit back another six hexes (for a total of 18 hexes behind the lead unit), 30th Corps may operate within six hexes of Club Route and, after a separation of 24 hexes, the restriction is thereafter maintained at twelve hexes from Club Route.
Note: that 30th Corps units that are not part of the spearhead must remain in Travel Mode on or off the highway unless they satisfy the requirements of [5.2.4.6].
[8.2.2.4] Movement restrictions stated in [8.2.2.3] are not in effect north of the Nijmegen bridge (hex B3235).
[8.2.2.5] If a German unit moves within 3 hexes of Club Route, Allied units nearby can move to engage them.
[8.2.2.6] Allied armored car units belonging to either the HHC or 43rd Division are an exception and may move farther than the limits given above, but they must always end their move within 12 hexes of Club Route.
[8.2.2.7] Units of Household Cavalry (HHC) may trace supply to any Guards Armored HQ but are considered separate from the spearhead.
[8.2.2.8] Once a 30th Corps combat unit reaches the command radius of an airborne HQ, it has the option to operate within that formation's command radius to support that HQ's subordinate airborne units. That means they must always remain within two hexes of an airborne unit that is in supply and command. If those operations result in a 30th Corps unit moving more than 12 hexes from Club Route, that unit's HQ must expend an additional CP (beyond the one or two usually expended) to operate. Note that any independent 30th Corps formations attached to airborne divisions to support them are also governed by these rules.
[8.2.3] Additional constraints on 30th Corps movement
[8.2.3.1] Movement along the Club Route is regulated by a variable movement allowance to simulate difficulties coordinating movement of heavy traffic along a single road. This Club Route movement allowance is described in [5.2.4].
[8.2.3.2] Movement of 30th Corps units on the highway is subject to stacking requirements for units in Travel Mode.
[8.2.3.3] Movement allowance of units on the highway may be further limited by CP availability from Turn 6 onwards when supply rules come into effect.
[8.2.3.4] In summary:
- All units on the highway must always follow stacking rules.
- Spearhead units may leave travel mode as early as phase 6 on turn 2 and their movement allowance on Club Route is not capped or subject to CP requirements which start on turn 6. They can leave the highway at any time but are confined by the 3-hex limit.
- HHC start in travel mode but must remain in this mode until shot at or can spot an enemy unit within 4 hexes. They are free to leave the highway at any time but must finish any movement within 12 hexes of the highway. They are not subject to CP requirements after turn 6 but should they use the highway, they must not exceed the Club route cap whilst doing so.
- Non-spearhead units of 30th Corps must stay on the highway and remain in Travel mode until shot at or they spot an enemy unit within 4 hexes. At that point they can leave the highway and operate in any chosen mode within the envelope described in [8.2.2.3]. Whilst on the highway they are subject to the Club Route movement allowance cap and the requirement for access to CP to leave the highway should the opportunity arise.
- 231st Brigade units begin in any mode and operate within 3 hexes of the highway from the start. They cease movement at the end of turn 4 (See [8.2.1.4]).
[8.2.4] 30th Corps Night Movement
30th Corps units may move at night on Turn 4. However, no unit of 30th Corps may move during the second Night Game Turn of Sept 18th (move 5). Thereafter a 1d6 is rolled at the beginning of each night Game Turn. If the result is a 1 or a 2, there is no movement restriction for that turn. 30th Corps armor units that have been attached to an airborne division and are stacked with units of that division may ignore this rule. 30th Corps units are permitted to fire at adjacent enemy units at night.
[8.3] Allied Airborne Division Movement Restrictions
Allied airborne units on the Formation Display are organized into serials. All those units are considered available to the Allied player. Checking the Game Turn Record Track, the Allied player will find his lift point allowance is 32 on the first day. When play begins, the Allied player may introduce 32 serials into play during 17 September.
[8.3.1] Immediately after landing, during the first turn, airborne units are limited to Reaction phase movement rates (two hexes maximum for infantry and four hexes for vehicles). Normal movement is used in subsequent phases. See [6.6.5].
[8.3.2] No airborne unit may voluntarily move more than 12 hexes from a DZ or a hex containing a bridge over which the Club Route will pass.
Exception: airborne units may move beyond that distance if they always remain within four hexes of a Club Route hex. Additionally, an airborne divisional HQ may never be moved farther than 12 hexes from its supply DZ hex.
[8.3.3] Allied units may not cross a ferry hex side. In other words, they can only cross the Neder Rijn at a bridge.
Exception: The Pannerden ferry may be used in limited circumstances. See [9.2.16].
[8.3.4] On GTs one and two, any Allied unit attempting to CA any German unit belonging to 16th SS battalion must first roll a 1d6. On a roll of 1-3, the initiation of CA fails, and that unit may not be the target of any further CA that phase.
[8.3.5] Lt. Col. John Frost (CO of the 2Bn/1Para/1 Airborne Division) possesses a special movement effect. Any units of his battalion, plus any four other divisional units that are either adjacent or in a contiguous line of march with him, receive a bonus to their MA equal to the roll of a 1d6 die. The units must, however, move with Frost to get that bonus. Make the die roll just before Frost and his associated units begin their move. Movement is still limited to a maximum of two hexes on the first move. No movement point bonus applies to disrupted units. The special movement effect is applicable during the first two turns only.
9.0 Cross River & Canal Movement
The objective of Market-Garden was the crossing of waterways that would normally be impassable without bridges under Allied control. The speed with which the Allies were able to cross the major canals and rivers would determine the success of the campaign. Ideally, the Allies would be able to capture all the bridges intact. The following rules outline what to do when the bridges are not captured intact.
Note that some of the waterways that are considered rivers by the Dutch, and are labelled as such on the game map, are not rivers for game purposes, but rather are the terrain type given on the map.
Bridge engineers can be used to repair or destroy bridges. They can also perform a function like a bridge. The German player is given the option of attempting to destroy bridges to slow the Allied advance.
[9.1] Bridge Engineers: Unbridged Crossings
Normally no unit may cross a canal or a river except at a bridge; however, a bridge engineer unit may "ferry" infantry, heavy weapons, headquarters, combat engineers and leaders (only) across an unbridged canal or river hex side.
[9.1.1] To execute a ferry action, both the bridge engineer unit and the unit(s) to be ferried must be stacked in the same hex adjacent to the relevant river or canal hex side at the beginning of the Movement Phase in which the unit(s) is to be ferried. The combat unit or leader may then move across (ferry) any of the adjacent intervening canal or river hex sides or hexes to the opposite bank, expending six additional movement points, above and beyond terrain cost, in doing so. A unit may always be ferried as the only movement action in the phase, even if that requires a move of two hexes (a river/canal hex plus the opposite bank hex).
[9.1.2] The maximum number of strength points that can be ferried by a bridge engineer in a single movement phase equals the bridge engineer's strength point value.
[9.1.3] The bridge engineer may not move in the same Movement Phase that the ferrying function is performed.
[9.1.4] Bridge engineers may ferry themselves across a river/canal, just as they would ferry a normal unit, except the bridge engineer unit itself is moved across. Once across, the bridge engineer unit may undertake no further movement in that phase.
[9.1.5] A bridge engineer unit may ferry no other units in the phase it ferries itself across a river/canal.
[9.1.6] Units may engage in Close Action when ferried by bridge engineers. The Close Action is resolved exactly as if it were performed across a bridge.
[9.2] Bridge Engineers: Permanent Ferries
The German Player may construct a ferry at the Pannerden Permanent Ferry Location (A1049-A1050).
[9.2.1] To initiate construction of the ferry, a combat engineer unit with at least two strength-points must be in hex A1050 at the start of the German Command Phase and remain in the hex until the ferry is completed.
[9.2.2] Engineer units must be in Concentrated Mode to construct a ferry. Additional units or engineer strength-points have no impact on the construction time or success.
[9.2.3] The Ferry can be built as Light-unit capable or Medium Vehicular Class capable. A Medium Vehicular Class capable ferry may transport leg units, towed units or very light to medium AFV class vehicles across the river. A Light Vehicular class capable ferry may only transport leg units, towed and Very Light AFV class units.
[9.2.4] During the first turn of construction place a "Ferry Under Construction" Marker on top of the engineer unit to denote the action. If the engineer unit is still in the same Permanent Ferry hex in the Player Command Phase of the next turn, roll 1d6. If the result is 3 or greater, flip the marker over to display the Light Capable side to show that light type units may now cross at that location. If the result is less than 3, the attempt failed and the engineer unit may make another attempt next turn if it remains in the hex.
[9.2.5] A Light-capable ferry may be improved to Medium Class Vehicle-capable if the engineer unit remains in the hex and rolls 4 or greater in the next or following turns. Replace the "Light-Capable Ferry" Marker with a "Vehicular-Capable Ferry" marker.
[9.2.6] An engineer unit may improve the ferry and also ferry units across the river in the same turn.
[9.2.7] The Allied Player may expend a single Airstrike to reduce the die roll attempt by one on daylight turns only. Airstrike range and spotting rules do not apply.
[9.2.8] A maximum of two leg company size units or two non-leg strength points may cross at a Permanent Ferry location per turn.
[9.2.9] Non-leg units require an engineer with at least two SPs present in one of the Permanent Ferry hex sides and the ferry must be of the appropriate type for the unit attempting to cross.
[9.2.10] Only one step of German engineer units is required for Leg units to use a ferry.
[9.2.11] To use the ferry requires 6 Movement Points over and above terrain costs.
[9.2.12] A Permanent Ferry can be attacked as a Light Class Vehicular Type target with two strength-points.
[9.2.13] A Permanent Ferry may automatically be destroyed by the German Player at any time.
[9.2.14] To provide a historic timetable, change the arrival of Brandt's 1/10SS Pioneer Company to Turn 3 (A1954) so it can operate the ferry on Turn 4 (if successful).
[9.2.15] German armor units should be restricted to crossing only during night turns due to constant threats by Allied airstrikes.
[9.2.16] Allied units may use the ferry if accompanied by a leader and a 2d6 is rolled and the result is less than six.
[9.2.17] Triangles show the specific terminating points (hexes) of the ferry and both parts of the hex are playable on each side of the river (e.g. A1823). At Pannerden (A1049) the greyed-out area requires the player to mark the unit(s) with an informational counter to help remember which side of the river the unit is on.
[9.3] Fire Combat and Ferrying Operations
[9.3.1] If units being ferried are subject to OF, consider them a concentrated target (except artillery type units, which are considered to be in Travel Mode). Their actual mode is ignored for this purpose.
[9.3.2] The bridge engineers do not trigger OF unless they are ferrying themselves.
[9.3.3] When calculating opportunity fire against a unit on a ferry, raise the ER of the opportunity firing unit(s) by one. ER cannot exceed nine.
[9.3.4] Units may CA from a ferry, but if they do so, their strength is quartered (round up).
[9.4] Bridges That Cannot Be Destroyed
[9.4.1] Railway, road and trail bridges across streams may not be destroyed unless bridging engineers are employed (see [9.5.6]).
Exception: see [9.5.6] when using bridge engineer units.
[9.4.2] Road bridges across rivers may not be destroyed.
[9.5] Bridges That Can Be Destroyed
[9.5.1] These require either 1) an engineer to spend enough time adjacent to the bridge or 2) the presence of an Allied combat unit adjacent to the bridge which prompts a German attempt to blow the bridge.
[9.5.2] Trail and railway bridges across canals and rivers, and road bridges across canals, may be destroyed. Whenever an Allied unit enters a hex adjacent to a hex or hex side containing one end of one of the eligible bridges for the first time, the Allied player must announce an Allied unit is adjacent to a bridge eligible for destruction. The German player then decides whether he will attempt to destroy the bridge.
[9.5.3] If the German player chooses to attempt destruction of the bridge, he declares he is blowing the bridge and rolls a 2d6. If a 6 or less is rolled, the bridge is destroyed, and a Destroyed Bridge marker is placed to note that fact. Anything higher than six means the attempt has failed and the bridge remains intact. If German units occupy one end of the bridge, subtract one from the die roll.
[9.5.4] For each bridge that has already been destroyed during the scenario, add one to any subsequent destruction die roll attempts.
[9.5.5] The bridge at A1826 is an exception. It is always destroyed on a roll of 8 or less.
[9.5.6] If a bridge engineer unit is adjacent to a bridge hex across a stream for three consecutive game turns, the bridge is considered blown (no die roll). During those three turns, the bridge engineer must remain in Concentrated Mode, and it must have at least three strength points. Should the engineer unit not fulfil the above conditions (for example, if it is disrupted), the engineer unit may continue the cycle an extra game turn, or the owning player may start the entire cycle again.
[9.5.7] To blow a railway bridge across a canal, the bridge engineer must spend five turns within the restrictions outlined above, and the owning player must roll 1-3 on a 1d6 to successfully destroy the bridge. If 4-6 is rolled, the bridge is intact.
[9.6] Repair of Destroyed Bridges
[9.6.1] A bridge engineer unit in supply (or a stack of such units), with a strength of at least four, which remains in a hex containing either end of a destroyed bridge for six consecutive complete game turns repairs that destroyed bridge. To indicate the first game turn of repair, flip the Destroyed Bridge marker over to the face showing "Bridge Under Repair"; on the conclusion of the sixth turn of repair, remove the marker.
[9.6.2] To effect repair, no enemy units may be present in or adjacent to either bridge end hex at any point in the repair process. Note that a repaired bridge may not be destroyed unless performed under the provisions of [9.5.7].
Table 1. Summary of bridges eligible for destruction by German troops when Allies approach, using die roll (reconstructed from the flattened extraction; "Not possible" means the bridge type cannot be destroyed over that obstacle, Y means eligible, N means not eligible):
| Bridge | River | Canal | Stream |
|---|---|---|---|
| Road | Not possible | Y | N |
| Rail | Y | Y | N |
| Trail | Y | Y | N |
Table 2. Summary of game turns required by engineers to destroy bridges (reconstructed from the flattened extraction; "3*" means no die roll is required):
| Bridge | River | Canal | Stream |
|---|---|---|---|
| Road | Not possible | 5 | 3* |
| Rail | 5 | 5 | 3* |
| Trail | 5 | 5 | 3* |
* No die roll required.
10.0 German Off-Map Movement
In the Campaign Game, the German player can make large-scale operational movement through areas not covered by the map. This activity is known as "off-map movement." Off-map movement takes place during the German Movement Phase.
[10.1] Executing Off-Map Movement
[10.1.1] The German Off-Map Movement Display is always hidden from the Allied player.
[10.1.2] When German units exit the map, or when they are called for as reinforcements, they are placed in the appropriate area of the display.
[10.1.3] Each of the 22 areas of the display corresponds to a specific range of map edge hexes on a specific map. For example, area 5W corresponds to the western map edge hexes of Map C bordered by the 4000 and 2100 hex rows. Each of the borders is described on the Off-Map Movement Display.
[10.1.4] A unit in an Off-Map Movement Area may enter the map between or on the two boundary hex rows corresponding to that off-map area. Placement on the map edge hex from the Off-Map Movement Display consumes MPs depending on the unit's type and mode.
[10.1.5] Stacking limitations may never be exceeded by entering units. If units whose total strength exceeds the stacking limitations attempt to enter via the same hex, they are simply divided into an appropriate number of stacks. They should enter sequentially as a string of units ("in column") with each subsequent stack paying appropriately increased MP costs at the same tariff as the entry hex.
[10.2] Restrictions on Off-Map Movement
[10.2.1] Only units in Travel or Concentrated Mode may move from one off-map area to another.
[10.2.2] Units may always enter and exit the map to and from the Off-Map Movement Areas regardless of command status, though units that exit the map may not re-enter during the same game turn, and units that enter may not exit during the same game turn.
[10.2.3] Units must occupy an Off-Map Movement Area for one complete friendly Movement Phase before entering the map from that area.
[10.2.4] Units in Travel Mode require one complete Movement Phase to move from one Off-Map Movement Area to an adjacent Off-Map Movement Area.
[10.2.5] Units in Concentrated Mode require one complete game turn to move from one Off-Map Movement Area to an adjacent Off-Map Movement Area. Movement must be from area to adjacent area.
[10.2.6] There is no limit to the total number of strength points that may be in an Off-Map Area at any instant but no more than 30 strength points may ever be moved from one Off-Map Movement Area to another during a Movement Phase.
[10.2.7] No movement may take place between areas during clear weather day turns. For the purposes of off-map movement, Maps A and B are considered to have the weather prescribed by the Northern Route Weather Status, and Maps C and D have the weather prescribed by the Southern Route Weather Status. Clear weather is defined as "0" weather flight conditions.
[10.2.8] No movement between areas can occur during daylight turns without an accompanying controlling HQ.
[10.2.9] A unit's HQ need not be present for movement between areas during night turns.
[10.2.10] Movement is allowed from an off-map area in which the weather is not clear to an off-map area in which the weather is clear but not in the opposite direction.
[10.2.11] German units in Area 6E must wait for two full turns before they are allowed to enter the map from that locale. Importantly, at the start of the second turn in that area, the German player must inform the Allied player there are units in that area that will be entering the map on the next turn.
Note: The nature of the map corner and proximity of the Grave Bridge to that area is such that it confers an unfair time/ space advantage on the German player. The extra bit of land that is missing would have enabled the Allied player to spot enemy units attempting to re-enter via that sector about one turn sooner.
[10.3] The Allied Advance
During the game the Allied VIII and XII Corps, advancing on the flanks of the 30th Corps off the map to the east and west, made certain off-map areas unavailable for German movement. Any German units in the listed off-map areas on the game turn they become "deactivated" are removed from play.
Table 3. Summary of off-map availability (off-map area, then the game turn it is deactivated; see also the Off-Map Movement Display, a separate sheet):
- 1W: GT 6
- 4E: GT 33
- 2W: GT 33
- 5E: GT 47
- 2E: GT 8
- 6E: GT 64
- 3E: GT 26
11.0 The Formation Display
Both players are provided with formation displays. These depict all the units used in the game, and they graphically show the subordination of those units to their various divisions, brigades, regiments, and in the case of the Allied Airborne formations, places the units in battalion-sized serials. Prior to the start of play, all the units should be placed on the displays to locate all units and thereby establish if any are missing. It also speeds subsequent play since the Reinforcement Track is keyed to the Formation Display.
Players should note, in some instances, not every individual company graphic is shown for a battalion. A multiplier next to the image of a company signifies that more than one of that type of unit are assigned to the formation and the units may have varying strength points. This was done to save space on the tables.
Most of the formation displays include tracks for recording the CP and AmP status of some formations. Others are located on separate display sheets.
[11.1] German Formation Displays
The German side is provided with three Formation Display sheets: one for the Southern section, one for the Central section, and one for the Northern section of play. The formations on each display have a letter code to reference reinforcements and set up for all the forces in the sector represented by that display. All the various divisions, Kampfgruppen, and independent units that the German player receives are included on the formation displays. On the Game Turn Record Track, the code for each display is "S" for south, "C" for central and "N" for north. In addition to coding the displays, each unit belongs to a reinforcement or set up group that is also letter-coded with the code appearing in its box on the display. So, to reference a unit on the Game Turn Record Track and the displays, first you would see the display letter followed by the letter code. That is, "C-a" denotes a unit on the Center display in box A.
[11.2] Allied Ground Formation Displays
There are three Allied Formation Displays. One is for the 1st Airborne Division and Polish Parachute Brigade in the Northern Sector. Another contains the two US airborne divisions. Finally, there is a display for all 30th Corps ground units (30C).
Unlike the German and Allied ground formations, the Allied airborne formations are not depicted in their normal organizational framework. Instead, they have been broken into battalion-sized serials for airdrop. Note the same coding system has been used to reference the units on the displays and Game Turn Record Tracks that was used on the German displays (see 21.1 above). The display codes are "N" for North, "C" for Center and "30C" for all 30th Corps ground forces.
12.0 Reinforcements
The Game Turn Record Track indicates when reinforcements are due to arrive. Next to the number of the game turn is a lower-case letter corresponding to a section of the Formation Display. Units in the formation box with the same letter-code arrive on that game turn. The player refers to the lettered display and finds the appropriately timecoded group of units.
For example, on Game Turn 6 the letters B, C and E appear. That means units from the 10th SS Panzer Division, the 9th SS Panzer Division, and the "Independent" display arrive as reinforcements on Game Turn 6. The German player would refer to each of those displays and locate the groups of reinforcements coded for Game Turn 6. He would then introduce them into play on Game Turn 6.
[12.01] Reinforcements may enter in any of the modes they possess at the owning player's discretion.
[12.02] All arriving HQs are assumed to have 2 CPs until the next CP and Logistics phase. Individual units must establish a command link after the first turn of arrival but are regarded as being in supply on the turn in which they enter the map. The 9thSS reconnaissance units that must get to Nijmegen bridge are an exception in that their supply status once they have crossed at Arnhem is not re-evaluated until they reach the south side of the Waal and remain there for one GT. They are then subject to normal supply rules.
[12.1] German Reinforcements
All German Reinforcements are coded as to time of arrival by game turn and location. The code is in three parts, reading from left to right. The first part of the code indicates the game turn of arrival; the second part lists the map of arrival with an upper-case letter; the final part of the code will either give a specific numbered hex on which the units must enter the map, or it will (in lower-case) label an entire map edge. For example, "7A3930" means the units arrive on Game Turn 7 on Map A at hex-number 3930. The code "10B East" means those units will arrive on Game Turn 10 on Map B anywhere along the east edge of that map.
[12.2] When Reinforcements Arrive
[12.2.1] German reinforcements are introduced onto the map during either of its Movement Phases of that game turn. [12.2.2] Arrival of German reinforcements may be deferred by choice (see [12.3.3]).
[12.3] German Movement Onto the Map
[12.3.1] When a reinforcement unit arrives on the map, it begins paying movement costs from when the unit enters the first map edge hex. Note that roads and trails run off the map, and the players can presume they extend indefinitely off the map such that a unit could enter onto the map on a road or trail.
[12.3.2] When multiple units arrive via the same hex in the same Movement Phase, they must enter in successive stacks such that "later" arriving units pay movement costs prior to arriving onto the map. Hex A3930 is a good example. On Game Turn 22, most of the Flak Brigade is scheduled to enter on that hex. If every unit in that formation only paid an initial cost upon entering, it would be an anomaly. Instead, the German player should line up those units in a column stretching along the hypothetical road off the map, with all units except those in the first stack paying movement costs for moving along the road prior to reaching the map.
[12.3.3] Rather than introduce units onto the map when scheduled, the German player may hold them in an appropriate Off-Map Movement Area. For example, units scheduled to appear in hex A3930 could instead be considered to arrive in Off-Map Area 2N.
[12.3.4] Units whose entrance hex is blocked may enter on an adjacent unblocked hex. Should the adjacent hexes also be blocked, treat the units as if they were entering from anywhere in the off-map area that abuts their entry hex. The owning player does not have to bring them into play immediately.
[12.4] Allied Ground Reinforcements
[12.4.1] Allied units displayed in the "X" and "Z" boxes are available on a conditional basis. When the conditions have been met, they may be introduced anywhere along the southern edge of Map D during any friendly movement phase.
[12.4.2] The Allied player is also governed by the "column" rule outlined in [12.3.2]. If he introduces more than the maximum stacking limit into a single hex in a single Movement Phase, he must assume successive stacks.
[12.4.3] Allied reinforcements enter under the same restrictions as [12.2].
[12.5] Allied Airborne Reinforcements
Allied airborne units are introduced into play via the airlanding rules (see [6.0]).
[12.6] Scenario Reinforcements
The scenario instructions will specify exactly where the Allied player must place his various Pathfinder markers and will call for specific lettered drop groups to be introduced on specific game turns. Given the mandated placement of the pathfinders, the Allied player will have restricted choice as he is forced to drop those units near their pathfinders (within three hexes, etc.). Airborne reinforcements may not be delayed in these scenarios.
[12.7] Campaign Game Reinforcements
In the Campaign Game, there is an option for the Allied player to introduce his airborne units when and where he desires rather than use the pre-designated DX hexes (assuming the opponent agrees). The Allied player may drop troops where he wants within the constraints imposed by how many "lift" points he has available each day and the effects of weather. He decides where and when to place his pathfinders, and thus decides where his units will drop.
13.0 Weather
[13.1] The weather is determined at the beginning of each 0900-1200 and 1800-2100 turn for each of the southern and northern sections of the map. The Allied player rolls 2D6 at 0600 and consults the Weather Conditions Table. The rating applies for three game turns until the next check at 1500-1800. After this check the weather is fixed until 0600 the next day. The Northern map area is rolled for first followed by the Southern area.
[13.2] The weather on the first two days (Sept 17th and 18th) is "0". Die rolling commences on the 0600-0900 turn of Sept 19th.
[13.3] A unit within a "P" weather zone has its observation range halved during daylight hours and has a range of one hex at night.
[13.4] The weather condition can affect airborne landings ([6.5.6], [12.7], [16.2.3]) airstrikes ([7.2.4]), off map movement ([10.2.7], [10.2.10]), supply to German divisional units ([5.2.1.1]) and supply to Allied airborne units ([5.2.2.5]).
14.0 Night Turns
[14.1] Observation range limits are reduced to two hexes during night turns unless a "P" weather condition reduces this to one hex.
[14.2] Recovery from disruption occurs automatically if a unit has not moved or been adjacent to enemy units for two consecutive night turns.
[14.3] Night turns affect airdrops ([6.5.3]), airstrikes ([7.2.4]), off map movement ([10.2.9]), 30th Corps movement ([8.2.4]) and cross river movement ([9.2.15]).
15.0 Optional Rules
Players should use the optional rules at their discretion, modifying them as they like. They are intended to add realism or explore the "what ifs" of the Market-Garden campaign. If you choose to implement one or more of them, interpret them as necessary if contradictions occur with the regular rules.
[15.1] German Ad-Hoc Formations
[15.1.1] The German player may create an independent battalion out of a battalion that has a formal subordination. For example, the II Battalion of the 22nd Infantry Regiment of the 10th SS Panzer Division may be declared an independent battalion. That permits the German player to subordinate the battalion to any German HQ rather than just the 22nd Regiment HQ. The re-subordination may only be done in the German Command Phase. The penalty paid for this is the reduction of the unit's ER by two until it is reunited with its original command.
Note: Several SS battalions are initially deployed on Maps C and D, while the parent formations are deployed on Map A. Application of this rule is one of two ways that problem can be resolved.
[15.2] Glider Drops
[15.2.1] Glider units must be designated to drop only in clear terrain hexes. If by chance glider units drop into any other type of terrain, they are automatically disrupted and must roll for losses. Each glider unit suffers a loss of one strength point on a die roll (1d6) of four or higher. Players should remember that all units (specifically artillery) that are glider units are affected by this rule, even if the symbol is one of a parachute unit.
[15.2.2] HQs making a glider landing in anything other than a clear terrain hex terrain will be disrupted. If the HQ moves out of the hex immediately on landing, other units in its formation are not affected.
[15.2.3] The headquarters of the 501st and 504th Parachute Regiments are exempt from the above provisions, as they were landed by parachute.
[15.3] Airborne Divisional Supply Markers
The supply heads of the 82nd and 101st Airborne Divisions must be placed in a clear terrain hex, with at least three other clear terrain hexes adjacent if using the optional landing hex rule in the Campaign game. The supply heads of the British 1st Division and the Polish Brigade may be placed in any clear terrain hex, or any woods hex with a road or trail in it.
[15.4] Independent Drops
[15.4.1] The Allied player may designate a serial to drop outside the DZ defined by its Pathfinder marker. If that is done, add six points to the prevailing flight conditions for purposes of resolving that serial's air landing routine.
[15.4.2] One company of the 82nd Division may make an independent drop within two hexes of Grave on the first landing without that counting as a separate serial for lift point purposes. (Historically, one company of the 82nd did land just south of Grave.)
[15.5] Allied Ferocity
[15.5.1] When a company of the Irish Guards (IG) first takes a strength point loss from fire combat or CA, the morale of all units in the Irish Guards is raised to 10 regardless of losses. All units marked "IG" receive this benefit until the end of the succeeding game turn after the first loss is taken.
[15.5.2] On the first game turn that units of the 82nd Airborne Division make an assault crossing of the Waal (that is, cross the Waal with the aid of bridge engineers), the morale of all units participating in the assault is raised to 10, regardless of losses, for the duration of the game turn.
[15.6] Rubble
[15.7.1] Each time that an attack by IF or AT (by units with a medium or heavy AT Dot) inflicts a step loss in a City hex, roll a 1d6. On a result of 3+ place a "Debris" counter in the hex. If a "Debris" counter already exists in the hex and the die roll is 3+, flip it over to the "Rubble" side.
[15.7.2] In the presence of a rubble marker, defending units in Defilade Mode treat the hex as having Entrenchments. Vehicles can only enter and remain in the hex in Defilade Mode. The rubble marker stays in place until the end of the game and affects both sides.
[15.7] Combat Air Patrol
Combat air patrol (CAP) represents fighters used to ward off enemy attacks over specified areas.
[15.8.1] An airstrike may not be used over an area in which a CAP is being used. In other words, if a unit is under CAP, it is invulnerable to airstrikes.
[15.8.2] The Allied player is assumed by default to have a CAP over the entire 30th Corps when using this optional rule. That CAP extends in a five-hex radius from every headquarters of all 30th Corps formations. The Allied player may extend that radius by two hexes for every airstrike expended for that purpose, up to a maximum of 11 hexes. i.e. a maximum of 3 airstrikes can be allocated for this extended CAP zone.
[15.8.3] Whilst the CAP is employed, the Allied player may not use airstrikes farther than 30 hexes away from the 30th Corps spearhead.
[15.8.4] An option for the Allied player is to remove the automatic Allied CAP at which point the range of Allied airstrikes becomes unlimited.
[15.8.5] The German player may use the airstrike allocated to him to perform a CAP against an Allied airborne landing. The German player must declare he is using the CAP option the moment the Allied player announces he is landing serials. The German player may use that CAP against up to eight serials within 10 hexes of each other. To do so, the German player rolls two dice. On a roll of 2-9, the landing has been intercepted and the Allied player must compute all landings as if the weather condition is 11+ for all affected serials. On a roll of 10, the CAP does nothing and is used up for the segment. On a roll of 11 or 12, the airstrike CAP is destroyed by Allied quick reaction, and the Germans have no more airstrikes for the duration of the game.
Note: Historically the Germans were unable to provide combat air patrol for their ground units because the Allies had near total air supremacy. The remnants of the Luftwaffe were, however, able to disrupt the landing of the Poles by attacking the serials as they came in for a landing.
[15.8] Enhanced Return Fire
In this option, any unit that fires in its reaction or main firing phase can be subject to simultaneous return fire from any eligible unit in the target hex (top two units) or any hex adjacent to the target hex that exerts a ZOC on the hex that initiated firing. This extends the opportunity of firing to many more units as it is no longer restricted to the return of AT fire. Return fire can be conventional or AT fire only.
[15.9] Variation to Order of Battle
There is lack of clarity on the exact historical role of the I and II Battalions of the 18th Fallschirmjäger (FJ) Regiment that thwarted the British 30th Corps advance along Club Route at Borkel under the command of von Hoffmann. The II Battalion may have been located nearer the frontline and, in keeping with this, historically it retreated to the West with the 6th FJ Regiment toward KG Chilli.
In this option, the II Battalion 18th FJ is set up within 1 hex of hex 1810 on Map D. The troops at Borkel will comprise the I Battalion 18th FJ. An AT company accompanies each battalion and there are three entrenchments for the 1st battalion. This option will make it easier to match the historical timeline of progress along Club Route in the early phase of the battle.
16.0 Scenarios
There are six scenarios and a Campaign game listed in Sections [17.0] to [23.0]. The six scenarios are essentially minigames permitting the players to isolate operations on the first couple of days on individual maps. Scenario [23.0] is the Campaign game.
[16.1] Scenario Length & Maps Used
Each of the first six scenarios is played on a single map. For example, Scenario [19.0], the Drop of the 82nd Airborne Division, is played on Map B; Scenario [20.0] is played on Map A, etc. The length of a scenario is stated in game turns on the Game Turn Record Track. A scenario does not necessarily begin on Game Turn 1. For example, the first turn of Scenario [22.0] is Game Turn 2. At least two of the scenarios start in the middle of the game turn sequence. For example, the instructions may state "play begins on Phase 6 of Game Turn x." In other words, the first five phases of the first game turn are ignored. Almost all scenarios begin on Phase 6 (the Allied Movement Phase). The Campaign Game also begins on Phase 6.
[16.2] Initial Deployment
[16.2.1] German Player
Under the heading "German Deployment", the German player will find a statement indicating that units of certain formations are deployed on the map. For example, "Units of the 9th SS Panzer Division, formation (a)." He would then refer to the formation display, which lists reinforcements and units initially deployed on the map. Those units are deployed on the map according to the deployment key on the display, which will indicate the exact hex(es) in which units must be placed or the maximum distance in hexes a unit may be placed from that hex. The key will also indicate if units start entrenched or disrupted. All German units are set up in Defilade Mode.
[16.2.2] Allied Player
Under the heading "Allied Deployment," the Allied player will find a statement describing exactly what formations he has available on the first game turn. For example, "Serials 1-10 group D1." He would refer to his formation displays and locate the specified units. (In the example, they would be several regiments of the 101st Airborne Division boxed in their battalion sized stacks.)
In scenarios involving the Allied airborne divisions, the Allied player is told to place Pathfinder markers in specific hexes. Then, during his first Movement Phase, the Allied player uses the air landing routine to enter his airborne units onto the map. Given the mandated deployment of his pathfinders, he will be forced to drop the bulk of his serials within the DZ delineated by the pathfinders.
[16.2.3] Weather and Lift Points
In the scenario set up instructions, no mention is made of weather or lift points. This is because for all the scenarios we define the weather as "0" during the first and second days, and the Allied player is assumed to have sufficient lift points to introduce his initial airborne units and any subsequent reinforcements.
[16.3] Reinforcements
Under the heading "Reinforcements," each player will find a listing of game turns and formations. When play progresses to a listed game turn, the player will refer to the formation display(s) specified, locating the appropriately coded reinforcements (see [12.0]). Note: The reinforcement listing is merely a recap of the Game Turn Record Track as a reminder to the players. The German player will only use reinforcements detailed to arrive on the map in use. Allied airborne reinforcements would arrive via the air landing routine.
[16.4] Restrictions
A common restriction is one requiring the Allied player to locate his regimental HQ in specific hexes by a specific time. This is a method of imposing a broadly historical course of action on the Allied player. Given the benefit of hindsight, perfect reconnaissance and a free hand, the Allied player would quickly mop up the Germans in the 82nd and 101st scenarios if not restricted in choice.
In some cases, the scenario calls for either player to exit units from the map. Scenario 18.0 is a case in point, with the German player required to exit the reconnaissance battalion of the 9th SS Panzer Division on the same turn it arrives as reinforcement. This reflects a historical event (the battalion appears as German reinforcements in the 82nd Airborne Scenario). It may happen that a player finds it impossible to comply with a restriction (for example, a headquarters may be scattered on drop), in which case he must adhere as closely as possible to the spirit of the restriction.
[16.5] Victory Conditions
Determining victory in the scenarios and the Campaign Game is based on either victory point awards or victory objectives, which a player will usually obtain for satisfying a given condition by or at the end of a scenario. There is only one type of victory condition: historical.
Historical victory conditions usually represent an approximation of the Allied objectives in game terms. Unfortunately for the Allied player, they tend to give the German player a better than even chance of winning. Players interested in competitive play should consider shifting levels of victory in favor of the Allies.
[16.6] Free Setup & Alternate Drop Zones (Optional)
Players may choose to allow the Allied player to designate DZ and supply DZ in locations different from those historically chosen. If that is done, all other normal rules for airdrop must be followed. The Allied player may alter the allocation of lift points between the various Airborne divisions, but he may not use more than the historical number of points that were available on any given day. If this option is chosen, the German set up can go two ways. First, players may choose to go with the same set up (historical) that already exists. That will grossly imbalance the game in favor of the Allies. If you want to have some real excitement, you should use the second option: German random alternate set up.
[16.7] German Random Alternate Set Up
This set up assumes the Germans might have bivouacked their units in the rear areas differently, while still having no knowledge of the impending airdrop. After the Allied player has designated his new DZ, the German player consults the random set up tables (rolling a die for each formation) and sets up according to the results on the table. Play proceeds normally after that is done.
The philosophy behind this option is the Allied player should have no idea exactly where the German units will be, and the German commanders would not have set up to optimally fight off an airdrop. They would have positioned troops according to rear area refit needs, etc.
[16.8] German Random Set Up Table
When using the random set up, if a stack's roll would place it in a hex already containing units from another random deployment, reroll on the Random Deployment Chart until a vacant hex is the result. The parenthesized values represent distance in hexes the unit may be from the hex listed on the chart. The German player decides the exact hex before he sees the Allied DZ.
17.0 Introductory Scenario: HELL'S HIGHWAY, 22 SEPT.
This Scenario serves to introduce players to the mechanics of the game, and it simulates the strongest German attempt to cut the corridor in the 101st Airborne Division's section. This attempt was launched by components of 107th Panzer Brigade, and units of a German Kampfgruppe drawn from the 59th Infantry Division. The offensive succeeded in cutting the road and delaying the Allies for 24 hours.
[17.1] Scenario Length & Maps Used
The Scenario begins with Phase 1 of the 0901/1201 Game Turn (GT 35) of September 22 and ends with the completion of the 1801/2101 Game Turn (GT 45) of the 23rd. The Scenario is 11 game turns long and takes approximately three hours to play. Only Map "C" is used for this scenario and play is confined to an area described by the 2100 and 4300 hex rows. No units may move outside these boundaries.
[17.2] Initial Deployment
Note: HQs indicated in boldface (boldface is not preserved in this extraction).
Allied:
- 101st Airborne all Group D: 1/501 (all); 3/501 (all) within two hexes of 2809.
- 2/501 (all); 501/101 within two hexes of 3213.
- 2/506 5-3 (one only); 506/101 within two hexes of 4418.
German:
- Group S: 2107P/107 (all); 2107/107 (all); 280/107 (all); 107PzB within two hexes of 3231.
- Group Q: 1053/85xx (all); Divisional Assets (all); 85xx within two hexes of 3603, 1054/85xx (all).
[17.3] Reinforcements
Allied:
- GT 36: 2/506 5-3 (x2); 2/506 6-6 (x1); ICG/5 2-5-8 (x4); 3/506 (all); hex 2411.
- GT 37: 3/327 (all); 81/101xx 2-2-8AT (x2); ICG/5 2-5-8 (x4): hex 2411.
- Following enter at one-half MA: 1/327 (all); 2/327 (all); 327/101: hex 2411.
- GT 43: 5CG/32 (all); 1WG/32 (all); 31G/32 (all); 32/GdA: hex 4519.
German:
- GT 36: 1036/59xx (all); II/159/59art; 1036/59: hex 2801.
- GT 37: L/7FJ (all); PzJgr/7FJAT; 7/7FJxx: hex 2633.
[17.4] Rules of Engagement
[17.4.1] The Allied player has available six full-strength artillery batteries (effectiveness rating 8, strength 4), off the southern map edge for the duration of the scenario. Those units may only fire on targets spotted by British units. Range for those units is counted from hex row 2100 (12 hexes).
[17.4.2] For GT 2 and GT 3 barrages by 30th Corps are exempt from the unobserved barrage rule.
[17.5] Supply
Players will note that neither the supply source of the 101st Airborne Division or the headquarters of the 5/GA are present for the duration of the Hell's Highway scenario. All units that would normally trace to either of those two for supply purposes now trace to hex 2411 for supply. The HQ and the supply sources are assumed to be along the road. All German units are in full supply for the duration of the scenario.
[17.6] Victory Conditions
The German player wins a decisive victory for achieving all three of the following conditions, a substantive victory for two, and a marginal victory for one.
- Occupy any hex of Club Route (the primary road between 2110 and 4218) at any time in the game for one complete game turn.
- Occupy any hex of the road listed in 1 above at the end of the 1201/1501 Game Turn of the 23rd.
- Cause the Allied player to suffer more than 20 step losses. The Allied player wins by avoiding all German conditions and eliminating 20 or more German steps.
18.0 Drop of the 101st Airborne Division, 17-18 Sept. 1944
This Scenario simulates the drop and pre-linkup action by the 101st Airborne along their assigned stretch of highway. The 101st was not particularly hard pressed until 18 September, when the "missing" 59th Division of the Wehrmacht suddenly began a concerted push toward the all-important road from the vicinity of Best.
[18.1] Scenario Length & Maps Used
The Scenario begins with Phase 6 of the 1201/1501 Game Turn of September 17 (Game Turn 1) and ends with the completion of the 1801 Game Turn of 18 September (Game Turn 10). The scenario is 10 game turns long and takes approximately three hours to play. Only Map C is used for this scenario. Some units are required to exit the southern map edge, and they may not return to play.
[18.2] Initial Deployment
German: All German units on Map C of Southern Sector Group U (mostly Division Gothsche).
Allied:
- Pathfinders (hex number): 506 C1011; 502 C1310; 501 C2611; 327 C1111.
- Supply head: 101 C1211.
The 101st Airborne Division (Serials 1-10, group D1) is available to drop on the Allied movement phase.
[18.3] Reinforcements
German: Game Turns 2, 3, 5, 9, 11: formation display S-P. Game Turn 5: formation display S-R.
Allies: Serials 11-13, group D2, 101st Airborne.
[18.4] Rules of Management
All Allied Reinforcements arrive via Air-landing procedure.
German units may enter any west map edge hex south of the 4000-hex row. (I.e., any hex ending in 01 south of hex 4001).
All Delivery Levels for German HQs are at Low.
[18.5] Restrictions
[18.5.1] Allied regimental headquarters must be located on the following hexes at beginning of Game Turn 3.
- 506/101: hex C0815
- 502/101: hex C1114
- 501/101: hex C3213
The headquarters of the 501st and 502nd Regiments may not move from those hexes. Of course, if the headquarters in question do not land, the Allied player does not have to put the units on the assigned hexes.
[18.5.2] By the conclusion of Game Turn 6, all units of the 506th Regiment must have exited from Map C via hex 0117. They may not return to play. (They appear in scenario 20.0 as reinforcements.)
[18.6] Victory Conditions
[18.6.1] Historical Victory Conditions
At the conclusion of play, the German player is awarded 1 victory point for achieving each of the following three conditions.
- Destroy 12 or more Allied strength points.
- Occupy the hexes at both ends of any canal/river bridge on the road between hex C0117 and hex C6122.
- If a German artillery unit is capable of firing without doubling its range (remember the road must be observed for the German artillery unit to be capable of fire on the road) on any hex of the road or any Allied pathfinder.
No victory points means an Allied victory; one victory point equals a German marginal victory; two victory points equals a German substantive victory, and all three victory points equals a German decisive victory.
19.0 Drop of the 82nd Airborne Division, 17-18 Sept. 1944
This Scenario simulates the drop and pre-linkup activities of the 82nd Airborne around the city of Nijmegen and the Maas Waal Canal. The 82nd has as its responsibility the capture and occupation of the canal and river bridges to provide 30th Corps with free movement through the area. The capture of all those objectives was achieved except one: the vital bridge across the Waal at Nijmegen.
[19.1] Scenario Length & Maps Used
The scenario begins with Phase 6 of the 1201 Turn of 17 September (Game Turn 1) and ends with the completion of the 1801 turn of 18 September (Game Turn 10). The scenario is 10 game turns long and takes approximately three hours to play. Only Map B is used for this scenario. Allied units may not exit the map. All units are automatically in supply until game turn 6 when normal supply rules apply.
[19.2] Initial Deployment
German: 406th Landeschutzen Division and various independent units (see display n): C-F, and C-J.
Allied:
- Pathfinders (hex number): 504 B1331 (one Co may land in B0924); 508 B2448; 505 B2048.
- Supply head: 82 B2348.
In England, (available to drop on Allied Movement Phase) Serials 17-18, Group E1 and serials 20-28.
[19.3] Reinforcements
German: Game Turns 3, 5, 6, 10: C-F. Game Turns 3, 4, 8: C-K. Game Turn 8: C-H.
The Reconnaissance Battalion (Grabner) of the 9th SS Panzer Division (N-B), which is scheduled to enter Map A on Game Turn 2 at hex A3930, has crossed Map A and now enters Map B at hex B3830 on Turn 3.
Allied: Game Turn 8: Serials 29-32, Group E2.
[19.4] Rules of Management
All Allied reinforcements arrive via air landing procedure.
All German delivery levels are low.
[19.5] Restrictions [19.5.1] At the conclusion of Game Turn 2, Allied regimental headquarters must occupy the following hexes and remain there for the balance of the scenario:
- 504/82: hex B1132
- 505/82: hex B2046
- 508/82: hex B3042
[19.5.2] At the conclusion of the scenario, all Allied units that are not in supply are considered destroyed for purposes of assessing German victory points.
[19.6] Victory Conditions
[19.6.1] Historical Victory Conditions
At the conclusion of the scenario, the German player is awarded a victory point for achieving each of the following three conditions.
- There is no Allied unit on or adjacent to hex B3336.
- Destroy 10 or more Allied strength points.
- At least two German units (undisrupted) are within two hexes of an Allied pathfinder.
The Allied player receives one victory point if he can trace a series of connected road hexes from hex B0122 to any hex of Nijmegen that is free of German units and their zones of control. Subtract the Allied victory point (if earned) from the German points.
| Differential | Victory Level |
|---|---|
| 3 | Decisive German |
| 2 | Substantive German |
| 1 | Marginal German |
| 0 | Draw |
| -1 | Allied victory |
20.0 Drop of the British 1st Airborne Division, 17-18 Sept. 1944
This scenario depicts the activity of the British 1st Division on the first two days of the operation. The British 1st was assigned the Arnhem highway bridge as its main objective and, when communications failed while the troops of the 1st Parachute Brigade began their march toward the bridge, disaster began. German AFV appeared and, when the sun set, only a part of 1st Parachute Brigade occupied the north end of the bridge, and the following day's operations failed to reinforce that bridgehead.
[20.1] Scenario Length & Maps Used
The scenario begins with Phase 6 of the 1201 turn of 17 September and ends with the completion of the 1801 Game Turn of 18 September. The scenario is 10 game turns long and takes approximately 3.5 hours to play. Only Map A is used for this scenario, and there are German units that are required to exit the southern map edge; they may not return to play.
[20.2] Initial Deployments
German: Units from formations on the Northern Display A, B, C, and D.
Allied:
- Pathfinders (hex number): 1/1 A1814; 4/1 A2510; 1AL/1 A2416.
- Supply head: 1 A2420.
In England, (available to drop on Allied Movement Phase) Serials 36-46, group A1.
[20.3] Reinforcements
German (game turn and formation display code, as printed under "Game Turn Formation"):
- 4A, 6A, 7A, 8A
- 2B, 3B, 4B, 5B
- 4C, 5C, 6C, 7C, 8C, 10C
- 4D, 5D, 8D
- 7E, 8E
Allied: Game Turn 12: Serials 47-54, Group A2.
[20.4] Rules of Management
All Allied reinforcements arrive via air landing procedure.
[20.5] Victory Conditions
The German player is awarded a victory point for achieving each of the following conditions at the end of the scenario.
- Destroy 14 or more Allied strength points.
- Contain all Allied units in the northeast quadrant of the map, keeping them west of hex row xx26 inclusive and north of the Neder Rijn.
- If any German unit can observe any Allied Pathfinder marker.
The Allied player receives one victory point if he has at least one unit in all the following hexes: A1927, A2232 and A2728. Subtract the Allied victory point from the German victory points. Three = German decisive victory; two = German substantive victory, one = German marginal victory; zero = draw, minus-one = Allied victory.
21.0 Destruction of the British 1st Airborne, Sept. 19-21, 1944
This scenario extends the drop of the British 1st Scenario [20.0] to the point where reinforcement and resupply were no longer possible. After the disastrous actions of 17-18 September, the British position continued to deteriorate, and by the 21st, the day the Nijmegen bridge was finally forced, the British 1st was confined to a tiny perimeter centered on Oosterbeek.
[21.1] Scenario Length & Maps Used
The scenario is an extension of the Drop of the British 1st Scenario, and thus begins with Phase 6 of Game Turn 1 and ends with the completion of Game Turn 30. The Scenario is 30 game turns long and takes approximately 20 hours to play. Only Map A is used for this scenario. There are German requirements regarding exiting the southern map edge; certain units may return to play. [21.2] Initial Deployment
Same as 18.2.
[21.3] Reinforcements
Same as 18.3, plus:
German (game turn and formation display code, as printed under "Game Turn Formation"):
- 14A, 18A, 19A, 28A, 29A, 30A
- 11C, 12C, 26C
- 15E
- 12D, 18D, 22D, 25D, 26D, 27D, 29D
Allied: The Polish paratroop serials 55-58 Group C were scheduled to drop just south of the Arnhem bridges on September 19th (timing as shown on the game record track). Historically, bad weather in England prevented this and they subsequently landed at Driel (DZ K1422) on September 21st instead. Players can choose either option before starting play.
[21.4] Victory Conditions
The German player receives one victory point for each of the following.
- Destroy 45 or more Allied strength points.
- Place all Allied units out of supply (that is, cut them off from hex A2420, which contains the 1st Division supply head).
- Eliminate all Allied units north of the Neder Rijn. The Allied player is awarded two victory points if he occupies both ends of an intact bridge across the Neder Rijn, or both ends of a ferry crossing, and there are no German units north of the river within five hexes of the northern terminus. Subtract the Allied points from the German points.
| Differential | Victory Level |
|---|---|
| 3 | Decisive German |
| 2 | Substantive German |
| 1 | Marginal German |
| 0 | Marginal Allied |
| -1 | Substantive Allied |
| -2 | Decisive Allied |
22.0 The Breakout of 30th Corps
This scenario simulates the attempt of 30th Corps to smash through German resistance on the front line around the Meuse-Escaut Canal and drive up the road, thus linking with the units of the 101st Airborne Division. German resistance proved much heavier than expected, with both the number and caliber of German troops exceeding intelligence estimates. Among the real surprises was the presence of SS troops who were not thought to be in the area.
[22.1] Scenario Length & Maps Used
The scenario begins with Phase 5 of 1501 Game Turn of the 17 September (Game Turn 2) and ends with the completion of the 1801 Game Turn of the 18 September (Game Turn 15). The scenario is nine game turns long and takes approximately three hours to play. Only Map D is used for this scenario. Both players may receive points for exiting the map.
[22.2] Initial Deployment
German:
- S-U
- S-O
- See optional rule 15.9
Allied: Group Y (units of the Guards Armored, etc.) deployed anywhere south of the initial front line printed on the map.
[22.3] Reinforcements
German (Game Turn, then formation display code): GT 3: C-M.
Allied (Game Turn, then entry): Game Turn 6: 506th Regiment of the 101st Airborne Division enters on Hex D6117. These were required to exit Map C in scenario [18.0].
[22.4] Victory Conditions
The German player is awarded one victory point for achieving each of the following conditions by the end of the scenario.
- Destroy 30 or more Allied strength points.
- Exit units totaling 24 or more German strength points off either the west or east edge of Map D above the 21xx hex row.
- Prevent any unit of the Guards Armored Division from exiting off the north edge of Map D. Two points equals a German victory.
The Allied player is awarded a victory, regardless of German victory points, if he exits "intact" units of the Guards Armored off the north edge of the map whose total strength equals or exceeds 30. An intact unit is one that has not taken any strength point losses.
23.0 The Campaign Game
While the scenarios are fun to play, Highway to the Reich is best appreciated in its entirety as a Campaign Game. The objective of Operation Market-Garden was to gain a viable bridgehead across the Rhine (Neder Rijn), so Montgomery's army group could blitz the North German Plain in subsequent operations and thereby end the war before winter.
It was a daring concept that almost succeeded. If the operation had not been attempted in Holland, the airborne troops would have probably been used elsewhere, but not necessarily in one large drop, as with Operation Market. Hindsight has shown the plan had deficiencies, mainly in that the 1st Airborne was dropped "a bridge too far."
[23.1] Preparation
The four maps should be laid out according to the diagram in [3.3]. Both players should set up their Formation Displays. The Game Turn Marker should be set on Game Turn 1. The time is 1201 hours, 17 September 1944.
[23.1.1] Initial German Deployment
The German player should examine all the German Formation Displays, locate all units to be deployed, and place the units accordingly. Some units will be disrupted or entrenched (see key); the remainder must be placed on the map in Defilade Mode. See optional rule 15.9. [23.1.2] Initial Allied Deployment
The Allied player places the lead elements of the 30th Corps (Group Y) on Map D anywhere south of the initial front line. All those units except for 231st Brigade and 30th Corps artillery must be in Travel Mode (See [23.1.3]).
Allied airborne units are in "England" on the Formation Display, boxed in serials. All those units are considered available to the Allied player. Checking the Game Turn Record Track, the Allied player will find his lift point allowance is 32 on the first day. When play begins, the Allied player may introduce 32 serials into play during 17 September. The Allies receive 15 Lift points on September 18th (2nd day).
[23.1.3] Allied Unobserved Indirect Fire
On Game Turns 2 and 3, the British Player may conduct unobserved Indirect Fire as if they were observed barrages. These barrages must be conducted against units within three hexes of Club Route only. 30th Corps and attached artillery should be considered entrenched at the start of the opening turn 2 barrage.
[23.1.4] Special Flak Suppression
Prior to the actual drops on 17 September, the Allies devoted hundreds of aircraft sorties to suppress known German flak emplacements near the transport flight routes. Those missions had a large degree of success. To simulate that effort, the Allied player will roll a die over each German Flak unit on the map (regardless of terrain, entrenchments and stacks, etc.) prior to play beginning, with a roll of one through five indicating the flak unit is disrupted. The German player may not roll to remove disruption from those units until Game Turn 2.
[23.1.5] Campaign Scenario Optional Rule
The [19.5.1] rule restriction related to the 82nd Airborne regimental HQ locations for the first ten game turns can also be used in the Campaign scenario as an option.
[23.1.6] Allied Objective Hexes
There really is only one objective hex, and that is the bridge over the Rhine at Arnhem. Get 30th Corps over the bridge and you win; it is that simple. All other objectives were subordinate to that one goal.
[23.1.7] Multi-player Schedule
- 2 players: Forces controlled: 1. Allied; 2. German.
- 3 players: Forces controlled: Allied Airborne; Allied Ground; German.
- 4 players: Forces controlled: Allied Airborne; Allied Ground; German West Forces; German East Forces.
As further commanders are added, we suggest discrete Allied divisions be given separate commanders, first the airborne divisions, then the ground divisions.
[23.1.8] Release of Off-Map Allied Units
Allied ground units begin the game off-map may start entering play according to the conditions listed below. All units enter from the south edge of map D using roads.
- The Allied 43rd Division and the engineer units of 30th Corps are available the turn after any 30th Corps ground unit in supply is adjacent to the Maas River.
- The Allied 50th Division (aside from the 231st Brigade which is already in play) becomes available one turn after a 30th Corps ground unit has crossed the Neder Rijn River using a road and is in supply.
- The 8th Armored Brigade is available the turn after any 30th Corps ground unit has moved to within four hexes of B2935.
- The seaborne element of 52nd Lowland Division is available the turn after any other element of 52nd Lowland Division enters play anywhere on the game map.
- The 52nd Lowland Division is normally available two turns after any Allied unit has entered a hex of Deelen Airfield (A3724) in supply, and a 30th Corps ground unit has crossed the Neder Rijn.
[23.2] Early Reinforcement Trigger
There are three divisional formations on the Central German Organization Chart, they are the 84, 180 and 190 Infantry Divisions. When playing the Campaign Game, certain British actions may trigger the early release of any one or all these formations. If any Allied 30th Corps ground unit moves farther than 12 hexes from the Club Route, and that condition persists for more than one turn, the German player checks to see if an early release has been triggered. First check for the 84th Division, then the 180th, and finally the 190th. On a roll (1d6) of three or less, the 84th Division arrives within four game turns. Thereafter, if the condition persists, or is triggered again, the 180th is triggered on a roll of one or two. Finally, under the same conditions, the 190th Division is triggered on a roll of one. The divisions enter where they would ordinarily.
[23.3] Victory Point Schedule
Victory points are awarded for killing enemy strength points and capturing bridges.
[23.3.1] VPs for Killing Units
Each side receives one VP for eliminating a leg unit that does not belong to an Allied airborne formation. Two VP are awarded for every engineer, airborne, AFV or artillery unit eliminated. Three VP are awarded for every HQ or German Tiger VIb unit eliminated. Add one VP to each unit eliminated if it could not trace a valid supply path at the time of its elimination.
[23.3.2] VP for Geographic Objectives
For each bridge along Club Route controlled by a player, 50 VP are awarded if the bridge crosses a major river, or 25 VP if it crosses a canal. A player must control both ends of the bridge, and no enemy unit may be within three hexes of it. The Arnhem bridge is worth 75 VP.
[23.3.3] Totalling VP
At the conclusion of the last turn of the Campaign Game, each side totals up the number of VP it has accumulated. Each side's total is compared to that of the other and is stated as a ratio of German VP to Allied VP. Victory levels are determined as listed below. Note the Allied player may never win a decisive victory if he has no 30th Corps units across the Neder Rijn (in supply) by the end of the game.
[23.4] Victory Levels
Victory is determined by comparing the total victory points awarded to each player, stating the comparison as a ratio (German player to Allied player), and evaluating that ratio in comparison to the schedule below.
| Victory Point Ratio | Level of Victory |
|---|---|
| 3.0 or more to 1 | German Decisive |
| 2.5 to 2.99 to 1 | German Substantive |
| 2.01 to 2.49 to 1 | German Marginal |
| 2.0 to 1 | Draw |
| 1.5 to 1.99 to 1 | Allied Marginal |
| 1.01 to 1.49 to 1 | Allied Substantive |
| 1.0 to 2.0 [as printed] | Allied Decisive |
24.0 Starting the Campaign
The following information complements the detailed sequence of play and highlights actions specific to the first few moves of the campaign scenario.
Weather is clear on 17th and !8th September. [as printed] All units are in supply until 0600 on 18th September when supply rules are applicable.
German and Allied units starting the campaign on Map D do not become active until phase 5 (Allied fire phase) of turn 2.
[24.1] 1201 hrs September 17th (Turn 1)
[24.1.1] Allied Movement Phase
[24.1.1.1] Determine German flak unit suppression. See [23.1.4].
[24.1.1.2] Land pathfinders in their prescribed hexes. Place each serial of airborne units (1st British Airborne, 101st and 82nd divisions) in its intended landing hex as per the formation chart and air landing operation rules. Mark each serial with a dismounted marker and add a strength marker to indicate the number of unsuppressed flak units flown over on the way to landing via Northern or Southern routes.
[24.1.1.3] Once all serials in the lift have been allocated to a landing hex, use the landing table to determine if scatter or flak damage occurs and then determine casualties from landing in inappropriate terrain, adjust for over stacking and perform any Special German OF or CA that may be triggered as each serial is landed. All leg units land in concentrated mode and all artillery, AT and vehicular units in defilade mode. Once the landing procedure is complete, remove the dismounted marker and combat strength marker from the serial and repeat the procedure for the next serial. The serials can be processed in any order.
[24.1.1.4] Once all the lifts are completed, the allied airborne units can move in limited fashion (limited on the first turn only). The movement allowance is normal but maximum move distances are 2 hexes for leg units and 4 hexes for any vehicular movement. Close Action is permissible if a unit has sufficient MA or the attackers are adjacent to enemy units.
[24.1.2] Allied Organization Phase
The mode of Allied units can now be changed if required in keeping with the standard SOP.
[24.1.3] German Fire Phase
Eligible units can fire.
[24.1.4] German Movement Phase
German units that start on the map must roll a 1d6 to determine their movement allowance (unit by unit) for Game Turns 1 and 2. On Game Turn 3, those units roll a 2d6 to determine their MA. Mode changes for units starting on the map can be made in the Organizational phase of Turn 2. Combined with the mandatory defilade mode, this means movement is severely restricted for units starting on the map on Turn One.
However, German units entering as reinforcements may operate normally with no restrictions.
[24.1.5] German Organizational Phase
There is very limited scope to change unit mode. All German units that started any scenario (including the Campaign game) on the map, including artillery and HQs, must stay in defilade until the organization phase of Turn 2. HQs and artillery that start in defilade must remain in that mode on day one unless they are assaulted and forced to retreat.
[24.1.6] Allied Reaction Phase
[24.1.6.1] Eligible units can fire.
[24.1.6.2] Allied units that did not conduct fire combat may move, but leg units may never move more than two hexes, and other units a maximum of four hexes. Units may perform Close Action. The German player may perform OP/Ambush fire if conditions permit.
[24.2] 1500 hrs Sept 17th (Turn 2)
The normal SOP is followed but there is no weather determination phase or CP and logistics phase.
[24.2.1] German Reaction Phase
[24.2.1.1] Eligible units may fire.
[24.2.1.2] German movement allowance on turn 2 for units that began turn 1 on the map is again determined by 1d6.
[24.2.1.3] German units starting on the map must remain in defilade. German units arriving as reinforcements are not restricted in this way.
[24.2.1.4] Usual restriction of leg unit movement to 2 hexes and motorized units to 4 hexes applies.
[24.2.3] Allied Command Phase
Normal procedure except there is no need to assess supply status.
[24.2.4] Allied Fire Phase
Normal procedure. In addition, the British XXX corps artillery may conduct unobserved Indirect Fire as if they were observed barrages against enemy units within 3 hexes of Club Route only. See [23.1.3].
[24.2.5] Allied Movement Phase
Normal procedure but take note of Allied movement restrictions on Club Route (see [8.2]) and for airborne units (see [8.3]).
[24.2.6] Allied Organization Phase
Normal procedure.
[24.2.7] German Command Phase
Normal procedure except no need to assess supply status.
[24.2.8] German Fire Phase
Normal procedure.
[24.2.9] German Movement Phase
Reinforcements move normally but MA for units starting on the map is determined by 1D6. Take note of the specific German movement restrictions in section [8.1].
[24.2.10] German Organization Phase
Units starting on the map in defilade may now change mode if desired. Reinforcements may change mode as usual.
[24.2.11] Allied Reaction Phase
Normal procedure.
[24.3] 1800 hrs Sept 17th (Turn 3)
Normal SOP with the following variants.
[24.3.1] The restriction of German MA for units starting on map continues but is determined by 2D6 and reverts to normal on move 4.
[24.3.2] 30th Corps artillery can still indirect fire unobserved without penalty this turn.
[24.4] Fourth and Fifth Turns These are night turns. Normal night turn rules apply for turn 4 but no movement of 30th corps units is allowed on turn 5.
[24.5] 0600 hrs September 18th (Turn 6)
This is the 0600 hours turn on 18th September. The normal SOP is applied. Supply rules are introduced this turn (but note the graduated introduction of CP and AmP for the German army as detailed in [5.2.1]).
25.0 Additional Game Markers
Although not included in the game, additional markers help game management. These include game turn, fired, moved, out of supply, debris/rubble markers, fatigue, airstrike markers, ferry construction markers and colored mini dice or blocks to highlight the position of HQs. Colored strength point counters are also useful for indicating the CP status of HQs below divisional level rather than constantly referring to the Formation Display (see System rules [14.0]). All these additional markers can be made or borrowed from other games. Paper and pencil are also useful to track re-assigned units/formations and record when time dependent actions should occur e.g. replacement of destroyed HQs (System rules [17.4.4]) or number of turns that Allied airborne HQ are out of supply (see Scenario rules [5.1.4.1]).