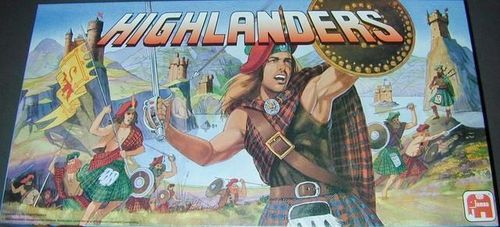
Highlanders
Highlanders Rulebook
Table of Contents
Table of Contents
Game Objective
The goal of the game is to conquer the most castles. To do this, players must combine the Knights they bring into the game into strong groups; for only the strongest groups will have a chance to drive the defenders from their castles. At the end of the game, the player with the most valuable (strongest) castles will win. The strength of each castle is shown by the number of swords next to it.
Contents
- 105 Knights (21 of each color)
- 1 Knight (12 small figures) – 2 Knights (5 medium figures) – 5 Knights (4 large figures)
- 30 Defenders (Shields 6 of each color) worth 0 – 0 – 0 – 1 – 2 – 3
- 1 Game Board
- 1 Die
- 1 Rulebook
Preparation
Lay the game board out on the table. The board depicts 18 castles along the Rhein River with connecting paths and path markers. Also shown are six starting areas with a coat of arms numbering from 1-6. The swords next to the castles represent their defensive strength (the number of swords or the number in the shield from 1-3).
Each player chooses a color and takes all the corresponding Knights and shields of that color. All the Knights are placed next to the players. The defense shields are placed face-down in front of the player; the underside of the shield shows a strength value of 0, 1, 2, or 3 Knights.
Choose a player to start the game. Game play will continue from this person in clockwise order.
Game Play
Summary:
On their turn, each player will roll the die once. One Knight will be brought into play on the starting area corresponding to the die roll.
The player may now move his Knights a maximum of 3 areas.
During the movement action battles may occur between players.
Battles may also occur when attempting to take possession of a castle.
The following are detailed explanations of the various game phases:
1. Bringing Knights into the Game
The player whose turn it is rolls the die once. The player then places one (1) Knight on the starting area (showing 1 to 6 shields) corresponding to the die roll number.
Example: A player rolls a 4 on the die. They place one Knight on the start area showing 4 shields.
Start areas are the only locations on the board where Knights from different players may be collocated.
Battles are not allowed on the starting areas.
Once a Knight leaves a starting area, they may never reenter any starting area.
Important: You may not place a Knight on a starting area for the number rolled if you already have a Knight in that area (from a previous turn).
2. Moving your Knights
Movement follows the placing of a Knight in a starting area. Knights may move along the white dotted lines from the starting area to a connected path marker space and beyond. The direction of movement may be freely chosen. Each player receives three moves that they may divide as they like among their Knights.
(Depiction 1: shows a move from a start area to an adjoining path marker.)
(Depiction 2: shows two moves along two adjoining path markers.)
(Depiction 3: if more that one Knight is in a space, they may all be moved together to an adjacent path marker and this only counts as one movement per space moved for the entire group.)
Game Tip: Since your Knights are entering the game at scattered starting areas, it is an important game element to bring them together into stronger groups.
Anytime you have two (2) or five (5) Knight figures together in a space, you may freely exchange them for a larger corresponding figure (you may also break them down if necessary).
3. Battles on Path Marker Spaces
Only figures of one color may every occupy a single path marker space. You may not pass through or jump over a path marker occupied by an opponent's Knights; they work as a blockade and must be beaten in battle.
You can only defeat an opponent's Knights by having at least one (1) more Knight than they have in a path marker space. For example, one Knight on a path space may be defeated by two; two knights are defeated by three, and so on.
Defeated Knights are returned to a player's stockpile. On their next turn they will be available again to bring into the game.
Important: A player may achieve the required majority to win a battle by bringing in Knights from multiple directions. However, you may not exceed the three movement points in order to do so. (See example in rules.)
4. Conquering an Unoccupied Castle
All castles start the game with an inherent defense, even if there are no Knights on their space. The defense strength of a castle is shown by a number of swords (or the number on the castle shield).
- 1 Sword = 1 Knight
- 2 Swords = 2 Knights
- 3 Swords = 3 Knights
The castle defenders will yield when a player has at least twice the number of Knights on the path marker leading to the castle and at least one movement point remaining to move into the castle. For example, this means that a castle with three swords can only be occupied when at least six Knights are on the space in front of the castle and still have one movement point remaining (see photo in rulebook).
If you have met these requirements, to conquer the castle you need move only a minimum of one Knight into the castle. Conquered castles must always be occupied by a minimum of one Knight. Additional Knights may be moved into or out of the castle normally so long as one Knight always remains in the castle.
When a player conquers a castle they may immediately place a defender (the small shields) into the castle. If a player chooses to place a shield:
- The player mixes up their face-down defender shields.
- One of the shields is drawn randomly. Only the owner of the shield may look at the strength on the underside to see its value.
- Place the chosen shield face-down onto the castle space. These defenders may never be swapped out or increased with additional shields.
Of course you may also conquer castles occupied by other players. That's covered next.
5. Defending your Castles
Once a castle is in your possession it must be defended by a minimum of one Knight and (perhaps) a number of defenders. The number of defenders is known only to the occupying owner (the value under the shield).
Important: The numbers of swords next to a castle no longer determine the strength of the castle. Now only Knights and defenders in the castle will count.
If you want to conquer a castle occupied by an opponent you must have a force of Knights that is double the number of defenders in the castle and occupy the space leading to the castle with at least one movement point remaining. After declaring the attack, the defender turns over their shield.
The shield now remains face up for the remainder of the game (if the defender wins).
If the attacker has at least double the strength of the defender (Knights plus shield value) the castle surrenders (all defending Knights are returned to the owner's supply). The defender's shield is removed from the game and the victorious attacker occupies the castle as described in 4 above.
If the attacked has less than twice the number of defenders the battle is lost and all the attacker's Knights are removed and returned to their owner's supply.
German Rules Example: The castle is defended by 2 Knights and a shield. It could be a 0, 1, 2, or 3 defense value. If it's a 3 then the castle's total defense value is 5 and would require a minimum of 10 attacking Knights to be conquered.
Important: The attempt to conquer a castle counts as one movement point whether successful or not.
Ending the Game
The game ends immediately when the next-to-last castle is conquered by a player. This means that there is one castle remaining that has not been yet conquered by any player and is still defended by its inherent value. It doesn't matter how many times other castles may have changed hands between players.
Calculate the scores as follows:
- Players score the value of their castles
- Castles are worth as many points as the number swords next to them
- The value of the last unconquered castle is given to the player who triggered the end game
- The player with the most castle points wins
- If there is a tie, the player with the most Knights on the board wins
Unofficial Variants
These are not part of the rules translation. The translator recommends trying the game first without any changes to the rules. The mechanics in this game do favor creating larger groups of Knights to be successful in winning. The random rolls for bringing on Knights tends to even out among players and those who plan their movements well will be rewarded and the game truly is excellent the way it is. However, there are some good suggestions for mitigating the luck of the die or even shortening the game length. The translator posts a few of the best suggestions found on the web. They can be used individually or in combination.
- 3 Kings Variant: Each player receives 3 Knights which may be brought onto a starting area of their choice in lieu of rolling the die (1 per turn of course). This variant allows you to overcome bad rolls or to build a large force quicker in a selected are.
- Quick 6 Variant: The game ends when one player has placed their 6th shield (note they may not have 6 castles if they lost some in battle to opponents). This variant allows for a quicker game and perhaps a strategy of grabbing 6 low cost castles fast to end the game before other can acquire castles of better values. Also with this variant, nobody gets a free castle for triggering the game ending.
- Pillaging Variant: When a castle is captured, the entire capturing force must enter the castle and cannot move any further that turn. This will effectively increase movement required for the capturing force as all of them must move in and move out again on the next turn thus slowing down larger forces.
- Attrition Variants: There are a number of variants out there allowing for mild attrition to severe attrition of attacking forces in battles. The translator likes the following the best: The defender loses all their Knights. The attacker loses as many Knights as the defender (Knights only not shields). So if you attack a force of 1 with a force of 3 you lose one Knight. If you attack a force of 2 with 3 Knights, you lose two Knights etc. Note that you won't lose any Knights attacking an unoccupied castle as there are no defending "Knights", and would only lose as many Knights as a defender has garrisoning an occupied castle. Empty castles would still make for an easy grab but this variant could take a bite out of big forces when they attack an enemy occupied castle as well as making you think twice before attacking small forces with just a +1 advantage.
- My Shield My Choice Variant: When placing a shield onto a conquered castle you may decide what shield value to place. The value still remains hidden until that castle is attacked.