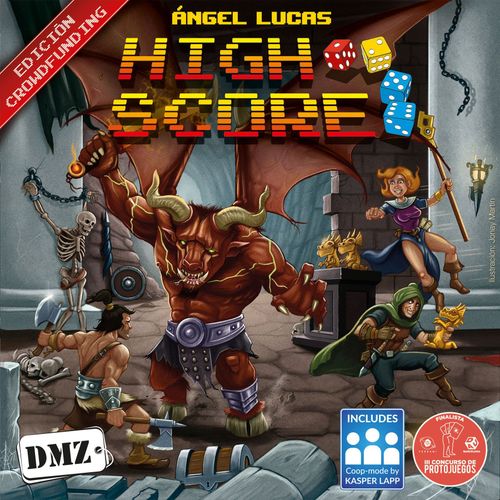
High Score
High Score Rulebook
Table of Contents
Table of Contents
1. Components
NOTE: As you can see, there's a lot of different cards and, as you read this rulebook, you may wonder what to do with some of them. High Score has a lot of game variants and many cards are designed to use on one or more of them, so don't worry if you don't know what some cards are used for. Just put them aside until a rule tells you how to use them.
- 12 gem tokens
- 7 characters (7 character stand-ups)
- 15 life tokens
- 30 coins
- 52 dungeon cards (13 / level)
- 16 final bosses (4 / levels 1-3; 3 / level 4; Azoz)
- 4 peddlers (1 / level)
- 47 equipment cards
- 9 bifurcations (3 / levels 1-3)
- 9 dead ends (3 / levels 1-3)
- 18 dice (5 red / blue / yellow and 3 black)
- 24 exploration tokens
- 12 wandering monsters + The Hunter
- 4 turn order cards
- 5 Game Over cards
2. Set-Up of the Game
For your first game you only need some of the cards in the game. Sort the dungeon cards by level but put aside the 4th. Do not mix the bifurcation and dead end cards! Shuffle the dungeon cards of each level separately and create each dungeon level by deploying the cards randomly as described on the graphic at the bottom (example of deployment for 1st level: a row of dungeon cards beginning with the characters' starting card, a peddler in its fixed position, a fork of two paths, and the final boss at the end).
There's one peddler per level. Put it in the position showed in the graphic. There's more than one possible final boss per level, so you should choose one randomly.
You will have many dungeon and final boss unused cards. Put them back in the box, you aren't going to need them.
Now that you have the dungeon ready:
- Deal a character to every player. You may do so randomly, by agreement or any other system you see fit.
- Put the character's stand-ups on the first card of the dungeon.
- Give to each player 1 coin, 1 gem and 3 life counters (4 in the case of the barbarian).
- Shuffle the equipment cards into one deck and put it near the dungeon.
- Leave the gem and coin pool near the dungeon.
- Leave all dice in the middle of the table, at hand's reach of all players.
- Return everything else to the box. You aren't going to need it.
- Choose a player to start the game.
3. Characters
Every character has an unique set of characteristics.
- Dice Pool: the character card lists the number of dice of each color you receive: red (Strength), blue (Dexterity), yellow (Cunning) and black (Magic).
- Lucky Die: If you get this result naturally on a dice of this color, you get 1 gem at the end of the test.
- Maximum Life and Special Ability: To use your special ability, you must turn the card 90º, to show it's already spent. In the final phase, you will straighten it again so it will be ready to use again on your next turn.
4. Game Play
Players play by turns until the objective of the game is accomplished. You must finish your turn before the next player's may start. Every turn comprise these phases:
- Initial phase
- Action phase
- Final phase
On the initial phase, you add as many dice to your pool as described on your character card. Example: Viggel gets 2 red dice, 3 blues and 3 yellows. During the game you may acquire some equipment that give you extra dice to your pool during this phase.
On the action phase you may try a test on the dungeon card you are in to advance to the next card. You may do that as many times as you like, and advance every time you succeed, until you run out of dice on your pool. How to deal with those tests is explained on the next chapter.
You may stop trying whenever you want. In this case, you announce that you rest and go to the final phase. Return any unused dice on your pool, straighten any cards you have spent (usually your character card, but some equipment also become spent when used) and pass the turn to the next player.
5. Dungeon Cards
Most of the dungeon cards ask you to succeed on a test to overcome them and advance to the next dungeon card. This test takes the form of a minimum result on specific die or dices.
Example: a card asks for a result of a given number on one blue die and a lower number on another blue die, at least. A roll that shows two dice both below the higher requirement is not enough, but a roll with one die meeting the higher requirement and the other die meeting the lower requirement is, since one is greater than the first and the other beats the second.
If there are two or more groups of dice separated by a slash symbol, you should choose one of them before attempting the test. You only need to overcome one of them to move to the next card.
Example (a monster card): This big but clumsy creature may be easily fooled with a magic trick (one black die), dodged with a little dexterity (one blue die) or you may fight against it (two red dice) to get its treasure.
If two or more groups are separated by a cross symbol, the first is the one you should overcome to succeed on this dungeon card and move forward. The group after the cross symbol is always optional (you may attempt it or not) and is resolved separately. This is the only reason to do two tests on the same dungeon card.
Overcoming some tests comes with a prize in coins and/or gems, depicted beside the test. It is possible, actually common, that the different groups of tests on the same dungeon card give different prizes.
To attempt a test, you must choose how many dice you want to roll. This is important, since you cannot add dice to an attempt after you make the roll. You may choose as many dice from your pool as you want, of the color you decide. Is usual to throw more dice than needed to improve your chances of success.
Once you make the decision, announce the test you want to attempt in case there's more than one and roll the dice. Compare your result with the test difficulty. If, for every die shown in the test, you can choose a rolled die that matches or exceeds it, you succeed and can advance to the next dungeon card. Remember that the color of the dice has to match as well, with two important exceptions:
- Yellow dice can be used to match blue or red dice.
- Black dice can be used to match any other dice color.
If you fail, don't despair, you still have some options:
- Your character ability may allow you to reroll or modify one or more of the dice.
- Some equipment allows you to reroll a die or modify the result of one or more of them.
- You may spend a gem to reroll a die of your choice.
You don't need to declare all your modifications at once. You may do that one by one and see the result before you decide your next action.
If despite this you fail to pass the test, you lose one life and should try again a test in the dungeon card if you want to move to the next one. If you lose all your life tokens, you are eliminated!!
NOTE: If your game group don't like elimination mechanics, when a player dies, move his character back to the next peddler or the first card of the level he is in, whatever is closer. He gets all his lives back and can keep his equipment, but obviously loses the rest of his turn!!
Pass the test or not, you lose all the rolled dice, so you must continue the turn with whatever is left on your dice pool.
If the dungeon card shows another test after a cross symbol, you may attempt it now before moving to the next dungeon card. This test is optional and differs from the others as follows:
- Succeed on it or not, you still move to the next dungeon card.
- You don't lose a life by failing on this test.
Usually this test appears on cards that depict a coffer. They represent your chance to stop and try to open it to get its contents, but you may also ignore them and press on. Your choice!!
Sometimes the dungeon will fork in two separate ways. You may choose the path you want to follow, but you cannot change it later on!!
If you overcome a test on the final boss of the 1st level, move to the first card on the 2nd. If you arrive to the 2nd level's final boss and overcome any of its tests, move to the first card in the 3rd level. If you defeat the 3rd level's final boss, the game's over and you most likely win the game (see 8. End of the Game and Victory).
If you run out of dice on your pool, or you don't have the appropriate ones, you should rest. Return all unused dice, straighten all your spent cards and pass the turn to the next player.
Example: "Viggel starts his turn with 2 red, 3 blue and 3 yellow dice. For the first test he decides to roll 2 blue dice and 1 yellow, to be sure. He gets a result sufficient to succeed and moves to the next dungeon card. He also gets a gem for his lucky die (a yellow die showing his lucky number). Now he decides to spend his 2 red dice against the goblin and rolls well, so he succeeds easily. Before continue, he tries to open the coffer with a yellow die. He rolls a low result, but uses his character ability to reroll a yellow die and obtain a good result, so he gets the coffer's coin and gem. By the time he gets to the third dungeon card, he only has a blue and a yellow die on his pool, enough to reach this coffer!! Rolls the dice and gets poor results. He discards one of the recently acquired gems to reroll the blue die and gets a good result. He cashes the coins from the coffer and moves to the next card, where he decides to rest, since he has no dice left on his pool!"
6. The Peddler
In every level there's an special card: the peddler. This dungeon card requires no test, but offers some advantages to the player who lands on it:
- You may heal by paying 2 coins per life token retrieved.
- You may buy equipment.
When you reach the peddler, draw five cards from the equipment deck and put them on the table. This is what the peddler has to offer to you this time. You may buy as many of this cards as you want as long as you can pay for them. You may use gems as coins (not the other way around), but remember that gems are very useful to reroll failed dices!
Put the equipment you bought beside your character card and return the rest to the deck and shuffle it. The next player will find a different offer.
You may stop and rest in this dungeon card if you choose to, but its effect will not activate again. It only does so when you enter!
7. Equipment
Equipment will help you to succeed through the dungeon tests. There are three main types of items, sorted by their use:
- One type adds dice to your pool. From the very moment you acquire the item, on every initial phase, you will get an extra die of the color shown on the item. You may put the card under your character, partially showing on the right side, as a reminder.
- The second type allows you, once per turn, to reroll a die or modify a result on one die. To use this ability, spend the card by turning it 90º as shown in the icon, to indicate that the ability cannot be used again this turn. On your final phase you will straighten this equipment to leave it ready to use on your next turn.
- This third type of equipment asks you to discard it to activate the effect. Return the card to the equipment deck when you do it. These objects have many different effects, from giving you extra dice to overcome a test or retrieve already used dice or lost lives, to modify a roll or give you a reroll.
8. End of the Game and Victory
The game ends when a player overcomes a test on the third level's final boss and, by doing so, defeats him. If there are players that haven't played their turn this round, let them do it. If, by the end of the round, only one player has defeated the final boss, he's the winner. If more than one player has managed to do it, compare their treasures by adding the value of the equipment and the unspent coins and gems. Whoever has the more treasure is the winner. If there's a tie on treasure, repeat the process but counting only the gems this time.
9. Optional Rules
Up to this point, you have all the rules needed to play a basic game of High Score, but this game has many variants and optional game modes. If this is your first game, we recommend you to play your game as we have already explained. If you are already familiar with the game, you may want to try one or more of the rules and game modes presented here. Several of this rules can be applied together, so it is important that all players agree on which rules you are going to use before start playing. Some are light alterations of the basic rules, while others offer a whole different way to play the game, so take your time to explore them.
9.1 Hidden dungeon cards
On the initial setup of the game, instead of deploying the dungeon cards visible to all players, you may put some of them face down and only turn them when a player enters on it. On a first game, we propose you just hide the final bosses, but on latter games, you may hide all the dungeon cards after the peddlers on the second and third level. This will make the life of the player ahead a lot tougher.
9.2 Variable Turn Order
After the first turn, determine the turn order by the relative position on the dungeon, being the player who has advanced less the first player and the one ahead, the last. Give turn order cards to every player as a reminder. After the last player in turn order has made his turn, the round is over and a new turn order must be determined. If two players are on the same dungeon card, their relative turn order doesn't change. Example: at the end of the round, the first player is still behind, but the second and third advanced the fourth player and are now on the same dungeon card. First player retains his position in the turn order, the fourth advances to second and second and third both gets down one position, to third and fourth.
Optionally, in this version the game ends immediately when a player defeats the last final boss and he wins the game. Be careful is you are ahead!
9.3 Insert Coin
This rule substitute the elimination rule on the basic game and adds some uncertainty when a character dies. When that happens, shuffle the 5 "Game Over" cards and start revealing them until the "new game" card is shown. Retreat the character one dungeon card per card revealed this way. It may happen that the character goes back to the previous level. Some Game Over cards also demands the loss of a coin, if able.
In any case, the player's turn ends immediately after this and he gets all his lives back.
9.4 Character special abilities
NOTE: We strongly advise you to use this variation in combination with rule 9.2 Variable Turn Order.
Every character card has an expert side. It shows an ability that allows you to interact with the other players' characters. You can only activate your ability once per turn, but is possible for it to resolve during other player's turn. All of them ask you to spend a die from your pool and, probably, to put it on a visible place like your character card or the dungeon card you are in. At the start of your next turn, you should discard the die even if you haven't used it. If you want to activate your ability, you have to spend the die again.
- Elbow hit: place a red die on your character card. When other character is about to leave the dungeon card you are in, you may roll the die: with the number shown on the card (or higher), this character loses a life.
- Shoot: place a blue die showing a 4 on a dungeon card directly in front or behind the one you are in. The first character to enter this card should attempt a test with your die as the difficulty (a blue die) or lose a life.
- Invisibility: place a black die on your character card. If other character is about to overcome this dungeon card and move to the next, discard the die to move with him.
- Thieving: spend a yellow die to steal a coin from another player in the same dungeon card as you.
- Trap: place a blue die showing a 3 on a dungeon card when you leave it. All difficulties on tests on this card also includes this die (so they increase in one blue die), except for the test after a cross symbol.
- Toll: place a red die on the dungeon card you are about to end your move on. Every character who leaves this card must pay a coin or a gem to you, if able.
- Blessing: Place a black die on your character card. The first time every other character activates his lucky dice, he must give you a coin or a gem.
9.5 Exploration Mode
In this mode, the shape of the dungeon is not defined at the start of the game but it rather develops as the characters explore it. To this end, modify the rules in 2. Set-Up of the Game as follows:
- Prepare a deck for every level be shuffling together the dungeon cards and the bifurcations of this level.
- Put aside the final bosses, separated by level. Do the same with the "dead end" dungeon cards.
- Also put aside the peddlers of the 1st and 2nd level, but shuffle the one of the 3rd level on his corresponding level's deck.
- Show the first dungeon card of the 1st level deck and place it on the table. If it's a bifurcation, shuffle it back and keep drawing until a non-bifurcation card appears.
- Place all the playing characters on this initial dungeon card and start the game as normal.
Whenever a character overcomes a test on the rightmost dungeon card, draw and place another dungeon card from the deck of the same level. If this card is a bifurcation, immediately add 1 final boss and 1 dead end to the deck and shuffle it. From this card on, there are two different paths and every character that passes through this point must decide which of the two paths he wants to follow.
If a character reaches a dead end card, he gets the reward shown and must fall back to a previous bifurcation and take the other path. To do this, must discard 1 die from his pool for every dungeon card he retreats. Other characters in the same path as this character can also retreat on his turn.
Example of dungeon exploration. Karthan reaches a dead end, finds 1 coin and must move backwards to the last bifurcation spending 1 die per step. Rhiarind, in her turn, may choose the path taken by Siranne or try the other one, still unexplored.
If a character defeats a final boss, he gains access to the next level. Deploy the peddler from the level you are leaving as the first card of the next level (the 1st level peddler serves as first card of the second level and the peddler from the 2nd level does the same for the 3rd level). From this point on, use the next level deck to keep building the dungeon. As in the regular game, if you defeat a boss in the 3rd level, the game ends.
As every time a bifurcation appears a new final boss card is added to the deck (along with a dead end), it is possible for different characters to gain access to the next level through different paths. They could even win simultaneously by defeating different bosses!
9.6 Solitary Mode
Azoz the Mad has gathered all he needs to summon the Beast of Chaos. If the ritual is finished, this world would be devoured along with anyone in it. Time is running short! You must get to Azoz and defeat him before he succeeds. Sure he will use his summoning abilities to unleash upon you creatures of all kind. Will you defeat them one by one or will try to avoid them to get to Azoz as soon as possible?
In this solo mode, you will play against the clock. You should apply all standard rules except for those lined here:
-
There will be only one character (you can choose!)
-
Set up the game as usual but substitute the final boss on the 3rd level by Azoz.
-
Separate the wandering monster cards by level, shuffle them and randomly choose 2 per level, without looking at them. Create a wandering monster deck by piling up the selected cards, the 1st level monsters on top and the 3rd level at the bottom. This deck should have 6 cards.
A wandering monster card shows: the monster's Movement and special ability; the monster level; and the tests for fight / dodge the wandering monster.
-
Add an extra phase at the beginning of the turn sequence: the Azoz Phase. On this, you must take the next actions, in order:
- Roll 1 die for Azoz. On a result of 3 or less, draw a wandering monster and deploy it in the first dungeon card of the third level (opposite to Azoz). If the result is 4 or higher, put a gem on one of the Azoz ritual icons. If there are no more creatures on the deck, don't roll the dice, always put a gem.
- Move all the wandering monsters towards the character as many dungeon cards as indicated in its movement capacity, by the shortest path (you choose if there's more than one option). All creatures that reach the character stop moving.
- Activate the wandering monsters abilities in the same level as the character.
-
If you are in the same location as one or more wandering creatures, you should deal with them before interacting with the dungeon card and, consequently, advance. You may choose to fight or dodge the creatures. Treat every creature as a test written in a dungeon card: if you fight and succeed, discard the creature. If you fail, you lose a life as normal. If you choose to dodge, you don't lose a life if you fail, but neither discard the creature in case of success, you have just dealt with it for this turn.
9.7 Fourth level
If three levels are not enough for you, don't worry! We have what you need. This 4th level is setup the same way as all the others: you can just deploy it when someone defeats the 3rd level final boss. Just take this into account:
- If you play with 9.1 Hidden dungeon cards, we suggest you deploy all the level face down, save for the peddler.
- This level cannot be played using the 9.5 Exploration mode, but this doesn't mean you cannot play the other three levels this way.
9.7.1 The Hunter: a solo mode for the 4th level
The Lord of the forest, known as The Hunter, is on your heels, and he never misses a prey, so you need to resort to desperate measures to escape! You go into the dungeon committed to go through it before he reaches you. You not only need to be faster than him, but you also have to deal with all the creatures he's going to unleash on you. Get to the 4th level, defeat the final boss and leave the dungeon before the Forest Lord hunts you!
This solo mode is played as the adventure against Azoz, explained on 9.6 Solitary Mode, with the next exceptions:
- You must use the four levels of the dungeon. Make the setup as normal, but you can hide part of the cards if you want more difficulty. Of course, Azoz is not used in this version.
- Prepare the wandering monster's deck the same way, but adding 3 creatures per level instead of 2. It means the deck will have 9 cards. Place The Hunter card beside the first card of the dungeon, just behind your character.
- Instead of an Azoz Phase, there is a Hunter Phase at the beginning of each turn, starting at the second turn (there is no Hunter Phase on the first turn). In this phase, you must perform the following actions, on this order:
- The Hunter calls for a hunt: If there are less than three wandering creatures on the table, draw a new creature and place it three dungeon cards ahead of The Hunter. If there are three creatures already, instead move all of them one dungeon card forward. If there are no creatures left to play in the deck, The Hunter gets +1 movement (keep track of this by placing a dice on the card).
- Move: Both creatures and The Hunter move forward their movement. Remember that creatures stop moving when they enter at the same location as the character. On the first move, the Hunter's move is to enter the dungeon.
- Run: Move The Hunter and all the creatures that are in a different (lower) dungeon level than the character one space forward. If they are at the same level, they don't advance in this step.
- You win this scenario if you arrive to the final boss of the 4th level and defeat it. You lose if you run out of lives or The Hunter reaches your location.
NOTE: This scenario is pretty difficult. If you have troubles with it, you may lessen the difficulty a bit by starting with 2 extra coins and 2 extra gems. (The printed icons are a coin and a gem symbol in the source; the exact pairing is as printed.)
9.8 Cooperative Mode
"When they told you the Drachemburg Mayor was hiring adventurers to get rid of the monsters that pestered the region, you thought it will be a piece of cake. Maybe you shouldn't have drunk so much at the welcoming party in the City Hall. More precisely, you shouldn't have drunk at all!! Now the major says there was poison on your goblets and he will give you the antidote only if you defeat the bosses on the town's outskirts. Better hurry, your belly is starting to ache!"
On this game mode, all players work together to defeat the monsters around the town. This time the adventure is not inside a dungeon but on the outside! You will play in the order you desire to try to open a path for your companions to reach the farthest objectives and defeat them. Hurry up, the time is running!
In this mode, the setup changes as follows:
-
Separate 12 dungeon cards, 1 peddler and 3 bosses for every level, 1st to 3rd, shuffle them separately and put them face down on the table following the pattern shown in the picture (a grid with a hollow in the center for the town; the printed pattern marks 12 and 3 card counts).
-
Besides the starting items every character gets at the start, reach through the equipment deck and separate the 3 heal potions. Any player at Drachemburg can use them at anytime, even if not his turn.
-
Place all player's stand-ups on the hollow in the center, representing the town of Drachemburg. Flip the 4 adjacent dungeon cards face up (diagonals are not adjacent).
-
Every round, players choose the turn order. It is not necessary to do that in advance, you can wait for the result of one player's turn to decide who's next.
-
On your turn, you may advance to an adjacent card and attempt a test on the card. If you succeed, place one of your character tokens on it and flip over all the adjacent cards still face down. You may keep moving to new adjacent dungeon cards and repeat the process as long as you have enough dices on your pool to do so.
-
On your turn, you can move on cards with an ally's character token (or one of your own) without having to attempt the test on them. Basically, you may move freely through dungeon cards already defeated this turn, either by you or by one of your allies.
-
When you enter a Peddler card, apply its effects normally (heal and buy objects as normal) and then place one of your character tokens on it, even if you don't use the peddler's services. As long as this token is on the card, nobody can activate the peddler abilities.
-
When you defeat a final boss, place a gem on it. This gem counts as a character token to all effects except that it's not removed at the end of the turn.
-
If you defeat a 3rd level final boss, draw and keep an equipment card as a reward.
9.8.1 Alternate Maps
If you want to test yourselves even more, you may use any of these alternate layouts. Every one shows the number of cards required and the number of bosses that need to be defeated to win. (Each level is shown as a map diagram in the printed rulebook.)
- Level 1: Each level: 12 dungeon cards, 3 bosses and 1 peddler. 2 players: 5 bosses (1 3rd level boss!); 3 players: 7 bosses; 4 players: 9 bosses.
- Level 2: Each level: 13 dungeon cards, 4 bosses and 1 peddler. 2 players: 6 bosses (1 3rd level boss!); 3 players: 9 bosses; 4 players: 12 bosses.
- Level 3: Each level: 13 dungeon cards, 4 bosses and 1 peddler. 2 players: 6 bosses (1 3rd level boss!); 3 players: 9 bosses; 4 players: 12 bosses.
- Level 4: Each level: 13 dungeon cards, 4 bosses and 1 peddler. 2 players: 6 bosses (1 3rd level boss!); 3 players: 9 bosses; 4 players: 12 bosses.
Equipment Icon Reference
- Add a die of this color to your pool on every initial phase.
- Turn this card 90º (spending it) to activate this card's effect.
- Discard this card to activate its effect.
- Reroll a die of this color.
- Recover a die you just rolled if it has this result.
- Recover an already used die of the color shown.
- Add as many points as shown to a die of the color shown.
- Add 1 to every rolled die of this color.
- Convert a die from the shown color from your pool into a different one.
- You cannot use a certain die on this test.
- You pay less per equipment.
- Every time you use a certain die on a test, roll an extra die.
- If you succeed on a test that requires at least a certain result, recover 1 life.
- Spend this card and lose a life to convert all dice of one color into another.
- Spend this card and discard a die to recover 1 life.
- Add a die to a test roll you are about to attempt.
- Add one of two dice to a test roll you are about to attempt.