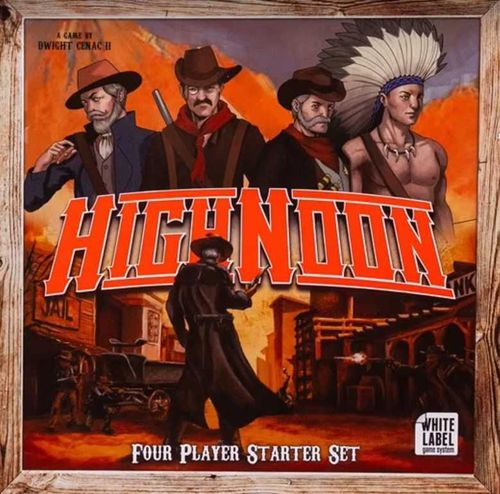
High Noon
High Noon Rulebook
Table of Contents
Table of Contents
Game Overview
There are two paths to victory in High Noon. A player is announced the winner/champion/best gun in the west if they possess the most gold at the end of the 12th round, or at any point in the game if they are the last posse standing.
Alternatively, players can continue the fight until one posse remains and is declared the Last Posse Standing.
High Noon is easy to learn and can be mastered in the first couple of rounds.
Game Components
- 14 Miniatures: Sheriff Garrett, Deputy Gates, Quentin LeRoy, James LeRoy, LeRoy Gang 1, LeRoy Gang 2, LeRoy Gang 3, Elsu, Kiyiya, Qaletaqa, Col. Rodgers, Rough Rider 1, Rough Rider 2, Rough Rider 3
- 61 Chips: 14 Red (x14), 35 Blue (x35), 12 Green (x12)
- 40 Gold Bars
- 18 Loot Crates
- 4 Starting Tiles
- 4 Road Tiles
- 4 Alley Tiles
- 1 Turn Counter
- 14 Character Sheets
- 144 Posse Cards
- 102 Loot Cards
- 1 Map of Saratoga
Character Sheets
Each posse has its own strengths, weaknesses, and styles of play. Every character within the posse has their own character sheet that contains the character's unique traits. Everything needed to know about a character is on their character sheet.
The character sheet shows:
- Character's faction
- Loot capacity: the number of loot cards the character may have in their inventory at any given time.
- Bounty: the amount of gold or Bounty that is rewarded to the player who eliminates this character.
- Speed: the number of Movement Points, or adjacent squares, the character may move each turn.
- Range: the number of adjacent squares the character may attack.
- Ammunition type: the ammunition type the character uses for their primary weapon.
- Health meter: the character's health, showing how many points of damage they can sustain. Red chips track health. Do not start the game with a chip on the 1st square.
- Death square: the final square marks the character's death and future career as a ghost pirate.
Ammunition
Ammunition can go a long way in how you decide your strategy throughout the game. Each character is predetermined with a specific ammunition type. Weapons that are drawn from loot crates also have a specific ammunition type. Pay close attention, as players may find that some loot cards are only compatible with other loot cards of specific ammunition types.
Ammunition types may perform differently from one another. The default qualities are:
- BODY: any attack without a weapon.
- BLADE: any edged weapon.
- PISTOL: generally a handgun.
- RIFLE: generally a rifle or long-gun. If the attack deals damage, the opponent takes an additional point of damage.
- SLUG: a round fired from a shotgun. Ignores one square of cover and doors.
Remember these qualities as they can make a huge difference in combat!
Loot Crates
Loot crates can be the game changer for any posse. Characters can use loot crates to enhance their abilities, keep themselves alive, or throw a wrench in their opponents' plans. Loot crates are identified by 3 categories and their corresponding icons: Rations, Weapons and Gear. Loot crates are also obstacles that hinder movement (see Phase 1: Movement) and provide cover (see Cover) during combat.
- Rations: items that are generally consumed for temporary boosts and buffs of a character's traits.
- Weapons: items that are generally used to substitute a character's natural attack from their deck.
- Gear: items that are generally used to permanently modify a character's traits or abilities.
Chips
Chips are integral to keeping track of nearly everything. They are broken down into three colors:
- Red: tracks a character's health.
- Blue: tracks the use of loot cards and cards with timers on them.
- Green: tracks poison and can mark the locations of objects and effects on the map.
Game Tiles
The board game is made up of various tiles. There are building tiles and terrain tiles. Players may choose to create their own map with these tiles or use predetermined standard maps. Maps must include the tiles that are designated to each posse as their starting locations in the game.
Sweetwater Gulch (Starter Map)
For a quick setup without much thought, consider this map to start off your first games with High Noon. The small dustball town of Sweetwater Gulch is where it all started anyhow!
Believe it or not, this set-up is also pretty balanced for everyone. Although the Rough Riders find themselves surrounded and out in the open, they're also entrenched in plenty of cover, while Elsu's Warband has range and plenty of options to move around the board.
Ultimately, however the map looks is entirely up to you. Try out any number of combinations and have fun with it.
Building Tile Elements
- Walls: walls form the box around buildings and block all objects from Line of Sight (see Line of Sight). You can't shoot through them, loot through them or move through them.
- Doors: doors allow players to enter and exit buildings and rooms without penalty. Even though there is no penalty to move through them, doors are always presumed to be shut. Like walls, you can't shoot through them, unless your ammunition is a slug. Doors may look different from building to building, but they should always be obvious as to what they are.
- Windows: windows are denoted by light shining on the floor of the adjacent space. From the adjacent marked space, windows act as Cover (see Cover) and provide Line of Sight (see Line of Sight) as normal. Players are able to move their gunslingers through windows for the penalty of 1 point of damage, but do not incur a movement penalty.
- Misc. Barriers: barriers are walls you can see and shoot through as if they were obstacles. In the example on the tile sheet, the walls of the jail cells are barriers.
Game Setup
Perform the following steps to set up each game:
- Each player chooses a posse.
- Place red poker chips beside each posse character sheet.
- Shuffle all posse decks face down.
- Shuffle all loot decks face down.
- Shuffle all loot crates with the "Looted" side facing up.
- Decide the first player. The LeRoy gang always goes first. If not in play, players decide who goes first.
- A good method is to flip the first card over from the top of each player's deck, and the player with the highest attack goes first. Otherwise, make up your own rule, such as "the player to watch a western most recently goes first." Then proceed clockwise from there.
- Starting with the player going last, and moving in reverse order, players take turns placing game tiles on the table, connecting each tile by at least one square until their desired map has been created.
- The map must include all players' starting tiles and at least one additional tile of any kind per player.
- Make sure there are no gaps between tiles as much as possible. Any remaining gaps block Line of Sight.
- Place loot crates ("Looted" side up) on all the Loot Squares (marked in Green) on the board.
- Each player takes 3 additional loot crates (do not look at them).
- Place all characters on their starting locations as indicated on their starting tiles.
- Each player then places the additional loot crates ("Looted" side up) on the board, one at a time.
- Loot crates must be at least 4 movement spaces (see Phase 1: Movement) away from any other loot crates or characters.
- Discard all remaining crates and flip over all crates on the board to reveal what they are.
Unconnected tiles: the example shows a blank space between Sheriff Garrett and James LeRoy. Because of that gap, neither character has Line of Sight and neither may attack.
Placing crates: the example shows crates placed at least 4 Movement Points from other crates and characters (see Phase 1: Movement). In the example, Crate 1 is 4 Movement Points away from both Elsu and Qaletaqa and 5 points away from Kiyiya. Crate 2 is 4 points from Qaletaqa and 5 from Kiyiya. Because of the cover between Elsu and Crate 3, Crate 3 is also 4 points away from both Elsu and Crate 2. All of these crates meet the minimum requirement for placement.
Playing the Game
High Noon takes place over 12 rounds or until only one posse remains. Each round consists of players taking turns in clockwise order. Each turn consists of the following 3 phases:
- Phase 1: Movement
- Phase 2: Action
- Phase 3: Draw 3 Cards
Phase 1: Movement
During the Movement Phase, all characters in your posse may move a maximum number of squares as specified by their Speed value on their character sheet.
Example: Col. Rodgers has a Speed of 4, so he may move up to four squares on the board. The illustration shows how many Movement Points are required for Col. Rodgers to reach each square.
- Players may move forward, backward, left or right. There is no diagonal movement in High Noon.
- Characters may move over obstacles (squares marked orange) or Loot Crates for a movement penalty of 1, making the total movement point value required for those squares 2.
- Obstacles are objects in orange squares, as well as Loot Crates. Obstacles may provide cover as well as causing a movement penalty to travel through.
Once all movement is resolved, move on to Phase 2.
Phase 2: Action
Once the movement phase is over, each character in a posse is allowed one action and as many Free Actions as they wish during the Action Phase.
Card actions come in 4 forms:
- Playing an attack card face-up to initiate combat.
- Playing a Special ability card.
- Using a weapon card equipped to a posse member to initiate combat.
- Using an item card for its effect.
Cards marked as Free Action do not count as an action when played, but they must be played during the Action Phase.
Actions can be any of the following:
- Play a card: see the card actions above.
- Loot a crate: draw three cards from the corresponding loot deck (identified by the icon on the crate). Select one of the cards and discard the other two. The selected loot card is then placed face-up next to the character sheet of the looting posse member. As long as it is in the game, everyone gets to see what it is and who has possession of it. Once a crate is looted, flip the crate over so the "Looted" side is face up. Looted crates are not removed from the board, because they also act as an obstacle that can hinder movement or provide cover.
- Loot a body: when a character is in possession of loot when killed, the miniature is tipped on its side on the board where they died. Dead characters hinder movement just like obstacles, but do not provide cover. Anyone adjacent to their body may loot it for any or all of their loot. Once the body is looted, remove the miniature from the board.
- Equip an item: some loot cards, such as armor or a rifle scope, require an action to equip (unless noted as a Free Action) before they can be used. To equip the item, announce that you are doing so and place a blue poker chip on the card to indicate it has been equipped.
- Pass an item: a character may use their action to hand off an item card to an adjacent character on the map. They may pass as many items as they wish to another character in that action, but they may only pass those items to one character.
Drop an item is a Free Action: a character may drop any or all loot from their inventory. Those items are considered broken or lost in the chaos and must be discarded to the appropriate decks they are associated with.
Dead characters are removed from the board, as noted under Combat, when they are killed; a character whose red chip reaches the skull-and-crossbones square is dead.
Phase 3: Draw 3 Cards
Once all actions have been taken, the player must draw 3 cards. The most cards a player can have in their hand is 12 cards, and drawing 3 cards must be done all at once. If a player has more than 9 cards in their hand at the Draw 3 Cards Phase, they must discard down to 9 cards before drawing the 3 cards.
Example: Mary has 11 cards in her hand. She must first discard 2 cards in order to draw 3 cards.
Once you have drawn your 3 cards, your turn ends and it is on to the next player!
The Cards
High Noon has 3 card types: Basic, Special and Loot.
- Basic and Special cards exist in your posse deck and may only be played by the associated character. If the character is not on the board, the card cannot be played.
- Loot cards may only be used by the character who has the loot in their possession.
Each Basic card has an Attack value and a Defend value. Basic cards can be used as attacks on your turn or for defense when you are being attacked. When played as an attack, use the Attack value. When played as a defense from an attack, use the Defend value.
Special cards have descriptions of what they can do and when they can be played. If a Special card allows you to deal combat damage, it is still subject to the game's standard rules. For example, to use the combat damage on Sheriff Garrett's Return Fire, the target must still be within Range and Line of Sight of Sheriff Garrett.
Once a Basic or Special card has been played, it must be placed in the player's discard pile. When all cards have been played, the discard pile may be reshuffled as the new deck to draw from. It is best to create a discard pile face up, so it does not get confused with your draw deck.
Loot Cards
Loot cards have 4 types: Weapons, Gear, Consumables and Ammunition.
- Weapons
- Any weapon may be used by any Posse Member, regardless of their base ammunition type.
- Weapon cards may be used to initiate an attack without playing a posse member's Basic or Special card.
- Weapons have a limited number of uses, marked by the number of empty boxes on the card.
- For the first use, place a Blue Chip in the top left box. For subsequent uses, move the chip from left to right until all boxes have been used.
- Once a weapon has no uses left, it may be discarded.
- Gear
- Once a Gear card has been equipped, mark it with a Blue Chip.
- If the Gear card has Usage Boxes, it no longer functions and may be discarded once all uses have been fulfilled.
- If a Gear card modifies a specific weapon type (marked by an ammunition type), then it may only be used on that weapon type. This can be either a weapon card or a character sheet with the correct ammunition type.
- Consumables
- Consumables are one-time uses.
- After using the ability of a Consumable, it is discarded.
- Ammunition
- Ammunition cards are used to buff an attack from a Weapon Card or Posse Member with the matching ammunition type.
- For the first use, place a Blue Chip in the top left box. For subsequent uses, move the chip from left to right until all boxes have been used.
Combat
When the red chip reaches the final square on a character sheet marked with a skull and crossbones, that character is dead and must be removed from the board. If they possess loot, keep them on the board and tip them over.
Objects in orange squares, as well as Loot Crates, are considered obstacles. Obstacles may provide cover as well as causing a movement penalty to travel through.
For combat to begin, the target must be:
- Within the attacker's Range (noted on the Character Sheet or on the Weapon Card being used).
- In Line of Sight: straight orthogonal or diagonal lines from the attacker.
In the Line of Sight illustration, Quentin may only attack the Rough Riders marked in green. The Rough Rider in red is neither in a straight line nor diagonal from Quentin and thus is not in his "Line of Sight."
Combat Steps
- Combat Initiation a. The active player announces the attacking posse member and a target enemy within Range and Line of Sight. b. The active player chooses whether they are attacking with a card from their hand or a Weapon Card equipped to the attacking posse member. i. The player puts a Basic or Special attack card down face-up. ii. If using a Weapon Card, the player announces to the opponent which Weapon Card they are using. c. If the active player has an applicable Ammunition Card, they announce whether they are using it in combat and advance the Blue Chip.
- Defense Declaration a. The defending player chooses whether or not to play a Defense Card, playing it face-up.
- Combat Resolution a. Total Attack Value = Attack Value of the card played plus any modifiers from ammunition or abilities. b. If the defender is behind cover, the Attack Value is divided by 2 (rounded up). c. Total Defense Value = Defense Value of the card played plus any modifiers from Gear or abilities. d. Damage = Attack Value - Defense Value. e. Damage is assigned: i. First, to any damage-absorbing Gear, by moving the Blue Chip 1 space for each absorbed damage. ii. Second, any remaining damage is assigned to the defender's character sheet by moving the Red Chip 1 space for each damage taken.
Example: Quentin LeRoy attacks Rough Rider 2 with an Attack value of 4, and Rough Rider 2 defends with a Defense value of 3. 4 - 3 = 1, so Rough Rider 2 takes 1 point of damage and moves his red chip from left to right 1 square.
Cover
Example: Col. Rodgers attacks Quentin LeRoy with an Attack value of 3. Between Quentin and Rodgers is a wagon, providing Cover, halving Rodgers' attack. 3 ÷ 2 is 1.5. 1.5 rounded up is 2, therefore Rodgers' final attack value is 2.
- A Posse Member gains a cover bonus if: a. There is cover between them and the attacker (see the example below). b. The attacker is not sharing the same obstacle as cover.
- The Cover Bonus divides the Attack Value in half (rounded up) before the Damage Resolution step of Combat.
Similar to objects, characters may fire through their own teammates with a cover penalty. But they may not fire through opponents.
In the example, Quentin has tactical advantage of Cover against Col. Rodgers. However, because there is a clear diagonal Line of Sight from the Rough Rider, there is no obstacle in the way and Quentin gets no Cover advantage against the Rough Rider.
Combat Through Windows
Windows function similarly to obstacles during combat. If a character occupies a square with a window, they are considered adjacent to it, and their attacks through the window deal full damage. However, characters attacking through a window from non-adjacent squares will suffer the cover penalty.
Line of Sight Through Windows:
- Adjacent to the window: if a character is on a square that directly shares the window, they may shoot through it in both straight and diagonal lines.
- Not adjacent to the window: if a character is not on a square that shares the window, they may only shoot straight through the window (no diagonal shots are allowed).
In the illustrations, Qaletaqa is on a square with a window and his attacks are full strength. Col. Rodgers is not adjacent to the window and his attacks suffer the Cover Penalty. Deputy Gates is on a square with a window and may attack Quentin LeRoy, James LeRoy or LeRoy Gang 1. None of the LeRoy Gang Members are adjacent to the window, so only Quentin LeRoy can attack straight at Deputy Gates.
Scoring Points and Winning the Game
At the end of 12 rounds, the player with the most gold wins. Gold is collected in two ways:
Dealing Damage
If a player deals at least 1 point of damage to an opponent's character on their turn, they earn 1 gold, regardless of the amount of damage dealt that turn. Dealing additional damage does not earn more gold. Gold is not awarded for self-inflicted damage.
There are times when a defensive player can play a special card that can deal damage to an attacker. Gold is not awarded to the defensive player in those instances. You may only earn gold for causing damage on your own turn.
Example: the attacking player deals damage, but the defending player plays a card that deals damage to the attacker. Only the attacking player is awarded 1 gold.
Killing a Character
When a player kills a character, they earn gold in the amount equal to the Bounty shown on that character's sheet. In instances where a defending character has killed an attacking character, the Bounty gold is awarded to the defending player.
Example: the attacking player kills a character, and in defense a character on the opposing posse has an opportunity to play a card to retaliate and kills the attacking character. Both players are awarded gold in the amount corresponding to the characters that they killed.
You can't take your gold with you when you die. To win by gold, at least one member of your posse must survive.
Dealing With a Tie
In the event of a tie at the end of the 12th round, follow these steps to determine the winner:
- Add the gold value of all surviving characters in your posse.
- If still tied, add the remaining health points of your surviving characters.
- If still tied, count the number of remaining loot cards.
- If there is still no winner, it is a draw.
High Noon Constitution
We hold these truths to be self-evident, that just about anything can be contested by just about anyone - that it is impossible to conjure every possible instance wherein a regulation ought to be institutionalized - that to secure an experience of enjoyment among players, no session shall be held hostage to unwritten uncertainties - that, at the end of the day, it not be forgotten High Noon, even in its most refined form, is just a game.
Any circumstance or mechanic not specifically covered in this rulebook (or any High Noon supplement) is up to the players at the table to decide.
A tiebreaking vote goes to the player who brought the pizza.