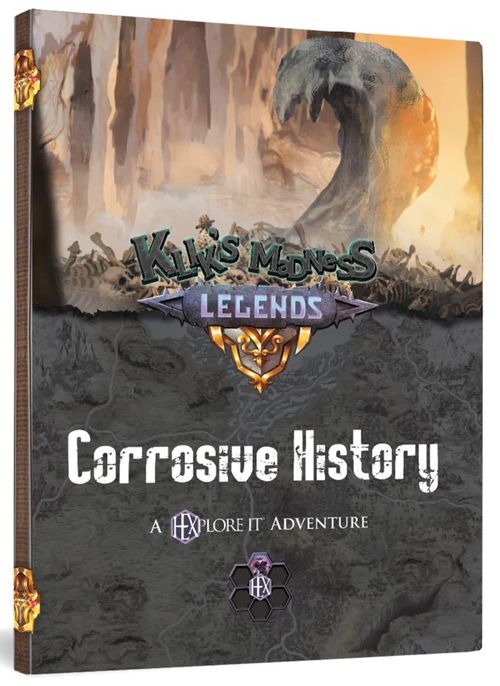
HEXplore It: The Valley of the Dead King – Klik's Madness Legends: Corrosive History
HEXplore It: The Valley of the Dead King – Klik's Madness Legends: Corrosive History Rulebook
Table of Contents
Table of Contents
- Rules Refresher
- Legend Rules
- Game Turn Sequence
- Legend Setup
- Appendix A: Statuses & Campaign Items
- Appendix B: Purchasable Items
- Appendix C: Circumstance Tables
- Appendix D: Campaign Opponents
- Appendix E: Campaign Allies
- Appendix F: Hero Sheet and Story Tracker
- Appendix G: Conditions
- Source Notes and Gaps
Rules Refresher
Refer back to these references when you need to look up a game mechanic in Klik's Madness.
- The Timer & Restore Deck (page 6)
- Reading Chapter Passages (page 7)
- Hero Death (page 8)
- Game Turns (page 12)
- Conditions (page 16)
- Keywords (page 16)
- Combat (page 18)
- Swarms & Hordes (page 19)
This Legend relies on the Klik's Madness Campaign Book for many rules. You will need to be familiar with the rules of Klik's Madness, and this Legend may refer to that book periodically.
Legend Rules
Game Turn Sequence
The Game Turn Sequence is unchanged from Klik's Madness. See page 4 for a thorough reminder of this sequence.
Sunrise > Movement > Skill > Event > Villain
Appendices
Several Appendices appear at the back of this Legend. Refer to them whenever necessary.
- Appendix A: Statuses & Campaign Items
- Appendix B: Purchasable Items
- Appendix C: Circumstance Tables
- Appendix D: Campaign Opponents
- Appendix E: Campaign Allies
- Appendix F: Hero Sheet and Story Tracker
- Appendix G: Conditions
Each of these Appendices is also available for download, so that you may print and use them during your adventure.
The Timer Deck
Restore points are common during play, but it will be important for you to keep enough cards in your Timer deck! If you must Advance but the Timer Deck is empty, read 098. If you have Employed, read 018 instead.
Hero Death
It is important to keep your heroes healthy! Be sure to Heal any lost Health or Energy as often as you can. Heroes who die during the adventure may be Revived in Shrines. If all heroes die, read 007.
New Heroes Mid Adventure
You may bring new heroes into your group during the Event phase while the group is in a City or Shrine.
Heroes created mid-campaign gain the same starting bonuses as heroes made at the beginning of the Legend.
Hero Revisions
Refer to page 31 of Klik's Madness for a comprehensive list of Hero Revisions and add the following:
Summoners
The following Roles have further slightly altered abilities:
- Beastmaster / Beast Lord: Begin with either Monstrous Rats or Silk Spiders in your Pack. Treat any Creature gained in combat as vanquished, but do not gain their rewards.
- Necromancer: Begin with any Level 1 non-Swarm/Horde opponent in your Dark Legion. You must pay for this from your Risen Pool.
- Shaman & Summoner: All Encounters on the "All Other Locations" Encounter table in Appendix C are available to you. However, you may only Summon an Encounter with a Level up to half of your First Mastery rank. (i.e. If you have a First Mastery of 5, you may only Summon an Encounter up to Level 2).
Strengthen Keyword
Heroes may only trigger the same Strengthen effect up to 6 times during this Legend.
Statuses
You will gain several Statuses during play. Track these on the Status Tracker found in Appendix A.
Items
- Campaign Items appear in Appendix A.
- Purchasable Items are found in Appendix B.
Selling Items
Single Use Items and [icon] may be sold back to any location that sells Items, for half the Item's lowest purchase value. Gear Upgrades [icon] may not be sold once obtained.
Gear Upgrade Limit
Unlike Klik's Madness, there are no limits to the number of Gear Upgrades your heroes may purchase during play. This Legend does not contain separate Chapters.
Circumstance Tables
When the group faces a Circumstance [icon], roll for a random Circumstance on the appropriate table in Appendix C. These Circumstance Tables are based on the terrain of the hex the group is currently in. If unsure, default to the "All Other Locations" table.
Opponents
All Encounters and Bosses that appear in this Legend can be found in Appendix D.
Content Icons
Each Encounter has an icon behind it that shows the Volume the opponent first appeared in. The source's icon key is a grid of icons: columns Vol 1, Vol 2, Vol 3 and Vol 4; rows Core Box, Expansion, Living and Campaign. Vol 3 and Vol 4 have N/A for the Campaign row. The icons themselves are not reproduced in this text.
Random Encounters
Encounters found in this Legend can be generated randomly by rolling on the Circumstance tables found in Appendix C.
Allies
You may gain one or more Ally escorts during play. See Appendix E for a list of non-player character Escorts and rules that govern their involvement in this Legend.
End Conditions
The Legend ends if any of the following occur:
- The group reaches a Campaign Passage ending in "The End" through decisions they have made.
- All heroes are killed and the group has Charon's Obol [icon]. When this occurs, read 080.
- The group must Advance but the Timer Deck is empty. When this occurs, read 098. If you have Employed [icon], read 018 instead.
Game Difficulty
Unlike in Klik's Madness, the Game Difficulty does not automatically increase during play, but may be increased by the players by 1 up to once each Game Turn, at any time. At the end of the game, you will be rewarded with more points if you end the game on a higher Difficulty Rating. See "Scoring your Legend" below.
You may find moments in the narrative that suggest a Game Difficulty increase.
Like in Klik's Madness, bonus Power Up rewards gained from increased difficulty combats are always treated as a group Restore 2 moment (see page 8 of Klik's Madness).
Scoring Your Legend
If you're interested in scoring your adventure, refer to this section before you begin play.
Your Legend score consists of the elements found in the table below. At the end of your game, begin at the top of the table and continue down to the bottom, generating a number for each row based on the outcome of your particular game.
| Criteria | Total Points Available |
|---|---|
| End Score Modifier. The ending Chapter Passage you read may or may not modify your end score. | Variable |
| Total # of Campaign Statuses. Gain 1 point for each Campaign Status you gained (see Appendix A). You may gain up to 12 points from Statuses. | 12 |
| Total # of Campaign Items. Gain 1 point for each Campaign Item you gained (see Appendix A). You may count items that were lost or used. Do not count additional copies of the same item. You may gain up to 8 points from Items. | 8 |
| Total # of Allies Met. Gain 2 points for each Ally (see Appendix E) that joined the group during play. You may count Allies that have died. | 10 |
| Scored Statuses. Gain or lose points for these special Campaign Statuses you gained: |
Scored Statuses (points):
- Business Concluded: -10
- Charon's Obol: -5
- Dutiful: 5
- Employed: 5
- Employee of the Month: 10
- Feedback Accepted: 10
- Nick of Time: 20
- Not the End: 10
- Sellswords: 5
- Slime Be Gone: 10
- To the Rescue!: 5
| Criteria | Total Points Available |
|---|---|
| Game Difficulty Rating. If you win the game, gain 10 additional points per Difficulty Rating higher than Starter. | 40 |
| True Mercenaries: Gold Acquired. Count the Gold the group has at the end of the game, then divide by the number of heroes. Divide this number by 3 (rounded down) and gain the resulting number of points. | Variable |
| True Detectives: Time Remaining. Gain 2 points for each card in your Timer deck at the end of your Legend. | Variable |
Score ranks:
- 25 or less: Mercenary. It certainly wasn't easy, but what is done is done.
- 26+: Adventurer. Sometimes the road travelled is paved with heartache.
- 50+: Hero. What you did takes guts and perseverance.
- 75+: Savior (with the Valor emblem). The people of the Runecrest will never forget you!
Game Turn Sequence
Reference page 4 of the Legend. Each Game Turn follows these phases in order: Sunrise, Movement, Skill, Circumstance or Event, Villain.
1. Sunrise
At Sunrise, a new Day begins. Use the Battle Mat or Day Tracker to record the new day. This phase acts as a timing indicator for other game events.
2. Movement Phase
Decide how the group will move. There are 4 types of Movement and each determines how many cards you Advance, any modifiers you'll gain, and the Skills rolled during the Skill phase.
Any increases to Movement rates (ie, due to Reliable Mounts, Pleasant Weather, Blessings, etc) do not count for Advancing the Timer deck for total hexes moved.
Camp – Do not move. Advance 1.
- The group will not Wander and if they have a Circumstance, they may choose to avoid it.
- Roll only Explore and Survival. Navigate automatically succeeds.
- The group also Heals 3 Health and 3 Energy.
Move Cautiously – Move only 1 hex, or up to 3 hexes along a River or Road. Advance 1 per 2 hexes moved (rounded up).
- Navigate automatically succeeds (shown by the Auto Succeed die icon in the table).
Move Normally – Move up to 4 hexes. Advance 1 per 2 hexes moved (rounded up).
- The group gains no bonuses or penalties.
- Roll Skill dice normally.
Move Recklessly – Move 5 or 6 hexes. Advance 1 per 3 hexes moved (rounded up).
- All heroes suffer 2 Energy Drain.
- Roll only Navigate. Explore and Survival automatically fail.
3. Skill Phase
Each hero rolls their Skill dice.
Navigate – If half or more of the group (rounded up) succeeds their Navigate roll, the group does not Wander.
- If any hero Critically Succeeds, the group does not Wander, then Restore 1.
- This effect may only occur up to once per Day.
Explore – If a hero succeeds their Explore roll, they locate 1 [Gold] worth of treasure.
- If a hero Critically Succeeds, they find 1 [Gold] and each hero Heals 1 Health or 1 Energy (their choice).
Survival – If a hero fails their Survival roll, they must consume [Food] equal to their Food Rating.
-
If a hero Critically Succeeds, they find 1 [Food] and each hero Heals either 1 Health or 1 Energy (their choice).
-
If any hero Critically Succeeds on all three Skill tests during this phase, Restore 1. You've managed to find precious time! This effect may stack with the Navigate Critical Success bonus and may only occur up to once per Day.
After resolving all Skill rolls, the group will either play a Circumstance [icon] or an Event, based on their location.
4. Circumstance or Event Phase
- If the group is not in an Event location, check the terrain where the group is located and roll on the applicable Circumstance table. After rolling, if the group Camped or Moved Cautiously, you may choose to avoid the Circumstance.
- If the group is in an Event location, interact with the Event instead. Some Events may also have you play a Circumstance before playing the Event. In these cases, if you Moved Cautiously, you may choose to avoid the Circumstance.
5. Villain Phase
Conduct any actions as indicated on page 7 (Triggered Events).
- At the end of the Villain phase, Advance 1. This card is flipped and indicates the end of the Day.
Legend Setup
After gathering your Core Box components, take the following steps to begin your Legend. Each step is described in more detail in the pages that follow.
- Create your heroes using the Klik's Madness rules (see page 28 of the Campaign Book) and any modified rules specified below. An optional Hero Sheet is provided in the Game Aids section to manage your heroes through this adventure.
- Build your Timer Deck.
- Set up your Legends Map.
- Look over the Triggered Events.
- When you are ready to begin play, read the Legend Introduction.
1. Create Your Heroes
Each hero also begins the adventure with the following:
- Gold: 4+ with a purple die. This die may HEXplode.
- Food Rating: 3x.
- 2 Gear Upgrades [icon].
- 1 Power Up. Drawn before you create the Timer and Restore Decks.
Accessed Hero Abilities
Unlike Klik's Madness, your heroes begin the game with all Abilities Accessed.
Suggested Roles
Not sure what Role to play? Try one of these on for size...
- Sapper: Shaman
- Healer: Priest
- Striker: Rabble Rouser
- Utility: Scoundrel
- Assist: Nomad
Inherited Aspects
Aspects are hero options found in the Hero Chest [icon]. If you'd rather not play with this content or do not have it, you may still gain Aspect Heroic Moments based on your Race's Inherited Aspect. Use the table below to assign your hero's Inherited Aspect (if they have one).
For instance, Elves have the Sylvan Inherited Aspect and Halflings have the Under Foot Inherited Aspect.
Your hero may only gain access to one Aspect type, either their Inherited Aspect or the Aspect card they've chosen for their hero.
Heroic Moments
Just like in the Campaign, Heroic Moments are an integral part of this adventure. Refer to page 28 of the Campaign Book for more information on how Heroic Moments work.
Heroic Moment counts are listed below and are not equally represented or balanced in this Legend.
Role Type – Heroic Moments
| Role Type | Heroic Moments |
|---|---|
| Sapper | 7 |
| Healer | 5 |
| Utility | 5 |
| Striker | 4 |
| Assist | 4 |
Race Size – Heroic Moments
| Race Size | Heroic Moments |
|---|---|
| Food Rating 0 or 1 | 1 |
| Food Rating 3+ | 1 |
Role & Race Heroic Moments
| Role | Moments | Race | Inherited Aspect | Moments |
|---|---|---|---|---|
| Apothecary | 10 | Angelborn | 3 | |
| Beastlord | 10 | Automaton | 1 | |
| Beastmaster | 6 | Centaur | Sylvan | 3 |
| Berserker | 4 | Demonborn | 1 | |
| Brute | 4 | Dragonkin | Draconic | 2 |
Aspect Heroic Moments
| Aspect | Moments | Aspect | Moments | Aspect | Moments |
|---|---|---|---|---|---|
| Bestial | 2 | Fey Kind | 0 | Ogre Kin | 4 |
| Draconic | 1 | Goblinoid | 5 | Sylvan | 0 |
| Elemental | 1 | Human Kind | 1 | Under Foot | 4 |
| Entomorph | 1 |
2. Build the Timer Deck
Timer Deck: 20 +3 per hero.
Need a refresher on how the Timer and Restore decks work? See page 6 of Klik's Madness Campaign Book.
3. Map Setup
Gather the following Map Tiles from your Core box and configure them as shown at right or use this portion of the Klik's Madness Campaign Mat.
- Quadrant C
- HexTiles F, G, H, and N
- 2 small map pieces shown
- Hex Token: Place one as shown
- Fortification Token: Place as shown
- Group Miniature: Place on Hagh-Durmish
Set Aside. Set aside the following components:
- Hex Tokens
- Quest Tokens
Get to know the Map Locations
- The Shrine of Seasons & Traveler: Skip the Circumstance phase here. The group may purchase Items from the Shrine list and may also gain a unique Blessing by Camping here (see Appendix B).
- Fain'hil & Restwind Dale: Skip the Circumstance phase here. The group may purchase Items from the City list (see Appendix B).
- Boss 2: Boss 2 is Southcrown Cave and is tied to a narrative event.
- Hex Token: These locations are considered to be cleared and do not initiate a Triggered Event. Place one Hex Token as shown before play and during play as required.
- Hagh-Durmish: An old abandoned Dwarven Stronghold. Place the group miniature here at the beginning of the game.
- King's Road Bridge: In the past, the dwarves of Hagh-Grindish have maintained this road and the bridge spanning Kestrel's River. But that maintenance may now be overdue.
- Farming Settlement: An ambitious family has planted roots far from the other major cities in this region.
- Ruins: Skip the Circumstance phase here. These dangerous ruins are being mapped by the dwarves.
- Quest Tokens: The group will learn of areas of interest throughout their adventure. Quest Tokens are placed as indicated by the narrative.
- Mountain Peaks: Any mountain whose peak extends above the hex. These locations are uncrossable when the group is not Underground. If the group has Climbing Gear, you may enter these hexes during the Movement phase.
4. Triggered Events
Sunrise Triggers (0)
Movement Phase Triggers (1)
- The first time you move into any of these designated hexes, pause movement and read 022.
Skill Phase Triggers (1)
- If you moved through any hex on HexTile H, did not end movement on an Event location, and at least one hero succeeds their Explore roll, read 074. This counts as your Circumstance for this Day and cannot be avoided.
Circumstance Phase Triggers (1)
- Ruin: If you are here in the Circumstance phase, read 005.
Event Phase Triggers (8)
- Hagh-Durmish (HexTile F): If you are here in the Event phase, read 009. Climbing Gear is required to enter this hex.
- Shrine of the Traveler (HexTile H): If you are here in the Event phase, read 154.
- Fain'hil (Quadrant C): If you are here in the Event phase, read 002.
- Restwind Dale (Quadrant C): If you are here in the Event phase, read 112.
- King's Road Bridge Quest Token (Quadrant C): This Quest Token is not initially placed. If you are here in the Event phase and there is a Quest Token here, read 128.
- Farming Settlement (HexTile G): If you are here in the Event phase, read 168.
- Shrine of Seasons (HexTile N): If you are here in the Event phase, read 170. Climbing Gear is required to enter this hex.
- Southcrown Cave (Quadrant C): If you are here in the Event phase, read 171.
Villain Phase Triggers (2)
- If any Allies died this Game Turn, check the Ally Death Event table below.
- If you have Unfinished Business [icon] but not Business Concluded [icon] and are not on an Event location, roll [die]. This die may not be modified. If the result is 3 or less, read 149.
Ally Death Event Table
- If both Vorlah and Shaman Dregnak have perished, read 098.
- If only Vorlah has perished, read 098.
- If only Shaman Dregnak has perished, read 146.
- If Garik has perished and you have no other Allies in the group, read 058.
Game Status Triggers
- If you must Advance but the Timer Deck is empty, and...
- You have Employed [icon], read 018.
- Otherwise, read 098.
- If all heroes die, read 007.
Appendix A: Statuses & Campaign Items
Status List
Statuses are tracked on the Status Tracker. Each status is numbered:
- Big Surprise
- Business Concluded
- But Why?
- Centaur Sentinel
- Charon's Obol
- Determined
- Don't Mention It. Seriously.
- Dutiful
- Employed
- Employee of the Month
- Feedback Accepted
- Fiendish
- Hamlet Haven
- Illuminating
- My Old Friend
- Nemo Resideo
- Nick of Time
- Not Interested
- Not My Problem
- Not the End
- Observant
- Pious
- Second Mouse
- Sellswords
- Sightseer
- Silver Lining
- Slime Be Gone
- Tinker's Toys
- To the Rescue!
- Unfinished Business
- Unprofessional
Item List
Items are numbered 1 to 15. Items marked with an asterisk (*) may be used in combat by performing the Defend action. Where a printed bonus value appears on the item card, it is shown after the description.
- Alvar's Runes: You may use this Item up to once per Day to power a Mastery or Ability (instead of using Health or Energy). (Printed bonus values: +1 +1)
- Athan's Tome: Each hero may use this Item once per Day as if it were a Luck Stone.
- Blessing of Rokk'to: Up to once per Game Turn per hero, when a hero fails a Stat Test, any hero may suffer 2 Energy Drain to treat the roll as if it were a success. The group may only have one active Blessing at any time. If a new Blessing is gained, lose this one.
- Bonemasher Mace: If the wielder deals Health damage to an opponent that does not have Bleeding, that opponent gains Bleeding. This Condition's damage is increased to 3 Health each Declaration phase instead of 1. (Printed bonus value: +2)
- Crystal Battery*: You may use this Item once per Day to Heal half of your maximum Energy. You may do this 3 times before the Crystal Battery is depleted. When depleted, it also loses its Wielder's Bonus. (Printed bonus value: +2)
- Enchanted Hourglass: Any time one or more heroes would die from suffering Health damage (at the end of the Resolution phase if in combat), you may roll [die] and add the result to each of the dead heroes' current Health. This die may HEXplode. The Hourglass crumbles to dust after this use and may not be used again.
- Everfull Bread: You may consume this Item during the Skill phase instead of consuming Food to prevent Starving. When consumed, also Raise 3 Health and 3 Energy. Each hero may carry up to 3. May be sold in Cities for 6 [Gold].
- Explorer's Journal: The wielder gains Favored Opponent against Magical Nature opponents. If you already have it, your Favored Opponent damage die increases to a [die] instead of a [die]. It HEXplodes on a result of a [icon] and a 10.
Flavour text on the Therylus's Bow card: You know craftsmanship when you see it, and this is a well-crafted bow. Yet, you spot some areas for improvement.
- Earned by Tinkersmith, Weaponsmith (Ro): If any hero earns this moment, double this item's Wielder's Bonus.
Appendix B: Purchasable Items
Services and Items available in Cities
| Item | Cost | Description | Usage |
|---|---|---|---|
| Stay at the Inn | 2 | A hero may stay at the inn to Heal all lost Health and Energy. This is purchased individually. | Instant |
| Gear Upgrades | Varies | Heroes may purchase Gear Upgrades here. Gear Upgrade costs vary. | Instant |
| Rations | 1 | Each Ration purchased equals 2 units of Food. 4 Food can be sold back for 1 Gold. | Once |
| Potion* | 1 | Heal: 3 Health and 3 Energy. | Once |
| Luck Stone | 2 | Use this stone to reroll any 1 die outside of combat, to alter the result of a rolled Circumstance by 1, or to increase a Restore amount by 1. Only 1 may be used per hero per Day. | Once |
| Handy Elixir* |
Services and Items available in Shrines
| Item | Cost | Description | Usage |
|---|---|---|---|
| A Comfy Bed | 1 | A hero may rest in the infirmary to Heal all lost Health and Energy and Negate all ongoing Conditions. This is purchased individually. | Instant |
| Blessing | Gain a Blessing by Camping in this Shrine. | Camp in this location to get the associated Blessing. The group may only have one active Blessing at any time. Blessing of Haste (Shrine 2): This Blessing increases the group's movement speed by 1 hex per turn (includes Moving Cautiously). This movement increase stacks with any other movement modifiers. Blessing of the Sun (Shrine 4): This Blessing Heals 2 lost Health & Energy before the Movement phase of each Game Turn. This blessing stacks with Camping Gear or other similar effects. | Instant / Permanent |
| Revival | 8 | Dead heroes are immediately Revived. Advance 1 after any number of heroes are Revived. If you cannot afford to pay Gold for this service, the monks may still provide aid. Advance 4 and then play the Villain phase. The dead hero(es) are Revived at Sunrise. If you are able to pay the Gold cost for a Revival, then you must do so. | Instant |
| Teleportation | 6 |
Services and Items available at Bezzelquark's
| Item | Cost | Description | Usage |
|---|---|---|---|
| Potion* | 1 | Heal: 3 Health and 3 Energy. | Once |
| Health Stone | 5 | Automatically Heals 3 Health when your hero reaches 1 or less remaining Health, then crumbles to dust. Only one can be carried per hero. | Once |
| Troll's Blood* | 6 | Regen 6 Health and 6 Energy for 3 combat rounds or Heal 12 Health and 12 Energy outside of combat. | Once |
| Dryad's Amulet | 10 | This amulet may be used once every 3 combat rounds during the Resolution phase of combat after Conditions are applied. Its use Negates all ongoing Conditions for the wielder. | Permanent |
| Celerity Potion* | 14 | Allows a single hero to act twice in one combat round. Using it costs 5 Health. Only one may be used per combat. | Once |
* This item may be used in Combat by performing the Defend action.
Appendix C: Circumstance Tables
Roll on the table for the terrain the group is in. If unsure, use the "All Other Locations" table.
Rivers and Roads
| Roll | Circumstance | Flavour |
|---|---|---|
| 1 | Giant Boar | You've come too close to an enormous sow's den, and she's angry! |
| 2 | Brigands | The Bandit Prince's men are relentless, even in this part of the Valley. |
| 3 | Floating Eye | What is this thing doing on the path!? |
| 4 | Roll on the Nature Table below. | Mother nature has chosen how our day will unfold. |
| 5 | You may purchase Single Use Items available in Cities and Shrines. | You encounter a kindly traveling merchant who opens his carriage to you! |
| 6 | Roll on the Hex Table below. | What do we have we here? |
All Other Locations and Random Encounter Table
Roll two dice (shown in the table heading) and add the results into one total.
| Roll | Circumstance | Flavour |
|---|---|---|
| 2 | Roll on the Hex Table below. | What do we have here? |
| 3-4 | Uneventful. Restore 1. | Desired or not, the day's trek has been peaceful. |
| 5-6 | Roll on the Nature Table below. | Mother nature has chosen how our day will unfold. |
| 7-8 | Spoilage [icon]. | Not the food! |
| 9 | The group may move 1 hex in any direction. If you are in an Event location and choose to move, this Event is now Complete. | What luck! You've uncovered a shortcut to your destination! |
| 10 | Each hero gains 1 Gear Upgrade and 2 [Food]. | You've discovered a hunting camp that was recently abandoned, and in a hurry. |
| 11-20 | Roll for a random Encounter (see the Random Encounter list below). |
Random Encounters: these Encounters may only be rolled for a Circumstance once. Reroll if you have already faced it.
| Roll | Encounter | Flavour |
|---|---|---|
| 1 | Silk Spiders | Spiders! Why did it have to be spiders? |
| 2 | Aggressive Thicket | You'll just have to hack your way through. |
| 3 | Mangy Wolves | These poor creatures are desperate enough to see you as their next meal. |
| 4 | Risen Vermin | Treading on a cursed patch of land causes the nearby deceased animals to rise! |
| 5 | Giant Boar | You've wandered too close to this she-boar's shelter, and she will defend it with her life. |
| 6 | Raiders | I guess everyone's looking for treasure and fortune out in the wilderness these days... |
| 7 | Plague Beast | The stench of the unholy creature alerts you of its arrival. |
Nature Table
**These cards last 2 Villain phases or until the group enters the Undervalley. If already in play, extend by 1 more Villain phase.
‡ Open Water hexes may not be moved into during this Legend. If the group is in a Marsh when this is drawn, they Wander.
| Roll | Circumstance | Flavour |
|---|---|---|
| 1 | Unrelenting Thunderstorm ‡ ** [icon] | Are we being punished for something!? |
| 2 | Inclement Weather ** [icon] | As if you didn't have enough to deal with! Time to break out the bee's wax. |
| 3-5 | Uneventful. Restore 1. | Desired or not, the day's trek has been peaceful. |
| 6 | Pleasant Weather ** [icon] | The cool, comfortable weather allows you to walk with a purposeful stride. |
Hex Table
*If this has already been played, Restore 2 instead.
| Roll | Result | Flavour |
|---|---|---|
| 1 | Restore 3 and each hero gains 3 [Gold]. | You've discovered a welcome shortcut toward your destination! |
| 2 | Each hero gains 1 Gear Upgrade. | Wolves have left the inedible parts from someone's campsite. Finders' keepers! |
| 3 | Enchanted Hourglass [item icon] * | A chance encounter with an abandoned backpack by a tree yields a great treasure! |
| 4 | Lucky Rabbit's Foot [item icon] * | Hopefully you'll have more luck than its previous owner. |
| 5 | Each hero may draw a Power Up from the Restore deck and either gain it or Restore it. | The day's journey is not just uneventful, but invigorating. You've never felt so good! |
| 6 | Choose one of the above options. | Just what we were looking for! |
Note on the table layout: the printed row numbers for the 6-sided tables, the lowest total of the 2d6 table, and the lowest Encounter number are shown in the source as die-face icons rather than digits. They are transcribed here by their position in the table (the Hex and Nature tables are six-sided, so the final row is 6; the 2d6 table's first row is 2; the Encounter list is 1 to 10).
Appendix D: Campaign Opponents
All Encounters and Bosses that appear in this Legend can be found in this Appendix. Opponents are shown in red throughout the text of the Legend book and come in two types: Encounters and Bosses.
The opponent stat cards (the Encounter and Boss cards on pages 74 to 81 of the Legend, including the Gray Slime and Overlord cards) are card artwork with stat blocks and ability text printed as icons and images in the source. They are not transcribed in this rulebook. The Game Difficulty sidebar printed on those cards is transcribed below.
New to Combat? Refer to page 35 of the Core Rulebook for more information on combat.
Combat Rewards
Unless otherwise stated, always receive opponent rewards after combat ends.
Unlike most Power Up rewards which are drawn from the Timer deck, Power Up rewards gained from vanquishing Bosses are drawn from the Restore deck. After drawing (and looking at) the Power Up reward, heroes may choose one of two options:
- Gain the Power Up immediately,
- Restore the Power Up instead of gaining it.
This allows you to gain time after you destroy a Boss!
Forests of Adrimon Icons
It is possible to gain Nature's Essence as a combat reward. Nature's Essence may be sold in any Market for the amount shown on its icon: Sell Value 1, 5, or 10.
Domain of Mirza Noctis Icons
For the purposes of this Legend, ignore the Critical Keyword and any of the following symbols that appear: (the symbols are shown as icons in the source and are not reproduced here).
Swarms and Hordes
Swarms & Hordes are a new Subtype of opponent introduced in our third Volume: The Sands of Shurax. Refer to this page when you face one. Swarms and Hordes do not have Health or Energy, therefore the group cannot inflict Health or Energy damage to them. Instead, they have a Vital called Outlast. Outlast is the length of time it takes for the heroes to gain the upper hand.
Outlast is equal to the number shown in the Outlast value plus 1 per hero. Additionally, Outlast increases by 2 for each Game Difficulty increase. Record an opponent's Outlast value on your Battle Mat.
The heroes vanquish an opponent with Outlast when their Outlast value is reduced to 0. Like other opponents, the group rolls the action die to determine the opponent's action each round. Each combat action is tied to one of the heroes' 9 stats.
Opponents with Outlast have 3 stat icons shown under the Outlast value. During the Declaration phase, heroes may choose one of these available stats to roll a Stat Test against in order to reduce the Outlast value.
Outlast is only reduced during the Resolution phase, and automatically reduces itself by 1 at the end of each round of combat.
Stat Tests & Stat Test Immunity: Each round of combat, each hero may choose to roll one stat that matches one of the 3 Stat Tests available (shown under the Outlast value). Rolling this Stat Test becomes the hero's only action for the round. If the Stat Test is successful, reduce Outlast based on the type of success (shown below). Additionally, each hero who succeeds on a Stat Test that matches the opponent's action is immune to the action that round.
- Success: -1 Outlast
- Critical Success: -2 Outlast
Using Other Abilities: Heroes may choose to use their Defend or Masteries instead of rolling a Stat Test. The opponent cannot suffer Health or Energy damage, but all other effects may still apply (such as Defending damage, Healing or Raising Vitals, decreasing the damage your opponent deals, etc).
Dangerous Swarms & Hordes: It is possible for a Swarm or Horde opponent to be Dangerous. Increase their Outlast by 2 for each increase in Difficulty. The damage they deal is increased normally.
Favored Opponent Swarms & Hordes: It is possible to gain Favored Opponent with either Subtype. Favored Opponent damage works a little differently for Swarms and Hordes. Heroes who face a Favored Opponent Swarm or Horde do not roll damage and instead reduce the Outlast value by an additional 1 each round.
Favored Opponent & Multiple Opponent Types: It is possible for heroes to gain more than one type of Favored Opponent. If you face an opponent with multiple types (for instance a type and a subtype), gain the Favored Opponent effect multiple times.
Game Difficulty (opponent sidebar)
| Difficulty | Vital* | Damage |
|---|---|---|
| Starter | - | - |
| Easy | +5 | +1 |
| Moderate | +10 | +2 |
| Difficult | +25 | +3 |
| Heroic | +50 | +4 |
| Epic | +100 | +6 |
*Increased Vitals are per hero.
Appendix E: Campaign Allies
You will meet several inhabitants of the Runecrest Valley, from simple refugees to fellow heroes willing to stand in the face of evil.
Some may even become Allies, non-playable characters in the story that can join your group. Such Allies are shown in orange throughout the text of this book. Each time an Ally joins the group, turn to this section to see their unique abilities and Stats.
There is no limit to the number of Allies that may join the group, though it is unlikely you will have more than a few in the group at any given time.
Gaining Allies
Allies join the group based on the decisions you make within the story. The Chapter Passages you read will indicate when an Ally joins or leaves the group. Have fun finding them in the story; some may turn out to be your new best friends!
Ally Stats and Special Abilities
Each Ally has one or more Stats shown on their Stat block and have additional Special Abilities available to the group. These Special Abilities are treated as though they are Racial Abilities and are usable to the group at any time.
Allies in Combat
While there is no limit to the number of Allies that may join the group, you may only have one Ally participate in each combat (unless otherwise stated). Before each combat begins (even before an Ambush event), the group may choose one Ally to enter combat alongside your heroes. This Ally may be targeted by heroes or by opponents and may act using only the Stats shown (for instance by Attacking, Defending, or rolling a Stat Test to reduce an opponent's Outlast). Allies are not affected by Conditions or Game Difficulty increases.
Allies who use their Attack to deal damage deal only Health damage, unless otherwise noted.
Some Allies have a Favored Opponent, treated similarly to a hero's Favored Opponent. However, you only may gain access to a participating Ally's Favored Opponent action if no other hero in the group has the matching Favored Opponent or if there is only one hero in the group.
The rest of your Allies may not be targeted by opponents, use their Abilities to help, or otherwise act. They are busy helping the group in other ways behind the scenes. If your chosen Ally dies in combat, a new Ally may not enter in their place.
Vitals and Stats
Ally Vitals are not tracked outside of combat events. When combat ends, alive Allies who suffered damage are automatically brought back to full Vitals. They must have a hidden stash of potions they're not sharing!
There may also be points in the story where the group suffers damage outside of combat. Unless otherwise stated, Allies are unaffected by these moments.
Ally Stats may not be modified in any way. For instance, if the group gains a Power Up, your Allies do not benefit.
Replacement Stat Tests
Up to once per Game Turn per hero when a hero fails a Stat Test outside of combat, one Ally in the group that possesses the matching Stat may roll it in their place.
If it succeeds, the hero who failed suffers 2 Energy Drain and the Ally's roll outcome replaces the hero's.
Allies may only roll the Stats that are shown in their Stat block. If an effect would have an Ally roll a Stat that is not shown, the test is treated as if it were a failure instead.
Leaving Allies Behind
Allies may leave the group at certain times during the story as indicated in the text. It is not possible to regain Allies that leave the group, unless the narrative mentions they rejoin you.
Ally Death
Just like heroes, Allies can die in combat or in the narrative of the story. Allies who have died may not be Revived with Items, Masteries, or Abilities. However, opportunities to Revive them in the narrative of the story may occur.
Villain Phase Trigger: Note that there is a Villain Phase Trigger that checks if any Allies died this Game Turn. Check the Ally Death Event table (shown on page 7 and below) if this is the case.
Ally Death Event Table
- If both Vorlah and Shaman Dregnak have perished, read 098.
- If only Vorlah has perished, read 098.
- If only Shaman Dregnak has perished, read 146.
- If Garik has perished and you have no other Allies in the group, read 058.
Ally Cards
Each Ally's Combat and Special text is transcribed below. Their stat values are printed as icons on the cards and are not transcribed.
Bezzelquark
- "Just need some elbow grease ...or earswax'll do. Rikr Skaparith, that's hogswash! Don't swear at me!"
- Combat: Bezzelquark Defends each combat round and uses his First Mastery to give one target Reflect equal to his First Mastery.
- Special: Outside of combat, you may purchase items from Bezzelquark's Black Market.
Garik Galrum
- "This is taking WAY too long. I thought I made myself clear earlier! This will undoubtedly affect your review."
- Combat: Garik Defends each combat round. Once per combat, a hero may spend 2 Energy to reroll an opponent's action.
- Special: During the Skill phase, heroes who succeed Explore gain 1 [Gold] or 1 Potion.
Huntmaster Thorgul (Favored Opponent: Monstrous Humanoid)
- "It's good that I've found you. We have much to discuss..."
- Combat: Thorgul Attacks and Defends each combat round.
- Special: If a hero is the target of an individual attack that would kill them, Huntmaster Thorgul becomes the new target of that attack. If he is also an individual target, he will be targeted twice.
Shaman Dregnak (Favored Opponent: Spirit)
- "There is a cycle to this life... Serpents entwined around serpents."
- Combat: Shaman Dregnak either Attacks or Defends each round. Once per Day, she may cause Health damage from one opponent's attack to be Nonlethal.
- Special: At the beginning of each Game Turn, one hero Raises 3 Energy and one hero loses all Conditions.
Vorlah (Favored Opponent: Humanoid)
- "We are here for a reason, and our paths have crossed for the greater good."
- Combat: Vorlah either Attacks or Heals one target's Health and Energy equal to her First Mastery each round.
- Special: If Shaman Dregnak is also in the group, Vorlah's Stat ranks are doubled.
Appendix F: Hero Sheet and Story Tracker
Story Tracker. You may use the tracker to note the Chapter Passages you have encountered while playing Corrosive History. The tracker lists Chapter Passages 001 to 170.
Day Tracker. You can optionally count days using the Day Tracker, numbered 1 to 30 in the Game Aids.
Hero Sheet. Use the Hero Sheets in this PDF to record your heroes. These sheets are the same from Klik's Madness. Some of the information, primarily on page 2, may not pertain to this story.
Game Difficulty (hero sheet table). The hero sheet prints the following table. The final column is headed "Restore 2" and its entries are transcribed as printed.
| Difficulty Level | Vital* | Outlast | Damage | Restore 2 |
|---|---|---|---|---|
| Starter | - | - | - | - |
| Easy | +5 | +2 | +1 | 2 or less |
| Moderate | +10 | +4 | +2 | 4 or less |
| Difficult | +25 | +6 | +3 | 6 or less |
| Heroic | +50 | +8 | +4 | 8 or less |
*Increased Vitals are per hero. Whenever the Game Difficulty increases, the group may instead Advance a number of cards equal to twice the current Chapter number to avoid the increase.
Bosses Vanquished (hero sheet tracker).
- Core: 1 The Bandit Prince; 2 The Gray Slime; 3 Overlord Chikak-ishak; 4 Goblin Emperor Klik; 5 The Megapede; 6 Syv the Siren Queen; 7 The Giant Basilisk; 8 The Cryovern; 9 The Frost Giant Jarl; 10 The Dead King.
- Campaign Bosses: 2 Hobgoblin Bruiser; 4 Kastrenik the Bloated; 7 King Klik's Forces.
- Expansion Bosses: 4 The Gray Wolf Pack; 5 The Storm Elemental; 6 Ethyr of the Wild; 7 Alabast the Fallen.
Allies (hero sheet tracker). Each is marked Met, and then Alive or Dead: Therylus; Baron Lasswell; Tiama; Lorelei Lasswell; Bezzelquark; Drumth Dorgott; Magistrate Aremi; Dented; The Wolf Pup; Kembeorn Thunderfist.
Game Turn Sequence Reminder. The hero sheet repeats the Game Turn Sequence and Movement summary from page 4 of the Legend, which are transcribed above.
Appendix G: Conditions
- Bleeding: Bleeding targets lose 1 Health during the Declaration phase of each round. Bleeding continues until the target receives Healing or until combat ends.
- Blinded: Blinded heroes must succeed on a Navigate roll during the Declaration phase of each round in order to act normally. If it fails, Ability ranks are halved this round.
- Bound: Bound targets are tied to the life force of another being. Anytime the ally they are bound to suffers damage, Bound targets lose the equivalent type and amount of Vitals. Loss of Vitals due to being Bound is only applied once if two targets are Bound to each other.
- Burned: Burned targets lose 3 Health at the beginning of the Declaration phase of each round and Heal 3 less Health each time their Health is Healed. The Healing reduction stacks but the Health damage dealt does not.
- Charmed: Charmed targets must use their Attack against a random ally next round. If they are unable to, they suffer Energy damage equal to the opponent's Level instead. Afterwards they are no longer Charmed.
- Confused: This Condition resolves before damage is dealt. Roll any die during the Resolution phase of each round. Confused targets lose their action if the result is an even number, or have the numeric effects of their action reduced by half if the result is an odd number.
- Cursed: Cursed heroes cannot be Healed. Roll all three Skills during the Declaration phase of each round and during the Movement phase of each Game Turn. If you succeed on all three rolls, you are no longer Cursed.
- Debilitated: Heroes who become Debilitated must roll the Hex die (see table at right). The rolled Ability may not be used. If there is a number specified in this Condition, you do not roll the die and instead lose access to the specified Ability. Heroes may only be affected by up to 3 instances of this Condition at any given time.
Conditions carry icons in the source to show their behaviour:
- Affects Any: Conditions with this icon can affect your allies or opponents.
- Persists: Conditions with this icon remain active after combat ends.
- Stacks: Conditions with this icon may be gained more than once. Apply the numeric effects multiple times unless otherwise noted.
New Keywords
- Corrosive X: This damage cannot be Healed the round during which it is suffered. If suffered outside of combat, Corrosive damage cannot be Healed for the remainder of the current Game Turn. Corrosive damage prevents Vitals from being Raised above their maximum.
- Critical: Ignore this Keyword for purposes of this Legend.
- Energetic: If an opponent has at least half their Energy remaining, that action gains an additional effect. If an opponent has multiple Energy values, check against the highest current Energy.
- Reinforce: Reinforce effects are only applied if the group consists of 4 or more heroes.
Source Notes and Gaps
Source note: the rules here come from the free official Game Aids PDF (Appendices A to C and the Hero Sheet and Story Tracker pages) and the preview pages of the paid Legend PDF (DriveThruRPG product 460226, pages 1 to 8). The publisher is Mariucci J. Designs. The full Legend PDF is paid and is not available free; the Chapter Passages (the numbered story text that the rules refer to) and the opponent and ally stat cards are not included.
- Icon-only glyphs in the source (Spoilage, the "Single Use Items and [icon] may be sold" line, the Circumstance, Food, Gold and Power Up symbols, Conditions icons and Hex die faces) are shown as [icon] or in words where the source text makes the meaning clear.
- The effect of Spoilage (Appendix C, 7-8 row) is not printed in text in the source and is not transcribed.
- The Rune service in Appendix B has no legible description in the source.