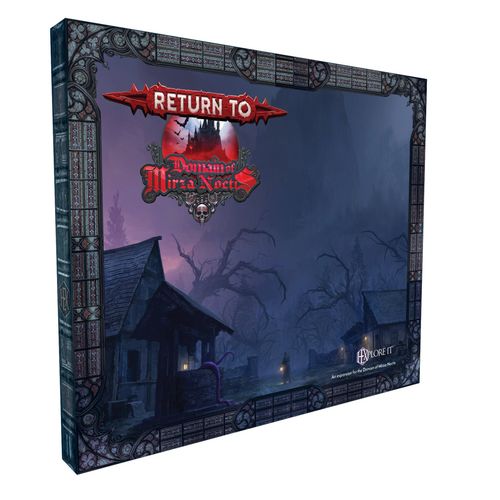
HEXplore It: The Domain of Mirza Noctis – Return to the Domain of Mirza Noctis
HEXplore It: The Domain of Mirza Noctis – Return to the Domain of Mirza Noctis Rulebook
Table of Contents
Table of Contents
Welcome
Welcome to the Expansion for the Domain of Mirza Noctis, the fourth Volume in the HEXplore It gaming universe. Most components in this Expansion may be added to your DoMN Core game to enhance your gaming experience.
Just as much content however, may be played in an entirely new way.
The Breach Game Mode offers a glimpse into a future time line. The Blood Lord has successfully ascended and now stands against immeasurably powerful horrors that have pierced this reality. Create powerful heroes to help him stave off the world's annihilation.
Game Contents
- 1 Rule Booklet
- 12 Rune Stones
- 24 Madness Cubes
- 1 Moon Die
- 8 Dry Erase Placards: 3 Roles, 4 Boss Placards*, 1 Game Play Placard**
- 2 Card Deck boxes
- 33 Cards (sized 70 x 110 mm)
- 6 Keepsakes
- 12 Races
- 15 Legendary Cards
- 28 Cards (sized 44 x 67 mm)
- 14 Dungeon cards
- 14 Blood Magic Spells
- 108 Cards (sized 63 x 88 mm)
- 68 Horror cards*
- 14 Power Up cards
- 6 Encounter cards
- 10 Day cards
- 10 Night cards
- 1 Punch Board
* Used only while playing the Breach Game Mode.
** One side is only used while playing the Breach Game Mode.
Rune Stones: A new type of Rune Stone is introduced in this Expansion. The Purple Star Rune Stone is used while the group is in the Dungeon.
Madness Cubes: Purple Cubes represent Madness heroes may gain during your adventure. Madness is counted and tracked on a hero's Madness tracker (see page 14).
Moon Die: Shared between all players, the Moon die is numbered 2 through 12, and the hex is considered to be a result of 1. This die is interchangeable with the Moon die from the Core box.
Placards: Placards define several mechanics, game locations, and opponents. These are all dry-erasable. Set these aside and consult them when you need them.
Roles (3): These are the Roles in the Domain of Mirza Noctis Expansion. You may use Roles from any HEXplore It Volume in your adventures.
Horrors (4): These are the 4 Horrors that have pierced the Breach. Each placard is double sided. One side contains their combat information and the other side details how the game changes while each Horror stalks the land.
Items Reference / Mirza Noctis Ascended (1): The Items placard shows the new items available for sale in Villages and Monasteries. Mirza Noctis's Ascended placard is used at the beginning of each turn to track how Noctis is dealing with the Horrors emerging from the Breach. This side of the placard is only used while playing the Breach Game Mode.
Loose Cards: The cards shown at right are not contained in a deck box. Races and Keepsakes may be used in any HEXplore It game. Legendary Cards are only used while playing Domain of Mirza Noctis.
Cards: Several cards in this Expansion supplement the core game and others are only used while playing the Breach game mode.
Unpack and shuffle the following cards and place in each of your Core game deck boxes:
- Power Up
- Encounter
- Day
- Night
- Blood Magic cards
The new Purple Star Rune Dungeon Deck is introduced in this box. Place these cards in the Core game Dungeon deck box and move the Blood Magic cards stored there to the Blood Magic deck box included in this Expansion.
The four Horror decks are only used while playing the Breach game mode.
Punch board: The Expansion Punch board contains many map tiles to supplement your game. They are:
- Madness Trackers (6): These are used to track each hero's Madness [icon]. For more information on Madness, see page 14.
- Horror Tokens (7): These are used to depict the four Horrors on your game board. Each token is assigned to one Horror (see page 38). Horror tokens are used in different ways.
- The Breach HEXtile (1): This Dungeon tile represents the Breach and cannot normally be placed by the heroes. During play, the heroes may attempt to close the Breach and destroy the Horrors for good (see page 45).
Tokens: Be sure to check that you have each of these before you toss out your Punch board cutouts.
- Hearth Stone Tokens (3): Cataclysm's Deck card. These tokens are druidic stones the group may find.
- Abandoned Cathedral Token (1): Disaster Deck card. This token is a new Monastery the group may find.
- Overpopulated Village Token (1): Disaster Deck card. This token represents a larger than normal Village.
- Forgotten Mausoleum (1): Calamity Deck card. This token is a new Crypt entrance the group may find.
- Treasure Tokens (4): Dungeon Deck card. These tokens represent great treasure lost in the dungeon.
- Rift Tokens (4): Breach Dungeon Tile. These tokens represent a residual rift where the Horrors have emerged.
- Spawn Tokens (3): Breach Dungeon Tile. These tokens represent spawn locations for otherworldy adversaries.
Expansion Disclaimer
The Domain of Mirza Noctis Core box is required to play with much of the content that appears in this Expansion. You'll find references to the DoMN Core Rule book throughout this booklet.
The following components in this Expansion can be used in any other HEXplore It game:
- 3 HEXclusive Roles
- 9 HEXclusive Races
- 3 Rare Races
- 6 Keepsakes
- 14 Blood Magic Spells
Dry Erasable Content
Several dry erase markers are included in the Core game. Please note that the following game components are laminated and can easily be erased:
- 3 Roles
- 4 Boss Placards
- 1 Game Play Placard
Heroes
You'll find all new Roles and Races in this Expansion that can be used in any HEXplore It game. They are more powerful than their basic counterparts. Each Role has two types instead of one. For instance, the Blood Mage is both a Striker and a Sapper.
For more information on Roles and Races, see page 12 of the Core Rule book.
It is best not to group these Roles and Races with basic ones. If you play with one of these and a basic Role, the basic might feel underpowered in comparison.
Legendary Cards
Legendary cards are new additions to the game that provide special Allies and Items. All Legendary Items and Allies may be triggered during a Core game or Expansion play through. Each Legendary card is obtainable in a slightly different way:
- Dretch: The Dretch is only available to the Demonologist (Role).
- Brandon Draven (Ally): Play the Night Expansion card, Hangman's Joke.
- Apeiron (Ally): Outlast Kaeln's Manor.
- Hellgirl (Ally): The group gains Blood Magic Tier 6 (or higher) or vanquish one of the following Encounters found in the Horror decks: Eldritch Rift or Abberant Portal.
- Albedo, Reflection of the Heavens (Item): Vanquish or Influence Raveziel the Fallen.
- Sanguinomicon (Item): Vanquish Maleketh the Lich.
- The Horseman's Spine (Item): Vanquish the Dulahan.
- Hook & Chain (Item): Vanquish Meat-Hook.
- Diary of a Mad Alchemist (Item): Vanquish the Mad Alchemist.
- The Blood Shard (Item): The first time a hero rolls hexes on all 3 of their Skill rolls during the Skill phase.
Role Type Items: Gain these Role-Type Legendary items through effects that allow you to search for and gain Legendary cards.
- North Star (Item): Striker only.
- Coiled Serpent (Item): Sapper only.
- Aglibol's Chest (Item): Assist only.
- Prismatic Beacon (Item): Healer only.
- Rings of Oppression (Item): Utility only.
Legendary Allies
Ally cards are special non-player characters that join the group and offer bonuses while they adventure with them. Allies have both Health and Energy stats, 3 combat options available to them (like Encounters), and additional Abilities usable by any hero in the group. Like Escorts, they can become a target in the group and can die. Allies cannot be brought back to life unless otherwise stated. The Action Key, Vitals, and action descriptions are similar to those on Encounter Cards.
- Ally Vitals: These are the Ally's Health and Energy ranks.
- Action Key: Roll the action die and use the Action key to determine what your Ally does each combat round. If you roll an Energy Ability and your Ally is out of Energy, they will use their Attack action (at full power) instead. See page 63 of the Core Rule book for more information.
- Action Descriptions: These are the three combat options available to your Ally.
- Special Abilities: These are Special Abilities your ally possesses. The group decides when an Ally will use one of these abilities, or they will happen when a trigger occurs, as specified by the Special Ability.
Legendary Items
These item cards are special and have their own Abilities. Each of these items must always be possessed by one hero. There are no limits to the number of item cards a single hero may carry.
Item cards may be traded to other members of the group as if they were items in their backpack.
- Special Abilities: These are Special Abilities the item possesses. Only the hero wielding the item may use these abilities.
- Wielder Bonus: The Wielder Bonus is a special rank increase or other enhancement that only the wielder gains. The Wielder Bonus is transferred if the item is passed to another hero.
- Role Type Ribbon: Some Legendary Items have a Role Type ribbon. Only Roles of this type may weild this item.
New Blood Magic Spells
There are 14 new Blood Magic Spells in this Expansion. These are to be mixed with the Blood Magic Spells from the Core box. All Blood Magic Spells can be placed in the Blood Magic deck box that comes with this Expansion. For more information on Blood Magic, see the Crypt placard from the Core box.
New Cards
There are several new cards for each of your Core box decks included in this Expansion. Simply add these extra cards to their appropriate Domain of Mirza Noctis Core Box decks. For more information, see the Core Rule book: Circumstances (page 35), Encounters (page 37), Dungeon Cards (page 48), and Power Ups (page 84).
New Items
There are several new items included in this Expansion noted on the Items placard. These items may be purchased while playing any type of Domain of Mirza Noctis game. However, some items may not be as effective outside of the Breach game mode.
Madness
Many new effects may cause a hero to gain Madness [icon]. The heroes may find themselves in situations that become modified by the amount of Madness they possess.
Each hero begins play with a Madness Tracker (set at 0). Each time a hero gains Madness, add a Madness cube to the tracker. Heroes may only have up to 6 Madness at any time. Each time a hero's Madness would exceed 6, do not gain another cube. Instead, lose 1 rank in a random stat. Roll a Core die and consult the table below.
| Die Result | Stat Lost |
|---|---|
| 1 | Hero's Choice |
| 2 | Health |
| 3 | Energy |
| 4 | Attack |
| 5 | Defend |
| 6 | First Mastery |
| 7 | Second Mastery |
| 8 | Navigate |
| 9 | Explore |
| 10 | Survival |
It is possible for ranks to be reduced to 0. If this occurs, you may not use the associated stat.
Heroes lose all Madness [icon] when they die.
The Breach Game Mode
Introduction
This version of play presents a future timeline for your heroes — what happens when Noctis succeeds?
The dark lord has gathered the blood needed for his ritual and has ascended to godhood. But his goal of ascension wasn't what people thought it would be. His hostility against the commoners of Krasvetelia has eerily ceased.
New, terrible horrors have arrived in the land, seeking to tear it asunder. Did Noctis summon them? Or was he preparing for this eventuality all along? Noctis may now be the only one strong enough to stand against these horrors. But did he gather enough power, or will he succumb to these titanic forces from another plane of existence?
Only your heroes can help shape Krasvetelia's destiny.
The Horrors have arrived. Tragedy. Calamity. Disaster. Cataclysm. Forge an entirely new journey in the darkening land of Krasvetelia and gather power as quickly as you can to stop the four terrible horrors that have arrived through the Breach. You'll face each, in a different order, each time you play. Your only ally is Noctis himself, but can you keep your sanity, or will you succumb to madness?
Summary of Changes
- The Blood Pool counts down from 100 instead of counting up from 0. Runes Imparted to Monasteries or Activated in Crypts no longer reduce the Blood Pool. Ignore these game effects.
- The group cannot face Mirza Noctis in this play style. Instead of using the Mirza Noctis game placard (from the Core box), use the Mirza Noctis Ascended placard from this Expansion.
- The heroes must act as an ally to Mirza Noctis, to help stave off the impending apocalypse. Mirza Noctis acts at the beginning of each Game Turn (see page 25).
- The game map begins completely revealed at the start of the game. The Dungeon is unaffected by this change.
- A new Purple Rune may be gained throughout play (see page 44).
- The heroes may gain Madness throughout play (see page 14).
- The four Horrors are variable Level Bosses and appear throughout play. Each has their own deck that will consume a Circumstance slot. Their actions are determined during the Villain phase each turn.
The Object of the Breach Game Mode
The heroes win the game when they defeat each of the four Horrors or if they close the Breach.
The heroes lose the game if the Blood Pool is reduced to 0 and any of the Horrors are alive, or if all heroes die.
Setup Overview
1. Choose your Hero: This step is unchanged (see page 12 of the Core Rule Book).
2. Set up the Game Board
- Place the entire map (A-N) in any orientation you choose.
- Shuffle and place each deck as indicated on page 20.
- Roll the Moon die to determine the first Horror that has pierced the Breach. Place its Horror deck on the "1" slot of the Night bar, face down.
- Locate that Horror's placard and set it aside.
- Draw 3 Day and 3 Night cards, placing each face up on their respective bar, starting with slot "2". Leave slot "1" of the Day bar empty. Shuffle any "Interrupt" cards drawn back into the deck and redraw.
- Place any Rune Stones on Investigation locations as per normal rules.
3. Select Day or Night, roll starting location, & make initial purchases
- Decide to begin the game during the Day or during the Night.
- The group chooses one of the following location types as their starting location: Village, Monastery, or Crypt. Roll to determine the heroes' starting position on the map (see page 22).
- Spend your Gold (if able) before the first Game Turn begins.
1. Choose your Hero
Each player creates their hero(es) at this time. See Hero Creation (page 12 of the Core Rule Book) for more detail.
2. Set up the Game Board
Set up the Map
- Place the four map quadrants (pieces A-D), in any orientation you like in the middle of your gaming table.
- Shuffle the HEXtiles, Dungeon Tiles, and the Breach Tile and set them aside face down.
- Draw one HEXtile at a time, and place each one face down to create the rest of your map. Once all HEXtiles have been placed, flip each one over in any orientation to reveal the map.
- Place a Locked Crypt token on each Crypt.
- Finally, place the Day and Night bars along the top and bottom of your map.
Initially place HEXtiles upside down in any orientation, then flip them over.
Set up the Decks & place the First Horror
- Roll the Moon die to determine the first Horror that has pierced the Breach. The random Horror table is also shown on each Horror placard and the Mirza Noctis Ascended Placard.
- -3: Calamity
- 4-6: Tragedy
- 7-9: Cataclysm
- 10-12: Disaster
- Place its Horror deck on the "1" slot of the Night bar, face down.
- Locate its Horror placard and note its Level (5) on each side of the placard. Consult the placard to place the Horror's token on the game board (see page 38).
- Shuffle and place the Day and Night decks, then flip 3 cards for each, placing one card face up in slots 2 through 4 on each bar. Slot 1 is reserved for the Horror deck. Shuffle any "Interrupt" cards drawn (see page 35 of the Core Rule Book) back into the deck and redraw.
- Shuffle and place the Power Up and Encounter decks, then place each in their respective slots.
In the example shown in the booklet, Tragedy is the first Horror to pierce the Breach and has been placed near Village 6.
Final Steps
- Shuffle the 4 Dungeon decks ([icon] [icon] [icon] and [icon]) and place beside the Dungeon Tiles.
- Place a Rune Stone that matches the Investigation Rune Reward ([icon] [icon] [icon]) on each Investigation drawn.
- Give each player a green, yellow, and blue Core die, as well as a Critical Wound and Madness tracker. Place all cubes in a spot near the game board, in reach of all players.
- The Collector [icon] dice will be rolled during Mirza Noctis's phase and the Clue cubes will be placed when the group rolls an Investigation during the Circumstance phase.
3. Starting Location
Before the game begins, choose either Day or Night, then look at your map and decide whether the group would like to start in a Village, Monastery, or Crypt. Each location will offer a different set of starting equipment. You may roll a Collector die if you'd rather this be a random selection (1: Village, 2: Monastery, 3: Crypt).
- Village Starting Location: Refer to the Core game to determine the random Village the group begins in. Starting from this location is unchanged from normal play. See page 26 of the Core Rule Book.
- Monastery or Crypt Location: Roll the Moon die and consult the table below. Begin in the numbered Monastery or Crypt rolled and gain the Gold, Food, Gear Upgrades, and an additional effect as stated in the table below.
| Moon Die | Monastery or Crypt |
|---|---|
| -3 | 1 |
| 4-6 | 2 |
| 7-9 | 3 |
| 10-12 | 4 |
Starting Equipment in Monasteries or Crypts
| Location | Gold | Food | Gear Upgrades | Extra |
|---|---|---|---|---|
| Monastery | 5 each | x4 Food Rating | The group gains 3 total | Gain this Monastery's Grace |
| Crypt | 15 each | x2 Food Rating | The group gains 3 total | Unlock this Crypt and gain 1 Blood Magic Tier |
Game Play
Game Turn Overview
- Noctis Acts
- Determine Day or Night, then Move the group: The Movement phase resolves normally, per Core game rules.
- Roll Your Skills (each hero rolls their own Skills): The Skill phase resolves normally, per Core game rules with the following caveat: a new Skill phase Critical Success option is available.
- Roll a Circumstance (one player rolls): The Circumstance phase resolves normally, per Core game rules with the following caveat: when a Circumstance results in a Horror deck slot, draw and play the next Horror card.
- Settle an Event: The Event phase resolves normally, per Core game rules.
- Villain: The Horrors: Reduce the Blood Pool by the number of Horrors in play (minimum of 1). Check the Mirza Noctis Ascended Placard to see if any other triggers occur. Roll the Moon die once and resolve the Horror effects for each Horror in play. The Horrors move toward their target as specified on their placard.
Next Game Turn.
1. Noctis Acts
Noctis works to close the Breach each Game Turn. This action may or may not have a residual effect on the heroes.
- Mirza Noctis begins the game with 7 Collector [icon] dice, representing his power to hold back the forces emerging from the Breach. As the Blood Pool decreases, his power diminishes and he loses Collector [icon] dice.
- Roll each of his Collector [icon] dice during this phase and add the result into one total. Then, consult the Mirza Noctis Ascended placard and play the resulting action.
- If at least 4 Collector [icon] dice match (or all dice if he has less than 4), the group also gains a Dark Grace.
Collector Dice: Collector dice are used differently in this version of play. They are no longer placed on Villages (or other locations). Noctis has already collected the Blood he needs and now works to close the Breach each turn. If a game effect would place a Collector Die on the board, ignore that effect.
Although his power is formidable, it may not be enough to close the Breach. At the beginning of the game, Noctis has 7 Collector dice. Starting at 90 Blood, he loses 1 die for every 20 Blood removed (he has 6 dice at 90, 5 dice at 70, 4 dice at 50, etc). This loss is shown on the Mirza Noctis Ascended placard (see adjacent page).
Collectors in Villages: The heroes may still face Collectors in Villages. Treat each Village as having Collectors present. If the group locates Collectors at Night, roll the Collector [icon] die to determine how many Collectors are present, then roll for their types normally. Each time the group vanquishes any of Noctis's Collectors in a Village, reduce the Blood Pool by an amount equal to the number of Collectors fought there. Remember, for every 3 Collectors you vanquish in a Village, the Game Difficulty increases by 1 (see page 68 of the Core Rule book).
Dark Graces: If at least 4 Collector [icon] dice results match (or all dice match if he has less than four dice remaining), the group gains a Dark Grace (see the Mirza Noctis Ascended placard). The Dark Grace gained is determined by the matching result of the dice (1, 2, or 3). Each Dark Grace has a rank equal to the amount of matching dice for that result. The group may only have 1 Dark Grace at a time but may choose to replace it if another is gained.
Example: For instance, the Blood Pool is currently 87. Mirza Noctis has lost 1 Collector die (at 90 Blood), and so he currently has 6 dice total. At the beginning of the turn, the group rolls the dice. The results are: 1, 2, 2, 3, 2, and 2. The group adds the results together and find the total is 12. First we resolve Mirza Noctis's action. The group consults Noctis's Action table and finds they are able to move more quickly this turn and may adjust their Circumstance result by 1. Next we check to see if a Dark Grace is obtained. We find 4 results are a value of 2. This means that the heroes have gained the second Dark Grace, Unhinged Geas. Its rank is 4.
The placard tables for Noctis's Action and Dark Graces are not reproduced here (see the note in the Table of Contents).
Blood Pool: The Blood Pool is reduced during the Villain phase. Noctis loses 1 Collector die at 90, 70, 50, 30, and 10 Blood. The Horrors arrive through the Breach at 100, 80, 60, and 40 Blood. Note their Levels: 5, 7, 9, and 11. The group may enter the Breach from Noctis's Castle once the Blood Pool is reduced far enough (see Placing the Breach in The Dungeon & the Breach section).
2. Move the Group
This phase resolves normally. The group selects to move during the Day or Night, and then decides the type of movement and the location they move to.
The Villain Action Modifier Die: The Villain Action Modifier die is not used to track the group's Villain Action Modifiers each turn while playing the Breach Mode game. Ignore any Villain Action Modifiers the group accumulates during play.
3. Roll your Skills
This phase resolves normally, though the heroes have a new Critical Success option available to them.
Each time a hero Critically Succeeds their Explore roll during the Skill phase, that hero may choose to remove 1 Madness from any hero. This option replaces any other Critical Success Explore bonuses they would receive.
4. Roll a Circumstance
This phase resolves normally, though the Circumstance slots are slowly being consumed by the Horrors.
- The first Horror that appears at the beginning of the game consumes the first Circumstance slot. Discard the card there. Its deck is placed on slot #1 of the Night bar. A Circumstance result of 1, regardless if it is Day or Night, will always draw a card from that Horror deck, until that Horror is destroyed.
- Horror Decks are considered to be Unavoidable cards.
- Each time a new Horror appears on the board, another slot is consumed by it (discard the card there). For example, the next Horror that arrives consumes slot #2.
- If the group vanquishes a Horror, return its slot to normal (Day and Night deck).
Example: The example below shows the Horrors appearing in this order: Tragedy (1), Calamity (2), Cataclysm (3), and finally Disaster (4). In this example, the group would no longer play Day or Night Circumstances. Instead, a result of 1 through 4 becomes a Horror card drawn from the applicable Horror deck, even if the group moved during the Day. A result of 5-6 remains an Encounter draw, per normal rules.
- Clues: Clues may be placed on (or removed from) slots containing Horror decks normally.
- Horror Decks (Unavoidable): Similar to the Core game, each Horror deck contains several types of cards, including: Investigations, Afflictions, Events, Discoveries, and Treasures. All Horror cards are Unavoidable cards (see page 35 of the Core Rule Book). If a Horror Deck runs out of cards, each time that slot is rolled again, each hero gains 1 Madness, until that Horror is vanquished.
- Boss Enhance: Boss Enhance cards are new to the Expansion. When these cards are drawn, the Horror becomes stronger. The group may sacrifice a Purple [icon] Rune to discard these cards (when drawn, or before combat begins with the Horror).
- Investigations in the Horror Deck: Investigations drawn from a Horror deck are not tied to locations on the map. Instead, the heroes play the Investigation in their location when the card is drawn as if it were an Interrupt card. The group may Camp in this location if you fail to complete the Investigation and attempt it again next Game Turn. The moment the group moves from this location and the Investigation has not yet been completed, discard it. After completing an Investigation, remove any Clues from that slot in both the Day and Night bar.
Reading Investigation Cards
- Interrupt Banner and Skill Type: Each of these cards are played immediately in the location where the card is drawn.
- Madness Effect: Madness may affect each hero or the group in different ways while playing these cards. Consult the Madness Effect and play as applicable.
- Rune Reward: Investigations in these decks reward Purple [icon] Runes instead of [icon], [icon], [icon]. See page 44.
- Nightmare Level: The Nightmare Level plays similarly to the Suspicion Level of the Core game (see page 57 of the Core Rule book). Unable to process the sheer terror unleashed across the land, the heroes are slowly losing their minds. Heroes who roll the Nightmare Level or greater while resolving an Investigation will trigger the card's Trap.
- Trap: Traps are detrimental events that occur if the group is not careful while resolving an Investigation. Two new Traps appear in the Horror decks. See page 57 of the Core Rule book for more information on Traps that do not appear below.
New Traps
- Trap icon: Madness cube. Each hero who triggers this Trap gains 1 Madness.
- Trap icon: Blood Pool drop marked "-3". Decrease Noctis's Blood Pool by the amount shown for each hero who triggers this Trap. Investigations in the Day and Night deck function normally, increasing Noctis's Blood Pool! Remnants of his machinations still exist in his domain.
5. Settle an Event
This phase resolves normally, though Noctis's Castle is no longer an Event location. Runes Imparted to Monasteries or Activated in Crypts no longer reduce the Blood Pool. Ignore these game effects.
6. Villain: The Horrors
The Horrors are described in detail in the next section of this booklet.
- Reduce the Blood Pool by the number of Horrors in play (minimum of 1).
- Check the Mirza Noctis Ascended placard to see if Noctis loses a Collector die [icon] or if another Horror appears on the board.
- Roll the Moon die once and resolve the effect(s) of that roll for each Horror in play.
- Each Horror moves toward its target as specified on their placard.
Villain Action Table
After you decrease the Blood Pool each Villain phase, roll the Moon die and consult the Villain Action table. This table is the same on each Horror placard. Place the Horror placards side-by-side (or only consult one), then play the result as specified.
| Result | Outcome |
|---|---|
| 1 [result number not in text layer; first row of the table] | Played once if any Horror is in play. |
| 2 | Played only if Tragedy is in play |
| 3 | Played only if Cataclysm is in play |
| 4 | Played only if Calamity is in play |
| 5 | Played only if Disaster is in play |
| 6 | Played if any Horror is in play. It is common to each Horror. |
| 7 | Played only if Tragedy is in play |
| 8 | Played only if Cataclysm is in play |
| 9 | Played only if Calamity is in play |
| 10 | Played only if Disaster is in play |
| 11-12 | Play this result for each Horror in play, in the order the Horrors appeared. |
Example: Calamity, Tragedy, and Cataclysm are currently in play and have appeared in that order. The group rolls a 5. Disaster is not in play, so no action is taken. The next turn, the group rolls a 6, which is a common result to all Horrors. The group plays the result once (not 3 times). The following turn, the group rolls a 12. They play each Horror's result, one-at-a-time, starting with Calamity. A few turns later, the group rolls a 4. Calamity acts (Bodies Everywhere), and the other two Horrors do not act this turn.
The Horrors
The Breach, a tear in the fabric of our reality, has formed and terrible entities are emerging from it. The first Horror emerges before play begins (see page 20). The remaining three emerge when the Blood Pool is reduced to 80, 60, and finally 40 Blood. Each time a Horror pierces the Breach, roll the Moon die to determine which of the 4 Horrors has arrived.
Each Horror has a variable Level determined by its order of appearance. The first that arrives is Level 5. The second is Level 7, the third is Level 9, and the fourth is Level 11.
If the group vanquishes a Horror and there is not another on the board, the Blood Pool is reduced to the next level (80, 60, or 40) and the next Horror arrives.
A fifth Horror, the World Render, will pierce the Breach the moment the Blood Pool is reduced to 0. The heroes will lose the game if this occurs.
Each time a new Horror appears, its deck is placed on the next highest Circumstance slot on the Night bar, and it begins moving toward its target each Game Turn.
Use the Horror placards to manage the game as each Horror appears in play.
Horror Placard
The Horror placard (one side) shows, for each Horror: its Level, its initial placement, its movement speed and target, the Villain Action table, a Villain Phase summary, the Unique Villain Action (a result of 11 or 12), and the Random Horror Table. The stat and action text on the placards is printed as graphics in the booklet and is not transcribed here.
Random Horror Table
Roll the Moon die to determine which of the four Horrors emerges each time a new one enters play. You'll find this table on the Mirza Noctis Ascended placard as well as each of the four Horror placards. Reroll the die if you roll a Horror that is already in play or has been vanquished.
- Moon die -3: Calamity
- Moon die 4-6: Tragedy
- Moon die 7-9: Cataclysm
- Moon die 10-12: Disaster
Blood Pool Reduction
Reduce the Blood Pool by 1 at the beginning of each Villain phase for each Horror in play. Horrors that have been vanquished no longer reduce the Blood Pool; however, if there are no Horrors in play, reduce the Blood Pool to the next Horror arrival.
For instance, the heroes just defeated the first Horror and another has not yet pierced the Breach. Because there are no other Horrors in play, during the next Villain phase, the Blood Pool drops to 80 and the second Horror arrives in the world.
Blood Pool Triggers: The Blood Pool is located on the Mirza Noctis Ascended placard. Two types of triggers occur when the Blood Pool is reduced to specific levels. These triggers only occur once (even if the Blood Pool rises and then falls again).
- A new Horror has pierced the Breach. Roll for a random Horror (see below), it arrives and immediately consumes the next Circumstance slot in play.
- Noctis loses a portion of his power. Remove one Collector die from play.
- The group may now enter the Breach from Noctis's Castle (see page 46).
Horror Levels: Each Horror enters play with a variable Level that may increase or decrease throughout play. Use their Boss Placard to note their Level whenever it changes. When facing a Horror in combat, their Vitals and combat actions may be affected by their Level. Whenever you see the Level symbol on their placard, the game effect is equal to the Horror's current Level.
Horrors may also gain special unlocks at certain Levels. When a number is shown inside the Level symbol (7, 9, 11), the Horror gains the effect that follows if it is that Level or higher. It is possible for a Horror to gain multiple Level unlocks.
For example, Calamity's Necrosis Wave action deals its Level x2 Corrosive Health damage. At Levels 9 and 11, Calamity's action gains an additional effect. At Level 11, it gains both the Level 9 and Level 11 effect.
Reducing a Horror's Level: The group may discard any Purple Runes they possess before facing a Horror in combat to decrease its Level by 1 for each Rune discarded. A Horror's Level may not be reduced lower than 1. For more information on Purple Runes, see page 44.
Horror Levels Beyond 11: It is possible for a Horror to gain Levels beyond 11. Good luck with that.
Horror Tokens & Initial Placement
Each Horror is represented by a token that will move across the map, targeting specific location types. Consult each Horror placard for details on the Horror's initial placement, its movement speed, and the location type it targets.
| Horror | Token(s) | Initial Placement |
|---|---|---|
| Calamity | [token image] | Place Calamity on a random Crypt, then it Roams twice. Calamity begins in this location. |
| Tragedy | [token image] | Place Tragedy on a random Village, then it Roams twice. Tragedy begins in this location. Each time it Roams (during initial placement or after), double the distance traveled. |
| Disaster | [token images, chosen randomly] | Roll any die when Disaster appears. If the result is odd, Disaster is represented with the 3 hex token. If even, Disaster is represented with the 4 hex token. Place Disaster on a random Monastery, then it Roams twice. Disaster begins in this location. |
| Cataclysm | [token images, determined by its Level] | Cataclysm's token is determined by its Level and can be increased or decreased in size during play. Place Cataclysm on top of Mirza Noctis's Castle (HEXtile G) in any orientation, without leaving the HEXtile. |
Horror Targets & Movement
Each Horror targets a different location type (Village, Monastery, Crypt, or Boss location), denoted on the Horror's placard. Horrors ignore Uncrossable terrain, may share the same space with each other, and may Teleport across gaps in the map of any size at the cost of 1 hex of movement.
Target locations destroyed by Horrors are no longer Event locations. Horrors do not affect other tokens or game locations (like Discoveries or Investigations). Place a Hex Token on Crypts, Monasteries, and Boss locations that are destroyed by Horrors, and use Desolate Village Tokens to cover Villages. Each Horror may gain power as it destroys more of its targets, denoted on the Horror's placard.
| Horror | Target | Movement (per Game Turn) |
|---|---|---|
| Calamity | Crypts | Level 5: 3 hexes per turn. Level 9: 5 hexes per turn. |
| Tragedy | Villages | Level 5: 2 hexes per turn. Level 9: 4 hexes per turn. |
| Disaster | Monasteries | Level 5: 2 hexes per turn. Level 9: 4 hexes per turn. |
| Cataclysm | Boss Locations | Level 5: 3 hexes per turn. Level 9: 2 hexes per turn. Level 11: 1 hex per turn. |
- Calamity: Calamity moves toward the nearest Crypt (or the heroes if there are no Crypts remaining) during the Villain phase each Game Turn. Each time Calamity ends movement on a Crypt, it is destroyed and Calamity gains the top card of the Encounter discard pile as a Fused Dead. The group may exit the Dungeon in a destroyed Crypt.
- Tragedy: Tragedy moves toward the nearest Village during the Villain phase each Game Turn. If all Villages are destroyed, it Roams each Game Turn. Each time Tragedy ends movement on a Village, it is destroyed and Tragedy gains 1 card from the Encounter deck as one of its Forms.
- Disaster: Disaster moves toward the nearest Monastery during the Villain phase each Game Turn. If all Monasteries are destroyed, it no longer moves. Each time Disaster ends movement on a Monastery, it is destroyed and it gains a Level. Monasteries that are destroyed are no longer considered to be revealed for purposes of Grace effects.
- Cataclysm: Cataclysm moves toward the nearest Boss location (random or numbered) during the Villain phase each Game Turn. It does not target other Horrors. Each time Cataclysm ends movement on a Boss location, it is destroyed. Cataclysm gains a Level for every 2 Boss locations it destroys.
Disaster & Cataclysm's Movement: Disaster and Cataclysm's tokens are larger than one hex. Each time you move these tokens, you may rotate the token as you wish. At least one hex of these tokens must remain on the map at all times, and in the case of Cataclysm's larger tokens, that hex must be the center hex of the token. Otherwise, these tokens may have one or more hexes that do not cover the map.
The Group Mini & Horror Tokens
Each Horror token is treated as though they are Boss locations.
- Calamity & Tragedy Tokens: Anytime the group or the Horror stops movement and shares the same space as the other, the heroes must face that Horror in combat.
- Disaster's Tokens: Each hex of Disaster's tokens contain a stat icon. The nature of this being makes it difficult to find its exact location. Before the group faces Disaster in combat, the group must check their position on the token and roll the applicable Stat Test. At least half the group must succeed in order to face this Boss. Otherwise, the heroes can't find it and may try again next turn. For instance, the heroes have stopped movement on the location shown in the booklet. Each hero rolls a Stat Test against their Defend rank. If half the group succeeds, they manage to find Disaster and combat begins immediately.
- Cataclysm's Tokens: Cataclysm changes the land as its presence rolls across it. The heroes may treat this token as if it were a Boss location and face the entity whenever they share the same space. Alternatively, the heroes may choose to pass through Cataclysm instead of facing it in combat. If the group chooses not to face Cataclysm, each hero suffers 3 Energy Drain for each hex of movement traveled across it and then rolls an Energy Stat Test. If the test fails, that hero suffers 1 Madness or 1 Critical Wound (their choice).
Facing Horrors in Combat
Whenever the group faces a Horror, locate its Boss placard (on the opposite side of the Horror placard), and face it in combat. It is possible for the group to, unluckily enough, face more than one Horror at the same time (for instance if Cataclysm and Tragedy share the same space).
Before combat begins, the group chooses to sacrifice any of their Purple Runes to decrease its Level by 1 (see page 37) or to discard a Boss Enhancement (see page 30). Afterwards, record the Boss's Vitals and note its Passives, then combat begins.
Titanic Subtype: Titanic opponents are massive and have more than one Health and Energy Vital (they are still considered one opponent). In order to defeat a Titanic opponent, the heroes must reduce all Health stats to 0. If an opponent only has 1 Health Vital and gains this subtype, it gains another Health Vital equal to its original Health. Each hero may choose during the Resolution phase which Vital their action damages. If an effect requires you to check against a Titanic opponent's Health, use its highest current Health value. Favored Opponent damage against Titanic opponents is dealt to only one of its Vitals each round.
Vanquishing a Horror & Horrific Choice
Each time a Horror has been vanquished, perform the following actions:
- Gain any rewards shown on its Boss placard (unless it is the last Horror).
- The group chooses one of the following special Horrific Choice rewards for vanquishing it:
- Each hero removes up to 3 Madness.
- The group may draw a number of cards from this Horror's deck equal to half its Level rounded down, and choose to play any of them immediately. Once this option is chosen, the group may not choose the alternate option.
- Remove its token and placard from play.
- Remove its Horror deck from play. The Circumstance slot is now restored to normal use (redraw new cards from the Day and Night deck and fill appropriately).
The Dungeon & the Breach
The Dungeon
New to this Expansion are Purple Rune Stones. Each time the group rolls at least 2 matching numbers while placing Rune Stones, those results combine into a single Purple Rune Stone. Purple Dungeon cards are often epic in their nature.
Purple Rune Stones & Dungeon Cards: Purple Rune Stones are new to this Expansion and may be used in normal games as well as while playing the Breach Game Mode. Whenever the group rolls two of the same results when placing Rune Stones, instead of placing two separate Runes, they combine and become a single Purple Rune Stone.
Each time the group moves onto a hex containing a Purple Rune Stone, draw a Purple Dungeon card and play it. These cards are often dangerous, rare, and can be a combination of any of the other card types. Unlike normal Dungeon cards which require two of a kind to create a Rune, each Purple Dungeon card you collect is worth a single Purple Rune.
Destroyed Crypts: Crypts that have been destroyed may act as exits from the Dungeon, though the group may not enter the Dungeon in these locations. A Destroyed Crypt is considered to be an Unlocked Crypt for purposes of Monastery item unlocks.
The Breach
The Breach is a special type of Dungeon Tile that may only be placed on the board in a few ways. The Breach may be located during play. If this occurs, the game is modified slightly.
The Breach Dungeon Tile & Tokens: The Breach Dungeon tile represents the Breach, a monstrous portal that has opened, acting as a doorway between this realm and the terrible reality the Horrors are emerging from. The Breach itself is alive and teeming with its own alien sentience. An even greater Horror, the World Render, is just beyond the Breach, biding its time to enter this realm. The group may attempt to close the Breach from deep inside it.
If you are able to perform this terrifying task, you have sealed away the World Render and you win the game!
- Breach Tile: This is the Breach Tile. It may only be placed in the Dungeon.
- Entry Location: The heroes may only enter and exit the Breach on this hex.
- Spawn Points: [icon] icons represent Spawn points in the Breach where Ascendant type creatures are emerging. The group will face Encounters here. Place a Spawn token on each Spawn Point when the Breach is placed.
- Rifts: [icon] icons represent residual patterns where a Horror emerged from within the Breach. The group will attempt to reduce the Horror's power here. Place a Rift token on each Rift when the Breach is placed.
- Event Horizon: This is where the heroes will attempt to close the Breach.
Placing the Breach: The Breach Dungeon tile may only be placed in the Dungeon, adjacent to other Dungeon tiles and may enter play in one of two ways, outlined below. When it is placed, also gather and place the Spawn and Rift tokens.
- The Breach Dungeon Card: The group may locate and place the Breach by playing "The Breach" Purple Dungeon card.
- Entering via Mirza Noctis's Castle: Once the Blood Pool has been reduced to 70 or less, the group may enter the Breach directly from Mirza Noctis's castle (or his Boss location in the Dungeon). During the Movement phase while the group is on Mirza Noctis's Boss location, the group may Teleport to the entry hex of the Breach Dungeon tile. If it is not already in play, it may be placed anywhere in the Dungeon.
Moving Through the Breach: The group moves through the Breach as though it were a part of the Dungeon, with the following changes:
- Rune Stones: Rune Stones are never placed in the Breach.
- Time: Each hex of movement inside the Breach costs 5 Time [icon] instead of 1.
- Path: The group may only move Backward, Rest in Place, or move Forward, and may never move through walls.
- Teleporting: The group may only Teleport into or out of the Breach through the use of Hearth Stones (see page 7).
- Turn Sequence: The group resolves only the Movement and Villain phases while in the Breach.
Moving Backward: The Breach itself doesn't want the group moving forward, and it rewards them for moving backward. For each hex the group moves backward toward the exit, each hero Heals Vitals (Health and Energy) equal to their Madness. Once all Time has been used, resolve the Villain phase.
Resting in Place: The group may decide to Rest in place instead of moving. Each hero Heals Vitals (Health and Energy) equal to half their Madness, then resolve the Villain phase.
Moving Forward: Moving forward is defined as moving closer to the center hex of the Breach. A few things occur each time the group stops movement when they've moved deeper into the Breach.
- Gain Madness: Each hero gains 2 Madness.
- Roll Stat Tests: Each hero rolls 3 Stat Tests of their choice, with a penalty to each test equal to the number of hexes the group moved this turn. Heroes lose 1 rank in any stat that fails and 2 ranks in any stat that Critically Fails.
- Add an Encounter to the Spawn Pile: Draw the top card from the Encounter deck and place it face down on top of the Spawn Pile. Do not look at this card.
- Resolve the Villain phase: After movement is resolved, play the Villain phase normally.
Spawn Points & The Spawn Pile: The Spawn Pile is a special Encounter pile that contains opponents that may only be fought in the Breach. They are collected as the group moves further inside it. After the group has moved for the turn, if they moved any number of hexes forward, draw the top Encounter and place it face down in the Spawn Pile. The group will face the entire Spawn Pile in combat when they end movement on a Spawn Point containing a Spawn token.
There are 3 Spawn Points on the map, at approximately 30%, 60% and 90% completion. The group must end their movement on a Spawn Point if a Spawn Token exists there.
The players will face each Encounter in the Spawn Pile in one battle, the moment they move onto a Spawn Point. Each opponent's type becomes Ascendant. Encounters that are vanquished are immediately removed from the Spawn Pile. If the group vanquishes all opponents, remove the Spawn token from play.
Fleeing from Spawn Points: The group may Flee from these battles if able, but gain a penalty to Flee equal to the number of Encounters you are currently facing. If successful, instead of Wandering, the group moves 1 hex deeper into the Breach (closer to the Event Horizon). Beware, all remaining opponents you Flee from are returned to the Spawn Pile, so the group will face them again deeper inside the Breach!
Rifts: There are four Rifts on the map where the heroes may stop to affect the Breach's pattern. The higher a hero's Madness, the more they understand about the alien nature of the horrors. The group may move through these locations without stopping, if they wish.
When the group ends movement on a Rift token, after an Encounter has been drawn and added to the Breach Pile, each hero rolls a Core die and compares the result to their Madness. If the result is equal to or less than their Madness, that hero succeeds. If the result is higher than their Madness, that hero fails and gains 3 Madness.
If at least half of the group succeeds, reduce 1 Horror's Level (your choice) by 3 and remove that Rift Token from play. If the group is unsuccessful, the Rift Token is not removed and the group may try again next Game Turn.
Horrors Emerging while the Group is inside the Breach: It is possible for Horrors to emerge while the heroes are inside the Breach. Each time a new Horror emerges from the Breach while the group is inside it, all heroes gain Madness equal to the number of Horrors currently in play. Then the Horror enters play normally.
Hero Death within the Breach: Heroes who die inside the Breach cannot gain a Greater Aspect. Instead, their Keepsake automatically activates (if they have one).
The Event Horizon: The last hex in the Breach is the Event Horizon, the point where the two dimensions merge. The group can close the portal here, and attempt to save the world from the spreading corruption! When the group ends movement on the Event Horizon, combat with the Horrors begins:
- Face each Horror in play in combat, one-at-a-time, starting with the lowest Level Horror.
- The group may not Flee from this combat once it begins.
- At the beginning of each Declaration phase, including the first, all heroes gain 1 Madness and the Horror currently in combat with the heroes loses 3 Levels.
- During the Resolution phase, if a Horror's Level is reduced to 3 or lower, or if that Horror would die (from the group's actions), that Horror is vanquished and the next highest Level Horror in play enters combat.
- The group does not gain rewards between combat with the Horrors while facing them in the Breach.
Horrors that have not yet arrived: It is possible for the heroes to arrive at the Event Horizon before all four Horrors have emerged on the map. If this occurs, combat continues with the next Horror arriving the moment the last Horror is vanquished. Reduce the Blood Pool to the next lowest Horror Blood Pool Trigger (for instance, if the 3rd Horror arrives in this way, reduce the Blood Pool to 60). This continues until all Horrors have been vanquished.
Role Type Bonuses: The heroes benefit greatly from being so close to the Event Horizon.
- Assist and Striker type heroes gain Block equal to their Madness while in the Event Horizon.
- Healer and Sapper type heroes gain Health or Energy Regen (their choice) equal to their Madness while in the Event Horizon.
- Utility type heroes may choose one of the above effects to gain while in the Event Horizon.
These bonuses may stack if a hero has more than one Role Type.
Valor Score
A point of Valor is awarded when specific milestones are achieved while playing any HEXplore It game. Valor is not unique to the Domain of Mirza Noctis Expansion. For more information on how Valor works, see page 16 of the Play Styles Rule book.
Gaining Valor: Here are the additional ways you can earn Valor while playing the Domain of Mirza Noctis Expansion. Mark the check box and adjust your Valor score on the bar below when you complete one of these objectives.
- Win the game by closing the Breach in the Event Horizon
- Defeat all 4 Horrors in a Single Game
- Gain 6 or more Legendary Cards in one game
- Win the game with at least one hero's Keepsake active
Valor bar: 1, 2, 3, 4.