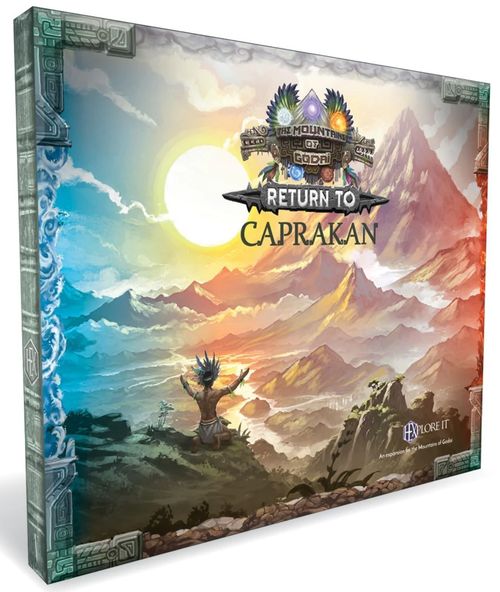
HEXplore It: The Mountains of Godai – Return to Caprakan
Official rulebook: Mariucci J. Designs, LLC · PDF
HEXplore It: The Mountains of Godai – Return to Caprakan Rulebook
Table of Contents
Table of Contents
- Welcome
- Expansion Disclaimer
- Game Contents
- Die & Miniature
- Card Decks
- Placards, Punch Boards & Tokens
- Heroes & New Content
- Blood Magic
- Bosses
- Return to Caprakan Game Mode
- Map Setup
- The City-State of Aztlant
- The Temple of the Everlasting
- Recruits & Specialists
- Primordial Centers
- Shamans
- SkyTiles & Nether Tiles
- Camping
- Towers & Fortresses
- Initial Acquire Amount
- Jaethi's Miniature, Siege Placard, & Imbalance
- The Short Count Calendar
- Repairing the Tapestry
- Dedications
- The Fifth Sun Deck
- Getting Started
- Return to Caprakan Tips
Welcome
Welcome to Return to Caprakan, an Expansion for the Mountains of Godai, the fifth Volume in the HEXplore It gaming universe.
Most components in this Expansion may be added to your Mountains of Godai Core game to enhance your gaming experience. Just as much content however, grants access to an entirely new way to play and experience the Mountains of Godai.
The Return to Caprakan Expansion offers a glimpse into a past timeline at the height of the Aztlant Empire. The Xumucane have turned from their traditions and now stand to usher in the Fifth Sun, the fifth and possibly final cataclysm that will shake the foundations of our world.
Create powerful heroes and help them stave off the world's annihilation!
Expansion Disclaimer
The Mountains of Godai Core box is required to play with much of the content that appears in this Expansion. You'll find references to the MoG Core Rule book (CRB) throughout this booklet.
The following components in this Expansion can be used in any HEXplore It game:
- 2 HEXclusive Roles
- 4 HEXclusive Races
- 1 Rare Race
- 5 Aspects
- 4 Bosses
- 10 Blood Magic Spells
- 10 Power Up Cards
- 10 Encounter Cards
Game Contents
- 1 Rule Booklet
- 1 Twelve Sided Die
- 1 Miniature
- 1 Punch Board
- 5 Dry Erase Placards
- 2 Roles
- 2 Boss Placards
- 1 Game Play Placard
- 1 Dry Erase Defender
- 10 Cards (sized 70 x 110 mm)
- 5 Races
- 5 Aspects
- 1 Tuck Box
- 80 Cards (sized 63 x 88 mm)
- 10 Power Up cards
- 10 Encounter cards
- 10 Commission cards
- 10 Harvest cards
- 40 Fifth Sun cards
- 32 Cards (sized 44 x 67 mm)
- 20 Siege cards
- 12 Blood Magic cards
Die & Miniature
Wellspring Die (1 pink; twelve-sided): Shared between all players, the Wellspring die is numbered 2 through 12, and the symbol face is considered to be a result of 1.
Xumucane Flamecaster: Shared between all players, this miniature represents the hero group.
Card Decks
Several cards in this Expansion supplement the core game and others are only used while playing the Return to Caprakan Expansion. Unpack and shuffle the following cards and place in each of your Core game deck boxes:
- Power Up (10)
- Encounter (10)
- Caprakan Commission (10)
- Harvest deck (10)
- Siege Decks:
- Air (4)
- Earth (4)
- Fire (4)
- Water (4)
- Void (4)
The Fifth Sun deck (40) is exclusive to the Return to Caprakan Expansion and replaces Jaethi's Villain deck during play.
Also new in this Expansion are Blood Magic (12) cards (see Blood Magic below). If you also own the Return to the Domain of Mirza Noctis Expansion, you will have a box to store your Blood Magic cards, including these.
Loose Cards: New Race (5) and Aspect cards (5) can be added to your HEXplore It collection.
Placards, Punch Boards & Tokens
Placards define several mechanics, game locations, and opponents. These are all dry-erasable. Set these aside and consult them when needed.
- Roles (2): These are the hero Roles in the Return to Caprakan Expansion. They are the Mycotomancer, and Thread Mage. Each player controlling a hero will select a Role. You may also use Roles from any HEXplore It Volume in your adventures.
- Bosses (2): These are 4 new Bosses you may face in the Return to Caprakan Expansion (one on each side).
- Aztlant Empire / Temple (1): The Aztlant Empire placard contains information about the central City-State of Aztlant. The back side of this placard contains information related to Temples. This placard replaces the Temple placard from the Core Box when you are playing the Return to Caprakan play style.
- Aztlant Defender Tracker (1): Like placards, this card is dry erasable and only used in this expansion. It is used to record the City-State of Aztlant's stats.
Dry Erasable Content: Dry erase markers are included in the Core game. Please note that only the placards listed above are laminated and can be erased.
Punch boards: You'll find a Punch board in your game box (on the top of the box). Take care when punching out your map tiles and tokens. Some tokens are small and may be easily missed. When complete, you'll have the following items:
- 1 Aztlant Empire Tile
- 4 Primordial Centers
- 1 Siege Portal (see Map Setup)
- Miscellaneous Tokens (see below)
Tokens: Be sure to check that you have each of these before you toss out your Punch board cutouts.
- Shaman Tokens (6): These tokens may be gained by the group and used in many ways during play. See Shamans.
- Settlement Tokens (5): These tokens may be placed by the group while they are in the City-State of Aztlant. See the Aztlant Empire Placard.
- Discovery Tokens (5): These tokens function like the Discovery Tokens found in the Core Box. They are placed through cards found in the Fifth Sun deck.
- Blood Bomb Tokens (6): These Tokens are gained each time the group gains a Blood Magic Tier. See Blood Magic.
- Skull Tokens (5): These Tokens are placed on the board each time Flaming Skull moves.
Heroes & New Content
Heroes
You'll find all new Roles, Races, and Aspects in this Expansion that can be used in any HEXplore It game.
Roles & Races: These Roles and Races are more powerful than their basic counterparts.
Each Role has two Role Types instead of one. For instance, the Mycotomancer is both an Assist and a Healer.
It is best not to group these Roles and Races with basic ones. If you play with one of these and a basic Role, the basic might feel underpowered in comparison.
For more information on Roles and Races, see page 12 CRB.
Aspects: Aspects are unique augmentations for your hero. At the beginning of the game, players may choose an Aspect to apply to their hero. Players may share the same Aspect if they'd like. Gain the stat modifiers, Food Rating Modifier, and other Abilities shown on the card.
Heroes may only have one Aspect at a time. If you gain a new one, discard the original (keep the old Aspect's Stat Modifiers, but retain none of its Abilities) and apply the new Aspect to your hero.
Blood Magic
Blood Magic was originally introduced in the Domain of Mirza Noctis, our fourth Volume and has been reintroduced in this Expansion.
Blood Magic can be purchased in Aztlant and may be rewarded in many situations.
Whenever you see the Blood Magic card as a game reward, the group's Blood Magic Tier increases by 1, the group draws one Blood Magic Spell, and gains 1 Blood Bomb Token.
While there is no limit to how many Tiers you may gain, there are only 12 Blood Magic cards and 6 Blood Bomb Tokens in the game. Record the group's Blood Magic Tier on the Aztlant Empire placard.
Blood Bomb Tokens
A Blood Bomb Token may be placed by the group on any hex the group moves into at any time during the Game Turn. Only one Token may be placed on any hex at a time, but there is no limit to how many Tokens may be placed in a single Game Turn.
Anytime a Siege Opponent moves within 1 Range of this Token, the group may choose to trigger the Token and deal 3 Siege Damage to Siege Opponents within the group's Range of the Token. This damage cannot be reduced or Negated.
When triggered, remove the Token from the map and regain it. It may be placed again later. The group may have up to 6 Blood Bomb Tokens (though their Tier may be increased higher than this).
Casting Blood Magic
Any hero may suffer Critical Vital damage equal to the Spell's cost to cast a Blood Magic Spell. This damage may not be reduced. Each hero may cast up to one Spell per Game Turn as if it were a Racial Ability.
Critical / Critical Wounds Keywords
These Keywords were introduced in DoMN and are referenced below. Keep tally of the number of Critical Wounds your hero has on your hero's Role placard or use the Critical Wound trackers from Volume 4, DoMN.
- Critical: Anytime a hero suffers 1 or more Critical damage from a single source, they gain 1 Critical Wound.
- Critical Wound: Each hero may only sustain a number of Critical Wounds equal to 3 plus their initial Food Rating (max 6). If a hero suffers more than this, they immediately die. Critical Wounds may not be removed by items, abilities, or effects that Negate Conditions. Each hero removes 1 instance of Critical Wounds from themselves anytime they Camp and all Critical Wounds if they die.
Storing your Blood Magic Spells
The Return to Domain of Mirza Noctis Expansion comes with a tuckbox to hold your Blood Magic Spells. It is large enough to hold all Blood Magic Spells in the HEXplore It series. If you do not have this content, this Expansion comes with a small baggie to hold your Blood Magic cards and Blood Bomb Tokens. You may use any of the Blood Magic Spells in the series, though some Blood Magic Spells may not be pertinent to the game you are playing.
Bosses
Four new Bosses are included in this Expansion. Each makes an appearance in the Return to Caprakan Game Mode. If you'd like to bring them into your MoG Core Box experience (or any HEXplore It game), here's how:
Three of the four Bosses can be assigned to three Boss Tokens in the MoG Core Box. Simply swap in the Boss from this Expansion when you interact with the applicable Token.
| Boss Token Level | Boss |
|---|---|
| 1 | Hexanthi Horde |
| 6 | Colossus Clifftalon |
| 7 | Teōtl Epēuani |
The final Boss for this Expansion, Kualotekutli, may be Summoned while playing the MoG Core game. To initiate combat with it, the group must Consume 4 in any Temple.
Hexanthi Horde
The Hexanthi are an ant-like race living deep under the roots of the Kapikiawal Jungle. Some say their Queen can access the mind of each of her brood. This Boss is triggered through a card in the Fifth Sun deck.
Colossus Clifftalon
Clifftalons are Wyvern-like creatures common in the Kapikiawal Jungle. This one, though, is much larger than usual. This Boss is triggered through a card in the Fifth Sun deck.
Teōtl Epēuani
Shamans are known to protect and nurture the natural world. Teōtl Epēuani believes that this world is being ushered into the next world, and that by interfering with this cycle, we are putting the universe at risk. This Boss is triggered through a card in the Fifth Sun deck.
Kualotekutli
Kualotekutli is the mythic protector of the fabric of the Wellspring. When the balance tips, just before an apocalypse, Kualotekutli stirs and labors to awaken Jaethi, the Keeper of the Wellspring. This Boss may be fought only from the Temple of the Everlasting.
Return to Caprakan Game Mode
This version of play presents a past timeline for your heroes — what happens before Jaethi arrives? What was the catalyst that ushered her into this world?
The Empire of Caprakan struggles to recover balance as demigods grow to power and walk the earth. Their ambition — fueled by the people who revere them, has sundered the world. Their terrible rise in power has tipped the elemental balance. Only the Xumucane Shamans can rally the people, which must happen to reverse the descent into madness.
As eternal twilight looms overhead, and the ancient power called Kualotekutli awakens, the veil between worlds will thin. Thin enough, and Jaethi will return.
The Object of the Game
Win the game if any of the following occurs:
- The group vanquishes Kualotekutli (the Level 10 Boss) in combat.
- The group Repairs the Tapestry for all 5 Elements (see Repairing the Tapestry).
- The group becomes Dedicated to all 5 Bosses (see Dedications).
Lose the game if any of the following occurs:
- The City-State of Atzlant is destroyed (either version, see The City-State of Aztlant).
- The Calendar reaches 0 on the last Siege.
- The number of Recruits in the Stockpile drops to 0.
- Unlike previous HEXplore It games, hero death is not a game-loss condition (see Reviving Heroes, page 104 CRB).
Summary of Differences from Core Box Play
The following list summarizes the differences between MoG Core Box play and the Return to Caprakan Expansion. Each point is described in detail on the pages that follow.
- Map Setup (see Map Setup): The map is set up differently from MoG Core Box play.
- Only Caprakan map tiles are used.
- There are 12 Siege Portals in play instead of 10. When rolling to place units using Siege Portals, use the Wellspring die instead of a Core die.
- Boss Tokens are not initially placed on the board and Boss Lairs are initially uncrossable locations.
- The map will not be expanded during play.
- City-State of Aztlant (see The City-State of Aztlant): Aztlant is a new City-State. Aztlant must not fall. The two Core Caprakan City-States are also used in this play style but their fall does not affect the endgame.
- The back side of the Aztlant Empire Tile is called Eternal Twilight.
- This game has a new villain, Kualotekutli, who is active during Eternal Twilight.
- The Temple of the Everlasting is a special Temple that appears during Eternal Twilight.
- Recruits & Specialist Resources (see Recruits & Specialists): The group starts with 40 Recruits and 8 Specialists in the Stockpile. The game is lost if the number of Recruits in the Stockpile is reduced to 0.
- Primordial Centers (see Primordial Centers): Four Primordial Centers exist in the world, one for each of the four basic Elements.
- Shamans (see Shamans): Up to 6 Shaman Tokens may be gained during play. They may be Consumed as if they were Aetherial Ore and they are vital to winning the game in this play style.
Summary of Differences (Continued)
- SkyTiles and Nether Tiles (see SkyTiles & Nether Tiles):
- Only the Nether side of SkyTiles are used during play.
- Floating Mountains & SkyTile Risers are not used during play.
- Camping (see Camping): The group gains an extra effect (like placing a Nether Tile, losing a Critical Wound, or flipping a Primordial Center) each time they Camp.
- Towers and Fortresses (see Towers & Fortresses): Towers and Fortresses may not be built during play, although the Temple Fortress (the special Temple) may be built.
- Initial Acquire Amount (see Initial Acquire Amount): The group's initial Acquire Amount is reduced to 2 in this play style.
- Jaethi's Miniature, Jaethi's Siege Placard, & Imbalance (see Jaethi's Miniature): Jaethi's miniature, her Siege placard, and Imbalance effects are not used in this play style. The Calendar is slightly modified.
- Repairing the Tapestry (see Repairing the Tapestry): The group may attempt to Repair the Tapestry to win the game.
- Dedicating to Bosses (see Dedications): Dedications function differently from MoG Core Box play.
- Villain Deck (see The Fifth Sun Deck): The Fifth Sun deck replaces Jaethi's deck. One Core box Boss is tied to each siege! card in the Fifth Sun deck.
- Starting the Game (see Getting Started): A few changes are made before you begin play.
Map Setup
The map in Return to Caprakan is always staged in the configuration shown on the map diagram. This helps balance your game play experience. As part of your game setup, you will place all tiles shown below (in any orientation that matches the layout). They are:
- 4 Game Bars
- Aztlant Empire Tile
- 2 Caprakan Empire Tiles (A-B)
- 8 randomly drawn Caprakan HexTiles
- 4 Siege Portal Tiles
- 4 Primordial Centers
Placing the Empire Tiles: The Aztlant Empire Tile is placed in the center of the game board with the Aztlant side face up. The two Caprakan Empire Tiles are placed in the positions shown, with each City-State rotated in any orientation you wish.
New Siege Portal (11-12): One new Siege Portal is placed on your board. This map piece adds Siege Portal numbers 11 and 12. Place each of the four Siege Portal pieces as shown, in any orientation you choose. Whenever you roll to generate a Siege Portal location, roll the Wellspring die instead of a Core die to determine the Portal number.
Boss Lairs & Boss Tokens: Boss Lairs are initially uncrossable locations. Do not place Boss Tokens on Boss Lairs when you create your map. Boss Lairs will become accessible during play when Sieges occur.
Expanding the Game Map during play: The map is not expanded in this game mode. The entire map is created before the game begins. The remaining four HexTiles will not be used.
The City-State of Aztlant
Three City-States are in play instead of two in the Return to Caprakan Expansion. The City-State of Aztlant is located on the Aztlant Empire Tile. Each of the seven hexes in orange are considered to be the City-State.
Aztlant must be kept alive during play! If Aztlant is destroyed, the game is lost.
If either or both of the other two City-States (Nimo Teptek and Manchu Pakra) are destroyed, it is unfortunate, but the game is not lost. Use their Defender Trackers to track their stats as per the Core game.
Eternal Twilight
The back (Nether) side of the Aztlant Empire Tile is Eternal Twilight. At many times during play, this tile will be flipped over. The Aztlant City-State still exists in this twilight realm.
Whenever this tile flips over, remove any Tokens from it. If any miniatures are on this tile when it flips over, place them on the matching hex of the flipped side.
Flipping to Eternal Twilight may occur during any Stage of the game. If it is already flipped to its Eternal Twilight side when another effect triggers it to flip, do not flip it back to its Aztlant side. The tile will flip back to its Aztlant side when the next Harvest Stage begins. See The Short Count Calendar.
Kualotekutli & Eternal Twilight
While the Eternal Twilight tile is in play, choose one of the following to occur at the end of each Villain phase:
- Kualotekutli Consumes 3 Recruits, or each revealed City-State of Aztlant loses -1 to the stat marked by the castle icon (your choice). [Transcriber's note: the castle icon is a glyph that the text layer does not carry; it is described as it appears on the page.]
Aztlant's Twin Defender Trackers
The Aztlant Defender Tracker has two sides. Each side is considered to be a separate City-State with different stats.
Both sides of this Defender are filled out at game setup and any enhancements/losses on each side are tracked separately, depending upon which side is present at the time of change.
Each time the Aztlant Empire Tile is flipped over, also flip the Aztlant Defender Tracker. Its Twilight side is in play whenever the Eternal Twilight side of the Empire Tile is in play.
Unless otherwise specified, you may only Improve the currently revealed version of the City-State of Aztlant. For example, during Eternal Twilight, only Twilight Aztlant may be Improved.
Aztlant & Final Moments
Only the City-States of Nimo Teptek and Manchu Pakra can be destroyed during the Final Moments random City-State destruction event that occurs at the end of the 3rd and 4th Siege Stage.
The City-State of Aztlant is not a target for this effect.
The Temple of the Everlasting
The Temple of the Everlasting is a special place that is available to the heroes only during Eternal Twilight. This Temple is treated as if it were a normal Temple, although it is not a Defender and cannot be destroyed.
The heroes may perform three new actions while in this location, each up to once per Stage. This includes learning Blood Magic (see Blood Magic), Consecration (a ceremony to gain Recruits or Specialists), and initiating Mortal Combat with Bosses from any HEXplore It game (including this game's villain, Kualotekutli). See the Aztlant Empire placard for more information.
Recruits & Specialists
If the number of Recruits in the Stockpile is reduced to 0, the game is lost. The group should therefore always keep at least some in the Stockpile to prevent a game loss. The group starts the game with 40 Recruits and 8 Specialists in the Stockpile.
Each of these Resources have a function in winning the Return to Caprakan game. Although you are not required to keep an inventory of Specialists, they are required to face Kualotekutli in Mortal Combat or to Dedicate to Bosses. This can only be done in the Temple of the Everlasting.
Consuming Recruits & the Stockpile at 0: There may be times when a game effect Consumes one or more Recruits.
If the Consume effect would leave none remaining in the Stockpile, instead of losing the game, the group may Consume twice the required amount of Recruits from any City-States and/or Temples. If you cannot lose them from these locations, the game is lost.
Primordial Centers
Four Primordial Centers exist in the world, each one is tied to a basic Element. These are sacred locations to the Xumucane people.
Like Cataclysm Tiles, Primordial Centers are considered to be Hazardous Terrain and the front of each tile (the Element side) contains an Elemental Rift (see page 35 CRB).
If the group Camps in a Primordial Center, flip the tile over to its Nether side.
A Shaman exists in the Nether and may be gained by the group after they have flipped it to its Nether side (see Shamans).
Shamans
Shamans may be gained in many ways during play and are represented and counted with Shaman Tokens. Shamans have a function in winning the Return to Caprakan game. The group may only have up to 6 Shaman Tokens at any time.
Shaman Tokens: Each of the four Primordial Centers (one for each basic Element) and the Eternal Twilight map tile (for Void) contain Shaman icons printed on the tile. A Shaman Token may be gained on these locations. Whenever one of these map tiles is flipped to its Nether side, check for the following:
- If the group has not gained the Shaman associated with the Element icon shown, place a Shaman Token on that hex. The group may gain it by traveling to that hex. Note that if the group is already on this hex when the Token is placed, they immediately gain it.
- If the group has already gained the Shaman associated with the Element icon shown, a Shaman Token is not placed on this location.
It is possible to gain Shaman Tokens in other ways, such as a Reward for vanquishing an opponent. In these cases, the Shaman Token is not associated with an Element.
Shaman Tracker: There are six boxes on the Aztlant placard to record the types of Shamans you have acquired. Five correspond to the five Elements (Air, Earth, Fire, Water, and Void). The sixth corresponds to no particular Element (it is blank and treated as a wildcard).
Whenever a Shaman Token is gained, fill in the corresponding Element Tracker box on the Aztlant placard. If no Element is assigned to the Shaman you have acquired (for instance the Eternal Darkness Siege Opponent card), fill in the sixth, blank box instead. Another Shaman Token of the same Element type may not be gained until the first is lost. Erase a filled in box on the Shaman Tracker when a Shaman is Consumed, used, or discarded.
Example: The group gains a Shaman Token after moving to the center hex of the Fire Primordial Center. They fill in the Fire check box on the Aztlant placard. Later, they decide to Consume a Shaman and choose Fire. They erase the Fire check box.
Shaman Uses: Shamans may be Consumed as if they were Aetherial Ore or may be Consumed in Temples to either Repair the Tapestry or in Mortal Combat against this game's Villain, Kualotekutli.
SkyTiles & Nether Tiles
Only the Nether side of SkyTiles are used in the Return to Caprakan Expansion. The Floating Mountain side of SkyTiles and SkyTile Risers are not used.
In this play style, only Void type Siege Opponents can move onto Nether Tiles. Basic type (Air, Earth, Fire, and Water) Siege Opponents may not move onto Nether Tiles.
Camping
Camping removes 1 Critical Wound from each hero.
Additionally, whenever the group Camps, they may choose one of the following:
- If the group is on a permissible location (see below), they may place a Nether Tile on their current location (any of the 7 hexes are placed on the group's hex location).
- Or, remove an existing Nether Tile from anywhere on the map.
- Or, remove a Hex Token covering a Settlement.
Nether Tile Permissible Locations
- Nether Tiles may not be placed on the Aztlant Empire Tile, Primordial Centers, or on the Siege Portals.
- Up to one Nether Tile may be placed on Empire Tiles A and B and on each HexTile.
Placing Nether Tiles over game locations (like Settlements and the City-States of Nimo Teptek and Manchu Pakra) can protect them from Siege Opponents and other game effects. These locations are considered removed from the game (though not destroyed) while a Nether Tile covers it.
Camping in Primordial Centers
When the group Camps in a Primordial Center, unless otherwise specified, that tile is flipped to its opposite side (a SkyTile is not placed).
Towers & Fortresses
Towers and Fortresses are not used in the Return to Caprakan Expansion. The only player-placed Defender used is the Temple Fortress.
Initial Acquire Amount
In the Core game, the group has an initial Acquire Amount of 3. While playing the Return to Caprakan Game Mode, the group's initial Acquire Amount begins at 2.
Jaethi's Miniature, Siege Placard, & Imbalance
Jaethi's Miniature and her Siege placard are not used in the Return to Caprakan Expansion. Skip the first part of the Siege phase. Jaethi's phase is not played. Any Imbalance effects are ignored.
The Short Count Calendar
When a Siege begins, the Calendar is increased differently than in the Core game. Instead of rolling the Core die, roll the Wellspring die.
Increase the Calendar by 3 + one third the roll result (rounded down).
Eternal Twilight (Calendar)
- While the Siege Duration counter is 4 or less, the Aztlant Empire tile is flipped to its Eternal Twilight Side.
- While 5 or higher, or at the end of a Siege, the Empire tile is flipped to its Aztlant side.
Unless otherwise noted by another triggered effect, keep the tile flipped with the Eternal Twilight side face up until the next Harvest Stage begins.
Example: A new Siege has begun, so the group rolls the Wellspring die. The result is 3, so 4 bubbles are filled in (base 3 plus 1 for the die roll result). Aztlant is also flipped to its Eternal Twilight side. If it is already flipped to this side, the players do not flip it back to its Aztlant side.
Final Moments: The Short Count Calendar card graphic lists the following Final Moments effects, which are cumulative. (The card graphic also prints a Siege Duration formula; it is not transcribed here because the printed text above gives the Calendar increase.)
- 1: All Defenders lose [castle icon] 1.
- 2: All Defenders lose [castle icon] 3.
- 3+: A random City-State is destroyed.
Repairing the Tapestry
The Tapestry is unravelling at its seams. One way to win the game in this play style is to Repair the Tapestry by balancing each of the 5 Elements. You may Repair each in any order.
This can be accomplished while the group is in a Temple and has at least 1 Shaman Token to discard.
- Consume 1 Shaman and an Element of your choice.
- Increase the Element cost by 1 for each Element you have already Repaired.
- Fill in the chosen Element in the tracker on the Temple placard, then discard a Shaman Token of your choice (erase it from the Aztlant tracker).
| Repair # | Cost |
|---|---|
| First | 1 Shaman and 1 Element |
| Second | 1 Shaman and 2 Elements |
| Third | 1 Shaman and 3 Elements |
| Fourth | 1 Shaman and 4 Elements |
| Fifth | 1 Shaman and 5 Elements |
If all five Elements are Repaired, the game is won! Congratulations, you have prevented Jaethi from appearing in the world until the era of the sixth Sun.
Example: The group is Repairing Fire. They have already Repaired 2 other Elements. So they must Consume 1 Shaman and 3 Elements.
Dedications
Powerful deities walk the earth. One way to win the game in this play style is to Dedicate yourself to each of the 5 Bosses shown on this page. You may Dedicate to each in any order (even if its Boss Token has yet to appear in the game).
Dedication to a Boss that has not been vanquished can be accomplished while the group is in any Temple up to once per Stage (once during each Harvest Stage and once during each Siege Stage).
- Consume 3 Specialists and an Element of your choice.
- The Element chosen determines the Boss you'll Dedicate to.
- Increase this cost by 1 Specialist for each Dedication you already possess.
- Fill in the chosen box on the Dedication Tracker (located on the Temple Placard).
If you gain all five Dedications, the game is won! Unfortunately for your people, Jaethi's path into this world is now guaranteed. The gods have gained too much power. Yet, perhaps, this will take time to occur. Problems for another day...
| Element | Boss |
|---|---|
| Air | Tlapēchitl |
| Earth | Itzcoatl |
| Water | Atlecuhtli |
| Fire | Miquipāpalōtl |
| Void | Tlacoehua |
| Dedication # | Cost |
|---|---|
| First | 3 Specialists and 1 Element |
| Second | 4 Specialists and 1 Element |
| Third | 5 Specialists and 1 Element |
| Fourth | 6 Specialists and 1 Element |
| Fifth | 7 Specialists and 1 Element |
Dedication Effects
Once Dedicated to a Boss, the group may not face them in combat for the remainder of the game. The group may trigger their Dedication Lair Effect on the Boss Lair, if it is revealed on the map.
Additionally, each Boss grants the group an Instant Dedication Effect and a Role Type Dedication Effect (available only to heroes sharing that Role Type, see page 12 CRB). Both types of special Dedication abilities are treated as if they were Racial Abilities.
The group does not need to have any specific Role Type for a Dedication to occur; if that Role Type is not represented, that special Role Dedication effect is simply not applicable. See the Dedication section on the Temple placard for details.
Mark the chosen Dedication in the tracker on the Temple placard.
The Fifth Sun Deck
This deck replaces Jaethi's deck during play. You will recognize cards in this deck as having the same symbols and systems that Jaethi's deck has in the Core Box. Beyond the content changes, this deck functions exactly the same as Jaethi's deck functions in the MoG Core Box play.
Build this deck as outlined on page 44 CRB before play begins. Return to Caprakan play consists of 3-4 Siege Stages, just like MoG Core Box play.
siege! Card Bosses
Each siege! card in this deck features one of five Bosses from the MoG Core Box. These demigods have stolen an enormous amount of power from the Wellspring. Followers devoted to them have given them this power. They are to blame for drawing Jaethi's attention to this world!
Imbalance numbers are not tracked in Return to Caprakan play. Aside from placing Boss Tokens as outlined at right, Siege cards function like they do in the MoG Core Box play (see page 68 CRB).
The page shows five siege! card Bosses, captioned: Tlapēchitl, Itzcoatl, Atlecuhtli, Miquipapalotl, and Tlacoehua.
Placing Boss Tokens
When a siege! card is drawn, this Boss has obtained enough power to manifest in the world. Follow the instructions on the top of the card.
Place their Boss Token on a Boss Lair of your choice as indicated on the siege! card. This Boss may now be fought, though it is Dangerous until the end of the Siege Stage in which it appeared. When the Siege ends, they are no longer Dangerous.
If the group vanquishes or Dedicates themselves to a Boss tied to an active Siege, the Siege Stage immediately ends and the next Harvest stage begins.
Magnetic Locations during a Siege
The group may use clever Nether Tile placement to guide Siege Opponents to their Magnetic targets.
Only Void type Siege Opponents may move onto Nether Tiles. Basic type Siege Opponents must move around them.
If a Basic type Siege Banner would spawn on top of a Nether Tile, reroll both its Siege Portal number and its Wander direction.
The City-States of Nimo Teptek and Manchu Pakra may be covered by a Nether Tile. If all hexes of the City-State are covered by it, it is not Magnetic.
The Aztlant Empire Tile may not have a Nether Tile placed on it, so it will always be a Magnetic target to all Siege Opponents.
Getting Started
Once you understand the game changes on the previous pages, follow these steps to set up your Return to Caprakan game.
1. Create your Heroes
- No changes from the Core box.
2. Set up the Game Board
- Place the map as configured in Map Setup. All tiles are placed at this time.
- Do not place an initial SkyTile on the board, they are not used.
- Shuffle and place the Caprakan Commission deck on each side of the map (roughly split in half), then flip over the top card of each of those decks.
- Shuffle and place the other card decks (Jaethi's Villain deck is not used).
- Gather and set aside the rest of the game components.
3. Create the Fifth Sun Deck
- This step determines how many Siege Waves your game will produce, your game length, and difficulty. Build this deck as outlined on page 44 of the CRB.
4. Place hero Group & Gain Initial Resources
- The group gains 40 Recruits and 8 Specialists, and begins play in the center hex of the City-State of Atzlant.
- Fill out each side of the Aztlant Defender Tracker.
- Each hero gains Initial Equipment and rolls the 5 Element dice as described on page 46 of the CRB. Do not place an initial Tower.
5. Begin your adventure to save the known world!
Return to Caprakan Tips
- Pay attention to your Recruits reserve. If you run out, you lose the game!
- Pay attention to Aztlant's Defender. If either side of the Defender is reduced to 0, you lose the game!
- Only Siege Opponents of the Void type can move across Nether Tiles.
- Camping allows the group to place a Nether Tile on the map. Careful placement can protect your City-States from Siege Opponents.
- Primordial Centers can be flipped to their Nether side to reveal Shaman Tokens. Gather them to help win the game.
- Focus on gathering Elements and Shamans to win the game by Repairing the Tapestry.
- Focus on gathering Specialists and Elements to win the game by Dedicating to Bosses.
- Blood Bomb Tokens can be strategically placed to deal damage to Siege Opponents.