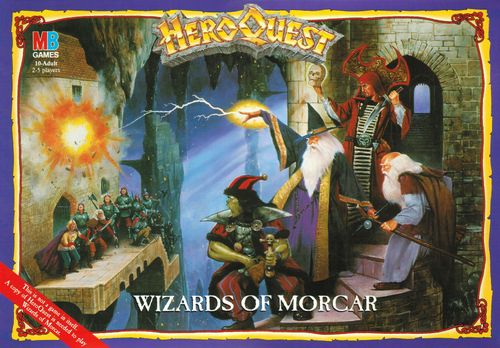
HeroQuest: Wizards of Morcar
HeroQuest: Wizards of Morcar Rulebook
Table of Contents
Table of Contents
- Components
- Cloak of Shadows
- Magical Traps
- 8. Hiring Mercenaries
- Playing Wizards of Zargon
- Quest Map Guide
- Quest 1: The Tower of the High Mage
- Quest 2: Crypt of the Necromancer
- Quest 3: Eyrie of the Storm Master
- Quest 4: Lair of the Orc Shaman
- Quest 5: The Final Conflict
- Monster Chart
- Mercenary Chart
- Magic Reference Chart
Components
Contents: Plastic Figures: 4 new Evil Sorcerer Figures, 12 Mercenary Figures, 24 Weapons; 24 new Chaos Spell Cards, 23 new Mercenary Cards, 9 new Wizard & Elf Spell Cards, 8 new Treasure Cards and a Cardboard Tile Sheet.
Cardboard tile sheet includes:
- 1 Earthquake Tile
- 1 Lightning Tile
- 4 Breached Wall Tiles
- 4 Fireburst Tokens
- 1 Cloak of Shadows Tile
- 6 Blocked Square Tiles
- 1 Magic Reference Chart
- 3 Magical Barrier pieces (Stone, Fire and Ice)
All cardboard components should be carefully removed from the cardboard sheet. The plastic figures and weapons should be removed from their runners. Discard waste cardboard and plastic. New game components are described below and on the following pages.
Preparing the Mercenary figures: take the 12 Mercenary figures and clip a weapon to each of them by slotting the weapon into the hole on the front of each miniature as shown in figure 1.
Preparing the Magical Barriers: carefully push out the card pieces from the card sheet. Take the 3 Magical Barrier pieces and slot each of them into a plastic base as shown in the booklet.
Note: Some of the cardboard tiles listed above are two-sided. The front and back may be different.
Note: The new cardboard components are shown here and on the following pages. Next to most components is a matching Quest Map symbol. These symbols appear on each map to show you where to place components on the gameboard. These symbols are also the exact size needed for the blank "create your own" Quest Map provided in the Game System Quest Book. All you have to do is photocopy the symbols and cut them out.
Cloak of Shadows
This tile is to be used with one of the new Wizard and Elf Spells. There is no Quest Map icon for this tile as it is used randomly during game play.
Magical Traps
Magical traps cannot be found by searching. They can only be disarmed with certain spells specified on the Magic Reference Chart. Magical traps may only be activated once. As soon as a magical trap has been activated, players can move safely through that room or corridor.
Whenever a character enters a room described in the Quest Notes as containing a magical trap, Zargon must refer to the Magic Reference Chart to see the effect of that particular trap.
The new magical trap tiles are the Fireburst Trap, the Hurricane Trap and the Teleport Trap. Their effects are given on the Magic Reference Chart (see the Magic Reference Chart section below).
8. Hiring Mercenaries
Adventurers may each hire up to four followers at any time between Quests. These followers may be from any of the four types of Mercenaries. To hire a Mercenary, a Hero must pay the initial Price to Hire which appears on the Mercenary Card. That Mercenary will then stay with and fight for that Hero until he, the Mercenary, is killed and as long as he is paid 10 Gold Coins at the end of each Quest. If he is not paid for his services, he will then leave and must be paid his full Price to Hire in order to return.
For each Mercenary a Hero hires, that player should take one Mercenary figure with the relevant weapon shown on that Mercenary Card. He should also take one Mercenary Card for each of the types he has hired. This details the statistics of each type of Mercenary. (Note: a number of spare Mercenary Cards have been provided to replace any lost or damaged cards.)
A player whose Hero is killed can choose to continue the Quest with the Hero's surviving Mercenaries. If not, he must remove the Mercenaries from the gameboard.
Example: Thorgrin the Dwarf decides to hire a couple of Mercenaries to aid him on his Quests: one Crossbowman to shoot any targets that they cannot reach on foot and one Halberdier to act as general extra muscle. This costs Thorgrin 125 Gold Coins before he sets out on the Quest, but it will also cost him 20 Gold Coins at the end of each Quest, assuming of course that both his Mercenaries survive.
Playing Wizards of Zargon
1. New Magic
Wizards of Zargon introduces four powerful new adversaries for the Heroes. Each of these new opponents is a Sorcerer and has his own set of sorcerous spells which he may use in the same way as the Wizard and the Elf.
- Each Sorcerer has his own special set of six spells which only he may use. For example, only the Necromancer may use the Necromancer spells and only the Orc Shaman may use the Orc Shaman Spells.
- Each Sorcerer may only cast one spell in a turn, instead of attacking. Each spell may only be used once in each Quest.
- Each new Quest starts with a full set of six spells for each Sorcerer in that Quest.
2. New Spells for the Heroes
There are also three new sets of spells for the Wizard and Elf: Spells of Protection, Spells of Detection and Spells of Darkness. These may be added to the existing sets of spells which the Elf and Wizard draw on, but they still only choose one and three sets of spells respectively. They may still change their spells between Quests.
3. Spell Special Effects
Several new spells have special effects which can be displayed on the board using the special counters on the card sheet. Details of each spell appear on each spell card while the general rules of effect are detailed below.
4. Magical Barriers
Wall of Ice, Wall of Flame and Wall of Stone spells allow the caster to build a solid barrier which will appear on the board as a card piece standing on a plastic base. This barrier may be placed across two squares on the gameboard to form a solid impassable wall that will remain on the board until it is destroyed. The wall may resist an attack by rolling the number of Defend Dice shown on the specific spell card and counting the White Shields scored. If the wall takes one Body Point or more of damage, it is destroyed and the piece is removed from the board.
5. Lightning Bolt and Earthquakes
When a player casts either of these spells, he or she takes the relevant card piece and places one end in a square in front of the spell caster and then lays the piece in a straight line from there. That spell then affects anyone along that line, unless a wall blocks the way, in which case a Lightning Bolt attack will stop there, attacking only those in front of the wall.
The Earthquake tile covers 6 squares, each of which counts as a pit trap except that they are all joined up. Players may move in the normal way along the bottom of the quake, but can only leave it by climbing out onto a clear square adjacent to it. Figures in the quake area may fight and cast spells as normal, but may only do so with figures inside the quake area.
If an Earthquake meets a wall, that wall is breached and a breached wall token is placed there. Any figure may move through a breached wall. If a room which has not been explored is breached, the contents should be laid out at once. If the Earthquake meets a Magical Wall, both spells are cancelled and the pieces are removed from the board.
6. Mercenaries
Mercenaries are soldiers who can be hired by a Hero before a Quest begins. They will accompany any Hero on a Quest, if the Hero pays their fee. The fee for each type of Mercenary is given on the Mercenary's Card, as well as on the Mercenaries Chart in the back of this book. The gold must be paid before the Quest begins.
Such men are found in towns and cities all around the country. Men willing to follow a great Champion and fight for him as long as he will pay for their upkeep. There are four types of Mercenaries. Each has his own strengths and weaknesses and each has his own price.
This Quest Pack contains 12 Mercenary figures, with 24 interchangeable weapons that enable you to put together the 4 different types of Mercenaries (the Scout, the Swordsman, the Crossbowman and the Halberdier).
7. Mercenaries in the Game
Once a player has hired any Mercenaries, he can take them with him on his next quest. Each player begins the Quest in turn by placing all his figures on the stairway tile or in any adjacent squares and then takes his turn before the next player sets up.
On a player's turn, they move his Hero and then move all of his Mercenaries.
- Each Mercenary may move and fight in the same way as the Heroes, using the values printed on the Mercenary Cards.
- When defending, Mercenaries count the White Shields.
- Mercenaries may open closed doors and jump over pit traps.
- Mercenaries may not search for treasure, use any equipment or Treasure Cards and only Scouts may search for and attempt to disarm traps.
- Any money given to a Mercenary may never be retrieved.
Quest Map Guide
The Quest map symbols are color-coded to help you guide the Heroes through these Quests. Here's what the various map symbol colors mean.
- Gold: This color is used to highlight traps that the Heroes can detect by searching.
- Light Green: This color is used to highlight traps and other hazards that the Heroes can neither see nor detect by searching.
- Dark Green: This color is used to highlight monster symbols. See the Monster Chart in the back of this book for actual symbols.
In each Quest, notes prefaced with a capital letter correspond to a matching letter location on the Quest map.
Quest 1: The Tower of the High Mage
"The first of Zargon's sorcerous Lieutenants you must defeat is Zanwrath, High Mage of Sarako. He lives in a magical tower, high in the Tarak Mountains where he is guarded by his elite army of Chaos Warriors. Prepare yourselves my Heroes for a fearsome battle against steel and magic."
Notes:
- All Chaos Warriors encountered in this Quest are part of Zanwrath's elite force. Their stats are as follows:
- Movement 7, Attack 5, Defend 5, Body 3, Mind 3.
- This chest is empty.
- The chest on the left contains 300 Gold Coins and a healing potion which will restore 2 Body Points to the first Hero who drinks it. The second chest is empty.
- This is the chamber of Zanwrath. He has all 6 of the High Mage Spells. His stats are as follows:
- Movement 5, Attack 5, Defend 5, Body 5, Mind 8.
- Any Hero who searches the room will discover 400 Gold Coins in a secret drawer in the table.
Wandering Monster in this Quest: 2 Chaos Warriors
Quest 2: Crypt of the Necromancer
"Summon up your courage my Heroes, for you must journey to a most terrible place to find your next enemy, Fanrax the Malicious. He dwells in an ancient crypt that lies in the vast and nameless graveyard swamp beyond the Shuddering Forests. Be doubly careful, for Fanrax commands both the forces of the living and the forces of the dead."
Notes:
- All Skeletons in this Quest are special creations of Fanrax himself. Their stats are as follows:
- Movement 6, Attack 3, Defend 3, Body 1, Mind 0.
- This is the magical statue of a Chaos Sorcerer. At the beginning of each of Zargon's turns, it will fire a death ray down the corridor which will attack any and all figures in the corridor with 2 Attack Dice, which they may defend against in the normal way. This statue cannot be harmed in any way.
- This room is filled with a magical darkness. Any figures in the room other than Skeletons, Zombies or Mummies will attack and defend with 2 less Combat Dice. No ranged attacks may be used at all.
- Each of these chests contain 150 Gold Coins.
- This is the Crypt of Fanrax the Necromancer. He has all 6 Necromancer Spells. His stats are as follows:
- Movement 6, Attack 4, Defend 6, Body 5, Mind 7.
Wandering Monster in this Quest: 2 Skeletons
Quest 3: Eyrie of the Storm Master
"High atop the loftiest peak in the dark mountains lies the eyrie of Boroush, the Storm Master. He is the next Lieutenant of Zargon you must defeat. You have had to scale the sheer heights of the mountains to get to this eyrie. Now you are here you must move quickly, for Boroush commands great elemental forces with which he can easily overcome unwary intruders."
Notes:
- This chest contains 250 Gold Coins.
- Heroes searching this chamber will discover 3 huge gems worth 150 Gold Coins each.
- This is the home of Boroush. He has all 6 Storm Master Spells. His stats are as follows:
- Movement 7, Attack 6, Defend 5, Body 5, Mind 6.
Wandering Monster in this Quest: 2 Fimir
Quest 4: Lair of the Orc Shaman
"Yonder dark cave in the hillside is the entrance to the lair of Grawshak, Orc Shaman of the Northern Tribes. To reach him you will need scores of brave men, for he has surrounded himself with his fiercely loyal elite body guard. They will fight to the death before they allow you to reach their master."
Notes:
- All Orcs in this Quest are members of Grawshak's elite bodyguard. Their stats are as follows:
- Movement 8, Attack 4, Defend 3, Body 1, Mind 2.
- All the Orcs in these corridors are armed with bows and may make ranged attacks with 2 Combat Dice.
- Heroes searching this room will find 2 golden crowns beneath the tomb worth 200 Gold Coins each.
- This is the lair of Grawshak, the Orc Shaman. He has all 6 Orc Shaman Spells. His stats are as follows:
- Movement 7, Attack 5, Defend 5, Body 5, Mind 7.
- All Orcs in this room are armed with bows and may make ranged attacks with 2 Combat Dice. The chest in the corner contains 400 Gold Coins.
Wandering Monster in this Quest: 2 Orcs (armed with bows)
Quest 5: The Final Conflict
"Alas! Zargon has deceived you and saved his four Lieutenants from the jaws of death. He has now brought them together in his citadel of darkness. However, the effort has cost him much. You must take advantage of this moment of weakness to assault his citadel and finally vanquish his evil Lieutenants."
Notes:
- Zargon, on your first round you must put out all of the contents of the central chamber. All 4 sorcerer figures start from the central chamber. They may then open and move through doors and secret doors. Lay out the contents of any rooms which they enter. The 4 sorcerers each have their 6 Spell Cards and have the following stats:
- Zanwrath: Movement 5, Attack 5, Defend 5, Body 5, Mind 8.
- Fanrax: Movement 6, Attack 4, Defend 6, Body 5, Mind 7.
- Boroush: Movement 7, Attack 6, Defend 5, Body 5, Mind 6.
- Grawshak: Movement 7, Attack 5, Defend 5, Body 5, Mind 7.
Wandering Monster in this Quest: One of the Sorcerers
Monster Chart
| Monster | Map Symbol | Movement Squares | Attack Dice | Defend Dice | Body Points | Mind Points |
|---|---|---|---|---|---|---|
| Zanwrath, The High Mage | (symbol image, not in text) | 5 | 5 | 5 | 5 | 8 |
| Fanrax, The Necromancer | (symbol image, not in text) | 6 | 4 | 6 | 5 | 7 |
| Boroush, The Storm Master | (symbol image, not in text) | 7 | 6 | 5 | 5 | 6 |
| Grawshak, The Orc Shaman | (symbol image, not in text) |
Mercenary Chart
| Mercenary | Map Symbol | Cost per Quest (Gold Coins) | Movement Squares | Attack Dice | Defend Dice | Body Points | Mind Points |
|---|---|---|---|---|---|---|---|
| Crossbowman | (symbol image, not in text) | 75 | 6 | 3(2) | 3 | 2 | 2 |
| Halberdier | (symbol image, not in text) | 75 | 6 | 3 | 3 | 2 | 2 |
| Scout | (symbol image, not in text) | 50 | 9 | 2 | 3 |
The Crossbowman wields a crossbow (see the Armory on the cardboard platform in the Game System). When adjacent to a foe, the Crossbowman attacks with a shortsword.
The Halberdier wields a halberd that enables him to attack diagonally.
The Scout has the Dwarf's ability to detect and disarm traps.
Mercenaries do not collect any treasure. Mercenaries can only move, attack and defend (except for Scouts, who can detect and disarm traps). The cost to hire them is for one Quest only. If a player wants to hire a Mercenary for more than one Quest, he must pay 10 Gold Coins for each Mercenary he wishes to retain.
Magic Reference Chart
The Magic Reference Chart is listed under Components. Its text, transcribed from the page image:
Magical Traps
Fireburst Traps: When a player enters an empty room, place a Fireburst token in the centre of the room. This will remain in place until the beginning of the Evil Wizard Player's turn, when it will explode attacking any figures in the room with 3 attack dice. It may only be disarmed with a Tempest spell.
Hurricane Trap: This trap must be set in a corridor. Once a character passes the spot marked "x", a Hurricane will rush down from the end of the corridor marked with the trap symbol. All figures in this corridor will be forced to move back 8 spaces along the corridor or until they hit a wall or set off a trap.
Teleport Trap: Any player who finishes their move on a square marked with symbol A, will instantly be transported to the square marked with symbol B, elsewhere on the map. Landing on a symbol B square has no effect. Once a character has been teleported, he is disorientated and his turn ends at once.
Spell Special Effects
Wall of Ice, Wall of Flame or Wall of Stone: Take one of these card pieces and set it on the gameboard in a plastic base. Each remains on the gameboard until it is destroyed. Walls may be attacked in the normal way and can resist attack by rolling combat dice and counting white shields scored. A wall is destroyed if it takes one Body point.