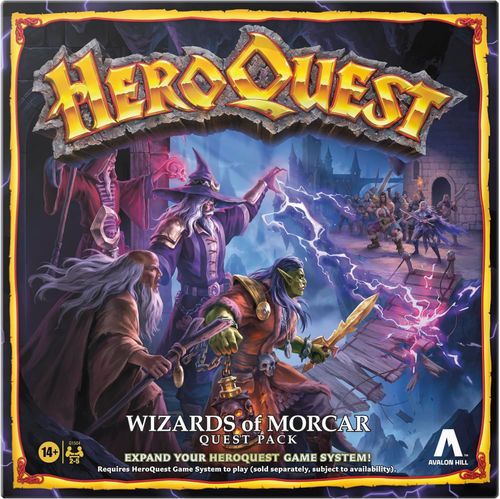
HeroQuest: Wizards of Morcar (2026)
HeroQuest: Wizards of Morcar (2026) Rulebook
Table of Contents
Table of Contents
- Components
- Playing the Quests
- Wizards of Morcar: The Original Version
- Fledgling Heroes
- Who is Morcar?
- What's New in this Quest Pack?
- Treasure Cards
- Starting and Ending a Quest
- Wandering Monsters
- Monsters with 0 Mind Points
- Large Monsters
- Reinforced Chests
- Dark Artifices
- Ambush
- Unearthing New Artifacts
- Passing Items
- Unthreatened Movement
- Zargon, Study This Book Carefully!
- Quest Map Guide
- Mercenaries
- New Magic
- Alchemist's Shop
- Hopekins Rest, Outpost at the Edge of the Borderlands
- Monsters
- Quests
- Quest 1: In Service to Gold
- Quest 2: The Mercenary Captain
- Quest 3: Tower of the High Mage (ORIGINAL)
- Quest 4: Crypt of the Necromancer (ORIGINAL)
- Quest 5: Eyrie of the Storm Master (ORIGINAL)
- Quest 6: Lair of the Warcaster (ORIGINAL)
- Quests 7 and 8: Double Quest
- Quest 9: The Final Conflict (ORIGINAL)
- Quest 10: High Altar of the Dread Shrine
- Design Your Own Quest Adventures
Components
The quest pack contains 64 game cards, 27 miniatures and 39 cardboard pieces (see pages 4-5 for descriptions of the cardboard pieces).
Miniatures listed in the quest book: Wizard Hero; Storm Master (Boroush); Warcaster (Nyashak); Necromancer (Fanrax); High Mage (Zanrath); Artificer (Keeper); Sir Ragnar; Golem; Minotaur; Dreadshifters; Magical Barriers (Stone, Fire and Ice); and the Mercenaries: Scouts, Halberdiers, Crossbowmen and Swordsmen.
Cardboard Pieces
The cardboard environmental pieces are listed below. All cardboard pieces should be carefully removed from the tile sheet. Some tiles are double-sided; the front and the back of a tile may be different.
- Cloak of Shadows Tile: represents darkness and is used with one of the new hero spells. The Cloak of Shadows tile produces a special effect that impairs sight.
- Lightning Strike Tile: represents a lightning strike conjured by Dread magic.
- Earthquake Tile: represents an earthquake conjured by Dread magic.
- Tunnel Tiles: represent the entrance/exit to an underground labyrinth that links two locations on the board.
- Magic Reference Chart: summarizes how new magical traps and spell effects work. New traps include the Fireburst Trap, the Hurricane Trap and the Teleport Trap.
- Fireburst Trap Tiles: represent a fireburst trap.
- Breached Wall Tiles: represent a damaged wall, allowing passage to the room on the other side.
- Altar / Heart Coffer Tile: one side of this tile represents the High Altar within the Shrine of Eiretash. The other side represents a coffer that holds the beating heart of an enemy.
- Key Tile (Silver / Gold): each side of this tile represents a different key that the heroes will need.
- Artificer's laboratory Tile: represents part of the room where the final conflict takes place.
Preparing the Mercenary figures: take the 12 Mercenary figures and clip a weapon to each of them by slotting the weapon into the hole on the front of each miniature.
Preparing the Magical Barriers: carefully push out the card pieces from the card sheet. Take the 3 Magical Barrier pieces (Stone, Fire and Ice) and slot each of them into a plastic base.
Playing the Quests
Wizards of Morcar: The Original Version
This quest book contains five exciting quests that were not in the original version of Wizards of Morcar. If you want to play the original quests only, play quests 3, 4, 5, 6 and 9 in sequence. (The original quests are marked ORIGINAL in the quest headers.)
Fledgling Heroes
If you are starting this expansion with all new heroes, let each hero select 2 pieces of equipment and award them 2 Potions of Healing.
Who is Morcar?
Heroes will discover the true identity of Morcar after they complete Quest 2, and Zargon reads the story on p. 21 aloud.
What's New in this Quest Pack?
Wizards of Morcar introduces two new elements to the HeroQuest game system:
- Evil Sorcerers: this pack gives Zargon five Evil Sorcerers, each of whom has their own new spell cards which will be used against the hero players.
- New Hero Powers: after Quest 2, each hero will gain a new Boon of Heroism. See Hopekins Rest, below.
Treasure Cards
The eight treasure cards added to this quest pack should be mixed into the game system's deck of treasure cards before play begins. Draw from this deck when a hero searches for treasure. Optionally, you may also add the "Nothing!" card for a bit of nostalgia.
Starting and Ending a Quest
The heroes do not always start and end their quests on the spiral stairway. When there is an entry or exit door, it is indicated on the quest map by an arrow (pointing onto the gameboard for the entry door, or off of the gameboard for the exit door). When there is an entry door, it is always placed on the gameboard in its specified location before each quest begins. At the start of an adventure, the heroes line up outside the door and ask Zargon to open it.
Note: as with regular doors, an exit door is not placed by Zargon until a hero looks down the appropriate corridor.
Wandering Monsters
Several quests in this quest pack have multiple Wandering Monsters. These monsters appear if a hero draws a Wandering Monster card from the Treasure deck.
Monsters with 0 Mind Points
Spells that affect a target's Mind Points (e.g. Sleep) cannot be cast on monsters with no Mind Points (e.g. Skeletons).
Large Monsters
Large monsters take up more than one square. Large monsters can attack anyone in any adjacent square (including diagonally), even if the monster's figure is facing away from the target.
Reinforced Chests
All chests in this expansion pack are Reinforced. Contents of chests are not found until the first time a hero adjacent to that chest searches the room. Heroes who are not adjacent to the chest draw from the treasure deck instead. Each room may still only be searched one time per hero.
Dark Artifices
On your quest, you'll encounter monsters afflicted by a terrible union between artifice and Dread magic, controlled by the whims of Zargon's followers.
Ambush
When a monster with the Ambush ability is encountered, Zargon places it onto the board as the object it appears to be (Dreadshifters in this expansion pack appear to be either a chest or a door).
Revealing Ambush Monsters
- The first time a hero moves into any of the 8 squares surrounding this object, replace it with the corresponding Ambush miniature. It may move and attack immediately. The hero may then continue with their turn.
- Ambush monsters are uncovered when a hero searches for traps in the room or corridor where they are located. Replace the furniture with its corresponding monster.
- If a hero searches for treasure in a room with a hidden Ambush monster, remove the furniture, then place the corresponding monster next to the treasure-searcher and immediately roll Attack dice. The hero may then continue with their turn.
- On Zargon's turn, they replace all hidden Ambush monsters with their model and take turns with them as normal.
- Other effects that interact with a hidden Ambush monster (e.g. Genie spell) reveal the monster for what it is.
Unearthing New Artifacts
If a quest asks you to "Unearth an Artifact," assemble a group of Artifacts that are either not currently owned by any hero and not included as part of this expansion, and randomly select one of those cards. The heroes find the selected Artifact!
Passing Items
A hero can pass a potion, artifact, weapon, or any other item to another hero only if the two heroes are on adjacent squares and neither hero is adjacent to a monster. Players may also freely trade items before and after any quest.
Unthreatened Movement
If no monsters are active on the board, heroes may move unimpeded. Instead of rolling for movement, they may move up to 4 spaces for each of their movement dice. For example, if a hero's movement roll is two dice, they may move up to 8 squares instead of rolling. If a hero's movement roll is reduced to one die, they may move up to 4 squares.
Zargon, Study This Book Carefully!
Although it is your guide to these quests, it may not answer every question you have during play. When in doubt, use your experience and imagination to make the best choice. Remember that you are the ultimate authority in your HeroQuest world!
Quest Map Guide
The quest map symbols are colour-coded to help you guide the heroes through the quests. [Gap: the colour names in the printed key are images only and are not in the text layer; the four key entries are given in printed order.]
- Used to highlight traps and mysteries that the heroes can detect by searching.
- Used to highlight traps or areas that the heroes can neither see nor detect by searching.
- Used to highlight areas mentioned in the quest notes or impacted by spell effects.
- Used to highlight monster symbols. See the monster chart at the back of this book for a monster symbol reference guide.
In each quest, notes prefaced with a capital letter correspond to a matching letter location on the quest map. Standalone italicized terms in the quest notes refer to items with corresponding cards in this quest pack or in the base game (for example, "The chest contains a Potion of Healing.").
Mercenaries
There are four types of Mercenaries. Each has their own strengths and weaknesses, and their own price.
The Crossbowman: Movement 6 squares; Attack 3 dice; Defend 3 dice; Body Points 2; Mind Points 2. Cost: 75 gold coins. Special Ability: wields a crossbow. The Crossbowman can make ranged attacks. This allows them to shoot at monsters who are waiting behind hidden traps or are too far away to attack in close combat.
The Halberdier: Movement 6 squares; Attack 3 dice; Defend 3 dice; Body Points 2; Mind Points 2. Cost: 75 gold coins. Special Ability: can make diagonal attacks. The Halberdier has equal attack and defense capabilities. Their attacks can also be made diagonally. This, combined with their movement, makes them a versatile companion.
The Scout: Movement 9 squares; Attack 2 dice; Defend 3 dice; Body Points 2; Mind Points 2. Cost: 50 gold coins. Special Ability: Dwarf-like ability to remove traps. The Scout has a low number of attack dice but, like the dwarf, can use an action to search for and disarm traps.
The Swordsman: Movement 5 squares; Attack 4 dice; Defend 5 dice; Body Points 2; Mind Points 2. Cost: 100 gold coins. The Swordsman is an offensive fighter who can take on more powerful creatures such as Mummies, Dread Warriors, or the Gargoyle. However, they are slower. Their high defense capability makes them useful against masses of enemies.
Hiring Mercenaries
Once a hero has become a Warden (after completing Quest 2) and their deeds are retold in lively taverns and around travelers' campfires, they may want to hire followers to aid them with their most challenging feats. Wardens may each hire up to four followers at any time between quests. Each follower may be any type of Mercenary. To hire a Mercenary, a Warden must pay the Price to Hire, which appears on the Mercenary's Card. That Mercenary will then stay with and fight for that Warden until the Mercenary is killed and as long as they are paid 10 gold coins at the end of each quest. If they are not paid for their services, they will leave. Wardens must then pay their full Price to Hire for them to return.
For each Mercenary a Warden hires, that player should take one Mercenary figure with the relevant weapon shown. They should make a note on their character sheet of each of the types they have hired.
A player whose Warden is killed can choose to continue the quest with the Warden's surviving Mercenaries. If they choose not to, they must remove the Mercenaries from the gameboard.
Example: The Dwarf decides to hire a couple of Mercenaries to aid him on his quests: one Crossbowman and one Halberdier. This costs the Dwarf 150 gold coins before he sets out on the quest, but it will also cost him 20 gold coins at the end of each quest, assuming that both of his Mercenaries survive.
Mercenaries in the Game
- Once a player has hired one or more Mercenaries, they can take the Mercenaries on as many quests as the Mercenary survives for. A player begins the quest by placing all their figures on the stairway tile or in any adjacent squares and then takes their turn before the next player sets up.
- On their turn, each player moves their hero and then moves all of their Mercenaries.
- Each Mercenary may move and fight in the same way as the heroes, using the movement and combat values on the Mercenary Card.
- When defending, Mercenaries count the white shields if controlled by a hero player or the black shields if controlled by Zargon.
- Mercenaries can open closed doors and jump over pit traps.
- Mercenaries may not search for treasure or use any equipment or treasure cards, and only Scouts may search for and attempt to disarm traps.
- Any money given to a Mercenary cannot be retrieved, even after their death.
New Magic
The Forces of Morcar
Wizards of Morcar introduces five powerful new adversaries. Each of these new opponents is a dark Sorcerer and has their own set of spells, which are used in the same way as the Wizard's and the Elf's spells.
Each Sorcerer's set of spells is unique to them, and only they may use it. For example, only the Necromancer may use the Necromancer spells.
Each Sorcerer may cast one spell per turn instead of attacking. Each spell may only be used once per quest.
At the beginning of a new quest, each Sorcerer in that quest starts with a full set of six spells.
New Spells for the Heroes
There are also three new sets of spells for hero spellcasters to choose from:
- Spells of Protection
- Spells of Detection
- Spells of Darkness
These may replace existing sets of spells that a spellcaster can draw on (but Elf and Wizard still have one and three sets of spells respectively). Spellcasters may change their spells between quests.
Wizard Hero
This quest pack includes a new Wizard hero. Their statistics are the same as the Wizard in the HeroQuest Game System and can be used to replace that hero if the player prefers.
When picking heroes, you may choose any hero you have available to you, but it is recommended that a group of heroes contains only one hero of the same kind (for example, it is not recommended to have a party with two Wizards).
Spell Special Effects
Several of the new spells have special effects which can be displayed on the board using the included cardboard tiles. Details of each spell appear on each spell card while the general rules of the effects are detailed below.
Magical Barriers
Wall of Ice, Wall of Flame, and Wall of Stone spells allow the caster to build a solid barrier, which will appear on the board as a miniature. This barrier may be placed across two squares on the gameboard to form a solid, impassable wall that will remain on the board until it is destroyed.
Zargon's monsters may attack barriers in the same way they attack heroes. Barriers defend with 6 Defend dice as shown on their spell cards by counting the white shields scored. If the wall takes 1 Body Point or more of damage, it is destroyed, and the piece is removed from the board.
Spell Special Effects (printed on the Magic Reference Chart): Wall of Ice, Wall of Flame, Wall of Stone. Take one of these miniatures and place it on the gameboard. They remain on the gameboard until it is destroyed. Walls may be attacked in the normal way and can defend the same way as characters. They roll six Defend dice. Walls have 1 Body Point.
Lightning Strike and Earthquake
When one of Zargon's Sorcerers uses either of these spells, they take the relevant cardboard piece and place one end in a square in front of the sorcerer, then lay it in a straight line from there.
Lightning Strike: that spell then affects anyone along that line, unless a wall blocks the way, in which case a Lightning Strike attack will stop there, attacking only those in front of the wall.
Earthquake: the Earthquake tile covers 6 squares, each of which counts as a pit trap, except that they are all linked together. Players may move in the normal way along the bottom of the quake area but can only leave by climbing out onto a clear square adjacent to it. Characters in the quake area may fight and cast spells as normal but may only do so with other characters or monsters inside the quake area.
If the Earthquake meets a wall that has a playable room or corridor on the other side, that wall is breached, and a breached wall token is placed there. Any figure may move through a breached wall. If a room that has not been explored is breached, the contents should be laid out at once. If there is no playable room or corridor on the far side, a breached wall token is not placed onto the board.
Magical Barriers and these spells: if a Lightning Strike or Earthquake meets a magical wall, both spells are cancelled, and the pieces are removed from the board. However, all characters in squares between the Sorcerer and the Magical Barrier are still affected before the spells are cancelled.
Magical Traps
Whenever a character enters a room described in the quest notes as containing a magical trap, Zargon must refer to the Magic Reference Chart to see the effect of that particular trap.
Magical traps cannot be found by searching. Magical traps may only be activated once. As soon as a magical trap has been activated, players can move safely through that room or corridor.
Teleport Trap: any hero that finishes their move on a space marked with the symbol 'A' will be teleported to the space marked with the symbol 'B', elsewhere on the map. Landing on a space with symbol 'B' has no effect. Once a hero has been teleported, they are disoriented, and their turn ends.
Hurricane Trap: this trap must be set in a corridor. Once a character passes the spot marked 'X', a Hurricane will rush down from the end of the corridor marked with a trap symbol. All characters in this corridor will be forced to move back 8 spaces along the corridor or until they hit a wall, or set off a trap.
Fireburst Trap: when a player ends their turn in a room with a Fireburst trap, place a Fireburst token in the center of the room. This will remain until the beginning of Zargon's turn, when it will explode, attacking all heroes and monsters in the room with 3 Attack dice of fire. If a hero in the room with a Fireburst token discards a Tempest spell or any Water Spell, the trap is disarmed.
Tunnels
Tunnel tiles are used to link two unconnected locations via an underground labyrinth. When entering a tunnel, a hero character or monster moves instantly to an unoccupied space adjacent to a tunnel tile in another location. If a hero or monster exits a tunnel and no unoccupied landing spaces are available, place them in the closest unoccupied space.
Alchemist's Shop
The potions available in the Alchemist's Shop are listed below with their printed costs and effects. Discard after use where printed.
- Potion of Healing (cost 500 gold coins; two copies): drink this to roll 1 red die and restore that number of Body Points (not exceeding your Body Point total).
- Potion of Fire Resistance (cost 300 gold coins): drink this to remain unharmed by the next magical fire attack to hit you, whether it is a spell or a Fireburst trap. Discard after a fire attack has been resisted.
- Potion of Magic Resistance (cost 300 gold coins): drink this when a spell is cast on you to ignore that spell's effects. Discard after use. A second printed text on this card reads: drink this potion to cancel any one damage-causing spell cast on you.
- Potion of Magical Aptitude (cost 400 gold coins): drink this at the start of your turn to cast two spells you know rather than one. Discard after use. A second printed text on this card reads: you may drink this at the start of one of your turns; you may cast two spells you know during that turn.
Hopekins Rest, Outpost at the Edge of the Borderlands
The heroes are now acclaimed Wardens of the Realm. At the start of each quest, a hero may select one location to visit and receive its Boon of Heroism (if available)*. A hero may only benefit from one boon at a time.
- Sharp Shooters Archery Range: you practice under the eagle eyes of the Realm's best archer. Take the Dead Eye hero skill (1 available).
- Training Barracks: receive training from a master in the use of a particular weapon. Take the Weapon Expert hero skill (1 available).
- Cathedral of Hope: the expert healers in the Cathedral of Hope can enlighten you in the art of medicine. Take the Healing Hands hero skill (1 available).
- Wandering Monsters' Mercenary Guild: Ragnar and the veterans of the guild share stories of their past victories. Recruit a Mercenary without paying their cost. This Mercenary returns to the guild if you ever choose another boon.
- Dewdrop Inn: friendship, food, merriment, and songs of heroic glory fortify your resolve. Raise your hero's max Body Points by 2.
- Hopekins Keep: the Commander of the Guardian Knights instructs you on the nature of teamwork. Take the Hold the Line hero skill (1 available).
- Peacekeeper's Tower: the constable charges you with upholding the King's peace. Take the Peacekeeper hero skill (1 available).
- Witch's Hut: the Witch of the Wyrd currently resides here, brewing potions for those who keep her company. Gain 1 Potion of Healing.**
- The Arcane Library: Mentor expands your knowledge of arcane mysteries. After heroes have selected spells, you may take an additional set of spells that you are eligible to cast. This boon is only for spellcasting heroes.
* Fallen Wardens may always return with new heroes. ** Can be gained multiple times.
Reward! When visiting the outpost, heroes may visit 2 locations and have a maximum of 2 Boons of Heroism each on all future quests.
Monsters
| Monster | Movement Squares | Attack Dice | Defend Dice | Body Points | Mind Points |
|---|---|---|---|---|---|
| Storm Master | 6 | 4 | 6 | 5 | 7 |
| Orc Warcaster | 7 | 5 | 5 | 5 | 7 |
| Necromancer | 6 | 4 | 6 | 4 | 7 |
| High Mage | 5 | 5 | 5 | 4 | 8 |
| Artificer |
* While Hammer of Ruin is cast.
Lore (from the monster chart): the Storm Master is a commander of elements who has forfeited his sanctity of mind for power. The Orc Warcaster is a seasoned commander with a strong magical influence over her orc forces. The Necromancer is a twisted sorcerer who dwells underground and experiments with the undead. The High Mage is a fearsome wielder with an exceptional command over the forces of Dread. The Artificer is an adversary whose well-honed magical craft is evident in her spells, as well as the items she imbues. Dreadshifters are horrible monsters that mask themselves as everyday objects and lunge when least expected. Golems are stone-forged servants that protect their master with unwavering loyalty. The Minotaur is locked away in an underground labyrinth and takes out its festering rage on any who dare disturb its caretaker(s).
Quests
At the beginning of each quest, read aloud the parchment text. The quest notes that follow the message are for Zargon's eyes only. The Mentor briefing text is omitted as flavour.
Quest 1: In Service to Gold
Setup: IMPORTANT: equip your Fledgling Heroes (see p. 6).
Read the following to the players at the start of the quest: "As you reach the bottom of the stairs to the Wandering Monsters' Mercenary Guild, a guard nods to you. 'Evening, 'venturers. Anyone hiring mercenaries needs speak to Krothgar. He's the big swordsman in the back.' He nods over his shoulder as he opens the door."
Open the door, place out the room, and tell the players: "Mercenaries are neutral and will not move or attack unless they are attacked first."
- A. When a hero enters the area marked X, tell them to stop. Read the following: "Krothgar turns and addresses you. 'What can I be doing fer you? 'Mm, the Dread Wastes you say. That there's some dangerous business. We'll have to see what the boss says.' Krothgar goes to open the door. Do you stop him?"
- Yes: "Krothgar shouts, 'They're on to us, lads. Get'em!' Your new objective is to defeat the Mercenaries and make it to the exit alive." All Mercenaries are now treated as monsters and will attack the heroes.
- No: "Krothgar chuckles as he pulls the door open, 'Fraid you're too late, friends. We've already been hired!' The Mercenaries draw their weapons! Your new objective is to defeat the Mercenaries and make it to the exit alive."
- Open the door out of the room and place out the corridor. Mercenaries are now treated as monsters and will attack the heroes. The hero resumes their turn.
- B. Read the following to the players: "Two statues stand on one side of the room. In a rumble that sounds like gravel underfoot, the statue on the left asks 'Warriors of fortune...who... do... you... serve?'" The players get one answer. If they guess Gold, the statues remain inactive. Otherwise, the statues animate and become Golems.
- C. A hero who opens the chest here will Unearth an Artifact and find 550 gold coins.
- D. Read the following to the first player to search for treasure: "You find a hidden treasure tucked away among the firewood." This player Unearths an Artifact.
- E. Read the following when players enter the room. "You see a logbook on the table, splayed open to the latest entry. It reads 'Client #346: Festral, One company for one month's work. Captain assigned – Ragnar.' Underneath that, an entry reads 'Client Festral missing in action. New client #347: Nyashak. Same Terms as above.'"
Wandering Monsters in the Quest: Mercenary Swordsman.
Quest 2: The Mercenary Captain
The Mentor briefing paragraphs at the start of this quest are flavour and are omitted.
- A. The Golems here start as statues. Read the following to the players: "Grim statues flank a Warrior Shrine. In the past, gladiators about to fight would offer prayer to their gods. You may pray as an action." Ask the first hero to pray if they seek safety or glory: if the hero chooses glory, dust fills the room as the statues lurch into life. If the hero chooses safety, nothing happens. When these Golems defend, one black shield rolled blocks all hits. When the last Golem is defeated, the hero who prayed Unearths an Artifact in its remains.
- B. The first hero to search for treasure here finds 500 gold coins.
- C. This is the surgeon's room, where those fortunate enough to survive the arena would be attended to. The first hero to search for treasure here finds an Elixir of Life Artifact (if this is already owned by a hero, find 2 Potions of Healing instead) and a gold key that unlocks door D.
- D. This room is locked. The gold key in room C unlocks it. When a hero enters this room, read the following: "You see an orc warrior flash a glare in your direction before handing a bag of coin to Ragnar. The orc hisses: 'Too late, heroes! Gold has been given and service bought! In the name of Nyashak, daughter of lord Grawshak—kill them, Ragnar!'" The orc points at you and Ragnar's face tightens. He mutters, "We are bound by gold, soldiers. ATTACK!" Ragnar cannot be killed in this quest (he always has at least one Body Point left).
- X. When the first hero enters the area marked X, read the following: "There is the screeching sound of iron on stone as the two entrances open on either side of the room." Place one Abomination on each grate tile. Any hero adjacent to Ragnar acquires a special action to show him the Oath Ring. If they do, read the following: "You hold the Oath Ring high, and the gleam of a gem within catches Ragnar's eye. 'Ragnar! You are bound by more than gold!' Ragnar's eyes widen. He speaks softly, 'My Liege, I had no choice. Forgive me.' Regaining his composure, he commands, 'Retreat!'" On Zargon's turn, Ragnar and the remaining Mercenaries move toward the exit and may move through any other figures. They will open doors (revealing more foes) and will no longer fight.
Wandering Monsters in the Quest: Mercenary Swordsman.
Quest 3: Tower of the High Mage (ORIGINAL)
Defeat the High Mage to complete this quest.
Notes: all Dread Warriors in this quest are part of Zanrath's elite force. Their stats are: Movement 7, Attack 5 dice, Defend 5 dice, Body 3, Mind 3.
- A. The first hero to search for treasure may take two treasure cards and choose one to keep. When a hero has searched for treasure, read the following: "A dusty tome lay in the corner of this room, splayed open to what looks like a legend. It reads '...The Keeper then enchanted the mighty hammer to give it a featherlight quality to the wielder. With it, she was able to forge formidable warriors from stone and Dread magic.'"
- B. The first hero to search for treasure finds 300 gold coins and a Potion of Healing.
- C. This is the chamber of Zanrath. When a hero enters this room, read the following: "You see Zanrath seated at his desk. He mutters, 'I did not expect you to seek out your demise so soon. The Dark Lord will be delighted to hear of your destruction. There may even be a generous reward in my future.'" Zanrath has all 6 High Mage spells. His characteristics are: Movement 5, Attack 5 dice, Defend 5 dice, Body 4, Mind 8.
- The first hero to search for treasure will find 400 gold coins in a secret drawer in the table.
- D. When a hero enters this corridor, read the following: "There is a message carved into the wall in a language you don't recognize. Mentor's voice tells you what it says: 'The wisest know that nothing is what it seems. Reach out to discover what I am.' What do you do?" If a hero touches or strikes the wall, read the following: "When you reach out to the wall, it flutters and dissipates. It is an illusion." The illusion wall can't be found by searching but can be walked through.
- E. The first hero to search for treasure in this room Unearths Urdyn the Unmaker, an Artifact.
Wandering Monsters in the Quest: Elite Dread Warrior.
Quest 4: Crypt of the Necromancer (ORIGINAL)
Defeat the Necromancer to complete this quest.
Notes: all Skeletons in this quest are special creations of Fanrax. Their stats are: Movement 6, Attack 3 dice, Defend 3 dice, Body 1, Mind 0. Fanrax has all 6 Necromancer spells. His characteristics are: Movement 6, Attack 4 dice, Defend 6 dice, Body 4, Mind 7.
- A. This is a magical statue of a Dread Sorcerer. At the beginning of each of Zargon's turns, it will fire a death ray down the corridor, which will attack all figures in the corridor with 2 attack dice. They may defend against it as they would normally. This statue cannot be harmed in any way.
- B. This room is filled with a magical darkness. Any figures in the room other than skeletons, zombies, or mummies will attack and defend with 2 fewer dice than normal. No ranged attacks may be used.
- C. The first hero to search for treasure will find 300 gold coins.
- D. This is Mortizan, the crypt of Fanrax the Necromancer. When a hero enters, read the following: "Fanrax stands before you, using a small dagger to carve etchings into what appears to be a human bone. 'Just in time,' he remarks, chucking the bone aside. 'I've heard remarkable tales of your heroism, and knew that I must have you for my army of undead!'"
Wandering Monsters in the Quest: 2 Skeletons.
Quest 5: Eyrie of the Storm Master (ORIGINAL)
Defeat the Storm Master to complete this quest.
Notes: Boroush has all 6 Storm Master spells. His characteristics are: Movement 6, Attack 4 dice, Defend 6 dice, Body 5, Mind 7.
- A. The first hero to search here finds 250 gold in the treasure chest.
- B. This is Boroush's hideout. When a hero enters this room, read the following: "Boroush waits for you here with crazed, electrified eyes. His gray mane whips back and forth in the gale of the tempest he commands. He is unrest manifest. Upon seeing you, he lets out an ear-piercing shriek." The first hero to search this room for treasure will find Boroush's Horde under a false floor panel. Inside, the hero finds three oversized gems worth 150 gold coins each, 2 Potions of Healing and the Artifact Drakehide Curiass [sic].
Wandering Monsters in the Quest: 2 Abominations.
Quest 6: Lair of the Warcaster (ORIGINAL)
Defeat the Orc Warcaster to complete this quest.
Notes: all Orcs in this quest are members of Nyashak's elite bodyguard. Their stats are: Movement 8, Attack 4 dice, Defend 3 dice, Body 1, Mind 2. Nyashak has all 6 Orc Warcaster spells. Her characteristics are: Movement 7, Attack 5 dice, Defend 5 dice, Body 5, Mind 7.
- A. All the Orcs in these corridors are armed with bows and may make ranged attacks with 2 Attack dice.
- B. The first hero to search for treasure in this room will find 2 golden crowns beneath the tomb worth 200 gold coins each.
- C. This is the lair of Nyashak, the Orc Warcaster. When a hero enters this room, read the following: "You see a towering Orc Sorceress who is surrounded on all sides by her growling minions. She lets out a snarl when she sees you, causing her sharp tusks to quiver with fury. 'You murdered my kin,' she roars. 'PREPARE TO SUFFER!'" All Orcs in this room are armed with bows and may make ranged attacks with 2 Attack dice. The first hero to search for treasure in this room will find 400 gold coins in the chest.
Wandering Monsters in the Quest: 2 Orcs with bows.
Quests 7 and 8: Double Quest
Character resource and body points are not restored between quests 7 and 8. The heroes may not visit the Alchemist's Shop or Hopekins Rest between quests.
Quest 7: The Dread Shrine of Eiretash
[Gap: the text layer prints no explicit completion line for Quest 7; none is supplied here.]
Labyrinth: the tunnels in this quest are the entrances into and out of the labyrinth. A hero that moves into a tunnel on their turn rolls two red dice and chooses one, then places their figure on or adjacent to a tunnel with the matching number. If they roll a number that matches the entrance they are on, they move to room E. Monsters who travel the labyrinth may emerge into any discovered area without rolling.
- A. At the start of Zargon's turn, open one of these secret doors and place the contents of the room. The monsters may act this turn.
- B. When the heroes enter the first room marked B, place Brak-Fellorn, the Minotaur lord. When he is revealed, read the following to the players: "Before you stands Brak-Fellorn, Lord of Minotaurs. He snarls and rushes into a head-long charge." Before the hero that entered the room does anything else, Brak-Fellorn will charge and make a single attack plus a bonus die for charging. See notes for Brak-Fellorn.
- C. These doors are locked. They require the key in room E to open. When one of these four doors is unlocked, they all open.
- D. The soul of the Keeper wanders this room. When a hero enters, read the following: "The Keeper of the Dread Shrine appears before you. Her voice booms: 'I died at the Dark Lord's hand, but I have forgiven him. And now that you're here, I can prove my worth.'" The Keeper has all the Artificer spells with Hammer of Ruin and Scrolls of Morcar already cast on her. If the Keeper is reduced to zero Body Points, she vanishes. Her characteristics are: Movement 6, Attack 4+2* dice, Defend 3 dice, Body 5, Mind 8. *While Hammer of Ruin is cast. When all monsters in this room are defeated, slide the tomb upwards. Read the following to the heroes: "Sir Ragnar appears on the step below the tomb. 'Follow me if you wish for the dead to stay that way!' He runs down the spiral stairwell." Remove Ragnar from play. This is the hero's exit.
- E. The first hero to search this room finds a coffer which holds a silver key and the beating heart of Brak-Fellorn. A hero adjacent to the chest can take an action to destroy the heart. When this is done, the Minotaur Lord can be killed normally.
Brak-Fellorn: use the stats shown on the Minotaur card. Any wound that would reduce him to less than 1 Body Point is ignored. He may be killed once his heart is destroyed.
Wandering Monsters in the Quest: 2 Orcs.
Quest 8: Halls of the Dead
Defeat the undead Sorcerers to complete this quest.
Ragnar: players choose who will control Ragnar. He moves and acts just like a hero. He may open doors, search for treasure, secret doors, and traps, and attempt to disarm traps.
- A. The Wizards of Morcar are frozen, entombed in Dread Crystals. They cannot be harmed in any way while in their Crystal. The sorcerers are slowly regaining power.
- B. These are the Dread Chests. They have 1 Body Point and can be attacked but take no damage from fire. They roll 6 Defend dice. Once destroyed, the matching Sorcerer lurches to life. Read the following to the players: "You hear a sickening crack that comes from the central chamber. A sorcerer must have broken free!" All sorcerers have the same stats: Movement 5, Attack 4 dice, Defend 4 dice, Body 2, Mind 4. The sorcerers do not have any spells but may attack as usual.
- Fireburst traps are placed into a room after the Dread Chest has been destroyed and operate as usual, exploding on Zargon's next turn.
Sorcerers Defeated: when all sorcerers have been defeated, read the following to the players: "Mentor appears in the room before you, looking even worse than he did when you met him in his quarters. 'We are glad that you chose to return your loyalty to the King, Sir Ragnar. I humbly thank you for your assistance in this matter.' Sir Ragnar says nothing but bows low. Mentor turns his attention to you. 'I have unfortunate news, heroes. Zargon has summoned his servants' remains for resurrection. You must stop him, before the Wizards of Morcar rise once again.'"
End of Quest: if Sir Ragnar survives, he grants you 300 gold towards hiring Mercenaries for the next quest.
Wandering Monsters in the Quest: Golem.
Quest 9: The Final Conflict (ORIGINAL)
Defeat the four Sorcerers in their final forms to complete this quest.
On Zargon's first turn, lay out the contents of the central chamber. All four sorcerer figures start from the central chamber. They may then open and move through doors and secret doors. Lay out the contents of any rooms that they enter. The four sorcerers each have their 6 spell cards and have the same characteristics as detailed in the previous quests:
-
Boroush: Movement 6, Attack 4 dice, Defend 6 dice, Body 5, Mind 7.
-
Nyashak: Movement 7, Attack 5 dice, Defend 5 dice, Body 5, Mind 7.
-
Zanrath: Movement 5, Attack 5 dice, Defend 5 dice, Body 4, Mind 8.
-
Fanrax: Movement 6, Attack 4 dice, Defend 6 dice, Body 4, Mind 7.
-
A. The first treasure chest contains 800 gold coins, and the hero will Unearth an Artifact. The hero will also Unearth an Artifact in the second treasure chest.
Wandering Monsters in the Quest: take a turn with one of the Sorcerers (only if available).
Quest 10: High Altar of the Dread Shrine
Destroy the High Altar to complete this quest.
Notes: skeletons here are iron constructs with the following statistics: Movement 6, Attack 3 dice, Defend 3 dice, Body 1, Mind 0.
- A. The first hero to search for treasure in this room finds 2 Potions of Healing.
- B. Inside the treasure chest a hero will find 200 gold and will Unearth an Artifact.
- C. When a hero peers inside this long-forgotten chest, they will Unearth an Artifact.
- D. When a door to this room is opened, read the following to the players: "Before you stands the Keeper with her underlings. She bellows 'You may have defeated Morcar's Wizards, but the power of the High Altar will never be destroyed! I will see to it myself,' her voice drops to a whisper as she hisses, 'and then the High Lord will welcome me back into his good graces. His love for me will bloom again. I know it.' In a corner of the room, you also see the reborn form of Brak-Fellorn." Brak-Fellorn has the stats shown on the Minotaur monster card and may be killed as normal.
- E. This room contains the Keeper, who has 3 Body Points and any spells she hasn't used in this quest remaining, as well as the High Altar. The Keeper has all the Artificer spells with Hammer of Ruin and Scrolls of Morcar already cast on her. When the Keeper is defeated, she vanishes. Her characteristics are: Movement 6, Attack 4+2* dice, Defend 3 dice, Body 5, Mind 8. *While Hammer of Ruin is cast. The High Altar may be attacked using normal combat and has 6 Body Points. It rolls four dice when defending.
When the Keeper is killed, read the following: "The Keeper uses her last breath to call out to Morcar, 'My Lord... even in death... I am yours.'" When the High Altar is destroyed, read the following: "The High Altar cracks asunder. There is a low wailing sound that comes from deep below and rises into a terrible scream. The sound grows ever more intense... and is then gone. Silence. The debris of the High Altar litters the floor." Remove all remaining monsters from play. The quest is won.
Wandering Monsters in the Quest: Golem.
Design Your Own Quest Adventures
Design your own exciting quests! Mark the map with the various monster, furniture, and trap symbols. Then write a short paragraph to explain the adventure, and you're ready to play. Simply photocopy or scan and print the symbols shown in the quest book, cut them out, and use them to design your own games. Permission is granted to reproduce this document for personal use. You may use these components in any way that you can imagine.