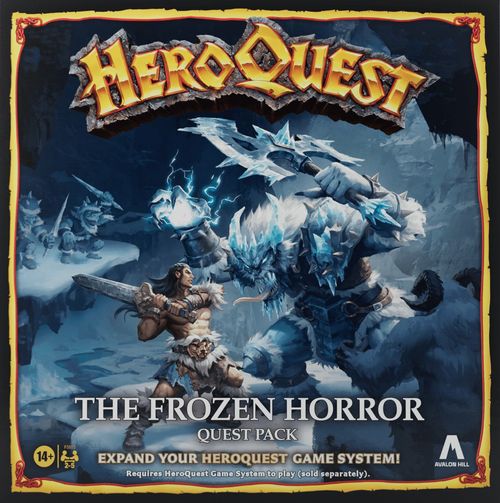
HeroQuest: The Frozen Horror
HeroQuest: The Frozen Horror Rulebook
Table of Contents
Table of Contents
- Alchemist's Shop
- Contents
- New Components
- Playing the Frozen Horror Quest Pack
- Quest Map Guide
- A Message from Mentor
- Quest 1 — Solo Quest: Xanon Pass
- Quest 2 — Solo Quest: Trial by Ice
- Quest 3 — Solo Quest: The Rescue
- Quest 4 — Group Quest: The Glacial Gate
- Quest 5 — Group Quest: The Deadly Depths
- Quest 6 — Group Quest: The Frosted Path
- Quest 7 — Group Quest: The Halls of Kelvinos
- Quest 8 — Group Quest: The Search for the Scepter
- Quests 9 & 10 — Double Quest: The Heart of Ice
- Conclusion
- Artifact Reference
- Monsters Chart
- Mercenaries Chart
- Design Your Own Quest Adventures
Alchemist's Shop
These potions may be purchased only between quests.
Potion of Battle Rage Cost: 400 gold coins
Only the Barbarian can drink this purple-red concoction. It grants them 2 attacks per turn as long as there are monsters in sight. As soon as there are no monsters in the Barbarian's line of sight, this potion's effect wears off.
Potion of Rejuvenation Cost: 500 gold coins
Any hero who drinks this bright yellow liquid regains up to 6 lost Body Points. Roll 1 red die to see how many Body Points the hero gets back. This potion cannot give the hero more than their starting number of Body Points.
Potion of Icy Strength Cost: 200 gold coins
This bubbling orange mixture grants the Barbarian superhuman strength for one turn. After the Barbarian drinks this potion, their next attack causes twice as many Body Points of damage as are rolled on the combat dice. No other hero can use this potion.
Potion of Frost Skin Cost: 300 gold coins
Only the Barbarian is affected by this slushy drink. It enables the Barbarian to roll 2 extra combat dice when defending against attacks. As soon as there are no monsters in the Barbarian's line of sight, this potion's effect wears off.
Three of these potions can be used only by the Barbarian. Different potions may also be purchased from the Alchemist's Shop in other quest packs.
Contents
Continue your HeroQuest adventure with The Frozen Horror Quest Pack, an expansion set used with your HeroQuest Game System. You must have the game system to play the adventures in this booklet.
- Plastic figures: Barbarian, Mercenaries (Scout, Swordsman, Crossbowman, Halberdier), Ice Gremlins, Polar Warbears, Yeti, Frozen Horror
- Plastic Iron Entrance Door and Wooden Exit Door
- 3 cardboard tile sheets
- 35 game cards
- Pad of character sheets
- Combat dice and movement dice
New Components
Cardboard tile sheets: The cardboard components are described below. Next to most components is a symbol that represents that component on the quest maps. These symbols appear on each map to show where to place components on the gameboard. For example, the iron entrance door is represented on the quest map by the symbol shown next to the door.
Slippery Ice: Do not place a slippery ice tile on the gameboard until a hero steps on the appropriate square. Whenever a hero moves onto a slippery ice square, the hero rolls 1 combat die. If a white shield is rolled, the hero falls and their turn ends immediately. Any other roll means the hero can continue moving (if they have the moves left). The hero must roll for each slippery ice square moved onto. A fallen hero cannot take any actions or defend against attacks until their next turn. Monsters are not affected by slippery ice. A slippery ice square cannot be found by searching, nor can it be disarmed. Once it is placed on the gameboard, it can be jumped over as a pit.
Ice Ledge: This slippery ledge surrounds a deep crevasse in the icy mountain. The heroes must walk around the crevasse on the ledge, inches from a fall to the death.
Ice Slide: Do not place the ice slide tile on the gameboard until a hero steps on the first square of the slide. Any hero who does step onto this slippery chute of ice is whisked away in the direction indicated by the arrow. The hero immediately moves to the last square of the slide. (More than one hero may occupy the exit square.) This ends the hero's turn. The slide is hidden and it cannot be searched for as a trap, nor can it be disarmed. When a hero slips down an ice slide, they roll 1 combat die. They lose 1 Body Point if they roll a white shield. Monsters cannot move onto ice slide squares. Heroes cannot climb up an ice slide in the direction opposite to that indicated by the arrow.
Ice Tunnels: A pair of tunnel entrances connect two apparently unconnected rooms via an unseen tunnel. Any hero or monster landing on one of these entrances immediately moves to the other entrance. After moving from one tunnel entrance to the other, the hero's or monster's turn is over.
Magic Ice: These tiles are used with the Ice Bridge spell scroll and the Ice Wall Dread spell.
Wooden Exit Door: In many quests, this special wooden door is used to exit the gameboard at the end of a quest.
Iron Entrance Door: This iron door is placed on the edge of the gameboard in many of the quests. Heroes line up outside the iron door to begin these quests.
Icy River: Each square of these underground streams counts as 2 squares for movement purposes. Each time a hero enters an icy river square, they roll 1 combat die. They lose 1 Body Point to the cold if they roll a white shield. Monsters suffer neither movement penalties nor damage from the icy river.
Ice Vault: This frigid room drains heat from heroes. For each turn in which a hero enters or remains in this room, the hero rolls 1 combat die. They lose 1 Body Point if they roll a skull. Monsters are not affected by the heat-draining property of this room.
Ice Cave Entrance: The special tile is used as an entrance or exit.
Crystal Key Tile: Use this magical key to open the door to the Seat of Power Room, where the Frozen Horror awaits.
Ice Gremlin Treasure Room: Ice Gremlins steal anything they can get their cold hands on. Their booty is all stored in this room.
Cage Room: This room serves as a prison for servants who have displeased the Frozen Horror.
Frozen Crypt Room: Monstrous servants of the Frozen Horror are encased in thick ice within this room. These monsters are freed when a hero opens the appropriate door.
Bottomless Chasm Room: The crevasse that divides this room can be jumped over as a pit, but any hero who falls into it is lost for eternity.
Living Fog Room: This room is filled with an eerie, swirling fog. Monsters seem to appear on all sides of the heroes, only to disappear into the fog when attacked.
Scepter Room: The Frozen Horror has hidden the Scepter of Glacial Majesty, an artifact of great power, in this room.
Seat of Power Room: The Frozen Horror rules from this room, devising evil plans for the conquest of the Realm.
Playing the Frozen Horror Quest Pack
The ten quests in this quest pack are generally played the same way as the quests in the HeroQuest Game System. As in the game system, heroes are returned to full strength between quests. (All Body and Mind Points are restored.) There are a few gameplay differences in The Frozen Horror Quest Pack. These differences are described below.
1. The Quests
The first three quests are solo adventures, designed for play by a Barbarian alone. These can be used as an introduction to HeroQuest for a new player or as fun quests to play when only two players are available. Also, if a new Barbarian is joining a party of experienced characters, these three quests will enable the Barbarian to catch up with the other heroes by gaining gold, equipment, and magical items.
The next five quests are all group quests. The last two quests are also group quests, but they are played as a single, double-sized quest, as the heroes must cross between the two quests to achieve ultimate victory.
2. Barbarian
This quest pack includes an alternate Barbarian hero. Their statistics are the same as the Barbarian in the HeroQuest Game System and can be used to replace that hero if the player prefers. Any reference to "Barbarian" in this or any quest pack applies to any Barbarian hero. A group of heroes can contain only one Barbarian at a time.
3. Starting and Ending a Quest
The heroes do not always start and end their quests on the spiral stairway. The message from Mentor at the beginning of each quest tells where the heroes start and end the quest. When there is an iron entry or wooden exit door, it is indicated on the quest map by an arrow (pointing into the gameboard for the entry door, and out of the gameboard for the exit door). When there is an entry door, it is always placed on the gameboard in its specified location before each quest begins. At the start of an adventure, the heroes line up outside the door and ask Zargon to open it.
Note: As with a regular door, an exit door is not placed on the gameboard by Zargon until a hero looks down the appropriate corridor.
4. Mind Points
- When a hero reaches zero Mind Points, they are not dead but in shock. (A hero cannot go below zero Mind Points.) They roll only 1 red die to move, attack with only 1 combat die, and defend with only 2 combat dice. (Armor, weapons, and most artifacts do not increase the attack or defend dice when a hero is in shock.) The hero's attack and defend dice can be temporarily increased by some spells and spell scrolls.
- The extra Mind Points gained from certain artifacts (such as the Talisman of Lore) can be lost in battle. For example, a Barbarian with the Talisman of Lore (for a total of 3 Mind Points) goes into shock after they accumulate 3 Mind Points of damage.
- In this and other quest packs, it is important to keep track of heroes' current Mind Points. Tell the players to use the bottom row of "Body Points" boxes on their character sheets to record Mind Point damage.
5. Rule Clarifications
- Passing Items: A hero can pass a potion, artifact, weapon, or any other item to another hero only if the two heroes are in adjacent squares and neither hero is adjacent to a monster.
- Spiral Stairway: During a quest, if a hero stands on a spiral stairway and attacks monsters, the monsters can attack back on Zargon's turn. When a spiral stairway is used as the exit at the end of a quest, any hero who moves onto that spiral stairway is immediately removed from the gameboard.
- Multiple Attacks: A hero rolls defend dice once for each attacking monster. For example, a hero attacked by three zombies gets 3 separate defend rolls. A hero attacked by a monster with multiple attacks (such as the Polar Warbear), however, gets only 1 defend roll against that monster per turn, no matter how many of the monster's attacks are directed at the hero.
6. Wandering Monsters
Several quests in this quest pack have multiple wandering monsters. These monsters may appear if a hero draws a Wandering Monster card from the Treasure card deck or if a hero moves onto a Wandering Monster trap as described below. For example, when the quest notes say, "Wandering monsters in this quest: 3 Goblins," place three Goblins adjacent to the hero who initiated the wandering monster encounter. If fewer than three adjacent squares are available, place the remaining monsters as close to the hero as possible.
Note: If you run out of the monsters called for, substitute other monsters of similar strength.
7. Traps in This Quest Pack
The Wandering Monster trap, the Stalactite trap, and the Swinging Axe trap do not have tiles.
Wandering Monster Trap: When a hero moves onto a square with the trap symbol shown, tell the player that the hero must stop on that square. The monster or monsters listed as Wandering Monsters for that quest appear on any square or squares adjacent to the hero or as close as possible. The monsters immediately attack, and the hero defends. (If the hero has not already taken an action that turn, they may do so after they defend.) Otherwise, the turn passes to the next player (or to Zargon). Each Wandering Monster trap can be activated only once. Monsters cannot activate it. Ignore the trap after the first time a hero springs it. Wandering Monster traps are so well concealed that they are not detected when a hero searches for traps.
Stalactite Trap: This deadly spear of ice clings to the ceiling of ice caverns. Unless searched for and disarmed, the stalactite falls upon the first hero to move onto the trap square, causing 1 Body Point of damage. Monsters do not spring Stalactite traps.
Swinging Axe Trap: When a hero moves onto this square, a huge axe swings out from a hidden alcove in the ceiling. The hero then rolls 2 combat dice and loses 1 Body Point for each skull rolled. The hero does not get to roll defend dice. A Swinging Axe trap can be searched for and disarmed. Until it is disarmed, a Swinging Axe trap affects every hero who steps onto the square. Monsters do not spring Swinging Axe traps.
8. Large Monsters
When a monster takes up more than one square (the Frozen Horror in this quest pack, for instance), that monster can attack anyone on any adjacent square (including diagonally), even if the monster's figure is facing away from the target.
9. Selling Excess Items
As the heroes gain better equipment, they can sell some of their old items to the armory. Only items that are listed for sale in the armory can be sold back to the armory. The hero receives gold coins equal to half of the armory's price when selling items to the armory. Thus a hero who sells a longsword (which costs 350 gold coins) back to the armory receives 175 gold coins. Items sold at the armory for odd sums (the dagger at 25 gold coins, for example) can be sold back for half price, rounded down (12 gold coins for the dagger).
10. Treasure
To eliminate conflicts among the heroes, large gold coin treasures found in treasure chests should be divided among all surviving heroes.
11. Treasure Cards in This Quest Pack
The six treasure cards added to this quest pack should be mixed into the game system's deck of treasure cards before play begins. Draw from this deck when a hero searches for treasure.
12. Artifact Cards in This Quest Pack
- Amulet of the North, Ring of Warmth, and Snowshoes of Speed: These artifacts are similar to the artifacts in the game system. When a hero finds one of these artifacts, they should record it on their character sheet.
- Spell Scrolls: Six of the artifact cards in this quest pack are spell scrolls. These are used just like the spell cards in the game system. However, a spell scroll can be used by any hero (not just the Wizard and Elf) who finds one. Note that spell scrolls can be used only once.
When a hero finds an unnamed spell scroll, Zargon should turn all of the spell scroll cards in this quest pack facedown, mix them up, and let the hero draw one at random. The hero should then record the spell scroll on their character sheet and return the scroll card to the scroll deck. After a spell scroll has been used, it must be crossed off the hero's character sheet.
13. Mercenaries
This quest pack contains 12 Mercenary figures, of four types: the Scout, the Swordsman, the Crossbowman, and the Halberdier.
In some quests, Mercenaries serve as evil monsters who oppose the heroes. Whenever a Mercenary is shown on a quest map, it should be considered a monster controlled by Zargon.
Mercenaries are also soldiers who can be hired by a hero before a quest begins. They will accompany any hero on a quest if the hero pays their fee. The fee for each type of Mercenary is given on the Mercenary's card, as well as on the Mercenaries Chart at the back of this book. The gold must be paid before the quest begins. Mercenaries may be hired for any group quest in this quest pack, but not for the solo quests.
A Mercenary is controlled by the hero who hired them. The Mercenary moves and attacks immediately after that hero's turn. A hero can control as many Mercenaries as they can afford to hire. A Mercenary can move, open doors, attack, and defend as a hero, but they can take no other actions (except for the Scout, who can search for and disarm traps). A Mercenary does not receive any treasure. If a hero dies on a quest, any Mercenary hired by that hero continues on the quest, controlled by the fallen hero's player.
The Scout, Swordsman, Crossbowman, and Halberdier each have different statistics and abilities. These are detailed on the cards that come in this quest pack, as well as on the Mercenaries Chart at the back of this book.
If a quest map calls for a type of Mercenary that is not available because they've all been hired by heroes, Zargon may substitute a different type of Mercenary, or another monster altogether.
Zargon, study this book carefully! Although it is your guide to running these adventures, it may not answer every question you have during play. When in doubt, use your experience and imagination to make the best choice. Remember that you are the ultimate authority in your HeroQuest world!
Quest Map Guide
The quest map symbols are color-coded to help you guide the heroes through these quests. Here's what the various map symbol colors mean.
- This color is used to highlight the monster symbols.
- This color is used to highlight traps that the heroes can detect by searching.
- This color is used to highlight traps and other hazards that the heroes can neither see nor detect by searching.
In each quest, notes prefaced with a capital letter correspond to a matching letter location in the quest map. Remember that Mercenaries cannot be hired in quests 1-3. Now, are you ready to begin your first quest?
A Message from Mentor
At the beginning of each quest, read aloud the parchment message from Mentor. The quest notes that the following messages are for Zargon's eyes only!
Welcome, mighty Barbarian, to the land of your youth! It seems only yesterday that the tribal elders gave you leave to explore the many wonders of the warm lands to the south. You return now as a renowned warrior, tall and strong, well-versed in the skills of battle.
Happy though your homecoming is, bitter tidings are on the minds of the tribal elders. They wearily tell you why you have been summoned back to aid your people in their time of need.
An ancient evil, long thought banished, has arisen to threaten the Northlands once more. The Frozen Horror has burst forth from the icy tomb where it has rested these last centuries, recovering its strength and awaiting Zargon's signal. At last, its master has called it, and the Frozen Horror has returned to its ancient Seat of Power deep within Ice Mountain. It has regained the Scepter of Glacial Majesty, an evil artifact of vast power. As we speak, the Frozen Horror is reviving its minions and enacting its plans to cover the Northlands and the Realm in a shroud of deadly ice.
Your people seek a champion to oppose the evil of the Frozen Horror. You have been called in hopes that you might prove to be that champion. To determine your worthiness, the elders have set before you three dangerous quests. These must be undertaken by you alone. If you survive this test, lead your companions into the depths of Ice Mountain. There you must find and destroy the Scepter of Glacial Majesty before it achieves its full power. Only when the Scepter is no more can you confront the Frozen Horror and destroy it forever.
You must call upon all your courage and skill, Barbarian! The greatest perils you have ever faced await within Ice Mountain. Great, too, is the treasure that will be yours if you succeed. Among the many riches to be found is the Amulet of the North, an ancient artifact that is said to grant its wearer marvelous powers. Good luck, mighty warrior. The fates of many depend on you!
Quest 1 — Solo Quest: Xanon Pass
"Good luck, Barbarian, on this, your first of three trials! Servants of the Frozen Horror have overrun the fortress that guards Xanon Pass. This is the only pass over the Cyberian Range, which you must cross to reach Ice Mountain. An iron door is your entry into the fortress. You must find the wooden exit door that leads out to the far side of the pass."
Wandering Monsters in this quest: 2 Skeletons
Notes:
- A: If the Barbarian searches for treasure in this room, 75 gold coins are found in the chest.
- B: The evil Crossbowman does not move but fires their crossbow at the Barbarian once during each of Zargon's turns until the Barbarian reaches them. If the Barbarian moves next to the Crossbowman and attacks, the Crossbowman surrenders immediately, offering their crossbow in exchange for their life. The Crossbowman then runs away. The Barbarian should add the crossbow to their character sheet. (See the armory for this weapon.)
- C: If the Barbarian searches for treasure in this room, a shield is found in the tomb. (See the armory for this item.)
- D: If the Barbarian searches for treasure in this room, a longsword is found in the weapons rack. (See the armory for this weapon.)
Quest 2 — Solo Quest: Trial by Ice
"Xanon Pass leads to an underground outpost on the slopes of the Cyberian Range. This outpost is a base of operations for minions of the Frozen Horror. It threatens several nearby villages. You must enter the outpost and slay one of the Frozen Horror's lieutenants, a Dread Warrior named Krag. The only way in or out is through the ice cave entrance. Your Quest begins and ends there."
Wandering Monsters in this quest: 2 Goblins
Notes:
- A: This ice tunnel is connected to the ice tunnel in the other room "A." The Barbarian or any monster landing on one of these squares immediately moves to the other ice tunnel square.
- B: This treasure chest is empty.
- C: If the Barbarian searches for treasure in this room, a Potion of Warmth is discovered atop the sorcerer's table. (See the matching treasure card in this quest pack.)
- D: If the Barbarian searches for treasure in this room, 120 gold coins are found in the chest.
- E: The Dread Warrior Krag is in this room. Their stats are as follows:
| Movement | Attack | Defend | Body | Mind |
|---|---|---|---|---|
| 7 | 5 | 5 | 4 | 3 |
Quest 3 — Solo Quest: The Rescue
"The minions of the Frozen Horror have captured Gothar, the Barbarian tribe's Great Elder. He has been taken to an evil Dread stronghold near Ice Mountain. Gothar has great wisdom, but he is old and frail. He cannot survive long in the cruel hands of the creatures of Dread. Your final solo test is to enter the stronghold, find Gothar, and bring him out safely. Begin on the spiral stairway and return to it to end your Quest."
Wandering Monsters in this quest: 2 Orcs
Notes:
- A: If the Barbarian searches for treasure in this room, the weapons rack holds a battle axe. (See the armory for this weapon.)
- B: If the Barbarian searches for the treasure in this room, 70 gold coins are found in the chest.
- C: If the Barbarian searches for treasure in this room, a helmet is found in the chest. (See the armory for this item.)
- D: This chest has a poison needle trap on it. If the Barbarian searches for treasure before the trap is disarmed, they lose 1 Body Point. One hundred and fifty gold coins are found in the chest.
- E: As the Barbarian enters this room, the two Dread Warriors have just tied Gothar down on the rack. They ignore Gothar and concentrate on attacking the Barbarian. If the Barbarian kills the Dread Warriors, Gothar is freed. Use any available hero figure for Gothar: place him next to the Barbarian. Gothar is under the Barbarian's control and moves after him. Gothar's stats are as follows:
| Movement | Attack | Defend | Body | Mind |
|---|---|---|---|---|
| 6 | 1 | 2 | 2 | 4 |
The Barbarian must bring Gothar to the spiral stairway to fulfill this final solo quest. Any monsters encountered attack only the Barbarian, as they are under orders to capture Gothar alive. If the Barbarian dies, Gothar is automatically captured.
Quest 4 — Group Quest: The Glacial Gate
"You have done well, Barbarian! The tribal elders have appointed you their champion to oppose the Frozen Horror and its minions. Now you and your companions—the Dwarf, the Elf, and the Wizard—are ready to assault Ice Mountain. An iron door is your entry into the outer chambers of the Frozen Horror's subterranean fortress. Find the wooden exit door to enter the deeper recesses of the mountain."
Wandering Monsters in this quest: 2 Abomination
Notes:
- A: The first hero to search for treasure in this room finds the Snowshoes of Speed lying atop the tomb. (See the new artifact card.)
- B: The heroes see a locked cage in the center of this room. There is an Ice Gremlin inside. It pleads with the heroes to free it, saying that the Frozen Horror has left it there to die and it wants revenge. If a hero announces that they are freeing the Ice Gremlin, and moves adjacent to the cage, the cage opens. The Ice Gremlin leaps out and steals one item from the hero who freed it. The Ice Gremlin decides which item to steal, but it cannot be the armor or shield a hero is using, nor the weapon they are wielding. The item stolen should be crossed off the hero's character sheet. The Ice Gremlin immediately disappears through a hole in the floor. (Remove the Ice Gremlin figure from the gameboard.)
- C: The first hero to search for treasure in this room finds a spell scroll hidden in the bookcase. The hero draws a spell scroll card at random and lists it on their character sheet.
- D: This chest has a trap with an explosive device. If a hero searches for treasure before the trap is disarmed, all heroes in the room lose 2 Body Points. The chest contains 600 gold coins.
- E: The ice ledge that surrounds the crevasse is very slippery. When a hero steps through a door and moves onto their first square in this room, they must roll 1 combat die. The hero is safe and can continue moving if a skull or white shield is rolled. If a black shield is rolled, however, the hero begins slipping into the crevasse, suffering 1 Body Point of damage. The hero must immediately roll another combat die. If another black shield is rolled, the hero plummets into the crevasse, never to be seen again. Any other roll means the hero returns to the square in which they entered the room, ending their turn. At the beginning of any turn in which a hero is in this room, they must first roll to see if they slip into the crevasse.
Quest 5 — Group Quest: The Deadly Depths
"Throughout Ice Mountain, alarms are sounding and the evil servants of the Frozen Horror are awakening. Your way into the stronghold becomes harder after this. The Dread Warlock known as Vilor awaits you in this Quest. Enter through the iron door and search for the wooden exit door. You have far to go before you confront the Frozen Horror itself. Consider hiring Mercenaries on the rest of the Quests, for the dangers may be too great for you to survive without help."
Wandering Monsters in this quest: 2 Mummies
Notes:
- A: This ice tunnel is connected to the ice tunnel in the other room "A." Any hero or monster landing on one of these squares immediately moves to the other ice tunnel square.
- B: As soon as all the heroes enter this room, the two doors marked "B" close and disappear. Remove the doors from the gameboard.
- C: This door does not appear until the doors marked "B" have disappeared. Leave it off the gameboard until then, even if the heroes walk right past it. When a hero opens this door, the ice encasing the monster cracks and they leap out to attack on Zargon's turn. The tile squares with monster images on them are considered empty spaces once the monsters move off those squares.
- D: The first hero to search for the treasure in this room finds 400 gold coins and a spell scroll. The hero draws a spell scroll card at random and lists it on their character sheet.
- E: The first hero to search for treasure in the room finds the Ring of Warmth. (See the artifact card.)
- F: The first hero to search for treasure in this room finds 2 Potions of Healing. Each potion restores up to 4 lost Body Points.
- G: The Dread Warlock, Vilor, guards this room. Vilor stands in the square marked "VIL." Vilor's stats are as follows:
| Movement | Attack | Defend | Body | Mind |
|---|---|---|---|---|
| 8 | 4 | 3 | 4 | 5 |
Vilor knows the following Dread spells: Chill, Ice Storm, Lightning Bolt, Sleep, and Tempest.
Quest 6 — Group Quest: The Frosted Path
"The iron door leads you into hallways that have lain empty for many centuries. Now the hallways are inhabited once again with the foul creatures of Dread. The Frozen Horror's minions are gathering to stop you from finding the wooden exit door. But find it you must if you are to venture deeper into the heart of Ice Mountain."
Wandering Monsters in this quest: 2 Dread Warriors
Notes:
- A: The first hero to search for treasure in this room finds 120 gold coins, a longsword, and a spell scroll. (See the armory for the longsword.) For the spell scroll, the hero draws a spell scroll card at random and lists it on their character sheet.
- B: The first hero to search for treasure in this room finds a set of plate mail armor in the weapons rack. (See the armory for this item.)
- C: The first hero to search for treasure in this room finds 250 gold coins and a Potion of Healing in the chest. The potion restores up to 4 lost Body Points.
- D: The first hero to search for treasure in this room finds a crossbow and a gem worth 300 gold coins. (See the armory for this weapon.)
- E: The first hero to search for treasure in this room finds 2 spell scrolls. For each spell scroll, the hero draws a spell scroll card at random and lists it on their character sheet.
- F: The chest in this ice vault room has a poison gas trap on it. If a hero searches for treasure before the trap is disarmed, all heroes in the room lose 2 Body Points. The chest is empty.
- G: See room "E" of Quest 4 for information on moving along the ice ledge.
Quest 7 — Group Quest: The Halls of Kelvinos
"Know Mighty heroes, that Kelvinos was a Barbarian of great power and fame. Centuries ago, he drove the Frozen Horror from Ice Mountain, ending the reign of terror. Sadly, Kelvinos did not return from that final battle; his body was never found. Some say that he walks again, but as an undead servant of Dread. You shall start at the iron door and explore until you find the wooden exit door that leads you closer to the Frozen Horror."
Wandering Monsters in this quest: 2 Yeti
Notes:
- A: The first hero to search for treasure in this ice vault finds 500 gold coins in the chest.
- B: The first hero to search for treasure in this room finds 2 Potions of Healing in the chest. Each potion restores up to 4 lost Body Points.
- C: The Barbarian hero Kelvinos is now a monster, an undead slave of the Frozen Horror. He is in the square marked "KEL." Use the extra Barbarian figure (or any other figure) for Kelvinos. His stats are as follows:
| Movement | Attack | Defend | Body | Mind |
|---|---|---|---|---|
| 5 | 4 | 4 | 4 | 0 |
The first hero to search for treasure in this room finds the Amulet of the North in the chest. (See the artifact card.)
- D: Few things are as they appear in the living fog room. Monsters and fog likenesses of monsters are all over this room. Whenever a hero attacks a monster, the hero first rolls a combat die to see if they attack a fog likeness instead of a real monster. On a roll of a black shield or skull, the hero is confused and attacks a fog likeness. (The hero wastes their attack.) Only on a roll of a white shield does the hero see a real monster. The hero may then roll their normal attack and the monster defends as usual. The monsters always see the heroes correctly.
Quest 8 — Group Quest: The Search for the Scepter
"You have come far, Heroes, but there is still far to go. Nearby is the resting place of the Scepter of Glacial Majesty, the source of much of the Frozen Horror's power. You must find it and destroy it. After you enter through the iron door, search for the scepter. As long as it exists, the Frozen Horror cannot be killed. Once you have destroyed the scepter, find the wooden exit door and go through it to reach the final battle against the Frozen Horror."
Wandering Monsters in this quest: 3 Ice Gremlins
Notes:
- A: This ice tunnel is connected to the ice tunnel in the other room "A." Any hero or monster landing on one of these squares immediately moves to the other ice tunnel square.
- B: The first hero to search for treasure in this room finds a spell scroll hidden in the bookcase. The hero draws a spell scroll card at random and lists it on their character sheet.
- C: This chest has a poison needle trap on it. If a hero searches for treasure before the trap is disarmed, that hero loses 2 Body Points. The chest contains 200 gold coins and 2 Potions of Healing. Each potion restores up to 4 lost Body Points.
- D: This ice tunnel is connected to the ice tunnel in the other room "D." Any hero or monster landing on one of these squares immediately moves to the other ice tunnel square.
- E: This ice tunnel is connected to the ice tunnel in the other room "E." Any hero or monster landing on one of these squares immediately moves to the other ice tunnel square.
- F: See room "E" of Quest 4 for information on moving along the ice ledge.
- G: The Scepter of Glacial Majesty rests in the upper right corner square. The scepter is frozen into the wall. The heroes can neither move it nor use it. Zargon, tell the heroes that to destroy the scepter, a hero must be adjacent to it, attack it, and roll at least one skull on the combat dice. The scepter explodes when it is destroyed, inflicting 2 Body Points of damage to all in the room. (Do not tell the heroes this until it happens.)
Quests 9 & 10 — Double Quest: The Heart of Ice
"Now that the Scepter of Glacial Majesty has been destroyed, the Frozen Horror is vulnerable. The time to destroy it is now! Start from the iron entrance door. First, you must find the spiral staircase that leads to the Frozen Catacombs. There you will find the Crystal Key. This key will open the final door, the door to the Seat of Power Room, where the Frozen Horror awaits. Be sure to take Mercenaries along on your Quest."
Zargon: Quests 9 and 10 are actually one double-sized quest. Notes A through F refer to the Quest 9 map; notes G through M refer to the Quest 10 map. The heroes will be moving back and forth between these two quests. Mind and Body Points are not restored when the heroes cross between Quests 9 and 10. Reset the gameboard (as described in Note A) when the heroes cross between quests.
Wandering Monsters in these quests: 2 Polar Warbears
Quest 9 Notes:
- A: This is the spiral stairway that leads to room "G" in Quest 10. When a hero moves onto the stairway to enter Quest 10, remove that hero's figure from the gameboard. Tell the players that they cannot enter Quest 10 until all the heroes have moved onto the stairway. Once all heroes have moved onto the stairway, remove the Quest 9 setup from the board. When the heroes return to Quest 9, set out only room "A" until they explore other rooms. Monsters they killed previously do not reappear.
- B: See room "D" of Quest 7 for more information about the living fog room.
- C: This ice tunnel is connected to the ice tunnel in the other room "C." Any hero or monster landing on one of these squares immediately moves to the other ice tunnel square.
- D: In the ice vault room, this chest has an exploding latch trap on it. If a hero searches for treasure before the trap is disarmed, that hero loses 1 Body Point. The chest contains 400 gold coins and 2 Potions of Healing. Each potion restores up to 4 lost Body Points.
- E: The first hero to search for treasure in this room finds a spell scroll and a Potion of Healing on the alchemist's table. The potion restores up to 4 lost Body Points. For the spell scroll, the hero draws a spell scroll card at random and lists it on their character sheet.
- F: The door to the Seat of Power Room will not open until a hero with the crystal key moves adjacent to it and opens it. See the Monster Chart on page 37 for the Frozen Horror's powers.
Quest 10 Notes:
- G: This stairway is also the way back to Quest 9. The heroes must return here once they find the crystal key.
- H: This ice tunnel is connected to the ice tunnel in the other room "H." Any hero or monster landing on one of these squares immediately moves to the other ice tunnel square.
- I: This ice tunnel is connected to the ice tunnel in the other room "I." Any hero or monster landing on one of these squares immediately moves to the other ice tunnel square.
- J: The first hero to search for treasure in this room finds a spell scroll and 2 Potions of Healing hidden behind the bookcase. Each potion restores up to 4 lost Body Points. For the spell scroll, the hero draws a spell scroll card at random and lists it on their character sheet.
- K: The Ice Gremlin treasure room tile is placed over the two small rooms to make one larger room. If the crystal key was stolen from the heroes by Ice Gremlins, the key will be here and can be reclaimed by the heroes.
- L: This ice tunnel is connected to the ice tunnel in the other room "L." Any hero or monster landing on one of these squares immediately moves to the other ice tunnel square.
- M: This chest has a poison needle trap on it. If a hero searches for treasure before the trap is disarmed, that hero loses 2 Body Points. The chest contains the crystal key and a Potion of Healing. The potion restores up to 4 lost Body Points. Give the crystal key tile to the hero who found it.
Note: Once the Frozen Horror has been destroyed, this quest is over. Go to the Conclusion on the next page.
Conclusion
Congratulations, mighty Barbarian! You and your companions have destroyed the Frozen Horror, saving the Realm from an ice-shrouded doom. Zargon's plans in the Northlands have been thwarted, thanks to your cunning, bravery, and skill.
In appreciation of your heroism, the tribal elders have awarded you and your fellow heroes 1,000 gold coins each.
We have won this battle, but we must remain vigilant. Zargon's power grows still. The Frozen Horror returned once before when the Forces of Good thought it dead, and it may well return again. For now, though, the danger has passed.
Your people will sing your praises forever, Barbarian! Centuries from now, your descendants may have to find another champion to defend them against the agents of Dread. May they find a hero as worthy as you!
Zargon's plans in other regions remain unchecked. The Realm is sorely pressed on many fronts. Soon your services will be needed again. I fear that many dangerous tasks still lie ahead of you.
But for tonight, you and your companions are honored guests at a great feast. Tales of valor will be told, and there will be much rejoicing. Come receive the thanks of your kinsfolk!
Artifact Reference
Amulet of the North: This ancient magical item was made for Barbarian kings centuries ago. It may be worn only by a Barbarian. While worn, it adds 2 Body Points and 1 Mind Point to the Barbarian's totals.
Ring of Warmth: This artifact grants its wearer immunity to the Chill spell, as well as to the effects of ice vaults and icy rivers.
Armband of Ice: This powerful item grants its wearer immunity to Mind Freeze and Chill spells, plus immunity to damage from ice vaults and icy rivers for as long as it is worn. It also reduces the damage from an Ice Storm spell by 1 point, for the armband wearer only.
Snowshoes of Speed: These magical snowshoes add 2 squares to a hero's movement, and they also negate the effects of slippery ice for as long as they are worn. These can be used only on quests in cold, icy regions.
Spell Scroll: Chill: This spell causes 1 Body Point of damage to any monster adjacent to the spellcaster (though not diagonally adjacent). The victim cannot defend against the attack. Scroll crumbles to dust once used.
Spell Scroll: Ice Storm: This spell creates a blizzard of ice that affects an area 2 squares wide by 2 squares long. Each monster and hero in that area is attacked separately by the spellcaster with 3 combat dice. There is no chance to defend. Cannot be used in corridors. Scroll crumbles to dust once used.
Spell Scroll: Ice Bridge: This spell creates a permanent bridge of Magic Ice tiles that enables heroes to cross over any pit, trap, chasm, crevasse, or icy square. Scroll crumbles to dust once used.
Spell Scroll: Psychic Recovery: This spell restores all lost Mind Points to the spellcaster or any one hero the spellcaster chooses. Scroll crumbles to dust once used.
Spell Scroll: Skate: This spell enables the spellcaster to move quickly through icy caverns and corridors. The spellcaster adds 6 to their red die movement roll and may pass through monsters and heroes during movement. The spell lasts only one turn. Scroll crumbles to dust once used.
Spell Scroll: Warmth: This spell bestows a healing warmth on the spellcaster or any one hero the spellcaster chooses. The warmth restores up to 3 lost Body Points. Scroll crumbles to dust once used.
Monsters Chart
The Frozen Horror can cast the following Dread spells: Chill, Ice Storm, Ice Wall, Mind Freeze, Skate, and Soothe. Zargon can choose an additional six Dread spells for the Frozen Horror from any of the Dread spells in the HeroQuest Game System, with the exception of the Escape spell.
During Zargon's turn, each Ice Gremlin can either attack a hero or Mercenary, or it can steal one item from one hero (Zargon's choice). The item stolen cannot be the armor or shield a hero is using, nor the weapon they are wielding. As soon as an Ice Gremlin has stolen an item, it runs away at full speed. The heroes can chase the Ice Gremlin on their turn. If they catch it and destroy it, they regain the stolen item. If no hero can see the Ice Gremlin at the start of Zargon's turn, the Ice Gremlin has escaped with the item. The item should be crossed off the hero's character sheet. Remove the Ice Gremlin figure from the gameboard.
The Polar Warbear attacks once with its mighty paw and once with its spiked mace. Two attacks can be made against one opponent or one attack can be made against each of two different opponents.
Whenever the Yeti's attack causes a hero to lose at least 1 Body Point, the Yeti grabs the hero in a powerful hug. This hug inflicts 2 Body Points of damage to the hero at the start of each subsequent Zargon turn. The hero cannot defend against this attack, nor can they take any actions. The Yeti can make no other attacks while hugging. This continues until either the hero dies or the Yeti is killed by the hero's companions.
| Monster | Movement Squares | Attack Dice | Defend Dice | Body Points | Mind Points |
|---|---|---|---|---|---|
| Frozen Horror | 8 | 5 | 4 | 6 | 4 |
| Ice Gremlin | 10 | 2 | 3 | 3 | 3 |
| Polar Warbear | 6 | 4/4 | 3 | 6 | 2 |
| Yeti | 8 | 3 | 3 | 5 | 2 |
Mercenaries Chart
Mercenaries do not collect any treasure. Mercenaries can only move, attack, and defend (except for Scouts, who can detect and disarm traps). The cost to hire them is for one quest only. If a player wants to hire a Mercenary for more than one quest, they must pay the Mercenary's cost for each quest.
The Crossbowman wields a crossbow—see the armory. When adjacent to a foe, the Crossbowman attacks with a broadsword.
The Halberdier wields a halberd that enables them to attack diagonally.
The Scout has the Dwarf's ability to detect and disarm traps.
| Mercenary | Cost per Quest (gold coins) | Movement Squares | Attack Dice | Defend Dice | Body Points | Mind Points |
|---|---|---|---|---|---|---|
| Crossbowman | 75 | 6 | 3 | 3 | 2 | 2 |
| Halberdier | 75 | 6 | 3 | 3 | 2 | 2 |
| Scout | 50 | 9 | 2 | 3 | 2 | 2 |
| Swordsman | 100 | 5 |
Design Your Own Quest Adventures
Design your own exciting quests! Simply photocopy or scan and print the blank map shown in the printed book, along with the symbols shown, and use them to design your own games. Permission is granted to reproduce this document for personal use.
Mark the map with the various monster, furniture, and trap symbols. Then write a short paragraph to explain the adventure, and you're ready to play.