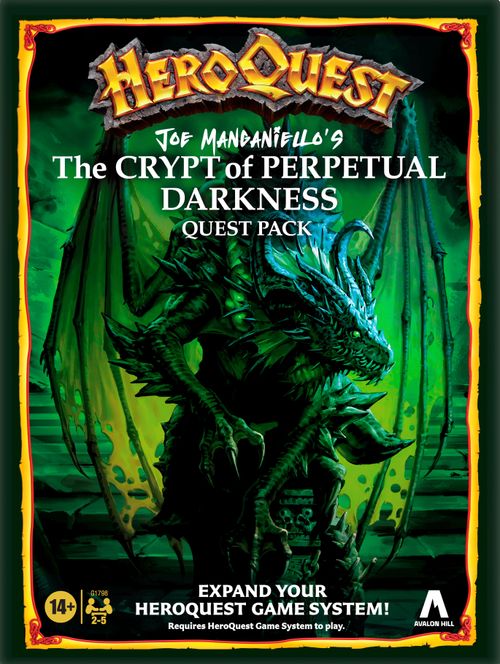
HeroQuest: The Crypt of Perpetual Darkness
HeroQuest: The Crypt of Perpetual Darkness Rulebook
Table of Contents
Table of Contents
- Alchemist's Shop
- Playing the Quests
- Tiles in This Set
- Quests
- Quest 1: The Rat and Candle Tavern
- Quest 2: Jail Break
- Quest 3: Marsh of Sorrows
- Quest 4: Lost Mine of Tyjit Shaleaxe
- Quest 5: Sunken City of Buubhealxea
- Quest 6: Tomb of Hate
- Quest 7: Halls of Doom
- Quest 8: Forge of the Mountain King
- Quest 9: Throne of the Death Knight
- Quest 10: The Crypt of Perpetual Darkness
- Epilogue
- Artifact Cards
Alchemist's Shop
These potions may be purchased only between quests.
Potion of Restoration Cost: 300 gold coins
Drink this brown, frothy liquid to restore 1 lost Body Point and 1 lost Mind Point. It's refreshing after a tough battle!
The book prints a second Potion of Restoration card with the same cost and effect: "The scent of lavender fills the air. Drink this potion to restore 1 Body Point and 1 Mind Point."
Venom Antidote Cost: 300 gold coins
This bubbling brew tastes foul but heals up to 2 Body Points of damage caused by poison needles or poison darts only.
Potion of Dexterity Cost: 100 gold coins
This sparkling liquid adds 5 movement squares to your next dice roll or guarantees one successful pit jump. If you purchase more than one of these potions, you may use only one potion per turn.
Potion of Battle Cost: 200 gold coins
If you have a really weak roll of the Attack dice, you may drink this blood-red potion. It allows you 1 reroll of your Attack dice.
Playing the Quests
The quests in The Crypt of Perpetual Darkness are generally played the same way as the quests in the HeroQuest Game System. It is especially important that these quests be played in order. As in the game system, heroes are returned to full strength (all Body and Mind Points are restored) between quests.
There are a few gameplay differences in The Crypt of Perpetual Darkness.
1. Starting a Quest
The heroes do not always start their adventures on the spiral stairway tile used in the HeroQuest Game System. Often, they enter through a door on the edge of the gameboard. This door is shown on the quest map with an arrow pointing inward toward the gameboard. This door is placed on the gameboard in its specified location before the quest begins. At the start of an adventure, the heroes line up outside the door and ask Zargon to open it.
2. Ending a Quest
Players may only leave the gameboard by locating the exit door on the edge of the board, or by finding the spiral stairway that exists in some of the quests. The exit door is shown on the quest map with an arrow pointing outward from the gameboard. Note: As with regular doors, an exit door is not put on the gameboard by Zargon until a hero looks down the appropriate corridor. An exit door is usually opened in the same way as a regular door, unless specified otherwise in the quest notes.
3. Treasures
Large gold coin treasures found in treasure chests should be divided among all surviving heroes.
4. Artifact Cards
The following artifact cards are used just like the artifacts in the HeroQuest Game System. When a hero finds an artifact, they should record it on their character sheet. Unlike most artifacts in the game system, however, some of these artifacts must be crossed off the hero's character sheet after they are used.
See the Artifact Cards section below for the printed text of each card.
5. What Happens if I don't have enough Monsters of a type?
Some quests may require more monsters than are available in the game. If all the monsters of a particular type are already on the gameboard and you, as Zargon, need to place another one, you may use any monster of the same color as the one that should have been used.
Tiles in This Set
Grasping Vines Traps
If found during a search, Zargon says that the area looks suspicious and points to the square where the trap is located. Once a grasping vines trap is discovered, a hero may attempt to jump the trap or disarm it. As a hero, when you step onto a grasping vines trap square, you automatically spring the trap. This causes vines to thrust out of the wall, floor, or ceiling and try to grab you.
Springing a Grasping Vines Trap
As a hero, if you move onto this trap square, Zargon puts a grasping vines trap under your hero figure and you must roll 1 combat die. If you roll either a black or white shield, you have dodged out of the way of the vines and may then continue with your move. If you roll a skull, you suffer 1 Body Point of damage and are held in place by the vines. This ends your turn. You or another adjacent hero can spend an action to destroy the vines, which frees you and removes the trap from the board.
Acid Pool Traps
Acid pools burn the skin of any hero who comes into contact with it. As a hero, if you move onto this trap square, Zargon puts an acid pool under your hero figure, and you must roll 1 combat die. On a skull, you suffer 1 Body Point of damage. The acid remains on the ground and affects any hero who moves onto it. Acid pools cannot be disarmed but can be jumped.
Dread Skull
As soon as a hero sees a Dread Skull, place it on the board. Immediately, and on Zargon's turn, the Dread Skull makes a ranged attack with the strength of 2 combat dice at a hero it can see with its green eye beams. The skull has 1 Body Point, 0 Defend Dice, and disappears once it sustains damage.
The tile set also includes a Temple tile and a Tavern tile. The book prints no rules text for either.
Quests
At the beginning of each quest, there is a message on parchment from Mentor. This message should be read aloud to all players. However, the quest notes that follow are for Zargon's eyes only!
Quest 1: The Rat and Candle Tavern
Every great adventure begins… in a tavern. The city is occupied by enemy forces and as you enjoy some downtime between quests, you hear the drunken ramblings of a jolly gnome singing tales of a crypt buried in Marsh of Sorrows that was the last resting place of an ancient weapon of dwarven make. The gnome produces a map from his pouch and offers a share in the reward to you if you can help him find it. At that very moment the gnome screams out and falls forward onto your table. A goblin with a long bloody knife smiles a toothy grin and says, "I'll be taking that map."
Notes
The heroes start around their favorite table at The Rat and Candle Tavern, marked with an "A." The city has been occupied by evil forces, hence it is overrun by orcs, goblins, and other agents of Dread. Also place the staircase and the two doors to that room. This represents the heroes' hideout, the location of which is known to them.
- A. The heroes start seated around this table.
- B. The tavern owner fled to this room. He rewards the heroes with a Ring of Return. Note: the ring cannot return the heroes to their hideout in this quest because they started in the tavern.
- C. This blacksmith's shop is in ruins. If a hero searches for treasure, they find the blacksmith under a collapsed section of the building. She gives that hero a Magical Throwing Dagger.
- D. These creatures guard Zargon's troops' supplies. The chest is trapped with a poison dart. If a hero searches for treasure before the trap has been disarmed, they lose 2 Body Points. The chest contains two Potions of Speed, as described in the HeroQuest Game System armory.
Wandering Monster in this Quest: Orc
Quest 2: Jail Break
Now that you've had a chance to inspect the map in private, you realize that it is written in an archaic form of elven that hasn't been used in centuries. A scholar friend of yours could translate it but he just so happens to be imprisoned by Zargon's troops for stealing back plunder. Break him out of the town jail and return him safely to your hideout so that he can decipher the map and help you understand why it was so valuable and what it leads to....
Notes
- A. The heroes begin at their hideout on the staircase.
- B. If a hero searches the room, they spot a mouse on the cupboard trying to get into a tin of crackers. Ask the heroes if they would like to help the mouse to a snack? If the answer is yes, place a rat miniature on the cupboard and tell the heroes that the mouse telepathically informs them that it is a wizard's familiar. A hero can release the mouse in front of any closed door in any quest to receive a telepathic message about what monsters and furniture lie behind the door (if any). When the mouse is used once in this way, it scurries off.
- C. The weapons rack is full of rusted shortswords and clubs of goblin make. There is nothing of value here.
- D. If a hero searches this room, they find two Potions of Healing. Each potion restores up to 4 lost Body Points.
- E. If a hero searches the room for treasure, they find in the fireplace a burnt skeletal finger with a ring on it that stores one use of the Fire of Wrath spell within it. Once the spell is used, the ring is no longer magical.
- X. This is the town jail where Vander the elf is being held captive by the Dread guards. If a hero searches this room, they find a crossbow. The crossbow is described in the HeroQuest Game System armory. Return Vander back to your hideout so he can translate the map. See notes for Vander.
Vander: Use the stats shown on the Elf card for Vander.
Wandering Monster in this Quest: Orc
Quest 3: Marsh of Sorrows
Vander translates the ancient elvish runes of the map and reads them to you: "When the black light of the new moon shines upon the great rock face in Marsh of Sorrows, the entrance to the lost goblin mine of Buubhealxea will appear. This is the first step on the path that will lead you to the final resting place of the death knight Kedrick Gilbane." You have followed the map diligently through the foggy and reptile-infested swamp to a rocky outcropping like the one on the map....
Notes
- A. "Zombies crawl out of the secret passage revealed by the new moon's light!" Secret door B is already discovered. On Zargon's turn, place a zombie on secret door B unless a Hero has previously reached this location. All of the traps marked "A" are so well hidden that any hero who searches for traps finds only one trap—the one closest to them. These traps are grasping vines. (See the discussion of new traps on page 5.)
- B. The first hero to search this room finds 250 gold in the chest.
- C. The Dread sorcerer represents a swamp hag, and she has the following spells: Lightning, Command, Sleep, Tempest, Rust, and Escape.
- D. The first hero to search for treasure finds a Potion of Defense on the bookshelf.
- E. The first hero to search this room finds 250 gold coins in the chest.
Dread sorcerer (swamp hag) stats: Movement 4, Attack 2, Defend 3, Body 2, Mind 3
Wandering Monster in this Quest: Abomination
Quest 4: Lost Mine of Tyjit Shaleaxe
These once great dwarven mines, named after a fallen mythical hero who died valiantly fighting for freedom from the forces of Dread, have become inhabited by the minions of the malevolent goblin Queen Buubhealxea. Battle your way against her troops from the staircase to the iron door marking the exit to continue your quest.
Notes
The heroes enter on the spiral stairway.
- A. If a hero searches for secret doors in this room, tell them that they feel a slight draft coming from the center of the room. Of course, don't reveal there is a pit trap here. It leads to the other pit trap marked with a "B" in the upper left room.
- B. If a hero searches this room for treasure, they find two scrolls. Randomly determine which scrolls they receive from their available spell scrolls.
- C. The top chest is trapped with a poison needle. If a hero searches for treasure before the trap has been disarmed, they lose 2 Body Points. The second hero to search for treasure finds the middle chest contains 500 gold pieces. The third hero finds that the bottom chest contains the bones of a giant, horned skeleton of a minotaur. The skeleton swings its axe immediately at the hero who discovered it. Place a skeleton miniature on the board to represent this monster. If defeated, a hero may take the monster's battle axe. The battle axe is described in the HeroQuest Game System armory.
Stats for the skeleton in the bottom chest (the minotaur skeleton): Movement 6, Attack 3, Defend 3, Body 2, Mind 0
Wandering Monster in this Quest: Zombie
Quest 5: Sunken City of Buubhealxea
A blast of stale air hits you in the face as the heavy iron door swings open, revealing a crudely carved staircase leading to a level below the mines. As you descend the steps, the sound of rushing water grows stronger. You discover the remnants of an ancient human city thought to have been lost to an earthquake centuries ago. Make your way through the sunken city now inhabited by the goblin queen's minions and travel farther down into the bowels of this subterranean maze of tunnels.
Notes
- A. If a hero searches for secret doors in this room, inform them that there is a loose panel in the wall revealing a crawl space that leads to the other room marked with an "A."
- B. If a hero searches for a secret door in this room, inform them that there is a tight passage through the fireplace leading to the secret door in the room above it marked with the other "B." The door to the east wall seeps water from underneath and is clearly holding back a deluge. It is well and truly shut and cannot be opened.
- C. If a player searches the room for treasure, tell them that they find a mouse trying to get at an old piece of cheese on a high shelf in the cupboard. If they decide to feed the mouse the cheese, give them a rat miniature. They can use the mouse in front of any door in the quest book to make the game master place everything visible in that room before they enter. When the mouse is used once in this way, it scurries off.
- D. If a player searches for secret doors in this room, slide the desk up in the direction of the arrow one square and reveal the secret door behind it.
- E. The goblin queen Buubhealxea has the following spells: Command, Fear, and Escape. Her treasure chest contains a gnawed-on femur bone, 400 gold pieces, and a skeletal key (a skeletal hand whose outstretched index finger has been carved into a key).
- F. The first hero to search this room finds 250 gold coins in the chest. Secret door can only be found in room D.
- X. The door is locked. It can only be opened by the skeletal key located in Buubhealxea's treasure chest.
Goblin queen Buubhealxea stats: Movement 8, Attack 3, Defend 3, Body 3, Mind 2
Wandering Monster in this Quest: Abomination
Quest 6: Tomb of Hate
The hair on your arms stands up straight on end as if you had just been jolted by a minor shock of lightning, and then it hits you… the fetid stench of death. You reflexively start taking shallow breaths in as you step forward into this cold and depraved level. The moisture in your breath turns cold. As you draw your weapons and step forward, spectral hands swing the heavy iron door shut and bolt it from the other side. Something terrible must lie ahead of you, and it knows that you are here. Find your way past this level with as much expediency as possible.
Notes
- A. The first hero who searches the altar or for treasure finds a spell scroll of Tempest and one of Lightning.
- B. This mummy is King Archaloneus, a powerful mummy lord with the following spells: Sleep, Rust, and Command.
- C. The first hero to search for treasure in this room finds 300 gold pieces and a Potion of Healing in the chest. These stairs lead down to the next level.
King Archaloneus stats: Movement 6, Attack 4, Defend 4, Body 4, Mind 3
Wandering Monster in this Quest: Mummy
Quest 7: Halls of Doom
Screams of agony can be heard echoing through these halls as you venture deeper and deeper below the catacombs of the mummy lord Archaloneus. According to the gnome's map, you are dangerously close to the crypt containing whatever is left of the evil death knight Kedrick Gilbane. His crypt should be among these once great Halls of Doom.
Notes
- A. This chest is trapped with a poison needle. If a hero searches for treasure before the trap has been disarmed, they lose 2 Body Points. The chest is otherwise empty.
- B. When a hero searches the room for treasure, they feel something cold and slimy envelop their hand. The hero must roll their Defend dice against 3 points of damage from the glowing ooze. On the bookcase is a vial of Holy Water.
- C. This chest is trapped with a poison needle. If a hero searches for treasure before the trap has been disarmed, they lose 2 Body Points. The chest is otherwise empty.
- D. A hero who searches this room finds a loose brick in the wall behind a shackled corpse. Stashed in this hidden cache is 75 gold pieces and a Potion of Restoration. The potion restores up to 4 lost Body Points and 1 lost Mind Point.
Wandering Monster in this Quest: Dread Warrior
Quest 8: Forge of the Mountain King
The Halls of Doom descend deeper into a maze of heated tunnels. You consult the map and read the translated elven runes that reveal you are passing through some sort of forge level on your way to the death knight's crypt. All dwarves grew up on the legends of the great Forge of the Mountain King. Thought to be long lost to time, it was instrumental in the War of Dragons. Could this actually be it? And could there be some long forgotten weapon that remains from that bygone war?
Notes
-
A. Once any door marked "A" is opened, an orc yells a war cry and all of the "A" doors swing open.
-
B. These chests are trapped with a dart. If a hero searches for treasure before the trap has been disarmed, they lose 1 Body Point from a dart that shoots out from the wall. These chests are all empty.
-
C. The mummy in this room was a dwarf in its former life. Its stat block is as follows:
Dwarf mummy stats: Movement 5, Attack 4, Defend 5, Body 4, Mind 0
-
D. The book on the stand is written in dwarvish. It documents the creation of a great weapon for fighting dragons. It also notes that the weapon was buried in this forge with the dwarf's combat mount.
-
E. If a hero searches the room for treasure, they are able to remove the lid of the sarcophagus to reveal the skeleton of a bear and an ancient dwarven weapon known as the Dragon Spear. (See the artifact card.)
-
F. If a hero searches the room for secret doors, slide the chair down to reveal the secret passage.
Wandering Monster in this Quest: Mummy
Quest 9: Throne of the Death Knight
Evil emanates from below the moment you begin your descent. The stairs lead to the inner sanctum and final resting place of a warrior whose ambitious plans of conquest were too large for the mortal realm. He volunteered himself as an experiment to gain immortality and, according to legend, he succeeded. Here he lies, growing in power and assembling an army of undeath, awaiting the day in which Kedrick Gilbane may ride forth to rule his kingdom and all others again.
Notes
The heroes begin on the stairway.
- A. As soon as a hero sees a Dread Skull, place it on the board. Immediately, and on Zargon's turn, the Dread Skull makes a ranged attack with the strength of 2 combat dice at a hero it can see with its green eye beams. The skull has 1 Body Point, 0 Defend Dice, and disappears once it sustains damage.
- B. The chest contains 500 gold pieces and a Potion of Dexterity.
- C. The Dread sorcerer represents the Dread knight Kedrick Gilbane. He has the following spells: Cloud of Dread, Fear, Firestorm, and Command. If a hero searches the room for treasure after the Dread knight is defeated, they find the Crown of Shadows. (See the new artifact card.) If a hero searches the room for secret doors, slide the throne one space to reveal the passage behind it.
Kedrick Gilbane (Dread knight) stats: Movement 7, Attack 5, Defend 5, Body 4, Mind 4
Wandering Monster in this Quest: Dread Warrior
Quest 10: The Crypt of Perpetual Darkness
Behind the death knight's throne was a secret passage revealing a system of tunnels beyond where the gnome's map ended. Steam rises from the slick stone floors and walkways, wafting a sharp, acrid, and penetrating smell through the air. Any mucous built up within your nostrils and throat evaporates within a few inhales. Your eyes water and your palms begin to sweat as you push forward into this dark lair that some new inhabitant calls home. One way or another, your quest will be over soon as something powerful awaits you in this murky, underground crypt....
Notes
- A. This square is an undetectable trap. Any hero who moves onto it slides all the way down onto the space marked "X" and their movement is done (but they may still take an action). If a hero slides down and the path to the "X" space is not clear, stop at the nearest available space and roll 2 combat dice to see if any damage is taken by the hero or monster who is landed on. A hero who searches the crypt finds two Potions of Healing and an oil of acid immunity which allows one hero to avoid the effects of acid damage for an entire quest.
- B. The door marked "B" is wedged shut and cannot be opened.
- C. This stone square is actually a secret door and can be traded for a secret door tile when found but initially it should be placed in the hallway to hide the fact that the dragon's lair is behind it.
- D. The chests contain the dragon's hoard, a total of 1,200 gold pieces.
- E. Once the heroes exit this door, read the epilogue.
- The Dragon Venim's Lair: When the secret door marked "C" is opened, place the lair tile as shown and inform the players that a sinister laugh echoes out of magical darkness. Any hero who cannot see in magical darkness has -2 combat dice the first and second time they attack, and then they may attack as normal. The monsters here do not suffer from this effect. Venim has the following spells: Cloud of Dread, Fear, Command, Sleep, and Breathe Acid (Firestorm but with acid damage).
Dragon Venim stats: Movement 7, Attack 5, Defend 5, Body 4, Mind 4
Wandering Monster in this Quest: Dread Warrior
Epilogue
Congratulations! You have completed your most difficult quest to date. It did not appear pretty at times, but luckily style points are not being awarded here. You have defeated the death knight Kedrick Gilbane, vanquished the Dragon Venim, and blocked Zargon's forces from possessing the incredibly powerful artifacts buried within the crypt. My friends, there simply is no rest for the heroic. As one quest comes to a close, another begins.... Over the coming nights, whenever you close your eyes and drift off to sleep, you are jolted awake by apocalyptic dreams of a vast wasteland of barren, volcanic earth and an obsidian tower in the distance. All of you share with each other these same visions of doom, and it becomes clear that they are most vivid and painful for the one who wears the Crown of Shadows. As the pain and visions grow sharper day by day, you come to realize that within the crown lies a great evil, one that needs to be destroyed, and it has something to do with the dark tower.
Artifact Cards
The Artifact and Equipment Reference page prints the text of the following artifact cards. The printed prices on that page are not transcribed: the text layer does not reliably tie each price to its card.
Crown of Shadows (Artifact, Armor) This helmet gives you 1 extra Defend die and allows you to see normally in darkness, both magical and nonmagical.
Dragon Spear (Artifact, Weapon) A long magical spear of dwarven make. When using it, roll 3 Attack dice, or roll 4 if attacking a dragon. This weapon may be used to attack diagonally. May not be used by the wizard.
Ring of Return (Artifact) When invoked, this magical ring returns all heroes that the ring wearer can see to the starting point of the quest. It can only be used once.
Magical Throwing Dagger (Artifact) Always inflicts 1 Body Point of damage when thrown at a monster a hero can see. Monster cannot defend. Dagger is lost once it is thrown.
Holy Water (Artifact) You may use the holy water instead of attacking. It kills any undead creature (skeleton, zombie, or mummy). The card is then discarded after use.
The reference page also reprints four HeroQuest Game System armory items (Spell Scrolls, Battle Axe, Crossbow and Potion of Speed). Those are base-game items and their rules are in the HeroQuest rulebook, so they are not repeated here.