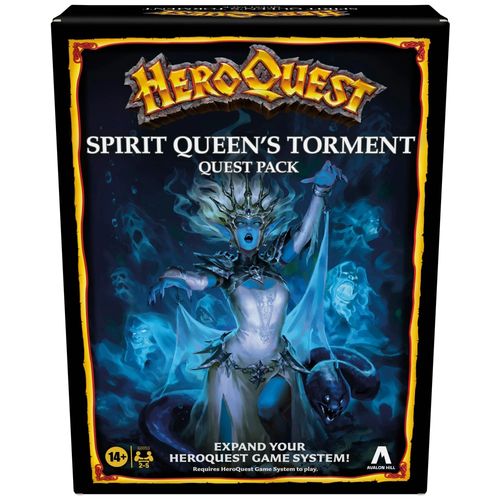
HeroQuest: Spirit Queen's Torment
HeroQuest: Spirit Queen's Torment Rulebook
Table of Contents
Table of Contents
- Alchemist's Shop
- A Message from Mentor
- Playing the Quests
- Quest 1: Ruins of Wyvern Keep–Ground Floor
- Quest 2: The Brigands' Barracks
- Quest 3: Nelath's Tomb
- Quest 4: The Goblin Warrens
- Quest 5: The Hero Within
- Quest 6: The Perilous Escape
- Quest 7: The Drowned Temple
- Quest 8: The Flooded Catacombs
- Quest 9: The Sage's Exile
- Quest 10: The Tower of Earth
- Quest 11: The Tower of Water
- Quest 12: The Tower of Air
- Quest 13: The Tower of Fire
- Quest 14: The Spire of Spirits
- Conclusion
- Artifact Reference
Alchemist's Shop
These potions may be purchased only between quests.
Potion of Restoration (Cost: 300 gold coins) Drink this potion to restore 1 lost Body Point and 1 lost Mind Point.
Venom Antidote (Cost: 300 gold coins) Drink this potion to restore up to 2 Body Points of damage inflicted by poison needles or darts.
Potion of Dexterity (Cost: 100 gold coins) Drink this potion to add 5 squares to your next movement roll OR automatically succeed one pit jump. You may not use more than one of these potions per turn.
Potion of Battle (Cost: 200 gold coins) Drink this potion to reroll all of your Attack dice.
A Message from Mentor
Terrible times are upon us, my friends. Zargon never rests, and the latest machinations of the evil sorcerer may be the most dire yet. An army under Zargon's command attacked us just days ago. It was repelled, but the vile sorcerer leading the attack employed a most unusual and devastating spell. It was an incantation of Dread magic, of course – the base magic evil creatures learn by giving up balance and empathy – but somehow, the spell produced Elemental fire. This should not be possible.
I have many suspicions and must travel to the site of the battle to learn more. I fear this was but a test of power by Zargon, and the source of this magic is likely found elsewhere.
As many of you know, with hard work and years of study, wizards, elves, and other creatures may master the schools of Elemental magic: air, water, earth, and fire. Powerful wizards can master more than one school or Element, but each spell is cast separately from another, with the Elements remaining pure. Fragments of records from the ancient and great orc kingdoms hint at other possibilities… but with the gravest of consequences.
Zargon and the evil sorcerer's minions have tried to uncover this information, but any knowledge has been lost to time.
I wish for you to meet with Silvana, one of my most accomplished diviners. She senses a connection between today's events and the fate of an old friend of hers. Someone under Zargon's command is gaining great and terrible power, and we sense these matters are related. Travel swiftly to her and be prepared for great danger. You shall certainly face it from Zargon's forces. But you will do well to remember that it is not only magic and might that win battles; a hero must also keep their heart and wit.
Mentor
Playing the Quests
The quests in Spirit Queen's Torment are generally played the same way as the quests in the HeroQuest Game System. It is especially important that these quests be played in order. As in the game system, heroes are returned to full strength (all Body and Mind Points are restored) between quests.
As you read through the text, helpful notes with useful information for gameplay are coded with the helpful-note symbol. So keep an eye out for these!
There are a few gameplay differences in Spirit Queen's Torment outlined ahead.
Starting a Quest
The heroes do not always start their adventures on the spiral stairway tile used in the HeroQuest Game System. Often, they enter through a door on the edge of the gameboard. This door is shown on the quest map with an arrow pointing inward toward the gameboard. This door is placed on the gameboard in its specified location before the quest begins. At the start of an adventure, the heroes line up outside the door and ask Zargon to open it.
Ending a Quest
Players may only leave the gameboard by locating the wooden exit door on the edge of the board, or by finding the spiral stairway that exists in some of the quests. The exit door is shown on the quest map with an arrow pointing outward from the gameboard.
As with regular doors, Zargon does not place an exit door on the gameboard until a hero looks down the appropriate corridor. An exit door is usually opened in the same way as a regular door, unless specified otherwise in the quest notes.
Treasures
Large gold coin treasures found in treasure chests should be divided among all surviving heroes.
Bard Hero and Dying
Players may choose to play the bard hero for this quest book. In addition, once the heroes have found Sigill in Quest 3, they gain an additional benefit, representing how Sigill (and later Udren) can help the characters.
If no one is playing the bard hero and a hero dies, place the bard hero in the room with the dead hero. The player of the dead hero now controls the bard hero and can immediately pick up any items held by the fallen hero. The bard hero may not take actions on the turn they appear.
The appearance of the bard hero in this way may only happen once during this quest series.
Controlling Allies
Several quests allow the heroes to find allies. Once found, a player controls the ally. The player takes their regular turn and then the ally's turn. The ally is treated as a hero by all monsters and traps, but does not take a share of any treasure.
Italicized terms in the quest notes reference items with corresponding cards found in this quest pack. (Examples: Rabbit Boots, Dust of Disappearance)
Capitalized monsters in the quest notes reference monsters with corresponding cards found in the HeroQuest Game System. (Examples: Goblin, Orc)
Quest 1: Ruins of Wyvern Keep–Ground Floor
At the beginning of each quest, there is a message on parchment from Silvana. This message should be read aloud to all players. However, the quest notes that follow are for Zargon's eyes only!
The land around the ruined keep is blackened from magic and siege engines, the outer walls barely standing. As you reach the sundered doors of what was once Wyvern Keep, Silvana uses the Far Voice spell to contact you. "Take care, for the enemy may have taken pains to make this place appear deserted. The bandits or Zargon's forces could lie in wait or have set traps. Seek the lower levels, for none of the towers still stand."
Notes
The heroes enter through the large entranceway at the top, indicated by the arrow. All furniture found on this level is ruined.
A. The weapons on the rack are rusted and broken. The Skeletons of the keep's defenders rise to battle intruders.
B. The treasure chest has a trap with a poison needle on it. If a hero searches for treasure before the trap is disarmed, they lose 1 Body Point. The chest is empty. No treasure can be found in this room.
C. The chest was brought here by the bandits and has a poisonous gas trap on it. If a hero searches for treasure in this room before the trap is disarmed, each hero in the room loses 1 Body Point. The chest is empty. No treasure can be found in this room.
This once regal throne room is blackened by fire, and the once elegant furniture ruined. Only a sturdy iron chest has withstood the damage.
D. If the heroes have set off at least one trap, the guardians in the adjacent rooms are alert and both doors will open as soon as a hero enters. Otherwise, the monsters in one room come to the aid of another only after the heroes have all had their second turn of combat.
When the battle starts, Zargon may say, "At last, you have found the bandits! They lay in wait, and a stairway leads farther below."
E. The bandits never found the secret door leading to this room. The chest is not trapped. The first time a hero searches for treasure, they find 220 gold coins and one Potion of Dexterity.
The heroes may proceed to the next quest once they have found the stairway.
Wandering Monster in this Quest: Skeleton
Quest 2: The Brigands' Barracks
"My divinations have allowed me to track your movements. Well done, heroes! Now that you have found where the brigands hide, you must put an end to their threat. Be on the lookout for my scout, the orc Sigill, who may be held captive. Sigill or the brigands may know Zargon's plans. Finally, seek the way to the catacombs, so that you may investigate Nelath's tomb."
Notes
A. This stairway continues down, but is blocked by a heavy locked gate. The brass key in D must be used to unlock this gate.
B. The door to this room has been barred shut by the Goblins to prevent the undead from reaching them. To open the door, an adjacent hero must roll 1 combat die. The door opens regardless, but if the result is a skull, the hero immediately ends their turn. The first hero to search for treasure finds 100 gold coins hidden in the bookshelf.
C. The brigands have trapped this false treasure room with a pit trap. The treasure chest has a magical trap. If a hero searches for treasure before the trap is disarmed, the Dread spell Ball of Flame is cast on that hero. The trap may be disarmed normally.
Silvana's Far Voice spell allows her to speak to you. "Mere brigands should not have been able to devise such a trap. Zargon must be involved!"
D. The Dread Warrior commands the undead in this room. The first hero to search for treasure finds the desk holds 250 gold coins, an Anti-Poison Quill, and the brass key needed to descend the stairway to the next level.
The desk also holds dispatches from the brigands, detailing raids on caravans orchestrated by their leader, Kavra. She is described as a powerful sorcerer, and she holds a prisoner in the dungeon below.
Wandering Monster in this Quest: Goblin
Quest 3: Nelath's Tomb
"My apprentice was buried in a tomb in the southeastern portion of the catacombs. Nelath's tomb may have been hidden, and likely was trapped. Any information or belongings you can recover would be meaningful to me. If the reports you found are true, our orc ally Sigill is held captive by the vile sorcerer, Kavra. Rescue Sigill and make note of any unusual magical talents Kavra may possess. Once you have done this, exit Wyvern Keep and return to me."
Notes
The heroes begin on the stairway. Once Sigill has been found, if a hero dies they may instead play the bard hero. See Bard Hero and Dying on page 4.
A. When the heroes enter the Dread Warrior's line of sight, the warrior shouts to one of the Goblins, instructing them to alert Kavra. Unless stopped, one Goblin moves to the door, opens it, and runs toward B.
B. If the Goblin from A reaches the door to this room, open the door and activate the monsters within.
C. The Goblins in this room have imprisoned the Orc, who is the scout Sigill. The first hero to enter this room controls Sigill. See Controlling Allies on page 4. Sigill speaks to the heroes.
"Heroes, I am Sigill. I am alive due to the kindness of an orc guard named Udren. Before she was reassigned to Bleak Swamp Fortress, she told me Zargon's forces took Nelath's remains there. An exit from this dungeon can be found in the evil sorcerer's room! Dangerous tombs are found to the southeast."
The weapons rack holds Sigill's gear, as well as a shield and a longsword.
D. A Mummy hides behind the bookshelf. Unless a hero searches for traps before they move to the space in front of the door to room E, the Mummy immediately moves and attacks.
E. Use the Gargoyle figure to represent Kavra. Her stats are those of a Dread Warrior, with 1 additional Defend die. She may cast the Dread spells Lightning Bolt and Ball of Flame. On her first turn only, she may cast both spells simultaneously.
F. The first hero who searches for treasure finds a hidden compartment missed by the brigands. Within are 300 gold coins and the Talisman of Lore magical artifact (unless the heroes already have it).
Nelath's tomb has been opened and her corpse removed!
Wandering Monster in this Quest: Goblin
Quest 4: The Goblin Warrens
"You have proven yourselves, heroes, with your victory against the sorcerer Kavra, who seemed to combine Dread and Elemental magic! Bleak Swamp Fortress, where Nelath's corpse was taken, is an evil place. Zargon's forces can be found there in great numbers. Beware the goblins and their traps while looking for Udren, an orc guard who can help us learn Zargon's plans. Find access to a lower level, for my divinations suggest she is below ground."
Notes
The heroes begin lined up outside the door indicated by the arrow. They must find the stairway to reach the next quest.
A. On their first turn, the Goblins in each of these rooms call for help. Zargon, open the door to the adjacent room containing monsters, who are now in play.
B. The Orc and Goblins have been brewing strange concoctions on this table; three potions can be found. If a hero drinks one, they roll 1 combat die. A different effect takes place for each roll result.
- On a white shield: They roll 1 red die and restore that many Body Points.
- On a skull: They immediately take on the effects of a Potion of Battle.
- On a black shield: They lose 1 Body Point.
C. The treasure chest has a poison needle trap. If a hero searches for treasure before the trap is disarmed, they lose 1 Body Point. Each chest contains 80 gold coins.
D. This chest has a magical trap on it. If a hero searches for treasure in this room before the trap is disarmed, a Sleep spell is cast on up to two of the heroes in this room. Both secret doors then open. The chest contains one pair of Rabbit Boots and one Courage spell scroll.
Wandering Monster in this Quest: Goblin
Quest 5: The Hero Within
"Your infiltration of Bleak Swamp Fortress has gone well, heroes! You have reached the dungeons below the fortress, and I do not believe the alarm has been raised yet. That is good, for there are many troops in other parts of the fortress. Udren, the orc guard who can help us, must be here. Find her and learn what Zargon has done with my apprentice's corpse. You may need to protect Udren. Zargon's forces despise traitors."
Notes
Zargon, tell the heroes that during this quest they may use an action to search for Udren in any room where an Orc is present. This action is similar to searching for secret doors but may be done during combat and will identify Udren if she is present.
A. The heroes begin here, on the stairway.
B. These cells once held prisoners, but now hold undead. Both doors are trapped. If either door is opened without disarming the trap, both doors open and the undead take a turn before the heroes!
C. The Abomination is on the rack but frees itself and fights the heroes. The first hero to search for treasure finds the artifact Phantom Blade and one crossbow.
D. This is a kitchen, and the Orc ally Udren is here, made to cook meals for the Goblins. Udren is forced to fight the heroes with the Goblins since she is their prisoner. If Udren is killed before the special action to search for the Orc ally is taken, the heroes fail the quest! If a hero takes that special action, however, Udren identifies herself and directs the party to E, instructing them on how to open the secret door. Udren joins the heroes as an ally, controlled by the hero who identified her. See Controlling Allies on page 4.
"Sigill sent you? I can indeed help. We can escape through the lower levels!"
E. A secret door leads out of this room and to Quest 6. The secret door can only be found if the heroes identified Udren. If Udren is alive, she retrieves 200 gold coins from a hidden cache and presents it to the heroes as they exit this quest.
Wandering Monster in this Quest: Orc
Quest 6: The Perilous Escape
"You found Udren, and she told us Nelath's fate. Nelath's spirit has been magically compelled into service by Zargon. Nelath, now taking the name of the Spirit Queen, left the fortress to retrieve magical secrets hidden away in an orc temple. Make haste, heroes! If we are to follow the Spirit Queen's path, you must find a way out of Bleak Swamp Fortress before Zargon's forces overwhelm you."
Notes
The heroes enter through the door marked with the entrance arrow and must leave through the onyx exit door, which is locked (see C).
Each time a room is exited for the first time, or whenever a trap is triggered, place three Goblins or two Orcs (Zargon's choice) lined up outside the entrance door. These monsters are in play and chase the heroes, representing the pursuit by Zargon's forces!
One of the heroes should control Udren, if she is alive.
A. Each of the squares marked A contains one inanimate Gargoyle. A Gargoyle animates when a hero moves within 2 squares of it, and is impervious to damage until then. When defeated, the stone rubble reveals half of an onyx key. The two halves fit together and open the locked exit door at C.
B. Each of these chests is trapped. If a hero searches for treasure before the trap is disarmed, the Dread spell Ball of Flame is cast on that hero. The trap may be disarmed normally. The first chest they search contains Dust of Disappearance. The last two chests each contain one Courage spell scroll.
C. This onyx exit door can only be opened with the onyx key (see A).
If the heroes succeed in escaping with Udren alive, Udren joins Silvana as a new apprentice. Silvana rewards the heroes, granting them 300 gold coins for their accomplishments.
Wandering Monsters in this Quest: 2 Goblins
Quest 7: The Drowned Temple
"Long ago, orcs discovered terrible arcane secrets. Being of good intent, they closed the temple to outsiders. Zargon laid siege to the orc temple, seeking the knowledge. The orcs sacrificed themselves, flooding their temple to deny Zargon his prize. Now we learn the Spirit Queen came to the Drowned Temple. The orc spirits are not evil, but they attack those who would trespass so that they may protect their secrets. Somehow you must prove yourselves worthy."
Notes
With the exception of room D, all creatures the heroes encounter are undead wearing the uniform of Zargon's troops. These undead were killed by the spirits of the temple.
A. The undead Dread Warriors once commanded Zargon's forces, but they've been weakened by the Orc spirits of the Drowned Temple. Each Dread Warrior rolls 1 fewer Defend die.
B. If a hero moves more than 3 squares into one of these rooms before the room has been searched for traps, the Mummy immediately gets a turn and surprises the hero.
C. The first hero to search this room for treasure finds one Tempest spell scroll and one Fire of Wrath spell scroll on the desk.
D. Zargon, read aloud the following:
"An ornate coffin is engraved with clouds, with three metal bands stretching beneath a sun. Each band is numbered from 1 to 3, and each bears a fist-sized round depression. There are three chests in the room."
Each chest holds a different gem: a red ruby, a violet amethyst, and a green emerald. This puzzle is solved by placing the gems in the order of the rainbow: red, green, and violet. If done incorrectly, bolts of lightning strike each hero, inflicting 2 Body Points of damage. Once done correctly, an Orc spirit rises and speaks.
"Long have I guarded these halls from Zargon, but I sense you are not evil. The Spirit Queen came recently, and she stole our knowledge. I grant you the ability to breathe water and traverse our drowned halls. I also present to you the weapon Orc's Bane. It shall aid you against the corrupted spirits below. Any of you may wield it while in these halls."
Any hero may wield the Orc's Bane. If any in the party already possess the Orc's Bane, the spirit does not give the party a second Orc's Bane.
The stairway descends, leading into watery depths. The heroes may take the gems as treasure, worth a total of 200 gold coins.
Wandering Monster in this Quest: Zombie
Quest 8: The Flooded Catacombs
You swim down the stairway, and you find you can breathe the water as if it were air. You can swim easily, as if water were your natural habitat. Silvana uses the Far Voice spell to send you a message: "Explore the flooded catacombs of the Drowned Temple. Beware, for I sense angry spirits in these drowned halls. Find the sage or a clue to where they may be found, before the enchantment granting your ability to breathe water fades."
Notes
The heroes begin on the stairway, submerged in water. During this quest, heroes can breathe water and each roll 1 additional movement die. Zargon, inform the heroes that unless noted otherwise, all monsters in this quest are spirits and all damage heroes take will affect their Mind Points instead of their Body Points. Heroes still deal Body Point and Mind Point damage normally to monsters.
A. This weapons rack holds rotting equipment. The first time a hero searches for treasure, they find the artifact Wizard's Staff, unless a hero already has it.
B. The fireplace glows with spectral blue flames. Any hero can spend an action here to restore all of their lost Mind Points. Each hero can benefit from this effect only once.
C. The first hero to search for treasure finds two Potions of Restoration. Each restores 1 lost Body Point and 1 lost Mind Point.
D. This room appears to be the submerged study of a sage, though the water has irreparably damaged the furniture and finely-bound books. The first hero to search for treasure finds 100 gold coins and a magical map. The map bears an enchantment preventing it from being damaged. It shows an exit to the east, and a sloping passage that rises to a higher level. Good thing, as you feel the enchantment that lets you breathe water begin to fade.
Wandering Monster in this Quest: Abomination
Quest 9: The Sage's Exile
Silvana uses magic to contact you. "I can divine you more clearly, now that you have climbed out of the watery depths. Somewhere in this ruined temple there is a powerful sage. The sage knows what magical knowledge Nelath, the Spirit Queen, has stolen. Just as importantly, you must learn where the Sprit Queen can be found. Once you have the information, leave the Drowned Temple and return to me."
Notes
The heroes are once again above water and breathe and move normally. Orc's Bane must again be wielded as indicated on the artifact card. However, all Orcs are still spirits, and the damage they deal is to Mind Points instead of Body Points. The heroes enter through the western door.
A. The first hero to search for treasure finds one Potion of Restoration.
B. Inform the heroes that they've stumbled upon an armory full of weapons. Each time they search for treasure, they find an item in this order: one handaxe, one crossbow, and the artifact Fortune's Longsword. If the heroes find all three, inform them they have thoroughly searched the room and there is no more treasure to be found.
C. A ghostly Orc is here, studying a spectral tome. He turns and addresses the heroes.
"You wield Orc's Bane. I know what you seek. The Spirit Queen has stolen our knowledge. With time, she can master the secrets of combining Dread magic with the Elements, creating devastating spells. If Zargon and the troops of that evil sorcerer mastered this power, they would be unstoppable. You can find the Spirit Queen high in the mountains at the Towers of the Elements, conducting her research."
The Orc gives the heroes the copper key, which they need for the door to area D.
D. The door to this room is locked, requiring the copper key in area C. These stairs lead out of the Drowned Temple, returning the heroes to the surface!
Wandering Monster in this Quest: Orc
Quest 10: The Tower of Earth
After meeting with Silvana, you head into the mountains and ascend to the peak holding the ancient Towers of the Elements. Four tall spires rise into the clouds. Only one of them has a door on the ground level. This tower is built from dark stone, and its iron door is decorated with sigils of Elemental earth. High above you see a thin spire, connecting this tower to another made from stone flecked with blue quartz.
Notes
All monsters are stone statues and roll 1 additional Defend die, except the Gargoyle who uses the usual statistics. The heroes begin on the stairway, having ascended from the ground level. Do not show the heroes the exit door until they have found Borin's Armor in C.
A. The Gargoyle in this room animates immediately. It may cast the Dread spell Cloud of Dread once. The first hero to search this room for treasure finds a note indicating an artifact of Elemental earth is hidden within this tower. It is one of four Elemental keys.
B. Zargon, tell the heroes that the floor of this room is loose earth. When a hero moves into or through this room, if the result of the movement dice is odd, they become stuck in the first square of their movement and take 1 Body Point of damage. Once stuck, a hero may only roll 1 die for movement, and they only move if the result of the die is an even number.
C. The first hero to search for treasure in this room finds 100 gold coins and a suit of armor in the large chest. This item is covered in dust and is the artifact Borin's Armor. This is the artifact of earth the heroes must find, and finding it activates the exit.
D. The exit appears once a hero has found Borin's Armor. The exit leads out onto a narrow walkway connecting to the blue-toned Tower of Water.
Wandering Monster in this Quest: Skeleton
Quest 11: The Tower of Water
A shimmering blue entranceway allows access into the Tower of Water. Silvana calls out to you with the Far Voice spell. "You should be able to walk through that entrance. However, the entire tower appears to be underwater. There must be something that allows Zargon's forces to breathe. Find it before your breath runs out!"
Notes
The heroes begin lined up outside the entranceway. Inform the heroes they are holding their breath. They should mark each turn that passes on their sheet, and if seven turns pass without finding a source of air, they die!
A. The first hero to search for treasure finds four blue glowing orbs in the chest. An orb allows the hero to breathe underwater. Each hero may take one or more orbs by standing adjacent to the chest. A hero may carry extra orbs and give any extra orbs they hold to an adjacent hero. The orbs lose their enchantment once this quest is complete.
B. Currents in these rooms press against the heroes. Each square in these rooms takes 2 movement points to traverse. Monsters are unaffected.
C. Currents in these rooms or halls make it easier for heroes to swim. A hero may move 2 extra squares when they first enter this area.
D. This door only appears once a hero has found the Elixir of Life. The stairway descends to a passage, which leads out onto a narrow walkway connecting to a tower built from pale white stone.
E. The first hero to search for treasure in this room finds 200 gold coins and the Elixir of Life artifact. This is the artifact of water the heroes must find, and finding it activates the exit at D. The heroes also find a stone tablet bearing the following message:
"Each tower is empowered by an artifact. All four must be gained to access the final tower."
Wandering Monster in this Quest: Abomination
Quest 12: The Tower of Air
You cross the narrow walkway to a tower of white stone: the Tower of Air. A door allows you access to a winding hallway, which leads to a stairwell. As you climb, you hear howling winds. Some of the cacophony comes from outside the tower, but some appears to be within the tower. The moaning of the wind reminds you of the haunting cries of spirits.
Notes
The heroes begin on the central stairway. Strong air currents move through the hallways. When a hero ends their movement in a hallway, they must roll 1 combat die. If the roll result is a shield, they move 2 additional squares in the direction of their choice. If the roll result is a skull, they move 2 squares in the direction of Zargon's choice.
A. The Dread Warrior here is also a sorcerer capable of casting the Dread spells Fear and Ball of Flame. On their first turn only, they may cast both spells at one target simultaneously. A note on the desk states that the Spirit Queen resides in the Spire of Spirits, researching secrets stolen from the Orcs.
B. The pits on the map indicate shimmering whirlwinds, which are visible to the heroes. Stepping into a whirlwind transports the character to the other room marked with a B.
C. On its turn, the Gargoyle in this room may blow powerful winds from its mouth before or after its standard attack. Any hero in the room must roll 1 combat die. If the roll result is a skull, Zargon may move the hero 4 spaces away from the Gargoyle in any direction. The first hero to search for treasure in this room finds 240 gold coins and the Wizard's Cloak artifact. This is the artifact of air.
D. This exit door only becomes visible once the heroes have found the Wizard's Cloak in area C. It leads onto an arcing walkway that leads to the Tower of Fire.
Wandering Monster in this Quest: Mummy
Quest 13: The Tower of Fire
You reach the fourth tower, built from red stone. A doorway leads to wide steps, which slowly spiral upwards. As you climb, the temperature increases, becoming oppressive as you exit the stairwell. Silvana calls out to you with her magic. "Brave heroes, you have bested three Elemental towers. Claim the final Elemental artifact and you can face the Spirit Queen!"
Notes
The heroes begin on the stairway.
A. The furniture in each of these rooms represents a large furnace, radiating heat. A hero can disarm the furnace as if it were a trap. Until this is done, a hero ending their turn in this room must roll 1 combat die, taking 1 Body Point of damage if they roll a skull. Monsters are used to the heat and do not take this damage.
B. The first time a hero searches this room for treasure, they find four vials of protective unguent in the chest. Each hero may take a vial by moving adjacent to the chest. A vial protects a hero from the next 2 Body Points of damage they would take from a furnace.
C. The Gargoyle in this room does not attack. Instead, each round it casts the Dread spell Sleep on one hero. The Gargoyle can be destroyed through combat, or it can be disarmed as if it were a trap. The first hero to search for treasure finds a gem on the Gargoyle worth 300 gold coins and the Spell Ring artifact. The ring holds the spell Ball of Flame within it. This is the artifact of fire.
D. This exit door is only visible once the heroes have found the Spell Ring.
Quest 14: The Spire of Spirits
You exit the Tower of Fire, and a wispy transparent walkway appears. It leads to an ethereal spire that seems to float in midair between the four Elemental towers, cloaked in tendrils of shadow. Silvana calls to you once more. "We cannot allow Zargon to gain the power that Nelath... I mean, the Spirit Queen... is researching. She awaits within. You will have to decide her fate. If you get the chance, tell her I am sorry for what Zargon has done to her."
Notes
Zargon, tell the heroes that they feel the power of the Elemental artifacts interacting with the Spire of Spirits, empowering them. Each hero may become insubstantial three times. Each use can be used to ignore any one source of damage, to pass through walls or solid objects on a hero's next move (they die if they end in a solid square), or to roll 2 additional movement dice. In this quest, all falling blocks and pits represent ground suddenly becoming solid or insubstantial. They are mechanically unchanged.
A. The first hero to search for treasure finds a journal. Each page is incomprehensible save one, which reads: "Zargon's spell has weakened. I remember who I am. I must contact Silvana. I…"
B. The chest contains a missive from Zargon, addressed to his loyal Dread Warriors:
"Watch the Spirit Queen closely. See to it that she adheres to my commands."
C. The Spirit Queen is here, represented by the Gargoyle figure. She has the statistics of a Dread Warrior with 6 Body Points, and may cast the following Dread spells: Command, Fear, Lightning Bolt, and Firestorm. She may cast two spells in a single turn. Though she can be defeated in combat, if a hero wants to remind her of her past as Nelath or shake her from her servitude to Zargon they may use their action to do so. That hero rolls 1 combat die. On a shield, the Spirit Queen is affected by the message and takes 1 Mind Point of damage. If the queen is reduced to 0 Mind Points in this manner, she breaks the enchantment placed upon her by Zargon and thanks the heroes for saving her before fading into glimmering light.
Wandering Monster in this Quest: Dread Warrior
Conclusion
Silvana and Mentor stand with you outside of the Towers of the Elements. Mentor weaves a spell of power, and the Spire of Spirits slowly becomes insubstantial, finally fading completely.
"That should do it," Mentor says. "Your heroic actions have stopped Zargon's sinister plans. The Spire of Spirits will be hidden from all. I will ask you to hold on to those Elemental artifacts, that none may access it once more.
We will also guard the Drowned Temple, ensuring the courageous orc spirits are not disturbed and that their secrets remain inaccessible to Zargon."
Mentor clasps his hands together. "The news is good, heroes. The Spirit Queen had not finished her work. Only the few sorcerers you met had begun to combine Dread and Elemental magic, and Zargon's forces are left without the secrets they sought.
Because of your courage, we have turned the tide against Zargon's forces. For now."
Silvana watches the place where the Spire of Spirits stood moments ago. She turns toward you and inclines her head in gratitude. "I no longer feel Nelath's presence, nor the restlessness of the spirits. My beloved apprentice has moved on to the afterlife. We will secure her tomb and ensure Zargon cannot interrupt her rest. Thank you for all that you have done."
If the heroes managed to convince the Spirit Queen to break her enchantment with Zargon, instead of defeating her in combat:
"I cannot thank you enough for the kindness you showed my apprentice. You gave her the strength to renounce Zargon's control over her spirit. You have restored her soul and ensured her peaceful rest. For this, you will always have my gratitude."
Mentor
Artifact Reference
Items in this expansion with corresponding cards found in the HeroQuest Game System:
- Borin's Armor
- Crossbow
- Elixir of Life
- Fortune's Longsword
- Handaxe
- Longsword
- Orc's Bane
- Phantom Blade
- Shield
- Spell Ring
- Talisman of Lore
- Wizard's Cloak
- Wizard's Staff
Cards included in this quest pack:
Spell Scroll: Courage Courage—This spell may be cast on one hero, including yourself. The next time that hero attacks, they may roll 2 extra combat dice. The spell is broken the moment the hero can no longer see a monster. The scroll crumbles to dust after use. Any hero may use this scroll.
Spell Scroll: Fire of Wrath Fire of Wrath—This spell may be cast on any one monster, blasting it with flames. It inflicts 1 Body Point of damage, unless the monster can immediately roll a 5 or 6 on one red die. The scroll crumbles to dust after use. Any hero may use this scroll.
Spell Scroll: Tempest Tempest—This spell creates a small whirlwind that envelops one monster of your choice. That monster misses its next turn. The scroll crumbles to dust after use. Any hero may use this scroll.
Dust of Disappearance A velvet pouch of shimmering silver powder. Sprinkle this dust on any one hero. On their next movement, they may move unseen through spaces that are occupied by monsters. May only be used once.
Anti-Poison Quill A potent antidote that rapidly spreads through the bloodstream. May be consumed immediately after being poisoned to restore all Body Points lost to poisoning. May only be used once.
Rabbit Boots Slipping these on fills you with a burst of frenetic energy. While wearing these boots, you may attempt to jump over one discovered trap. Before jumping, roll 1 combat die. On any roll result other than a black shield, you successfully jump over the trap. May be used once per turn.
Wandering Monster in this Quest: Dread Warrior