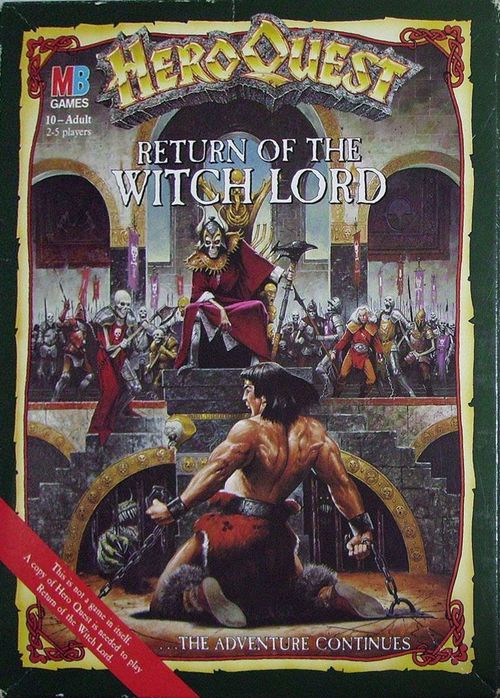
HeroQuest: Return of the Witch Lord
HeroQuest: Return of the Witch Lord Rulebook
Table of Contents
Table of Contents
- Alchemist's Shop
- Components
- Playing Return of the Witch Lord
- A Message From Mentor
- Quest 1: The Gate of Doom
- Quest 2: The Cold Halls
- Quest 3: The Silent Passages
- Quest 4: The Halls of Vision
- Quest 5: The Gate of Bellthor
- Quest 6: Halls of the Dead
- Quest 7: The Forgotten Legion
- Quest 8: The Forbidden Caves
- Quest 9: The Last Gate
- Quest 10: The Court of the Witch Lord
- Conclusion
- Artifact Reference
- Spell Scrolls
- Design Your Own Quest Adventures
Alchemist's Shop
These potions may be purchased only between quests.
Potion of Restoration (500 gold coins): Drink this brown, frothy liquid to restore 1 lost Body Point and 1 lost Mind Point. It's refreshing after a tough battle!
Potion of Dexterity (100 gold coins): This sparkling liquid adds 5 movement squares to your next dice roll or guarantees one successful pit jump. If you purchase more than one of these potions, you may use only one potion per turn.
Venom Antidote (300 gold coins): This bubbling brew tastes foul but heals up to 2 Body Points of damage caused by poison needles or poison darts only.
Potion of Battle (200 gold coins): If you have a really weak roll of the Attack dice, you may drink this blood-red potion. It allows you 1 reroll of your Attack dice.
Components
Contents: 16 miniatures (8 skeletons, 4 mummies, 4 zombies); 2 dungeon doors; a cardboard sheet of game tiles; 14 game cards. Requires HeroQuest Game System to play (sold separately).
Cardboard sheet includes:
- Throne room tile
- 4 coffin tiles
- 6 blocked-square tiles
- 2 pit trap tiles
- 4 secret door tiles
- Revolving room tile
- Death mist tile
All components should be carefully removed from the cardboard sheet. Additional game components included with this quest pack are described below.
Iron Entrance Door
This iron door is placed on the edge of the gameboard in many of the quests. Heroes line up outside the door to begin these quests.
Wooden Exit Door
In many quests, this special wooden door is used to exit the gameboard at the end of a quest.
Death Mist
This mist is a deadly breath of Dread, which harms all who are not evil.
Bone Pile
No description is printed for the bone pile in the quest book; it appears only as a component illustration.
Throne Room
The large throne room is used by evil rulers such as the Witch Lord.
Coffins
The four coffins may be used as tombs. They may contain an undead creature and/or a treasure. They may also have traps on them.
Revolving Room
The revolving room is used to disorient the heroes. You never know which door you'll be using to leave this room.
The smaller illustrations shown with each component above are quest map symbol references. These symbols are also the exact size needed for the blank "create your own" quest map provided in the HeroQuest Game System quest book and at the end of this quest book. When creating your own quest adventures, you may use these components in any way that you can imagine.
Playing Return of the Witch Lord
The quests in Return of the Witch Lord are generally played the same way as the quests in the HeroQuest Game System. It is especially important that these quests be played in order. As in the game system, heroes are returned to full strength (all Body and Mind Points are restored) between quests.
There are a few gameplay differences in Return of the Witch Lord:
1. Starting a Quest
The heroes do not always start their adventures on the spiral stairway tile used in the HeroQuest Game System. Often, they enter through an iron door on the edge of the gameboard. This door is shown on the quest map with an arrow pointing inward toward the gameboard. This door is placed on the gameboard in its specified location before the quest begins. At the start of an adventure, the heroes line up outside the door and ask Zargon to open it.
2. Ending a Quest
Players may only leave the gameboard by locating the wooden exit door on the edge of the board, or by finding the spiral stairway that exists in some of the quests. The exit door is shown on the quest map with an arrow pointing outward from the gameboard.
As with regular doors, an exit door is not placed on the gameboard by Zargon until a hero looks down the appropriate corridor. An exit door is usually opened in the same way as a regular door, unless specified otherwise in the quest notes.
3. Treasures
Large gold coin treasures found in treasure chests should be divided among all surviving heroes.
4. Artifact Cards
The following five artifact cards are used just like the artifacts in the HeroQuest Game System. When a hero finds an artifact, they should record it on their character sheet. Unlike most artifacts in the game system, however, some of these artifacts must be crossed off the hero's character sheet after they are used.
- Magical Throwing Dagger: When thrown at a monster that a hero can see, this dagger always hits and inflicts 1 Body Point of damage. The monster cannot defend. The dagger must be crossed off the hero's character sheet after it is used.
- Dust of Disappearance: If a handful of this dust is tossed on any hero, that hero may move past any monsters encountered on their next turn. The dust must be crossed off the hero's character sheet after it is used.
- Anti-Poison Quill: This rare, hollow quill contains a mysterious substance that counteracts any type of poison. This antidote will restore Body Points lost by poisoning if used immediately by the owner. The quill must be crossed off the hero's character sheet after it is used.
- Rabbit Boots: These magical boots give their wearer a greater chance to jump over one discovered trap per turn. A hero can successfully jump a trap by rolling anything but a black shield on 1 combat die. (However, if a black shield is rolled, the trap is sprung, and the hero suffers the body damage caused by that particular type of trap.)
- Arm Band of Healing: The wearer of this magical arm band can restore 2 of their lost Body Points once per quest. If the wearer's Body Points are reduced to 0, this artifact can be used immediately to restore 2 Body Points as long as it has not already been used in that quest.
The five remaining artifact cards on the inside back cover are spell scrolls. These scrolls are used just like the spell cards in the HeroQuest Game System. However, a spell scroll can be used by any hero who finds one. When a spell scroll is found, the hero should record it on their character sheet. After the scroll has been used, it must be crossed off the hero's character sheet.
Heroes who have artifacts are allowed to give them to other heroes.
A Message From Mentor
Worthy companions, we must act fast. The Witch Lord is not dead! He managed to escape to the fallen city of Kalos. Many years ago, this beautiful city was destroyed by Zargon and given to the Witch Lord to rule. Beneath the ruins, he built a great stronghold, for the light of day was too pure for his foul creatures to endure. Once the Witch Lord's strength is fully returned, he will gather his army of the undead and attack the Realm. Only heroes with great courage dare stand against the Witch Lord. His vile warriors know no fear and fight relentlessly until they are destroyed.
Many days of travel have brought you across the parched Plains of Death. The journey has been hard, for the land here is scorched and barren. Finally, you reach the great ruins of Kalos. Throughout your trek, you have felt an uneasy presence. The Witch Lord has been watching your progress, awaiting your arrival. As he sits upon the high throne of Kalos, he sees all who approach. No one can escape his gaze.
If the Witch Lord is not stopped soon, two others join him: Skulmar, captain of the Forgotten Legion, and Kessandria, the Witch Queen. With these figures seated alongside the Witch Lord, it is said that the bones of all fallen warriors may be summoned together under the Black Banner.
It is up to you, brave heroes, to destroy the Witch Lord once and for all. When you need my guidance, listen deep within yourselves.
Mentor
At the beginning of each quest, there is a message on parchment from Mentor. This message should be read aloud to all players. However, the quest notes that follow are for Zargon's eyes only!
Quest 1: The Gate of Doom
"The entrance to the Witch Lord's stronghold is not hard to find, for no attempt has been made to disguise it. The outer gate lies open and you see evidence that many creatures have passed through in the last few days. You must work your way through treacherous tunnels to find the Gate of Doom. Your destiny lies beyond. Tread carefully, my friends. The enemy has had many days to prepare your welcome."
Wandering Monster in this Quest: Dread Warrior
Notes
A. The two doors marked A are false doors. They cannot be opened.
B. The first hero to search for treasure in this room finds 200 gold coins in the chest.
C. The monsters in these four rooms have been warned of the heroes' arrival and have prepared an ambush. When a hero first enters any of these rooms, all monsters in all four rooms are activated and all doors in the four rooms open immediately.
D. The first player to search for treasure in this room finds two pouches on the mantle above the fireplace. Each pouch contains a handful of the Dust of Disappearance. (See the artifact card.) The pouches may be divided between two heroes.
Quest 2: The Cold Halls
"These icy passages are the resting place of the dread Spirit Riders who once led the Witch Lord's skeletal cavalry into battle. They now lie dreaming of past glories, waiting to be summoned to the Black Banner once more. You must find your way to the spiral staircase to reach safety and continue on your quests."
Wandering Monster in this Quest: Zombie
Notes
A. Place the revolving room tile on the gameboard as soon as one of the doors numbered 1-4 has been opened. This tile covers two rooms and overlaps a third room to make one large room. When a hero attempts to leave this room, they must first roll 1 red die to see which door they use to exit.
If they roll a 1 or 2, they exit through door 1. If they roll a 3, they exit through door 2. If they roll a 4 or 5, they exit through door 3. If they roll a 6, they exit through door 4.
B. The first hero to search for treasure in this room finds a vial of holy water behind a large book in the cupboard. This liquid may be used to destroy one regular skeleton, zombie, or mummy.
C. This chest contains 300 gold coins. It also has a poison needle trap on it. If a hero searches for treasure in this special room before the trap has been disarmed, they lose 3 Body Points.
D. If a hero searches for treasure in this room, ask them if they wish to pry open the tomb of a great warrior. If they say yes, a sparkling mist fills the room as the tomb is opened. No Body Points are lost, but any hero in this room (or any hero who later enters) with Borin's Armor or Orc's Bane sees those artifacts crumble into powder. Of course, don't tell the heroes this until after it happens. There is no treasure in the tomb.
E. The skeletons in these four rooms are the Spirit Riders. Their stats are as follows:
| Movement | Attack | Defend | Body | Mind |
|---|---|---|---|---|
| 8 | 4 | 4 | 3 | 3 |
Quest 3: The Silent Passages
"These passages have been silent for over a thousand years. The last voices that echoed through these hallowed halls were those of King Agrain and his subjects as they rushed to defend the city. It is said that ancient and terrible magic is at work here. Tread carefully, my friends, as you search for the wooden exit door that leads to safety!"
Wandering Monster in this Quest: Skeleton
Notes
A. At the beginning of the quest, the death mist tile is placed on the gameboard as shown next to the square marked A. This mist is a breath of Dread, which harms all who are not evil. The death mist tile moves up to 6 squares on each of Zargon's turns and can only move within the shaded corridors. When the death mist tile passes over a hero, they lose 1 Body Point. The mist may affect one or more heroes each time it is moved on Zargon's turn. It does not affect monsters. The mist cannot move onto the same square twice in one turn. It also cannot end its turn on the same square with a hero. If this happens, the death mist tile must stop short on the square in front of the hero.
The mist is not affected by normal weapons. It can only be destroyed by a tempest spell or by the Spirit Blade. Don't tell this to the heroes!
B. The chest has a trap on it. If a hero searches for treasure in this room before the trap has been disarmed, they lose 1 Body Point from a dart that shoots out from the wall. This chest contains two Magical Throwing Daggers. (See the artifact card.) The daggers may be divided between two heroes.
C. The first hero to search for treasure in this room finds 100 gold coins in the chest. They also find a potion of healing that restores up to 4 lost Body Points.
D. If the Spirit Blade was lost in a previous quest, it can be found in the tomb. (See artifact card in the HeroQuest Game System, sold separately.) If one of the heroes already carries the Spirit Blade, then the tomb is empty.
Quest 4: The Halls of Vision
"King Agrain was one of the greatest of all rulers in a time before Dread. Although he was a powerful and feared warrior, he was also known for his fairness. Agrain dabbled in magic and created the Halls of Vision, a maze of magical rooms. The secret of the halls lies in the Keys of Agrain. You must find these valuable keys and reach the safety of the wooden exit door."
Wandering Monster in this Quest: Mummy
Notes
A. The four magical rooms marked with an A were built to protect King Agrain's secret laboratory. Each room is guarded by a mummy. If one of these mummies is killed, immediately remove the door that is marked with the arrow (from the same room as the mummy just killed).
B. This is the magical laboratory of King Agrain. The first hero to search for treasure in this room finds two spell scrolls: fire of wrath and ball of flame. They also find four gold keys on the bench. They are the Keys of Agrain. If these keys are found by a hero, Zargon must immediately replace any doors that were removed when the mummies were killed. The four keys are each worth 200 gold coins. They may be divided among the heroes. The mummies in this quest do not attack anyone holding one of the keys. Skeletons and zombies still attack.
Quest 5: The Gate of Bellthor
"Here begins the true domain of the Witch Lord. In these deep caverns, he has created his own subterranean fortress from which he plans the destruction of the Realm. Loretome has told me of a terrible guardian, Bellthor, who watches over the gate. If Bellthor is to be defeated, you must confront the creature together."
Wandering Monster in this Quest: Skeleton
Notes
A. The first hero to search for treasure in this room finds 500 gold pieces in each chest.
B. Once all heroes have entered this room, the door disappears and traps them inside with Bellthor, a foul gargoyle. Bellthor does not move or attack on its turn until all of the heroes are in the room together. Bellthor cannot be harmed until after it attacks. Its stats are as follows:
| Movement | Attack | Defend | Body | Mind |
|---|---|---|---|---|
| 6 | 4 | 6 | 3 | 3 |
Bellthor also has a poisonous breath and can breathe on any one hero in the room (once per turn) after it has attacked. To do this, it rolls 6 combat dice. For each skull rolled, the defender loses 1 Mind Point. If a hero is reduced to 0 Mind Points in this situation, they are not killed but knocked unconscious. The hero should then be removed from the gameboard until the next quest.
If Bellthor is killed, it explodes, filling the room with poisonous gas which knocks everyone in the room unconscious. All of the heroes have now been captured by the Witch Lord! There is no successful way to exit from this adventure. (A Ring of Return does not work here.) Turn to the next quest.
Quest 6: Halls of the Dead
"The wizard and dwarf wake up in a prison cell. Shaking off the effects of the poisonous gas, they hear Mentor's voice deep within themselves. 'A terrible fate has befallen you! You have become prisoners of the Witch Lord. Your companions, the elf and barbarian, have been taken to a secret place where the Witch Lord plans to feed them to his pets. You must rescue your companions and escape to the spiral stairway!'"
Wandering Monster in this Quest: Skeleton
Notes
Tell the heroes that the wizard and dwarf are the only heroes taking turns and moving on the gameboard until the elf and barbarian are found.
A. Place the wizard and dwarf in this room at the beginning of the quest. Place a closed door where shown. Explain to the two heroes that this is their prison cell. Tell them that Mentor has just cast a powerful spell and the cell door has burst open. Then replace the closed door with an open door. Tell the wizard and dwarf that any weapons, artifacts, spells, and potions that they owned are on the floor outside the door, but their gold and gems are gone. They must cross off any gold or gems that are on their character sheets. Both heroes start with full Body Points.
B. This is the Hall of the Witch Lord. Use the Dread sorcerer figure to represent the Witch Lord and place him on the square marked B. The barbarian and elf start in this room on the spaces marked X. They should not be placed on the gameboard until either the wizard or dwarf opens the door to this room. The barbarian and elf are chained up and all of their weapons, artifacts, potions, gold, and gems have been taken. Both heroes start with full Body Points and the elf has their spells. As soon as the wizard or dwarf enters this room, the Witch Lord curses them and disappears amidst a howling storm. The barbarian and elf are then free and may move normally.
C. The first hero to search this room finds the barbarian's and elf's weapons, artifacts, and potions in this chest. However, their gold and gems have been stolen and should be crossed off their character sheets.
D. Do not place the spiral stairway on the gameboard until one of the heroes looks into this room.
Quest 7: The Forgotten Legion
"You have escaped from the Witch Lord, but it will not be long before he pursues you. The halls through which you now pass are guarded by the Forgotten Legion, the elite of the Witch Lord's army. They are led by Skulmar. In combat they are to be feared for they bear the scars of a thousand battles, each one a victory for Dread. You are safe only when you find the wooden exit door."
Wandering Monster in this Quest: Dread Warrior
Notes
The heroes enter on the spiral stairway.
A. When a hero opens this door, place monsters where shown in the room. Explain to the heroes that these monsters are the Forgotten Legion, encased in a magical ice that cannot be broken with any weapon.
B. When a hero opens this door, the magical ice shatters and the Forgotten Legion moves to attack on Zargon's turn. Don't tell the heroes this until after the door has been opened.
C. Skulmar stands on the space marked C. Use the Dread sorcerer to represent Skulmar. His stats are as follows:
| Movement | Attack | Defend | Body | Mind |
|---|---|---|---|---|
| 8 | 5 | 6 | 3 | 4 |
If the heroes destroy a lot of the monsters, Skulmar should try to escape. To do this, he must reach the spiral stairway, at which point he is removed from the gameboard. If Skulmar is killed, the heroes find his treasures: the Rabbit Boots (artifact card) and the pass through rock spell scroll.
Quest 8: The Forbidden Caves
"No one has ever entered the Forbidden Caves before. Even Loretome can tell little of what lies before you. It is said that the passages are filled with the walking dead, mindless servants of Zargon. You must also be wary of the caverns themselves, for they are ready to collapse at any time. You must find the wooden exit door to continue your quests."
Wandering Monster in this Quest: Dread Warrior
Notes
The heroes enter on the spiral stairway.
At the beginning of each of Zargon's turns, you may pick two skeletons, zombies, or mummies that are available and place them on any two of the spaces marked with an X.
A. The first hero to search for treasure in this room finds 360 gold coins in this chest. They also find two Anti-Poison Quills. (See the artifact card.) The quills may be divided between two heroes.
B. This chest is empty.
C. The first hero to search for treasure in this room finds the heal body and courage spell scrolls on the sorcerer's table. The scrolls may be divided between two heroes.
D. This chest is trapped with a poison needle. If a hero searches for treasure in this room before the trap has been disarmed, they lose 3 Body Points. The chest contains two shortswords and two longswords. These weapons are exactly like the ones described on the equipment cards in the HeroQuest Game System armory. They may be divided among the heroes.
Quest 9: The Last Gate
"This, my friends, is the last gate before you reach the court of the Witch Lord. The passages beyond the gate are guarded by Dread warriors from the Doomguard. Beware! They are more powerful than other Dread warriors that you have already defeated. They stand guard here in the chambers of Kessandria, the Witch Queen. You must find the spiral stairway that leads directly to the Witch Lord."
Wandering Monster in this Quest: Dread Warrior
Notes
A. This is the abode of three Doomguard Dread warriors who have the following stats:
| Movement | Attack | Defend | Body | Mind |
|---|---|---|---|---|
| 8 | 4 | 6 | 3 | 3 |
The first hero to search for treasure in this room finds 240 gold coins in the chest. They also find an Arm Band of Healing. (See the artifact card.)
B. The Dread warrior in this room has the same stats as the ones in the room marked A. The first hero to search for treasure in this room finds two Magical Throwing Daggers on the weapons rack. (See the artifact card.) The daggers may be divided between two heroes.
C. This is the chamber of Kessandria, the Witch Queen. She stands on the square marked C. Use the Dread sorcerer figure to represent her. She is immune to all spells except fire spells. She has the following stats:
| Movement | Attack | Defend | Body | Mind |
|---|---|---|---|---|
| 6 | 4 | 6 | 3 | 4 |
Kessandria also knows the following Dread spells: lightning bolt, tempest, fear, sleep, and cloud of Dread. She has a potion of speed, which allows her to move 12 squares on the turn in which she drinks it. If Kessandria's Body Points are greatly reduced, she should attempt to escape by going through the secret door (which she can open) and by trying to reach the spiral stairway. As Kessandria retreats, she may place open doors as needed on the gameboard (as shown on the quest map). If she succeeds in escaping, remove her from the gameboard.
Quest 10: The Court of the Witch Lord
"The Witch Lord has watched your progress. He has tried repeatedly to destroy you, but you have thwarted him every turn. Now he has fled to his throne room. There you must do battle with him. This time there must be no escape for him."
Wandering Monster in this Quest: Mummy
Notes
The heroes enter on the spiral stairway.
A. These four orcs are magical statues that do not move and cannot attack or be harmed. They completely block the corridors. They cannot be climbed over or passed. If a hero attacks any of these statues, their weapon breaks (even a Magical Throwing Dagger or crossbow breaks). They then lose that weapon and must cross it off their character sheet. The only exception to this rule is the Spirit Blade, which is so powerful that it does not break. However, it still does not harm the statue.
B. The first hero to search for treasure in this room finds two potions of healing in the chest. Each potion restores up to 4 lost Body Points.
C. Here the Witch Lord awaits the final conflict. Place the large throne room tile in this room only after a hero opens the door to the room. Use the Dread sorcerer figure to represent the Witch Lord and place him on the square marked C. The two Dread warriors in this room are members of the Doomguard and their stats are listed in the previous quest. The first hero to search for treasure in this room finds 500 gold coins in a secret compartment under the throne. The Witch Lord's new stats are as follows:
| Movement | Attack | Defend | Body | Mind |
|---|---|---|---|---|
| 10 | 5 | 6 | 4 | 5 |
The Witch Lord can only be harmed by four things at this time: the Spirit Blade, the fire of wrath spell, the ball of flame spell, and the Magical Throwing Dagger. The Witch Lord knows the following Dread spells: summon undead, firestorm, tempest, lightning bolt, fear, and command. If the Witch Lord is killed, read aloud the Conclusion on the next page.
Conclusion
My friends, we have much to be thankful for. The Witch Lord has been defeated and his army of undead remains asleep under the earth. The magic that controlled them has now been weakened. Yet this victory could herald our downfall if we relax our efforts. Now that the enemy is weaker, we must be all the stronger. The minions of the Witch Lord who escaped will surely seek revenge on those who defeated their master.
Loretome has shown me that Skulmar, who we believed to be slain, has escaped from the ruins of Kalos with many of the Witch Lord's most powerful spell books. I fear that it will not be long before you must confront Skulmar and attempt to end his threat forever. But for the present you have earned yourselves a rest. So come, my brave heroes! The King awaits you in the Grand Palace. Tonight, you are to be honored for your incredible feats of heroism.
Artifact Reference
Card text as printed on the artifact cards:
- Anti-Poison Quill: Restores any of the owner's Body Points lost by poisoning if used immediately. May only be used once.
- Arm Band of Healing: Restores 2 lost Body Points once per quest. If the wearer's Body Points are reduced to 0, use immediately.
- Dust of Disappearance: If tossed on any hero, this dust allows that hero to move past any monsters encountered on their next turn. May only be used once.
- Magical Throwing Dagger: Always inflicts 1 Body Point of damage when thrown at a monster a hero can see. Monster cannot defend. Dagger is lost once it is thrown.
- Rabbit Boots: To jump over one discovered trap per turn, roll anything but a black shield on 1 combat die.
Spell Scrolls
Card text as printed on the five spell scroll cards:
- Heal Body: This spell may be cast on any one hero, including yourself. Its magical power immediately restores up to 4 lost Body Points but does not give a hero more than their starting number. Scroll crumbles to dust after it is used.
- Pass Through Rock: This spell may be cast on any one hero, including yourself. That hero may then move through walls on their next move. They may move through as many walls as their dice roll allows. Caution! There are shaded areas on each quest map, which indicate solid rock. If a hero ends their move in one of these areas, they are trapped forever! Scroll crumbles to dust after it is used.
- Ball of Flame: This spell may be cast on any one monster, enveloping it in a ball of fire. It inflicts 2 Body Points of damage. The monster then rolls 2 red dice. For each 5 or 6 rolled, the damage is reduced by 1 point. Scroll crumbles to dust after it is used.
- Courage: This spell may be cast on any one hero, including yourself. The next time that hero attacks, they may roll 2 extra combat dice. The spell is broken the moment the hero can no longer see a monster. Scroll crumbles to dust after it is used.
- Fire of Wrath: This spell may be cast on any one monster, blasting it with flames. It inflicts 1 Body Point of damage, unless the monster can immediately roll a 5 or 6 using one red die. Scroll crumbles to dust after it is used.
Design Your Own Quest Adventures
Create your own exciting quests! Simply photocopy the blank map shown on the page (the same blank map is provided in the HeroQuest Game System quest book), along with the symbols shown below, and use them to design your own games. Mark the map with the various monster, furniture, and trap symbols. Then write a short paragraph to explain the adventure, and you're ready to play.
Quest map symbols:
- Skeletons
- Zombies
- Mummies
- Iron Entrance Door
- Wooden Exit Door
- Coffins
- Revolving Room
- Throne Room
- Pit Traps
- Blocked squares
- Death Mist
- Secret doors