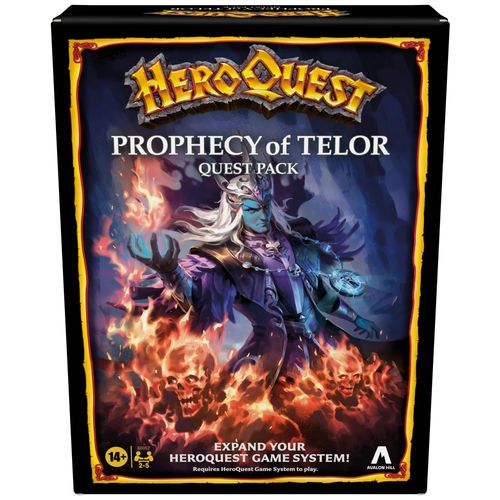
HeroQuest: Prophecy of Telor
HeroQuest: Prophecy of Telor Rulebook
Table of Contents
Table of Contents
- Alchemist's Shop
- Notes
- Playing the Quests
- Mentor's Introduction (heading added)
- Quest 1: Return to Melar's Maze
- Quest 2: Escape from Melar's Maze
- Quest 3: The Great Stairwell
- Quest 4: The Tower of Turekk Tor
- Quest 5: Melar's Chambers
- Quest 6: The Ruined Temple of Gilgarreth
- The Remaining Quests
- Mentor's Message (heading added)
- Quest 7: The Archives at Arborenis
- Quest 8: Telor's Tomb
- Quest 9: Halls of the High Mages
- Quest 10: The Arena of Misildia
- Quest 11: Melar Unleashed
- Quest 12: The Rise of Fellmarak
- Quest 13: Zargon's Flame
- Conclusion
- Artifact Reference
Alchemist's Shop
These potions may be purchased only between quests.
Potion of Restoration (Cost: 300 gold coins) Drink this potion to restore 1 lost Body Point and 1 lost Mind Point.
Potion of Healing (Cost: 500 gold coins) Drink this potion to roll 1 red die and restore that number of Body Points (not exceeding your Body Point total).
Potion of Lesser Healing (Cost: 200 gold coins) Drink this potion to restore up to 2 Body Points.
Potion of Magic (Cost: 400 gold coins) Drink this potion to recover up to 3 spells you have cast during this quest.
Potion of Battle (Cost: 200 gold coins) Drink this potion to reroll all of your Attack dice.
Notes
As the quests progress, the bearer of the talisman hears a voice they believe is Mentor. It helps guide the hero to various locations, and even grants the hero additional Mind Points and the use of some Dread spells. However, they come to realize they are guided not by the voice of Mentor but by Melar's Dread spirit.
The talisman cannot be removed. The heroes must release the Dread spirit from the talisman. They must defeat the spirit before it can overwhelm the bearer, allowing Melar to take form once more.
For the heroes, it is a race against time - with each passing quest, Melar becomes more powerful. The obstacles placed before the heroes on their quests are difficult, for Zargon wishes to see Melar returned to his true form. If restored, Melar has the potential to become a most obedient Sorcerer King - the one called Fellmarak.
Playing the Quests
The quests in Prophecy of Telor are generally played the same way as the quests in the HeroQuest Game System. It is especially important that these quests be played in order. As in the Game System, heroes restore all Body and Mind Points between quests unless explicitly stated otherwise. There are a few gameplay differences in Prophecy of Telor outlined ahead.
Starting a Quest
The heroes do not always start their adventures on the spiral stairway tile used in the HeroQuest Game System. Often, they enter through a door on the edge of the gameboard. This door is shown on the quest map with an arrow pointing inward toward the gameboard. This door is placed on the gameboard in its specified location before the quest begins. At the start of an adventure, the heroes line up outside the door and ask Zargon to open it.
Ending a Quest
Players may only leave the gameboard by locating the exit door on the edge of the board, or by finding the spiral stairway that exists in some of the quests. The exit door is shown on the quest map with an arrow pointing outward from the gameboard.
Note: As with regular doors, an exit door is not placed on the gameboard by Zargon until a hero looks down the appropriate corridor. An exit door is usually opened in the same way as a regular door, unless specified otherwise in the quest notes.
Treasures
Large gold coin treasures found in treasure chests should be divided among all surviving heroes.
The Armory & Alchemist's Shop
Players may only visit the armory or alchemist's shop if allowed at the end of a quest. Equipment cards may be purchased at the armory in the HeroQuest Game System. The items available at the alchemist's shop are listed on page 2.
The Talisman of Lore
One of the heroes must carry the Talisman of Lore.
At the beginning of the first quest, ask the heroes what artifacts they have. If no one has the Talisman of Lore tell the wizard that Mentor has given them the talisman, thinking it may be of use.
In some quests, there are special instructions for the hero who wears the talisman. Call out these sections to the bearer.
Body Points
If the bearer's Body Points are reduced to zero, they do not die but instead fall unconscious. While unconscious, they cannot move or take actions.
Monsters may not take possessions from the unconscious bearer.
Other heroes may still use a potion or magic to restore the bearer's Body Points and allow them to regain consciousness. The bearer may then continue play as normal.
The Rise of Fellmarak
If the bearer of the talisman is unconscious and all other heroes are dead, the quest is over. Read the following text to the players:
"Melar has triumphed. He has found form once more and arisen as Fellmarak, the Sorcerer King. The Dread banners shall be raised, and the host marches beneath the Shadow Sky. The realm shall know only darkness for the heroes upon whom much hope rested have fallen. Who now will step forth to replace them?"
Removing the Talisman
The bearer cannot remove the talisman. If they try, read the following to the hero:
"You feel a great heat emanating from the talisman." Lose 1 Body Point.
Note (boxed in the book): Italicized terms in the quest notes reference items with corresponding cards found in this quest pack. (Examples: Potion of Lesser Healing, Rock Skin spell scroll)
Capitalized monsters in the quest notes reference monsters with corresponding cards found in the HeroQuest Game System. (Examples: Goblin, Orc)
Mentor's Introduction (heading added)
The page has no printed heading. This message should be read aloud to all players.
Mentor is distracted in his welcome. As you enter the study, the wizard glances at you, nods slightly, then continues to stare deeply at the pages of the open book. Finally, Mentor looks up, eyes still focused on a distant thought.
"Apologies, my friends." The wizard closes the large book and stands before you.
"I am troubled. The pages in Loretome do not reveal everything to me. The symbols often shift and change as future possibilities come into view. But not today. Today is different. The pages are like liquid; the runes like formless ink that swirls within the page. When I focus my power, they take shape for but a moment, revealing one word, one name—Melar.
As you may recall, you recovered Melar's Talisman of Lore from the heart of his maze some time ago. What I did not tell you at the time was that Melar was experimenting with magic beyond his own means in pursuit of research. What he was researching, I know not. He vanished, and the maze and tower fell to ruin and were abandoned. When I discovered a scroll that spoke of the talisman, I sent you to retrieve it. But now I feel there must be something else—something I have overlooked.
Dread magic is surely at play here, for the pages of Loretome have never before been so affected. I must explore this further. You, my friends, must return to Melar's maze. There you must uncover all that remains of the library, scour the laboratory once more, and delve into the tower on the cliffs of Turekk Tor.
I will guide you as best I can, but with the pages of Loretome in turmoil, my help will be limited. When I'm able, I will use the Far Voice spell and speak with you directly at key points along your journey.
Hurry, my trusted heroes. Hurry! For without Loretome's guidance, the forces of Zargon move unseen and the realm is in dire peril indeed."
Quest 1: Return to Melar's Maze
At the beginning of each quest, there is a message on parchment from Mentor. This message should be read aloud to all players. However, the quest notes that follow are for Zargon's eyes only!
Mentor speaks to you with the Far Voice spell. "Much time has passed since you were last here. All may not be as you remember. You discovered the Talisman of Lore but there is something else that we have missed. Melar was researching something before disappearing. I have seen some of his cryptic notes. Melar obviously wanted the experiments to be kept secret. You must search the library. Perhaps there you may find more clues on the research being done, and clues to what happened to Melar."
The quest map printed above the notes is not reproduced here; the lettered notes below refer to its marked areas.
Notes
If you have not done so already, make sure one of the heroes carries the Talisman of Lore.
A. This secret door is already open. When the heroes enter either of these two rooms, place both rooms out along with all the monsters.
B. The first hero to search for treasure finds a small faded note in a drawer of the desk. Read the text that follows to the players.
"The talisman has aided my work. I see more clearly now what must be done. To defeat Zargon and his minions, I must dare to master the Dread craft upon which the evil sorcerer's power so depends."
C. When the bearer enters this room, read the following to them. The player may then complete their turn.
"This room feels strangely familiar to you. You glance at the cupboard. It's almost as though you remember being here before, perhaps when last you adventured to Melar's Maze. You open the cupboard and pull a bottle from many that clutter the shelf. It is one Potion of Lesser Healing that restores up to 2 lost Body Points when consumed."
D. The first hero to search for treasure finds a journal hidden behind some larger books. Read the text that follows to the players.
"This is the journal of Melar. My experiments proceed well. I have been able to summon the dead. Now I must prepare for summoning a—"
The journal is protected by a spell and bursts into flames. The hero who searched loses 1 Body Point.
Wandering Monster in this Quest: Orc
Quest 2: Escape from Melar's Maze
"Melar's tower rises from a great overhang halfway up the cliff wall of Turekk Tor. There is no path to that tower. The only way in or out is via the great stairwell. This may be found within Melar's Maze. Find the stairwell, then climb to the tower above. There you will find Melar's personal chambers and hopefully uncover more secrets. You must move swiftly, for I sense that Dread powers have awoken to your presence, and even now gather their strength to track you!"
The quest map printed above the notes is not reproduced here; the lettered notes below refer to its marked areas.
Notes
The heroes begin lined up outside the door C.
A. When the first hero passes either of these squares, both doors marked A open. Read aloud the below text to the heroes.
"The clanging of metal and the growing rumble of boots on stone echo from the halls behind you. The clamor rises. There can be no mistaking the frenzied chattering of Goblins and the menacing war cries of Orcs. The enemy has found you. Run!"
Zargon, for the remainder of the quest, at the start of each of your turns, place 2 Goblins and 1 Orc to the side of the board in the area marked B. Treat area B as a normal room. Heroes cannot enter into it or attack monsters in area B. If a hero stands on the square marked C, you may attack them.
B. This area is treated as a room and is the location where your Goblins and Orcs are placed before chasing the heroes.
C. A hero standing here may be attacked by one of the monsters in area B.
D. This is the great stairwell. Heroes who are moved onto the stairway tile are removed from the board. They are safe, for now. Monsters may not be moved onto the stairway tile.
E. The first hero to search for treasure finds the artifact Rod of Telekinesis.
Wandering Monster in this Quest: Orc
Quest 3: The Great Stairwell
"You did well to escape from Melar's maze. Now you must prepare to ascend the great stairwell. There are twelve levels. Only once you reach the uppermost level will you gain access to Melar's tower—the Tower of Turekk Tor. Climb with caution, for the stairwell is guarded by both the living and the dead. Dread magic is also at play here. Powerful spells and glyphs have been etched into the stone. These guard against any who do not bear the mark of the Dread lord, Zargon."
The level maps (Levels 1 to 12, printed above the Quest 3 notes) are not reproduced here. They are, in order: Level 1 The Orc Guards; Level 2 The Library of Woe; Level 3 The Grub Room; Level 4 The Storeroom; Level 5 The Enchanted Goblin; Level 6 The Armory; Level 7 The Crypt of Pillars; Level 8 The Chamber of Terror; Level 9 The Dread Altar; Level 10 The Treasury; Level 11 The Sorcerer's Tome; Level 12 The Gate to Turekk Tor.
Notes
In this quest, only use the center room. The heroes begin each level on the stairway tile. Heroes must move off the stairway tile before they can perform any actions. They must clear the level of all monsters before they can move back onto the stairwell and up to the next level. Once all heroes are back on the stairwell, reset the room for the next level.
A. Only place the bookcases, but not the Orcs and Goblins. The bookcases are a magical illusion. The first player to search for traps uncovers the illusion. Remove the bookcases and place the monsters. If on Zargon's turn no hero has yet searched for traps, you may remove the bookcases. The monsters may now move and attack.
B. This Goblin is bolstered by enchantment. When defeated, roll 1 red die. On a roll of 6, the monster is eliminated. On any other roll result, the Goblin disappears and reappears on a square of your choice. It screams "Ha, ha! Can't beats I!" and immediately attacks.
C. The first player to search for treasure may open the first chest. They roll 1 red die. On a roll of 1, they trip a magical glyph and lose 1 Body Point. On any other roll result, they find one Potion of Lesser Healing. The next two heroes may roll for the second and third chest in the same way.
D. The first player to search for treasure finds a sorcerer's tome. One spellcaster may read it and regain all their spells for this quest.
E. This is Gor-Lethim Kar, a Dread fire demon. It knows the Dread spell Firestorm. Once defeated, the secret door is revealed and opens. This is the entrance to Melar's Tower of Turekk Tor.
Wandering Monster in this Quest: Orc
Quest 4: The Tower of Turekk Tor
"Your climb was hard fought, but there is no time for rest. Now you must enter Melar's tower. The air here reeks of Dread magic. Melar's research must have reached dangerously into the realm of Zargon's craft. Tread carefully. Many have sought to use the powers of darkness for good, but I tell you madness embraces them all in the end. The meaning in Loretome's pages still eludes me. If I discern any foresight into your journey, I will speak with you. For now, farewell."
The quest map printed above the notes is not reproduced here; the lettered notes below refer to its marked areas.
Notes
Several notes in this quest affect the bearer. Zargon, make note of which hero bears the talisman.
A. When the first hero passes the square marked X, the secret door opens. You may now move and attack with these monsters on your next turn.
B. When the bearer reaches this space, read the text that follows to the players and point to where room D is on the map.
"You feel there is a Dread power beyond this wall."
C. The first hero to search for treasure finds a dusty, leatherbound journal. They open it to a marked page and read the below text:
"Fellmarak, the Sorcerer King, is found? Then he shall rise as foretold and bring about darkness to the realm. I must seek an audience once more with Zargon and seek to stop what I have begun. Then I must gather coin and raise my army!"
D. When the bearer enters this room, read the following text to the hero:
"You feel a wave of warmth wash over you like heat from a winter hearth. Gain 1 Mind Point. You can now use the Dread spell Lightning Bolt."
E. If the bearer enters this room, any remaining Skeletons drop to their knees and bow their heads toward the hero before collapsing to dust.
F. The first hero to search for treasure finds 200 gold coins in the treasure chest.
G. The first hero to search for treasure finds 150 gold coins in the treasure chest.
Wandering Monster in this Quest: Orc
Quest 5: Melar's Chambers
"So, Melar was raising an army. Did that fool believe a Dread legion could be commanded, think the might of Zargon could be confronted? Coin may have lured some weak-willed rogues to the cause. Yet I sense Melar had a darker design. I see sorcery in this work—foul magic to transform lesser minions into abominations. The answers we seek are surely to be found in Melar's chambers. Go with care, my friends. I will speak again with you soon."
The quest map printed above the notes is not reproduced here; the lettered notes below refer to its marked areas.
Notes
A. These are the towering Skeletons of Abominations. They use the statistics of the Skeleton, but each have 3 Body Points.
B. The first hero to search for treasure finds 150 gold coins in the chest. Move the bearer to any square adjacent to the bookcase and read the following text to them:
"You are drawn to a red tome on the highest shelf. The pages open to a spell. It is one you dimly recall. You chant, 'Rak thorag, Rak thrug-nor, Rak threg orc.' The room is engulfed with a dark mist that swirls around you all. When it lifts, all other heroes, regardless of where they are, have been turned into Orcs!"
The bearer is unaffected. Each affected hero replaces their character with a different Orc miniature. They now roll Attack and Defend dice as Orcs. They may still use any armor, weapons, or equipment they may have. Each affected hero has 2 Body Points, and may not use any potions, magic, or other items to raise their Body Points above 2. They may not cast spells.
The bearer hears a familiar voice, "Quickly, the effects of the transformation become permanent unless you can find the blue tome."
C. If the bearer casts Lightning Bolt in this room, they gain 1 Mind Point.
D. When any hero enters this room, move the bearer to any square adjacent to the altar and read the following text to the hero:
"A blue tome lays open upon the altar. You begin to chant, 'Rak Darok Nar!' The room is engulfed once again. When the mist clears, all heroes are returned to their former selves and restored to their full Body Points. A familiar voice echoes in your mind once more: 'We are done here. Leave now by the stairway and go to the ruined Temple of Gilgarreth. There, I will speak with you again.'"
Wandering Monster in this Quest: Skeleton
Quest 6: The Ruined Temple of Gilgarreth
"You journey to the crumbling ruin and make camp. It is almost nightfall by the time Mentor speaks with you. This time he also appears as a colorless apparition flickering above the campfire's flames. 'You must go into the temple and retrieve the Sorcerer's Crown. The talisman holder will lead the way. I shall be speaking to you. Do exactly as I say. We enter by the Witching Door.' Behind you a blue light glows on the ruin's walls revealing a secret door and you enter."
The quest map printed above the notes is not reproduced here. Its numbered path markers (1 to 4) and lettered notes (A to C) are referred to below.
Notes
The following information is for Zargon only. Do not read this to the heroes. The vision the heroes saw was a spell cast by Melar. It was not Mentor's voice the heroes heard. Tell the players that the bearer must go first each turn.
When the bearer takes their turn, read them the following text:
"You hear the voice. 'This way.'"
You move the bearer's miniature 9 squares for the first four turns. Count them out exactly along the path indicated to land on the square matching the turn number. This uses the bearer's movement, but they may still perform actions.
A. The secret door closes after the last hero enters the room. Tell the heroes they will have to leave via the main gate.
B. When the bearer lands on this square, read the following text to the hero:
"You hear the voice. 'I am almost there. Move quickly.' You begin to run!"
C. When the bearer lands on this square, read the following text to the hero:
"You hear the voice. 'Give in to me, hero. You cannot stop me!' You realize it is Melar's voice. You must fight to break his hold on you."
The bearer must immediately roll 2 red dice. Move the hero that number of squares along the path shown, then read this text to the hero:
"You muster all your will and cast Melar from your mind. Your senses seem to sharpen and for the first time in many days you feel like yourself again. You hear the voice. It is just a whisper. 'You held me back this time, hero. No matter. Your strength will fail. I shall prevail!'"
The bearer gains 1 Mind Point and learns the Dread spell Firestorm.
Wandering Monster in this Quest: Orc
The Remaining Quests
(Rules reminder printed on page 18.)
The heroes now know that the talisman holds the Dread spirit of Melar. They also know he seeks to possess the bearer of the talisman and become Fellmarak the Sorcerer King. Melar's power continues to grow, and the following special rules apply to the hero wearing the talisman.
Dread Spells
The bearer of the talisman knows two Dread spells: Lightning Bolt and Firestorm. Each time the hero casts one of these spells, they gain 1 Mind Point. Each spell may only be cast once per quest.
The Talisman Bearer's Burden
Melar seeks to weaken the hero that bears the talisman. At the beginning of each of the bearer's turns, they roll 2 red dice. If the total roll result is less than the bearer's current Mind Points, nothing happens. If the total roll result is equal to or greater than the bearer's current Mind Points, they feel the Talisman tighten its grip and lose 1 Body Point. The bearer's resilience is boosted by the presence of their companions. The bearer adds 1 point to their roll total for each hero in the same room or corridor as them when the roll is made, and 2 points to their total for each hero adjacent to them.
Body Points
As previously, if the bearer's Body Points are reduced to zero, they do not die but instead fall unconscious. While unconscious, they cannot move or take actions.
Monsters may not take possessions from the unconscious bearer.
Other heroes may still use a potion or magic to restore the bearer's Body Points and allow them to regain consciousness. The bearer may then continue play as normal.
Removing the Talisman
The bearer cannot remove the talisman. If they try, read the following to them:
"You feel a great heat emanating from the talisman." Lose 1 Body Point.
The Rise of Fellmarak
If the bearer of the talisman is unconscious and all other heroes are dead, the quest is over. Read the following text to the players:
"Melar has triumphed. He has found form once more and arisen as Fellmarak, the Sorcerer King. The Dread banners shall be raised, and the host marches beneath the Shadow Sky. The realm shall know only darkness for the heroes upon whom much hope rested have fallen. Who now will step forth to replace them?"
Between Quests (heading added)
Read the following to the heroes:
"Having escaped the Ruins of Gilgarreth, you journey back to gain counsel from Mentor. While waiting for the wizard, you may visit the armory and alchemist shop."
Once the players have finished any purchases, read the following page before starting the next quest.
Mentor's Message (heading added)
The page has no printed heading. This message should be read aloud to all players. Page 19 is printed rotated; its paragraphs were read in order from the page image.
Mentor's note bid you make haste to his study. As you enter, the wizard turns to greet you. Despite a serious face, his arms are outstretched in a warm welcome. "Friends, never before have I been so blinded. I am sorry that I failed to protect you from Melar at the Temple of Gilgarreth."
Mentor smiles. "But I am glad to see you survived, nonetheless. The good news is that the intent of Melar's Dread spirit has now been revealed. Once more it becomes too bold. Once more it has moved too soon. Now that I understand the nature of our foe, I have been able to free Loretome from the disruption that had been placed upon it."
Mentor turns the large book around. "Look closely." There on the page is a beautiful but ominous illustration embellished with gold. It shows a dark future. Zargon rides at the head of a great army. To the side, another figure rides. The face of Fellmarak cannot be mistaken. It is the bearer of the talisman, and around the Sorcerer King's neck rests the Talisman of Lore!
Mentor continues. "It is as well my friends that you did not discover the Sorcerer's Crown at Gilgarreth. I shall journey there and ensure it remains hidden. This may delay Melar's plans but it will not defeat him. You must journey to Telor's Tomb and seek an audience with his spirit. We must discover the means to defeat him. To gain access, you will first need to journey to the Archives at Arboreni and find a map to Telor's Tomb."
The dangers we face were foretold. Telor, who rode with Rogar during the first wars against Zargon, left us this prophecy. The realm shall fall in darkness. So says the prophecy of Telor.
Mentor opens Loretome and reads from its pages. "Then shall Fellmarak rise—a spirit given form and born of a Dread talisman. It shall bow for Zargon's gift, the Sorcerer's Crown. Spirit no more, the Sorcerer King shall ride by Zargon's side and together they shall bring the Shadow Sky. No light shall touch the land nor give hope to a brighter tomorrow."
Be swift, for Melar's power is rising. He will try to possess you again, bearer of the talisman! Mentor looks to the others. "Guard well your companion!"
Quest 7: The Archives at Arborenis
"I have retrieved the Sorcerer's Crown and hidden it from Zargon. You must locate the study of the cartographer. There you should find a map to Telor's Tomb. We must assume that Zargon has insight to our plans. For let us not forget, Melar is here with us." Mentor glances briefly at the talisman. "That fool took audience with Zargon before being consumed by Dread magic. It is possible that even now, in some way, Melar can communicate with his dark patron."
The quest map printed above the notes is not reproduced here; the lettered notes below refer to its marked areas.
Notes
The Talisman Bearer's Burden: Melar seeks to weaken the hero that bears the talisman. At the start of each of the bearer's turns, they roll 2 red dice. If the total roll result is less than the bearer's current Mind Points, they feel the talisman tighten its grip and lose 1 Body Point. The bearer's resilience is boosted by the presence of their companions. The bearer adds 1 point to their roll total for each hero in the same room or corridor as them when the roll is made, and 2 points to their total for each hero adjacent to them.
Transcription note: the threshold above is printed as "less than the bearer's current Mind Points" in this quest. Page 18 gives it as "equal to or greater than". Both are transcribed as printed; the printed text here has not been corrected.
A. The door to the archives is broken open. Parchments and scrolls are scattered across the hallways.
B. All of these rooms have been ransacked. When the heroes see the door, place an open door and the whole room.
C. The first hero to pass this square notices what appears to be a walled up doorway.
D. The first hero to search for treasure finds two Potions of Lesser Healing.
E. The first hero to search for treasure opens the chest and draws one card from the treasure deck. If they draw a wandering monster or hazard card, it does not take effect and is discarded. The hero continues drawing until they draw a card that isn't a wandering monster or hazard. After that, no more treasure can be found in the room.
F. This is the cartographer's study. The first hero to search for treasure finds a scroll. It is the map they are seeking. This is the end of the quest. The heroes leave the archives and travel to Telor's tomb!
X. A Dread Sorcerer who knows the following Dread spells: Ball of Flame, Cloud of Dread, and Command.
| Movement | Attack | Defend | Body | Mind |
|---|---|---|---|---|
| 8 | 4 | 4 | 3 | 4 |
Following this quest, the heroes may visit the armory and alchemist's shop.
Wandering Monster in this Quest: Dread Warrior
Quest 8: Telor's Tomb
"The ransacking and destruction of the archives at Arborenis is sad news. Thankfully, you found the map to Telor's resting place. Once you reach the tomb, the crystal vial will help you. Its presence will cause the secret entrance to glow blue. The vial shall be carried by you, bearer of the talisman. When you reach Telor's tomb, smash the vial and it will summon Telor. Let us hope he can help you."
The quest map printed above the notes is not reproduced here; the lettered notes below refer to its marked areas.
Notes
The Talisman Bearer's Burden remains active during this quest. See page 18 for more. If the bearer of the talisman fails this dice roll, Melar may immediately cast Summon Orcs. The summoned monsters are controlled by Zargon as usual. Melar may only cast this spell once per quest.
A. To thwart robbers, an illusion spell has been cast over a plain table to disguise it as Telor's tomb. If the heroes shatter the crystal vial, the spell breaks. Replace the tomb with a plain table.
B. The first hero to search for treasure finds one Elixir of Life.
C. The first hero to search for treasure finds 250 gold coins.
D. This room has a large painting above the table showing Telor. The legendary wizard resembles the bearer.
E. The first hero to search for treasure finds 300 gold coins.
F. This is Telor's desk. The first hero to search for treasure finds one Rock Skin spell scroll.
G. This is the tomb of Telor. When the bearer enters, the tomb begins to glow blue, as well as the vial (if the heroes haven't already shattered it). This is the end of the quest. Read the following aloud to the heroes before moving on.
"The air chills as the spirit of Telor rises from the stone effigy. The wizard looks to the bearer. 'I bid welcome to you, my kin.' The spirit's face quickly tightens to a terrible stare. 'There is no welcome left to you, Dread spirit Melar! Long ago did you relinquish what goodness was left in you. Be warned: harm not this hero.' The spirit of Telor turns to all in the room. 'You must journey to the Halls of the High Mages. There you will find the magic you need to tear Melar from his sanctuary and save your companion.' The spirit chants gently, then fades back into the stone. The bearer loses 1 Mind Point."
Following this quest, the heroes may visit the armory and alchemist's shop.
Wandering Monster in this Quest: Skeleton
Quest 9: Halls of the High Mages
"So, my friend," says Mentor, looking to the bearer of the talisman, "now you know the truth. You are born to a great bloodline of mages. Telor is the most legendary, but others too had names of renown. You must go quickly. For the time has come to vanquish Melar's Dread spirit—to cast it out of the talisman and let the foul phantom be blown to the winds." Mentor's eyes narrow as he looks at the talisman. "You heard me, Melar, didn't you?" The talisman begins to glow a soft blood red.
The quest map printed above the notes is not reproduced here; the lettered notes below refer to its marked areas.
Notes
The Talisman Bearer's Burden remains active during this quest. If the bearer of the talisman fails this dice roll, Melar may immediately cast Summon Orcs. The summoned monsters are controlled by Zargon as usual. Melar may only cast this spell once per quest.
A. When any of these doors are opened, open all doors marked A. Place the rooms and monsters onto the board.
B. This corridor leads to the gallery which overlooks the altar of the high mages.
C. Do not place the monsters until the heroes trigger the summoning in room E. This room is sunken down and can only be accessed by a hero or monster moving on the stairs. Treat the stairs as a single square on which only one miniature may be placed at a time. Any miniature on a gallery square can see any miniature in the altar room and vice versa. A hero may jump into the room below but loses 1 Body Point.
D. These are the Skeletons of the high mages. Cursed by Dread magic, they each have 2 Body Points. The hero that defeats the final Skeleton sees a mage's spirit appear briefly. It speaks in a chilling whisper. "Go beneath the room to the Arena of Misildia." The spirit smiles sadly before disappearing.
E. A Dread Sorcerer reads from a tome on the desk and casts a summoning spell. Place the monsters in room C on any square you wish. Place the Dread Sorcerer on the square marked X. The Dread Sorcerer knows the following Dread spells: Tempest and Fear.
| Movement | Attack | Defend | Body | Mind |
|---|---|---|---|---|
| 8 | 4 | 4 | 3 | 4 |
The stairway in the Altar Room leads down another level.
Wandering Monster in this Quest: Orc
Quest 10: The Arena of Misildia
"Of course! The Arena of Misildia!" Mentor's face lights up hearing your account. "Why didn't I think of that? Misildia was a high mage but also a highly skilled fighter. The arena was built so Misildia could train the other mages in combat. The whole arena is built with Kertz stone. No magic can exist within its walls. If you enter the arena, Melar will be cast out, for the magic of the talisman cannot hold there. You all need to enter the arena at the same time, just as they once did for the trials."
The quest map printed above the notes is not reproduced here; the lettered notes below refer to its marked areas.
Notes
The Talisman Bearer's Burden remains active during this quest. If the bearer of the talisman fails this dice roll, Melar may immediately cast Summon Orcs. The summoned monsters are controlled by Zargon as usual. Melar may only cast this spell once per quest.
A. These high mage Skeletons each have 2 Body Points.
B. This is the apothecary's room but there are no potions.
C. This is the apothecary's storeroom. The first hero to search for treasure finds two modified Potions of Healing that restore up to 4 lost Body Points when consumed.
D. These are magical opponents, once used for the trials.
E. The first hero to search for treasure discovers the pages for the "Ritual of the Trial." Read the following text:
"Then shall they pass the secret portal. Each shall take their place at their given gate. Only then will the arena bid them enter."
F. When the bearer enters this room, read the following text:
"You hear a soft voice that chills your soul. 'Why do I not hear from you, Melar? Who is there with you? Won't you sit and talk?'"
G. This is the arena. It is one big room. Ignore the walls marked. The doors are magically closed and cannot be opened. When every hero stands at a different doorway, read the following text:
"The doors before you open, and you are forced forward. You hear a terrible scream as Melar's spirit is torn from the protection of the talisman. It looks around desperately then envelops the Abomination. Melar has found form!"
Move each hero one space forward.
The bearer is no longer affected by Melar, can no longer cast Dread spells, and their Mind Points revert to their total before starting this quest pack. No spells, artifacts, or equipment may be used in the arena. Spells cast before entering the arena are lost. Potions and elixirs can be used. When the Abomination is defeated, the quest ends. Read aloud the following:
"I curse you! You shall not escape me!" Melar's spirit fades.
Following this quest, the heroes may visit the armory and alchemist's shop.
Wandering Monster in this Quest: Zombie
Quest 11: Melar Unleashed
"Melar was cast out of the talisman but has found form again in an abomination. These creatures can only host a Dread spirit for a short while. We must destroy Melar once and for all, before the sorcerer's power grows too strong—before Melar can find a worthier host. The sorcerer has returned to the dungeons below Turekk Tor. There he summons abominations to fill the ranks of an army. Prepare yourselves for war for the Shadow Sky looms, and you return to Turekk Tor!"
The quest map printed above the notes is not reproduced here; the lettered notes below refer to its marked areas.
Notes
A. The secret door cannot be found in this room.
B. This is the Orc guardroom. The boss has 3 Body Points.
C. When the bearer enters this room, read the following text:
"Once again you hear the soft chilling voice from before. 'Melar has spoken of you. Enjoy your moment, but do not fool yourself that you have been victorious. My Sorcerer King shall yet ride.' The fire in the hearth roars angrily and glows a deep blood red. Then there is quiet, and the flames softly flicker once more."
D. The first hero to search for treasure will find 300 gold coins one Heal Body spell scroll that seems to have been modified by a high mage, allowing it to be cast three times before the scroll crumbles to dust.
E. A Gargoyle stands guard for Melar, who is possessing an Abomination. Place an Abomination on the square marked X to represent Melar and read the below to the heroes:
"Melar stands at the altar, eyes glowing a deep red. His voice rings out as he casts Summon Orcs before opening and disappearing through the secret door with a menacing grin."
The summoned Orcs may be placed in any vacant square in the room. Remove the Abomination from play.
When the first hero searches for treasure, read the following:
"You uncover a sturdy box made from dark wood. Dread runes have been etched into the sides. The interior is lined with fur and completely empty, save for an indentation the size of a person's head."
F. The first hero to search for treasure finds one Lightning Bolt spell scroll, modified to be cast three times before the scroll crumbles to dust. If still unopened, the secret door opens.
Following this quest, the heroes may visit the armory and alchemist's shop.
Wandering Monster in this Quest: Zombie
Quest 12: The Rise of Fellmarak
"The Shadow Sky thunders ever closer. The elven city Haven of the Lights has been destroyed by the Doomguard. With it, my spells to shroud the Sorcerer's Crown have been broken. Fellmarak has arisen and Zargon rides at the head of the Dread Host to meet at the ruins of Haven. There is but one last chance. Confront Fellmarak there—before Zargon arrives. If the sun sets on this day and we have failed, it will set forever on this realm and we shall live out our days in darkness!"
The quest map printed above the notes is not reproduced here; the lettered notes below refer to its marked areas.
Notes
A. As soon as a hero lands on either of the spaces marked A and sees the Goblin, read the following text:
"Wait! Don't attack. My name is Gawr. I am in the service of the realm. I've been sent to scout on Zargon's army. The ruins are very unstable, and you must tread with care. The Doomguard are everywhere. They protect the Sorcerer King. Follow me!"
Move Gawr along the path.
B. The blocked square B is a fake wall. Remove it. Gawr opens the door and the monsters are placed. The next hero moves and fights as Gawr after taking their turn. Gawr is tough for a Goblin - use the Gargoyle statistics for him.
C. The tomb of the elven seer Elmerrin is now a makeshift armory. The first hero to search for treasure finds one bolstered Potion of Healing that restores all lost Body Points.
D. These Dread Warriors are immune to crossbows given their large shields. They stubbornly stand to block the way.
E. The first hero to search for treasure in this room opens the chest. Draw one card from the treasure card deck. If they draw a hazard or wandering monster card, they discard it and draw another card.
F. When the first hero enters the room, read the following:
"Fellmarak, the Sorcerer King, stands before you. He smiles. 'I have been waiting for you!'"
Place the Dread Sorcerer Fellmarak on the square marked X. Fellmarak knows the following Dread spells: Firestorm, Rust, Command, Fear, and Cloud of Dread. Fellmarak casts Firestorm on the first turn, which destroys the doors in the room, all of which are now open. Fellmarak cannot be killed; when he reaches 0 Body Points, his crown melts down his face. The fireplace behind him opens as a secret door, and he screams and flees through it.
| Movement | Attack | Defend | Body | Mind |
|---|---|---|---|---|
| 8 | 5 | 4 | 6 | 6 |
Following this quest, the heroes may visit the armory and alchemist's shop.
Wandering Monster in this Quest: Mummy
Quest 13: Zargon's Flame
"Bravely done!" beams Mentor. "The Sorcerer's Crown has been destroyed and Fellmarak's power broken! Though Zargon has not abandoned the sorcerer. Loretome reveals Fellmarak has been granted the power to summon monsters with Zargon's Flame. Such creatures are hard to fell but may be more easily defeated with the spell Water of Healing. Make haste. Fellmarak plans his stand beneath Gurrok Cairn. Be wary. There are no limits to what Fellmarak will risk to have his vengeance upon you!"
The quest map printed above the notes is not reproduced here; the lettered notes below refer to its marked areas.
Notes
Zargon's Flame: All monsters shown on the map have been summoned with Zargon's Flame. They attack and defend as normal, but have no Body Points. When a monster summoned by Zargon's Flame is hit, regardless of how many Body Points of damage are dealt, Zargon calls out any two numbers 1-6 and rolls 1 red die. If the roll result matches one of the numbers called, the monster is unharmed. If not, it is consumed by flame and defeated.
If a hero casts Water of Healing on any monster affected by Zargon's Flame, that monster is hit and cannot roll Defend dice. Zargon may only call out one die number to stop that monster from being consumed by flame.
A. These are magical doors protected by guardians when approached. As soon as a hero sees the door, draw a random monster card and place the monster on the space marked A. The door opens when the monster is defeated.
B. When either of these doors are opened, all the magical doorways marked A disappear. The monsters in these rooms have a blood red flame flickering around their heads. They have been summoned with Zargon's Flame.
C. These are undead knights. Summoned with Zargon's Flame they fight as Dread Warriors. The first hero to search for treasure in each of these rooms must roll 1 red die. On a 1, 2, or 3 they find one Potion of Lesser Healing. On a 4, 5, or 6 they encounter a wandering monster.
D. The first hero to search for treasure finds one Water of Healing spell scroll that has been modified to be cast twice before crumbling to dust.
E. Use the Dread Sorcerer miniature on X to represent Fellmarak. Fellmarak is wreathed by Zargon's Flame. Remove the Dread spells Summon Orcs and Summon Undead from the Dread spell deck. On Fellmarak's turn, shuffle and draw one random Dread spell to cast. If Escape is drawn, the sorcerer is immediately destroyed by blazing fire.
| Movement | Attack | Defend | Body | Mind |
|---|---|---|---|---|
| 8 | 5 | 4 | 0 | 6 |
Wandering Monster in this Quest: Randomly Drawn
Conclusion
Mentor stands outside the Great Hall. "Welcome, my friends. It has been my honor to aid you on this quest and today it will be your honor that we celebrate. Beyond these doors sits the Grand Council of Heroes. You are to be reaffirmed as Champions of the realm. Each of you shall receive a Ring of Fortitude." The wizard smiles. "A small and fitting token of our appreciation. These fabled rings were forged by the Dawnsmiths, using a blend of dwarven and elven technique."
The joy in Mentor's face fades slightly, replaced by thoughtful concern. "We cannot, however, forget that there are still dark days ahead. Zargon has recoiled from advancing now that the Sorcerer King has been vanquished, but Zargon is no single headed snake! Like the hydra, the evil sorcerer attacks and threatens in many directions. If defeated, Zargon simply regroups and strikes again. We have gained a valuable respite—valuable time for us to prepare."
"Each of you shall be called. Each of you shall be tested. Each of you shall face failure and when you do, I shall be there to aid you. The lesson of Melar's fall must be remembered. Dread powers corrupt, twist, and consume. Stay true, my heroes."
Mentor's face relaxes and recovers a more joyful look once more. "Come, let me lead you to the council. They grow impatient to welcome you."
The wizard tucks Loretome under an arm and steps forward as the doors to the Great Hall swing inward. War horns echo throughout the vast chamber to announce you. There is a moment's pause before the assembly erupts with a deafening wave of cheers and applause. The din rises and rises then fades slowly before falling silent. You look at all those gathered, and they look at you—beyond you—through the majestic windows that line the Great Hall. Out to the horizon where the sky darkens and storm clouds gather.
Artifact Reference
Items in this expansion with corresponding cards found in the HeroQuest Game System:
- Elixir of Life
- Ring of Fortitude
- Rod of Telekinesis
- Talisman of Lore
Spell scrolls printed on this page:
Lightning Bolt (Spell Scroll): This spell may be cast in a horizontal, vertical, or diagonal direction. The bolt will travel in a straight line until it strikes a wall or closed door. It inflicts 2 Body Points of damage on all heroes or monsters that stand in its path. The scroll crumbles to dust after use. Any hero may use this scroll.
Water of Healing (Spell Scroll): This spell may be cast on any one hero, including yourself. Contact with this revitalizing water restores up to 4 lost Body Points but does not give a hero more than their starting number. The scroll crumbles to dust after use. Any hero may use this scroll.
Heal Body (Spell Scroll): This spell may be cast on any one hero, including yourself. Its magical power immediately restores up to 4 lost Body Points but does not give a hero more than their starting number. The scroll crumbles to dust after use. Any hero may use this scroll.
Rock Skin (Spell Scroll): This spell may be cast on any one hero, including yourself. That hero may roll 1 additional combat die when defending. The spell is broken when the hero suffers 1 Body Point of damage. The scroll crumbles to dust after use. Any hero may use this scroll.