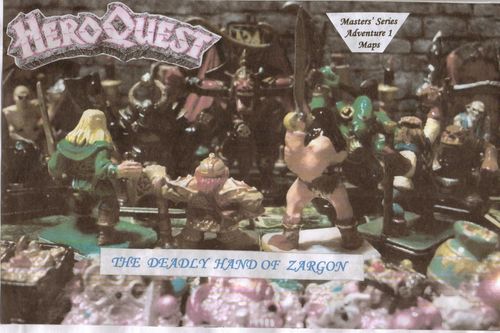
Masters' Series: Adventure 1 – The Deadly Hand of Zargon (fan expansion for HeroQuest)
Masters' Series: Adventure 1 – The Deadly Hand of Zargon (fan expansion for HeroQuest) Rulebook
Table of Contents
Table of Contents
A Few Rules at a Glance
Mind Points
When a Hero reaches zero Mind Points, he is not dead but in shock. (A Hero cannot go below zero Mind Points.) He rolls only 1 red die to move, attacks with only 1 combat die, and defends with only 2 combat dice. (Armor, weapons and most artifacts do not increase the attack or defend dice when a Hero is in shock.) The Hero's attack and defend dice can be temporarily increased by some spells and spell scrolls.
In this and other Quest Packs, it is important to keep track of Heroes' current Mind Points. Tell the players to use the bottom row of "Body Point" boxes on their Character Sheets to record Mind Point damage.
Mercenaries
This Quest Pack contains Mercenary figures, with interchangeable weapons that enable you to put together the 4 different types of Mercenaries (the Scout, the Swordsman, the Crossbowman and the Halberdier).
Mercenaries are also soldiers who can be hired by a Hero before a Quest begins. They will accompany any Hero on a Quest, if the Hero pays their fee. The fee for each type of Mercenary is given in the Mercenary's card. The gold must be paid before the Quest begins.
A Mercenary is controlled by the Hero who hired him. The Mercenary moves and attacks immediately after that Hero's turn. A Hero can control as many Mercenaries he can afford to hire. A Mercenary can move, open doors, attack and defend as a Hero, but he can take no other actions (except for the Scout, who can search for and disarm traps). A Mercenary does not receive any treasure. If a Hero dies on a Quest, any Mercenary hired by that Hero continues on the Quest, controlled by the fallen Hero's player.
The Scout, Swordsman, Crossbowman and Halberdier each have different statistics and abilities. These are detailed on the cards that come in this Quest Pack.
If a Quest map calls for a type of Mercenary that is not available because they've all been hired by Heroes, Zargon may substitute a different type of Mercenary, or another monster altogether.
Turning Heroes into Werewolves
If a Hero is affected by a Werewolf's Curse spell or injured by the attack of a Werewolf, the Hero becomes a Werewolf, cursed to switch between Hero form and Wolf form. At the start of every turn, the Hero must roll 2 red dice to see if he transforms into a Wolf. A roll of 2 through 9 means the Hero remains in Hero form and under the control of the player; the Hero may move and act normally. A roll of 10 through 12 means the Hero transforms into a Wolf and Zargon controls him as a monster for 1 turn (on Zargon's next turn).
When a Hero transforms into a Wolf, replace his figure with a Wolf tile. All of his possessions are left in the square in which he transformed. Place a Weapon Pack tile in the square to represent the Hero's former possessions. The Weapon Pack tile stays on this space until the Hero returns to pick up his possessions. (Monsters cannot take the Weapon Pack.)
This Wolf is a true monster, with no Hero abilities and all the abilities of monster (moves on Zargon's turn, attacks as a Giant Wolf, unaffected by traps or pits, cannot open doors, etc.).
At the end of Zargon's turn, the Wolf transforms back into the Hero and returns to the player's control. The Hero figure replaces the Wolf tile.
The Hero must roll for this transformation each turn until he is cured by drinking a Wolfsbane Potion (or the Potion of Restoration from the Alchemist's Shop).
Large Monsters
When a monster takes up more than one square (the Giant Wolf in this Quest Pack, for instance), that monster can attack anyone in any adjacent square (including diagonally), even if the monster's figure is facing away from the target.
Spell Scrolls
When a spell scroll is found, the Hero should record it on his Character Sheet. After the scroll has been used, it must be crossed off the Hero's Character Sheet.
Multiple Attacks
A Hero rolls defend dice once for each attacking monster. For example, a Hero attacked by 3 Zombies gets 3 separate defend rolls. A Hero attacked by a monster with multiple attacks (such as the Polar Warbear), however, gets only 1 defend roll against that monster per turn, no matter how many of the monster's attacks are directed at the Hero.
Drinking Potions
I have always made it that the Hero had to use a turn if he wanted to drink an extra potion. It was realistic. But now we're going to change this rule and allow the Heroes to drink in the middle of a turn or if he has a lousy roll.
Double Potions
A Hero cannot drink two potions at one time to add more power to a single attack. He can take a potion when he is under a spell. Like Courage or Rock Skin. There are 3 potions that have long lasting effects; Vision, Speed and Thunder. We have made it that a Hero can't drink an extra potion while under the effects of these potions, it's a tuff choice that they need to make. The only exception is when needing a healing potion. A potion can be mixed with a spell. But Heroes and monsters can never have more than 6 combat dice on a single roll.
Heroic Brew
When a Heroic Brew is used; your opponent can defend against your first attack, but not against your second attack. This is called a quick stroke. If a monster drinks a Heroic Brew, a Hero cannot defend against his second attack as well.
Holy Water
It can only be used to destroy a regular Skeleton, Zombie, Ghoul, and Mummy. On the stronger monsters Holy Water will make 2 Body Points of damage on the following monsters; Iron Skeletons, Stone Mummies, Vampires and Kalra-nji. Monsters cannot defend against the water.
Spells
Invisible
I made a change to the Invisible spell. This spell now only lasts for two turns. Also it is useless against Bellthors, Ogres, Giant Wolves and Werewolves. These monsters can sense the Hero's presence.
Unconsciousness
When a Hero or monster becomes asleep or unconscious. They can awaken if they can roll a 6 on one red dice. They get one try for each of their "existing" Mind Points. This is why it's so important to build and keep your mind. Monsters never attack a sleeping Hero. They'd rather take them prisoner.
The Sky Orb
It doesn't increase a Hero's Mind Points it only protects their mind from 4 hits. When a hit is taken on the orb that point is lost forever. Heroes do not get them back at Quest's end.
Stretching the Rules
As for all the other spells I allow the Heroes to use their imagination. Casting Boil on themselves when entering a freezing room, or a freeze spell on themselves when entering a room where the forge is running out of control.
Making Suggestions
There are a lot of spells that the Elf and Wizard can now use. It's very hard for a new player to just jump in and start using so many. You, Zargon, can make a lot of good suggestions to your Heroes if this happens. Let the Heroes stretch a few rules, sure, but don't let them get carried away also. Remember, in reality, unicorns can't fly.
Casting 2 spells
To give the monsters a bit more of a chance, I've made a rule that a Hero cannot have more than one spell cast upon him at one time, That is, if he has a spell that is lasting until he takes a hit, then he can't have another spell cast upon him until that first spell has worn off. Even if the Elf and Wizard can cast two spells on a single turn, they can't be under a Courage and Rock Skin spell at the same time. I only make an exception for a healing spell to be cast upon a Hero while he is under the influence of another spell. Potions and a spell can be mixed. But Heroes and monsters can never have more than 6 combat dice on one roll.
Carrying Items
We discovered that it saves a lot of paper room on the stat sheets if you allow one Hero to carry all of a certain item. Examples are; Wizard carries all the Potions, Elf carries all the spell scrolls, Dwarf carries all the throwing weapons and so on. I've allowed the Heroes to "toss" an item to their friend so that they can use it.
Needing a Torch
Some Quests require that the Heroes carry a torch. If they do not have one then they lose 2 Attack dice and 1 Defense dice.
Traps
I've always said that the Heroes can see a trap a mile off, giving them a chance to disarm them first. But now we're going to make it that Zargon's monsters have gotten a lot better at hiding their traps. The extra room that the board provides gives the Heroes a chance to walk around the traps. Heroes must step on a trap to see where it is, unless they can detect a pattern in the traps' setup. Here is a list of the traps that we will use and the rules for them.
Pit Traps
When a Hero steps on this space he falls into a pit. Single space pits cost the Hero 1 Body Point. Double space pits cost the Hero 2 Body Points. 4 space pits are always open. A Hero can willingly jump into a pit with no harm, unless otherwise stated.
To jump over a single square pit, Hero needs either shield.
To jump over a long pit trap, the long way, Hero needs a black shield.
When the Hero is down in the pit he can pull a treasure card. There is only one treasure card for each pit.
If a wandering monster card is pulled, that monster was left in the pit to starve to death. The undead need magic to keep them alive. That monster then can make a deal with the Heroes. If they spare his life he will join the Heroes and fight with them until the end of the Quest, and then the monster leaves. When a monster joins the Heroes he switches from using black shields to white shields in defense.
Falling Block
When a Hero steps on this square. He must roll 3 combat dice. Each skull is a lost Body Point. Hero then must jump either forward, backwards, or to the side. This ends his turn. Zargon then places a ruble stone tile on that space. This space is no longer passable.
Spear Traps
When a Hero steps onto this square, he must roll 1 combat dice. A skull is a lost Body Point. A shield means that he dodged the spear and can continue with his move. We have made it that unless the spear trap is disarmed, the spear resets itself and is ready again. If a Hero tries to disarm a spear trap. He moves onto the space and rolls 1 combat dice. A skull means that he tripped the trap. He must now roll 1 combat to see if he has been hit. A skull means a hit and the trap resets itself. The Hero must try again.
If the Hero has a tool kit or they let the Dwarf disarm the trap. Then only a black shield will trigger the trap.
Giant Boulder (Rolling Rock Trap)
When a Hero steps on this space, the boulder starts rolling. Tell the Hero to stop and place boulder on the marked square. The Hero that triggers the trap can then use the rest of his turn (if he has any) to run for it. Boulder starts rolling on Zargon's turn, after the Heroes have moved. Zargon rolls 2 red dice and moves the boulder that many spaces towards the star burst on his map. Any Hero that gets flattened by the boulder must roll 5 combat dice. Each skull is a lost Body Point. Because the hallway is 2 spaces wide means nothing. The boulder is rolling back and forth down the hallway, smashing everything in the hall, until it stops at the end.
No giant boulder trap can be disarmed or searched for.
Swinging Axe
When a Hero steps on this square. He rolls 2 combat dice. Each skull is a lost Body Point. Trap then resets. Disarming an axe trap is the same as disarming a spear trap.
Furniture Traps
The Heroes are always warned if these chests are booby trapped. Zargon simply tells them how many points they will lose if they trip the trap and what kind of trap it is. It's usually a needle, but sometimes it can be a gas trap, then all the Heroes inside the room would take the hit.
The Deer Skull Door
This door needs a soul to open it. When the Warlock that made the door is killed then the evil spell is broken.
Obtaining Miniatures
You don't have to buy the same exact figures that we use. You can substitute anything. I can't find a place that sells Ogres, Polar War Bears, Yeti, or a Frozen Horror. So we just substituted other monsters. I've bought some prisoners for when the Heroes find a prison cell full of people, just for the fun of it. You can get all of these new figures that you can use with this game. Here are the places and the order numbers for the figures.
reapermini.com
- Mountain Orcs: Black Orcs - 02855 (You get two); Black Orc warrior - 02321; Black Orc w/ 2 handed sword - 02335; Ta'resk Black Orc Warlord - 02356; Nagrash Orc Cheiftain - 02502; Gragg Elf Slayer - 02726; Neanderthal Champion - 02400
- Zargon: Valdarynn Redhand Archmage - 02591
- Vampires: Sirithis - 02181; Alyscia of the Forest - 02248; Alura the Succubus - 02254; Batna Succubus - 02309; Siobhana Vampire Queen - 02329; Venom Vampire Warrior - 02352; D'mona the Drinker - 02066
- Others: Wolf Pack - 02830; Ghost Warrior - 02125; Neferu - 02485; Werewolf - 02139; Gargoyle Warrior - 02379; Laurana Sorceress - 02621; Vandorenda - 02633
- Furniture: Altar of Evil - 02580 (comes w/ 2 candle stands)
- Female Heroes: Selmarina Witch - 02682 (Wizard); Margara, Mage - 14082 (Dwarf); Liriel Sliverlocks Female Brad - 02458 (Elf); Marda of the Blade - 02164 (Barbarian)
Mega miniatures - Ebay
- Globe - Deal 20008a
- Telescope - Deal 20008b
- Compass - Deal 20008c
- Book Stand - Deal 20004c
- 3 Swamp Creatures - Deal 0028 (Othalus)
- Male Victim Tied to Post - Deal 20030b
Ironwindmetals.com
- Hydra - DF-089
- Captive Female - DF-423
- Female Captive - DF-094
- Female Captive 2 - DF-621
- Female Victim 1 - DF-244
- Female Victim - DF-246
- Female Victim - DF-247
- Female Victim - DF-248
- Male Captive - DF-095
Some of these figures are naked. If you are playing with children, then they need to be clothed. You can do this with a couple of layers of tacky glue and paint. I've always considered HeroQuest to be an adult game with so much violence and killing. Please use you own discretion wisely.
Checklist
In addition to HQ Game System.
Furniture
- Bookcase x2
- Table x2
- Treasure Chest x5
- Throne x4
- Sacrificial Altar x1
- Candle Stand x2
- Book Stand x1
- World Globe x1
- Telescope x1
- Compass x1
Tiles
- Short Stairway x4
- Long Stairway x2
- Stairway x1
- Trap Door x4
- The Weapons Forge x1
- Coffin x4
- Double Blocked Square x13
- Iron Entrance Door x1
- Open Door x6
- Closed Door x5
- Death Mist x3
- Cliff Corridor x1
- Giant Stone Boulder x2
- Mirror x1
- Portcullis x2
- Cloud of Chaos x1
- The Seat of Power Room x1
- Throne Room
- Wolf Token x4
- Weapon Pack x4
- Magic Ice x6
- Sky Orb Set x3
- Large Door x3
- Large Open Door x3
- Large Pit Trap x1
- Ice Gremlin Treasure Room 3x3 x1
- Ice Ledge 4x5 x1
- Bottomless Chasm 5x5 x1
- Slippery Ice 1x1 x7
- Slippery Ice 1x2 x1
Monsters
- Orc x8
- Zombie x4
- Skeleton x8
- Mummy x2
- Fimir x3
- Ogre x3
- Polar Warbear x2
- Giant Wolf x2
- Frozen Horror x1
- Ice Gremlin x3
- Yeti x2
- Uruk-hai x4
- Othalus x3
- Kalra-nji x1
- Hydra x1
- Ghost Warrior x1
Heroes
- Princess Millandriell x1
- Mercenaries x6
Cards
- Artifact x41:
- Ball of Flame x2
- Fire of Wrath x2
- Heal body x2
- Courage x2
- Tempest x1
- Sleep x1
- Rabbit Boots x1
- Armband of Healing x1
- Dust of Disappearance x1
- Anti-Poison Quill x1
- Treasure Without Doom x1
- Chill x1
- Rock Skin x1
- Genie x1
- Fire Ring x1
- Magical Throwing Dagger x2
- Pass Through Rock x1
- Lost Forever x4
- Ice Storm x1
- Skate x1
- Psychic Recovery x1
- Warmth x1
- Ice Bridge x1
- Chaos Spell x9
- Monster x33
- Treasure x70
- Air Spell x5
- Earth Spell x5
- Fire Spell x5
Words for Zargon
This adventure was made using two extra mercenaries. We allowed the mercenaries to search for treasure just like the Heroes.
The 31 highlighted Artifacts Cards from the checklist are a new deck that is used alongside the treasure cards. When Zargon tells the Heroes that they found an artifact, Zargon shuffles this deck face down and lets the Heroes choose a card. The Heroes keep these cards until the end of the Quest and if they did not use the card during the Quest they record it down on their status sheet, so that at the beginning of the next Quest, there are 31 Artifact Cards in the deck.
We allow for crossbow, throwing weapons and spells to be shot over the tops of most furniture. Zargon, be generous, if a Hero has a bad red dice roll and needs to shoot through a friend. That Hero can yell to his friend to duck down and allow him to make the shot. This rule of course also works for the monsters.
Sometimes the Fimir use "fighting magic" to attack the Heroes. This works as a normal attack, but when a Hero takes a hit. They lose Mind Points instead of Body Points.
A good question brought up was if the cursed coin causes the Heroes to lose the extra Mind Points gained from the Sky Orbs. I say no, because the lost is temporary. But the Mind Points lost from the dust trap or poison cards will cause the Heroes to lose Sky Orb points, unless a potion, like Renewal, is drank right away.
The Fire Place spell also works on the forge.
Heroes and monsters can never use more than 6 combat dice on one roll.
Heroes will sometimes find more than one of the same artifacts.
Monsters
The expansion packs made some pretty cool monsters. Most are explained on their Monster Card. All monsters can have the ability to cast a spell; these special circumstances are explained to the Heroes by Zargon when they meet up with one.
Shape Changer (Changeling)
This monster appears in any of the eight original monster forms. He fights as that monster until the Heroes reduce his Body Points to zero. The Heroes then draw a card from the eight and that is the new form the changeling takes. Only when the card that is drawn is the same as the form the changeling is presently in is he killed. Sometimes this can take a very long time. The changeling gets to make an attack if he can survive a round of the Heroes attack and right after he makes a change.
Death Mist
We made a few changes to this guy. It can move anywhere on the board, except where there is solid stone. It can move up to 6 squares per turn. It cannot move over the same space twice on a single turn. It cannot end its turn on a space occupied by a Hero, it must stop short one space then. When a mist passes over a Hero that Hero loses 1 Body Point. No defense. The mist can only be destroyed by the following spells: Tempest, Remove Air, Dispel, and Turn to Stone. The Spirit Blade no longer has any effect on it.
Bellthor
This Gargoyle breathes a poisonous gas. He does this after making each of his attacks, making for 2 attacks per turn. When a Bellthor breathes on a Hero, Zargons rolls 6 combat dice; each skull is a lost Mind Point for that Hero. There is no defense. If the Hero's Mind Points are reduced to zero, he becomes unconscious. That Hero has a chance to awaken by rolling a 6 on one red dice. He gets to roll once for each Mind Point he has on his stat sheet at full strength. The Bellthor no longer explodes when he is killed.
Giant Wolf
A Giant Wolf is not a Werewolf. These are two separate monsters. A hit from a Giant Wolf does not curse a Hero, unless Zargon says that certain Wolves will.
Werewolf
When a Hero does battle with a Werewolf, he becomes infected with the Werewolf's curse if he takes anybody hits from the Werewolf.
When a Hero is cursed, he must roll 2 red dice at the beginning of every turn to see if he turns. 2-9 he's all right. 10-12 he turns into a Werewolf and instead of moving, Zargon takes control of him and he turns and attacks his friends. If he gets a body hit on any of his friends that he attacks while being a Werewolf, then that Hero also becomes infected with the curse. The curse only lasts for one turn, he then returns to being Human. But the Hero remains under the curse until he can drink a Wolfsbane Potion or a Potion of Rejuvenation.
Elves and Mercenaries
These people can be Heroes or Enemies. When they are with the Heroes they use white shields to defend. When they are the enemies then they use black shields to defend.
Warbears
Warbears make 2 attacks per turn. We treat this the same as drinking a Heroic Brew. A Hero can defend against the first attack. But there is no defense against the second attack. This is called a quick stroke. It makes him a more deadly monster.
Yeti
If a Hero takes a hit from a Yeti, the yeti now has that Hero in a death hug. That Hero must remove the Body Points that he took from the initial attack, and his figure is removed from the board. That Hero cannot do anything. He will now lose 2 Body Points for every turn he spends inside the Yeti Hug, until he is dead. His friends must save him by attacking the Yeti. The Yeti can't make an attack on another Hero when he has one in a hug, but the Yeti still has 3 Defense dice when being attacked.
Frozen Horror
My Heroes can take my monsters out so easily it's really a challenge finding that right balance between Hero and monsters. Because of this we have now made it that the only thing that can hurt the Horror is the magical spear Scepter. This spear has 3 Attack dice.
Stone Mummy
The following spells can destroy a stone mummy; Landslide, Sandstone, and Pass Through Rock.
Ghost Warrior
This monster cannot be killed. He will not attack until he is first attacked. Sometimes the Heroes will be able to talk to him. He is always guarding something. He stays with that item, unless the Heroes take what it is that he is guarding, he will then keep attacking the Heroes until they return the item.
Vampires and Kalra-nji
They are treated as the undead, giving Spirit Blade 4 attack dice when attacking them.
Alura
She uses a new rule. She uses black and white shields when rolling defense. This makes her very hard to hurt.
Hydra and Kalra-nji
Both of these monsters make 2 attacks on their turn. The Heroes cannot defend against their 2nd attack. These two also use black and white shields when defending.
Special Tiles
Cloud of Chaos
To get through this room the Heroes must roll one red dice to see which door that is marked on Zargon's map they will go through. When they roll a 6 they will be trapped inside the room with the cloud. It's possible for more than one Hero to become trapped inside the cloud. When a Hero becomes trapped he must roll one combat dice. A skull means that everyone inside the cloud takes 1 Body Point of damage. We changed the rule about finding a door. If two or more Heroes roll the same number they can all enter the same room. Heroes can also travel as a group with one player rolling for all the Heroes.
Cliff Corridor
We've made this tile a lot more dangerous. When a Hero starts to move onto the cliff his dice rolls are divided by 3. Dropping any remainders. A roll of 7 or 8 means that the Hero can only move 2 spaces, and so on. If a Hero rolls a 2 on his red dice when he is on the ledge then that Hero just slipped, now he must roll 1 combat dice. If he rolls a black shield, then he has just fallen to his death, if this happen, you Zargon must provide a replacement Hero for your players. You can do this by having the Heroes find a Hero chained to the wall in the next room that they enter, they'll find the keys and this new Hero just happens to have all the same belongings that the lost Hero had. It will make your players happy.
Monster Chart
The printed chart's Map Symbol column shows a coloured icon for each monster and is not reproduced here.
| Monster | Movement Squares | Attack Dice | Defend Dice | Body Points | Mind Points |
|---|---|---|---|---|---|
| Hobgoblin | 12 | 2 | 2 | 2 | 1 |
| Mountain Orc | 7 | 3 | 3 | 3 | 3 |
| Iron Skeleton | 5 | 5 | 5 | 5 | 0 |
| Stone Mummy | 3 | 4 | 6 | 3 | 0 |
| Ghoul |
New Tiles and Quest Map Symbols
The printed section shows an illustration beside most entries; the illustrations are not reproduced here.
Iron Entrance Door
This iron door is placed on the edge of the gameboard. Heroes line up outside the iron door to begin the Quest.
Portcullis
Some of these massive iron gates open when the Hero spring a certain trap, while others are unlocked by the brass key or forced up by brute strength. Heroes and Monsters cannot "see" through a portcullis until it is opened.
Locked Door
These doors are locked and will often require a key to be opened.
Double Door
When opened, replace the closed big door with the open big door.
Coffins
The 4 coffins may be used as tombs. They may contain an undead creature and/or a treasure. They may also have traps on them.
Giant Stone Boulder
The giant stone boulder rolls down a corridor, doing great damage to anything in its path.
Key
This key comes in different colors on the Quest map. They unlock the doors with the same color.
Short Stairway
There are 3 movement squares on the short stairway. These tiles are used to create the effect of climbing up or down stairs.
Long Stairway
There are 5 movement squares on the long stairway. These tiles are used to create the effect of climbing up or down stairs.
The Weapons Forge
The forge is a place where Dwarven blacksmiths once created the finest and sturdiest weapons in the land.
Death Mist
This mist is a deadly breath of Chaos which will harm all who are not evil.
Cliff Corridor
The cliff corridor is a dangerous walkway. Each square takes 3 movement points to cross.
Cloud of Chaos
When surrounded by this mysterious, purple cloud, Heroes cannot "see" anything.
Magic Ice
These tiles are used with the Ice Bridge spell scroll and the Ice Wall Chaos spell.
Wolf Tokens
These represent Heroes in Wolf form.
Weapon Packs
These tiles represent weapons and other items dropped by the Heroes when they are transformed into Wolves.
Sky Orb and Sky Orb Tokens
This artifact is a mystical crystal orb that protects the Hero who is carrying it from Mind Point damage. It can absorb up to 4 Mind Points of damage before it becomes useless. When a Hero finds the Sky Orb, he takes it and the 4 Sky Orb tokens. Whenever the Hero suffers Mind Point damage, he gives up one Sky Orb token for each Mind Point of damage. (Give up the token with 4 points of light first, then the one with 3 points, etc.) When the Hero has no more tokens, the Sky Orb is useless.
Ice Gremlin Treasure Room
There may be treasure or there may be just a pile of junk in these rooms. Zargon will tell the Heroes what they have found when they search the room.
Icy River
Each square counts as 2 squares of movement. At the beginning of every turn that the Hero takes while in the river he must roll 1 combat dice. A white shield means that the Hero loses 1 Body Point to the icy cold, unless he is protected in some way. So a Hero can enter the stream without effect.
Mirror
This stand-up mirror is a secret portal that leads to a hidden room with great treasures. Fit this into the plastic door stand from the Game System when it is called for in a Quest.
Slippery Ice
The single space tiles are not placed on the board until a Hero steps on them. He then must roll 1 combat dice to see if he has slipped. A white shield rolled means he slips and this ends his turn. Because there are now large areas and whole rooms that are filled with slippery ice. A Hero only needs to roll the combat dice once at the beginning of his turn to see if he slips. I also allow the Heroes to be able to see these larger areas of ice and Zargon will lay them down when they come into the Heroes' view. This makes it easier for Zargon because monsters will be standing on these spots as well. A fallen Hero cannot take any actions or defend against attacks until his next turn. Monsters never slip. A slippery ice square cannot be found by searching, nor can it be disarmed. Once is it placed on the gameboard, it can be jumped over as a pit.
Four sizes:
- 1 square
- 1x2 square
- 4x4 squares
- 4x6 squares
Ice Ledge
This is a dangerous room. When the Hero enters he must roll 1 combat dice. Anything but a black shield means that the Hero is safe and doesn't slip. If a black shield is rolled, that Hero slips and suffers 1 Body Point of damage. He must also roll 1 combat dice again. Anything but a black shield and the Hero can continue. If another black shield is rolled then that Hero has just fallen to his death. You Zargon must provide a replacement Hero as soon as you can.
Throne Room
The large throne room is used by evil rulers such as the Witch Lord.
The Seat of Power Room
The Frozen Horror rules from this room, devising evil plans for the conquest of the Empire.
Bottomless Chasm
This room is very dangerous. Heroes must jump the chasm. The chasm is treated like a pit trap. Heroes must roll any shield to make the jump. A skull means that that Hero just fell to his death and Zargon needs to make a replacement Hero. Rabbit Boots, spells and potions are recommended when crossing this room.
Scepter Tile
We have made this scepter into a collapsible spear. This is now the only weapon that can hurt a Frozen Horror. This spear has the strength of 3 Attack dice.
Foggy Ice Vault
I took the Scepter room and removed the scepter from the tile. I put the scepter on a single tile. When the Heroes now enters this room, they must start rolling one combat dice at the beginning of every turn, a skull means they suffer 1 Body Point of damage to the cold. Heroes must roll for every turn that they spend inside this room, unless they are protected by a spell, potion, or artifact. Also this room is very foggy. When attacking a monster inside this room the Heroes must first roll 1 combat dice. If they roll a skull or black shield then they attacked a false image and wasted their turn. Only when they roll a white shield do they see the real monster and can then make their attack. Monsters can attack and defend as normal.
Furniture Pieces
The printed page shows these pieces as pictures only, with no text: Candle Stand, Sacrificial Altar, Book Stand, World Globe, Telescope, Compass.