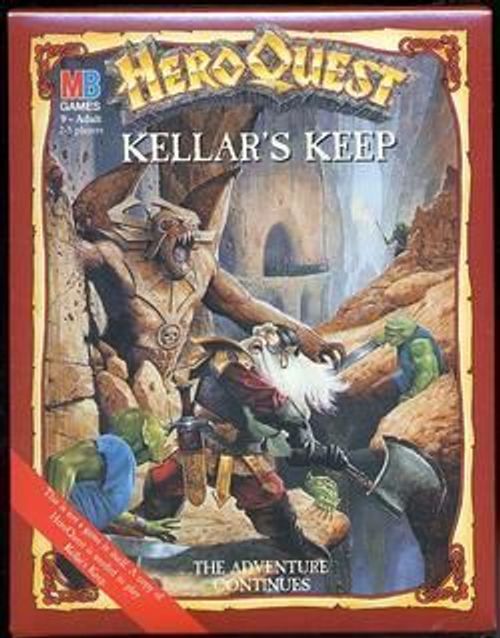
HeroQuest: Kellar's Keep
HeroQuest: Kellar's Keep Rulebook
Table of Contents
Table of Contents
Kellar's Keep Components
Kellar's Keep is an expansion set used with your original Hero Quest Game System. You must have the Game System in order to play the adventures in this booklet.
Contents: 8 Orcs, 6 Goblins, 3 Fimir, cardboard tile sheet.
The cardboard sheet includes:
- 1 Two-sided Iron Door
- 1 Two-sided Wooden Door
- 4 Short Stairway Tiles
- 2 Long Stairway Tiles
- 1 Cliff Corridor Tile
- 1 Giant Stone Boulder Tile
- 2 Trap Door Tiles
- 2 Pit Trap Tiles
- 12 Blocked Square Tiles
- 1 Weapons Forge Tile
- 1 Cloud of Chaos Tile
- 1 Four-part Stone Map Tile
All components should be carefully removed from the cardboard sheet. New game components are described below.
Doors
Iron Entrance Door: This iron door is placed on the edge of the gameboard in each Quest. Heroes line up outside the door to begin each Quest.
Wooden Exit Door: In most Quests, this special wooden door is used to exit the gameboard at the end of a Quest.
Door Assembly: Take 2 plastic door stands from the Game System. The 2 new doors in this Quest Pack should be folded and fitted into the door bases as shown in the printed illustration (not reproduced here). These doors are described above.
Other New Components
Cloud of Chaos: When surrounded by this mysterious, purple cloud, Heroes cannot "see" anything.
Giant Stone Boulder: The giant stone boulder rolls down a corridor, doing great damage to anything in its path.
The Weapons Forge: The forge is a place where Dwarven blacksmiths once created the finest and sturdiest weapons in the land.
Four-part Stone Map: These pieces fit together to form a stone map. Finding the map pieces is a major objective in this Quest Pack.
Trap Doors: The 2 trap doors are used to link 2 visually unconnected rooms via an unseen "tunnel." When landing on 1 trap door, a Hero moves instantly to the other trap door.
Cliff Corridor: The cliff corridor is used as Grin's Crag, a dangerous walkway near the entrance into Kellar's Keep. Each square on this tile counts as one space.
Short Stairway: There are 3 movement squares on the short stairway. These tiles are used to create the effect of climbing up or down stairs.
Long Stairway: There are 5 movement squares on the long stairway. These tiles are used to create the effect of climbing up or down stairs.
Note: The small illustrations shown with each component above are Quest map symbol references. These symbols are also the exact size needed for the blank "create your own" Quest map provided in the Game System Quest Book. All you have to do is photocopy the symbols and cut them out [the remainder of this note is cut off at the scan edge].
When creating your own Quest adventures, you may use these components in any way that you can imagine. For example, the stairs could be used to link several levels of a multi-map Quest.
Playing Kellar's Keep
The Quests in Kellar's Keep are generally played the same way as the Quests in the Game System. It is especially important that these Quests be played in order. As in the Game System, Heroes are returned to full strength (all Body and Mind Points are restored) between Quests.
There are a few game play differences in Kellar's Keep:
1. Starting a Quest
The Heroes do not start their adventures on the spiral stairway tile used in the Game System. Instead, they enter through an iron door on the edge of the gameboard. This door is shown on the Quest map with an arrow pointing inward toward the gameboard. This door is always placed on the gameboard in its specified location before each Quest begins. At the start of an adventure, the Heroes line up outside the door and ask Zargon to open it.
2. Ending a Quest
Players may leave the gameboard only by locating the wooden exit door on the edge of the board, or by finding the spiral stairway that exists in one of the Quests. This exit door is shown on the Quest map with an arrow pointing outward from the gameboard.
Note: As with regular doors, an exit door will not be put on the gameboard by Zargon until a Hero looks down the appropriate corridor. An exit door is usually opened in the same way as a regular door, unless specified otherwise in the Quest notes.
3. Treasures
To eliminate conflicts among the Heroes, large gold coin treasures found in treasure chests should be divided among all surviving Heroes.
4. New Artifact Cards
These new cards are found on the inside back cover of this Quest Book. Cut out the cards from the cover or, if you prefer, photocopy the inside cover, and then cut them out.
- Fire Ring and the Magical Throwing Dagger: These artifacts are similar to the artifacts in the Game System. When a Hero finds one of these artifacts, he should record it on his Character Sheet. Unlike most artifacts in the Game System, however, these artifacts must be crossed off a Hero's Character Sheet after they are used.
- Spell Scrolls: The 8 remaining artifact cards are called spell scrolls. They are used just like the spell cards in the Game System. However, a spell scroll can be used by ANY Hero (not just the Wizard and Elf) who finds one.
When a Hero finds a spell scroll, Zargon should turn all of the spell scroll cards facedown, mix them up and let the Hero draw one at random. The Hero should then record the spell scroll on his Character Sheet and return the scroll facedown to the scroll deck. After a spell scroll has been used, it must be crossed off the Hero's Character Sheet.
Note: On his turn, any Hero who has artifacts may give them to other Heroes.
Alchemist's Shop
These potions may be purchased only between Quests.
Potion of Restoration
Cost: 500 Gold Coins
Drink this brown, frothy liquid to restore 1 lost Body Point and 1 lost Mind Point. It's refreshing after a tough battle!
Venom Antidote
Cost: 300 Gold Coins
This bubbling brew tastes foul, but heals up to 2 Body Points of damage caused by poison needles or poison darts only.
Potion of Dexterity
Cost: 100 Gold Coins
This sparkling liquid adds 5 movement squares to your next die roll or guarantees 1 successful pit jump. If you purchase more than one of these potions, you may use only 1 potion per turn.
Potion of Battle
Cost: 200 Gold Coins
If you have a really "weak" roll of the attack dice, you may drink this blood-red potion. It allows you 1 re-roll of your attack dice.
Quest Notes
Each Quest begins with a message on parchment from Mentor. This message should be read aloud to all players. However, the Quest notes that follow are for Zargon's eyes only!
In each Quest, notes prefaced with a capital letter correspond to a matching letter location on the Quest map.
Quest 1: The Great Gate
"I shall guide you as far as the Great Gate. Beyond, fearsome foes await you. I shall watch over your progress and aid you when I can. Your first task is to find the wooden exit door that leads into the Warrior Halls."
Notes:
- A: The treasure chest is empty.
- B: These 3 secret doors are magically controlled and cannot be found by normal searching. You (as Zargon) may place one or more of these door(s) on the gameboard at the beginning of any of your turns. When you do so, you must immediately declare the door(s) open. Then place any monsters on either side of the doors onto the gameboard. You may move those monsters during your turn.
- C: The Gargoyle appears to be a stone statue that does not move. The chest contains 200 gold coins, but it has a trap on it. If a Hero searches for treasure before the trap has been disarmed, the Gargoyle will spring to life and immediately attack. If a Hero disarms the trap first, he will discover (be told by you) what would have happened if he had searched for treasure before disarming the trap. The Gargoyle cannot be harmed until it has either moved or attacked a Hero.
Wandering Monster in this Quest: Orc
Quest 2: The Warrior Halls
"Another great iron door lies before you. Beyond, you will find the Warrior Halls, ancient passageways where all of the great Dwarven warriors were honored. Testimony to their great deeds is carved into the wall so that none may forget their valor. Tread carefully, for these halls were also designed to test the bravest and most cunning of the Dwarves. Beware of traps and deadly opponents as you search for the wooden exit door that leads to safety."
Notes:
- A: Zargon, you may tell the Heroes that these 4 Chaos Warriors are actually enchanted suits of armor. They were used centuries ago to test the fighting skills of Dwarven Warriors. They have the same stats as real Chaos Warriors.
- B: This is the secret armory of the Dwarves. The first Hero to search for treasure in this room will find 2 Magical Throwing Daggers. (See the new artifact card.) The daggers may be divided between 2 Heroes.
Wandering Monster in this Quest: [line cut off at the bottom edge of the scan; the monster type is not legible]
Quest 3: The Spiral Passage
"Another giant iron door stands before you. Beyond, a series of staircases will eventually lead to the Great Citadel. It seems that those who journey through these passages are forever going down and around into the very heart of the mountain. Your goal is to find the spiral stairway. It will bring you deeper into the heart of the mountain—and closer to the Great Citadel. Beware! The Orcs may have laid traps to guard against attack."
Notes:
- A: When the last Hero passes the square marked "A," a giant stone boulder will fall from the ceiling. Place the round boulder tile on the square marked "A." On your (Zargon's) next turn and subsequent turns, roll 2 red dice to see how far down the corridor the boulder rolls (to the right, toward the Heroes.) The boulder will eventually crash into the wall at the end of the passage, on the corner square marked with a starburst. The passage will then be blocked for the rest of the Quest. Tell each Hero hit by the boulder to roll 5 combat dice. For each skull rolled, a Hero loses 1 Body Point. (No defend dice are rolled.) The boulder trap cannot be searched for or disarmed.
- B: All of the traps in the corridors marked "B" are so well hidden that any Hero who searches for traps will find only 1 trap—the one closest to him. After a discovered trap has been sprung or disarmed, the next trap can be found if searched for. (The Heroes will have to discover this on their own.)
- C: Place the wooden exit door here to fool the Heroes into thinking that this is an exit.
- D: Use the spiral stairway tile from the Game System in this Quest. When a Hero steps onto this stairway, tell him that he has made it through the Spiral Passage.
Wandering Monster in this Quest: Orc
Quest 4: The Dwarven Forge
"Although the Orcs now dwell in these halls, they have yet to find the magical Dwarven Forge. The weapons forged by the Dwarves at the dawn of time are legendary. You must find the Forge, for it is written that part of Grin's stone map lies somewhere nearby. Once you find part of the map, you must find the wooden exit door to continue on your journey."
Notes:
- A: When this Orc is killed, he screams out and the door he was guarding opens. The monsters in the room must then be placed on the gameboard.
- B: The Fimir in this room knows the Chaos spell "Rust." (See Chaos spell card in Game System.) It can cast this spell on 3 separate turns. The first Hero to search for treasure in this room will find a beautiful fire opal hidden under the table. The opal is worth 100 gold coins.
- C: The first Hero to search for treasure in this room will find a Fire Ring in the chest. This powerful ring is explained on the new artifact card.
- D: This is the Dwarven Forge. The heat from the forge is intense, for the embers burn with a magic fire brought from the depths of the earth. Burning embers blast out of the forge, threatening any Hero in the room except the Dwarf. Any Hero (except the Dwarf) who ends his move in this room must immediately roll 1 combat die. If a skull is rolled, the Hero loses 1 Body Point.
- E: This chest is trapped with a poison dart. If a Hero searches for treasure before the trap has been disarmed, he will lose 2 Body Points. One part of Grin's stone map is inside the chest. The Hero who finds it should take one of the stone map tokens.
- F: The first Hero to search for treasure in this special room will discover 300 gold coins in the chest.
Wandering Monster in this Quest: Fimir
Quest 5: Hall of the Dwarven Kings
"The Dwarves had many great kings. King Belorn built the Great Citadel and was honored with a magnificent burial hall. His descendants have all proven themselves and each is buried alongside his forefathers. Let no man say that the Dwarves are without courage for their valor has no equal. You must find another part of Grin's stone map and then escape through the wooden exit door to continue your journey."
Notes:
-
A: When the first Hero passes the square marked "A," read the following sentence aloud:
"The distant sound of warriors echoes down the passage. There can be no doubt that a war party has been sent after you. Hurry, for time is short!"
Zargon, beginning on your turn (and on each of your future turns), roll 1 red die to see how many monsters enter the corridor through the iron door. You may choose any monsters except the following: the Chaos Warlock, the Gargoyle, 1 of the Zombies, 4 of the Skeletons and 3 of the Goblins. After moving the new monsters into the corridor (refer to Monster Chart in Game System for movement), you may then move any other monsters present on the gameboard, as usual.
-
B: When one of the doors (with a skeleton behind it) is opened, all of the other doors in this room will open at the same time. All of the monsters behind the doors are then placed on the gameboard. The Zombie will move and attack as usual on your (Zargon's) next turn. However, the Skeletons will not move or attack until one of the Skeletons has been attacked. Then on Zargon's next turn, they will all attack. These Skeletons are those of ancient Dwarven Kings and are more powerful than "regular" Skeletons. If they are attacked, they will fight and move as follows:
Movement Attack Defend Body Mind 6 3 4 2 0
Wandering Monster in this Quest: Fimir
Quest 6: The Great Citadel
"The Great Citadel lies at the center of the Halls of Belorn. This is where most of the Orcs now dwell. You will find them here in great numbers, as they amass for their attack on the Empire. They are led by Gragor, an evil magician. The third part of Grin's stone map lies hidden within the Great Citadel. You must find the map piece and then escape through the wooden exit door to continue your Quests."
Notes:
- A: This door has been locked for many years. To open the door, a Hero must stand next to it and roll 2 red dice. If he rolls LESS than his starting number of Body Points, the door will open. If he fails to open the door, his turn ends.
- B: The first Hero to search for treasure in this room will find 2 Potions of Healing in the chest. Each potion will restore up to 4 lost Body Points.
- C: The first Hero to search for treasure in this room will find the third part of Grin's stone map, as well as a spell scroll and a Magical Throwing Dagger! The Hero who finds these items should do the following:
- Take another one of the remaining map tokens.
- Draw a spell scroll at random from the scroll cards and list it on his Character Sheet.
- List the dagger on his Character Sheet. (See the new artifact card.)
- D: The tomb in this room contains the skeletal remains of a great Hero. The first person to search for treasure in this room will discover a sturdy crossbow among the bones. The crossbow is described in the Game System Armory.
- E: Use the Chaos Warlock figure to represent Gragor. Place him on the square marked with his name. His stats are the same as a Chaos Warrior, but he also knows the following spells: Summon Orcs, Fear, Rust, Ball of Flame and Lightning Bolt. (Refer to the Chaos Spell Cards in the Game System.) The first Hero to search for treasure in this room will find 2 spell scrolls on Gragor's table. This Hero should draw 2 spell scrolls at random from the scroll cards and list them on his Character Sheet.
Wandering Monster in this Quest: Fimir
Quest 7: The Eastern Passage
"The East Gate marks the end of the Halls of Belorn. To get to the Gate, you must make your way through several Quests. Your first goal is to negotiate the Eastern Passage. This passage is guarded by many foes, so take care! Along the way, you must locate the last part of Grin's map and then escape through the wooden exit door."
Notes:
- A: The leader of these Orcs is Ograk, the infamous Orc Captain who led his evil marauders into the border provinces of the Empire. Use the Orc with the large notched sword to represent Ograk. Place Ograk on the square marked with his name. He is a mighty warrior whose stats are the same as a Chaos Warrior. On any one of your (Zargon's) turns, you may place the secret door tile on the gameboard and move Ograk through the secret door.
- B: When a Hero tries to open this door, tell him that the door just won't budge.
- C: The first Hero to search for treasure in this room will find an Elixir of Life in the table drawer. The Elixir is described on its matching artifact card in the Game System.
- D: The Gargoyle in this room is a stone statue that cannot harm anyone and cannot be harmed. Of course, don't reveal this information right away. Sit back and watch the Heroes try to figure it out.
- E: The first Hero to search for treasure in this room will find the last part of Grin's stone map in the chest. This Hero should take the remaining map token.
- F: This wooden exit door leads to Belorn's mine. Tell the Heroes that there are Dwarven danger symbols on the door.
Wandering Monster in this Quest: [line cut off at the bottom edge of the scan; the monster type is not legible]
Quest 8: Belorn's Mine
"Zargon has blocked the main passage to the East Gate. It is written in Loretome that another passage leads through Belorn's mine to the Gate. This mine was once the richest of all. The tunnels have long since been abandoned and are likely to collapse. Monsters often wander through the mine, searching for the gold that was hidden there. You must find the wooden exit door leading out of the mine."
Notes:
- A: The Gargoyle in this room is alive and ready for battle. The 3 chests in this room have poisonous gas traps on them. If a Hero searches for treasure before all 3 traps have been disarmed (one at a time), all of the Heroes in the room will lose 2 Body Points. Each chest contains 200 gold coins.
- B: This group of monsters is looking for the gold.
- C: Both of the trap doors are linked by a tunnel. Any Hero or monster landing on one of these squares immediately moves to the other trap door square. The connecting tunnel is dangerous and any Hero moving through it must roll 1 combat die. If he rolls a skull, he loses 1 Body Point. After moving from one trap door square to the other, the Hero's or monster's turn is over.
- D: Dwarven symbols on this door indicate that it leads to the East Gate!
Wandering Monsters in this Quest: Chaos Warrior
Quest 9: The East Gate
"You have done well and journeyed far to reach this point! Now you must find the East Gate if you are to reach Grin's Crag and the Emperor. The Gate will undoubtedly be guarded, for you are now closer to Kellar's Keep than you have ever been. Beyond the East Gate, you will need the stone map, so protect the 4 pieces with your lives!"
Notes:
- A: This monster is a shape changer and is currently in the shape of a Fimir. Every time it is killed, shuffle all the monster cards and take the top card. This is the new shape the monster takes. Place the new monster in the space where the old one was killed. The monster can be permanently killed only if the new card drawn matches the monster's most recent form. Of course, don't reveal this information to the Heroes until after it happens.
- B: Place Borokk, an evil Chaos Warlock, on the square marked with his name. Borokk has the same stats as a Chaos Warrior, but he also has a very special and deadly magical power. On each of his turns, he attacks the "mind" of any Hero in the same room or corridor and in his line of sight. To do this, Borokk rolls 2 combat dice. For each skull he rolls, the victim of the attack loses 1 Mind Point. If a Hero reaches zero Mind Points, he is dead forever, unless he has an Elixir of Life. (See matching artifact card in the Game System.)
- C: This treasure chest is empty.
- D: The East Gate was locked many years ago by special Dwarven magic. It is not easily opened. When either the Barbarian, Elf or Wizard attempts to pass through the Gate, tell him to roll 2 red dice. That Hero may pass through the gate only if the total number rolled is equal to or less than his current number of Mind Points. If the Hero fails to open the gate, his turn ends. The Dwarf needs to roll only 1 die as he has some knowledge of the magic used to lock the door.
Wandering Monster in this Quest: Fimir
Quest 10: Grin's Crag
"Now you must find your way to Grin's Crag. Remember your task. Do not stray from it, for your enemies are too numerous. When you have passed Grin's Crag you will reach a giant wooden door leading to Kellar's Keep. Once opened, you will be able to lead the Emperor and his army back to safety. Beware! Grin's Crag is guarded. You must tread carefully!"
Notes:
- A: This room is filled with the blinding Cloud of Chaos. Any Hero who enters this room cannot see the other doors in the room, so do not place them on the gameboard at this time. (Monsters may not enter this room.) If a Hero enters the room, he must stop and roll 1 red die:
- If a Hero rolls a "1" or "2" on the die, he ends up back in the corridor on the square marked 1/2.
- If a Hero rolls a "3," "4" or "5," place one door in the position shown next to the square with the corresponding number rolled. Then, move the Hero through the door to the corresponding number. If the square is occupied, the Hero moves back into the room and treats his roll as a "6." See directions that follow.
- If a Hero rolls a "6," the Cloud of Chaos attacks and the Hero must roll 1 combat die. If a skull is rolled, he and any other Hero in the room lose 1 Body Point.
- B: This chest contains 250 gold coins. It also has a trap with an exploding lock. If a Hero searches for treasure before the trap has been disarmed, he will lose 3 Body Points.
- C: This cliff corridor is Grin's Crag. The first player who moves onto the square marked "C" will activate the Guardian of Grin's Crag. Place the Gargoyle on the square marked "X." On your (Zargon's) next turn, the Gargoyle moves, attacks and defends as a normal Gargoyle would, but it is also immune to all spells and has 4 Body Points.
- D: This wooden exit door is magically locked and will not open until the Gargoyle is dead. After the last Hero passes through the door, read aloud the conclusion on the following page.
Wandering Monster in this Quest: Fimir
Conclusion
The door opened into the darkness of Kellar's Keep. From far above came the thunder of battle. The forces of Zargon were making their final assault. This time there could be no holding them. The Emperor assembled his elite force of Guardian Knights, determined to organize one last line of defense. Then came the news—a group of Heroes had found a secret passage into Kellar's Keep. Escape was now possible!
Without hesitation, the Emperor ordered his army to fall back towards the secret passage. Kenaron, the Captain of the Emperor's Guardian Knights, stood bravely at the gate, giving his fellow soldiers and the wounded time to escape.
Zargon and his foul forces could not be permitted to follow. Time and time again the evil Doomguard surged forward, only to be felled by Kenaron's sword.
Zargon watched for a while and smiled wryly at Kenaron's courage and skill-at-arms. A moment later Zargon's patience was spent. Kenaron fell before a searing storm of flame that burst against the gate.
But it was too late. Zargon's warriors howled in anger, for the escape passage had been destroyed. The Emperor and his army were safe.
"You have done well, brave Heroes. The Emperor has asked me to express his gratitude. Each of you will receive 500 gold coins for your efforts. But do not let victory deceive you. A dark cloud still hangs over the Empire as the forces of Chaos grow stronger. I shall look for ways to delay Zargon's advance. For now, rest well my friends. Once I have consulted Loretome, I shall summon you."
— Mentor