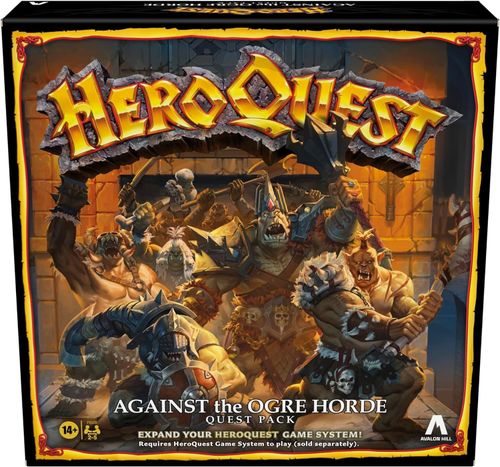
HeroQuest: Against the Ogre Horde (2024)
HeroQuest: Against the Ogre Horde (2024) Rulebook
Table of Contents
Table of Contents
- Contents
- A Message from Mentor
- Playing the Quests
- Dungeon Features
- Quest Map Guide
- Ranged Enemies
- Bone Weapons
- Ogre Mercenaries
- Animal Allies
- Mind Points
- Dread Sorcerer Spells
- World's End Tournament
- Tournament Quests
- Challenger and Defender
- Playing a Tournament Battle
- Solo Combatants
- Treasure in the Tournament
- Death in the Tournament
- Incomplete Tournament Quests
- Trophy Tiles
- Playing the Tournament Outside of Quests
- World's End Team Roster
- Monster vs Monster Variant
- Optional Rule: Player Safeguards
- The Quests
- Conclusion
- Ogres in Against the Ogre Horde
- Design Your Own Quest Adventures
Contents
The adventure continues! The Against the Ogre Horde quest pack plunges our heroes into the mysterious underground society of ogres on the fringes of the realm and into conflict with a threat more dangerous than any they've yet encountered: the Dirgrusht ogre horde. As with other expansions, this quest pack must be played with the HeroQuest Game System. The components included in this quest pack are described here and in the following pages. To learn more about the ogre adversaries, see the monster cards and page 41 of this quest book.
Components listed on the printed Contents page:
- 28 miniatures: Ogre Warriors, Ogre Champion, Ogre Commander, Ogre Lord, Orc Archers, Goblin Archers, Skeleton Archers, Druid Hero, Wolf
- 29 game cards
- Cardboard tile sheets (see pages 4 and 5 of this quest book)
- Stone Doorways (x4)
- Double-doors
- Throne
- World's End Tournament (see page 12 of this quest book)
Note: the per-figure quantity labels on the printed Contents page are small artwork captions and are not fully legible in the text layer, so they are not given here (Stone Doorway x4 and Double-door x2 are printed beside those components).
A Message from Mentor
A hearty welcome to you, heroes! I have come before you all to call once more upon your bravery and heroism, for you see there is yet again unrest within the bounds of the realm. The runes twist and take shape on the pages of Loretome, warning of strange happenings in the land of the ogres; happenings at the center of which I fear a familiar Dreadful presence lies.
Zargon's latest plot targets the Dirgrusht horde, a powerful and secretive community of ogres far to the north. He seeks to corrupt the lord of the Dirgrusht clan and use their fighting prowess towards his own designs. Though little is known of these private people, it should come as no surprise that ogres are mightily powerful; if Zargon wrests control of them, they will be a formidable weapon to further expand his dominion of Dread. Alas, I cannot divine the location of the Dirgrusht fortress, but Loretome reveals the identity of a potential ally who may have information for you to access the fort. This person will not be easy to meet – they are the reigning Master of Battle at the notorious World's End Tournament, where only the bravest of warriors compete for glory at risk of their lives. If you manage to catch their attention, they may hear you out. Heroes, the way forward is clear: prove your merit in the World's End Tournament, infiltrate the Dirgrusht ogres' hold, and sever Zargon's newfound alliances! If you fail, I fear the consequences shall be most dire.
At the beginning of each quest, there is a message on parchment from Mentor. This message should be read aloud to all players. However, the quest notes that follow are for Zargon's eyes only!
Playing the Quests
The quests in Against the Ogre Horde are generally played the same way as the quests in the HeroQuest Game System. It is especially important that these quests be played in order. As in the Game System, heroes restore all Body and Mind Points between quests unless explicitly stated otherwise. There are a few gameplay differences in Against the Ogre Horde outlined ahead.
Play it Your Way
For new heroes and heroes looking to take on a test of strength in the World's End Tournament, begin with Quest 1: The Tournament Gauntlet. For heroes looking to take on the original quest experience of Against the Ogre Horde, feel free to skip ahead to Quest 4: Infiltrating the Fortress of Ogres.
Starting and Ending a Quest
The heroes do not always start and end their quests on the spiral stairway. When there is an entry door or exit door, it is shown on the quest map. An entry door is shown on the border of a quest map with an arrow pointing at it. If an entry door is used, it is always placed on the gameboard in its specified location before each quest begins. At the start of an adventure, the heroes line up outside the door and ask Zargon to open it. The exit is shown on the quest map with an arrow pointing outward from the gameboard.
Note: As with regular doors, an exit door is not placed on the board by Zargon until a hero looks down the appropriate corridor. An exit door is usually opened in the same way as a regular door, unless specified otherwise in the quest notes.
Unthreatened Movement
If there are no monsters active on the board, heroes may move unimpeded. Instead of rolling for movement, they may treat each red die they would have rolled as a 4. For example, if a hero's movement roll is two dice, they may choose to move 8 squares instead of rolling. If a hero's movement roll is reduced to one die, they may choose to move 4 squares instead of rolling.
Large Monsters
When a monster takes up 2 squares, that monster can attack any creature on the surrounding 10 squares.
Multi-Phase Enemies
Some powerful foes adopt new statistics as the heroes battle them. A monster who changes statistics is still considered the same monster for game effects such as spells. A multi-phase enemy who receives healing will not revert to a previous phase.
For example, the Spawn of the Pit from Quest 1 undergoes two phases during combat.
Spawn of the Pit
| ATTACK | DEFEND | MOVE | BODY | MIND |
|---|---|---|---|---|
| 4 dice | 3 dice | 6 | 4 | 3 |
When Spawn of the Pit reaches 0 Body points, do not remove the miniature from the board. The Spawn instead takes on a new phase, strengthened by its rage. Adopt the below statistics of Spawn of the Pit - Enraged and continue the battle.
Spawn of the Pit - Enraged
| ATTACK | DEFEND | MOVE | BODY | MIND |
|---|---|---|---|---|
| 5 dice | 1 dice | 10 | 6 | 1 |
Dungeon Features
Tiles and Reading the Map
All cardboard components should be carefully removed from the cardboard tile sheet. Note that the tiles are double-sided; the front and back of many tiles are different.
Next to most components is a symbol that represents that component on the quest maps. These symbols show Zargon where to place components on the gameboard.
Stone Doorway
This symbol represents a stone doorway. Stone doorways are large slabs of rock that must be pushed out of the way using brute force before a hero can pass. To open one of these doors, a hero rolls their base Attack dice. If the roll result includes two skulls, the heavy stone door swings open. Once a stone doorway has been opened, it remains open for the remainder of the quest.
Note: The wizard rolls 1 Attack die, and therefore cannot open a stone doorway.
Swinging Blade Trap
This symbol represents a swinging blade trap, which triggers if a hero moves onto a square with the gold overlay that denotes traps. A huge blade swings down from the ceiling, slicing any heroes on one of the squares marked with a white or red blade symbol. Zargon rolls 2 Attack dice, and any affected heroes roll Defend dice as normal.
A swinging blade trap can only be detected by searching for traps in the room or corridor containing the square with the gold overlay and adjacent white blade symbols.
The dwarf may automatically disarm a swinging blade trap once it has been discovered. Any other hero with a tool kit may attempt to disarm a swinging blade trap. To do so they must roll one combat die. If they roll a shield, they successfully disarm the trap. If they roll a skull, the trap is immediately triggered.
For example, the elf moves 5 squares and lands on a white blade square. Because they landed on the white blade square, they do not trigger the trap. On the barbarian's turn, they move 4 squares and land on the red blade square with gold overlay. The blade swings down, hitting both the elf and the barbarian with 2 Attack dice.
Pit of Darkness
This tile represents a pit of darkness trap. This trap works in the same way as a normal pit trap with the following exceptions:
- If a pit of darkness is discovered by a hero's search action, place the tile on the board. Pits of darkness cannot be disarmed, but heroes can jump over them like ordinary pit traps.
- Pits of darkness are much deeper than a typical pit trap, causing dire consequences for heroes that rely on heavy armor. If a hero crossing a pit of darkness rolls a skull, they plunge 30 feet onto the hard stone floor. They immediately suffer fall damage based on how much armor they are wearing. Heroes wearing no armor or only non-metal armor take 1 Body Point of damage. Heroes wearing metal armor take 2 Body Points of damage, unless they're wearing plate mail, in which case they take 3 Body Points of damage.
A hero may climb out of a pit of darkness on their next turn if there is a free square on any one side of the pit.
Supply Crate
This symbol represents a gift from Gruzbella, smuggled into the fortress to aid heroes on their quest. The first hero to search for treasure in a room containing one of these chests will find 4 Potions of Healing. Each Potion of Healing restores one red die roll of Body Points, not exceeding the hero's total number of Body Points.
Quest Map Guide
The quest map symbols are color-coded to help you guide the heroes through the quests. See below to learn what the various colors mean.
- This color is used to highlight hidden traps and mysteries that the heroes can detect by searching.
- This color is used to highlight hidden traps that the heroes cannot detect by searching.
- This color is used to highlight monster symbols.
- This color is used to highlight supply crates. See Supply Crate on page 5 of the printed book (above).
Note: the color swatches themselves are artwork on the printed page and are not reproduced here.
In each quest, notes prefaced with a capital letter correspond to a matching letter location on the quest map. Capitalized monsters in the quest notes reference monsters with corresponding cards found in this quest pack or the HeroQuest Game System (examples: Gargoyle, Ogre Commander).
Ranged Enemies
When Zargon has the option to place a monster on the board, they may place a standard monster or a ranged version of that same monster type (in this quest pack, that means skeletons, orcs, and goblins). A ranged monster rolls Attack dice equal to their standard attack score against any non-adjacent target in their line of sight. If their target is adjacent, they roll 1 Attack die.
Example: This ranged skeleton rolls 1 Attack die against the barbarian, but 2 Attack dice against the dwarf.
Bone Weapons
Weapons made of bone are identical to weapons of the same name found in the armory, but bone weapons have no gold coin value and cannot be bought or sold.
Ogre Mercenaries
In this quest pack, the ogre mercenaries are friends and sparring partners of Gruzbella Hammerhand, the reigning Master of Battle at the World's End Tournament.
There is one ogre mercenary available for work at any time between quests. Before a quest begins, a hero may hire the mercenary by spending the gold coin cost listed on the card. The mercenary will move and act on the designated hero's turn until the quest ends or the mercenary is defeated or dismissed. Heroes may retain that mercenary's aid in following quests by paying half the mercenary's cost per quest. If a mercenary is defeated, they may be hired again for a future quest – but their cost resets to the full listed amount.
The ogre mercenary cannot use or carry equipment, artifacts, treasure, or other items unless it is explicitly stated that the items are intended for them. They can move, open doors, attack, and defend.
Animal Allies
Animal allies are faithful companions who can be recruited at no cost to accompany a hero on a quest, so long as there are fewer than four hero players. The animal ally must be recruited before the quest begins.
An animal ally is controlled by the player that recruited them. A hero can control only one animal ally at a time. The animal ally takes their turn immediately following the turn of their allied hero. They can move, attack, and defend, but cannot perform other actions, use potions, or open doors.
The animal ally cannot use or carry equipment, artifacts, treasure, or other items unless it is explicitly stated that the items are intended for them.
Any hero can use an action to administer one of their potions to an animal ally in an adjacent square, so long as neither is adjacent to a monster.
If a hero with an animal ally dies during a quest the ally continues the quest, controlled by the fallen hero's player, until all heroes are defeated.
Mind Points
In this and in other quest packs, it is important to keep track of heroes' Mind Points. Mind Points are a measure of a creature's wisdom and magical aptitude. Heroes may use the bottom row of the Body Point boxes on their character sheets to record Mind Point damage.
When a creature reaches 0 Mind Points, they go into shock. While at 0 Mind Points, they can only roll one red movement die, 1 Attack die, and 2 Defend dice. (Armor, weapons, and artifacts do not increase the Attack or Defend dice while a hero is at 0 Mind Points.) The creature's Attack and Defend dice can be temporarily increased by some spells and spell scrolls. Additional Mind Points gained from certain artifacts may be lost. If the creature later restores Mind Points, they are no longer in shock and can roll dice as normal. A creature cannot go below 0 Mind Points.
Spells that affect a target's Mind Points (e.g. Sleep) have no effect on monsters with no Mind Points (e.g. skeletons).
Dread Sorcerer Spells
This quest pack features Dread spells that affect the Mind Points of their targets. These spells have corresponding cards that monsters will use when allocated in the quest notes.
A Dread Sorcerer may only cast one spell per turn. A spell can be cast on any target in the Dread Sorcerer's line of sight. If a Dread Sorcerer casts a spell on their turn, they may take their movement but may not make a weapon attack in the same turn.
If a Dread Sorcerer has an active spell and is killed, the effects of that spell immediately end.
Mind Lock
This spell may be cast on any one target and allows a Dread Sorcerer to freeze a hero's mind. When Mind Lock is cast, both attacker and defender roll combat dice equal to their Mind Points. For each skull scored by the attacker, the defender is frozen for one turn. If no skulls are scored against the defender, the spell has no effect.
A frozen hero rolls 1 Defend die and may not move, attack, or perform any other action. That hero takes a Mind Lock card for each turn they are affected, returning one card to Zargon at the end of each of their turns spent frozen. When they return a card, they may attempt to break the spell's hold by rolling a number of combat dice equal to their Mind Points. On a roll result of three or more skulls, they return all remaining Mind Lock cards and the spell ends.
Dominate
This spell may be cast on any one target and allows a Dread Sorcerer to take control of a hero. When Dominate is cast, both attacker and defender roll combat dice equal to their Mind Points.
If the attacker scores at least two skulls, the hero is Dominated. If the attack is unsuccessful, nothing happens. Zargon hands the affected hero a Dominate card and may immediately take that hero's full movement and action. Zargon may move, fight, cast spells, and perform any other action as the Dominated hero (including attacking other heroes). At the end of the Dread Sorcerer's turn, the spell ends.
Mind Burst
This spell may be cast on any one target and allows a Dread Sorcerer to inflict Mind Point damage on a hero from afar. A Dread Sorcerer with this spell uses the reserve of Mind Burst cards specified in the quest notes. Each time they cast Mind Burst, they discard one of their spell cards.
When Mind Burst is cast, both attacker and defender roll combat dice equal to their Mind Points. The combatant with the most rolled skulls (be it attacker or defender) then inflicts Mind Point damage on their opponent. The damage dealt is equal to the difference in skulls rolled by each combatant. If they have an equal amount of skulls, neither takes damage.
For example, say a Dread Sorcerer casts Mind Burst on the wizard. The Dread Sorcerer has 5 Mind Points and rolls five combat dice. The wizard has 6 Mind Points and rolls six combat dice. Because the wizard rolled two more skulls than their opponent, the Dread Sorcerer takes 2 Mind Points of damage.
World's End Tournament
Tournament Quests
The first three quests in Against the Ogre Horde take place in the World's End tournament hall, a place where warriors gather to test their mettle.
Challenger and Defender
There are two teams in a tournament: the Challenger team and the Defender team. Heroes and allies make up the Challenger team, while Zargon's forces lead the Defender team.
Playing a Tournament Battle
At the start of a battle, the doors to the tournament hall raise to reveal both teams.
Starting a Round. Rounds track the activation cycle of teams. At the start of each round, the Defender team goes first. Zargon chooses one member of the Defender team to activate, and then takes that monster's turn, using their movement and action. Play then passes to the Challenger team, who activate any one hero and take that hero's turn. Continue alternating turns between the Defender and Challenger teams. Each turn, the respective team activates one team member that has not yet been activated. If teams can no longer alternate turns because one team has run out of members to activate, the team with inactive members remaining takes consecutive turns activating new team members until all remaining members have been activated.
Ending a Round. After all members of both teams have been activated, the round ends. All Defenders and Challengers deactivate but remain in the same square they were when the round ended. A new round begins, with the Defender team going first.
Ending the Battle. Rounds of activation continue until one team is defeated. The battle ends, and the team left standing wins!
Printed map labels: "Place the Challenger team here." "Place the Defender team here." "Use the activation token to mark miniatures that have been activated."
Solo Combatants
Any tournament combatant who is the sole member of their respective team is emboldened by the cheers of the tournament spectators and gains a surge of energy. In addition to their own turn, they may take a basic maneuver after each opponent's turn. A basic maneuver consists of either moving up to their movement speed or rolling 2 Attack dice against an adjacent creature (if they can usually attack diagonally, they may do so in the basic maneuver as well). A solo combatant may not take a basic maneuver if they are incapacitated or would not be able to take their action (for example, under the Tempest spell). This rule applies to combatants whose teammates have all been defeated. A combatant who becomes a solo combatant maintains its activation token.
Treasure in the Tournament
If a hero uses an action to search for treasure while adjacent or diagonal to a treasure chest, roll two red dice to determine the result, then remove the treasure chest from the board.
| Roll | Result |
|---|---|
| 2 | Explosive trap! The hero loses 3 Body Points. |
| 3-4 | Poison gas! The hero loses 2 Body Points. |
| 5-6 | Arrow trap! The hero loses 1 Body Point. |
| 7 | The hero finds one bone battleaxe. |
| 8-9 | The hero finds 100 gold coins. |
| 10-11 | The hero finds 200 gold coins. |
| 12 | The hero finds 300 gold coins. |
Death in the Tournament
If a hero dies in a tournament quest, they are out of the game for the remainder of the quest. Items in their possession prior to death remain on the square where they died. They can be picked up by any hero who moves adjacent to the square (no action required).
Incomplete Tournament Quests
If a tournament quest can't be completed or ends with disastrous results (such as death for all heroes), Zargon should modify the quest before it is replayed. You can do this by creating a new battle using the World's End Tournament on page 12.
Trophy Tiles
If a Challenger or Defender ends their turn on a trophy tile, they may collect that tile (no action required). That tile is added to a shared team pool and may be used by any member of that team.
Tiles may not be stolen. They remain throughout the rounds of a battle, but any uncollected tiles disappear at the end of the battle. Once used or activated, the tile is discarded.
Burst of Speed. At any time, a combatant may discard any trophy tile to add 2 squares to their movement.
Combat Tiles. A combatant may use a combat trophy tile to add to their combat roll. Use it after rolling combat dice. For example, a combatant could discard a white shield tile to add one shield to their Defend roll, or a white skull tile to add one skull to their Attack roll.
Printed tile art: "+2 – Add two skulls to your combat roll." and "x2" tiles.
Healing Potion Tiles. A combatant may discard a healing potion trophy tile to restore lost Body Points equal to the number on the tile. If a combatant's Body Points are reduced to 0, they may discard a healing potion tile before they die to immediately restore Body Points.
Riposte Tiles. A combatant who suffers damage from another combatant adjacent or immediately diagonal to them may discard a riposte trophy tile to immediately attack back. This trophy tile may be used even if the defending combatant is defeated by the triggering attack.
Note: If a combatant would not be able to take an attack otherwise, such as under the effects of the Tempest spell, they may not take a riposte attack until the effects have ended.
If a large monster ends their turn on multiple trophy tiles, they collect whatever amount they end their turn on.
Playing the Tournament Outside of Quests
Tournament battles can be played separately from quests, whenever heroes wish to test their mettle against the might of Zargon.
How to Play
- Determine the Challenger team power. Each hero begins with a power of 1, then adds the Attack dice of their strongest attack. Add up each participating hero's individual power to get the team's total power score.
- Assemble the Defender team. The Defender team's power must be less than or equal to the Challenger team's power. See the World's End Team Roster below.
- Zargon, shuffle the trophy tiles and place them facedown on the squares designated on the map. Place any remaining trophy tiles to the side.
- The Defender team is placed on their tile first. Zargon, use the game master screen to conceal the Defender team from the heroes. Once the Defender team has been placed, the Challenger team is placed. After both teams have placed their tile and team members, remove the game master screen from the board and reveal the Defender team.
- The Defender team opens the door and begins the first round! Play proceeds as in Playing a Tournament Battle above.
The printed example (page 15) shows a Challenger team with a team power of 16, with the following figure captions: Broadsword 4, Shortsword 3, Shortsword 3, Genie spell 6.
World's End Team Roster
The roster below gives each tournament monster's statistics (Movement in squares, Mind Points, Defend dice, Body Points, Attack dice). The printed roster page also has blank Symbol, # and Total Power columns for building a team; the printed example (page 16) fills them in for the team shown and is reproduced below.
| Monster | Movement (squares) | Mind Points | Defend Dice | Body Points | Attack Dice |
|---|---|---|---|---|---|
| Goblin | 10 | 1 | 1 | 1 | 2 |
| Goblin (Ranged) | 10 | 1 | 1 | 1 | 2 |
| Orc | 8 | 2 | 2 | 1 | 3 |
| Orc (Ranged) | 8 | 2 | 2 | 1 | 3 |
| Skeleton |
Printed example team, named in the team-name box as GRAZZARG GORETOOTH'S GANG, team power 15: 3 Goblins (total power 6), 2 Goblins (Ranged) (total power 4), 1 Ogre Champion (total power 5).
Monster vs Monster Variant
Instead of playing with heroes, both Challenger and Defender teams can battle with monsters! Both sides agree on an equal team power for both sides. Randomly determine which team will be the Challenger team, and which team the Defender team. The Defender team selects a monster from those available first, and the two teams proceed to alternate selecting monsters until each team meets the agreed-upon team power. As with all tournament battles, the Defender team starts the first round.
Optional Rule: Player Safeguards
The halls of the ogre horde are filled with peril, uncertainty, and – of course – punishing traps. Many heroes of olde have found themselves trapped in a room with no exit to be found. For heroes wishing to travel in the footsteps of these classic heroes, run the quests as presented. Otherwise, consider allowing heroes who become trapped to find an escape. For example, a trapped hero searching a pit trap might reveal a tunnel back to their companions. Alternatively, a faithful animal ally might step in to replace a trapped hero.
The Quests
The quest map for each quest is printed on the page facing its notes and is not reproduced here. Capital letters in the notes (A, B, C...) refer to the matching letter on that map.
Quest 1: The Tournament Gauntlet
"The World's End Tournament is held on the ancient ruins of Alvakryn, where one does not wander by accident. It is bustling with formidable warriors who have traveled far and wide to win glory and riches. You will need to defeat three teams of competitors to advance and face the current reigning champions. Before you do, you will need to name your team!"
Notes
See World's End Tournament on page 12. When a wave of combatants is defeated, immediately add the next wave to the Defender tile and continue the battle round with the new combatants. Heroes maintain activation. Trophy tiles don't replenish between waves.
- Wave 1: Heroes versus Skutter Rat and the Bruisers
- Wave 2: Heroes versus Death's Chosen
- Wave 3: Heroes versus Spawn of the Pit
The Spawn of the Pit undergoes different phases as the battle progresses. See Multi-Phase Enemies on page 6 and Solo Combatants on page 13. Zargon, do not reveal to the heroes that the Spawn has multiple sets of statistics.
Spawn of the Pit
| ATTACK | DEFEND | MOVE | BODY | MIND |
|---|---|---|---|---|
| 4 dice | 3 dice | 6 | 4 | 3 |
When Spawn of the Pit reaches 0 Body points, do not remove the miniature from the map. The Spawn instead takes on a new phase, strengthened by its rage. Adopt the below statistics of Spawn of the Pit - Enraged and continue the battle.
Spawn of the Pit - Enraged
| ATTACK | DEFEND | MOVE | BODY | MIND |
|---|---|---|---|---|
| 5 dice | 1 dice | 10 | 6 | 1 |
Quest 2: Proven Worthy
"The current World's End Arena champions are lead by a ferocious ogre pit fighter called Doralf. They call themselves the Wolves of World's End. Defeat these opponents and you may earn the respect of the Master of Battle, who is most certainly watching."
Notes
See World's End Team Roster on page 17 and build a team of Defenders. Doralf must be one of the monsters on the Defender team. See his statistics below.
Doralf
| ATTACK | DEFEND | MOVE | BODY | MIND |
|---|---|---|---|---|
| 6 dice | 5 dice | 6 | 7 | 3 |
As the dust from the battle clears, a slow applause is heard from a figure behind the heroes. They turn and make the acquaintance of the reigning Master of the Battle, an ogre by the name of Gruzbella Hammerhand. She congratulates their efforts. When she hears of the heroes' plans to infiltrate the Dirgrusht hold, she regards them with solemnity.
"There is no honor in allying with one such as Zargon. I have no great love for the arrogant leader of the Dirgrusht, Ekur, but I did not think him capable of this. I will guide you to their fortress, but my information comes at a price. You put on quite the show in the arena, and it has been ages since I fought an opponent worth unleashing my full strength on. . . in exchange for the information you seek, I ask that we battle here and now."
The heroes must accept her challenge to obtain the directions to the Dirgrusht fortress. Once they do, the quest is complete.
Quest 3: Glory and Gold
"You have agreed to test your mettle against Gruzbella Hammerhand, the World's End Master of Battle. She is undeniably a formidable opponent, but you are the heroes of the realm – and you have proven yourself in battle thus far."
Notes
When the battle begins, use the statistics of Gruzbella the Confident. Gruzbella is an extremely skilled fighter and fearsome adversary. As such, she undergoes different phases as the battle progresses. See Multi-Phase Enemies on page 6 and Solo Combatants on page 13. Zargon, do not reveal to the heroes that Gruzbella has multiple sets of statistics.
Gruzbella possesses the following special abilities and may use each ability once (no action required):
- Break – Use at any time. End the effects of any one spell active on Gruzbella.
- Resilience – Use at any time. Gruzbella ignores all damage from one attack.
- Deflect – Use when Gruzbella would be the target of an attack. You can instead direct the attack to any one hero in Gruzbella's surrounding 10 squares.
Gruzbella the Confident
| ATTACK | DEFEND | MOVE | BODY | MIND |
|---|---|---|---|---|
| 4 dice | 6 dice | 5 | 5 | 4 |
When Gruzbella the Confident reaches 0 Body points, do not remove the miniature from the map. Instead, adopt the statistics of Gruzbella the Determined and continue the battle.
Gruzbella the Determined
| ATTACK | DEFEND | MOVE | BODY | MIND |
|---|---|---|---|---|
| 5 dice | 5 dice | 7 | 5 | 4 |
When Gruzbella the Determined reaches 0 Body points, do not remove the miniature from the map. Adopt the statistics of Gruzbella the Reckless and continue the battle.
Gruzbella the Reckless
| ATTACK | DEFEND | MOVE | BODY | MIND |
|---|---|---|---|---|
| 6 dice | 1 dice | 8 | 5 | 4 |
When Gruzbella the Reckless reaches 0 Body points, she finally admits defeat. Smiling ruefully, she shakes each of the heroes' hands before awarding them a champion coin purse containing 1000 gold coins. She vows to be better prepared next time they do battle.
Quest 4: Infiltrating the Fortress of Ogres
"Your information led you through the unruly wilderness to the vast network of earthen tunnels surrounding the entrance to the fortress. Now it is up to you, my heroes, to find the fortress's iron gate, hidden within the coils of the caverns. But tread warily! The denizens of that fortress will surely have placed guardians and traps to protect their domain."
Wandering Monster: 4 Goblins
Notes
The heroes begin the quest on the overground tile.
- A. The first hero to search for treasure finds one crossbow, two Potions of Healing, and 200 gold coins.
- B. The treasure chest is rigged to trigger a swinging blade trap when opened. See Swinging Blade Trap above. If a hero searches for treasure before the trap is disarmed, or if a hero fails their roll while attempting to disarm the trap, the trap activates. The first hero to search for treasure finds a chest containing 50 gold coins.
- C. All the Orcs in this room are skilled combatants and may attack diagonally. The first hero to search the room for treasure finds one bone longsword and 60 gold coins.
- D. This Orc is a magical effigy that guards the iron gate of the ogre horde. Each turn, it may launch a ball of fire of 3 Attack dice at any one hero in its line of sight. It is unable to move and is immune to all spell effects.
Guardian Effigy
| ATTACK | DEFEND | MOVE | BODY | MIND |
|---|---|---|---|---|
| 3 dice | 5 dice | 0 | 2 | 0 |
Quest 5: Beyond the Gate
"You have found the entrance to the ogre fortress, marked by a worn but sturdy iron gate. You must now strike at their raiding parties and destroy the subterranean war room where they plan and execute their raids. To do so, you must keep the central chamber free of monsters for at least one hero's turn, then escape."
Wandering Monster: Dread Warrior
Notes
The heroes cannot exit the quest until the central chamber is free of monsters for one hero's full turn.
- A. The first hero to search for treasure finds a cluster of emeralds worth 300 gold coins in the chest.
- B. The first hero to search for treasure finds 300 gold coins.
- C. This is the chamber where the Ogres plan their raiding squads. To complete the quest, the heroes must clear the room of monsters and be the sole occupants of the room for one hero's full turn. The two chests contain loot from the Ogres' latest raid, a total of 600 gold coins and one Potion of Healing.
- D. If a hero moves onto the square marked X, the secret door opens and the monsters of this room activate.
Quest 6: Lair of the Ogre Horde
"In order to reach the heart of the fortress, you must make your way through the lair that houses the might of the Dirgrusht ogre horde. Be wary not to alert these forces to your presence; even you might be hard-pressed to best an entire army."
Wandering Monsters: 3 Orcs
Notes
- A. The first hero to search for treasure finds a chest containing 200 gold coins.
- B. If a hero is in any of these corridors during Zargon's turn, they must roll one red die. 1-2: All monsters in the central chamber activate and the door opens. 3-6: Nothing happens.
- C. This is the chamber of Tograk, a high-ranked member of the Ogre forces. He is an Ogre Commander.
- D. This is the chamber of Nexrael, an apprentice Dread Sorcerer. Nexrael can cast Mind Burst and uses a reserve of 4 cards. The first hero to search for treasure finds two Potions of Healing and 150 gold coins.
- E. This is where the horde stows their plundered treasures. One of the chests conceals a spear trap. If a hero searches for treasure before the trap is disarmed, they lose 1 Body Point. The chests contain a combined 900 gold coins.
Nexrael
| ATTACK | DEFEND | MOVE | BODY | MIND |
|---|---|---|---|---|
| 3 dice | 4 dice | 8 | 1 | 5 |
Quest 7: Tumultuous Halls
"You have successfully entered the inner reaches of the fortress. Between you and their leader lies the horde's large mess halls, no doubt full of raucous warriors. The presence of Dread Sorcerers in the lair confirms our suspicions to come here – keep your senses keen for Zargon's vile influences!"
Wandering Monsters: 2 Abominations
Notes
- A. If a hero opens the door on the right, the swinging blade trap activates. It cannot be activated in any other way.
- B. The first hero to search for treasure finds a chest containing 200 gold coins.
- C. The first hero to search for treasure finds a suit of bloodred chainmail and two Potions of Healing.
- D. The first hero to search for treasure finds a cache of 5 diamonds hidden behind a stone in the fireplace, each worth 100 gold coins.
Quest 8: The Pit of Dread
"Tread carefully, heroes, for I sense that you now approach a powerful source of Dread power. Loretome warns of a fate worse than death for any who underestimate the Pit of Dread. You must destroy this wellspring of Dread by obtaining the Dread Sorcerer Festral's Ring of Power and hurling it into the Pit."
Wandering Monsters: 2 Dread Warriors
Notes
The heroes cannot exit the quest until the Pit of Dread has been destroyed. They do so by throwing Festral's Ring of Power into the Pit.
- A. In the center of this chamber is the Pit of Dread. Any hero that willingly moves into the pit or moves into the pit under the Dominate spell and does not move out on their next turn after the spell ends is instantly consumed by Dread and falls under the control of Zargon forever. This is the domain of Festral, the Dread Sorcerer. Festral can cast Mind Burst, Mind Lock, and Dominate, and uses 3 cards for each spell. The Dread Warriors in the room are Festral's personal guard. They each roll 5 Attack dice and 5 Defend dice.
- B. The first hero to search for treasure finds Festral's Ring of Power hidden in a hollowed-out book, as well as 10 diamonds worth 75 gold coins each.
- C. The center of this room is a bottomless abyss over which a small bridge stretches. Any hero or monster that moves onto an abyss square immediately plunges to their death.
Festral
| ATTACK | DEFEND | MOVE | BODY | MIND |
|---|---|---|---|---|
| 4 dice | 5 dice | 6 | 3 | 8 |
Quest 9: Fortress of the Ogre Lord
"At last, you have reached the heart of the fortress where Ekur, the lord of the Dirgrusht ogres, presides over his domain. Ekur has become completely corrupted by the lure of Zargon, but there is yet hope for the ogre people under his reign. If you can defeat Ekur, you will break the unity of the horde and save the realm from Zargon's threat."
Wandering Monster: Ogre Warrior
Notes
The quest cannot be completed until the heroes defeat Ekur. They exit the quest via the spiral stairway.
- A. The first hero to search for treasure finds a bejeweled cat figurine worth 200 gold coins.
- B. This is the chamber of Festral's assistant, Xenloth the Dread Mage. Xenloth can cast the spells Mind Lock and Mind Burst. He has 5 cards for each spell.
- C. Here lies the illustrious treasure of the Ogre Lord. One of these chests conceals a poison gas trap. If a hero searches for treasure before the trap is disarmed, they lose 2 Body Points. The chests contain a combined 2100 gold coins.
- D. You have finally reached the great hall of the Ogre Lord Ekur. Here he sits with his general and his finest warriors. If he is killed, the first hero to search for treasure finds his jewel-encrusted crown worth 450 gold coins.
Xenloth
| ATTACK | DEFEND | MOVE | BODY | MIND |
|---|---|---|---|---|
| 2 dice | 4 dice | 6 | 1 | 4 |
Quest 10: Flight to the Surface
"A thousand praises, my heroes! You have destroyed the formidable Ekur and shattered the might of the horde, keeping its might from the clutches of Zargon. But do not rest, for we cannot rejoice yet! You are still deep within the fortress and the alarm has been raised. You must escape and reach the surface!"
Wandering Monster: If a wandering monster card is drawn, Zargon may activate one room.
Notes
The heroes begin on the spiral stairway. On each of their turns, Zargon may activate all the monsters in one or two rooms, regardless of whether the door to that room has been opened. Zargon rolls one red die. On a roll result of 1-5, one room may be activated. On a roll result of 6, two rooms may be activated. The contents of the room are then laid out, and the door is opened. Any monsters in the activated room may move on that turn.
- A. On each turn after the heroes have left this room, Zargon may place up to three Orcs on the stairway tile, depending on how many are available. The Orcs may move immediately.
- B. The first player to open this door will trigger a falling block trap, which falls on the square marked X. The chest inside the room is empty.
- C. Once the heroes pass through this door onto the overground tile, they are safe and the quest ends. No monsters may follow them there.
Conclusion
After your thrilling escape from the fortress, the King's auxiliary forces met with you and Gruzbella to defeat the last of Ekur's most staunch followers. Gruzbella and her legion of warriors are staying with the remainder of the Dirgrusht clan to aid them in determining their next leader. Under Gruzbella's watchful guidance, we need not worry that their next lord will be one so susceptible to Dread temptations. Though many of the ogre clans are still private and prone to isolation, this marks a momentous first step towards a potential future alliance with the realm. A mark of progress we owe entirely to you, of course. You have foiled the insidious plot of Zargon once again. Loretome's pages reveal no looming danger to me as yet, though we know our foul enemy is not one to bide his time for long. Indeed, even as we rest along the edge of World's End, I sense a foreboding darkness on the horizon. The time will soon come when I again call for your aid. Until then, let us revel in this worthy victory!
Ogres in Against the Ogre Horde
Monster Chart
| Monster | Movement (squares) | Attack Dice | Defend Dice | Body Points | Mind Points |
|---|---|---|---|---|---|
| Ogre Warrior | 6 | 5 | 4 | 5 | 1 |
| Ogre Champion | 6 | 5 | 4 | 6 | 1 |
| Ogre Commander | 4 | 6 | 5 | 6 | 2 |
| Ogre Lord | 4 | 6 | 6 | 10 | 5 |
Design Your Own Quest Adventures
Design your own exciting quests! Mark the map with the various monster, furniture, and trap symbols. Then write a short paragraph to explain the adventure, and you're ready to play.
Simply photocopy or scan and print the blank map shown above, along with the symbols shown below, cut them out, and use them to design your own games. Permission is granted to reproduce this document for personal use. You may use these components in any way that you can imagine. For example, the stairs could be used to link several levels of a multi-map quest.