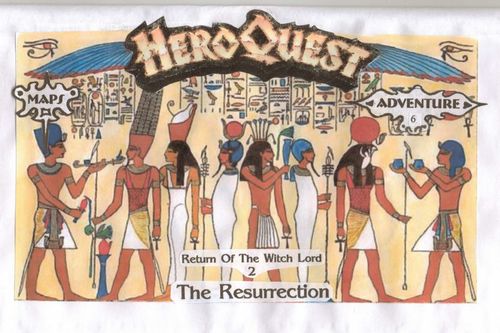
Adventure 6: Resurrection – Return of the Witch Lord 2 (fan expansion for HeroQuest)
Adventure 6: Resurrection – Return of the Witch Lord 2 (fan expansion for HeroQuest) Rulebook
Table of Contents
Table of Contents
Words for Zargon
Zargon, sorry about the maps being so crowed. You should go over each Quest by yourself before playing with your friends, so that no mistakes are made and your friends can have an enjoyable game.
Orc's Bane: Allow Hero to attack two different Orcs, if he kills one on the first attack.
Heroic Brew: Allow Hero to attack a second monster if he kills one on the first attack.
Treasure Cards: There are so many treasure cards now that once a card is picked, it's better to make a discard pile. So Heroes get to keep good cards and bad cards are discarded after Hero completes the action.
Monsters with Potions: There will be times offered when if a Hero can take out a monster before they get a chance to drink the potion, that Hero could claim the monster's potion. These events are specified inside the Quests.
Attacking: When Heroes open the door and the monsters are placed on the board. It's a puzzle. Your Heroes need to figure out the best attack formation that they can. Strong Heroes up front, taking multiple attacks, protect the Wizard or wounded companions, and so on. Enjoy!
Artifact Cards: When Heroes discover an artifact, shuffle Artifact Cards and allow Hero to pick. Hero keeps card until Quests end, then he records what he has not used during the game and Artifacts Cards are collected so that for the next Quest Heroes will have a fresh pile to pick from again.
Arm Bands of Healing: Each Hero can wear two, if they are lucky enough to pick them.
Mist: We changed the rules regarding the Mist. Only Tempest, Remove Air, Dispel and Turn to Stone spells can kill the Mist.
Stone Mummies: This adventure introduces a new monster. Stone Mummies can be destroyed by the following spells. Landslide, Sandstone and Pass Through Stone.
Monster Chart
The Monster Chart lists these monsters. Each monster also has a map symbol, which is not reproduced here.
| Monster | Movement Squares | Attack Dice | Defend Dice | Body Points | Mind Points |
|---|---|---|---|---|---|
| Stone Mummy | 3 | 4 | 6 | 3 | 0 |
| Doom Guard | 8 | 4 | 6 | 3 | 3 |
| Spirit Rider | 8 | 4 | 4 | 3 | 3 |
| Bellthor | 6 | 4 | 6 | 3 | 3 |
| Witch Lord |
New Tiles and Quest Map Symbols
Iron Entrance Door
This iron door is placed on the edge of the gameboard. Heroes line up outside the iron door to begin the Quest.
Wooden Exit Door
This special wooden door is used to exit the gameboard in the end of a Quest.
Locked Door
These doors are locked and will often require a key to be opened.
Large Door
When opened, replace the closed big door with the open big door.
Coffins
The 4 coffins may be used as tombs. They may contain an undead creature and/or a treasure. They may also have traps on them.
Key
This key comes in different colors on the Quest map. They unlock the doors with the same color.
Death Mist
This mist is a deadly breath of Chaos which will harm all who are not evil.
At the beginning of the Quest, the Death Mist tile is placed on the gameboard as shown next to the square marked "A." This mist is a breath of Chaos which will harm all who are not evil. The Death Mist tile moves up to 6 squares on each of your (Zargon's) turns and can only move within the shaded corridors.
When the Death Mist tile passes over a Hero, he loses 1 Body Point. The mist may affect 1 or more Heroes each time it is moved on your (Zargon's) turn. It will not affect monsters.
The mist cannot move onto the same square twice in 1 turn. It also cannot end its turn on the same square with a Hero. (If this happens, the Death Mist tile must stop short on the square in front of the Hero.)
The mist is not affected by normal weapons. It can only be destroyed by a Tempest spell or by the Spirit Blade. (Don't tell this to the Heroes!)
Revolving Room
The revolving room is used to disorient the Heroes. You never know which door you'll be using to leave this room.
Throne Room
The large throne room is used by evil rulers such as the Witch Lord.
Quest Book
The Quest Book gives the setup for each Quest. Each Quest has its narrative, its room notes keyed to the printed map, and the monster that appears as a Wandering Monster in that Quest.
Quest 1
I am Mentor, trainer of Heroes. Lore tome has revealed to me a growing threat inside the desert Plains of Death. In the ruins of the fallen city of Kalos, Skulmar and Queen Kessandria have survived and over the past ten years have been strengthening themselves and will soon prepare for battle against the kingdoms of our realm. I have gone before the Emperor and informed him of this new danger. It has been agreed that we will send in my sons, who ten years earlier defeated the Witch Lord and his minions within the ruins of Kalos. But my sons need supplies, they need gold, so I have instructed them to seek out a Goblin hideout along the trade route, destroy this plague and collect the spoils with which they can buy the supplies that they will need. Be careful my sons, for now new dangers from Zargon are making him a deadlier opponent.
"Mentor said that the Goblin's hideout was between two large stones. Do you think that is them over there?" Asked the barbarian. "It sure is." Said the Elf. "And there are Goblins hiding out in there. Lookouts." "Well, let us go around and come up behind them. If we are careful we can take them out without sounding an alarm." You follow your friends and make quick work of the Goblins. You follow the path that leads you to their hideout. You make your way inside.
Notes
- A: Starting place of the Heroes.
- B: The first three Goblins have Potions of Defense that they drink. When Heroes search this room they discover an artifact inside the bookcase. When Heroes search this room they discover 2 Heroic Brews and an artifact inside the bookcase. Heroes also discover a secret door.
- C: No note is printed for this room key in the source.
- D: This chest is safe, inside are 200 gold coins.
- E: When Heroes search this room, they discover an artifact on the fireplace.
- F: This Goblin has a crossbow that he shoots at the Heroes.
- G: This chest is safe. Inside are 400 gold coins.
- H: One of these Fimir knows magic and casts Stonefall over one of the Heroes. When Heroes search this room they discover a crude map inside the desk. "According to this map there's a castle further in the mountains." Says the Wizard. "We will have to check it out when we are done here." Says that Barbarian.
- I: When Heroes search this room, they discover in the cupboard a sealed jar. Inside are 9 mushrooms. Each mushroom will restore 1 Body Point. Mushrooms must be eaten right away. Mushrooms can be shared.
- J: When Heroes search this room they discover 2 throwing axes on the weapons rack.
- K: These Hobgoblins are asleep. Here's the deal. Heroes can sneak in and attack quietly. Hobgoblin has no defense. If a Hero fails to kill a Hobgoblin on his first attack, then all the Hobgoblins awake and make the next attack.
Wandering Monster in this Quest: Hobgoblin.
Quest 2
"We did well." Says the Dwarf. "Shall we try our luck and follow the map?" You all agree too. You follow the path deep into the forest and come to a castle that's built into the base of a mountain. "This is not a Goblin castle." Says the Dwarf. "Look at that workmanship, she's beautiful." "And very old, this castle was built by the Wizards long ago, I wonder why they abandon her?" Says the Wizard. "Whoever lives here now feels pretty secure in themselves. No sentries." Says the Elf. "Then let us see who is home." Says the Barbarian. You make your way to the main gates.
Notes
- A: This door is locked. Heroes need iron key to open it.
- B: When Heroes search this room, they discover 4 throwing stars on the weapon rack.
- C: When Heroes search this room, they discover an iron key and an artifact in the bookcase.
- D: When Heroes search this room, they discover inside the cupboard a sealed jar. Inside are 9 mushrooms. Each mushroom will restore 1 Body Point. Mushrooms must be eaten right away. Mushrooms can be shared.
- E: When Heroes search this room, they discover 40 gold coins on the table.
- F: These two Orcs have a Potion of Defense and an Elixir of Life that they drink.
- G: Bellthor can sense an invisible Hero's presence.
Wandering Monster in this Quest: Hobgoblin.
Quest 3
"That Demon was guarding these stairs." Says the Elf. "I wonder what is down there that they're trying so hard to protect?" Asked the Dwarf. "I can't imagine, maybe he was protecting someone." Said the Wizard. "Well, let us see what is down there." Says the Barbarian. You make your way down the stairs.
Notes
- A: This metal door is locked. Heroes need iron key to open it.
- B: This metal door is locked. Heroes need silver key to open it.
- C: This metal door is locked. Heroes need iron key to open it.
- D: This metal door is locked. Heroes need silver key to open it.
- E: This metal door is locked Heroes need brass key to open it.
- F: This metal door is locked. Heroes need silver key to open it.
- G: This metal door is locked. Heroes need iron key to open it.
- H: This metal door is locked. Heroes need gold key to open it.
- I: This metal door is locked. Heroes need brass key to open it.
- J: This chest is booby trapped. 2 hit points if sprung. Inside are 4 Potions of Renewal and the Iron Key.
- K: This chest is booby trapped. 2 hit points if sprung. Inside are 4 Potions of Renewal and the brass key.
- L: When Heroes search this room, they discover a secret door.
- M: This chest is booby trapped. 2 hit points if sprung. It is empty.
Zargon, give the Wizard his new spells. Also there is a magical shirt. This shirt will give the Wizard an extra Defense dice. Also, there are 4 heart strengthening potions. When Heroes drink this potion they increase their Body Points by 2. So now Barbarian has 10 Body Points, Dwarf has 9, Elf has 8, and the Wizard has 6.
Wandering Monster in this Quest: Orc.
Quest 4
You make your way back through the forest to the main highway. You rest often, sharing your food with the two girls. You are amazed at their courage considering what they have just been through. It takes a couple of days to find their home, but the joy upon their return more than makes up for the lost time.
You and your friends return to the city to buy the supplies that you will need for your long journey. "We better get enough torches, I remember how dark Kalos was." Says the Elf. "It's a shame that we can't buy sacred water." Says the Wizard. "That came in real handy the last time." You get your supplies and two weeks of traveling find you entering the Plains of Death.
You find a castle on the edge of the desert. You see guards. You wait until nightfall and get as close as you can to the main gates before you rush towards the guards. They prepare for your attack. They don't have time to sound an alarm. You are upon them.
Notes
- A: Heroes start here.
- B: When Heroes search this room, they discover an artifact on the weapons rack.
- C: This chest is booby trapped. 2 hit points if sprung. Inside are 2 Heroic Brews and 40 gold coins.
- D: When Heroes search this room, they discover the iron key. They also discover a map of the desert inside the desk. "HEAVEN HELP US!" Says the Wizard. "What is it?" Asks the Barbarian. "I think that these symbols on this map are castles. The dessert is full of them!" "Looks like Zargon been busy these past years." Says the Barbarian. "When is he not?" Asks the Dwarf. "Well then, we got our work cut out for us." Grumbles the Barbarian.
- E: When Heroes open this door. The Warlock immediately casts Lightning Bolt at the Hero standing in the doorway. On Warlock's next turn he casts Firestorm, then he resorts to physical combat. When Heroes search this room, they discover an artifact on the altar.
- F: When Heroes search this room; they discover a sealed jar inside the cupboard. Inside are 9 mushrooms. Each mushroom will restore 1 Body Point. Mushrooms must be eaten right away. Mushrooms can be shared.
- G: This chest is booby trapped. 2 hit points if sprung. Inside are 2 artifacts and 100 gold coins.
- H: When Heroes search this room, they discover in the bookcase a crystal sphere that is full of gas. Only the Wizard knows that this gas will restore a Hero's Body Points back to full strength. All the Heroes can gather together in a circle, break the sphere and inhale. Use wisely.
- I: This metal door is locked. Heroes need iron key to open it.
Wandering Monster in this Quest: Skeleton.
Quest 5
"Well, for a barren desert, this place is pretty busy!" Says the Dwarf. "We better not waste the rest of the night and get a good start." Suggests the Elf. "I agree." Says the Barbarian. The moon lights your way as you travel into the Plains of Death.
The cold air keeps you alert. You travel on into the sunrise and until the noon sun gets so hot that you have to rest. The barren land, filled with stones and sparse vegetation swallows you up. The light colors of the sand and stones magnify the sun's rays, nearly blinding you. "Here you go lads." Says the Dwarf as he hands you a piece of cloth from out of his sack. "Tie them around you head and let part of it drape over your face. It will protect our eyes." You do as the Dwarf does and are relieved by the protection the cloth offers. It is thin enough that you can see quite well.
You spend the following days traveling mostly at dawn and sunset. You rest in the full day and night. You are amazed at how well you remember the way. "Nothing has changed in the years gone by. I don't know how they do it, but they know that we are here." Says the Barbarian. "Aye. And they will let us make the first move. So we might as well make it." Says the Dwarf.
The next day the Elf spots the city. "I see it just up ahead. Looks quiet." You make your way to the gates of the city of Kalos.
Notes
Zargon, Kalos is falling apart. Block tiles show places that have caved in. The Heroes need to light a torch. If they have no torch then they lose two Attack dice and one Defense dice for the duration of the Quest.
- A: Place Death Mist on board. Follow the instructions in the Instruction Booklet, except that the Spirit Blade can't kill Mist. Tell Heroes that only Tempest, Remove Air, Dispel and Turn to Stone spells will destroy Mist. There will be more than one Mist. Ha Ha.
- B: When Heroes search this room, they discover in the bookcase among the books of black art, a bottle of sacred water. This water will destroy one regular Skeleton, Zombie or Mummy.
- C: When Heroes search this room, they discover inside the bookcase an artifact and a ruby worth a 200 gold coins.
- D: These are false doors.
- E: This chest is booby trapped. 2 hit points if sprung. Inside the Heroes discover an artifact.
- F: This chest is booby trapped. 2 hit points if sprung. Inside are 2 artifacts and 40 gold coins.
Wandering Monster in this Quest: Zombie.
Quest 6
The printed Quest 6 has no narrative text; its page carries only the notes.
Notes
Zargon, Heroes need another torch for this Quest or they lose two Attack dice and one Defense dice.
- A: Remember Mist is destroyed by Tempest, Remove Air, Dispel or Turn to Stone spells.
- B: Heroes must roll one red dice to see which of the 4 doors they will exit from. Heroes can travel as a group.
- 1 or 2 - door #1
- 3 - door #2
- 4 or 5 - door #3
- 6 - door #4
- C: Zargon, shuffle only the original Chaos Spell Cards and allow the Heroes to pick which spells that the Warlock will cast. Warlock will cast one spell on each of his turns. You get to choose which Hero gets zapped!
- D: This is where the Warlock teleports to if Escape spell was picked. Heroes must battle Warlock again, minus the teleport card. When Heroes search this room they discover 2 artifacts on the altar.
- E: Heroes find any replacement weapons, if some were lost during the battle with the Warlock.
- F: This chest is booby trapped. 3 hit points if sprung. Inside there is a Potion of Battle Rage, a Speed Potion, a Shield Potion and 2 Potions of Strength.
- G: The Heroes can see this secret door. But it is locked. Heroes need iron key to open it.
- H: When the first Hero steps on this space, all 4 doors in the hallway open and the Spirit Riders awaken. This is going to get messy. But if the Heroes use this corner passageway wisely, they should do fairly well.
- I: This chest is safe. Inside is Spirit Rider armor. If Dwarf looks inside chest he notices a secret compartment in the bottom. Inside is a small ruby worth 50 gold coins.
Wandering Monster in this Quest: Spirit Rider.
Quest 7
You follow the stairs down. They are littered with debris. Suddenly you come to a dead end. "It has collapsed. There is nothing more here." Says the Barbarian. You make your way back up the stairs and back through the ruins of Kalos. You head across the Plains of Death. Your friend the Wizard now leads you. "According to the maps, there's a castle here and I think there is an oasis with it." "Good, then we will at least find water, I hope it is not too far, we still have to get home and we did not bring enough food for an extended stay here." Says the Elf. "We will find something. Kessandria and Skulmar are Human, they got to eat, so there will be something." Says the Dwarf. You make your way through the desert. On the next morning you find the castle next to the oasis. It's huge! But there are no guards. To play it safe you wait until nightfall and make your way up to the main gates.
Notes
Zargon, this Quest introduces the Stone Mummy. Stone Mummies can also be destroyed by casting Sandstone, Pass Through Stone and Landslide spells.
- A: Starting place of the Heroes.
- B: This metal door is locked. Heroes need iron key to open it.
- C: When Heroes search this room, they discover inside the cupboard dried Human flesh. Heroes also find a secret door.
- D: This chest is safe. Inside the Heroes discover 2 Anti-Poison Quills, a Speed Potion, 2 Elixirs of Life and an artifact.
- E: This chest is booby trapped with poisonous gas. 3 hit points on all Heroes inside the room if sprung. Inside are 2 Potions of Recall, 2 bottles of sacred water, 4 Heroic Brews, 4 Potions of Strength and 100 gold coins.
- F: When Heroes search this room, they discover a small iron chest inside the bookcase. This chest is booby trapped. 1 hit point if sprung. Inside is a large diamond worth 500 gold coins.
Wandering Monster in this Quest: Ghoul.
Quest 8
"Wow, this place is bigger than it looked on the outside!" Grumbles the Dwarf. "The hairs on the back of my neck are on edge." Says the Barbarian. "There is a Warlock up here for sure." "Is it just my imagination, or are these Warlocks getting stronger, every time we meet one?" Asks the Elf. "No you're not imagining it, my friend. The stars are aligning on the side of evil. Something big is going to happen soon." Says the Wizard. "How are you holding up?" The Barbarian asks the Wizard. "Me? I put my faith in God. The stars mean little to me or my powers." "I like that!" Says the Dwarf. "All I ask of God is a good axe and a strong arm to wield her with." "Then God be praised!" Says the Barbarian. "For I feel like we are being protected, it is a good feeling." "God Be Praised!" You all say and make your way up the stairs.
Notes
- A: Starting place of the Heroes. But this massive door is locked and there is no key. Wizard must use Wood Blast or Rot spells to weaken door. Once this is done, there remains the iron frame. Wizard can cast Heat Metal spell to soften the iron bars so that the Heroes can break through.
- B: This metal door is locked. Heroes need iron key to open it. When Heroes search this room they discover the iron key.
- C: This wooden door is locked. Heroes can break it in. It will take 5 hit points to break in the door.
- D: This room is full of Human prisoners. Men and women who are half starved. They are frightened. "There are more people behind that door." They say. Again the door is locked. 5 hit points will break it in. You free all the people. "You must wait here until we return." You tell them. You give them all your food and water so that they can regain some of their strength while you are gone.
- E: Zargon, these Fimir know magic. They are making undead monsters. Heroes get first attack. If any Fimir survive the first attack. You judge if your Heroes can take a big attack with Total Chaos and Flaming Spear spells. When Heroes search this room, they discover a dead man on the rack. There is nothing they can do for him.
- F: When Heroes search this room, they discover 2 artifacts inside the bookcase.
- G: This iron door is locked. Heroes need iron key to open it.
- H: Zargon, this wooden door is locked. 5 hit points will break it in. When Heroes enter this room, the metal door behind them closes. The ceiling starts to come down. IT'S A DEATH TRAP! Heroes have 3 turns to break in the door or they're all dead!
- I: This Ghoul has a crossbow.
Wandering Monster in this Quest: Ghoul.
Quest 9
You are busy tending to the freed people. You all decide to take a day of rest to regain your strength and help the people. They recover quickly. You make a map for them and provide them with food and water for their journey back to the King's realm. You and your friends pack your bags and head deeper into the Plains of Death.
You travel for 3 more days, finally you come to the temple. "This is it. Kirijath Arba." The Wizard calls it by name. "This place is in the middle of nowhere, why would they build it here?" Asks the Elf. "It may have to do with their plans. There are certain spots on this earth, where magic spells are amplified. This must be one of those spots." Says the Wizard. "There is no cover out here. We will have to wait until nightfall for any chance of making it in." Says the Barbarian. "It's a new moon tonight." Says the Wizard. "That is good for us, then." Says the Dwarf. "We may be too late though. If they are awaiting for the stars to align then I believe tonight will be the night." Says the Wizard. "Then let us rest while we can and then we finish this tonight." Says the Barbarian.
You wait for the sun to go down, the absence of the moon makes the night come quickly. You make your move. You come up the side of the temple and cut across the front to the main gates. Two Chaos Warriors are guarding the gate. You move in quickly for the attack.
Notes
- A: Starting place of the Heroes.
- B: When the Heroes reach this spot, they see windows built into the center room. They can look through these windows and see down into the next lower level. There are Humans worshiping an idol. They are performing all kinds of evil worship. "This isn't good." Says the Wizard. "They're summoning some very evil magic." "Are we in time to stop them?" Asks the Barbarian. "I don't know." Says the Wizard. "Have faith lads, and let us waste no time." Says the Dwarf.
- C: When the Heroes search this room, they discover inside the desk a letter. "Dear Lord! They're going to resurrect the Witch Lord, tonight!" Says he Wizard. "We got our work cut out for us then." Says the Barbarian. "We got to keep our heads about this" Says the Dwarf. "You're right, my friend. We need to be quick, yet thorough, we can't afford to miss anything that maybe a big help to us." Says the Elf.
- D: This Warlock can cast two spells on each of his turns. Heroes get first attack. If Warlock survives, his first set of spells are Firestorm and Summon Undead. His second set is Shroud of Night and Summon Demon. When Heroes search this room, they discover an artifact on the altar. They also discover a secret door.
- E: This chest is booby trapped. 1 hit point if sprung. Inside are 2 Heroic Brews, a Potion of Speed and an artifact. Heroes also find the iron key.
- F: This metal door locked. Heroes need iron key to open it.
- G: When Heroes search this room, they discover 3 throwing axes and 2 throwing stars on the weapon rack.
- H: This wood door is locked. Rot, Wood Blast or 5 hit points will break it in. Inside this room the Heroes discover 6 prisoners. They are all dead. The Heroes can't help them.
Wandering Monster in this Quest: Chaos Warrior.
Quest 10
You make your way down the long set of stairs. Suddenly the stench of death hits you like an invisible wall. "As long as I live, I will never get use to this horrible smell." Says the Dwarf. "It makes me able to fight harder." Says the Barbarian.
You get to the bottom of the stairs. The Dwarf stops you. "There are two pit traps at the bottom of these stairs, lad. Just take a moment." He says.
Notes
Zargon, the Heroes will need a torch for this level or else they'll lose two Attack dice and one Defense dice.
- A: Heroes start on this stair tile.
- B: When the Heroes open this door pandemonium breaks out. All the Humans run away. Only the 2 Doom Guards and Spirit Riders stand to fight.
- C: When the Heroes open this door, they realize that they are facing the forgotten legion.
- D: This chest is booby trapped. 1 hit point if sprung. Inside are 4 Anti poison Quills, 3 Heroic Brews, 6 Potions of Renewal and a bottle of sacred water.
- E: When Heroes search this room, they discover on the altar 2 artifacts.
- F: When the Heroes search this room, they discover inside the cupboard a sealed jar. Inside are 9 mushrooms. Each mushroom will restore 1 Body Point. Mushrooms must be eaten right away. Mushrooms can be shared.
- G: When Heroes search this room, they discover inside the bookcase an artifact. They also discover a small iron chest. This chest is booby trapped. 1 hit point if sprung. Inside is a small ruby worth 100 gold coins.
- H: This metal door is locked. Heroes need iron key to open it.
- I: This Zombie has a crossbow.
- J: Each of these Fimir has 2 Potions of Strength that they will drink if they are able to make their attacks. Heroes can claim Potions if the Fimir are killed right away.
- K: When Heroes search this room, they discover 2 artifacts inside the desk.
Zargon, the chest with an arrow pointing at it is the false chest. If Heroes choose correctly then they discover a Potion of Thunder, a Potion of Battle Rage, a Potion of Speed, a Water of Vitality, 4 Potions of Strength and 500 gold coins. Heroes also discover the iron key hanging on the wall.
- N: When Heroes search this room, they discover the tomb of the Witch Lord. When they open it they discover that it is empty. "This is not a good sign!" You say.
- O: These stairs lead down to the next level.
Wandering Monster in this Quest: Spirit Rider.
Quest 11
The printed Quest 11 has no narrative text; its page carries only the notes.
Notes
Zargon, Heroes need a torch for this level or they lose two Attack dice and one Defense dice.
-
A: Starting place of the Heroes.
-
B: This Warlock casts Hurricane as soon as the Heroes open the door. All Heroes are affected. Warlock then makes a physical attack.
Zargon, this Warlock has 6 potions that will restore 4 Body Points. Warlock will drink these potions one by one as long as he is able. If Heroes can kill the Warlock on one of their round of turns. The Heroes can claim these potions.
-
C: This chest is booby trapped. 1 hit point if sprung. Inside are 2 artifacts.
-
D: When Heroes search this room, they discover an artifact inside the bookcase.
-
E: Heroes get first attack. If Warlock survives, he casts Cloud of Chaos. Then he makes a physical attack.
-
F: When Heroes search this room they discover a sealed jar inside the cupboard. Inside are 9 mushrooms. Each mushroom will restore 1 Body Point. Mushrooms must be eaten right away. Mushrooms can be shared.
-
G: When Heroes open this door, they discover the Warlock making Stone Mummies. This Warlock has used all his powers so he can't cast a spell. When Heroes search this room, they discover that the door marked G on the map is surrounded with evil symbols and has a deer's skull on it. "Stay away from that door!" Says the Dwarf. "That door needs a soul to open it!" If any Hero tries to open it, a bolt of lightning comes out and kills him.
-
H: When Heroes search this room, they discover 3 throwing axes and a shield for the Dwarf on the weapon rack.
Wandering Monster in this Quest: Stone Mummy.
Quest 12
You rest for a moment to regain your strength. "How deep do you think we need to go?" You ask. "This temple is carved out of solid rock." Says the Dwarf. "They could go for quite a ways yet." "How are we going to get back through that door? Do we need another prisoner?" Asks the Barbarian. "Not if we can kill the Warlock that created the spell. His death will break that evil curse." Says the Wizard. "We need to hurry! They could be resurrecting the Witch Lord at this very moment." Says the Elf. "Then let us go now." Says the Barbarian.
Notes
- A: Starting place of the Heroes.
- B: This metal door is locked. Heroes need silver key to open it.
- C: This door is locked. Heroes need brass key to open it.
- D: This metal door is locked. Heroes need iron key to open it.
- E: When Heroes search this room, they discover a letter inside the desk. "Battle plans! After they resurrect the Witch Lord, Zargon plans a massive attack against the Kingdom. See, here's where they plan to make the first attack." Says the Wizard. "If we can stop the resurrection, then maybe they would not attack." Says the Dwarf. "Then let us make sure that it does not happen." Says the Barbarian. "We need to move quickly, yes, but let's not miss something that maybe a big help to us." Cautioned the Elf. "We'll take these plans with us back to the Emperor. He'll know what to do then." You say.
- F: This chest is booby trapped. 2 hit points if sprung. Inside are 2 Anti Poison Quills, 3 Potions of Strength, 4 Heroic Brews, an Elixir of Life and 2 artifacts.
- G: When Heroes search this room, they discover on the table 2 throwing daggers and the iron key.
- H: When Heroes search this room, they discover a throwing axe on the weapon rack.
- I: This chest is safe. Inside are dishes and spoons. The cupboard is full of food. If Heroes eat a little they regain 1 Body Point.
- J: When Heroes open this door the Warlock immediately casts Lightning Bolt at the Hero in the doorway. Heroes can then make attack. Warlock's next spell is Summon Undead. His third spell is Summon Undead again. Then he resorts to physical combat.
Wandering Monster in this Quest: Stone Mummy.
Quest 13
"That was Skulmar! That accursed slippery devil got away!" Yells the Barbarian as you all run down the stairs. "We are getting close now, keep your heads!" Says the Dwarf. "STOP!" He suddenly yells as you reach the bottom of the stairs. "There are pit traps ahead, let me disarm them."
Notes
-
A: Heroes start on this stair tile. The wooden door in this room is locked. Rot, Wood Blast or 5 hit points will break it in.
-
B: When Heroes open this door they are surprised to see Queen Kessandria and Skulmar behind a band of monsters. "KILL THEM ALL! DON'T LET THEM PASS!" She yells to her guards. Kessandria and Skulmar then run down the hallway.
When the Heroes kill all the monsters, your friend the Barbarian turns to you and says, "Kessandria and Skulmar got away, did you see which way they went?" You do not know.
-
C: This wooden door is locked. 5 hit points will break it.
-
D: This wooden door is locked. 5 hit points will break it in.
-
E: When Heroes search this room, they discover inside the bookcase 2 artifacts and a flask of sacred water. They also discover a secret door.
-
F: This chest is booby trapped. 2 hit points if sprung. Inside are 4 Heroic Brews, 4 Potions of Defense, a Potion of Speed, a Potion of Battle Rage, a Potion of Thunder, an Elixir of Life and 2 artifacts.
-
G: When Heroes search this room; they discover a sealed jar inside the cupboard. Inside are 9 mushrooms. Each mushroom will restore 1 Body Point. Mushrooms must be eaten right away. Mushrooms can be shared.
-
H: This Warlock's first and second spell is Summon Undead. He then resorts to physical combat.
Wandering Monster in this Quest: Doom Guard.
Quest 14
You and your friends race down the stairs. You are getting tired. "I pray that there's not too much more of this." You say. "Have heart, my friend, there can't be too much more of them left now." You make your way to the bottom of the stairs. A door stands before you.
Notes
-
A: Starting place of the Heroes.
-
B: When you open this door and look in you say. "Good Lord help us! It's the forgotten legion!" If any of the Heroes have any Courage spells, now's the time to use them.
-
C: Nothing happens inside this room. Heroes cannot open the tombs. Heroes can search this room, but when they go to open the door the tombs all open and a Spirit Rider comes out of each Tomb.
-
D: This chest is safe. Inside are tablecloths and dinning wear. If Dwarf looks inside this chest. He notices a false bottom. Underneath are 2 Elixirs of Life. When Heroes search this room they discover a sealed jar inside the cupboard along with a lot of good Human food. Inside are 9 mushrooms. Each mushroom will restore 1 Body Point. Mushrooms must be eaten right away. Mushrooms can be shared.
-
E: All these metal doors are locked. When the first Hero steps on this spot the 4 doors open and out comes 4 Doom Guards. They were expecting you. They get first attack.
-
F: This Warlock's first and second spell is Summon Undead. His third spell is Hurricane. Warlock then resorts to physical combat.
-
G: This wooden door is locked. 5 hit points will break it in.
-
H: This Warlock casts Lightning Bolt as soon as the Heroes break in the door. His second spell is Hurricane. He then resorts to physical combat.
Wandering Monster in this Quest: Spirit Rider.
Card Text
The card text below is transcribed from the remake's Cards sheet. The card faces print their names and stats; the card backs carry no rules text.
Spell Cards
Annul: This spell when cast will stop any one spell that the Heroes cast.
Flaming Spear: This spell when cast will create a flaming spear that the spellcaster can throw at a Hero that is in his line of sight. Spellcaster rolls 6 Attack dice. The Hero then defends himself.
Hangman: This spell when cast will choke a Hero. That Hero will be unable to attack or defend himself. Roll 1 red die for each of his Mind Points. A 6 will free him. Spell can also be broken by killing the spellcaster. Hero loses 1 Body Point for each turn he is under the spell.
Hurricane: This spell when cast, will affect all the Heroes. It creates a strong wind that causes them to lose 2 Attack dice and 1 Defense dice. Spell lasts until spellcaster is dead.
Open Pit: This spell when cast will open up a pit in the floor. If a Hero is over that spot, then he falls in and suffers 1 hit point of body damage. If pit is cast in hallway in front of the Hero then that Hero needs to jump the pit if no other route is available.
Shroud of Night: This spell when cast will cause a room to become completely dark. All Heroes' Attack and Defense dice are reduced to 1. Heroes cannot search this room. This spell will last for the whole Quest. Only a light spell will allow Hero to counter this spell.
Spell Magnify: To cast this spell will take up the spellcaster's turn. But, that next spell he casts will affect all the Heroes inside the room or in the hallway.
Stone Fall: This spell when cast will cause a ceiling or wall to cave in, creating an impassable spot on the gameboard. If a Hero is on this spot when the spell is cast, follow springing a fallen rock trap rules.
Summon Demon: This spell when cast will summon a Demon. Roll one red die. 1 or 2 - a Gargoyle. 3 or 4 - a Big Gargoyle. 5 or 6 - a Bellthor. Demon get to attack after being summoned.
Summon Fimir: This spell when cast will summon Fimir. Roll one red die. 1 or 2 will summon 1 Fimir. 3 or 4 will summon 2 Fimir. 5 or 6 will summon 3 Fimir. Fimir get to attack right after being summoned.
Total Chaos: This spell when cast will totally confuse a Hero. Reducing his Attack and Defense dice to 1. Hero cannot defend himself against this spell, except with a counter spell. Spell is broken when spellcaster is dead.
Triple Terror: To cast this spell will take up the spellcaster's turn. But on his next turn, he will be able to cast 3 different spells.
Sand Stone: This spell when cast will cause a wall or one stone square on the game board to turn into sand. Heroes can now pass through.
Remove Air: This spell when cast will choke a monster. That monster's Attack and Defense are reduced to 1 die. Monster rolls 1 red die for each of his Mind Points. A 5 or 6 frees him from the spell. Monster loses 1 Body Point for each of his turns that he is under the spell.
Dispel: This spell when cast will stop or break a chaos spell that is being cast on you or a fellow Hero.
Cat's Eye: This spell when cast give the spellcaster the ability to see inside a magically darken room.
Magic Torch: This spell will create a magical light that enables Heroes to see inside a magically darken room.
Quicksand: This spell when cast will trap a monster in its place. Monster can still attack and defend if Hero gets next to it. Monster is trapped for the length of the Quest.
Mind Burst: This spell when cast will give the Hero who it is cast upon 6 extra Mind Points for 2 turns. Hero's Mind Points then return to normal.
Geyser: This spell can be cast on any Hero. That Hero will then be protected from any fire spell. This spell lasts until there are no more monsters in sight.
Broth: This magical liquid will restore a Hero's Mind Points back to normal.
Summon Fire Ants: This spell will summon fire ants to attack 1 monster. That monster will lose 1 Body Point on each of his turns, until he is dead or can destroy ants with a fire spell.
Ivy Sap: The sap from this rare ivy plant will restore 4 lost Body Points. Hero cannot exceed his starting points.
Recall: This spell enables spellcaster to recall one spell that was already cast during the Quest.
Treasure and Event Cards
Treasure Hoard!: Under a loose stone in the floor, you find a small chest. Inside are 300 gold coins! Record the money on your Character Sheet. Do not return this card to the deck.
Anti-poison Quill: Restores any of the owner's Body Points lost by poisoning if used immediately. May only be used once.
Potion of Restoration: On a large shelf you find many bottles. All are empty except one. You find a Potion of Restoration. When you drink it, you regain all your Body and Mind Points that you had when you started the Quest. This potion will also cure a Hero who has been turned into a Werewolf. This can only be used once. Do not return this card to the deck.
Rat: A Rat attacks you. Refer to Rat monster card for statistics.
Monster Cards
The monster cards print the same Movement, Attack, Defend, Body and Mind figures as the Monster Chart above. The notes printed on the cards are:
- Skulmar: Can perform two actions per turn. Can cast two spells, or make an attack and cast one spell, or make two separate attacks.
- Queen Kessandria: Can perform two actions per turn. Can cast two spells, or make an attack and cast one spell, or make two separate attacks.
- Witch Lord: Can perform two actions per turn. Can cast two spells, or make an attack and cast one spell, or make two separate attacks.
- Bellthor: Breathes a poisonus gas after each attack. Roll 6 attack dice, that Hero defends. For each hit Hero loses a Mind Point. If Mind Points reach zero, Hero is knocked out.