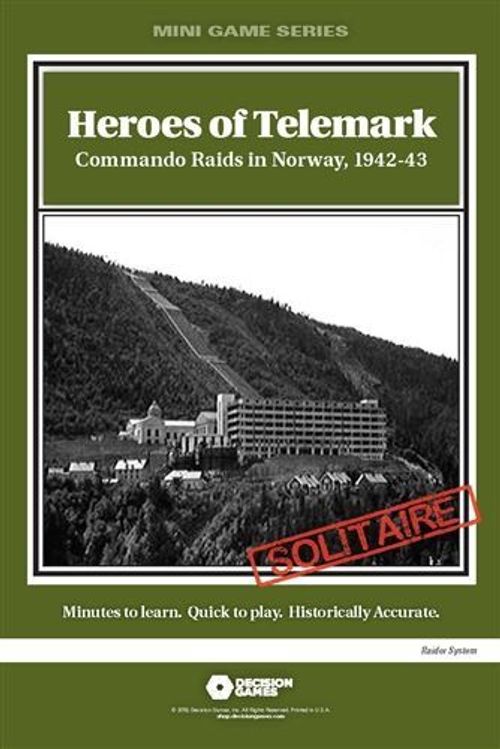
Heroes of Telemark: Commando Raids in Norway, 1942-43
Heroes of Telemark: Commando Raids in Norway, 1942-43 Rulebook
Table of Contents
Table of Contents
- Raiders System Rules
- 1.0 Components
- 2.0 Introduction
- 3.0 The Map
- 4.0 Playing Pieces
- 5.0 Cards
- 6.0 How to Win
- 7.0 How to Set Up the Game
- 8.0 Mission Cards
- 9.0 Recruiting & Recruit Points (RP)
- 10.0 How to Play the Game (General)
- 11.0 Operations (Ops)
- 12.0 Movement
- 13.0 Operations Cards
- 14.0 Hostile Units
- 15.0 Combat (Battle)
- 16.0 Post Battle
- 17.0 Alert
- 18.0 Special Moves
- 19.0 Objective Markers
- 20.0 Leaders
- 21.0 Pioneers / Engineers
- 22.0 Guides / PSYWAR
- 23.0 Gear
- 24.0 Supplies
- 25.0 Campaign Game
- Heroes of Telemark Scenario Rules
Raiders System Rules
Version 9 (2024). These are the general rules for the Raiders mini game system; the Heroes of Telemark scenario rules follow in their own section and supersede or modify them where they conflict.
1.0 Components
This Mini Game is complete if it includes: 40 counters (units), 18 Mission and Operations cards, one 11x17-inch map, these system rules and a two-page scenario rules sheet. If any parts are missing or damaged, please write to: Decision Games, Mini Game Support, PO Box 21598, Bakersfield, CA 93390-1598. Please register this game purchase on-line at: www.decisiongames.com.
1.1 Do or Die
Players must provide one or more six-sided dice (six is good).
2.0 Introduction
Raiders is a solitaire wargame system in which the player takes command of a small force (called Raiders) conducting daring missions behind enemy lines and engaging in fierce combat on far flung frontiers. The opposition force (Hostiles) is controlled by the game system. A deck of Operation cards provides various situations and generates potential combat situations.
2.1 Scenario Rules Precedent
Each game is played in missions, generated by Mission cards. The system rules include a campaign game, allowing you to link the individual missions into a larger campaign. Scenario rules supersede or modify the rules in this system rules booklet for each specific game. Instructions on cards take precedent over the game rules.
Note: Raiders is similar to DG's Commando System but has some significant differences.
2.2 Game Terms
May: You can choose to take the action or not.
Must: You have to take the action.
Operating Force: A group of units taking an action together.
Pick or pick at random: Pick at random from the designated marker pool.
Roll against a value: Roll a die and then compare it to your unit's combat value. If the die roll is less than or equal to the factor, the die roll succeeds. If it is greater than the combat value, it fails.
Example: Your unit has a combat value of three. To destroy a hostile unit, it would require a die roll of one, two or three. A roll of four or higher would miss.
Select: Sort through the markers and choose the one you want.
2.3 System Rules
These rules are for several different games. Particular rules may not necessarily apply to all games. See the exclusive scenario rules for exceptions and additional rules specific to the scenario.
3.0 The Map
Each game in the series shows the Area of Operations (AO). The map depicts the following.
Staging Areas: Special spaces where your forces start (and potentially end) missions.
Spaces: Locations where you place units. Different types of spaces are described on the Terrain Effects Chart.
Routes: The lines connecting spaces. Players move their units via routes.
Recruit Box: A convenient place to put units that are not in play, or were destroyed due to combat or other game actions. These units may sometimes be returned to play.
Alert: The enemy's preparedness level. The higher the level, the more enemy units appear when encountered.
Hostiles Bin: A wide mouth opaque container, such as a coffee mug; a convenient place to put hostile units when not on the map and from which they are picked.
4.0 Playing Pieces
The square die-cut pieces are called units. Scenario rules provide more information about their set-up. The following game definitions apply to the various counters.
Friendly Units: Raider units controlled by the player.
Unit Information: The sample counter in the printed rules is labelled Unit ID, Type, Movement and Combat value.
Gear: Special equipment that raider units can use to enhance their actions.
Hostile units: Combat units controlled by the game system; they will sometimes fight friendly forces and vice versa.
Combat: Basic combat power of a friendly unit; in combat, a die result of this number or less eliminates one opposing unit.
Movement: Basic number of spaces the unit can move in a turn. A Mobile unit has a movement allowance of 1 (one) or more; a Static unit has a movement of 0 (zero).
Elite: A unit with enhanced tactical abilities. The "+" sign denotes that it confers a +1 to the Tactical Edge die roll.
Markers: The reverse of some counters reference any special rules for them.
Objectives: Special units or markers that are the focus of missions are explained in the Scenario rules.
Alert: Indicates the readiness of the hostiles.
RP: Indicates remaining number of Recruit Points.
5.0 Cards
There are two types of cards: Mission and Operations. These are explained under their respective rules sections.
6.0 How to Win
The game is played in missions. Each mission will require you to draw one Mission card. This will state the objective. If you have fulfilled this mission by the end of the game, you win. Generally, this will be in terms of destroying or revealing objective markers, or occupying certain spaces. Sometimes, it requires moving an objective marker to a Staging Area. If you fail to fulfill the objective, then you lose.
7.0 How to Set Up the Game
- Place all hostile units in the Hostiles Bin (place objective markers aside; scenarios will give the procedure for deploying them).
- Shuffle the Mission cards together and place them face down in a separate pile.
- Draw at random one mission card and read it.
- Shuffle the Operations (Op) cards together and deal out the number of Op cards specified for the mission and place them face down in the draw deck. The remaining cards form the reserve deck.
- Place objective markers on the map per scenario instructions.
- Create your starting force by purchasing raider units for the scenario with recruit points. Place these in a Staging Area per the Exclusive Rules.
- Place all un-purchased raider units in the Recruit Box.
- The mission is now ready to be played.
8.0 Mission Cards
Each mission card has the following information.
- Situation: The starting alert level and/or hostile unit/objective marker placement.
- Mission/Objective: What you have to do to win the mission.
- Execution: The number of operations (turns) in the mission.
- Logistics: The number of recruit points you have to build your force.
- Command/Leadership: The stacking limit for raider units.
- Success: If you successfully complete the mission, what you receive at the start of the next mission.
9.0 Recruiting & Recruit Points (RP)
Each raider unit and gear costs a designated number of Recruit Points (RP) as listed on the Recruit Table. Place recruited raider units in any Staging Area. Place gear with raider units.
9.1 Banking RP
Any RP you did not expend during initial deployment can be saved to recruit units during the game. This is done in the Re-supply & Scouting segment of the turn. You can then buy additional gear at certain locations. You may also gain RP during a game through objective markers or event cards; these are added to the RP to the Ranger Recruit Point track.
9.2 Cards & Tables
Operations cards and game tables can provide recruits. These units are received at no cost in RP; they are free. Place per the card or table instructions. If there are no units available, then there is no further effect.
10.0 How to Play the Game (General)
10.1 Game Length
The game lasts until the end of the turn when the last operations card has been picked and played. It can also end if all raider units have been eliminated.
10.2 Stacking
Stacking is having more than one unit in a single space. You may have a number of raider units in a single point up to the command limit listed on the mission card (or as determined in the exclusive rules). Leaders, gear, hostiles, and objective markers do not count against stacking. Stacking is checked only at the end of a movement segment. You may otherwise move any number of units through a particular space. An unlimited number of units may be stacked in a Staging Area.
10.3 Force
A force is a group of units in the same space, conducting an operation together. A force can consist of a single unit or more than one unit (up to the stacking limit).
11.0 Operations (Ops)
Each mission card will assign you a number of operations (abbreviated "Ops") you can use during a mission. The number of Ops is tallied by the number of Ops cards remaining in the draw deck. One operation is defined as one raider force taking all the following actions in this order.
- Recruiting & Scouting/Recon Segment: The operating force can either perform a recruit action (expending RP) or a scouting/recon (27.0) action. See the rules for details.
- Movement Segment: Move the operating force up to its movement allowance.
- Operations Card Segment: Pick one operations card. The instructions on it are implemented by the player and may affect the space in which the force ended its move.
- Combat Segment: If there are any hostile units in the space entered (which may be generated by the operations card or certain objective markers), you must engage in combat.
- Objective Segment: If there is a face down objective marker in the space in which a force completed its operation, flip it face up. You may conduct actions on the objective (e.g., demolitions and possible combat against Hostile units generated by a revealed Objective marker).
Example: In one Op, you may recruit or scout, then move one force, then draw an operations card. If enemy forces are present in the force's space (due to the card draw), you must engage in combat with those forces. If the force moved into a space with an objective marker, that revealed marker may result in another enemy force and a second combat. The revealed marker (or simply the terrain type) may be the target of demolition or other action. One Op, therefore, consists of all of the above actions.
11.1 Multiple Operations
A single unit or force of units can conduct any number of operations per mission, as long as you expend one Op for each operation. You do not have to use your full number of operations for a mission if you win before then.
11.2 Mission End
When you have conducted your last operation, the mission comes to an end.
11.3 Variable Operations
Certain operation cards or scenario rules will cause a gain or loss of Ops in a mission.
Gain of Op: Pick one (or more) Ops card (face down) from the reserve deck and place it on the bottom of the draw deck. If the reserve deck is exhausted, shuffle the discards to form a new reserve deck.
Loss of Op: Pick the top Op card from the available deck and discard it, face down. If there are no more cards in the deck, or if this is the last card, the mission ends.
12.0 Movement
During a force's movement segment, you may move the operating force any number of spaces, up to its movement allowance. If you have more than one unit starting in a space, you may form some of them into a force and leave the rest behind in the starting space (those that remain could move in a subsequent operation). If there is more than one unit in a force, they must move together. They use the movement of the slowest unit. After leaving the starting space, you may not pick up or drop off units from a moving force; they must stick together.
Example: You have three units in a space. You could form them into one combined force (of three units), or two forces (one of two units which then moves, and a second of one unit which stays behind, or vice versa).
Example: A force with the slowest unit with a movement of 2 may move two, one or no spaces during a Movement segment.
A force must stop and move no farther this Op if it enters a space for which the Terrain Effects Chart indicates STOP. Also, a force must stop if it enters a space with an objective marker. The force can move out of such a space on a subsequent Op.
13.0 Operations Cards
At the conclusion of a force's movement segment, regardless of whether the force has actually changed location, you must pick an operations card (e.g. if the force only conducted recruit and did not move). The card is picked from the top of the deck.
Exception: When an operating force completes a move into a Staging Area, you do not pick an operations card. Staging Areas will be indicated by scenario.
Operations cards may have the following information.
- Make an Alert Check: If die roll is equal or less than Alert Level, implement the card effects. If higher, no effect.
- Reinforcements: If a card calls for you to receive raider units, they are received at no RP cost. They are placed per the card instructions.
- Go To Combat Procedure: The player picks the stated number of hostile units from the bin, and places them in the space containing the operating raider force. This will trigger combat in the force's ensuing combat segment (see below).
- Win/Lose Ops: If your force wins that battle, certain cards award a number of additional operations. If your force loses the battle, certain cards deduct a number of your Ops. (See 14.0.)
- Other Win/Lose: Some cards will cause you to gain or lose RP. You can not go above the scenario max or below zero (see the RP Index).
13.1 Operations Card Disposition
Generally, operations cards are placed in a separate discard pile after they have been picked and played (face down). When the last card in the draw deck has been picked, the game comes to an end at the conclusion of that Op (following the Objective segment).
Some Ops cards will return discards to the deck. In this case, pick them from the discard pile (face down) and reshuffle them into the deck.
You keep cards that state "Keep this card". Place the card in front of you; you may play it per the instructions. This does not count as an extra Op. At that time, implement one of the listed special events. Then discard it.
14.0 Hostile Units
Hostile units are temporarily placed on the map as the result of events. They are placed in the same space as the force that triggered the card draw. Hostile units are automatically removed from the map after the battle concludes, and placed back in the Hostiles Bin. They may be temporarily eliminated by combat, but are always returned to the Hostiles Bin (unless a scenario specifies otherwise).
15.0 Combat (Battle)
Combat is initiated when a force of your units is in the same space as hostile units. This will occur as a result of operations card draws. All combat occurs during the Combat segment.
Because each force must move individually, generally, you will not be able to combine different forces in the same combat. However, if there were other units already in the space, and a moving force entered that same space, those units will also participate in combat generated by an operations card draw.
15.1 Battle Procedure
Each combat must go through the following stages.
-
Determine the Number of Hostile units. If not otherwise stated on the card, roll one die and pick a number of units equal to the result. Cards may call for additional or specific numbers of units to be picked.
-
Determine which side has Tactical Edge. Roll one die for the raider force, and another die for the hostiles; if either side has an elite unit with its force, add "1" (+1) to that side's die roll for each elite unit. The side with the higher total result has Tactical Edge. If the net die rolls are tied, the Terrain Effects Chart will give who has Tactical Edge.
-
First Round of Battle. Once Tactical Edge has been determined, line up all of the hostile units in the order of the strongest Combat rating to the weakest. If more than one unit has the same value, place them in any order you want. Next, line up all of the raider units in any order you prefer.
If the raiders have the Tactical Edge, they fire first. The player fires the first unit in line at any hostile unit. If the hostiles have Tactical Edge, they fire first with their first (strongest) unit in line at the first unit in the raider line.
To "fire" a unit, roll one die. If the die result is less than or equal to a unit's combat value, it eliminates one enemy unit. Losses are inflicted upon the targeted unit immediately. Next, the side that does not have Tactical Edge fires with one unit, per above.
Note: All units are affected the same by a die roll result, regardless of the unit's type or strength. Opposing units alternate firing, one unit at a time (and inflicting any casualties immediately), until all qualified units have fired during that "round." A unit that is eliminated may not fire. If one side has more units than the other, after alternating fire between the opposing forces, that side fires all of its remaining units.
Note: A unit that is eliminated is not eligible to fire (this is why Tactical Edge is important). Fire with the next unit in line.
-
Second Round of Battle. If both sides have surviving units, a second round of battle begins. This repeats the procedure of the first round. Maintain who had the Tactical Edge.
-
Continuing Rounds of Battle. Upon completion of any second round of battle, a third (and then a fourth, fifth, etc., if necessary) round is executed, following the same procedure. Continue this procedure until all the units of one side have been eliminated or a Breakoff occurs (15.2). Whichever side has at least one unit remaining at the end of a round of combat is considered the winner.
Note: Because of the alternating fire procedure, it is not possible for both sides to be entirely eliminated.
15.2 Breakoff
If each side in consecutive rounds fails to inflict any losses on the other side, then the combat comes to an end. The battle is a draw. Go to the Post Battle procedure (below).
16.0 Post Battle
After a battle comes to an end, do the following:
- Hostiles: Return all hostile units to the bin. (Scenario rules may provide exceptions.)
- If the Raiders win the battle: Gain Ops (and other bonuses) per the instructions given on the operations card.
- If the Raiders lose the battle: Lose Ops (and other bonuses) per the instructions on the operations card.
- If the battle ends in a draw: Neither gain nor lose Ops (and other bonuses).
Note: Surviving Raider units will remain in the space.
17.0 Alert
The Alert Track modifies the hostiles reaction. The scenario will designate where to start the Alert Level on the Index. Various game events can cause the alert level to rise (or sometimes fall). The alert level can never go lower than one or higher than five.
17.1 Effects
Operations cards may call for the player to pick hostile units from the bin equal to the Alert level. Also, if an operations card calls for an alert check, then roll one die against the current alert level. If it is less than or equal to that level, the alert event takes place; if it is higher, the alert fails; see the cards (or scenario) for the outcome.
18.0 Special Moves
Certain operations cards will allow you to move a force in a special way. This is explained on the card.
Note: These moves may not be in each game.
18.1 Airfield Move
Pick up any and all mobile units in one force on an airfield and move them to another airfield.
18.2 Water Move
Pick up any and all mobile units in one port or coastal space (defined by scenario) and move them to another port or coastal space.
18.3 Operations
Airfield and water moves use all movement for that force for the operation. At the completion of the move, the force picks an Ops card normally.
18.4 Transport
Some units transport other units (such as gear, or in some cases, objective markers). This will be indicated by individual games. To transport an eligible unit, a mobile unit must be in the same space as the unit to be transported. The transport picks it up. The transported unit then moves with the transporting unit, using the latter's movement allowance. It must stay with the transporting unit for the entire move. If the transporting unit is eliminated, so is the transported item. You may debark a transported unit at the end of any movement (or keep it transported). If a transporting unit is eliminated, then the item is lost for the remainder of the mission.
19.0 Objective Markers
Each game has objective markers. Scenario rules will give specific rules for them.
20.0 Leaders
Leaders represent superlative commanders. Leader units may be assigned by a scenario, by winning a mission, and/or may appear after winning a battle.
20.1 Leader Units
Leaders are considered units for all game purposes. Generally, leaders are elite units. They may have other special abilities per scenario rules. If a leader is eliminated, he may not be replaced in a mission.
20.2 Gaining Leaders
If a raider force wins a battle, roll one six-sided die. If the roll is a 6, the player picks one leader from the recruit pool (if available) and places it in the space with that force.
21.0 Pioneers / Engineers
Some scenarios have pioneers (or engineers). These units have special abilities.
21.1 Demolition
Demolition allows pioneers to destroy certain objective markers per scenario instructions. To perform demolition, a pioneer must be part of an operating force in the same space as an objective marker in an Objective Phase. Roll one die for each pioneer in that space. Consult the Demolition Table. If you have more than one pioneer in a space, you declare which pioneers are attempting demolition one at a time, and may cease at any point.
22.0 Guides / PSYWAR
If there is a guide or PSYOP (psychological warfare) qualified unit (as defined by the scenario) with a raider force, or if you have a card specifying a one-time PSYOP option, after drawing an operations card, but before playing it, you may place that card on the bottom of the deck. You must draw a substitute card. Each force may do this only one time per Operations Card segment, even if there is more than one guide qualified unit with that force.
23.0 Gear
Gear represents additional weapons and equipment. Scenario rules explain their use.
23.1 Recruiting Gear
You purchase gear markers by expending RP. You assign gear by placing the counters under individual raider units. Gear assignment is done during initial setup (and sometimes in a scenario depending on Ops cards).
23.2 Control of Gear
Generally, each leader can transport (and use) one item of gear, while each mobile unit can transport and use two gear items. You can trade items of gear between raider units in the same operating force at the start of a movement segment.
23.3 Elimination of Gear
If a raider unit is eliminated, then any gear with it is also eliminated. Otherwise, gear is not affected by combat.
23.4 Expending & Abandoning Gear
Some gear can be used only once (demolition, supplies, see scenario rules for specifics). You can abandon gear from a force at any time it is conducting an operation by returning the gear to the Recruit Pool. Eliminated, expended and abandoned gear is returned to the Recruit Pool.
24.0 Supplies
Some scenarios will give you supply gear. A force can expend a supply gear counter to do one of the following.
- Forced March: At the start of a Movement segment to move a raider force one extra space. The extra space is moved before regular movement (and does not trigger hostiles reaction). OR
- Maximum Firepower: During combat, to roll the die two times for each raider unit in the force firing for one round. The second die roll may be used against the same or different hostile unit as the first die roll.
- Certain Ops Cards: provide bonuses for expending supplies.
Transcriber's note: the printed text reads "THe second die roll"; the capitalisation is corrected here.
25.0 Campaign Game
Raiders can be played as a series of games. At the conclusion of a scenario, return all of your units to the Recruit Pool. You keep any leaders who survived that scenario. Other units must be recruited again normally to be brought back into play. However, eliminated leaders may be replaced in future scenarios.
25.1 If You Win the Scenario
- Remove that mission card from the deck.
- Keep any unexpended RP.
- For the next scenario, add one to the starting alert level.
- For the next scenario, gain what is listed after Success on the completed mission card (this is for the mission just completed, not others).
25.2 If You Did Not Win a Scenario
- Reshuffle that mission card back into the deck; you can potentially pick it again.
- Keep any unexpended RP.
25.3 Winning the Campaign
You win the campaign only when you have won all of the scenarios. However, if you lose any two scenarios, you lose the campaign.
Heroes of Telemark Scenario Rules
Scenario rules, MINI-T_Telemark_V7F (2019), numbered 28.0 to 37.0 to extend the Raiders system rules. These supersede or modify the system rules above for this game, and the Errata printed at 37.0 applies.
Transcriber's note: the scenario sheet cites sections 26.0 (Coordinated Operation) and 27.0 (Scouting/Recon), and the Demolition Table, Airborne Insertion Table, Gestapo Interrogation Table, Recruit Table, Terrain Effects Chart and Random Placement procedure. Neither supplied PDF prints sections 26.0 or 27.0, and the tables, the Random Placement procedure and the 18 Mission and Operations cards are map and card components that are not in the supplied files. These references are transcribed as printed and are unresolved in the source.
28.0 Introduction
Heroes of Telemark is a solitaire game of the Raiders series in which you, the player, take command of British-Norwegian SOE (Special Operations Executive) forces attempting to destroy the German heavy water plant at Vemork in Norway. The German defenses are controlled by the game system by a deck of Operation cards. The player conducts the following missions.
Grouse: a preliminary scouting and intelligence mission.
Freshman: a failed attempt with glider-borne engineers to sabotage the plant.
Gunnerside: a successful raid by Norwegian SOE commandos that sabotaged the heavy water production facilities.
Tinnsjo: the sabotage and sinking of the ferry carrying heavy water barrels across Lake Tinnsjo for shipment to Germany.
29.0 Counter Types
Raider Units (player)
Leader (1+3): a commander of extraordinary abilities. Adds one to Tactical Edge die roll.
Commandos (2-3): a team of SOE trained Norwegian commandos. The binoculars on the reverse indicate they are Scouting/Recon capable.
Combat engineers (3-2 with red dot on front and demolition symbol on reverse): troops specially trained to use high explosives. Combat engineers have demolition capability (rule 31.2).
Partisan Squad (3-2): local irregular fighters.
MILORG Camp (2-0): a forward camp set up by the Norwegian underground (see 36.0).
Airstrike (4): tactical air support. An airstrike can only be called in by a Raider unit with a Radio.
Raider Gear
Supplies: see the Supply Rule (24.0).
Comp-C (demolitions): a force can expend one of these (23.4, also see 31.2) to roll one die when trying to destroy an objective. Any Raider unit can use Comp-C.
Silenced pistol: gives +1 die roll modifier to Tactical Edge (in addition to any Elites). This does not expend the Gear.
Bren LMG: add one to the combat value of the carrying unit. This does not expend the Gear.
Radio: an Operating force can use the Radio to (1) call in an airstrike in its space as part of an Op; or (2) conduct optional Coordinated Operation (26.0).
Objective Markers
Heavy Water (D₂O) Facility and Barrels (counter value 1 RP): these remain in place until destroyed by Demolition (either combat engineer or Comp-Cs).
Pu-239 (Plutonium) sample (counter value 1 RP): this remains in place until recovered or destroyed (see 32.2).
Ambush (counter value 0 RP): if revealed by a Raider force entering the space, then a Hostile force appears; place a number of Hostile units equal to the current Alert level and engage in combat. If it is revealed by other means, then nothing happens. Regardless, remove the marker from play.
Abandoned (counter value 0 RP): nothing happens, remove the marker.
Hostile Units
Infantry (2 to 4) and Sd.Kfz. 251 armored vehicle (5): combat units.
Gebirgsjager troops (4+): elite mountain unit. Adds one to Tactical Edge die roll.
Flak Battery (4): If a Raider airstrike is called in, the airstrike and the flak gun are removed (no further airstrike can be called in). Flak unit does not participate in the ground battle if it cancels an airstrike, but does participate, with strength 4, if there was no airstrike to cancel.
Gestapo (1):* If a Raider force loses a battle and there is a Gestapo unit surviving, then you must immediate roll on the Gestapo Interrogation Table and apply the result.
30.0 Special Spaces
30.1 SOE Staging Area (Britain)
In Telemark, the SOE Staging Area is the only airfield. Raider units can move onto the map from here via Air Movement.
31.0 Special Units
31.1 Norwegian Partisans (3-2)
This unit can be recruited via play of the Partisans Ops card. Treat it thereafter as a Raider unit.
31.2 Engineers & Demolition
Engineer units have an inherent demolition capability. This allows them to destroy certain Objective markers per the scenario. To perform demolition, an Engineer must be part of an Operating force in the same space as an Objective marker in an Objective phase. Roll one die for each Engineer in that space. Consult the Demolition Table. If you have more than one Engineer in a space (or you have Engineers and Comp-C gear in the same Operating force), you can declare one demolition attempt for each Engineer unit and each Comp-C gear in the space. Engineers are not expended after demolition attempts (unlike Comp-C gear). Demolition attempts are conducted one at a time in any order the player chooses (and can stop, regardless of success or failure).
31.3 Scouting/Recon
Leader and Commando units may conduct scouting/recon per 27.0.
31.4 Airborne-Qualified Units
All Raider Leader and Commando units are parachute qualified. Combat Engineer units are glider qualified.
31.5 Airstrikes
The player places purchased Airstrikes in the Air Available Box. They are available to support ground combat operations. To call in an airstrike, the Operating force must include a Radio. The player picks up an available airstrike unit from the Air Available Box, and places it on the map in the same space as a Raider force engaged in combat. The airstrike attacks any one German unit before rolling for Tactical Edge.
Airstrikes are never affected by enemy fire (exception: the FLAK Battery prevents placement of the Airstrike). Furthermore, airstrikes may not attack German units by themselves; they may only be placed in a space where a Raider force conducts ground combat.
An Airstrike can fire only once per Combat and then is placed in the Recruit Box. It can be re-purchased on an ensuing Operation (see the Resupply phase).
Note: Using airstrikes does not count as an additional Op.
32.0 Objective Markers
When setting up the game, turn all the Objective markers face down and randomly pick five of them and place them on the Objective Locations. They are revealed (flipped face up) only if one of the following conditions apply:
a) an Operating Raider force is in the same space during an Objective segment; or b) if you play a card which reveals an Objective; or c) via the Scouting/Recon rule; or d) if the Grouse mission has been successfully completed, one Abandoned marker is removed from play for the rest of the campaign.
Once an Objective marker is revealed, it remains so until eliminated or recovered.
Note: if you are playing a single Mission or a random Campaign, remove one Abandoned marker when playing any but the Grouse Mission.
32.1 Movement Effects
A moving force must cease movement in a space containing an Objective marker (face up or down).
32.2 Actions on Objectives
Mission cards will detail the actions Raiders need to take when in the same space as an Objective.
Reveal: Turn the Objective marker on the map face up (see 32.0).
Destroy the Heavy Water (D₂O) Facility and Barrels: Raider units attempt to destroy the Objective (see 31.2).
Recover the Pu-239 sample: An eligible Raider unit must pick up the Objective and transport it to the MILORG Camp (see 18.4). If the MILORG Camp has been removed, transport it to one of the three spaces with a grey arrow to transfer it to an agent who will smuggle it out.
Ambush: If this is revealed by a Raider force entering the space, then a German force appears; pick a number of German units equal to the current Alert level and engage in combat. If it is revealed by other means, then nothing happens. Regardless, remove the marker from play. If you win the ensuing battle, gain one Op. If you lose, lose one Op.
Abandoned: nothing happens, remove the marker.
32.3 Objective RPs
When an Objective is successfully destroyed or recovered, the RPs are gained immediately. The Pu-239 marker must be transported to the MILORG Camp in order to count for victory and RP bonus.
33.0 Leaders
One Leader starts the first mission. If a Raider force wins a battle, roll one six-sided die. If the roll is a "6," the player picks one leader from the recruit pool (if available) and places it in the space with that force.
Leaders are considered units for all game purposes however they do not count towards the stacking limit (10.2). Leaders are elite units. If a leader is killed, he may not be replaced in a mission.
34.0 Airborne Landings
Certain units (see 31.4) can make airborne insertions via parachute or glider. To do so, they must start in the SOE Staging Area. You execute an Airborne landing as an Operation (step 2). Pick up the units from the Staging Area you wish to insert (up to stacking limits), and place them on any one designated landing zone space on the map (as a single force). Next, roll one six-sided die for the force and consult the Airborne Insertion Table; apply the cross-indexed outcome indicated for that die roll result. After the insertion, the airborne units may not move any further that Op. Pick an Operations Card normally for that force after it lands.
Note: Airborne insertions are different from airfield to airfield moves. Also, the glider and transport aircraft are not represented by counters in the game.
35.0 Gear
You purchase Gear markers by expending RP. You assign Gear by placing the Gear counters under individual Raider units. Gear assignment is done during initial setup (and sometimes in a scenario depending on Ops cards).
You can trade items of Gear between Raider units at the start of a movement in which they conduct an op. If a Raider unit is eliminated, then any Gear with it is also eliminated. Otherwise, Gear is not affected by combat. A Raider unit can carry a maximum of two items of gear.
Gear Effects
See Counter Types (29.0).
36.0 MILORG Camp
You receive this unit at no cost at the start of each scenario. Deploy it via the Random Placement procedure.
This acts as a combat unit with the following special rules. Once placed, the camp can move only under the following circumstances:
a) an Op card causes it to move. Use Random Placement to determine the new location. Reroll if same location. b) it is eliminated via combat or card; remove it from the scenario.
MILORG Effects
The camp itself cannot be part of an Operating force. A Raider force that starts an Operation in the same space as the MILORG may:
a) Resupply: declare an Op. Instead of moving, the force remains in place. You can expend RP to buy Gear. OR b) Gain Intelligence: initiate an OP. Instead of moving, roll one die. On an odd result, you can reveal any one Objective marker. On an even, nothing happens.
Camp Destruction
The camp is destroyed if:
a) the Raiders fight and lose a battle in the same space. b) a card calls for it.
The camp cannot be replaced within the course of the current mission. The camp is automatically replaced at the start of the next mission.
37.0 Campaign Game
For a historical Campaign Game, play the missions in their card number order. Repeat a failed mission per 25.0, but any subsequent failed mission (same or subsequent mission) loses the Campaign. In the Campaign Game, any leaders that are in the MILORG camp or the Staging Area at the end of the mission are retained for the next mission (all other units must be re-purchased). Win or lose, retain half the RP's plus the number of Op cards remaining (rounded down).
Errata: Cards #12-14 & #16-18: the failure result is on greater than (">").