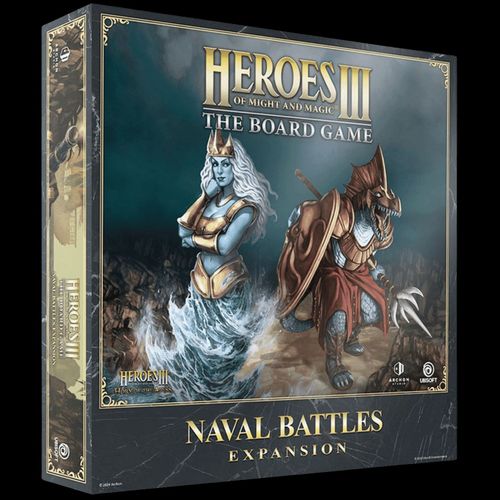
Heroes of Might and Magic III: The Board Game – Naval Battles Expansion
Heroes of Might and Magic III: The Board Game – Naval Battles Expansion Rulebook
Table of Contents
Table of Contents
Component List
- 1 × Mission book
- 2 × Neoprene Combat board
- 50 × Creature Bank Unit card
- 32 × Empowered Ability card
- 24 × Creature Bank token
- 10 × Empowered token
- 9 × Stacked Unit token
- 4 × Attack die
New Elements
Neoprene Combat Boards
This expansion contains two neoprene Combat boards, with a regular Combat board on one side and the Naval Combat board on the other.
The regular Combat boards can substitute the original cardboard ones, and—given that there are two of them—they will certainly come in handy when you invite friends to play with you. If you are experienced enough to perform your turns simultaneously—during cooperative scenarios, for example—they will help to reduce the downtime, which can be a real plague in multiplayer games.
With few additional rules, the Naval Combat board will introduce an interesting variation for battles at sea locations. For more details, see Naval Combat below.
Naval Combat
If the scenario you are about to play uses Sea tiles, before starting the game, you may opt to use this alternative board for any Combat that will take place on them.
The Naval Combat board's setting is somewhat different from the regular one—the two spaces in the center are removed—which results in a minor modification to the Combat rules. Ground units must navigate around these spaces by taking a path on the left or right side of the board. Flying units can move over the missing spaces as if the spaces were there, but they still cannot end their movement there any more than they could move outside the board. The diagram on page 3 of the mission book illustrates permitted and forbidden paths.
If you decide to give it a try, be careful—some battles may challenge you more than you may think!
Empowered Ability Tokens
This token allows you to empower your next Ability card (see the next section). You can use one of these tokens the moment you gain a new Ability card, regardless of how you obtain it (by leveling up, visiting a location, or any other way). When you gain this token, place it on your Hero card. Once the token is used, discard it.
You can obtain these tokens as rewards at certain locations.
Example: Crag Hack reaches level 2. The player controlling him decides to perform the Search (2) action and draws two cards from the Ability deck. The cards are Offense and Wisdom. The player chooses Offense and places the other card on the discard pile.
Now, the player may either use an Empowered Ability token on the newly gained Ability card or save the token for later. The player decides to use it, so they Remove the "Offense" Ability card and take the Empowered "Offense" Ability card in its stead.
Empowered Ability Cards
These cards work identically to Ability cards, but have only one effect that does not require using your Expert. When you gain an Ability card, you may use an Empowered token to gain its Empowered version instead. If you do so, Remove the non-empowered Ability card you would otherwise gain. Keep the Empowered Ability deck face up next to the Ability deck.
NOTE: There is only 1 copy of each Ability card, so if one player takes a particular Empowered Ability card, they prevent other players from obtaining it—in the example in the previous section, by taking the Empowered Offense Ability card, Crag Hack made it impossible for any other player to have the Empowered Offense. Whether you will wait for your desired ability or empower—and use—one early is up to you.
Card anatomy: 1. Name; 2. Basic effect; 3. Expert effect; 4. Faction-specific card*.
*Faction-specific cards may be added to any faction's deck of Might and Magic, however they can only be used by their specific factions. If you Search the Ability deck and find a faction-specific card that cannot be used by your faction, you may choose to reveal it, place it in the Ability discard pile, and draw an additional card from the Ability deck in its place. Cards with the Necropolis symbol can only be used by the Necropolis faction.
Creature Bank Tokens
A Creature Bank token is a new type of token that allows you to turn blocked fields into visitable ones. There are two types of Creature Bank tokens that correspond to two types of tiles they can be placed on—the Near tokens and the Far tokens. You can identify them by the Roman numerals on their backs, which correspond to the numerals on the backs of the said tiles.
When you discover a Near or Far Map tile, you may choose to replace one of its blocked fields with a Creature Bank token of the corresponding type. When you enter such a field, you must defeat the Neutral Army defending it (see Creature Bank Combat below), resolve the field's effect, and then mark it with a Black cube, just like any other visitable field.
Before the game, separate the Creature Bank tokens into two piles (Near and Far) based on the numerals on their backs. Shuffle each pile and place them near the map.
Stack Tokens
These tokens represent stacks of Neutral Units. For as long as a Stack token remains on a unit, it increases either its Initiative by 2 or its Attack, Defense, or HP by 1—as indicated by the token.
Units with Stack tokens are similar to reinforced faction units. When a Stacked Neutral Unit takes a total of damage equal to or greater than its max HP, discard 1 Stack token from that unit and remove all damage from it. Then, deal any leftover damage (if any), deducting it from the new max HP. When a Neutral Unit without a Stack token takes damage equal to or greater than its max HP, it perishes normally. However, instead of being discarded, the defeated Creature Bank Unit cards are returned to the Creature Bank Unit deck.
Pool all Stack tokens face down (so that their values are not visible) near the Creature Bank Unit deck. Whenever you need a Stack token, take one from the pool at random, and whenever you return a Stack token, shuffle it back into the pool.
NOTE: As an extra reward, you can gain a Stacked unit. If you do, also place one Stack token on that unit.
Creature Bank Unit Cards
These cards make up a deck that is similar to the Neutral Unit deck and represent units that you may fight in Creature Banks. Every Creature Bank has its set of 4 units you will need to find in this deck when you visit it. That is why—unlike the Neutral Unit deck—this deck does not need shuffling and is always face up.
Place the Creature Bank Unit deck near the Neutral Unit decks. For the list of units guarding specific Creature Banks, see List of Creature Banks below.
Creature Bank Combat
Note: Creature Bank Combat has no field difficulty level, so a Quick Combat is never going to happen at these locations. Additionally, these fields do not provide any Exp, but you have a chance to gain plenty of resources.
When you start Combat at a Creature Bank, place up to 5 of your units in the player deployment zone (green on the diagram). Now, look at the list of units guarding each type of Creature Bank, shown below. Depending on the Creature Bank you are visiting, take the corresponding units from the Creature Bank Unit deck and place them randomly in the Neutral Unit deployment zone (red on the diagram).
Based on the game difficulty level, take the following number of Stack tokens:
- Easy: 1 token
- Normal: 2 tokens
- Hard: 3 tokens
- Impossible: 4 tokens
Each token has a unique effect modifying a unit's statistics the following way: +1 Attack, +1 Defense, +1 HP, or +2 Initiative. Distribute the tokens randomly among the Neutral Units guarding the Creature Bank—no more than one token per unit. Each unit with a Stack token is now a Stacked unit and has one of its statistics increased—as indicated by its token.
The more Stacked units there are, the tougher the Combat and the greater the loot. Once you win the Combat against the Neutral Units, you will claim the Creature Bank's reward, as well as an additional reward for every Stacked unit you defeat. If the Creature Bank rewards you with a unit, take the indicated unit from the Creature Bank Unit deck. Whenever you use such a Stacked unit in Combat, before the Combat begins, take 1 random Stack token and place it on that unit.
Creature Bank Combat may prove more challenging, so—just like in the case of Combat against Neutral Units (the blue-star units)—you do not need to rush things up, as there is no round limit and no need to spend MPs to extend it.
List of Creature Banks
Derelict Ship
- Category: Visitable
- Units: 4 × Water Elementals.
- Reward: Negative Morale and 7 Gold.
- Extra: 2 Gold for every Stacked unit and Search (X) the Spell deck, where X is the number of Stacked units.
- NOTE: This field is not considered a sea field.
Pyramid
- Category: Visitable
- Units: 2 × Gold Golems, 2 × Diamond Golems.
- Reward: Search (5) the Spell deck.
- Extra: For every Pack unit. You may Remove 1 Spell, Ability, or Artifact card from your hand or discard pile, then Search (5) the appropriate deck.
Shipwreck
- Category: Visitable
- Units: 4 × Wraiths.
- Reward: Negative Morale and 5 Gold.
- Extra: 2 Gold for every Stacked unit and Search (X) the Artifact deck, where X is the number of Stacked units.
- NOTE: This field is not considered a sea field.
Dragon Fly Hive
- Category: Visitable
- Units: 4 × Dragon Flies.
- Reward: 1 × Dragon Flies unit.
- Extra: If the Creature Bank was guarded by at least 2 Stacked units, gain Stacked Dragon Flies instead.
Medusa Stores
- Category: Visitable
- Units: 4 × Medusas.
- Reward: 6 Gold and 1 Valuable.
- Extra: 3 Gold or 1 Valuable for every Stacked unit.
Dwarven Treasury
- Category: Visitable
- Units: 4 × Dwarves.
- Reward: 7 Gold.
- Extra: 3 Gold for every Stacked unit.
Griffin Conservatory
- Category: Visitable
- Units: 4 × Griffins.
- Reward: 1 × Griffins unit.
- Extra: If the Creature Bank was guarded by at least 2 Stacked units, gain Stacked Griffins instead.
Naga Bank
- Category: Visitable
- Units: 4 × Nagas.
- Reward: 6 Gold and 2 Valuable.
- Extra: 6 Gold and 1 Valuable for every Stacked unit.
Crypt
- Category: Visitable
- Units: 1 × Skeletons, 1 × Zombies, 1 × Wraiths, 1 × Vampires.
- Reward: 6 Gold.
- Extra: 2 Gold for every Stacked unit.
Imp Cache
- Category: Visitable
- Units: 4 × Imps.
- Reward: 3 Gold.
- Extra: 1 Gold for every Stacked unit.
Cyclops Stockpile
- Category: Visitable
- Units: 4 × Cyclopes.
- Reward: 8 Building Materials and 2 Valuable.
- Extra: 2 Building Materials and 1 Valuable for every Stacked unit.
Dragon Utopia
- Category: Visitable
- Units: 1 × Black Dragons, 1 × Gold Dragons, 1 × Crystal Dragons, 1 × Faerie Dragons.
- Reward: 40 Gold and Search (3) the Artifact deck.
- Extra: Search (5) the Artifact or the Spell deck for every Stacked unit.
- NOTE: The Dragon Utopia that may be listed in a scenario's description refers to a location on the Center Map tile and is not the same as a Creature Bank Dragon Utopia. In other words, unless explicitly stated otherwise, a Creature Bank Dragon Utopia does not qualify to meet a scenario's Victory Conditions by virtue of being a Dragon Utopia. It may, however, help you meet other types of Victory Conditions, like the ones involving visiting every field on a tile, for instance.
Cooperative Mode
During all cooperative games, all players are allied and play together to beat the scenario.
When controlling Neutral Units, use Combat rules for the solo mode (see page 33, "AI Combat" in the Core Rulebook).
Additionally, when your Hero visits a Trading Post, apart from taking advantage of the normal effects of that location (see page 36, "Trade Table" in the Core Rulebook), you may also use it to give resources to any player.
Victory Conditions for cooperative scenarios can include:
- Defeating a specified number of Neutral Units.
- Taking control of specified locations.
If any player meets a scenario's Victory Condition—unless stated otherwise—the game immediately ends and all players win the scenario.
Barbarian Breakout
Player count: A scenario for 2–4 players.
Scenario length: This scenario plays out over 11 rounds.
Map setup: Take the following Map tiles and set them up as shown in the scenario map layout (pages 12–13 of the mission book; the diagrams are not reproduced here):
For a 2-player scenario:
- 3 × Starting (I) Map tile
- 3 × Near (IV–V) Map tile with an Obelisk
- 4 × Far (II–III) Map tile
For a 3-player scenario:
- 4 × Starting (I) Map tile
- 4 × Near (IV–V) Map tile with an Obelisk
- 6 × Far (II–III) Map tile
For a 4-player scenario:
- 5 × Starting (I) Map tile
- 5 × Near (IV–V) Map tile with an Obelisk
- 8 × Far (II–III) Map tile
Starting resources: Each player starts with the following resources: 10 Gold, 4 Building Materials, 0 Valuable.
Setting a player's income: Set the income on the income tracker to: "10" Gold, "0" Building Materials, "0" Valuable.
Starting buildings: Each player starts the game with these buildings:
- Bronze Dwelling
- City Hall
Starting units: Each player starts with the following units:
- 3 × a Few Bronze units
Additional scenario rules:
Before the start of this scenario:
- The central Starting tile belongs to the enemy. Arrange it as shown in the picture.
- We recommend using the Stronghold faction for "Enemy Town," but if you don't have this expansion, use any other faction not participating in the game.
During this scenario:
- Players can exchange artifacts. To do so, they need their Heroes to occupy adjacent fields.
- Players cannot Flag locations that are already Flagged by another player.
- A Hero cannot move onto the "Enemy Town" field until all Near tiles are discovered and every Obelisk has been visited by any player at least once.
- When a player visits an Obelisk, they gain an Empowered Ability token.
- When a player enters the field with the "Enemy Town," they trigger Combat against the following defenders: 3 × a Pack of Bronze and 2 × a Few Gold. If the player wins the Combat with "Enemy Town", they place their faction cube on the field to mark it as visited, but only for them. This field may be visited multiple times—each time by a different faction—so there may be multiple faction cubes on it.
Victory condition: If every faction's cube is placed on the "Enemy Town" field, the game ends and all players win the scenario.
Round tracker: If the above condition is not met by the end of the 11th round, the game ends and all players lose the scenario.
Timed event: There are no timed events in this scenario.
Clash Mode
Gorlam's Tentacle Swampland
Player count: A scenario for 2 players.
Scenario length: This scenario plays out over 14 rounds.
Map setup: Take the following Map tiles and set them up as shown in the scenario map layout (page 15 of the mission book; the diagram is not reproduced here):
- 2 × Starting (I) Map tile
- 3 × Near (IV–V) Map tile
- 4 × Far (II–III) Map tile
Starting resources: Each player starts with the following resources: 16 Gold, 4 Building Materials, 1 Valuable.
Setting a player's income: Set the income on your income tracker to: "15" Gold, "0" Building Materials, "0" Valuable.
Starting buildings: Each player starts the game with these buildings:
- Bronze Dwelling
Starting units: Each player starts with the following units:
- 3 × a Few Bronze units
Additional scenario rules: During this scenario:
- When a player wins Combat at a Creature Bank, they additionally receive an Empowered Ability token.
Victory condition: At the end of a round, if any player controls 6 or more Mines, the players will play one final round. The player with the most Mines at the end of that round is the winner.
Round tracker: If the above condition is not met by the end of the 14th round, the game ends in a draw.
Timed events: During the 4th, 5th, 6th, 10th, 11th, and 12th rounds, the Mines located on the edge fields of the map do not generate income. Additionally, if any player initiates Combat on an edge field of the map during these rounds, the battle is treated as Naval Combat.
NOTE: An edge field is a field with at least one edge being non-adjacent to another field.
Solo Mode
Island of Fire
Player count: A scenario for 1 player.
Scenario length: This scenario plays out over 16 rounds.
Map setup: Take the following Map tiles and set them up as shown in the scenario map layout (page 17 of the mission book; the diagram is not reproduced here):
- 1 × Starting (I) Map tile
- 4 × Near (IV–V) Map tile
- 2 × Far (II–III) Map tile
Starting resources: The player starts with the following resources: 10 Gold, 4 Building Materials, 0 Valuable.
Setting a player's income: Set the income on the income tracker to: "10" Gold, "0" Building Materials, "0" Valuable.
Starting buildings: The player starts the game with these buildings:
- Bronze Dwelling
Starting units: The player starts with the following units:
- 3 × a Few Bronze units
Additional scenario rules: During this scenario:
- Whenever you discover a tile, you must place a Creature Bank token on it, as indicated below.
- a) When you discover a Far tile, place a Creature Bank token with an Imp Cache on it.
- b) When you discover the first Near tile, place a Creature Bank token with a Griffin Conservatory on it.
- c) When you discover the second Near tile, place a Creature Bank token with a Naga Bank on it.
- d) When you discover the third Near tile, place a Creature Bank token with a Pyramid on it.
- e) When you discover the fourth Near tile, place a Creature Bank token with a Dragon Utopia on it.
- When you win Combat at a Creature Bank, you additionally receive an Empowered Ability token.
- Each Trading Post is a Visitable location.
- When you enter a location, first resolve the effect of the location listed in Story Locations (see page 18).
Victory condition: You must win Combat at every Creature Bank on the map.
Round tracker: If the above condition is not met by the end of the 16th round, the game ends and you lose the scenario.
Story Locations
Story Locations
- Water Wheel: When you visit a Water Wheel for the first time, do not resolve the effect of this field. Instead, read §1.
- Witch Hut: When you visit a Witch Hut for the first time, do not resolve the effect of this field. Instead, read §2. When you visit another Witch Hut, do not resolve the effect of that field. Instead, read §13. When you visit a Witch Hut with a Defense token, do not resolve the effect of this field. Instead, read §23.
- Trading Post: When you visit a Trading Post for the first time, do not resolve the effect of this field. Instead, read §3. When you visit a Trading Post and you have the "Job" keyword noted down, do not resolve the effect of this field. Instead, read §8.
NOTE: Whenever you visit one of the locations above, after reading the relevant paragraph, place a Black cube on the visited location!
Special Tiles
- F5 Mystical Garden: On your first visit to this Location do not resolve the effect of this field. Instead, read §4. Place a Black cube on the field with this location.
Paragraphs
The paragraphs below keep only the rule effects and the choices of each paragraph. Narrative text is omitted.
§1
- If you help the peasants, pay 2 Building Materials and read §14.
- Otherwise, read §27.
§2
- The old witch offers a job: find the young witch, defeat her, and bring back her head.
- If you agree to accept the job, read §7.
- Otherwise, read §11.
§3
- If you have at least 3 Gold and want to play dice, read §12.
- If you say, "I'd like to take on a task," read §17.
- If you turn down the offers, read §6.
§4
- If you think silence is rewarding enough and leave the Leprechaun alone, read §20.
- If you demand that he show you the pot of gold, read §24.
§5
- Note down the "Crime" keyword.
- Place a Defense token on the Witch Hut that already has a Black cube—you can visit it again. When you do, read §23.
§6
- No rule effect is printed in this paragraph.
§7
- Note down the "Pact" keyword.
§8
- Look for the artifact you noted down in your hand, discard pile, and M&M deck. If you still have it, Remove it and gain 10 Gold.
- Shuffle all your cards to form a new M&M deck.
§9
- Gain Negative Morale twice.
- You can Search (3) the Spell deck up to three times.
§10
- Gain 10 Gold.
§11
- No rule effect is printed in this paragraph.
§12
- Bet on the result of two dice.
- If you bet that neither die will roll a "−1," read §15.
- If you bet that at least one die will roll a "−1," read §22.
- If you bet that both dice will roll a "+1," read §25.
§13
- If you have noted down the "Pact" keyword, you must commit the crime. Read §5.
- If you tell her what the old witch wanted from you, read §21.
§14
- Search (3) the Artifact deck and lose 1 Movement (if possible).
§15
- Roll two Attack dice and check your bet.
- If you are correct, gain 1 Valuable.
- If you are wrong, lose 3 Gold.
§16
- Flip one of your Silver units to the "Few" side (if possible).
§17
- Search (1) the Artifact deck, note down the artifact you acquired and the "Job" keyword.
- Place a Black cube on this Trading Post. You cannot visit it for the rest of the game.
§18
- Search (2) the Artifact deck.
§19
- Gain Morale and Search (5) the Spell deck.
§20
- Gain +1 Movement.
§21
- If you refuse, read §18.
- If you agree, read §26.
- If you accept the quest but only if the young witch accompanies you, read §29.
§22
- Roll two Attack dice and check your bet.
- If you are correct, gain 5 Gold.
- If you are wrong, lose 3 Gold.
§23
- If you have the "Crime" keyword noted down, you can give her the head of the young witch. If you do so, read §9.
- If you have the "Wart" keyword noted down, you can shout it as a signal to attack. If you do so, read §19.
- If you try to end the tyranny of the old witch, read §16.
§24
- If you leave the Leprechaun alone, read §28.
- If you intimidate the creature, read §10.
§25
- Roll two Attack dice and check your bet.
- If you are correct, gain 2 Valuable and Search (3) the Artifact deck.
- If you are wrong, lose 3 Gold.
§26
- Place a Defense token on the Witch Hut that already has a Black cube. When you visit it again, read §23.
§27
- Gain Negative Morale.
§28
- Lose 5 Gold or as much as you have.
§29
- Note down the "Wart" keyword.
- Place a Defense token on the Witch Hut that already has a Black cube. When you visit it again, read §23.