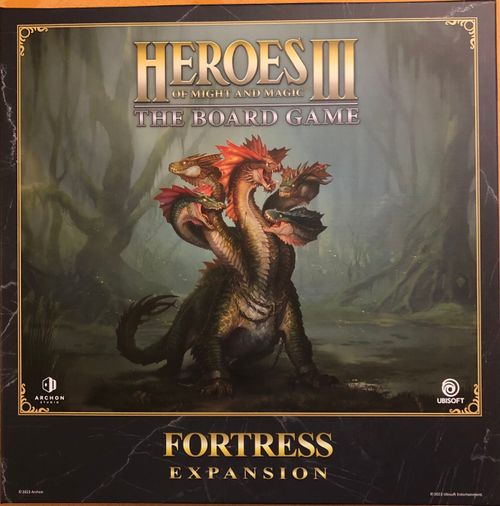
Heroes of Might and Magic III: The Board Game – Fortress Expansion
Heroes of Might and Magic III: The Board Game – Fortress Expansion Rulebook
Table of Contents
Table of Contents
Component List
- 7 × Map tile
- 1 × Starting tile
- 3 × Far tile
- 2 × Near tile
- 1 × Center tile
- 1 × Town board
- 1 × Mission book
- 1 × Player's Aid
- 2 × Hero model
- 7 × Unit model
- 1 × Hero card (double-sided)
- 7 × Unit card
- 2 × Neutral Unit card
- 7 × Town Building tile
- 3 × Astrologers Proclaim card
- 8 × Artifact card
- 20 × Spell card
- 4 × Ability card
- 6 × Specialty card
- 20 × Event card
- 8 × Statistic card
- 4 × Defense card
- 2 × Power card
- 2 × Knowledge card
- 9 × Gold token
- 3 × "1 Gold"
- 3 × "3 Gold"
- 3 × "10 Gold"
New Elements
Events
The Fortress introduces "Event cards" that describe a new type of events, which means that with this expansion the gameplay can be affected by three types of events:
- Astrologers Proclaim cards*
- Timed events*
- Event cards
* For a detailed description, see the Rulebook page 9.
Event cards
At the start of each Resource round (except for the first one), after each of the players is given their resources, an Event card is drawn and resolved according to its description. The first player draws the first card, then—on the next Resource round—the drawing player changes clockwise. Event cards describe events that affect different aspects of the game, and they take effect immediately. Shuffle this deck and place it face down near the Round tracker.
Each Event card has three parts:
- Name
- Fluff
- Effect
Rules for using Event cards
Whenever Event cards are used in the game, the following rules apply:
- Event cards are only used in scenarios involving multiple players. If the described action does not involve other players, each player performs the action in clockwise order.
- If there is no specific information on the order of performing actions, the players take actions clockwise, starting with the one who drew the Event card.
- If the actions described in the event are not connected to each other, players can perform them simultaneously without waiting for others to finish.
- After resolving an event, if any additional cards are left, shuffle them back into the piles from which they were taken.
Schools of Magic
Some cards refer to Schools of Magic, and every Spell card belongs to one of the following four of them: Air, Fire, Earth, and Water. Each School has its own border around the symbol:
- School of Fire
- School of Water
- School of Air
- School of Earth
NOTE: Although "Magic Arrow" belongs to all Schools of Magic, it can benefit from a bonus from only one School at a time.
Map Locations
In Fortress Expansion, you will find more tiles with new locations to discover. For the complete list of the locations, see "Map Locations" at the end of this rulebook.
Alliance Mode
This mode requires at least one expansion and 4 players to form an Alliance of 2 players vs. 2 players.
Additional Rules
When playing in this mode, the following rules apply:
- An Alliance is a team of 2 players that is determined at the beginning of the game and lasts for the duration of the chosen scenario.
- Each player chooses their faction at the beginning of the scenario.
- Allied players can exchange artifacts. To do so, they need their Heroes to occupy adjacent fields.
- Resources may be exchanged without the need for both players' Heroes to occupy adjacent fields. Members of an Alliance can exchange resources freely during the turn of either player in the team.
- Players in an Alliance cannot Flag locations that are already Flagged by another player from the same Alliance.
Finishing Scenario
Allied players share the victory and defeat conditions. There is no additional step of comparing who did better in the given game or who contributed to the victory more.
Arrogance
Once, centuries ago, the world was at peace. Four cultures lived in harmony and freely associated with each other. Then you came into power and realized things would be better for you if you took over the entire world.
PLAYER COUNT — A scenario for 4 players (2 vs. 2).
SCENARIO LENGTH — This scenario plays out over 12 rounds.
MAP SETUP — Take the following Map tiles and set them up as shown in the scenario map layout:
- 4 × Starting (I) Map tile
- 8 × Near (IV-V) Map tile, 4 of which must contain an Obelisk
- 2 × Center (VI-VII) Map tile, 1 of which must contain a Grail
- 8 × Far (II-III) Map tile – Each player gets 2 of these tiles and places them face down next to their Hero card to use during the scenario.
NOTE: Before placing the Near tiles, separate them into 2 piles (with and without an Obelisk). Put them alternately so that the tiles with an Obelisk are not placed adjacent to each other.
STARTING RESOURCES — Each player starts with the following resources:
- 13 × Gold
- 4 × Building Materials
- 1 × Valuable
SETTING A PLAYER'S INCOME — Set the income on the income tracker to:
- "10" Gold
- "0" Building Materials
- "0" Valuable
STARTING BUILDINGS — Each player starts the game with these buildings:
- Bronze Dwelling
STARTING UNITS — Each player starts with the following units:
- 2 × A Few Bronze units with the highest Recruitment cost.
ADDITIONAL SCENARIO RULES — During this scenario:
- Only a Main Hero can obtain the Grail.
- Only one Grail can be taken, even if there are 2 tiles with the Grail.
- Alliance may not visit the field with the Grail token unless either they have already visited at least 4 different Obelisks or the Grail token has been taken by any Hero at least once.
- To obtain the Grail token, a player's Hero must spend 2 Movement Points on the field with the Grail.
- If another Hero defeats the Hero with the Grail token, they also take the Grail token.
- If a Hero with the Grail token surrenders during Combat, the Grail token is placed on the hex where the Hero surrendered.
- If a Neutral Army defeats a Hero with the Grail token, the Grail token is placed on the hex where the Hero was defeated.
- The Grail token increases Gold income by 5.
VICTORY CONDITION — To win the scenario, by the end of the 12th round, an alliance must have the Grail token delivered to one of its Towns.
ROUND TRACKER — If the above condition is not met by the end of the 12th round, the game ends and all players lose the scenario.
TIMED EVENT — At the start of the 3rd, 6th, and 9th rounds, every Hero gains Positive Morale.
Clash Mode
Search for the Grail
The Grail is said to have been lost somewhere in the area, and you have been charged with finding and retrieving it. But beware! The minions of your enemies are also seeking to lay their hands on it!
PLAYER COUNT — A scenario for 2–3 players.
SCENARIO LENGTH — This scenario plays out over 10–13 rounds.
MAP SETUP — Take the following Map tiles and set them up as shown in the scenario map layout:
For a 2-player scenario:
- 2 × Starting (I) Map tile
- 6 × Near (IV-V) Map tile, 3 of which must contain an Obelisk
- 1 × Center (VI-VII) Map tile with the Grail field
- 4 × Far (II-III) Map tile – Each player gets 2 of these tiles
NOTE: Before placing the Near tiles, separate them into 2 piles (with and without an Obelisk). Put them alternately so that the tiles with an Obelisk are not placed adjacent to each other.
For a 3-player scenario:
- 3 × Starting (I) Map tile
- 6 × Near (IV-V) Map tile, 3 of which must contain an Obelisk
- 1 × Center (VI-VII) Map tile with the Grail field
- 6 × Far (II-III) Map tile – Each player gets 2 of these tiles
NOTE: Before placing the Near tiles, separate them into 2 piles (with and without an Obelisk). Put them alternately so that the tiles with an Obelisk are not placed adjacent to each other.
STARTING RESOURCES — Each player starts with the following resources:
- 16 × Gold
- 4 × Building Materials
- 1 × Valuable
SETTING A PLAYER'S INCOME — Set the income on your income tracker to:
- "10" Gold
- "0" Building Materials
- "0" Valuable
STARTING BUILDINGS — Each player starts the game with these buildings:
- Dwelling (Bronze).
STARTING UNITS — Each player starts with the following units:
- 2 × A Pack of Bronze units with the lowest Recruitment cost.
ADDITIONAL SCENARIO RULES — During this scenario:
- Only a Main Hero can obtain the Grail.
- Only one Grail can be taken, even if there are 2 tiles with the Grail.
- Players may not visit the field with the Grail token unless either they have already visited at least 2 different Obelisks or the Grail token has been taken by any Hero at least once.
- To obtain the Grail token, a player's Hero must spend 2 Movement Points on the field with the Grail.
- If another Hero defeats the Hero with the Grail token, they also take the Grail token.
- If a Hero with the Grail token surrenders during Combat, the Grail token is placed on the hex where the Hero surrendered.
- If a Neutral Army defeats a Hero with the Grail token, the Grail token is placed on the hex where the Hero was defeated.
- The Grail token increases Gold income by 5.
VICTORY CONDITION — To win the scenario, a player's Main Hero must gain the Grail token and return with it to their Faction Town.
ROUND TRACKER — If the above condition is not met by the end of the 10th round, the game ends and all players lose the scenario. If by the end of the 10th round the above condition is not met, but a player has the Grail token, they gain additional time – until the end of the 13th round – to return with the Grail to their Faction Town. Otherwise, they – too – lose the scenario.
TIMED EVENT — At the start of the 3rd and 9th rounds, all Heroes gain +1 MP.
Fortress Campaign – Playing with Fire
1: Farming Towns
SCENARIO LENGTH — This scenario plays out over 13 rounds.
PLAYER SETUP
- Faction: Fortress
- Faction Hero: Choose one – Adrienne or Wystan
- Faction Army: A Few Gnolls, a Rogue (Bronze)*
- Starting Resources: 12 × Gold
- Town Buildings: None
- Bonus: Choose one of the following options:
- Search (3) the Artifact deck
- Search (3) the Spell deck
- +4 Gold Resources
- Special: Prepare the Zombies card for later use in the scenario
* Before beginning the scenario, find this card in the relevant Neutral Unit deck.
AI HERO SETUP
- Faction: Necropolis
- Enemy Heroes: "NightStalkers"
- Enemy Army: A Pack of Vampires, a Pack of Liches, a Pack of Zombies, a Mummies unit (Silver)*
- Enemy Deck: 2 × Magic card, 4 × Might card
- Enemy Spell Deck: 2 × "Curse" Spell card
MAP SETUP — Take the following Map tiles and set them up as shown in the scenario map layout:
- 1 × Starting Map tile (I):
- 1 × Fortress (S5)
- 3 × Far Map tile (II-III):
- 2 × Castle (choose from: F3, F6, F9)
- 1 × Fortress (choose from: F13-F15)
- 3 × Near Map tile (IV-V):
- 1 × Necropolis (choose from: N1, N4)
- 2 × Fortress (N9, N10)
HEROES PLACEMENT — Place your Fortress Hero on the empty field on the bottom leftmost Map tile – the furthest distance away from the Fortress Starting tile. Ensure the Map tile is rotated and positioned in such a way that the empty field is the leftmost field of the map.
ADDITIONAL RULES — During this "Fortress" campaign scenario, the following rules apply:
- The bottom leftmost Map tile is already discovered.
- Once your Hero reaches Level 5, they gain no more Experience.
- You can neither Recruit using your Town Buildings nor produce resources unless you have conquered the Town.
- Prepare two copies of the "Diplomacy" Ability card for the special event.
- The "Diplomacy" Ability card can be used for Bronze and Silver units even without the corresponding Dwelling.
- Whenever you trigger Combat with Neutral Units, replace one Bronze unit with a Few Zombies.
- If your Hero visits an Obelisk before the 6th round, it does nothing. After that, it triggers a special event in the story.
WIN/LOSE CONDITIONS
- Win: You must fulfill the conditions described in the "Some Things Never Change" section.
- Lose: You fail the scenario if:
- You do not capture the Town within 4 rounds.
- You do not fulfill the conditions described in the "Some Things Never Change" section.
TIMED EVENTS — When you reach the following rounds, follow the corresponding instructions:
- 1st Round: Read the "Please, Help Us!" section below.
- 4th Round: If you do not have a Town at the end of this round, you suffer defeat in the scenario.
- 6th Round: Read the "Some Things Never Change" section below.
- 8th Round: Remove the Black cubes from all locations on the map. The locations can be visited again.
- 13th Round: At the end of the round you lose unless you have fulfilled the conditions from the "Some Things Never Change" section.
- When you complete the scenario: Read the "Where There Is a Light, There Is Always a Shadow" section below.
Please, Help Us!
Story text omitted.
- Your Hero immediately gains one level of Experience – draw the Diplomacy Ability card instead of an Ability card that you would draw normally. Once you draw the starting hand for your hero, put another copy of the Diplomacy Ability card on top of your deck.
- If you enter a field with an enemy Town, you can capture it. The Town is defended by a III level Neutral Army. After capturing it, read the "Town of Basdar" section below.
Town of Basdar
Story text omitted.
After capturing the Town, choose one of the following options:
Option 1 – Gain:
- City Hall
- A Bronze Dwelling
- +30 Gold Resources
- +3 Valuables Resources
- Set Production of Building Materials to 2
- Set Production of Gold to 20
Option 2 – Gain:
- A Bronze Dwelling
- A Silver Dwelling
- +8 Gold Resources
- +8 Building Materials Resources
- +1 Valuable Resource
- Set Production of Building Materials to 2
- Set Production of Gold to 20
Some Things Never Change
Story text omitted.
This part unlocks two Victory Conditions for the scenario (you must meet both to win):
-
You need to gather:
- 40 × Gold
- 20 × Building Materials
- 10 × Valuables
If you succeed, read the "Dirty Politics" section below. Beware! You will lose these resources!
-
Enter a field with an Obelisk, read the "NightStalkers" section, and then win the fight with the "NightStalkers" Army.
If you fulfill both of these conditions, read the "Where There Is a Light, There Is Always a Shadow" section.
Dirty Politics
Story text omitted.
Return these resources to the Resource Pool:
- 40 × Gold
- 20 × Building Materials
- 10 × Valuables
NightStalkers
Story text omitted.
Start Combat with the "NightStalkers" Army. For the first round of battle, all units in their army gain +2 to initiative. Place 2 Damage tokens on the Vampire unit.
If you win the fight, read the "Prison of the Vampires" section below.
Prison of the Vampires
Narrative only; story text omitted.
Where There Is a Light, There Is Always a Shadow
Narrative only; story text omitted.
2: March of the Undead
SCENARIO LENGTH — This scenario plays out over 12 rounds.
PLAYER SETUP
- Faction: Fortress
- Faction Hero: Choose one – Adrienne or Wystan
- Faction Army: A Pack of Gnolls
- Starting Resources: 10 × Gold, 3 × Building Materials, 1 × Valuable, additional +5 Gold production
- Town Buildings: Bronze Dwelling, Silver Dwelling
- Bonus: Choose one of the following options:
- Add a Few Lizardmen, a Few Dragon Flies, and a Few Basilisks units to your army
- Add a Few Marksmen, a Few Griffins, and a Few Crusaders units to your army
AI HERO SETUP
- Faction: Necropolis
- Enemy Heroes: Nagash
- Enemy Army: A Pack of Dread Knights, a Pack of Vampires, a Pack of Wraiths, a Pack of Liches
- Enemy Deck: 6 × Magic card, 1 × Might card, 3 × Skill card
- Enemy Spell Deck: 2 × "Magic Arrow" Spell card, 2 × "Curse" Spell card, 2 × "Slow" Spell card
- Skill: "Sorcery" Ability card*
- Special: Prepare the Zombies, Skeletons, and Wraith unit cards for later use in the scenario
* If you draw skill cards two times in a row or if there are no more spells in the AI hero Spell deck, deal Damage equal to SpellPower to the player's unit with the lowest HP.
MAP SETUP — Take the following Map tiles and set them up as shown in the scenario map layout:
- 1 × Starting Map tile (I):
- 1 × Fortress (S5)
- 3 × Far Map tile (II-III):
- 3 × Fortress (F13, F14, F15)
- 4 × Near Map tile (IV-V):
- 2 × Dungeon (N2, N5)
- 2 × Fortress (N9, N10)
The Starting Map tile and both Dungeon Near Map tiles are already discovered.
HEROES PLACEMENT — Place your Hero's model on the center field of the Fortress Starting Map tile.
ADDITIONAL RULES — During this "Fortress" campaign scenario, the following rules apply:
- The first time you discover a Fortress Near tile with an Obelisk field on it, read the "Bad Decisions..." section.
- You cannot enter the field with Obelisk till all Mines and Settlements are Flagged, except for the ones on the Dungeon Near tiles.
- Entering the Obelisk on the Fortress Near tile teleports your hero to the field with an Obelisk on the Dungeon Near tile.
WIN/LOSE CONDITIONS
- Win: You must Flag (put your faction cube on) all Settlements and Mines on the map.
- Lose: You fail the scenario if you reach the end of the 12th round without fulfilling the winning condition.
TIMED EVENTS — When you reach the following rounds, follow the corresponding instructions:
- 1st Round:
- Read the "The Death Knight's Shadow" section below.
- Whenever you trigger Combat with Neutral Units, replace the first drawn Bronze unit with a Few Skeletons unit.
- 3rd Round:
- Read the "Birthdays Are the Worst" section below.
- From this turn onward, the difficulty level of every Combat encounter on the map increases by one till the end of the scenario (see page 35, "Field Difficulty Level Table" in the Core Rulebook).
- Whenever you trigger Combat with Neutral Units, replace the first drawn Bronze unit with a Few Zombies unit, and the second drawn Bronze unit with a Few Skeletons unit.
- 5th Round:
- Read the "Birthday Present" section below.
- Whenever you trigger Combat with Neutral Units, replace the first drawn Bronze unit with a Few Zombies unit, and the first drawn Silver unit with a Pack of Wraiths unit.
- 12th Round:
- At the end of the round, if the Enemy Army has not been defeated, the player fails the scenario.
- If you discover a Fortress Near tile with an Obelisk on it:
- Read the "Bad Decisions..." section.
- When you complete the scenario:
- Read the "The Last of Them" section below.
The Death Knight's Shadow
Narrative only; story text omitted.
Birthdays Are the Worst
Narrative only; story text omitted.
Birthday Present
Narrative only; story text omitted.
Bad Decisions...
Story text omitted.
After this part, you will have two locations to Flag with your faction cube. In the second location, instead of a usual army, you engage in Combat with Nagash's Army. Add Wall and Gate cards to their side of the Combat board. If your Difficulty Setting is Hard or Impossible, add the Arrow Tower card.
If you are victorious, read the "The Last of Them" section.
The Last of Them
Narrative only; story text omitted.
3: Burning of Tatalia
SCENARIO LENGTH — This scenario plays out over 14 rounds.
PLAYER SETUP
- Faction: Fortress
- Faction Hero: Choose one – Adrienne or Wystan
- Faction Army: A Pack of Gnolls, a Few Lizardmen
- Starting Resources: 15 × Gold, 6 × Building Materials, 1 × Valuable, additional +5 Gold production, additional +1 Valuable production
- Town Buildings: Bronze Dwelling, Silver Dwelling, Citadel
- Bonus: Choose one of the following options:
- Add a Pack of Dragon Flies and a Few Basilisks units to your army
- Add a Pack of Marksmen and a Few Crusaders units to your army
AI HERO SETUP
- Faction: Necropolis
- Enemy Heroes: Lord Haart's Follower 1, Lord Haart's Follower 2, Lord Haart
- Enemy Armies:
- Lord Haart's Follower 1 and 2 Army: A Pack of Zombies, a Pack of Vampires, a Pack of Liches, a Few Dread Knights
- Lord Haart's Army: A Pack of Black Dragons, a Pack of Dread Knights, a Pack of Ghost Dragons, a Pack of Liches
- Lord Haart's Follower 1 and 2 Decks: 2 × Might card
- Lord Haart's Deck: 6 × Might card, 3 × Magic card, 2 × Skill card
- Enemy Spell Deck: 2 × "Curse" Spell card, 1 × "Slow" Spell card
- Lord Haart's skill: "Offense" Ability card
MAP SETUP — Take the following Map tiles and set them up as shown in the scenario map layout:
- 1 × Starting Map tile (I):
- 1 × Fortress (S5)
- 4 × Far Map tile (II- III):
- 4 × random tiles from Necropolis (from: F1, F4, F7) or Fortress (from: F13-F15)
- 4 × Near Map tile (IV-V):
- 2 × Necropolis (N1, N4)
- 2 × Fortress (N9, N10)
Additionally, for the timed event prepare:
- 1 × Center Map tile (VI-VII) with the Dragon Utopia in the middle (C1)
HEROES PLACEMENT — Both Enemy Heroes are represented by the two Necropolis Faction Hero models. The two Enemy Heroes are placed on blocked fields on the Near Map tiles, as described in the timed events section. Place your Hero on the center field of the Fortress Starting Map tile.
NOTE: The source text reads "Both Enemy Heroes" here, while the AI Hero Setup above names three enemy heroes (Lord Haart's Follower 1, Lord Haart's Follower 2, and Lord Haart). Transcribed as printed.
ADDITIONAL RULES — During this "Fortress" campaign scenario, the following rules apply:
- The difficulty level of every Combat encounter on the map increases by one (see page 35, "Field Difficulty Level Table" in the Core Rulebook).
- Enemy Heroes move according to the standard rules.
- The Enemy Heroes move after the human player.
- You can enter a blocked field if the Enemy Hero is in that field.
- After defeating an Enemy Hero's Army, gain 2 Valuables.
- When your Hero visits an Obelisk, you trigger a special event.
WIN/LOSE CONDITIONS
- Win: You must visit both Obelisks and defeat all three Enemy Armies.
- Lose: You fail the scenario if:
- You lose control of your Faction Town.
- You lose one Combat encounter.
- You reach the end of the 14th round and have not defeated the Enemy Armies.
TIMED EVENTS — When you reach the following rounds, follow the corresponding instructions:
- 1st Round: Read the "A Season of Blessings" section below.
- 5th Round:
- Read the "Armies from All Directions" section below.
- Discover all undiscovered Near Map tiles on the right side of the map.
- Place the first Lord Haart's Follower on the rightmost blocked field from the Near Map tiles on the map.
- 9th Round:
- Read the "Four Riders" section below.
- Discover all undiscovered Near Map tiles on the left side of the map.
- Place the second Lord Haart's Follower on the leftmost blocked field from the Near Map tiles on the map.
- 14th Round:
- If you do not secure victory by the end of this round, you are defeated. All is lost!
- When you complete the scenario:
- Read the "Die a Hero or…" section below.
A Season of Blessings
Story text omitted.
- Your Hero immediately gains one level – Search (2) the Ability deck.
- If you enter a field with an Obelisk, read the "Tome of Earth" section.
Armies from All Directions
Story text omitted.
Choose one option:
Option 1 – Gain:
- A Few Gorgons unit
- +5 Gold Resources
Option 2 – Gain:
- A Few Zealots unit
- +5 Gold Resources
Option 3 – Gain:
- +15 Gold Resources
Four Riders
Story text omitted.
Choose one option:
Option 1 – Gain:
- +15 Gold Resources
- +4 Building Materials Resources
- +4 Valuables Resources
Option 2 – Gain:
- +10 Building Materials Resources
- +6 Valuables Resources
After defeating both Enemy Armies on the map, your Hero can proceed to the final battle. Go to the top right tile of the map and then spend one Movement Point to add a Center Map tile. As long as it is connected, you can place it anywhere you want. You can only enter the tile if you have visited both Obelisks on the map. Upon entering the center field of that new Map tile, read the "Like an Undead Mouse in a Trap" section and then fight Lord Haart's Army.
Tome of Earth
Story text omitted.
Choose one option:
- Remove one Artifact with a Defense symbol on it from your hand.
- Remove one Silver unit from your army.
If you are unable to do so, to finish this part, come back when you can meet one of the conditions.
Place your faction cube on this field – from now on, whenever you visit this field again, you can Remove one Artifact card from your hand to draw one new Spell card.
If you enter another field with an Obelisk, read the "Tome of Fire" section.
Tome of Fire
Story text omitted.
Choose one option:
- Remove One Relict Artifact from your hand.
- Lose 4 Valuables.
NOTE: Printed as "Relict Artifact"; the base game's term for the top artifact level is "Relic".
If you are unable to do so, to finish this part, come back when you can meet one of the conditions.
Place your faction cube on this field – from now on, whenever you visit this field again, you can Remove one Artifact card from your hand to draw one new Spell card.
Like an Undead Mouse in a Trap
Story text omitted.
In the first Combat round of this fight, you can cast one spell from the Earth School and one from the Fire School. Neither of the spells counts against the spell limit. Each of these spells is cast with the maximum SpellPower and returns to your hand instead of being discarded.
After defeating the enemy army, read the "Die a Hero or…" section.
Die a Hero or…
Narrative only; story text omitted.
Map Locations
Town
- Category: Flaggable
This is a player's starting field. If a player captures a Town, they gain a bonus depending on the scenario.
Settlement
- Category: Flaggable
When you Flag a Settlement, you may select your reward from a number of bonuses. If you capture a Settlement that has not been previously owned by any player, you gain an extra bonus (see page 25, "Settlements" in the Core Rulebook).
Scholar
- Category: Visitable
Roll 1 Attack die. Depending on the result, do the following:
- +1 – Draw 1 chosen Statistic card or Remove one of the Statistic cards from hand.
- 0 – Draw 2 Ability cards, take one of them and discard the other.
- -1 – Draw 2 Spell cards, take one of them and discard the other.