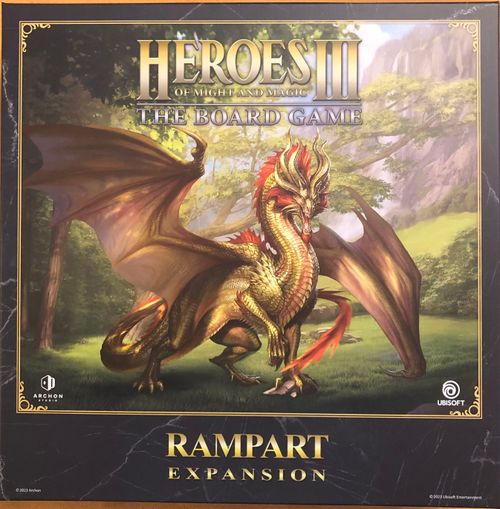
Heroes of Might and Magic III: The Board Game – Rampart Expansion
Heroes of Might and Magic III: The Board Game – Rampart Expansion Rulebook
Table of Contents
Table of Contents
Component List
- 7 × Map tile:
- 1 × Starting tile
- 3 × Far tile
- 2 × Near tile
- 1 × Center tile
- 1 × Town board
- 1 × Mission book
- 1 × Player's Aid
- 2 × Hero model
- 7 × Unit model
- 1 × Hero card (double-sided)
- 7 × Unit card
- 7 × Town Building tile
- 2 × Neutral Unit card
- 3 × Astrologers Proclaim card
- 8 × Artifact card
- 20 × Spell card
- 4 × Ability card
- 6 × Specialty card
- 12 × War Machine
- 7 × Statistic card:
- 1 × Attack card
- 3 × Defense card
- 1 × Power card
- 2 × Knowledge card
- 9 × Gold token:
- 3 × "1 Gold"
- 3 × "3 Gold"
- 3 × "10 Gold"
New Elements
Permanent Cards
These cards either provide you with a bonus or have a condition waiting to be met. When you play a Permanent card, place it in front of you. It stays there until you either discard it or replace it with another Permanent card. A Hero may only have one card of this type at a time.
NOTE: When a Permanent card is in play, you can still use its effects, either Basic or Expert. But remember, they do not stack – if you use the Expert effect, do not add it to the Basic effect.
Map Locations
In Rampart Expansion, you will find more tiles with new locations to discover. For the complete list of the locations, go to page 25 (see Map Locations below).
War Machine
This new type of cards can be obtained from the War Machine Factory or Trading Post. If you decide to buy a War Machine from a Trading Post, you cannot use any other Trading Post actions during this visit and must pay additional 3 Gold for the machine as compared to its cost at a War Machine Factory. Place the War Machine deck within the reach of all players.
War Machine card layout:
- Name
- Effect
- War Machine Factory cost
- Trading Post cost
The printed example is a "Ballista" card with a Factory cost of 7 Gold and a Trading Post cost of 10 Gold. Its effect line reads: "At the beginning of each Combat round, deal 1 [text obscured by the numbered callout in the printed example] to the enemy unit with the [text obscured] [icon]." The obscured words cannot be read from the booklet, so they are not reproduced here; the effect text on each War Machine card is the authority.
Alliance Mode
This mode requires at least one expansion and 4 players to form an Alliance of 2 players vs. 2 players.
Additional Rules
When playing in this mode, the following rules apply:
- An Alliance is a team of 2 players that is determined at the beginning of the game and lasts for the duration of the chosen scenario.
- Each player chooses their faction at the beginning of the scenario.
- Allied players can exchange artifacts. To do so, they need their heroes to occupy adjacent fields.
- Resources may be exchanged without the need for both players' Heroes to occupy adjacent fields. Members of an Alliance can exchange resources freely during the turn of either player in the team.
- Players in an Alliance cannot Flag locations that are already Flagged by another player from the same Alliance.
Finishing Scenario
Allied players share the victory and defeat conditions. There is no additional step of comparing who did better in the given game or who contributed to the victory more.
The Challenge
The king has just revealed that it is only a matter of months before he passes away. For that reason he announced that whoever rises to the challenge of building the grail structure in the capital city of Osha within the next six months will be anointed as his successor. The gauntlet has been thrown, will you take it up?
Player Count: A scenario for 4 players (2 vs. 2).
Scenario Length: This scenario plays out over 11-14 rounds.
Map Setup: Take the following Map tiles and set them up as shown in the scenario map layout:
- 4 × Starting (I) Map tile
- 8 × Near (IV-V) Map tile, 4 of which must contain an Obelisk
- 2 × Center (VI-VII) Map tile, 1 of which must contain a Grail
- 8 × Far (II-III) Map tile – Each player gets 2 of these tiles
NOTE: Before placing the Near tiles, separate them into 2 piles (with and without an Obelisk). Put them alternately so that the tiles with an Obelisk are not placed adjacent to each other.
Starting Resources: Each player starts with the following resources: 16 × Gold, 4 × Building Materials, 1 × Valuable.
Setting a Player's Income: Set the income on the income tracker to: "10" Gold, "0" Building Materials, "0" Valuables.
Starting Buildings: Each player starts the game with these buildings:
- Bronze Dwelling
Starting Units: Each player starts with the following units:
- 2 × Pack of Bronze units with the lowest Recruitment cost.
Additional Scenario Rules: During this scenario:
- When a player visits an Obelisk, they roll 2 Treasure dice and choose one to resolve.
- Players can use their deck of Might and Magic when paying gold to defend their Faction Town.
- Alliance may not visit the field with the Grail token unless either they have already visited at least 4 different Obelisks or the Grail token has been taken by any Hero at least once.
- To obtain the Grail token, a player's Hero must spend 2 Movement Points on the field with the Grail.
- If another Hero defeats the Hero with the Grail token, they also take the Grail token.
- If a Hero with the Grail token surrenders during Combat, the Grail token is placed on the hex where the Hero surrendered.
- If a Neutral Army defeats a Hero with the Grail token, the Grail token is placed on the hex where the Hero was defeated.
- The Grail token increases Gold income by 5.
Victory Condition: To win the scenario, a Hero must obtain the Grail token and bring it to their Faction Town.
Round Tracker: If the Grail is not obtained at least once by the end of the 11th round, the game ends, and all players lose the scenario.
If the Grail token has been obtained, the players gain additional time – until the end of the 14th round – to bring the Grail to their Faction Town. Otherwise, all players lose the scenario.
Timed Event: At the start of the 4th and 9th rounds, remove all Black cubes from all locations on the map.
Clash Mode
Dwarven Gold
Dwarven gold madness swept the region when Invis Smythers (renowned Dwarven miner) struck it lucky when he found a gold vein worth 75,000 gold pieces. Local lords have started mounting expeditions.
Player Count: A scenario for 2-3 players.
Scenario Length: This scenario plays out over 10 rounds.
Map Setup: Take the following Map tiles and set them up as shown in the scenario map layout:
For a 2-player scenario:
- 2 × Starting (I) Map tile
- 4 × Near (IV-V) Map tile, all must contain an Obelisk
- 1 × Center (VI–VII) Map tile with the Grail field
- 4 × Far (II-III) Map tile – Each player gets 2 of these tiles
For a 3-player scenario:
- 3 × Starting (I) Map tile
- 6 × Near (IV-V) Map tile, 3 of which must contain an Obelisk
- 1 × Center (VI–VII) Map tile with the Grail field
- 6 × Far (II-III) Map tile – Each player gets 2 of these tiles
NOTE: Before placing the Near tiles, separate them into 2 piles (with and without an Obelisk). Put them alternately so that the tiles with an Obelisk are not placed adjacent to each other.
Starting Resources: Each player starts with the following resources: 15 × Gold, 3 × Building Materials, 1 × Valuable.
Setting a Player's Income: Set the income on your income tracker to: "10" Gold, "2" Building Materials, "0" Valuables.
Starting Buildings: Each player starts the game with these buildings:
- Bronze Dwelling.
Starting Units: Each player starts with the following units:
- 1 × A Pack of Bronze units with the highest Recruitment cost.
Additional Scenario Rules: Before the start of this scenario:
- Using cards that provide resources is prohibited in this scenario. If during the Search (X) action, you draw one of these cards, show it to the other players, discard it, and take another card in its place.
During this scenario:
- Only a player's Main Hero can obtain the Grail token.
- The Grail token gives a player's Main Hero 15 Gold immediately, and only once the player's Main Hero has returned to their Town with the Grail token, their Gold Income immediately increases by 5.
- When a player visits an Obelisk, they roll 2 Treasure dice and choose one to resolve.
- Players can use their deck of Might and Magic when paying gold to defend their Faction Town.
- Players may not visit the field with the Grail token unless either they have already visited at least 2 different Obelisks or the Grail token has been taken by any Hero at least once.
- To obtain the Grail token, a player's Hero must spend 2 Movement Points on the field with the Grail.
- If another Hero defeats the Hero with the Grail token, they also take the Grail token.
- If a Hero with the Grail token surrenders during Combat, the Grail token is placed on the hex where the Hero surrendered.
- If a Neutral Army defeats a Hero with the Grail token, the Grail token is placed on the hex where the Hero was defeated.
NOTE: If there are not enough Gold tokens in the Resource Pool, a player can place one Black cube on a "1" Gold token to represent a "10" Gold token.
Victory Condition: To win the scenario, a player must possess 75 Gold at the end of a round. If more than one player meets the condition, the player with the most Gold wins.
Round Tracker: If the above condition is not met by the end of the 10th round, the game ends and all players lose the scenario.
Timed Event: At the start of the 2nd, 4th, 6th, 8th, and 10th round, remove all Black cubes from the Windmill and Water Wheel locations.
Rampart Campaign – Dead-Cold Revenge
1: Search for a Killer
When two AvLee lords are found dead, Gem and Gelu set out on their vengeful quest to seek justice. Their fates, however, unexpectedly lead them to find much more than they had hoped for. Will they manage to foil the sinister plot brewing on AvLee borders, or has the gruesome discovery come too late to stop the Necromancers' schemes?
Scenario Length: This scenario plays out over 11 rounds.
Player Setup:
- Faction: Rampart
- Faction Hero: Gelu
- Faction Army: A Few Centaurs, a Few Dwarves, a Few Elves
- Starting Resources: 14 × Gold, 4 × Building Materials, additional +5 Gold production
- Town Buildings: Bronze Dwelling, Silver Dwelling, Citadel
- Bonus: Choose one of the following options:
- +2 Valuable Resources
- +4 Building Materials Resources
- Ammo Cart War Machine card
AI Hero Setup:
- Faction: Necropolis
- Enemy Heroes: Galthran, Aislinn, Town army
- Enemy Armies:
- Aislinn's Army: A Pack of Skeletons, a Pack of Zombies, a Few Liches, Bronze Rogues*
- Galthran's Army: A Pack of Vampires, a Pack of Zombies, a Pack Liches, Silver Mummies*
- Town Army: A Pack of Zombies, a Pack of Vampires, a Pack of Dread Knights, a Pack of Liches, Wall and Gate cards, a Few Black Dragons
- Galthran's Deck: 4 × Might cards
- Aislinn's Deck: 1 × Might cards, 3 × Magic cards
- Town Army's Deck: 3 × Might card, 2 × Skill card
- Aislinn's Spell Deck: 2 × "Haste" Spell card, 1 × "Magic arrow" Spell card
- Town Army's skill: Ballista War Machine card**
* Before beginning the scenario, find this card in the relevant Neutral Unit deck.
** Keep this card near your army. Its effect is activated when the Skill card calls for it, rather than at the beginning of the Combat.
Map Setup: Take the following Map tiles and set them up as shown in the scenario map layout:
- 2 × Starting Map tile (I):
- 1 × Necropolis (S1)
- 1 × Rampart (S4)
- 2 × Far Map tile (II-III):
- 2 × Rampart (choose from: F10-F12)
- 3 × Near Map tile (IV-V):
- 1 × Necropolis (choose from: N1, N4)
- 2 × Rampart (N7, N8)
Additionally, for the timed event prepare:
- 1 × random Dungeon Far tile (choose from: F2, F5, F8)
- 1 × random Dungeon Near tile (choose from: N2, N5)
Heroes Placement: Both Enemy Heroes are represented by the two Necropolis Faction Hero models and appear on the map as a result of timed events. You can assign the models to the AI Heroes as you like.
Place your Hero on the center field of the Rampart Starting Map tile.
Additional Rules: During this "Rampart" campaign scenario, the following rules apply:
- The Enemy Heroes move after the player.
- You can enter a blocked field if an Enemy Hero is in that field.
- After defeating an Enemy Hero's Army, gain 2 Valuable.
- The first time a Hero enters an Obelisk field, they trigger a story event. After that, when your Hero enters another Obelisk field for the first time, roll 2 Treasure dice and resolve one of them (your choice).
Win/Lose Conditions:
- Win: You must defeat all Enemy Armies.
- Lose: You fail the scenario if:
- You lose control of your Faction Town.
- You lose a fight with an Enemy Army.
- You fail to defeat all Enemy Armies before the end of the 11th round.
Timed Events: When you reach the following rounds, follow the corresponding instructions:
- 1st Round: Read the "Mysterious Death" section below.
- 5th Round: If you have read the "Saving Soledare" section, skip this bullet point. Otherwise, read the "The Ruins of Soledare" section now.
- 7th Round:
- From this turn onward, the difficulty level of every Combat encounter on the map increases by one till the end of the scenario (see page 35, "Field Difficulty Level Table" in the Core Rulebook).
- Read the "The Path One Chooses" section below.
- Place Galthran on the blocked field on the Necropolis Near Map tile. If it is not discovered, flip it now.
- 11th Round: If you do not secure victory by the end of this round, you are defeated. All is lost!
When you complete the scenario: Read the "Answers That Breed More Questions" section below.
Story Events
Story prose is left out. Only the rule instructions are kept.
Mysterious Death (1st Round):
Flip one Rampart Near Tile on the map – it is already discovered for you. You have time till the end of the 4rd [sic] round to arrive at an Obelisk. If you make it in time, read the "Saving Soledare" section. Otherwise, ignore this part.
Saving Soledare (Obelisk field):
When you enter the Obelisk field, you will fight Aislinn's Army. If you are victorious, choose:
- +4 Building Materials Resource and raise Building Materials production by 2
- +15 Gold Resource and raise Gold production by 5
Then, read the "A Way Forward" section below.
The Ruins of Soledare (5th Round, if "Saving Soledare" was not read):
Gain 8 × Building Materials and additional 2 Movement this round.
Place the Aislinn model on the Obelisk field of the Rampart Near tile. If it is not discovered, flip all Rampart Near tiles on the map, and then place the model. Add A Few of Vampires to her army.
Read the "A Way Forward" section below.
A Way Forward (after "Saving Soledare" or "The Ruins of Soledare"):
Take the two Dungeon tiles (prepared during Map Setup) and place them between the two parts of the Map, connecting the Necropolis Near Map tile and Rampart Near Map tile. You can arrange them however you like. They are all already discovered.
The Path One Chooses (7th Round):
When you enter the Necropolis Starting tile, read the "Herding" section below. Fight the Town Army.
Herding (Necropolis Starting tile):
When you vanquish the Town Army, read the "Answers That Breed More Questions" section below.
Answers That Breed More Questions (on completing the scenario):
Narrative only; no rule instructions.
2: Final Peace
Scenario Length: This scenario plays out over 13 rounds.
Player Setup:
- Faction: Rampart
- Faction Hero: Gem
- Faction Army: A Few Centaurs, a Few Dwarves, a Few Elves
- Starting Resources: 12 × Gold, 4 × Building Materials, 2 × Valuable, additional +5 Gold production
- Town Buildings: Bronze Dwelling, Silver Dwelling, Citadel
- Bonus: Choose one of the following options:
- +8 Gold Resources
- +4 Building Materials Resources
- Search (2) the Spell deck, twice.
AI Hero Setup:
- Faction: Necropolis
- Enemy Heroes: Lord Fayette's Guards, Lord Fayette
- Enemy Armies:
- Lord Fayette's Guards Army: A Pack of Skeletons, a Pack of Vampires, a Pack of Zombies, a Few Liches
- Lord Fayette's Army: A Pack of Zombies, a Pack of Vampires, A Pack of Liches, a Pack of Dread Knights
- Lord Fayette's Guards' Deck: 5 × Might card
- Lord Fayette's Deck: 3 × Might card, 2 × Magic card
- Lord Fayette's Spell Deck: 2 × "Stone skin" Spell card
Map Setup: Take the following Map tiles and set them up as shown in the scenario map layout:
- 3 × Starting Map tile (I):
- 1 × Necropolis (S1)
- 1 × Dungeon (S2)
- 1 × Rampart (S4)
- 2 × Far Map tile (II-III):
- 2 × Rampart (choose from: F10-F12)
- 6 × Near Map tile (IV-V):
- 2 × Dungeon (N2, N5)
- 2 × Necropolis (N1, N4)
- 2 × Rampart (N7, N8)
The Rampart Starting Map tile is already discovered.
Heroes Placement: Lord Fayette's guards are represented by one of the Necropolis Faction Hero models and appear on the map as a result of a special story event.
Place your Hero on the center field of the Rampart Starting Map tile.
Additional Rules: During this "Rampart" campaign scenario, the following rules apply:
- The Enemy Heroes move after the player.
- You can enter a blocked field if an Enemy Hero is in that field.
- After defeating an Enemy Hero's Army, gain 2 Valuable.
- The first time a Hero enters an Obelisk field, they trigger a story event.
Win/Lose Conditions:
- Win: You must defeat all Enemy Armies.
- Lose: You fail the scenario if:
- You lose control of your Faction Town.
- You lose a fight with an Enemy Army.
- You fail to defeat all Enemy Armies before the end of the 13th round.
Timed Events: When you reach the following rounds, follow the corresponding instructions:
- 1st Round: Read the "One Last Service" section below.
- 4th Round: Read the "Fond Memories" section below.
- 7th Round: If you have read the "Old Friends" section, skip this bullet point. Otherwise, place Lord Fayette's Guards Army in the center of the Necropolis Starting tile and add a Few Dread Knights unit to this army.
- 13th Round: If Lord Fayette is not vanquished by the end of this round, you suffer defeat. All is lost!
When you complete the scenario: Read the "Last Duty" section below.
Story Events
Story prose is left out. Only the rule instructions are kept.
One Last Service (1st Round):
When you enter an Obelisk field on the Rampart Near tile, read the "One Scheme After Another" section below.
When you enter the Town field on the Necropolis Starting tile, start a Combat with Lord Fayette's Guards Army. Add three Wall cards and one Gate card on the Enemy's side. After vanquishing this enemy, read the "Old Friends" section below.
Fond Memories (4th Round):
Narrative only; no rule instructions.
One Scheme After Another (Obelisk field on the Rampart Near tile):
Discover one of the Necropolis Near tiles. Then discover both Dungeon Near tiles.
Old Friends (after vanquishing Lord Fayette's Guards Army):
From now on, when you enter an Obelisk field on a Necropolis Near Map tile, you are teleported to the Obelisk on the Dungeon Near tile. At the same time, when you enter an Obelisk field on a Dungeon Near tile, you are teleported to the Obelisk on the Necropolis Near map tile.
From this turn onward, the difficulty level of every Combat encounter on the map increases by one till the end of the scenario (see page 35, "Field Difficulty Level Table" in the Core Rulebook).
When you enter the Town field on the Dungeon Starting tile, start a Combat with "Lord Fayette's Army". Add three Wall cards and one Gate card, and one Arrow Tower on the Enemy's side of the board. After vanquishing this enemy, read the "Last Duty" section below.
Last Duty (on completing the scenario):
Narrative only; no rule instructions.
3: Agents of Vengeance
Scenario Length: This scenario plays out over 12 rounds.
Player Setup:
- Faction: Rampart
- Faction Hero: Gem, Gelu
- Faction Army: A Few Centaurs, a Few Dwarves, a Few Elves
- Starting Resources: 14 × Gold, 8 × Building Materials, 3 × Valuable, additional +5 Gold production
- Town Buildings: Bronze Dwelling, Silver Dwelling, Citadel
- Bonus: Choose one of the following options:
- +2 Valuable Resources
- Search (4) the Artifact deck.
- Reinforce two of your units.
AI Hero Setup:
- Faction: Necropolis
- Enemy Heroes: Charna, Galthran, Vidomina
- Enemy Armies:
- Charna's Army: A Pack of Zombies, a Pack of Wraiths, a Pack of Liches, a Few of Vampires
- Galthran's Army: A Pack of Vampires, a Pack of Liches, a Pack of Zombies, a Few Dread Knights
- Vidomina's Army: a Pack of Skeletons, a Pack of Dread Knights, a Pack of Ghost Dragons, a Pack of Liches
- Charna's Deck: 4 × Might card
- Galthran's Deck: 4 × Might card
- Vidomina's Deck: 4 × Magic card, 3 × Skill card
- Vidomina's Spell Deck: 2 × "Haste" Spell card, 2 × "Cure" Spell card
- Vidomina's skill: Sorcery Ability card*
- Additionally, prepare for timed events: Sandro's Specialty cards: I and VI
* If you draw skill cards two times in a row or if there are no more spells in the AI hero spell deck, deal Damage equal to Spell Power to the player's unit with the lowest HP.
Map Setup: Take the following Map tiles and set them up as shown in the scenario map layout:
- 2 × Starting Map tile (I):
- 1 × Necropolis (S1)
- 1 × Rampart (S4)
- 4 × Far Map tile (II-III):
- 2 × Rampart (choose from: F10-F12)
- 2 × Necropolis (choose from: F1, F4, F7)
- 4 × Near Map tile (IV-V):
- 2 × Necropolis (N1, N4)
- 2 × Rampart (N7, N8)
Additionally, for the timed event prepare:
- 1 × Central Map tile (VI–VII) with the Dragon Utopia (choose from: C1, C3)
The Rampart Starting Map tile is already discovered.
Heroes Placement: Charna and Galthran are represented by the two Necropolis Faction Hero models. They appear on the map as a result of special story events, so you may want to keep them handy. You can assign the models to the AI Heroes as you like.
Vidomina does not move on the map.
Place your Hero on the center field of the Rampart Starting Map tile.
Additional Rules: During this "Rampart" campaign scenario, the following rules apply:
- Every time a Hero enters an Obelisk field, they trigger a story event.
- The Enemy Heroes move after the player.
- After defeating an Enemy Hero's Army, gain 2 Valuable.
- The difficulty level of every Combat encounter on the Necropolis Map tiles is increased by one (see page 35, "Field Difficulty Level Table" in the Core Rulebook).
Win/Lose Conditions:
- Win: You must defeat the Enemy Army at the Dragon Utopia.
- Lose: You fail the scenario if:
- You lose control of your Faction Town.
- The Enemy Army at the Dragon Utopia is not defeated by the end of the 12th round.
Timed Events: When you reach the following rounds, follow the corresponding instructions:
- 1st Round: Read the "Deyjan Lords Must Be Stopped" section below.
- 3rd Round: Read the "Wraiths Over the Horizon" section below. Place Charna on the center field of the Necropolis Starting Map tile.
- 7th Round:
- Read the "Necromancer Reinforcements" section below.
- Place Galthran on a center field of one of the Necropolis Far Map tiles that is further from your model. If both are in the same distance, you can choose either of the tiles.
- 12th Round: If you do not secure victory by the end of this round, you are defeated. All is lost!
When you complete the scenario: Read the "Far From Over" section below.
Story Events
Story prose is left out. Only the rule instructions are kept.
Deyjan Lords Must Be Stopped (1st Round):
When you enter the Town field on the Necropolis Starting tile, read the "Is that all?" section below.
Wraiths Over the Horizon (3rd Round):
If you are victorious, choose:
- Lose one Movement and gain Positive Morale
- Gain Negative Morale
Flip the Necropolis Starting Map tile. It is discovered for you.
Place Charna on the center field of the Necropolis Starting Map tile. While fighting with that AI Hero Army, increase its Wraiths' Attack by one point.
Necromancer Reinforcements (7th Round):
Choose one:
- If you have reinforced a Silver unit, flip it to the Few side.
- If you have a Bronze unit, discard it.
If none of the conditions above apply, ignore this effect.
Then, discover both Necropolis Far Map tiles.
Is that all? (Town field on the Necropolis Starting tile):
Take the prepared Center Map tile and add it to the map so that it is connected with at least one Necropolis Near Map tile. When you enter the field with the Dragon Utopia, read the "Castle Crypthome" section below.
Choose one:
- +3 Valuable Resource
- +10 Gold Resource
- Search (4) the Artifact deck
Castle Crypthome (Dragon Utopia field):
The fight with Vidomina's Army starts. Place both Sandro's Specialty cards on the Pack of Skeletons unit. Then perform a free attack with this unit – they can still perform their regular attack in their initiative activation.
If you are using Gelu as your Main Hero, put 1 Damage to every enemy on the Combat board.
If you are using Gem as your Main Hero, put 3 Damage on the chosen enemy unit.
After that, the battle abides by the standard rules.
Far From Over (on completing the scenario):
Narrative only; no rule instructions.
Map Locations
Town
Category: Flaggable
This is a player's starting field. If a player captures a town, they gain a bonus depending on the scenario.
Settlement
Category: Flaggable
When you Flag a Settlement, you may select your reward from a number of bonuses. If you capture a Settlement that has not been previously owned by any player, you gain an extra bonus (see page 25, "Settlements" in the Core Rulebook).
Mine: Sawmill
Category: Flaggable
Sawmill works just like any other mine. If you capture a mine that has not been previously owned by any player, it immediately provides you with its income. Additionally, depending on its type, it will passively generate income at the beginning of each Resource round:
- Sawmill: 2 × Building Materials
Trading Post
Category: Revisitable
Allows the visiting Hero to exchange resources, Remove a card, or buy a War Machine.
War Machine Factory
Category: Revisitable
This location allows a Hero to buy a War Machine.