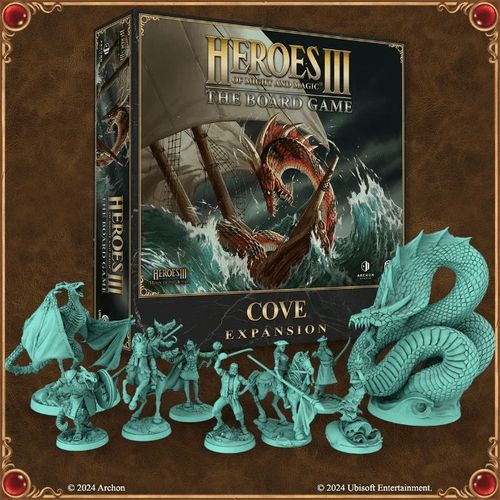
Heroes of Might and Magic III: The Board Game – Cove Expansion
Heroes of Might and Magic III: The Board Game – Cove Expansion Rulebook
Table of Contents
Table of Contents
- Component List
- New Elements
- Alliance Mode
- Clash Mode
- Campaign Rules
- Clarification on Some Rules from the Core Game
- Using Different Heroes
- Your Might and Magic Deck Between Scenarios
- Setting the Player's Income
- Neutral Units in AI Armies
- AI Deck Sharing
- Not Enough Card Copies During Setup
- Disproportionate Numbers of Cards in the AI Spell Deck and Magic Cards in the AI Deck
- AI Under Siege – Arrow Tower, Gate, and Walls
- Rules for More Complex Spells
- Cove Campaign – Terror of the Seas
- Map Locations
Component List
- 5 × Map tile:
- 1 × Starting tile
- 3 × Far tile
- 1 × Near tile
- 7 × Sea Map tile:
- 6 × Near tile
- 1 × Center tile
- 1 × Town board
- 1 × Mission book
- 1 × Player's Aid
- 1 × Unit leaflet (Cove)
- 2 × Hero model
- 1 × Town model
- 7 × Unit model
- 2 × Hero card (double-sided)
- 7 × Unit card
- 7 × Town Building tile
- 7 × Neutral Unit card
- 3 × Astrologers Proclaim card
- 6 × Artifact card
- 6 × Spell card
- 6 × Ability card
- 12 × Specialty card
- 7 × Statistic card:
- 3 × Attack card
- 2 × Power card
- 2 × Knowledge card
- 4 × War Machine card
New Elements
Sea Map Tiles
Discovering Sea Map tiles follows the regular placement rules, just like with any other Map tile. Moving over them, however, is somewhat different. Some Sea Map tiles may contain both land and sea fields. You move normally between two fields of the same type (sea to sea, land to land) and when you enter a land field from a sea field. However, when your Hero enters a sea field from a land field, their movement for the turn ends – they do not lose any unspent Movement Points, and they can still use them (for example, to extend Combat resulting from resolving the field they entered), but they cannot move anymore that turn, not even with the help of card effects.
Whirlpool Tokens
The Whirlpool token marks a field that connects to another Whirlpool on another tile, allowing Heroes to travel between them. When you discover a Sea tile with a Whirlpool on it, place the tile according to normal rules and then place the token on the field indicated by the scenario's map layout. Keep in mind that the Whirlpool token replaces the field's original location and cannot be placed on blocked fields, other tokens, or fields containing locations required to meet any of the scenario's victory conditions. You can place the token however you wish, provided that it follows the above rules.
Each Whirlpool token shows a number that corresponds to an Attack die roll result. If there are three Whirlpool tokens on a map, each time your Hero enters one of them, roll an Attack die to determine where it takes them. If your roll result sends you to the Whirlpool your Hero has just entered, repeat the roll. After each such travel, lose 1 unit from your army – you can later Recruit this unit again.
Weakness Tokens
A unit with this token suffers -1 Attack or -2 Attack, as indicated by the token's side. Each unit can have only one such token at a time – if a unit that already has such a token would gain another one, the player controlling it chooses which one to keep.
Time Tokens
To mark the remaining duration of an Ongoing effect, you can use Time tokens. Just put them on the card or a token that provides the effect and reduce their total value by 1 at the end of the round. When there are no Time tokens left, the effect ends – discard its card or token.
Clone Tokens
There are two different-colored sets of two Clone tokens in the game – one set for each opponent in Combat – that are used to mark the effect of a "Clone" spell. When you cast this spell, choose an allied unit (depending on the Spell Power used) and an empty space on the Combat board that is adjacent to the unit. Next, place one Clone token on the chosen unit and another one on that space. The token on the empty space represents the Clone.
It has the same statistics and special abilities as the original unit, but its HP is only 1 and its Defense is 0. Additionally, its defense cannot be increased by any effects from cards and other units. Remember that if the Cloned unit is attacked or takes even 1 Damage from a Spell, it perishes. The Clone does not inherit any effects that have been played on the original unit.
NOTE: The Clone's Attack value, Initiative, and special ability are the same as those of the original unit. If the original unit is removed from the Combat board, remove its Clone as well.
Example: While playing Casmetra, one of your units in Combat is a Pack of Sorceresses whose initiative is 7. You "Clone" them – placing one Clone token on the Pack of Sorceresses and the other one on the empty space next to them. Next, you decide to play Casmetra's Level 4 Specialty card on the original Sorceresses unit. It increases their initiative by 2. Now, the original Sorceresses' initiative is 9, but the Cloned unit's initiative remains 7.
Map Locations
In Cove Expansion, you will find more tiles with new locations to discover. For the complete list of the locations, go to page 34 (see Map Locations below). NOTE: The printed book refers to page 34 here, but the Map Locations pages it describes are numbered 35–37.
Permanent Cards
These cards either provide you with a bonus or have a condition waiting to be met. When you play a Permanent card, place it in front of you. It stays there until you either discard it or replace it with another Permanent card. A Hero may only have one card of this type at a time.
Cards with the Permanent symbol (∞) can be played in the same way as the cards with the Map or Activation symbols.
NOTE: The effect of these cards lasts only as long as they are in play.
War Machine
These cards can be obtained from the War Machine Factory or Trading Post. If you decide to buy a War Machine from a Trading Post, you cannot use any other Trading Post actions during this visit and must pay additional 3 Gold for the machine as compared to its cost at a War Machine Factory. Place the War Machine deck within the reach of all players.
War Machine card layout:
- Name
- Effect
- War Machine Factory cost
- Trading Post cost
Alliance Mode
This mode requires at least one expansion and 4 players to form an Alliance of 2 players vs. 2 players.
Additional Rules
When playing in this mode, the following rules apply:
- An Alliance is a team of 2 players that is determined at the beginning of the game and lasts for the duration of the chosen scenario.
- Each player chooses their faction at the beginning of the scenario.
- Allied players can exchange artifacts. To do so, they need their Heroes to occupy adjacent fields.
- Resources may be exchanged without the need for both players' Heroes to occupy adjacent fields. Members of an Alliance can exchange resources freely during the turn of either player in the team.
- Players in an Alliance cannot Flag locations that are already Flagged by another player from the same Alliance.
Finishing Scenario
Allied players share the victory and defeat conditions. There is no additional step of comparing who did better in the given game or who contributed to the victory more.
Strait of Storms
Player Count: A scenario for 4 players (2 vs. 2).
Scenario Length: This scenario plays out over 14 rounds.
Map Setup: Take the following Map tiles and set them up as shown in the scenario map layout:
- 4 × Starting (I) Map tile, 1 of which must contain a Dungeon Town
- 6 × Near (IV-V) Sea Map tile
- 8 × Far (II-III) Map tile
NOTE: Place the Starting tiles with a blocked field (the field with a yellow border on each edge) as shown in the map layout.
NOTE 2: Place 2 Whirlpool tokens as shown in the map layout.
Starting Resources: Each player starts with the following resources: 14 × Gold, 4 × Building Materials, 1 × Valuable.
Setting a Player's Income: Set the income on the income tracker to: "10" Gold, "0" Building Materials, "0" Valuables.
Starting Buildings: Each player starts the game with these buildings:
- Bronze Dwelling
- Mage Guild
Starting Units: Each player starts with the following units:
- 2 × A Pack of Bronze units with the lowest Recruitment cost
Additional Scenario Rules: Before the start of this scenario:
- There are 4 starting locations divided into 2 starting areas. The teams choose their starting areas, and then each player picks their starting position within their team's starting area.
- Instead of the regular starting bonus, you can recruit a Secondary Hero for 5 Gold. Ignore this rule if your Difficulty Setting is Impossible.
During this scenario:
- A player can send resources to an ally only during the player's turn.
- Each player can Recruit a Secondary Hero only once.
- No Main Hero can surrender in Combat against another Hero. Only Secondary Heroes can do that.
Victory Condition: To win the scenario, an Alliance must either capture one of the enemy Towns and maintain Control over it for the next 2 rounds, or defeat both Main Heroes of the enemy Alliance.
Round Tracker: If the above condition is not met, the game ends with the 14th round. If one of the players Flags an enemy Town in the 13th or 14th round, the game extends until the end of the 15th or 16th round, respectively. If both teams meet the victory conditions, the game ends with a draw, and if no team meets the victory conditions, both Alliances lose.
Timed Event: There are no timed events in this scenario.
Clash Mode
With Sword and Fire
Player Count: A scenario for 2 players.
Scenario Length: This scenario plays out over 11 rounds.
Map Setup: Take the following Map tiles and set them up as shown in the scenario map layout:
- 2 × Starting (I) Map tile
- 4 × Near (IV-V) Sea Map tile
- 4 × Far (II-III) Map tile, none of which must contain a Settlement
Starting Resources: Each player starts with the following resources: 13 × Gold, 3 × Building Materials, 1 × Valuable.
Setting a Player's Income: Set the income on the income tracker to: "10" Gold, "0" Building Materials, "0" Valuables.
Starting Buildings: Each player starts the game with these buildings:
- Bronze Dwelling
- Mage Guild
Starting Units: Each player starts with the following units:
- 1 × A Pack of Bronze units with the highest Recruitment cost
Additional Scenario Rules: During this scenario:
- No player may have a Secondary Hero.
- Players can use their deck of Might and Magic when paying gold to defend their Faction Town.
Victory Condition: To win the scenario, a player must capture their opponent's Town or defeat their Hero.
Round Tracker: If the above condition is not met by the end of the 11th round, the game ends in a draw.
Timed Event: During the 3rd, 6th, and 9th rounds, players can exchange resources as if they visited a Trading Post.
Blazing Archipelago
Player Count: A scenario for 3 players.
Scenario Length: This scenario plays out over 13 rounds.
Map Setup: Take the following Map tiles and set them up as shown in the scenario map layout:
- 3 × Starting (I) Map tile
- 6 × Near (IV-V) Sea Map tile
- 1 × Center (VI–VII) Sea Map tile
- 6 × Far (II-III) Map tile, none of which must contain a Settlement
NOTE: Place 3 Whirlpool tokens as shown in the map layout.
Starting Resources: Each player starts with the following resources: 14 × Gold, 4 × Building Materials, 1 × Valuable.
Setting a Player's Income: Set the income on the income tracker to: "10" Gold, "0" Building Materials, "0" Valuables.
Starting Buildings: Each player starts the game with these buildings:
- Bronze Dwelling
Starting Units: Each player starts with the following units:
- 3 × A Few of Bronze units
Additional Scenario Rules: During this scenario:
- No player may have a Secondary Hero.
- Players can use their deck of Might and Magic when paying gold to defend their Faction Town.
- After defeating the level VII Neutral Army, do not place any cubes on its field. Each time a Hero enters the location, they trigger Combat.
- After the first player defeats the level VII Neutral Army, in order to win, the remaining players must also defeat the level VII Neutral Army in their next turn. Ignore this rule, if it is already the 13th round.
- When you win Combat against the level VII Neutral Army, remove your Hero from the map.
- In this scenario, all players can achieve victory.
Victory Condition: To win the scenario, a player must defeat the level VII Neutral Army.
Round Tracker: The scenario ends with the 13th round or the moment the last player meets the above condition. All players who meet the Victory Condition, win. All players who fail to do so, lose.
Timed Event: During the 3rd, 6th, and 9th rounds, each player can either reroll 1 die once or roll and resolve 1 Resource die.
Campaign Rules
By the campaign, we understand a series of scenarios designed for solo play.
Each scenario is divided into two sections: the game-mechanics section and the story section. Only the game-mechanics section is transcribed here (see the note in the Table of Contents).
Campaigns make use of an additional set of rules that are described in the first Mission Book, in the Core Game. Reading them before starting the campaign below may be a good idea.
Clarification on Some Rules from the Core Game
- You cannot surrender to AI Heroes.
- The AI Heroes move after the player.
- When an AI Hero's Skill card calls for drawing a card, draw another AI card and resolve its effect.
- The AI cards that raise Defense or trigger the use of other cards that do so stay on the units till they are used for defending against one attack. Use them in a manner similar to how a real player would.
- The bonus from the campaign's scenario setup replaces the default starting bonus.
Using Different Heroes
Although each campaign has its own recommended Hero for whom it is balanced and who is also the main character of the story, you are free to play with any other Hero – there is only one condition, the champion you choose for your cause must belong to the same faction as the recommended Hero.
Your Might and Magic Deck Between Scenarios
After finishing a campaign scenario, follow these steps:
- Return the cards from your hand and the discard pile to your deck.
- From these cards, take out all the Statistic cards and the level 1 Specialty card, and set them aside.
- Now remove the rest of the Specialty cards.
- From the remaining cards, choose 5 and add them to the cards you set aside in the second step – this will be your Starting deck for the next scenario.
- Note down the cards that make your new Starting deck.
If you lose a scenario, reset your deck by removing all the cards that are not part of your current Starting deck.
REMEMBER! Every time you start a scenario, you reset your Hero's Experience Level to 1.
REMEMBER! Spell Scrolls are not part of the deck! You cannot carry them over to the next scenario.
If you choose to change your Hero between the scenarios or when you repeat the scenario with a different Hero, in step 3 replace all of the previous Hero's Statistic cards and the level 1 Specialty card with all of the Statistic cards and the level 1 Specialty card of your new Hero. If the previous Hero had Empowered Statistics cards, you can remove Statistic cards of the same type from the new Hero's deck, and replace them with Empowered Statistic cards of the corresponding type.
In step 4 you can replace any card that remains in the deck after step 3 with the new Hero's starting Ability card and Magic Arrow(s). You can neither add a second copy of the Hero's Ability card to your deck in this way, nor have more than 4 Magic Arrow cards. After replacing the cards, proceed with choosing 5 cards from the deck and adding them to the new Hero's level 1 Specialty card and Statistic cards – this will be your Starting deck for the next scenario.
Setting the Player's Income
At the start of each campaign scenario, set your income by placing your faction cubes on the following spaces of the income tracker on the Town board: "10" Gold, "0" Building Materials, "0" Valuables.
Special rules in each scenario can change the above values.
Neutral Units in AI Armies
Unit cards originating from the Neutral Unit decks are listed in each campaign scenario's AI Hero setup with both their tier (Bronze, Silver, Gold, Azure) and name. Before you start the scenario, find the indicated cards in their relevant Neutral Unit decks.
AI Deck Sharing
If the setup does not specifically say that a given deck (e.g., a Spell deck) or Skill is to be used exclusively by one AI Enemy Army, you should assume it is shared. After each Combat, shuffle the deck's cards – used and unused – back together.
During setup, if multiple AI Heroes use the same unit, and you do not have enough copies of its card, the AI Heroes must share it – set everything up without that card, and add it to the AI Hero's Army the moment you trigger Combat with them.
Not Enough Card Copies During Setup
If you lack some of the cards listed in the setup because they are already in your Hero's Starting deck, you may use other cards instead.
AI Skill cards cannot be replaced, so if setup assigns the AI Hero a card that your Hero has, remove the needed card from your Hero's deck and Search (3) the respective card's deck to compensate your Hero for the loss. If the AI Hero is assigned a Spell card that is unavailable, substitute it with a Magic Arrow card. If your Hero is assigned a Spell, Artifact, or Ability card that is unavailable, Search (3) the respective card's deck to get another card in its stead.
Disproportionate Numbers of Cards in the AI Spell Deck and Magic Cards in the AI Deck
Sometimes in the AI Spell deck, there are more Spell cards than there are Magic cards in the AI Hero's deck. This is no mistake. Not all spells must be used, some are there for the sake of diversity.
If the AI Spell deck empties before Combat ends, shuffle the AI Spell discard pile to form a new Spell deck. After the Combat, shuffle the Spell deck and the discard pile together.
AI Under Siege – Arrow Tower, Gate, and Walls
The Arrow Tower is treated as a Ranged unit of the Silver tier. When it attacks, follow the normal order of targeting enemy units – prioritize other Ranged units of the same tier. If there are no valid targets, the Arrow Tower attacks lower tier Ranged units (in the order of descending tier), and if there still are no valid targets, it attacks higher tier Ranged units (in the order of ascending tier). When there are no Ranged units to target, the Arrow Tower attacks the Ground and Flying units, following the same order. If there is more than one valid target, attack the one that is the closest to perishing – has the smallest difference between its HP and the number of current Damage. If there is still more than one valid target, then you can choose which unit is attacked.
When the Walls and Gate are mentioned in Combat preparation but no additional information on how to arrange them is given, arrange them just like a human player would – place the Gate in front of the Ground unit with the highest Initiative. By default, the units do not attack the Walls – they would rather fly over them to attack their target or move towards it through the Gate. If it is not possible, they take a Defense Action.
Rules for More Complex Spells
In the following campaign, enemies use a number of spells whose effects are not fully compatible with the standard use of AI Magic cards. To fully use their effects, we present extended descriptions of how AI Heroes should use each of these spells.
Spells attacking multiple targets (like Fireball and Chain Lightning) – When activated, target any unit with one or two adjacent units from the player's army, prioritizing the groups where there are more higher-tier units. If there is more than one valid group, attack the one that is the closest to perishing – has the smallest difference between its HP and the number of current Damage. If there is still more than one valid target, then you can choose which unit is attacked. If there are no player units adjacent to one another, target units that are not adjacent to any of the AI units. If that is also not possible, do not use this spell – instead, skip the AI card that activated this effect and put it on the bottom of the Enemy AI deck. Then, shuffle this spell back to the Enemy Spell deck.
Attack-weakening spells (like Weakness) – When activated, if the AI's activated unit is to perform an attack that will provoke a Retaliation, cast this spell on the Retaliating enemy to lower their Attack. If the AI's unit causes no Retaliation, do not cast this spell – instead, ignore the AI card that activated the spell and put it at the bottom of the Enemy AI deck. Then, shuffle the Spell card back to the Enemy Spell deck.
Instant Defense spells (like Stone Skin) – When activated, put this card on the side of the Combat board, then put a Defense token on the unit with the highest Defense to represent the card's effect – it stays there until the defense is resolved. If there already is a Defense token on that unit, choose another one in the order of decreasing Defense. In case of a tie in Defense value, give preference to the unit of the highest tier and then to the greatest value of Damage.
Healing spells (like Cure) – When activated, remove the Damage from the AI unit with the greatest value of Damage tokens, starting with the highest tier available. If no AI unit has any Damage, put the AI card that triggered the spell at the bottom of the Enemy AI deck. Then shuffle the "Cure" Spell card back to the Enemy Spell Deck.
Single-round buffs (like Fire Shield) – When activated, check the tier of the unit on which you are about to cast the spell and count how many units of the same or higher tier there are on the board. If more than half of them have already activated this turn, do not cast the spell now – instead, place it on the side of the Combat board and play it when the first AI unit activates in the next combat round. Skip drawing the AI card for that activation.
Cove Campaign – Terror of the Seas
1: Evenmorn
Scenario Length: This scenario plays out over 13 rounds.
Player Setup:
- Faction: Cove
- Faction Hero: Jeremy or any Cove Hero
- Faction Army: A Few Oceanids, a Few Sea Dogs
- Starting Resources: 10 × Gold, 2 × Building Materials, 0 × Valuable
- Town Buildings: Bronze Dwelling
- Bonus: Choose one of the following options:
- Search (4) the Artifact deck
- Search (4) the Spell deck
- Reinforce Sea Dogs
AI Hero Setup:
Enemy Heroes: Drakon, Nimbus, Drakon Vanguards, Nimbus Vanguards
Enemy Armies:
- Drakon's Army: A Pack of Medusas, a Pack of Minotaurs, a Few Manticores, Gold Nix, Gold Trolls
- Nimbus's Army: A Pack of Zombies, a Pack of Wraiths, a Pack of Vampires, a Pack of Dread Knights, a Few Ghost Dragons
- Drakon Vanguards: Neutral Army of a level equal to the current round number divided by two (rounded up). If there are fewer than 5 units in the Army, add a Pack of Harpies.
- Nimbus Vanguards: Neutral Army of a level equal to the current round number divided by two (rounded up). If there are fewer than 5 units in the Army, add a Pack of Skeletons.
Enemy Decks:
- Nimbus's Deck: 2 × Might card, 4 × Magic card
- Drakon's Deck: 2 × Might card, 3 × Skill card
- Other AI Heroes' Decks: 3 × Might card, 1 × Magic card
Enemy Spell Deck: 3 × "Magic Arrow" Spell card, 2 × "Slow" Spell card
Skill: "Armorer" Ability card*
- Whenever this skill is activated, put a Defense token on the unit with the highest Defense to represent the card's effect. The token stays there till the unit resolves a defense. If there already is a Defense token on that unit, choose another one in the order of decreasing Defense. In case of a tie in Defense value, give preference to the unit of the highest tier.
Map Setup: Take the following Map tiles and set them up as shown in the scenario map layout:
- 3 × Starting (I) Map tile:
- 1 × Necropolis (S1)
- 1 × Castle (S3)
- 1 × Cove (S9)
- 2 × Far (II-III) Map tile:
- 2 × random tile from Castle (F3, F6, F9) and Cove (F25-F27)
- 3 × Near (IV-V) Map tile:
- 2 × Necropolis (N1, N4)
- 1 × Cove (N22)
- 3 × Sea (IV-V) Map tile:
- 3 × random Sea tile (from W1-W6)
Heroes Placement: Place your Cove Hero on the Town field of the Cove Starting tile. This tile is already discovered. Use a Necropolis model for Nimbus Vanguards' model and a Dungeon model for Drakon Vanguards' model. Keep them handy, they will appear on the map as a result of timed events. Nimbus and Drakon do not have models or appear on the map.
Additional Rules: During this "Cove" campaign scenario, the following rules apply:
- When your Hero takes control of any of the Towns, gain 10 Gold. Then remove all Black cubes from all locations on the map – you can visit the locations again.
- Whenever you defeat one AI Enemy, gain 8 Gold.
- Entering a field with an Obelisk triggers a story event listed in timed events.
Win/Lose Conditions:
Win: You must Control both Necropolis and Castle Towns.
Lose: You fail the scenario if your Hero is defeated in any Combat or you lose control of your Faction Town. You can still retreat from Combat with non-Azure tier Neutral Armies.
Timed Events: When you reach the following rounds, follow the corresponding instructions:
-
1st Round: Read the "The Thin Ice Called Trust" section below. (This section contains no rule instructions.)
-
3rd Round: Read the "It's Not My Business, But…" section below. (This section contains no rule instructions.) Place a Nimbus Vanguards' model on the Necropolis Town field. Place a Drakon Vanguards' model on the Castle Town field.
-
7th Round: Read the "Honor Among the Pirates" section below. Your Main Hero loses one Movement Point. Then choose two of the following options:
- Gain 5 Gold Resources.
- Gain 4 Gold Resources.
- Gain 3 Building Materials Resources.
- Gain 2 Valuables Resources.
Place a Nimbus Vanguards' model on the Necropolis Town field unless it is under your control. Place a Drakon Vanguards' model on the Castle Town field unless it is under your control.
-
10th Round: Read the "Always Listen to Your Rum" section below. Your Main Hero loses one Movement Point. Choose two of the options below:
- Gain 5 Gold Resources.
- Gain 4 Gold Resources.
- Gain 3 Building Materials Resources.
- Gain 2 Valuables Resources.
Place a Nimbus Vanguards' model on the Necropolis Town field unless it is under your control. Place a Drakon Vanguards' model on the Castle Town field unless it is under your control.
When you enter a field with an Obelisk without your faction cube: read the "Seer's Hut" section below.
When you complete the scenario: read the "Where There Is a Light, There Is Always a Shadow" section below. NOTE: The printed book refers to this section, but it does not appear in the source text and is therefore not reproduced here.
Seer's Hut
Choose one of the options below. After resolving the event, place your faction cube on the field.
- Dragon Hunt: Draw from the Azure Neutral Units deck until you draw a "Dragons" unit. Shuffle the rest of the cards back into the deck and start Combat with the Dragons. After winning the Combat, you gain 15 Gold and 2 Valuables, then you can Search (2) the Artifact deck.
- Sea Priestess: Discard a Few Oceanids or flip this Unit card from "a Pack" to "a Few" to Search (3) the Spell deck. If you Discard a Pack of Oceanids, you can perform Search (3) twice.
2: In Search of the Horn
Scenario Length: This scenario plays out over 13 rounds.
Player Setup:
- Faction: Cove
- Faction Hero: Jeremy or any Cove Hero
- Faction Army: A Few Oceanids, a Few Sea Dogs
- Starting Resources: 16 × Gold, 3 × Building Materials, 2 × Valuable
- Town Buildings: Bronze Dwelling, Citadel
- Bonus: Choose one of the following options:
- Search (4) the Artifact deck
- Search (4) the Spell deck
- +4 Gold Resources
AI Hero Setup:
Enemy Heroes: Gerwulf, Guardians of the Horn, Prison Guards
Enemy Armies:
- Gerwulf's Army: A Pack of Zealots, Silver Sharpshooters, Silver Sorceresses, Gold Manticores, Azure Crystal Dragons, 1 × Gate card, 1 × Arrow Tower card, 3 × Wall card
- Prison Guards: A Pack of Halberdiers, a Pack of Zealots, a Pack of Crusaders, a Pack of Champions, 1 × Gate card, 1 × Arrow Tower card, 3 × Wall card
- Guardians of the Horn: Gold Haspids, level VII Neutral Army
Enemy Decks:
- Gerwulf's Deck: 3 × Might card, 2 × Magic card, 2 × Skill card
- Prison Guards' Deck: 1 × Might card, 4 × Magic card
- Guardians of the Horn's Deck: 4 × Might card, 1 × Magic card
Enemy Spell Deck: 3 × "Magic Arrow" Spell card, 1 × "Lightning Bolt" Spell card, 1 × "Slow" Spell card
Skill: "Cannon" War Machine card*
- Do not activate this card according to its rules. Instead, activate it only when a Skill card tells you to do so.
Map Setup: Take the following Map tiles and set them up as shown in the scenario map layout:
- 2 × Starting (I) Map tile:
- 1 × Castle (S3)
- 1 × Cove (S9)
- 3 × Far (II-III) Map tile:
- 1 × random tile from Cove (F25-F27) and Castle (F3, F6, F9)
- 2 × random tile from Dungeon (F2, F5, F8)
- 4 × Near (IV-V) Map tile:
- 2 × Dungeon (N2, N5)
- 2 × Castle (N3, N6)
- 6 × Sea (IV-V) Map tile:
- 6 × Sea tile (W1-W6)
- 1 × Center (VI-VII) Map tile:
- 1 × Sea Center Map tile (W7)
NOTE: Prepare two Whirlpool tokens for a special story event.
Heroes Placement: Place your Cove Hero on the empty field of the Sea tile that is adjacent to the Cove Starting tile. Rotate this Sea tile so that the empty field is not adjacent to the Cove Starting tile. This tile and all tiles adjacent to it are already discovered. AI Heroes do not have models or appear on the map.
Additional Rules: During this "Cove" campaign scenario, the following rules apply:
- You cannot Recruit a Secondary Hero – you will gain them for free after capturing the Mine on the Cove Starting tile.
- Entering a field with an Obelisk triggers a story event listed in timed events.
- Both of your Heroes can freely use the Deck of Might and Magic.
- Each turn, the first time you spend the last Movement Point of either of your Heroes, if the number of cards in your hand is below your Limit, either draw up to your Limit or draw a number of cards equal to half of your Limit (rounded down), whichever is lower. Your pool of Expert uses per round is shared by both of your Heroes – if one of your Heroes uses all of the Expert, the other one will not be able to benefit from them on that turn.
When you capture the Mine on the Cove Starting tile:
- Discover both Far Dungeon Map tiles. Rotate the tile with the Mine so that the Mine is not adjacent to the Sea Map tile.
- You gain a Secondary Hero. Place them on the Mine on the Far Dungeon Map tile and Flag it, ignoring Combat that would normally occur. Raise your income normally, but ignore the bonus for capturing the Mine.
- Read the "The Serpent's Labyrinth" section below. (This section contains no rule instructions.)
Whenever your Secondary Hero discovers a Sea tile or a Near tile:
- The first time they do, read the "Note 1" section below. The second time – "Note 2", and the third time – "Note 3". Ignore this effect after reading all the notes.
- Then, resolve the field normally.
When you enter a field with an Obelisk on a Dungeon tile:
- Start Combat with the Prison Guards.
- Place the Gate and Walls in the middle of the Combat board. Place the Arrow Tower near the board. The Pack of Champions should be in front of the Gate. Do not move the rest of the units unless the Wall in front of them is destroyed, or they can exit through the Gate.
- After winning the Combat, read the "Prison" section below.
- Put your faction cube on the field, then place two Whirlpool tokens in the position shown in the map layout.
On a Castle tile, when you enter a field with an Obelisk without your faction cube: read the "Seer's Hut" section below.
When you enter a field with the Castle Town: immediately start Combat with Gerwulf's Army.
When you enter the center field of the Center Map tile: start Combat with the Guardians of the Horn instead of the regular Neutral Army.
When you complete the scenario: read the "Biting the Hand That Feeds You" section below. (This section contains no rule instructions.)
Win/Lose Conditions:
Win: You must defeat Gerwulf's Army and the Guardians of the Horn.
Lose: You fail the scenario if your Hero is defeated in any Combat, but you can still retreat from Combat with non-Azure tier Neutral Armies.
Timed Events: When you reach the following rounds, follow the corresponding instructions:
- 1st Round: Gain Negative Morale and lose 1 Movement Point. Read the "The Risk of Being a Pirate" section below. (This section contains no rule instructions.)
- 6th Round: Read the "Suspicion" section below. (This section contains no rule instructions.)
- 13th Round: At the end of the round, you lose. The secrets of the Horn are lost!
Seer's Hut
Choose one of the options below. After resolving the event, place your faction cube on the field.
- Mermaid Knowledge: Remove an Artifact from your hand to Search (3) the Spell deck twice.
- Nymph's Pets: Remove an Artifact from your hand to Reinforce or Recruit Ayssids and gain 5 Gold.
- A Suspicious Skull in the Wall: Pay 1 Valuable, then find the "Offense" card in the Ability deck and add it to your hand. Shuffle the deck afterwards.
Note 1, Note 2, Note 3
The texts of these notes are story only and are omitted. The trigger and the order in which they are read are kept above.
Prison
The printed "Prison" section contains this rule instruction (its story text is omitted):
- Put a Whirlpool token on the empty field of the closest Sea Map tile and another one on the Center Map tile. They are connected – when your Hero enters a field with a Whirlpool token, they are immediately transported to the other one.
3: Treachery
Scenario Length: This scenario plays out over 12 rounds.
Player Setup:
- Faction: Cove
- Faction Hero: Jeremy or any Cove Hero
- Faction Army: A Few Oceanids, a Few Sea Dogs
- Starting Resources: 0 × Gold, 0 × Building Materials, 0 × Valuable
- Town Buildings: Bronze Dwelling, Silver Dwelling, Citadel
- Bonus: Choose one of the following options:
- Search (4) the Artifact deck
- Search (4) the Spell deck
- +6 Gold Resources
Special: Prepare three Wall cards and one Arrow Tower for a special story event.
AI Hero Setup:
Enemy Heroes: Defenders of the Castle Outpost, Defenders of the Regnan Fortress
Enemy Armies:
- Defenders of the Castle Outpost: A Pack of Halberdiers, a Pack of Marksmen, a Pack of Zealots, a Pack of Crusaders, a Pack of Champions
- Defenders of the Regnan Fortress: A Pack of Crusaders, a Pack of Champions, Gold Enchanters, Gold Nix, Gold Haspids
Enemy Decks:
- Defenders of the Castle Outpost's Deck: 4 × Might card, 1 × Magic card
- Defenders of the Regnan Fortress's Deck: 2 × Might card, 4 × Magic card, 2 × Skill card
Enemy Spell Deck: 1 × "Magic Arrow" Spell card, 1 × "Lightning Bolt" Spell card, 1 × "Fireball" Spell card, 1 × "Blind" Spell card
Skill: "Cannon" War machine card*
- Do not activate this card according to its rules. Instead, activate it only when a Skill card tells you to do so. Disregard the Expert cost. Target the unit of the highest tier. If there is more than one valid target, attack the one that is the closest to perishing – has the smallest difference between its HP and the number of current Damage. If there is still more than one valid target, then you can choose which unit is attacked.
Map Setup: Take the following Map tiles and set them up as shown in the scenario map layout:
- 2 × Starting (I) Map tile:
- 1 × Castle (S3)
- 1 × Cove (S9)
- 2 × Far (II-III) Map tile*:
- 2 × random tile from Castle (F3, F6, F9) and Cove (F25-F27)
- 2 × Near (IV-V) Map tile:
- 2 × random tile from Cove (N22) and Castle (N3, N6)
- 3 × Sea (IV-V) Map tile:
- 3 × random Sea tile (from W1-W6)
- 1 × Center (VI–VII) Map tile:
- 1 × Center Map tile with Dragon Utopia (C1)
- After randomly selecting the tiles, make sure that at least one of them contains a Trading Post.
Heroes Placement: Place your Cove Hero on the Town field of the Cove Starting tile. This tile is already discovered. You do not place any AI Heroes on the map.
Additional Rules: During this "Cove" campaign scenario, the following rules apply:
- From the Starting tile, your Hero can only move to Sea tiles.
- When your Hero captures a Town, gain 15 Gold, 2 Building Materials, and 3 Valuables.
- Do not place your faction cubes on Settlements or Mines, and do not increase your production. Instead, resolve the bonus for flagging them twice if they are located on the Far or Starting Map tiles, or three times if they are on the Near tiles. Then place a Black cube on them.
- Entering a field with an Obelisk triggers a story event listed in timed events.
Win/Lose Conditions:
Win: You must Flag the Dragon Utopia.
Lose: You fail the scenario if your Hero is defeated in any Combat, but you can still retreat from Combat with non-Azure tier Neutral Armies.
Timed Events: When you reach the following rounds, follow the corresponding instructions:
- 1st Round: Read the "If You Enter, Do It With a Blast" section below. (This section contains no rule instructions.)
- 3rd Round: Read the "Fried Eel for Dinner?" section below. (This section contains no rule instructions. NOTE: The timed-event list names it "Fried Eel for Dinner?", but the printed section is headed "Smoked Eel for Dinner?".)
- 5th Round: Read the "Rum and Writing at Night Go Hand in Hand" section below. You do not receive any Gold income this round.
- 7th Round: Read the "Answers and Even More Questions" section below. (This section contains no rule instructions.)
- 12th Round: At the end of the round, you lose. The Horn remains in Dargem's hands!
Seer's Hut
Choose one of the options below. After resolving the event, place your faction cube on the field.
- Displeased Pirates: Reinforce two Bronze or Silver units in your army for free.
- Dragon Hunt: Draw from the Azure Neutral Units deck until you draw a "Dragons" unit. Shuffle the rest of the cards back into the deck and start Combat with the Dragons. If your Hero is below level 6 before the Combat, after defeating the Dragons, you gain 15 Gold, 2 Valuables, and 1 Experience.
- Mermaid Charms: Remove up to 2 Ability or Spell cards from your deck. If you Remove at least one card that way, gain 1 Valuable. Reshuffle your deck and the discard pile to create the deck anew.
When you enter a field with the Castle Town: start Combat with the Defenders of the Castle Outpost.
When you enter the center field of the Center Map tile: read the "Regnan Fortress" section below and start Combat with the Defenders of the Regnan Fortress instead of the regular Neutral Army.
When you complete the scenario: read the "The Epilogue" section below. (This section contains no rule instructions.)
Regnan Fortress
The printed "Regnan Fortress" section contains these combat setup instructions (its story text is omitted):
- Place the Arrow Tower card on the Combat board in one of the corners on the AI side, and place Gold-tier Enchanters in the other corner. Next, surround the Arrow Tower with three Wall cards. Place the remainder of the AI Army in the third row of the Combat board in one line. Start Combat with the Defenders of the Regnan Fortress.
- You can play two cards at the start of the Combat before any unit moves and then draw two more cards.
Map Locations
Town
Category: Flaggable
This is a player's starting field. If a player captures a Town, they gain a bonus depending on the scenario.
Settlement
Category: Flaggable
When you Flag a Settlement, you may select your reward from a number of bonuses. If you capture a Settlement that has not been previously owned by any player, you gain an extra bonus (see page 25, "Settlements" in the Core Rulebook).
Derelict Ship
Category: Visitable
You may Search (2) the Artifact deck. If you do so, you also gain 2 Gold.
Shipwreck
Category: Visitable
Roll and resolve 2 Resource dice.
Flotsam
Category: Visitable
Gain 2 Building Materials.
Sea Barrel
Category: Visitable
Roll and resolve 1 Resource die.
Shipwreck Survivor
Category: Visitable
Search (2) the Artifact deck.
Mermaid
Category: Visitable
The Hero who entered this field gains 1 additional Movement Point this turn. You also gain a Positive Morale token.
Sea Chest
Category: Visitable
Roll 1 Attack die. Depending on the result, do the following:
- Attack +1: Search (1) the Artifact deck.
- Attack 0: Gain 5 Gold.
- Attack -1: Gain nothing.
Jetsam
Category: Visitable
Roll 1 Attack die. Depending on the result, do the following:
- Attack +1: Roll and resolve 2 Resource dice.
- Attack 0: Roll and resolve 1 Resource die.
- Attack -1: Gain nothing.
Temple of the Sea
Category: Visitable
Gain 10 Gold and Search (2) the Artifact deck twice.
Buoy
Category: Visitable
Gain a Positive Morale token.
Pandora's Box
Category: Visitable
Roll a specified number of Resource dice or Treasure dice, then select one to resolve its effect.
Grave
Category: Visitable
Gain a Negative Morale token, 3 Gold, and Search (1) the Artifact deck.
Shrine of Magic Gesture
Category: Visitable
You may Search (2) the Spell deck.
Shrine of Magic Incantation
Category: Visitable
You may pay 3 Gold to Search (2) the Spell deck.