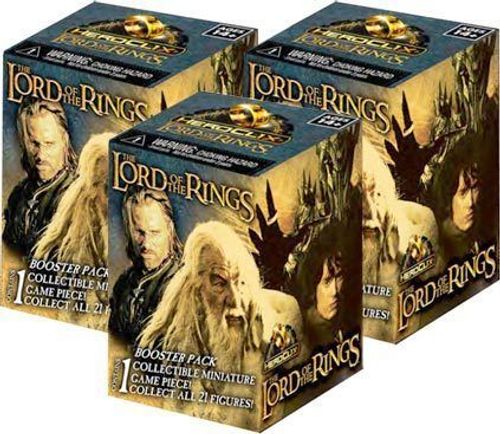
HeroClix: The Lord of the Rings
HeroClix: The Lord of the Rings Rulebook
Table of Contents
Table of Contents
- What's New?
- Epic Battles
- Horde Tokens
- Horde Powers and Epic Hordes
- Campaign: The Battle for Middle Earth
- Setting Up a Campaign Battle
- Treasures and Reinforcements
- Campaign Battle #1: On the Road to Rivendell
- Campaign Battle #2: The Mines of Moria
- Campaign Battle #3: Betrayal at Amon Hen
- Campaign Battle #4: The Battle of the Hornburg
- Campaign Battle #5: The Battle of Pelennor Fields
- Campaign Battle #6: The Battle of the Black Gate
What's New?
Lord of the Rings HeroClix brings several new mechanics to the HeroClix system!
Epic Battles
An epic battle is a HeroClix battle with a build total between 400 and 1000 points.
Epic Actions and Epic Trait Abilities
In an epic battle, each player is granted one epic action each turn. An epic action is a special type of power action that can only be used to activate an epic trait ability (indicated by the epic symbol on a character card). Unlike a power action, an epic action does not count against your action total and you cannot activate more than one epic trait ability each turn. A character cannot be given an epic action to activate any game effects that only require a power action. In this release, most epic trait abilities scale with the build total of the game.
Horde Tokens
Horde tokens are bystander tokens marked with the M symbol. Unlike other characters, identical horde tokens (those with the same set symbol and collector number) can share a single square on the battlefield by being stacked, and when stacked they can use special powers called horde powers. In this release, most horde powers scale with the number of tokens in the stack.
Stacking and Unstacking Horde Tokens
Two or more identical friendly horde tokens in the same square is a stack. A stack can contain up to the maximum number of horde tokens indicated on the token next to the M symbol. Horde tokens may be stacked during their placement in the starting area at the beginning of the game.
Stacks break away automatically. Stacks may add additional tokens to the stack while moving by moving through a square containing an identical horde token. Two stacks can also merge, but are still limited by the maximum stack size; any remaining tokens are placed in the last square the stack moved through before merging. When a single horde token moves into a stack, if the stack is already marked with an action token do not place a token on the stack.
You can move a horde token or stack to merge with another stack that already has two action tokens, even though no action token will be assigned.
If a stack has not yet been assigned an action token during a turn, an individual horde token in the stack may be given an action normally to unstack and move away.
Stacks on the Battlefield
A stack of horde tokens is considered a single character for the purposes of movement, taking actions, making an attack, and being attacked. When a stack takes damage, regardless of the amount of damage taken, remove only one token from the stack. The token removed from the stack is defeated.
Horde Powers and Epic Hordes
Horde Powers
Horde powers are explained on the back of horde tokens. A horde token only possesses its horde power when it is the top token of a stack. When the S symbol appears in the text of a horde power, it refers to the current number of tokens in the stack. When the M symbol appears in the text of a horde power, it refers to the maximum number of tokens that stack can have. When the phrase "When M" appears in the text of a horde power, it refers to a power that can only be used if the current number of tokens in the stack is the maximum allowed.
Epic Hordes
In epic battles, defeated horde tokens are removed from the battlefield as normal but have a chance to return. At the beginning of each player's turn, that player may place horde tokens previously removed from the battlefield back onto the battlefield in that player's starting area. For each 100 points of the game's build total, a player may return two horde tokens to the battlefield, to a maximum of 50 total points of tokens. You may return them directly into a stack if the stack occupies an area they could be placed. In an epic battle, if a player has only horde tokens remaining on the battlefield at the end of any turn, all of their horde tokens are immediately defeated and that player loses the game.
Campaign: The Battle for Middle Earth
Setting Up a Campaign Battle
The setup section for each campaign battle specifies what map or maps should be used for the battle, and the point value of the battle. Before setting up the first battle in a campaign, players should determine who will play Force A and who will play Force B for the duration of the campaign; during each battle, each Force is required to include particular characters in their force, as explained in the setup section, and the rest of the force can be made up of other characters from the Lord of the Rings HeroClix set or players' HeroClix collections. The setup section also contains any special rules that apply to the battle.
Treasures and Reinforcements
The aftermath section of each campaign battle explains treasure and reinforcements a player can earn based on the outcome of a battle. Treasures are awarded to the winner of the battle if they qualify, and can be used during any subsequent battle in the campaign, but only one treasure effect can be used per battle. Reinforcements are awarded to the loser of the battle if they qualify, and must be used in the next battle you play in the campaign.
Campaign Battle #1: On the Road to Rivendell
As the disguised Aragorn guides Frodo Baggins and the hobbits of the Shire toward a fateful meeting at the elven outpost Rivendell, the travelers are attacked by murderous Nazgul sent by the dark lord Sauron!
Setup
- Map: Battlefield
- Point Value: 300
- Force A: Aragon [sic] (or Strider), Frodo (or Ringbearer), at least one other character with the Hobbit keyword
- Force B: Witch King of Angmar OR two characters with the Nazgul keyword
Aftermath
Treasure - If you won and scored 200 or more victory points:
Barrow Blade: Once per battle, before dealing damage with a close combat attack, roll a d6; if the result is greater than the damage being dealt, that damage is penetrating.
Reinforcements - If you lost and the winner scored 50 or more victory points than you did:
Slowed by the River: Before the beginning of the next battle's first turn, give three opposing characters an action token.
Campaign Battle #2: The Mines of Moria
When Saruman blocks their path over the Misty Mountains, the Fellowship chooses to go under the mountains through the dwarven mines of Moria--only to discover the once thriving dwarven city is now a tomb infested with creatures of darkness!
Setup
- Map: Moria
- Point Value: 300
- Force A: Only characters with the Fellowship keyword
- Force B: 8 Orc horde tokens
Aftermath
Treasure - If you won and scored 75 or more victory points than the other player:
Mithrill Shirt: Once per battle, when one of your characters would be dealt penetrating damage, the damage is not penetrating.
Reinforcements - If you lost and the winner scored 50 or more victory points than you did:
Fly, You Fools!: During your first turn of the next battle, up to three friendly characters may be given a move action as a free action.
Campaign Battle #3: Betrayal at Amon Hen
On the banks of the river Anduin, the Fellowship stops to rest on their journey. Alone with Frodo, Boromir is tempted by the Ring's power and attempts to take it for his own, just as the Uruk-Hai captain Lurtz brings the forces of Sauron to attack the Fellowship!
Setup
- Map: Battlefield
- Point Value: 400
- Force A: Merry (or Esquire of Rohan), Pippin (or Guard of the Citadel), Frodo (or Ringbearer)
- Force B: Lurtz (or Captain Lurtz), 4 Uruk-Hai horde tokens
- Special Rules: Before the beginning of the first turn, place Boromir in square J12 as part of neither force. Any player may give Boromir a free action and roll a d6 (even if he is not on your force). On a roll of 4-6, he becomes friendly to your force. Victory points for Boromir are given to the player who causes him to be defeated.
Aftermath
Treasure - If you won and scored 300 or more victory points:
Ringbearer's Inspiration: Once per battle, as a free action remove an action token from up to two characters that have exactly one action token.
Reinforcements - If you lost and the winner scored 100 or more victory points than you did:
Slowed by the Pursuit: Before the beginning of the next battle's first turn choose three opposing characters and deal each of them 1 unavoidable damage.
Campaign Battle #4: The Battle of the Hornburg
As the corrupted wizard Saruman guides the armies of Sauron toward the fortress of Helm's Deep, Aragorn, Gimli, and Legolas stand alongside the warriors of Rohan to make their stand on the fortress walls.
Setup
- Map: Helm's Deep and Helm's Dike
- Point Value: 500
- Force A: Aragorn (or Strider), Legolas OR Gimli, 4 Haldir's Archers horde tokens, 8 Riders of Rohan horde tokens
- Force B: Saruman, 4 Uruk-Hai horde tokens, 8 Orc horde tokens
Aftermath
Treasure - If you won and scored 100 or more victory points than the other player:
Hammerhand's Horn: Once per battle, give one of your characters a power action; they can use Incapacitate as a free action as if they had a range value of 8.
Reinforcements - If you lost and the winner scored 350 or more victory points:
Reinforcements at Dawn: During your first turn of the next battle, each horde token can be given an action as a free action.
Campaign Battle #5: The Battle of Pelennor Fields
As the forces of Sauron lay siege to the fortress-city of Minas Tirith and the thinned ranks of the free armies wait desperately for reinforcements, the Witch-King of Angmar arrives for his final battle on the Pelennor Fields.
Setup
- Map: Minas Tirith and Pelennor Fields
- Point Value: 600
- Force A: Gandalf, Merry (or Esquire of Rohan), Legolas, Gimli
- Force B: Witch King of Angmar
Aftermath
Treasure - If you won and scored 500 or more victory points:
Inspired by the King: Once per battle, roll a d6 for each friendly character on the battlefield with a point value of 50 points or more; on a result of 1-2, heal the character of damage equal to the result.
Reinforcements - If you lost and the winner scored 300 or more victory points:
Army of the Dead: During the next battle, each time you would return up to two horde tokens to the map, you may return them to the map in any square within 5 squares of any starting area, instead of within your own starting area.
Campaign Battle #6: The Battle of the Black Gate
As Frodo climbs the slopes of Mount Doom to destroy the One Ring, the Free Armies of the West push toward the Black Gate of Mordor to distract the eye of Sauron. There they meet the Mouth of Sauron, who offers them one last chance to surrender--unaware that Sauron's own destruction may be at hand.
Setup
- Map: Helm's Dike and Battlefield
- Point Value: 1000
- Force A: Aragorn (or Strider), Gandalf
- Force B: Mouth of Sauron, Olog Hai
Aftermath
End of campaign; total your victory points from each campaign battle and compare to determine the winner of the campaign.
Transcriber's notes: the printed text reads "Aragon" in Campaign Battle #1 Force A; it is transcribed as printed and marked [sic]. The scans have ghosted text from the reverse side showing through the paper; it was not transcribed. The publisher's copyright and address footer is omitted.