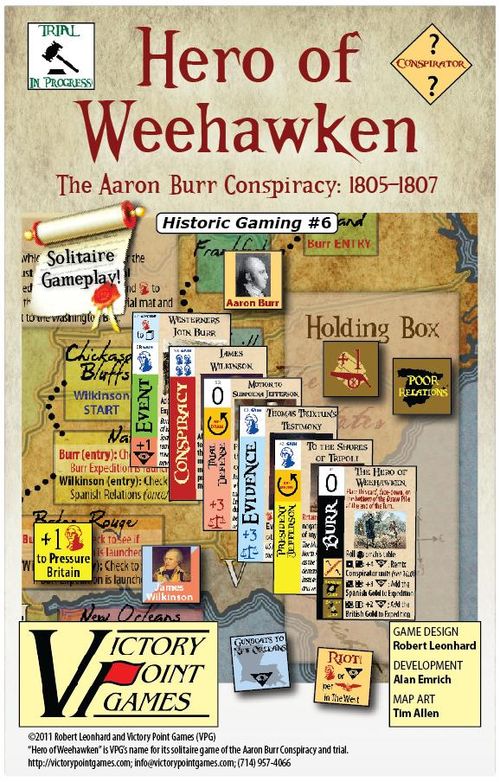
Hero of Weehawken: The Aaron Burr Conspiracy 1805-1807
Hero of Weehawken: The Aaron Burr Conspiracy 1805-1807 Rulebook
Table of Contents
Table of Contents
- [1.0] Introduction
- [2.0] Game Equipment
- [3.0] Sequence of Events
- [4.0] Setting up the Game
- [5.0] Operations Stage Sequence of Play
- [6.0] Reshuffle Option
- [7.0] Adjusting Points
- [8.0] The Burr Expedition
- [9.0] Cards and Events
- [10.0] Remixing the Conspirators
- [11.0] Burr/Agenda Phase
- [12.0] Jefferson Phase
- [13.0] New Orleans
- [14.0] Trial Stage
- [15.0] Scoring
- Dramatis Personae
[1.0] Introduction
Hero of Weehawken is a solitaire game in which the player takes the role of President Thomas Jefferson at a dangerous moment in the history of the United States. Former Vice President Aaron Burr is somewhere out west, and rumors abound that he is threatening the nation with plans for some sort of ill-advised military adventure that could bring America to war with Spain, or even a direct act of treason against the United States! To forestall this disaster, you must 1) determine Burr's real plans; 2) find and arrest him before he executes his plan; and 3) gather sufficient evidence to convict Burr at trial. If your agents arrest him too soon, you will not have gathered enough evidence or figured out what to charge him with. If you wait too long, however, you may be too late to stop his nefarious plans.
Some of your fellow Democratic-Republicans, thrilled to be rid of Hamilton, assigned the nickname "Hero of Weehawken" to the now disgraced Burr.
[0.0] Using These Rules
New gaming terms, when they are initially defined, appear in dark red lettering for quick referencing.
The instructions for this game are organized into major "Rules" sections as shown in large green CAPS font, and represented by the number to the left of the decimal point (e.g., Rule 4.0 is the fourth Rule). These Rules generally explain the game's components, procedures for play, the game's core systems and mechanics, how to set it up, and how to win.
With each Rule, there can be "Cases" that further explain a general concept or basic procedure. Cases might also restrict the application of a Rule by denoting exceptions to it. Cases (and Subcases) are an extension of a Rule shown in the way that they are numbered. For example, Rule 4.1 is the first Case of the fourth Rule; and Rule 4.1.2 is the second Subcase of the first Case of the fourth Rule.
Important information is in red text.
References to examples of a Rule or Case are in blue text and this font.
Text in shaded boxes, like this, provides the voice of the game's designer, who is addressing you to explain an idea or concept that is not, itself, a Rule or a Case.
[2.0] Game Equipment
Parts Inventory
- 1 8.5" x 11" map
- 2 8.5" x 5.5" mats (Plan and Trial)
- 1 8.5" x 11" Player Aid sheet
- 32 5/8" square game pieces
- 60 Event cards
- 1 Rules booklet
Not included are one red and one blue 6-sided dice.
The Game Map: The 8.5" x 11" map shows the United States and neighboring territories circa 1804. It includes Tracks for recording Jefferson's Prestige Points, the progress of various Administration Agendas, and the movement of Aaron Burr and James Wilkinson as they head toward New Orleans. There are boxes for holding various units and markers.
In addition to the map, there a player aid with charts and tables, plus two game mats: a Plan mat and a Trial mat. These are repositories for various cards and markers. The Plan mat shows the strength of the conspiracy and the progress of Aaron Burr's plans to launch his Expedition. The Trial mat is used if Aaron Burr is arrested.
The Playing Pieces: Some cardboard game pieces represent key individuals. These pieces, called "units," include the Conspirator pieces (including "blanks"), Federal Agents, and James Wilkinson.
Other game pieces, called "markers," track game data, status and values.
Game Symbols: Certain symbols have a special game meaning. The key is below:
- Prestige Points (PPs) are acquired (shown with the symbol in blue) and spent (shown with the symbol in red) to perform various actions.
- Plan Progress measures how far along Aaron Burr's plans are for launching his Expedition. As the plan ripens, checks are made to see if the Expedition is actually launched.
- Expedition Strength. These symbols are assigned to various Assets that add or subtract to the Expedition's Strength. The greater the Expedition's Strength, the more likely that: A) it will be launched and, B) succeed when it does launch.
- Trial Die Roll Modifier. Trial Die Roll Modifiers (DRMs) are applied during Arguments, adding to either the defense (red) or prosecution (blue).
- Federal Agent. This symbol stands for a Federal Agent unit.
- Search Attempt. This symbol represents one attempt to "search" for a Conspirator unit by revealing one of the hidden ones in the West.
- Reshuffle into the Draw Pile. This symbol means taking that card and not playing it, but instead returning it to the Draw Pile and then reshuffling the Draw Pile (so, yes it could come back as the very next card).
- Redraw. Only an abbreviated Turn is played when this card is drawn.
Multiple symbols denote the amount gained or lost. E.g., three Prestige Point symbols indicates a gain of three PPs while two Prestige Point symbols in red shows a cost of two PPs.
Cards: Every card belongs to one of the different "suits" in the game: Conspiracy, Event, Evidence, President Jefferson, Trial Defense and the [Aaron] Burr card. All of them indicate their Prestige Point (PP) adjustment on the left sidebar. In addition to their suit, there can be other notations along their left sidebar, with the main purpose of the card shown on the right side.
The history flavor text has no gameplay effect and merely provides context.
[3.0] Sequence of Events
Hero of Weehawken is played in two distinct Stages. The first, called the Operations Stage, is when the player performs Turns, reveals cards, and moving pieces on the map. During this Stage, you must search for Conspirators and arrest them, attempt to deduce and thwart Burr's plans and nip them in the bud if threatening, gather Evidence, and ascertain the loyalty of James Wilkinson – all the while pushing your own Agenda and dealing with the issues of the day (both foreign and domestic). The Operations Stage ends when: 1) Aaron Burr is captured (or possibly killed), 2) when his Expedition is launched, or 3) you decide that Burr is no threat and simply "let him go."
If Aaron Burr is captured, the second Stage, called the Trial Stage, commences. There, you must levy the Charge (from your own deduction of what the conspiracy actually is), present the prosecution's arguments, introduce evidence, and hopefully obtain a conviction for the best possible score.
Finally, after Burr's death, the launching of his Expedition and its outcome, or his Trial ends, Victory Points (VPs) are scored and your performance is determined.
[4.0] Setting up the Game
Follow these steps to set up the game:
-
Lay out the map in front of you, and place the Plan mat above the map to the left and the Trial mat above the map to the right.
-
Sort out the game pieces. On the Plan mat, place the Plan Progress marker on its Start space.
-
Nothing sets up on the Trial mat.
-
On the map, place the four Federal Agent units in the Federal Agents in Washington box.
Roll a die. Place the Prestige Points (PP) marker on the Prestige Point Track on the same box as the die roll result (e.g., if you rolled a 4, this marker would begin the game in the "4" box).
Place the three Agenda markers (Pressure Britain, Judicial Reform and Virginia Dynasty) in the Start boxes of their Tracks.
Place all twelve Conspirator units (which includes the two blanks), face-down, in The West box and mix them up.
Place the James Wilkinson unit in the Chickasaw Bluffs space.
The remaining pieces are placed in the Holding Box.
-
Examine the cards and remove the nine Conspiracy (red bordered) cards. Turn these nine cards face-down, mix them up, and select three. Stack these three cards and place them, face-down, on the left side of the Plan mat in The Conspirators box. These are Burr's actual Conspirators this game.
-
Place the remaining six Conspiracy cards, still face-down, back into the Deck (also face-down). Shuffle the Deck and place it, face-down, on the upper-left corner of the map in the box labeled "Draw Pile."
You are ready to begin the Operations Stage by following this Sequence of Play.
[5.0] Operations Stage Sequence of Play
The Operations Stage is played in Turns, represented by revealing and acting upon one card. Each Turn, this Sequence of Play is performed in strict order:
-
Reveal Card Phase: Reveal the top card in the Draw Pile. It is now the Current card. If this card has a Reshuffle Option symbol below the upper-left corner, you may immediately exercise that option (see 6.0).
If you reshuffle it back into the Deck, the Turn is over and you begin a new Turn with this Phase. If you do not reshuffle it back into the Deck, play continues:
-
Adjustments Phase: Consult the left sidebar of the card and gain or lose any Prestige Points and Plan Progress as indicated (see 7.0).
-
Event Phase: Perform the card's Event, if any, discarding or placing it as indicated (see 9.0).
-
A. Redraw Phase?: If the Current card has the Redraw symbol below the upper-left corner, the Turn is over. Begin a new Turn with the Reveal Card Phase. If there is no Redraw symbol on the card, proceed to 4.B, below:
-
B. Burr/Agenda Phase: If the Aaron Burr Conspirator unit is revealed (i.e., face-up), he advances one space closer to New Orleans (see 11.0). If he is hidden, you receive one free attempt to advance your lowest-valued Agenda (see 12.1).
-
Jefferson Phase: You may perform desired Actions (see 12.0).
-
New Orleans Phase: First Aaron Burr's, and then James Wilkinson's, effects are resolved if either or both of these units are currently in New Orleans (see 13.0).
The Operations Stage ends when: 1) Aaron Burr is captured (or killed), 2) when his Expedition is launched, or 3) you decide that Burr is no threat and simply "let him go" and conduct the Expedition (see 8.3).
[6.0] Reshuffle Option
Timing: When the Current card has a Reshuffle Option symbol on it, this option can be exercised during the Reveal Card Phase (if it is on the left sidebar, in which case reshuffling will end the Turn) or the Event Phase (if this option is in the body of the Event text, in which case the Turn is played to completion).
Procedure
To exercise a Reshuffle Option when it is offered, pay the indicated cost in PPs (see 7.0), return the Current card to the Deck, then reshuffle and replace the Deck.
Note that the Current card could be reshuffled back to the top of the Deck and be the very next card drawn (again)!
[6.1] Just the Deck: Unless specifically instructed by an Event, Discards are not reshuffled back into the Deck!
[6.2] The Prestige Cost: If you do not have sufficient PPs to pay the cost shown, you cannot exercise this option. Note that when the Austerlitz marker is in play, the cost to reshuffle is always increased by one (+1) Prestige Point.
[7.0] Adjusting Points
Whenever Prestige Points (or PPs) are gained or lost (or "spent"), or whenever the Plan Progress or an Agenda marker is moved up or down on its Track, the following cases apply:
[7.1] Variable: Some cards show a small table that might produce a gain of one, loss of one, or no change in Prestige Points that Turn. Make a quick die roll on this table during the Adjustments Phase when such a card is the Current card.
[7.2] Min-Max: A loss of points can never move a marker below zero (0) on its Track (additional losses are ignored). PPs cannot be spent voluntarily if it would take the PP marker below 0.
Similarly a marker cannot go above the maximum allowed on its Track.
- For the Prestige Points marker, the maximum is actually nineteen points. When the tenth point is gained, move this marker from the 9 box to the 0 box and flip it over to its +10 side (shown here). Conversely, when the tenth PP is lost, move it from the 0 box (on its +10 side) back to the 9 box (flipping it back over to its regular side).
- For an Agenda marker, this would be its Agenda Completed space, which provides a specific benefit (summarized on the back of each Agenda marker). Note that some Events lower these markers; if this happens to a completed agenda's marker, it is lowered and that agenda is no longer considered completed until its marker is again advanced into its Completed Agenda space.
- For the Plan Progress marker, this would be the Launch space. When the marker reaches this space, the Burr Expedition is automatically and immediately launched, ending the game (see 8.3).
[8.0] The Burr Expedition
There are, essentially, four aspects to the Burr Expedition: 1) Progressing the plan (which is much like watching a fuse burn down), 2) launching the Expedition (which is done automatically if the Plan Progress marker reaches the Launch space on its Track, and it is also "checked" on occasion by a die roll for an earlier departure), 3) revealing the conspiracy to determine where the Expedition is going and what it's doing there (e.g., invading Mexico, seizing New Orleans, etc.), and then 4) conducting the Expedition (which signifies the end of the game; a die roll determining the Expedition's success or failure and how many Victory Points Aaron Burr's scheme has cost you). Each of these aspects are explained below:
[8.1] Progressing the Plan: Adjust the Plan Progress marker along its Track as indicated on the various cards and tables (and see 7.0). When it reaches the seventeenth (Launch) space, the Expedition is immediately launched (see 8.3).
The fuse of this bomb has burned all the way down and now it goes "Boom." Generally speaking, that's bad.
[8.2] Acquiring Assets: Card and marker Assets for the Expedition feature the Expedition Strength symbol indicating how much that Asset adds or subtracts from the Expedition Strength. These Assets are placed on the Plan mat in the spaces indicated so that you can see their Expedition Strength modifiers.
The stronger the Expedition grows, the more likely it will launch when checked and then achieve success when launched.
[8.3] Launching the Expedition: The Expedition is automatically launched if the Plan Progress marker reaches the Launch space on its Track.
Prior to that, Launch checks are made as instructed on various cards and tables.
Procedure
To conduct a Launch check, roll a die and add to its result the value of all the Assets on the Plan mat plus the row modifier for the Plan Progress marker (which is +0 on the top row of its Track, +1 on the second row, and +2 on the third, as shown on the Track). If that total is equal to greater than (≥) 12, the Expedition has been launched; the conspiracy is immediately revealed (see 8.4) and the Expedition conducted (see 8.5). If the total is less than (<) 12, the Expedition is not launched and there is no effect.
Example: A Launch check is conducted and the die roll is a 4, which is modified by the Assets on the Plan mat which currently include:
+1 for the row modifier (because the Plan Progress marker is currently in the 9 box on its Track), +1 for Spanish Relations being Poor, +1 for having Spanish Gold, +2 for one Westerners Join Burr card, +1 for Nashville Boats, +1 for the Arms Cache, +1 for the British Caribbean Fleet Arrives, -1 for the Gunboats Sent to New Orleans
When summed, the total is 12; barely enough, but the Expedition is launched!
[8.4] Revealing the Conspiracy: After the Burr Expedition is launched or the Trial verdict is determined (see 14.0), the three Conspiracy cards placed on the Plan mat during Set Up (see 4.0, #4) are revealed and compared to the Conspiracy Objective chart on the Player Aid sheet. The Objective chart lists the different three-conspirator combinations and what their objective is.
Example Continued: The Expedition has launched, so now it is determined where it is going. The three Conspiracy cards are revealed to be Jackson, Merry and Wilkinson. Looking at the Objective chart in the "One Wilkinson card" section, this group of three is found and their objective is III: Invade Mexico.
[8.5] Conducting the Expedition: With the Expedition launched (8.3) and its objective known (8.4), it is then resolved. This works similarly to a Launch check in that the procedure uses a die roll modified by the Expedition's Assets but, in addition, the die roll modifiers on the Expedition Outcome chart on the Player Aid sheet are also added to the result. Note that some Assets may be counted twice, once as an Asset and again for its additional die roll modifier.
If this total is also equal to greater than (≥) 12, the Expedition succeeds (i.e., Burr fulfills his ambition). If the total is less than (<) 12, the Expedition fails (Burr is stopped by local forces and agencies).
Example Continued: Burr invades Mexico, rolling a 4 this time. The same Asset modifiers from the Launch check still apply:
+1 for the row modifier (because the Plan Progress marker is currently in the 9 box on its Track), +1 for Spanish Relations being Poor, +1 for having Spanish Gold, +2 for one Westerners Join Burr card, +1 for Nashville Boats, +1 for the Arms Cache, +1 for the British Caribbean Fleet Arrives, -1 for the Gunboats Sent to New Orleans.
And to them are included the following additional die roll modifiers from the Expedition Outcome chart for III: Invade Mexico:
+0 Because Burr is not in New Orleans; he is in Baton Rouge which has no modifier, +2 for the British Caribbean Fleet Arrives (this is in addition to its +1 value as an Asset!), -1 for holding one Wilkinson Conspiracy card in your hand.
When summed, the total is once again 12; barely enough! The Expedition is a success and you score -20 Victory Points (see the Expedition Outcome chart on the Player Aid sheet). And wait until historians have their say about your shameful handling of this crisis!
[9.0] Cards and Events
The cards set the tempo of the game and provide a narrative around which your own player decisions are made. While the cards are largely self-explanatory, each of the different "suits" is elaborated upon below.
When there is a conflict between these Rules and a card's instructions, the card's instructions take precedence.
Any card or table's instruction that cannot be performed is ignored (e.g., Burr receiving the Spanish Gold marker twice).
[9.1] The Burr Card: There is only one Burr-suited card in the Deck: The Hero of Weehawken. After it is played, it is not discarded. Instead, it is placed, face-down on the bottom of the Draw Pile; note that it is not reshuffled back into the Deck at this time!
But it will be should the Deck be reshuffled in the future, so exercise a little caution the next time a Reshuffle Option presents itself to you – you might be playing right into Burr's hands (by redrawing this card!)
[9.2] Conspiracy Cards: Three of these cards are secretly set up and placed on the Plan mat to represent the actual conspirators and their dastardly scheme. The remainder are shuffled into the Deck and retained by you when drawn. When held, these cards will remind you of who is not a conspirator and, by the process of elimination, you can better deduce who is and what their intentions may be.
[9.2.1] Theodosia Burr Alston: Aaron Burr's married daughter, if an actual conspirator (i.e., one of the three selected during set up), automatically makes Aaron Burr innocent and his plan I: Settle the Ouachita Valley.
[9.2.2] James Wilkinson cards, when held by you, President Jefferson, represent his loyalty to you, and thus your ability to influence his actions to your benefit. Of course, if Wilkinson gets himself in trouble (e.g., by killing Aaron Burr or being indicted at trial), the closeness of your association with him is detrimental.
General of the Army James Wilkinson was an unscrupulous, self-serving scoundrel who professed loyalty to everyone he thought could benefit him. Nearly a half-century after the events portrayed in this game, US officials discovered papers proving he had been in the pay of the Spanish for much of his career in the US Army!
In return for a generous pension, Wilkinson kept the Spanish informed of US intentions and worked to foil American military expeditions into Spanish America. Wilkinson conspired with Aaron Burr, but then betrayed him, working with Thomas Jefferson to convict Burr of treason. Nearly indicted of treason himself by a grand jury, he was also later court-martialed and acquitted.
In Hero of Weehawken, you will find it difficult to ascertain Wilkinson's loyalties and must decide whether you will work with him or around him. Historically, Jefferson stuck with Wilkinson and trusted him, but Wilkinson was despised by the prosecuting attorneys at Burr's trial who believed him every bit as guilty as Burr.
[9.3] Event Cards: These cards relate directly to actions that help or hinder Burr's plan and equip his Expedition with Assets.
While some Events are 'good news' for you, Mr. Jefferson, most are not – but those with bad news usually offer you a Reshuffle Option (if you can afford the cost).
[9.4] Evidence Cards: These cards are an investment in your success at Trial should you arrest Aaron Burr before his Expedition is launched. The +X value above the Trial symbol, in blue, meaning the scales of justice are tipping in your favor) indicates how useful it will be at Trial in helping your side (the prosecution) win an Argument and thus prove Burr's guilt.
[9.5] Trial Defense Cards: These help Aaron Burr at Trial, modifying his Argument die rolls. Unless you pay to reshuffle them back into the Deck, they are added to the defense using their +X value above the Trial symbol, in red, meaning the scales of justice tipped in Burr's favor). These cards also hasten the game as they do not provide a complete Turn to be played.
[9.6] President Jefferson Cards: The Jefferson Administration governed during a very tumultuous time both at home and abroad. These cards provide you many opportunities to interact with the larger events surrounding Jefferson at this time.
In your first term, with Burr as your Vice-President, you successfully acquired the Louisiana territories from Napoleon. Now, in your second term, The West is a land ripe with opportunity, adventure, and potential wars. The Great American Desert (the modern American Midwest) remains to be explored and settled, and the Northwest Passage is still being sought.
[10.0] Remixing the Conspirators
Certain cards (Aaron Burr's Flight from Arrest and Hero of Weehawken) and Tables (Local Authorities and Arrest Burr) call for a Remix of the Conspirator units.
Procedure
To perform a Remix, all of the face-up Conspirator units on the map (including the "Blanks," Riots and Aaron Burr, but excluding any Arrested conspirators residing on the Trial mat) are flipped back to their unrevealed side; they are then mixed together in The West box and must be searched for anew (12.3).
[11.0] Burr/Agenda Phase
The Aaron Burr Conspirator unit is set up, unrevealed, in The West along with all of the other Conspirator units. When he is discovered (revealed), the Aaron Burr unit is immediately placed on the New Orleans Track (12.3.6).
During Burr/Agenda Phase, if the Aaron Burr Conspirator unit is revealed, it is advanced one space closer to New Orleans. Once he reaches Louisiana, Burr's presence greatly stirs matters, as follows:
[11.1] Burr Arrives: Each time the Aaron Burr unit enters the Baton Rouge or Natchez spaces, an immediate Expedition Launch check is made (see 8.3).
[11.2] Burr in New Orleans: During the New Orleans Phase each Turn (see 13.0), if the Aaron Burr unit is in the New Orleans space, an Expedition Launch check is made (see 8.3).
Once Burr is in New Orleans, he remains there until the game ends or a Remix occurs (see 10.0) at which time he again moves to The West box and is undetected.
Historians disagree as to whether Aaron Burr was a self-seeking villain or simply a maligned, misunderstood target of Thomas Jefferson's political vendetta. In Hero of Weehawken either possibility exists, and each time you play the game, the outcome can be different.
[11.3] Burr is Hidden: If Burr is not revealed (i.e., he is hidden), then you can focus on your political Agendas. You may make one free (i.e., at no PP cost) Agenda Advance attempt (see 12.1) to raise your lowest current Agenda (only; your choice if more than one Agenda is tied for lowest).
Example: Burr is hidden, allowing you to focus on your Agendas. Both Judicial Reform and Pressure Britain are tied for lowest at '1' each (with Virginia Dynasty currently at '3'). You may make one free Agenda Advance attempt for either Judicial Reform or Pressure Britain.
[11.4] Expedition Check: If the Plan Progress marker is on the last row of its track, make a Launch check at the end of this Phase (8.3).
[12.0] Jefferson Phase
This is the heart of the game where you, as President Jefferson, make decisions and allocate your political capital to best effect by performing Actions.
Hint: Sometimes, the best thing to do is nothing. It can be wise to save up PPs and, like a Poker player, hold your cards close, let matters develop, and wait for better opportunities in the future.
There are several different types of Actions that you can perform each Turn during this Phase, and you may perform any number as long as your Prestige Points hold out.
Important: If the Virginia Dynasty Agenda is completed, you receive 1 PP at the beginning of this Phase each Turn.
Actions
[12.1] Agenda Advance Attempt: For 1 Prestige Point*, you may attempt to advance any one Agenda marker by one space on its Track (see 7.0). You may pay this cost and make an attempt regardless of previous successes or failures to advance Agendas that Turn.
Advance Agenda Procedure
Indicate the Agenda marker that you are attempting to advance and roll a die. If the result is shown by die faces in the space it would enter, it advances into that space. Any other die roll result has no effect.
Example Continued: You opt to advance the Pressure Britain Agenda marker, from its "Non-Importation Act" space to its "Pinckney and Monroe to London" space. You must roll a 5 or higher (as shown in the London space you want to advance into) to succeed.
*If the Trafalgar marker is in play, you must pay 2 Prestige Points to attempt to advance the Pressure Britain Agenda by one space during this Phase.
[12.2] Dispatch a Federal Agent: For 1 Prestige Point, you may move one Federal Agent marker from its present location to another location. These locations are: The West box (to Search for/Arrest conspirators there), a box on the New Orleans Track (to Arrest the Aaron Burr Conspirator unit located there), and the Federal Agents in Washington box (i.e., back at the capital in the District of Columbia).
[12.3] Search for a Conspirator: For 1 Prestige Point, you may roll a die in a Search Attempt to reveal (i.e., flip face-up) one hidden (face-down) Conspirator unit and thus discover its identity.
Search Procedure
Count the number of Federal Agent units in The West (which includes those on the New Orleans Track) AND add that to the number of Wilkinson Conspiracy cards you currently hold. Roll a die; if the result is ≤ the count, reveal one Conspiracy unit; otherwise, there is no effect (and the PP is wasted).
[12.3.1] Presidential Proclamation: After the Presidential Proclamation has been issued (see 12.7), you may conduct up to two free Searches per Turn (i.e., at no PP cost), if desired.
Newly Revealed Conspirator Units
Unless it is revealed to be Aaron Burr, leave that unit face-up in The West box.
[12.3.2] Blanks: If a Blank Conspirator unit is revealed, nothing happens. But at least you've narrowed down the search!
[12.3.3] Riot!: If a Riot unit is revealed, you immediately lose Prestige Points and/or increase the Plan Progress by an amount whose total equals the number of Federal Agent units in The West (which includes those on the New Orleans Track).
Example: There are currently 2 Federal Agent units in The West when a Riot unit is revealed. You must either: lose two Prestige Points, advance the Plan Progress marker two boxes, or lose one Prestige Point and advance the Plan Progress marker one box (for a total of two).
[12.3.4] James Wilkinson Moves: If this marker is revealed, you must immediately move the James Wilkinson unit one space down the New Orleans Track closer to New Orleans (and see 12.5.1 and 12.5.2).
[12.3.5] A Conspirator is Revealed: If it is not Aaron Burr, that revealed Conspirator unit remains in The West box awaiting Arrest (see 12.4) or Remixing (see 10.0).
[12.3.6] Aaron Burr is Revealed: The first time Burr is revealed in The West box, place the Aaron Burr Conspirator unit in the Blennerhasset's Island space on the New Orleans Track.
Each time that Burr is Remixed (10.0) and subsequently revealed in The West box, he is then placed in a random box on the New Orleans Track. To determine which box on that Track, roll a die and count that many boxes up the track from New Orleans and place the Aaron Burr Conspirator unit there.
Example: Using this procedure to place Burr back in play for a second or subsequent time after his rediscovery, a die roll of 1 would start Burr in Baton Rouge, and a die roll of 6 would start Burr all the way back at Blennerhasset's Island.
[12.4] Arrest a Revealed Conspirator: To Arrest a revealed (face-up) Conspirator unit, there must be at least one Federal Agent unit in the same box as that revealed Conspirator unit (exception: using Local Authorities; see below). For 1 Prestige Point, you may make one Arrest. To do this, return one Federal Agent unit sharing that box (the "Arresting Agent") to the Federal Agents in Washington Box, and the revealed Conspirator unit is placed in the Arrested Co-conspirators box on the Trial mat.
[12.4.1] Presidential Proclamation: After the Presidential Proclamation has been issued (see 12.7), you may make one free Arrest Attempt per Turn (if desired) using Local Authorities (i.e., rolling on the Local Authorities Table). There is no Prestige Point cost and no Federal Agent unit is involved when using Local Authorities.
[12.4.2] Arrested Conspirator Effects: Each Conspirator unit, when Arrested, has a special effect:
A. John Adair: Immediately advances the Plan Progress marker one space.
B. Aaron Burr: Aaron Burr is also placed in the Arrested Co-conspirators Box on the Trial mat, after which the Operations Stage is over and the Trial Stage begins (see 14.0).
C. Jonathan Dayton: Reveal the cards in the Draw Pile, one card at a time, until a Conspiracy card appears. Retain that Conspiracy card, gaining its Prestige Points, and then reshuffle the Deck, including the other just-revealed cards. Ignore this effect if you have already collected all six of the Conspiracy cards from the Deck.
D. John Smith: Advance the James Wilkinson unit one space closer to New Orleans. Ignore this effect if he is already in New Orleans (and see 12.5.1 and 12.5.2).
E. Samuel Swartwout: Place this Conspirator unit at the top of the Arrested Co-conspirators Box on the Trial mat. His special effect occurs during the Trial Stage.
F. Colonel Comfort Tyler: If the Comfort Tyler's Supply Convoy Arrives card is part of the Burr Expedition, it is discarded. If it is not, there is no effect and, if later drawn, it is added to the Expedition normally.
[12.5] Attempt to Move Wilkinson: For 1 Prestige Point, you may attempt to move the James Wilkinson unit one space along the New Orleans Track in either direction. To do this, roll a die and add one (+1) to the result for each Wilkinson Conspiracy card that you possess (your influence over him). If that total is equal to or greater than six (≥6), you may move the James Wilkinson unit one space in either direction along the New Orleans Track.
The Wilkinson unit represents the physical location of Wilkinson and the bulk of the US Army in the West.
[12.5.1] Wilkinson Arrives in Natchez: The first time (only) that the James Wilkinson unit enters the Natchez space, U.S. Relations with Spain will change as follows:
If there is currently a Spanish Relations marker on the Plan mat, remove it (i.e., the Relations revert back to "Normal" as printed on the mat).
If there is not a Spanish Relations marker on the Plan mat, randomly select one (using any desired method for random determination) from the Holding Box on the map and place it in the Spanish Relations box on the Plan mat (thus altering the U.S. Relations with Spain).
[12.5.2] Wilkinson Arrives in Baton Rouge: Each time the James Wilkinson unit enters the Baton Rouge space, an immediate Expedition Launch check is made (8.3).
[12.6] Send Gunboats to New Orleans: For 3 Prestige Points, once per game you may dispatch Gunboats to New Orleans. To do so, place the Gunboats marker in the Gunboats box on the Plan mat and advance the Plan Progress marker by one space. The effect of sending Gunboats is to hinder both Launch Checks (8.3) and the success of the Expedition (8.5).
[12.7] Issue a Presidential Proclamation: For 10 Prestige Points, once per game you may issue a Presidential Proclamation. To do so, place the Presidential Proclamation marker in its box on the map as a reminder of its ongoing effects to facilitate capturing Conspirator units with free Searches and Arrests via Local Authorities (see 12.3.1, 12.4.1, both of which can begin on the Turn that the Proclamation is issued) and advance the Plan Progress marker by two spaces. (As Burr's confederates hear about Jefferson's actions, they accelerate their plans.)
In November of 1806, President Jefferson issued a Proclamation ordering all authorities in The West to find and arrest Aaron Burr.
[13.0] New Orleans
During the New Orleans Phase each Turn, check to see if the Aaron Burr and/or James Wilkinson units are in the New Orleans space. If so, beginning with Burr, they conduct their business as follows:
[13.1] Burr in New Orleans: Make an Expedition Launch check (see 8.3; also see 11.2).
[13.2] Wilkinson in New Orleans: Roll a die on the Wilkinson in New Orleans Table. Note that you may spend a single Prestige Point for a plus one or minus one (±1) die roll modifier which you must declare before rolling the die. After the die is cast, you may discard (i.e., you no longer retain that card and place it in the Discard Pile) Wilkinson Conspiracy cards for a ±1 die roll modifier each.
If a Fateful Encounter result has you rolling on the Arrest Burr Table, there are no die roll modifiers for that Table.
[14.0] Trial Stage
Once Aaron Burr is arrested (see 12.4), the Operations Stage of the game has ended and the Trial Stage begins, abstractly simulating the Grand Jury indictment and subsequent trial of Aaron Burr.
During the Trial Stage, you will Charge the defendant (Burr) with a crime, and then argue the case in light of Evidence and Trial Defense cards, trying to win consecutive Arguments and secure a conviction.
Setting Up for the Trial Stage
Follow these steps to set up the Trial Stage:
- Move the map and reposition the Trial mat so that it is directly in front of you.
- Shuffle the Trial Defense cards on the left side of the Trial mat and turn them face-down to form a Draw Pile there.
- Spread out the Evidence cards so that you can easily see their +X values.
- If you have the President Jefferson cards Supreme Court Appointees and/or Tax Reductions, keep them handy.
- Place the Trial in Progress marker on its "Start" space.
- If either or both of these Agendas are completed, place the Pressure Britain and Judicial Reform markers, face-down, in their respective boxes along the top-right of the Trial mat to remind you of their effects.
- If he has been arrested, place the Samuel Swartwout Conspirator unit at the top of the Arrested Co-conspirators box on the Trial mat.
The Trial Stage Sequence of Play
The Trial Stage is played through in the following sequence, with multiple Arguments performed as long as the prosecution (you) continues to prevail until either you lose an Argument or Burr has garnered the harshest possible verdict. To conduct the Trial Stage, perform these Phases in order:
- Charge Phase: Deduce the Charge that you will try Burr on and place the Charge marker as appropriate (see 14.1).
- Argument Phase: Roll the blue (Prosecution or "P") and red (Defense or "D") dice and compare their results.
- If D ≥ P, go to the Prosecution Segment (see 14.2.1), followed by the Defense Segment (see 14.2.2), and then the Rebuttal Segment (see 14.2.3)
- If P > D, skip to the Defense Segment (see 14.2.2) and then the Rebuttal Segment (see 14.2.3). 2.a. Prosecution Segment: Play (discard) as many available Evidence cards to modify P as needed (consulting the Wilkinson Indictment Table if necessary) so that P > D. 2.b. Defense Segment: The top Trial Defense card from its Draw Pile and, if needed, Samuel Swartwout are committed to raise the value of D. If P is still > D, advance the Trial in Progress marker to the next higher level of guilt and begin a new Argument Phase; if P is now ≤ the newly modified D, proceed to 2.c, below: 2.c. Prosecution Rebuttal Segment: Play (discard) as many available Evidence cards to modify P as needed (consulting the Wilkinson Indictment Table if necessary) so that P > D, then advance the Trial in Progress marker to the next higher level of guilt and begin a new Argument Phase; if P cannot be made > D, the trial is over. Flip the Trial in Progress marker over to its Verdict side.
- Reveal Conspiracy and Adjust Verdict: When the trial ends, the three Conspiracy cards are revealed, their plan determined on the Conspiracy Objective chart (see 8.4), and the Verdict marker is adjusted (see 14.3).
- Score Victory Points: Determine the level of your success or failure (15.0).
[14.1] The Charge Phase: This is a test of your inductive reasoning skills where you must guess which three Conspiracy cards were set up on the Plan mat at the beginning of the game (see 4.0, #4). Hopefully, by the time the Trial Stage begins, you will be holding some Conspiracy cards and thus can eliminate them as suspects (as you do when playing a game of Clue). Note that there are four James Wilkinson Conspiracy cards in the game, and one each of the other five 'suspects.'
Procedure
During this Phase, after due consideration, you must select one of the seven (I – VII) possible plans and place the Charge marker in that box at the top of the Trial mat.
If the Charge marker is placed to the left of the dashed line (i.e., plans I – V), the Charge that Burr is being tried on is a Filibuster; place the Charge marker with its orange text ("No Death") side showing.
In the 19th century, the term filibuster referred to a private (and illegal) military expedition against a foreign power. The word derived from the Dutch vrijbuiter, which meant "pirate" or "freebooter."
If the Charge marker is placed to the right of the dashed line (i.e., plans VI or VII), the Charge that Burr is being tried on is Treason; place the Charge marker with its red text ("Death") side showing.
The maximum sentence in a Filibuster case is #5: Life Imprisonment; the maximum sentence in a Treason case is #6: Death.
You want to make the appropriate Charge against Burr to earn bonus Victory Points. If you guess very wrong, you are penalized Victory Points (see Player Aid sheet).
[14.2] The Argument Phase: During this Phase, either the Prosecution will win the Argument being debated at the Trial (proving greater guilt with the Trial continuing), or the Defense will win the Argument (immediately ending the Trial).
Procedure
Roll the blue (Prosecution or "P") and red (Defense or "D") dice, adding one (+1) to the P die if you have completed the Judicial Reform Agenda, and compare their results.
- If P ≤ D, go to the Prosecution Segment (see 14.2.1), followed by the Defense Segment (see 14.2.2), and then the Rebuttal Segment (see 14.2.3)
- If P > D, skip to the Defense Segment (see 14.2.2) and then the Rebuttal Segment (see 14.2.3).
[14.2.1] The Prosecution Segment: You must play (and then discard) as many available Evidence cards as necessary, adding their modifiers until P > D (i.e., until the Prosecution is "winning" that Argument).
When P is > D, proceed to the Defense Segment (see 14.2.2).
If P cannot be raised to > D (insufficient Evidence), the Defense has prevailed, the Trial is over. Flip the Trial in Progress marker over to its Verdict marker side and score Victory Points (see 14.3).
[14.2.2] The Defense Segment: Reveal the top Trial Defense card from its Draw Pile and add its modifier to D. Discard that card, and then compare P to D again:
If P is now ≤ D, proceed to the Rebuttal Segment (see 14.2.3).
If P is still > D, Samuel Swartwout, if Arrested, adds his +1 to D and is flipped over (as a reminder that he can only do this one time during the course of the Trial). Then compare P to D again:
If P is now ≤ D, proceed to the Rebuttal Segment (see 14.2.3).
If P is still > D, advance the Trial in Progress marker one box to the right and repeat the Argument Phase unless the Maximum Sentence (i.e., Life for a Filibuster or Death for Treason) has been reached, in which case the Trial is over. Flip the Trial in Progress marker over to its Verdict side and score Victory Points (see 14.3).
Example: The Argument scores are tied, but your only remaining Evidence card is a +3. You can't use only 1 from that card and save the other 2 for the next Argument.
-
The Neutrality Act of 1794: This Evidence card cannot be used at Trial if the Charge is Treason. It can only be used against a Filibuster Charge.
-
Wilkinson's Grand Jury Indictment: The first time (only) that you play either Wilkinson Evidence card at Trial (i.e., Wilkinson's Ciphered Letter or James Wilkinson's Testimony), you must roll a die and consult the Wilkinson Indictment Table on the Trial mat, adding one (+1) for each Wilkinson Conspiracy card you have.
If Wilkinson is not Indicted (the historical outcome), there is no effect. If he is, you must immediately discard all of your Wilkinson Evidence cards without effect and, when scoring, you will lose ten Victory Points (-10 VPs) for each Wilkinson Conspiracy card you hold.
[14.2.3] The Rebuttal Segment: You must (again) play (and then discard) as many available Evidence cards as necessary, adding their modifiers until P > D (i.e., until the Prosecution is "winning" that Argument).
When P is > D, advance the Trial in Progress marker one box to the right and repeat the Argument Phase unless the Maximum Sentence (i.e., Life for a Filibuster or Death for Treason) has been reached, in which case the Trial is over. Flip the Trial in Progress marker over to its Verdict side and score Victory Points (see 14.3).
If P cannot be raised to > D (insufficient Evidence), the Defense has prevailed, the Trial is over. Flip the Trial in Progress marker over to its Verdict marker side and score Victory Points (see 14.3).
Notes
- Weighing Evidence: Each Evidence card can only be used once per trial and is discarded after use. Excess additions played to win an Argument cannot be saved and used on the next Argument; these cards don't "make change."
[14.3] Reveal Conspiracy and Adjust Verdict: Reveal the three cards that constitute the Conspiracy (see 8.4) and compare it to the Charge marker that you set during the Charge Phase.
- If it is an exact match, advance the Verdict marker one space (but not above the maximum sentence).
- If only the type matches (e.g., the Charge and conspiracy were both Filibusters), there is no effect.
- If the type is a mismatch (i.e., the Charge and the conspiracy are on different sides of the dashed line on the Trial mat), move the Verdict marker backward one space (but no lower than Exonerated).
[14.4] Score Victory Points: Score Victory Points as per Rule 15.0 on the back of the Player Aid sheet.
Example: A complete Trial example can be found on the inside covers of this game.
[15.0] Scoring
Victory Points are scored at the end of the game — whether the game ends by the Burr Expedition being conducted (see 8.5) or by a Trial verdict being reached (see 14.3) — using the Victory Point tables printed on the back of the Player Aid sheet, which cover both the Expedition Outcome and Trial Verdict results referenced throughout these Rules (see 8.5, 14.4).
Dramatis Personae
Aaron Burr: New York Democratic-Republican, veteran of the Revolutionary War, womanizer, and consummate politician, Burr delivered New York to Jefferson in the bitter election of 1800. By a constitutional fluke, he and Jefferson had the same amount of votes for the presidency and this unforeseen standoff nearly led to a political meltdown for the young American Republic. Burr became Jefferson's Vice President, but was clearly out of favor by the end of the first term. Following an unsuccessful bid for the governorship of New York (hindered, in part, by Jefferson himself), Burr had a war of words with his (and Jefferson's) nemesis, Alexander Hamilton. The argument led to the infamous duel that saw Hamilton killed, and Burr – reviled by the Federalist Party – earned the nickname "Hero of Weehawken" from some of his fellow Democratic-Republicans. With his political career in the East all but finished, Burr headed West where he could find friends, sympathizers… and fellow conspirators.
Thomas Jefferson: Virginia planter, lawyer, writer of the Declaration of Independence, Secretary of State (under Washington), Vice President (under Adams), and third President of the United States, Thomas Jefferson was a complex man. He cultivated and led a dramatic shift in American political culture, steering the nation back toward small, limited government, at least in theory. By the end of his second term, however, he had presided over the largest accretion of American territory in history (the Louisiana Purchase), relying upon dubious interpretations of executive authority to make a deal with Napoleon, and had imposed a harsh trade embargo between the United States and Great Britain. His relationship with Burr evolved from cordial to suspicious to vicious, and his failure to gain a conviction against his former Vice President left Jefferson enraged and bitter.
John Marshall: One of the most influential Chief Justices of the Supreme Court, Marshall (a relative of Jefferson's) was a Federalist who fought for the prerogatives of the Judiciary and established the precedent of judicial review – interpreted as a tyrannical assault on the Constitution by Jefferson's Republicans. Marshall had the unwelcome duty of presiding over the Aaron Burr trial and had to navigate a careful path of legal interpretation between British and American jurisprudence. Jefferson blamed him for Burr's exoneration.
James Wilkinson: Revolutionary War veteran, opportunistic merchant and politician, and lately Commanding General of the US Army, Wilkinson had deep ties to Spanish authorities in New Orleans, including a substantial pension in exchange for confidential information and support. Self-serving and dishonest, he could be Jefferson's sycophant one moment, and plot treason with Aaron Burr the next. When he concluded that events were turning against his confederate, Wilkinson betrayed Burr and served as Jefferson's chief witness in the trial. Almost everyone but Jefferson thought him a scoundrel, and he nearly fell prey to the grand jury himself.