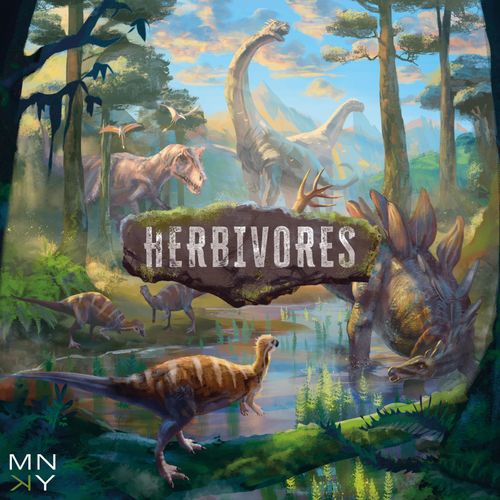
Herbivores
Herbivores Rulebook
Table of Contents
Table of Contents
Herbivores Overview
Source note: the rules refer to the "herbivores overview on page 13"; the species overview is printed on pages 2–3 of the rulebook, and this section reproduces it.
Camarasaurus (Camarasaurus supremus) Length: 13-20 m. Weight: up to 23.000 kg. Speed: 20 km/h. Food: groundcover, cycads and low-hanging leaves.
The gigantic Camarasaurus could reach a maximum length of approximately 20m and a shoulder height of no less than 4m. The Camarasaurus was a Sauropod, which were the biggest herbivores of the Jurassic. They could easily eat leaves from tree tops and were too big of a prey for carnivores.
Camptosaurus (Camptosaurus dispar) Length: 5 m. Weight: 500-700 kg. Speed: 25 km/h. Food: conifers, ginkgos and seed ferns.
The Camptosaurus mostly lived in large groups. Just like with herds of zebras and wildebeest, this increased its chances of survival. Its powerful hind legs allowed it to cross great distances to find the most fertile soil.
Dryosaurus (Dryosaurus altus) Length: up to 3 m. Weight: 100 kg. Speed: 50 km/h. Food: groundcover and conifers.
The Dryosaurus did not benefit from its mass or size and did not have armor to protect itself. Instead, the Dryosaurus was good at hiding in the underbrush to avoid carnivores.
Gargoyleosaurus (Gargoyleosaurus parkpinorum) Length: 3-3,5 m. Weight: 300–754 kg. Speed: 10 km/h. Food: groundcover, ginkgos and conifers.
The Gargoyleosaurus, an ancestor of the well-known Ankylosaurus, developed an armor of small plates and spikes across its neck, back and tail. This protected it from carnivores and other kinds of damage, despite the Gargoyleosaurus's small size.
Psittacosaurus (Psittacosaurus mongoliensis) Length: 1-2 m. Weight: 5-18 kg. Speed: 40 km/h. Food: pine needles, cycads and ferns.
The Psittacosaurus was one of the smallest herbivores of the Jurassic. Like the Dryosaurus, it had few defenses against carnivores. By not staying in the same place for too long and carefully looking for new habitats, the Psittacosaurus managed to escape the clutches of carnivores.
Stegosaurus (Stegosaurus stenops) Length: up to 9 m. Weight: 1600 kg. Speed: 17 km/h. Food: leaves, pine needles, cycads and ferns.
The Stegosaurus was not just big, but it also evolved into a true fighting machine. Thanks to the plates on its back and the spikes on its tail, it did not have to fear many enemies. The exact function of its back plates has never been confirmed, but one theory is that they were meant to regulate its body temperature. That way the Stegosaurus would have been able to endure extreme weather a lot better.
- Despite the fact that paleontology has developed into an advanced science, not all information about dinosaurs can be confirmed, and several details will remain scientific theories for now.
Goal of the Game
In Herbivores, players take on the roles of different plant-eating dinosaur groups. A successful dinosaur group will eat, drink and reproduce until the group becomes large enough to split up. The oldest generation stays behind and the younger generations will live on. The first player to have placed 4 generation tokens on the landscape tiles wins the game.
Contents
- 6 Dinosaur boards
- 1 Season board
- 6 Intimidation dice
- 4 Food markers
- 1 Season marker
- 4 Drink markers
- 45 Food cubes
- 4 Vitality markers
- 12 Season cards
- 18 Migration cards
- 4 Nest markers
- 6x Warm season cards
- 6x Cold season cards
- 4 Player aid sheets
- 4 Player aid cards
- 30 Generation cards
- 24 Generation tokens
- 6 Dinosaur group miniatures
- 30 Landscape tiles, including 1 Starting tile
- 6 Carnivore miniatures
Setup
1 Your dinosaur group
All players (randomly) receive 1 face-down dinosaur board with a food marker, a drink marker, a vitality marker and a nest marker. Turn the dinosaur board face-up and place it in front of you. Place a food marker, drink marker and vitality marker at the top of their respective meters. Place the nest marker next to your dinosaur board.
Receive the miniature, the 5 generation cards and the 4 generation tokens that belong to your dinosaur group. During the game, you will place generation cards above your dinosaur board from left to right (from oldest to youngest). Each card represents a new generation that you raise. Now place the first generation card on the top left and slide it underneath your dinosaur board until only the top dinosaur on the card remains visible. You can identify the first generation card by its alternative card back (see example). Place the other generation cards to the side for now.
Each dinosaur group has its own unique abilities (see "Unique abilities" on page 20).
On your dinosaur board you will find 3 survival meters that represent essential needs of your dinosaur group.
- The food marker goes down when your group becomes hungry and goes up when your group eats.
- The drink marker goes down when your group becomes thirsty and goes up when your group drinks.
- The vitality marker goes down when your group is injured, or is dying from hunger or thirst, and goes up when your group recovers.
Figure: the first generation card with the alternative card back.
Figure labels on the dinosaur board: survival meters, Mass, Camouflage, Intimidation, Unique ability, Nest marker.
2 The playing area
Place the starting tile in the middle of the table. You can identify this tile by its alternative tile back. The starting tile contains a safe haven and water, but no food. Shuffle the remaining landscape tiles to form a face-down pile next to the playing area.
PLEASE NOTE! Make sure there is enough space on the table for multiple tiles, because you will expand the playing area by adding tiles during the game.
Now place your dinosaur group's miniature on the starting tile. This is where your adventure begins!
3 The season and migration cards
Place the season board within reach of all players. The season board is used to keep track of the game's turns. Place the season marker on the gray stone on the season board. Each time a player's turn ends, move the season marker 1 space clockwise on the season board.
Sort the season cards into warm season and cold season cards. Shuffle the two decks separately and place them face-down within reach of all players.
Shuffle the 18 migration cards and place the deck face-down within reach of all players.
4 Player aid cards and player aid sheets
All players receive a player aid card. This lists the different actions and their costs.
All players also receive a player aid sheet. This contains information about all herbivores and carnivores in the game.
5 Carnivore miniatures
Place the 6 carnivore miniatures to the side for now. They won't enter the game until later.
The Game
Players take turns in clockwise order. The fastest herbivore starts the game (see herbivores overview on page 13).
Always start your turn with the following actions in the order listed below. These actions are mandatory and cannot be skipped.
Mandatory (in the following order)
- Move your vitality marker up 2 spaces if your group is on a tile with a safe haven.
- Move your food and drink markers down 1 space on their respective meters.
- Remove your nest marker from the dinosaur board if you have made a nest.
After these mandatory actions, you may perform any of the following actions in any order (none of these are mandatory).
Not mandatory
- Moving twice (walking and/or migrating)
- Eating and drinking
- Growing
- Leaving a generation behind
- Intimidating
- Nesting (this immediately ends your turn)
If you don't want to perform any more actions, end your turn and advance the season marker to the next space on the season board. If the marker lands on an icon, resolve the matching action (see "Season board" on page 15). Then, the next player takes their turn.
Moving
You may move your dinosaur group twice during your turn. You may use these moves for the "walking" action and the "migrating" action. So, in 1 turn you may walk once and migrate once (in any order), or you may walk twice, or you may migrate twice.
PLEASE NOTE! You must move your drink marker down 1 space on the meter each time you move.
A Walking
Cost: 1 drink.
When walking, move your group to an adjacent landscape tile.
PLEASE NOTE! You may only move your group horizontally or vertically, not diagonally.
B Migrating
Cost: 1 drink.
When migrating, move your group to a spot in the playing area that does not have a landscape tile yet (B1). Choose a spot next to the tile where your group is currently situated, take a landscape tile from the pile and place it in the spot you wish to migrate to (B2).
PLEASE NOTE! The new tile may not be placed diagonally.
Then place as many food cubes on the new tile as are indicated by its food icon.
- Grass biotope = 1 food cube
- Forest biotope = 3 food cubes
- Shrubbery biotope = 2 food cubes
- Desert biotope = 0 food cubes
Mountain ridge
If you place a tile with a mountain icon in the playing area while migrating, you must orient it in such a way that the mountain ridge is directly opposite the tile that your dinosaur group migrated from (see example C). Your group may enter this tile, but it can't walk or migrate across the mountain ridge.
Then immediately move your group to the newly placed tile and draw a migration card (B3). A migration card has 3 possible outcomes (see "Migration cards" below).
PLEASE NOTE! Drawing and resolving a migration card is mandatory.
Migration cards
Turn the top card of the migration deck face up and immediately resolve its action. Resolved migration cards go into a face-up discard pile (unless the card has a carnivore on it). If the migration card deck runs out of cards, shuffle this discard pile and form a new deck. There are 3 types of migration cards:
- Safe journey: Your journey was safe: nothing happens.
- Dangerous journey: There were dangers along the way: move your vitality marker down 1 space.
- Carnivores: You encounter a carnivore! Place the corresponding carnivore miniature on the tile that you just migrated to. Now check if your group is attacked (see "Carnivores" on page 16). Place the carnivore's card near the carnivore, so you can see its stats.
Eating and drinking
During your turn, you can eat and drink to quench your hunger and thirst. This way you can prevent your group's vitality marker from being lowered.
- If your group is on a tile with 1 or more food cubes, you may remove these from the tile and move your food marker up a number of spaces equal to the amount of cubes that you removed. When your food meter is full, you can't remove any more cubes. After removing the food cube you can move your food marker 1 space up.
- If your group is on a tile with water, you may move your drink marker all the way up to the top of the meter.
You may perform the "eating and drinking" action at any moment during your turn, before or after other actions, and as often as you like.
Growing
Cost: 2 food and 2 drink.
By growing, your dinosaur group will gain new or improved traits. To grow, you must move both your food and drink markers down 2 spaces and move your oldest (non-adult) generation up 1 space. A generation reaches adulthood after growing twice.
PLEASE NOTE! At the start of each following turn, move your food marker down an additional space for each adult generation in your group.
You may perform the "growing" action as often as you like in a single turn, as long as you can pay the required food and drink.
Leaving a generation behind
To win the game, you must leave your oldest generation behind 4 times. You do this by placing 1 of your 4 generation tokens on the playing area. Leaving a generation behind does not cost you any food or drink, but it does cost you 1 entire generation. Remove the leftmost generation card from your dinosaur board and place a generation token on the generation icon of the landscape tile where your group is currently located. Flip over the generation card so the colored back is facing up and slide it underneath the right side of your dinosaur board (see example). This gives the entire dinosaur group 1 new trait, but the previous traits of the generation that was left behind no longer apply (see "Icon overview generation cards" on page 22). Then, if possible, move any other generations 1 space to the left on the dinosaur board.
Keep the following rules in mind when leaving a generation behind:
- It has to be possible to place a generation token on the tile where your group is currently located. A tile must have this white icon for the placement of generation tokens. You cannot place a generation token on a tile if there is already another generation token present there.
- The oldest generation of your group must be an adult generation, and there has to be at least 1 other generation in your group (this does not have to be an adult generation).
- Generation tokens cannot be removed once they've been placed on a landscape tile.
Intimidating
Cost: 1 food and 1 drink per intimidation action.
If your group is on a tile with 1 or more dinosaur groups belonging to other players, or with a carnivore, you may intimidate them during your own turn to try and chase the group(s) or the carnivore from the tile. Per "intimidation" action you can target either 1 or more groups of herbivores or 1 carnivore, but not both.
PLEASE NOTE! If you move to a tile that contains a carnivore, you may only intimidate the carnivore after you've checked if the carnivore will attack your group or not (see "Carnivores" on page 16).
Each time you perform the "intimidating" action, you must move your food and drink markers down 1 space. You can intimidate as many times as you wish during your turn, provided that you have enough food and drink to do so.
Roll a number of dice equal to your group's intimidation value (so 2 intimidation = 2 dice). If you roll multiple dice, only the highest single dice result counts.
PLEASE NOTE! You may never intimidate multiple carnivores with a single "intimidating" action, for example when there are multiple carnivores on a single tile. However, you are allowed to intimidate multiple dinosaur groups with 1 "intimidating" action.
Intimidating players
Your opponent(s) roll(s) a number of dice equal to their intimidation value as well, but they don't have to lower their food and drink markers. The player with the highest dice roll wins. In case of a tie for the highest roll, those players roll again. The winning player moves the group(s) of the losing player(s) once, to any adjacent tile (you can choose different tiles for different groups, if you wish). This can be a diagonal move as well.
When moving a losing player's group, the following rules apply:
- The losing player does not have to lower their food or drink markers because of this move. It does not cost them any of their 2 moves for their turn either.
- This move is not affected by season cards.
- If a group is moved to a tile containing a carnivore, do not check if it attacks at that point.
Example: you roll 2 dice because your intimidation is 2. By rolling the 4 you win against the carnivore who has an intimidation higher than 3.
Intimidating a carnivore
If your highest roll is higher than the intimidation value listed on the carnivore's card, you may move that carnivore to any adjacent tile twice. In other words, it will move by a maximum of 2 tiles that are adjacent to each other horizontally, vertically and/or diagonally.
PLEASE NOTE! The carnivore will not attack other players due to this move.
If you lose to a carnivore, nothing happens and you may continue your turn.
Nesting
Cost: 1 food and 2 drink. This action immediately ends your turn.
To expand your dinosaur group, your dinosaurs will have to reproduce by nesting. To perform the "nesting" action, you must move your food marker down 1 space, your drink marker down 2 spaces and you must place the nest marker on the nest icon of your dinosaur board.
The following rules apply when nesting:
- You must have an adult generation.
- Your group must be on a tile with the specific biotope indicated on your dinosaur board.
- You can only have 1 nest at a time. That means you can only make a new nest after your previous one has hatched.
- You may not perform the "nesting" action if your group already contains 3 generations.
- After performing the "nesting" action, you always end your turn immediately.
At the start of your next turn, remove the nest marker from your dinosaur board. The egg has now hatched. Add a new generation to your group by adding a new generation card to the right of your current generation. Slide it underneath your dinosaur board until only the youngest dinosaur is visible.
PLEASE NOTE! Generation cards can have different traits when they are left behind later in the game. These are depicted on the back of the generation cards. You should plan ahead and choose which traits you would like to develop when expanding your group.
Figure labels: Adult generation; New generation; Biotope and nest icon. Turn 1: nest made. Turn 2: nest hatched.
Losing vitality
Carnivore attacks or season cards can lower your dinosaur group's vitality marker. If your food and/or drink markers are already at the bottom space of their meter and you need to lower them, move your vitality marker down 1 space instead for each space you couldn't lower your food and/or drink markers. Always make sure that your food and drink markers stay high enough on their meters!
PLEASE NOTE! If the cost of an action would cause your vitality marker to be moved to the bottom space of its meter, you may not perform that action. In other words, you cannot intentionally let your dinosaur group die.
Example: your drink marker is at the bottom space of your meter, so you now must lower your vitality marker.
A generation dies
If your vitality marker does reach the bottom space of the meter, one of your generations dies. In this case, the following happens:
- You lose the last generation you added to your board (regardless of how much it has already grown). Remove this generation card from your dinosaur board. PLEASE NOTE! If you only have 1 generation, slide this generation all the way back down until only the youngest dinosaur remains visible.
- Move your vitality marker back to the top of its meter, but leave the food and drink markers where they are.
- End your turn (unless your generation dies during another player's turn).
Example: your vitality marker reaches the bottom space of its meter; you lose your youngest generation.
Recovering in a safe haven
When your vitality is low, you may choose to recover in a safe haven. To be able to do so, your group must be on a landscape tile with a safe haven icon (like the starting tile). Your vitality does not recover immediately. Only when you start your turn on a tile with a safe haven icon, you may move your vitality marker up 2 spaces. This takes place before the food and drink markers are lowered and before the hatching of an egg.
PLEASE NOTE! Because of its unique ability, the Gargoyleosaurus moves its vitality marker up 1 additional space per adult generation when it recovers in a safe haven.
Example: your dinosaur group is on the starting tile at the beginning of your turn, which means you can move your vitality marker up 2 spaces.
Season board
The season board depicts the passing of time between the warm season and the cold season. Some of the spaces on the season board also contain icons that indicate certain actions:
- Drawing a season card: Draw a season card with the correct icon (warm season or cold season) and place it face up next to the season board. The effects listed on this card remain active until the season marker moves to the next season icon and a new season card is drawn. When you draw a new season card, place the old season card on the discard pile of that season. There can always only be 1 season card active at any given time. All season cards are described in "Season cards" on page 18.
- Plant growth: Replenish all food cubes on all landscape tiles in play, so the amount of cubes on each tile once again matches the amount indicated on the tile next to the food icon.
- Carnivores on the hunt: When the carnivore icon is depicted alongside another icon, all carnivores in the playing area move 1 tile in the direction of the closest dinosaur group. For this, the following rules apply:
- Carnivores can move diagonally as well. However, they will move horizontally and/or vertically as much as possible before they move diagonally.
- Carnivores only move if they can see a prey (a herbivore). The sight of a carnivore is listed next to the sight icon on the carnivore's card. This is the number of tiles that the carnivore can see around itself when looking for herbivores to attack. Example: sight 1 means that a carnivore can see all directly adjacent tiles. Sight 2 means that a carnivore can see all directly adjacent tiles and all tiles directly adjacent to those, et cetera.
- When carnivores see more than 1 herbivore, they move towards the herbivore with the lowest camouflage value. PLEASE NOTE! Landscape tiles can lower the camouflage value of your group. This can even result in a negative value.
- If multiple dinosaur groups within range have the same camouflage value, the carnivore does not move. PLEASE NOTE! The unique ability of the Camptosaurus can affect this (see "Unique abilities" on page 20).
- When carnivores move to a tile that contains herbivores while hunting, they can attack the herbivores (see "Carnivores" on page 16).
Mountain tiles and carnivores
Carnivores can't cross a mountain ridge when moving. However, you do not have to keep mountain tiles into account when determining which groups a carnivore can see, and carnivores can move diagonally to any tiles adjacent to the tile beyond the ridge.
Carnivores
There are also carnivores in the herbivores' habitats. When your group moves to a tile containing a carnivore or the carnivore moves to a tile containing your group, you must always immediately check if it attacks your group (regardless of whether it's your turn or not). You must do this before performing any other action. Whether a carnivore attacks your group or not depends on your camouflage value, your mass value and your intimidation value. You can find these on your dinosaur board and the carnivore's card.
PLEASE NOTE! If multiple dinosaur groups are attacked at the same time, deal with them in turn order. If there are multiple carnivores attacking you, you decide in which order this happens.
- Camouflage: your camouflage is an indication of how difficult it is for carnivores to see you. The higher your camouflage, the more difficult it is for carnivores to see you. Traits, abilities and landscape tiles can all affect your camouflage. After applying any bonuses or penalties, compare your camouflage to the carnivore's sight, which is listed on the carnivore's card next to the sight icon. If your camouflage is higher than the carnivore's sight, it will not attack you.
- Mass: your mass indicates how big your herbivores are. Traits and abilities can affect your mass. After applying any bonuses or penalties, compare your mass to the carnivore's mass, which is listed on the carnivore's card next to the mass icon. If your mass is higher than the carnivore's mass, it will not attack you.
- Intimidation: if your camouflage and mass are both equal to or lower than the carnivore's, you can only use intimidation to try and prevent an attack. The intimidation on your dinosaur board indicates how many dice you can roll. Traits and abilities can affect the number of dice. Compare your highest roll to the carnivore's intimidation. If your highest roll is higher than the carnivore's intimidation, it will not attack you.
PLEASE NOTE! Only the highest single dice result counts. Do not add up the results of multiple dice.
If a carnivore has a higher or the same sight and a higher or the same mass and you lose the intimidation roll, it attacks your group, and you lose the amount of vitality indicated on the carnivore's card. However, if your camouflage, mass or the result of your intimidation roll are higher than the carnivore's values, nothing happens and you are safe.
Figure labels on the carnivore card: Mass, Camouflage, Intimidation, Sight, Vitality loss.
Example: carnivores on the hunt
The Torvosaurus has a sight of 2 and sees the Camptosaurus, Camarasaurus and Dryosaurus. The Dryosaurus has 3 camouflage, but receives a penalty of 2 because of the landscape tile it is on. The Camptosaurus has 2 camouflage but also receives a penalty of 2 because of the landscape tile it is on. The Camarasaurus has 1 camouflage and receives 1 penalty. The Camarasaurus and Camptosaurus both have the same camouflage, which is 0, but due to the unique ability of the Camptosaurus, the Torvosaurus moves towards the Camarasaurus.
When the Torvosaurus enters the tile with the Camarasaurus later in the game, it is determined whether the carnivore attacks. This dinosaur group currently has 2 mass and 1 camouflage, the Torvosaurus has 5 mass and 2 sight. So the intimidation dice must be rolled to avoid the attack. The highest roll is 5, which is higher than the Torvosaurus's maximum intimidation, which is 4, so this player narrowly escapes the attack of the carnivore.
Sight grid for 2 sight (the printed diagram lists the following values for the example):
- Dryosaurus: 3 & -2 = 1
- Camptosaurus: 2 & -2 = 0
- Camarasaurus: 1 & -1 = 0
End of the Game
The game ends when a player has left 4 generations behind in the playing area. Finish the current round until all players have had an equal amount of turns. The player with 4 generation tokens in the playing area wins the game. If multiple players have 4 generations in the playing area, the player with the highest vitality wins. If that is tied as well, those players share the victory.
Season Cards
Warm season cards
- Quicksand: When you walk or migrate to a tile that contains water, move your vitality marker down 1 space. This includes the starting tile.
- Heatwave: When you perform the "growing" or "nesting" action, move your drink marker down 1 additional space.
- Forest fire: When you move or migrate to a tile with a forest biotope, move your vitality marker down 1 space.
- Rainy season: Place 1 food cube on all tiles containing a shrubbery biotope or a forest biotope. PLEASE NOTE! This must not exceed the maximum amount of food cubes listed on the tile.
- Sandstorm: When you move or migrate to a tile with a desert biotope, move your vitality marker down 1 space.
- Volcanic eruption: When you move or migrate to a tile with a mountain icon, move your vitality marker down 1 space.
Cold season cards
- Snowfall: When you move or migrate to a tile with a grass biotope or a desert biotope, move your food marker down 1 space.
- Extreme drought: When you move or migrate to a tile with a shrubbery biotope or a forest biotope, move your food marker down 1 space.
- Earthquake: Subtract 2 from your camouflage value.
- Frozen lakes: You may not perform the "drinking" action during your turn.
- Cold nights: Move your food marker down 1 additional space at the start of your turn.
- Rockslide: Do not move your vitality marker up when you're in a safe haven at the start of your turn.
Unique Abilities
- Camarasaurus, Unequaled heights: When the Camarasaurus removes a food cube from a tile with a grass biotope, you may move the food marker up 1 additional space. You can only activate this effect once per turn, at a time of your choosing.
- Camptosaurus, Flight behavior: When there is a tie in camouflage value between the Camptosaurus and 1 other dinosaur group when a carnivore is hunting, the carnivore will move towards the other group.
- Stegosaurus, Thermoregulating plates: The Stegosaurus is not affected by the effects of the season cards "Heatwave", "Snowfall" and "Extreme Drought". These cards show the Stegosaur icon in the top left of the card.
- Psittacosaurus, Careful adventurer: When you migrate with the Psittacosaurus, draw 2 migration cards instead of 1, and choose which card to resolve. Place the other card face down on top of the migration card deck. You do not have to reveal this card to the other players.
- Dryosaurus, Small and silent: During your turn, the Dryosaurus always receives +1 to its camouflage value.
- Gargoyleosaurus, Armored plates: When the Gargoyleosaurus has to lower its vitality marker due to a carnivore attack, lower the marker by 1 fewer space. This means that it will not lose any vitality if it has to lower the marker by 1.
Icon Overview Generation Cards
- You must move your food marker down an additional space at the start of your turn.
- At the beginning of your turn you may move your food marker 1 space up. This happens before you move your food and drink marker down.
- Add 1 to your dinosaur group's intimidation value. You can roll an amount of dice equal to your intimidation value during any intimidation attempt, regardless of which player initiated it.
- Move your drink marker 1 fewer space down when intimidating. This means that you only have to move your food marker down, because the cost for your drink marker is now 0. PLEASE NOTE! You can only use this reduction once per turn for each of these icons you have.
- Add 1 to your dinosaur group's mass value. Always add this +1 to your original mass value. Your total mass is calculated by adding up all +1 mass icons and your original mass.
- Your dinosaur group receives 1 additional move each turn. However, this move may only be used to perform the "walking" action, and not to perform the "migrating" action. You may use this additional move at any time during your turn.
- Your dinosaur group gets an extra move for using the "walking" action, but only if it is moved to a grass biotope tile.
- Your dinosaur group gets an extra move for using the "walking" action, but only if it is moved to a tile with water.
- Move your drink marker 1 fewer space down when performing the "walking" action. PLEASE NOTE! You can only use this reduction once per turn for each of these icons you have.
- Move your drink marker 1 fewer space down when performing the "migrating" action. PLEASE NOTE! You can only use this reduction once per turn for each of these icons you have.
- Add 1 to your dinosaur group's camouflage value. Always add this +1 to your original camouflage value. Your total camouflage is calculated by adding up all +1 camouflage icons and your original camouflage.
- Your dinosaur group has 2 additional camouflage as long as the group is on a tile with a safe haven.
- Recover 1 additional vitality for each of these icons when recovering in a safe haven.