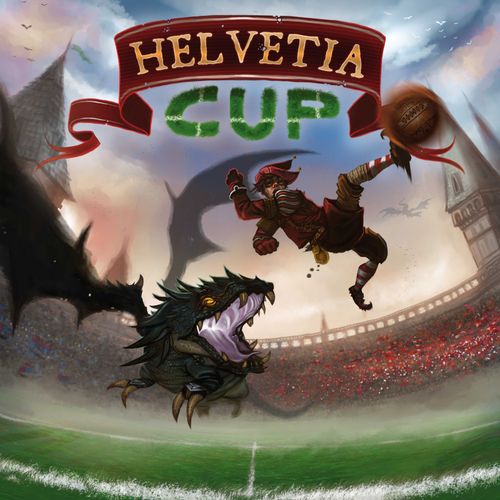
Helvetia Cup
Helvetia Cup Rulebook
Table of Contents
Table of Contents
Introduction
HELVETIA Cup is a game of simulation football set in a fantasy world. You play the role of a team coach to defy other coaches in epic games and magnificent championships. HELVETIA Cup blends tactical skill, strategy and luck.
HELVETIA Cup exists in two versions:
- a FAMILY version (explained on a separate double-sided page).
- a GEEK version (which is explained here).
In these rules, the player is called "coach", while the football player is called "player".
1. Contents of the Box
The box contains the equipment to play:
- 1 game board,
- 2 teams: the Madmen, the Dragons,
- 1 ball,
- 48 markers (cylinders): 40 BOOST markers, 8 yellow cards,
- 1 TOTOMAT tray with its time marker,
- 2 player's help cards,
- 1 time dice "D6" (6, 6, 9, 9, 9, 12),
- 1 Chafouin coin (head or tails),
- 2 dice (20 sided) "D20" (1 red, 1 green),
- 2 goals with its markers (8 black cylinders),
- the Family rules (one double-sided page).
Per team:
- 9 figurines (1 goalkeeper, 6 standard players and 2 captains),
- 1 packet of players cards,
- 1 packet of POWER cards,
- 1 team dice (1D6),
- 2 team tokens.
Presentation of Some Game Parts
The pitch
The board shows: the template of deviation, the penalty area, the point of penalty, the goalkeeper zone, the center of pitch, the off-side limit, the zone of shoot and the zone of outrun. Hexagons on the pitch carry numbers (1/3/6, 12/20, 2/7/13, 4/5/11, 8, 9, 10, 14, 15, 16, 17, 18, 19) that are used with the D20 result for the deviation template (see Long Pass).
The players
There are three qualities which define a player: his physique, his defensive competences and his offensive competences. You find this information on the player's cards.
- The football player's physical reserves represent his capacity to accelerate and to surpass his basic faculties. The inhabitants from Helvetia are all sensitive to a potion called BOOST which allows them to raise their capacity to move faster. At each movement, the player will lose a BOOST point and when all points are used up, he will no longer be able to move.
- Defensive competences define the quality of the player's defense. They are represented by 4 blue columns. The higher the values are, the stronger the player is in defense.
- Offensive competences define the quality of the player's attack, represented by 4 red columns.
There are three types of players in HELVETIA Cup:
- the players,
- the goalkeeper (marked by G),
- and the captains (marked by C on the player's card).
2. Geek Rules
2.1 Purpose of the Game
The games are between 2 teams composed of a goalkeeper, four players, two substitutes and a coach.
HELVETIA Cup can be played in two ways:
A single match. The winner is the team that scores the most goals in 90 minutes. In the event of a draw, there is additional time of 30 minutes. If there is still no winner then the teams have to go on to penalty shoots.
A competition. During a competition, a coach and his team play several matches. The aim of the coach is to make the most wins. At the same time he will have to maintain his team, avoid injury, improve physical condition with serious training sessions and of course avoid getting yellow or red penalty cards!
We suggest not using the POWER cards for the first games. The use of the LEGEND cards is also optional in a single match.
2.2 Setting Up
Each coach chooses a team and puts in front of him:
- the figurines and corresponding players cards,
- POWER cards and LEGEND cards for the chosen team (optional),
- a goal with its markers,
- his Team tokens,
- dices (1D20 as well as the team dice).
The game board is put down between both coaches; both goals are put on the back lines. They will be used during shoots by the coaches.
Yellow cards, TOTOMAT and BOOST markers are put down next to the game board. The ball is put down in the centre of the pitch and the time marker on the square O of the TOTOMAT. On the TOTOMAT, each coach puts a BOOST on O of score, and his team token on the free square which signals which team is on which side.
Each coach must choose 1 goalkeeper, 4 players and 2 substitutes (max. 1 captain per team). The other players are lined up in the box.
During a single match, the coach draws 5 POWER cards and chooses a LEGEND card. He then keeps three out of 6 and replaces the others in the box.
The corresponding player cards of the chosen players are laid down in front of the coaches. They put the BOOST markers on the players who start the match. The cards for the substitutes are put down behind the goal.
They toss the Chafouin coin to start the match. The winner of the toss chooses to begin in attack or in defense. In Helvetia Cup the attackers have possession of the ball.
The players of the team in attack are the attackers and the players of the team in defence are the defenders.
Placing the players. The team in defense begins by putting his goalkeeper in the goalkeeper's zone and 4 other players according to football regulations (each player on their own side of the pitch and no player in the centre circle). The attacking team then does the same, not forgetting to put a player with the ball in the centre circle ready for kick-off.
The overlapping hexagons on each side of the pitch are accessible to the players during the initial placement phase, each one of course remaining on his own side of the pitch.
2.3 Match Procedure
Rounds of the game. A round consists of two phases: the moves and the actions. The move phase allows the coaches to move their players. The action phase allows the defense to take possession of the ball and the attacker to try a pass, a shot or other action.
Order of a round:
- a) Attackers Moves; b) Defenders Moves
- a) Defenders Actions; b) Attackers Actions
A round immediately ends when:
- The team in attack decides not to make any additional action,
- The team in defense recuperates the ball. If this is the case, there is change of possession. The defending team go into attack and the attacking team go into defense.
Exception: at the beginning of a match, at the beginning of the second half or after a goal, the team in attack doesn't begin its round with a move but the player with the ball starts play by kicking off.
Change of possession. The defensive team goes into attack and inversely.
Length of a match and end of game. A match lasts 90 minutes. The TOTOMAT indicates the time and score. In case of a draw at the end of a match, there will be two overtime periods of 15 minutes each. If the score remains equal, there will be a session of penalty shoots to determine the winner.
At each goal scored and at each change of ball possession, the coach passing into attack throws the time dice and the Totomat time marker is moved according to the time indicated; 6, 9 or 12 minutes. When the marker goes over 45 min. the match is interrupted. The second half-time begins by placing the players as at the start of the match, the difference now being that the team who first kicked off goes into defense and vice-versa.
If the TOTOMAT indicates the 45th minute, the action continues, the half-time ends when the TOTOMAT is over 45'.
2.4 Moves
The coach of the attacking team can move all, some or none of his players, the coach of the team in defense then does the same. Every player can be moved one hexagon free of charge.
If the ball is on a hexagon without a player, it will be automatically taken by the first player arriving on this hexagon.
BOOST. If the coach wishes, he can then spend one or several BOOSTS to move a player, one hexagon per BOOST. The used BOOST is removed from the player's card and put back in the box. When a player has no more BOOST on his card, all his skills are divided by two (rounded off to the lesser whole number), and he is said to be exhausted.
Outrun. The hexagons on the wings allow the attackers to move faster. These hexagons are recognizable thanks to the muddy strip on the edge of the pitch. An attacker who ends his move on one of these hexagons can advance one more in the same direction free of charge. A BOOST cannot be used on an outrun. An outrun cannot be used by the team in defense.
Constraints of movements. There can be only one player of each team on a hexagon. Only the goalkeeper can occupy the goal area. If a player is on the ground, he can use his free move to get up again, and can then continue his move by using a BOOST.
Example: Berg R goes for free to (B). Bu S goes for free to (D) then goes for free to (E) thanks to the outrun hex. Stok Alp goes for free to (G) and spends a BOOST to go to (E). Brute Un doesn't move.
2.5 Actions
When the teams have ended their moves, the action phase begins. Contrary to the move phase, it is the defense team who first come into action, followed by the team in attack. An action is optional for both attack and defense. If the defense decides not to make an action it is then the turn of the attacking side. If the attackers decide likewise, it is the end of the round.
The team in defense can only make an action if one of its players is on the same hexagon as the player with the ball. A defender can only execute one action per round. The defender can try a defensive action:
- to steal the ball,
- to tackle,
- to obstruct his opponent by putting pressure on him.
The attacker can attempt an offensive action:
- to make a short pass,
- to make a long pass,
- to shoot.
All these actions are made with varying degrees of ease by the players according to their skills. The more competent the player is, the better the action will be. The action is considered successful if the result of the dice (D20) is smaller or equal to the corresponding skill, otherwise it is said to be a failure.
Reminder: if a player has no more BOOST, all his competences are reduced by half.
Defense actions
Stealing the ball. The simplest way to retrieve the ball is to try to steal the ball from the opponent. The attacker responds to this attempt by a dribble. To attempt to steal the ball, the defender must throw a D20.
- If he fails to steal the ball, the attacker keeps it and MUST move one hexagon free of charge.
- If he succeeds in stealing the ball the attacker MUST try a dribble by throwing a D20.
- If the attacker succeeds in dribbling, he keeps the ball and MUST move one hexagon free of charge.
- If the attacker fails his dribble, then the defender steals the ball and MUST move one hexagon free. There is a change of possession of the ball and the round ends.
Example: Stok Alp, who has 12 in Stealing the ball, wants to steal the ball from Berg R who has 14 in Dribbling. They are both in the hex (A). Stok Alp throws the dice and gets an 8. Berg R tries the dribble: he gets 15, his dribble is missed. Stok Alp gets the ball and moves for free one hex (B). There is change of ownership and the clock moves on.
Tackle. The second way to retrieve the ball is to attempt a tackle. Unlike Stealing the ball, the success of this action does not depend on the skills of the attacker, but it induces a risk of injuries and penalties. The coach throws the D20.
If the tackle is successful, the defender gets the ball and the attacker is knocked down. When a player is down, his figure is placed lying on the board to indicate this.
If the tackle fails there are two possibilities:
- If the D20 result is greater than 16, the tackle fails "miserably", the player did not even bother the attacker: the defender finds himself on the ground and the attacker keeps the ball.
- If the result of D20 is smaller or equal to 16, it is a foul. Both coaches throw their team dice to determine injury and penalty card. This is followed by resolution of the fault, and then the tackled team continues the game as the offensive team.
Cards (yellow or red color) apply to the defender, while injuries apply to the attacker. The color of the dice indicates a yellow card or red card. If the dice is yellow, place a yellow marker on the player's card. If the player in question already had a yellow card, then his second yellow becomes a red card. If a red card is given, the player must leave the field without being replaced.
Injuries result in the loss of one or more BOOST. The indication < 1 - 2 - 3 > on the dice gives the number of BOOST to be removed. They are immediately removed from the player's card. If the player's BOOST is down to zero and the dice indicates more to be taken off, the player is badly injured and must leave the field. The coach can replace him if he has not yet completed his two changes.
If, following an injury or a penalty, a team has only two players left on the field, it immediately loses the game by forfeit.
After a foul, a particular phase of moves is carried out as follows:
- An attacker MUST be in the hexagon where the ball is. If there is no player there, the coach MUST (this movement is free) place the player nearest the ball in the hexagon (the coach can choose in the case of equal distance between players).
- No defender may be in the hexagon.
The match continues with an offensive action.
If a fault occurs in the penalty area, there is a penalty. The ball is placed on the penalty spot. It continues with a move phase with the following restrictions:
- there must be an attacker on the penalty spot. If necessary the coach can put the nearest player onto it, free of charge;
- there must be no player in the penalty area; if necessary, a supplementary move of a free hexagon is authorized;
- the goalkeeper is placed in the goal area.
The attacker on the penalty spot shoots the ball.
Example: Stok Alp attempts a tackle on Berg R, who is in the same hex. Stok Alp has 9 for tackles, he throws the D20 and gets a 12. The result is less than 17 but greater than 9, so there is a fault. Both coaches throw their team dice. Stok Alp's coach gets a yellow face, Stok Alp is warned, he must be careful not to take a second card for the rest of the match. The coach gets a -2 for Berg R, Berg R loses two BOOST and ends up at -1. He is injured and must leave the field, his coach replaces him with Bü S by putting him on the hex where the ball is. Bü S is the one who plays the penalty. A move phase then allows all players to move. Bü S must then make an offensive action, he tries a long pass and the game continues.
Pressure. If a defender who is in the same hex as the ball carrier does not make any defensive action, he nevertheless exerts a pressure that will interfere with the ball carrier on his next offensive action. If the ball carrier makes an offensive action he automatically suffers a penalty whose value is equal to the pressure competence of the defender. No dice throw is required in the case of pressure.
A defender cannot put pressure on a short pass. If a defender tries an interception, he loses the chance of putting on the pressure thereafter.
Example: Stok Alp who has four in pressure decides to interfere with Berg R. Berg R tries a long ball to 16. The pressure from Stok Alp obliges Berg R to go down to 12 (16-4) to complete his action.
Offensive Actions
The player of the attacking team can perform an offensive action; if he does not, the round ends and we start a move phase.
Short Pass (1-2). A short pass does not require a dice throw. The ball is moved by 1 or 2 hexagons in any direction chosen by the coach. A short pass can be intercepted by a defender standing in the hexagon where the pass is aimed. To attempt an interception, the coach of the defending team throws D20.
- If the interception is successful, the defender takes the ball and must then move a hexagon; there is a change of possession.
- In case of failure of the interception or if no defender was in the hexagon where the pass was directed, the attacker receives the ball. The attacker can either stop his turn, or continue with a short pass, a long pass or a direct kick.
A short pass can be directed to an empty hexagon. In this case, the round ends. The team closest to the ball goes into attack. In case of equidistance, the attacking team stays in attack. If the defending team is closer, there is a change in possession.
Example: Berg R makes a short pass to Bu S who is in (B). Stok Alp, also in (B), tries an interception with a competence at 10. He throws an 8, the interception is successful; Stok Alp takes the ball and moves to (C). There is change of ownership and the clock moves on. The short pass, restricted to two hexagons max, could have been made to every hex marked with a 1 or a 2.
Long Pass. The long pass allows a long distance move. There is no limit to the number of hexagons. The attacker chooses a hexagon, which may be empty, and throws the D20.
- If the long pass is successful, the ball reaches the target hexagon.
- If the long pass is missed, the ball is deviated off course by one or two hexagons according to the template by applying the result of D20 used for the pass. Each coach uses the template visible from his side of the field. The ball never goes off pitch; it always stops on the last hexagon on the edge of the board.
Use of the template. The centre of the template represents the target hexagon. The ball may deviate by 1 or 2 hexagons in six directions. If the throw of the D20 is 16, 17, 18 or 19 (central areas of the template), the ball is deviated by one small hexagon. Otherwise it is deviated by two hexagons.
Example: Deg N tries a long pass aimed at Bü S who is located in the hexagon (A). Deg N has 10 in Pass. If the throw of D20 is smaller or equal to 10 the ball lands at A. If the throw of D20 is 18, the ball lands at (B) (deviation of a hexagon). If the throw of D20 is 11, the ball lands at (C) (deviation of 2 hexagons).
A long pass can finish up on an empty hexagon or on one occupied by one or more players. Four scenarios are possible:
- there is only one attacker in the destination hexagon, he can either:
- try a header if he is in the penalty area;
- end the round and continue with a move phase.
- there is only one defender in the destination hexagon, he gets the ball, there is a change of possession;
- there is an attacker and a defender in the destination hexagon, the defender may attempt a clearance by throwing a D20:
- if the kick is successful, the ball is deviated by one or two hexagons according to the template by applying the result on the dice. These four scenarios are applied again depending on the occupation of the hexagon where the ball lands;
- if the kick out is missed, the attacker automatically grabs the ball.
- if there is nobody in the destination hexagon, the round ends. The team closest to the ball goes into attack. In case of equidistance, the attacking team stays in attack. If the defending team is closer, there is a change of possession.
One cannot directly carry out a shoot following a pass. On the other hand, a header is possible following a long pass and a direct kick is possible following a short pass.
Example: Deg N (A) attempts a long pass aimed at Bü S who is in the hexagon (B). Deg N has 10 in Pass. He throws an 8, his pass is successful and lands in (B). Stok Alp who is in the same hexagon tries clearance, he has 10. He throws 3, the ball bounces 2 hexagons forward according to the template in front of him.
The Shoot. The shoot is a shot towards goal aiming to put the ball into the net! The shoot is allowed when a player is in one of the three shooting zones. The goal is divided into 6 squares. The success of a shoot depends on the skill of the player, his position on the pitch and the square of the goal aimed at. The further away the ball comes from, the easier it will be for the goalkeeper to stop it.
The lighter areas of the pitch represent the shooting zones. The number on the hexagon indicates the number of squares that the goalkeeper can choose. Shooting into a top corner is harder to do than a shoot into the center. Each of the six goal squares carries a malus (number to be deducted) printed on the goal square; these values are shown on the board/goal graphics only and are not reproduced in text in the rulebook (in the example below the top-corner square A has a -4 penalty).
During a shoot, the attacker secretly chooses one of six squares corresponding to the goal area in which he will shoot. The goalkeeper secretly chooses a number of squares equal to the number of hexagons that separate the shooter from the goal. These squares must be adjacent (not diagonal). Both coaches mark the selected squares, then they show them simultaneously.
- If the goalkeeper chooses the right number, he stops the ball. He seizes the ball and there is a change of possession.
- If the goalkeeper has not chosen the right number, the attacker launches the D20 to see if he can put the ball where he wants. The result of the dice must be less or equal to his shooting competence, minus the malus (number to be deducted) of the area aimed at according to its position in the goal.
- If he is successful, there is a goal, end of round and change in possession. After adjusting the score and time, we begin with a placement phase as at the start of the game.
- If he fails, the goalkeeper gets the ball and there is a change of possession, followed by a movement phase. The goalkeeper cannot move during this phase and has then to make an offensive action. If the defence goalkeeper had left the goalkeeper's zone, he can return to his place for free.
Example: Moné, who has 18 in Shoot, wants to try one, he is 2 hexagons from the goal. He secretly chooses square A (top corner) which has a -4 penalty. The goalkeeper, who has the right to choose two adjacent squares, chooses B and C. The two coaches reveal their choices. The goalkeeper goes the wrong way and can't stop the shoot. Moné launches D20, it's a 7, which is less than 14 (18-4), the ball reaches the net and it is a GOOOOOOAAAALLL!
Direct Kick. The Direct Kick is similar to the shoot, but it is performed after a short pass and therefore more difficult to achieve. A -4 penalty is applied to D20 for the shoot. The rapidity of the Direct Kick surprises the goalkeeper who has one square less to defend than for a shoot. It is thus possible that the goalkeeper has no choice of squares.
The direct kick is the only means of carrying out a shoot directly following a short pass without having to go through a new move phase.
Example: Brute One in (A) makes a short pass to Moné who has 18 in Shoot (B). He performs a Direct Kick. The goalkeeper has the right to choose only 1 square, however Moné has a -4 penalty for shooting ability, so he has 14 (18-4). The target square penalty must also then be applied. If Brute One had made a direct shoot, the goalkeeper would have been entitled to choose two squares. If Moné had been in (C), the goalkeeper would not have been able to choose any square on his goal.
Header. A Header is only possible after a long pass and the attacker must be in the penalty area. A header is resolved like a shoot but using the attacker's Header competence. A long pass can be made over 1 or 2 hexagons, if followed by a header for example.
2.6 Rule Precisions
Goalkeeper G. The goalkeeper is a full player. He can go out of his zone and, like any other player, perform defensive and offensive actions. He cannot stop a shoot however if he is out of the goalkeeper zone. If the goalkeeper is hurt, a field player replaces him. When this replacement goalkeeper saves a goal he can only choose one square of the goal whatever the distance of the shooter. He is thus penalised for his lack of experience. No other player can enter the goalkeeper zone.
Substituting players. Two players' changes at the most are allowed per match. The composition of the team decided before a match includes 7 players (1 goalkeeper, 4 players and 2 substitutes). A change can be made:
- After a goal: the coach can freely choose to change one or other of his players; he takes a player off a hexagon and replaces him with a substitute, on the same hexagon. He makes his move with the newly entered player;
- During the game: the player who is replaced must go to a hexagon at the edge of the pitch. He can then go off the pitch using a move or a BOOST. The player who replaces him comes onto the pitch on the same hexagon that the other player leaves by. The player who comes on cannot move on this round;
- After an injury: the injured player can be replaced; the substitute takes the place of the injured player (who goes off) wherever he is on the pitch.
A player who has been replaced cannot come back into the game.
Off-side. HELVETIA Cup applies the off-side rule only if one of the coaches asks for it. A player is off-side when:
- he hasn't got the ball; and
- he is on the opposition side of the pitch; and
- he is between the last defender (who is generally the goalkeeper) and the last but one defender;
- the off-side position is allowed in HELVETIA Cup.
If the pass is not directed forwards but behind or across, there is never off-side.
There is offside if a player is in offside position after a pass towards the opposing goal and he is the first player to touch the ball after this pass. If another player touches the ball before that, it cancels the offside.
At the moment when the attacker who was offside gets the ball, the opposing coach can shout "offside". There is change of possession, the attacker goes into defence. There is then a move phase with the following restrictions at the end:
- an attacker MUST be in the hexagon where the ball is. The coach can "bring" in the player closest to this hexagon for free (to be chosen by the coach in case of equidistance);
- there cannot be a defender in that hexagon.
Then the attacker who is in the hexagon with the ball MUST make an offensive action.
Example: Berg R in (A) makes a long pass for Bü S in (B). If the ball lands in (B) there is offside. Bü S (B) is closer to the goal than the last but one defender (C). If the ball arrives in (E) and (F) and Bü S takes over the ball from a defender, there is also offside. If the ball arrives in (D) and Bü S who was in (B) is the first to take the ball, there is also off-side. If Bü S had been in (D) or in (C), he would not have been off-side, even if the ball lands in (C), (D), (E) or (F).
Extra time and Penalty shoots. The extra time consists of two complete periods of 15 minutes each, whether there is a goal scored or not. The team who kicked off at the beginning of the match begins the extra time as the attacking team. If there is no winner at the end of extra time, there will then be a Penalty shoot out.
Only the players on the pitch at the final whistle can participate. If a player is exhausted, his Shoot competence is reduced by half. The team to shoot first is chosen by tossing the Chafouin coin. Each team kicks a series of three shots from the penalty point using three different players, designated beforehand. If at the end of this sequence there is still no winner, the shoots take place one by one until one team scores, and the other misses. A player cannot kick a second penalty before all the players of his team, including the goalkeeper, have had their turn.
2.7 POWER Cards and LEGEND Cards
The POWER cards and the LEGEND cards enable you, thanks to skilful coaching, to surprise your opponent and sometimes influence the course of a match. The cards are specific to each team. Each card is divided into several zones:
- the level of the card,
- the team,
- an image,
- a challenge zone for the POWER cards (used only in championships),
- the number of the card.
Reminder: in a single match, a team can choose 3 cards (two POWER and one LEGEND or three POWER). The use of cards is optional.
- The POWER cards are placed face down in front of the coach.
- The LEGEND card is placed face up.
The POWER cards can be used only once per match, so one has to choose the most favourable moment. After use, the POWER cards are placed back in the box. The detailed description of the cards for each team can be seen on the fourth cover of these rules (not included in the supplied PDF).
3. Competition
Even though the single matches already offer a good amount of excitement, it is the competitions, in cup or championship form, which offer the coaches the ultimate challenge. Throughout the competitions, the coaches will have to show their skill by managing not only the tactics and strategy during the matches, but also injury, penalty cards and team training. The Web site www.helvetia-cup.ch gives you various details concerning the competitions and allows you to create and manage them on-line.
Win: 3 points. Draw: 1 point. Loss: 0 points.
3.1 Evolution of the Team and the Players
During competition, the team and its players will evolve according to the following rules:
Fatigue. If a player has no more BOOSTS at the end of a match, he is said to be exhausted. An exhausted player, even if he is replaced before the end of the match, will begin the next match with one BOOST less than his usual physical level.
Injury. If a player has no more BOOST but the team dice or a POWER card still requires him to remove one or more BOOST, the player is then injured. In the event of injury, the player misses the next match. At the following match, the coach must check if the player is able to play. He throws his team dice: if the dice shows a red card, the player cannot play yet, he is not yet fully recovered; this process is repeated at the following match, and so on until the player is fit enough to regain the team.
Penalty Cards. During the match, the players can be given cards. If a player receives 2 yellow cards or a red card during a match, he is sent off the pitch and will be suspended for the following match. If the player who receives a red card has already received a yellow card during the match, the effect is the same: the player cannot play the next match; the markers are put back to zero once the suspension is purged. A yellow card remains active for the duration of the competition. So if a player having already received a yellow card at a preceding match receives a new yellow card, he will be excluded from the next match, the markers are then put again to zero.
Don't forget to mark the penalty cards, injuries and exhaustion on the match sheet.
POWER and LEGEND cards. The LEGEND cards are available from the beginning of the competition. Only one LEGEND card is allowed per match. Each LEGEND card can only be used once per competition.
The coach can acquire POWER cards either by assiduity in training, or by tenacity in fulfilling certain challenges during the matches. If the coach manages to carry out the challenge or decides to use his training sessions to acquire a new technique, then he can add the corresponding card to his deck of POWER cards for the rest of the competition. At the beginning of the matches, the coach can choose 3 POWER cards from the cards on his deck.
Training. Between competition matches, a coach has three training sessions. The level of the card indicates the number of training sessions necessary to acquire it and add it to his deck.
Example: after three training sessions, the Zion coach can get 1 card level 3 or 1 card level 2 + 1 card level 1 or 3 cards level 1.
The Challenge. Before the match, a coach can choose one POWER card that he hasn't yet got on his deck and try to play the challenge during the match (for example, "make 3 shoots"). If he succeeds, he gets the card and puts it on his deck. As for the LEGEND cards, the challenge is put face up on the table, before the beginning of the match.
3.2 Creating a Competition
The coaches choose the kind of competition. Any type of competition is possible but the two great classics of HELVETIA are the Cup and the Championship:
- the CUP is a competition with direct elimination. The matches are played with extra time of 2x 15 minutes in the case of a draw, and a penalty shoot out if the score is still equal after extra time.
- during the CHAMPIONSHIP, each team plays twice against each of the other teams in matches of 90 minutes without extra time. A win earns three points, a draw one point and a defeat zero points. The team with the most points is the winner!
Each coach chooses a team and gives it a name that shall be written on the Team sheet.
3.3 Before the Match
Before each match the coach is entitled to three training sessions which enable him to add cards to his deck. The coach checks if the injured players are ready to return to play and updates his Team sheet then chooses 1 goalkeeper, 4 players and 2 substitutes, taking account of the injuries and penalty cards. Reminder: only one captain in each selection.
The coach chooses 3 POWER cards from his deck, and maybe 1 LEGEND card. Then the coach chooses a challenge and puts the corresponding POWER card face up in front of him.
3.4 During the Match
The match proceeds in the same manner as a single match. However each coach notes on his team sheet the penalty cards and injuries of his players.
The team who wins a match by forfeit notes a result of 2-0 except if the score was higher before the interruption; if this is the case then it is the score obtained before interruption which is noted.
If the coaches so wish, they can note the statistics of the match on the match sheet (available on the www.helvetia-cup.ch site). This allows the follow-up of the actions of the match and the collection of the season statistics in order to know for example the best striker, the player who received the most penalties etc.
3.5 After the Match
Each coach also notes on the Team sheet the players who finished exhausted. At the end of the match, if the team succeeded its challenge, the coach can add the corresponding POWER card to his deck by marking it on his Team sheet. If he did not succeed his challenge, he cannot add this card to his deck. Lastly, do not forget to enter your statistics on the HELVETIA Cup site!
Player Card Details
A player card shows: C = Captain, G = Goalkeeper, the version, the team armorial, the name of the player, the number of the player, Attack, Defence, and the Boost reserve.