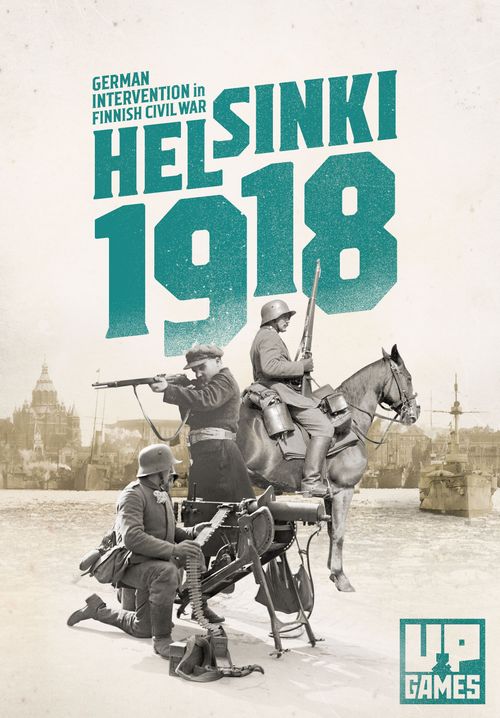
Helsinki 1918: German Intervention in the Finnish Civil War
Helsinki 1918: German Intervention in the Finnish Civil War Rulebook
Table of Contents
Table of Contents
Game Basics
The battlefield and terrain
The battlefield represents Helsinki centre and outskirts. Each hex is approximately 300 meters. The hex terrain type is determined according to the terrain which covers the largest area of the hex.
Dice
The game uses six sided dice (D6) for all die rolls.
Army pieces
There are two types of army pieces: units and HQs. Each unit marker, a stick, represents approximately a company sized force. HQ markers, cubes, represent the headquarters and commanders of the battle groups. White HQ markers are referred to as squads because they do not represent only officers but also other White underground forces gathering at the same location and preparing to join the battle.
Cards
The game has four different card decks: German support cards, Reds support cards, Reds event cards and Whites activity cards.
Scenarios
If the players are not familiar with Battle of Helsinki it is recommended to read the background of the battle and the plans of each side to get an idea of the roles for the players.
Three player game
In a three player game each player takes command of one of the following sides: Red Guards, White Guards and Germans.
Two player game
In a two player game one player plays Germans and Whites. The opponent will play Reds. The following changes are applied to the victory rules:
- The Red player draws three Reds' event cards instead of two.
- The German/White player victory is considered as a major victory only if the result is "shared victory", otherwise it is a minor victory.
Germans & Whites
Germans and Whites are not considered to be opponents in the game. In the rules they are considered to be "friendly" to each other. They can move into the same hexes as long as the stacking rules are fulfilled. They cannot attack against each other. White units cannot take part for German orders nor can Germans take part for Whites orders.
Game Setup & Preparations
Reds' secret events
The Red player randomly draws two cards from the six "Reds' event cards". The rest of the cards are discarded and not used in the game. The two drawn cards are not shown to other players before being played.
Card decks
White Activity card deck, Red Support card deck, and German Support card decks are shuffled.
German unit setup
The German player places three units into the Abteilung Meurer box and another three units into the leftmost hex of the Tikkurila box, in the upper right corner of the map. Eight units and three HQs are set up in the main battlefield in the marked hexes near the north-western edge of the map. 12 units are placed in the German Reserves box.
White unit setup
Eight white squad markers and six units are placed in the White Reserves box.
Red unit setup
One red unit is set up in Tikkurila box, in the hex containing the railway. One HQ marker is placed in each of three hexes with Red HQ symbols. 15 Red units are placed on the battlefield in the hexes with Red unit symbols. Eight units are placed in the Red Reserves box.
Markers
- A black marker is placed in the first square of the time track (15:00).
- A red marker is placed in the Red Morale track at the highest square of morale level 3.
- A black marker is placed in the first square (0) of the Abteilung Meurer arrival track.
- A black marker is placed in the second square (1) of the German Division HQ track.
- A black marker is placed in the first square of the Tikkurila track.
- A white marker is placed in the first square of the White Activity track.
Editor's note: the printed setup refers to numbered callouts that point to positions on the game map. Those callout numbers are map references only and are omitted here. Minor typographical errors in the printed text ("One red units", "a a road", "the the arrival", "initiaitve") have been corrected.
Turn Order
Instead of a fixed turn order the players play turns in a random order throughout the game. These turns are called initiatives in the rules. During an initiative the acting player gives and executes orders.
Initiative roll
To determine which player gets an initiative to play, the Red and German players each roll a die. If a player has won the previous initiative one is reduced from the die score. The player with highest score gets the initiative to play and is called the "active player". If the results of the dice rolls after modifiers are equal the White player gets the initiative.
The active player receives command points according to the following rules and executes orders with these points. No points can be stored for later initiatives. Also other players have actions which they perform during an opponent's initiative.
First initiative
The initiative dice are not thrown for the first initiative of the game. The German player receives 4 command points to play in the first initiative. The Red player draws one support card at the beginning of the first initiative.
Germans' initiative
When the German player wins the initiative the steps below are performed in this order:
- If the Red player's initiative die score after modifiers is equal to or lower than the Reds' morale value, then the Red player draws a card from Red deck.
- If the marker on the Abteilung Meurer arrival track is no longer in square 0 and it is not a night turn the German player rolls for Abteilung Meurer arrival.
- If there are command points in the Tikkurila track, the German player may use these to execute orders in Tikkurila.
- The German player receives command points equal to the German die result rolled for the initiative (including modifiers) and can use these points to give orders shown in the Order Table. The German player can also use the points in the Division HQ track as a command point.
Reds' initiative
When the Red player wins the initiative the steps below are performed in this order:
- The German player chooses one of the following at the beginning of Reds' initiative:
- Add one command point to Tikkurila (move the marker one square forward in the track).
- Move the Abteilung Meurer arrival marker one square forward in its arrival track, unless Meurer is already disembarked in Helsinki.
- Add one point to the German HQ (move the marker one square forward in the track).
- The White player may choose to perform one of the following:
- Draw a card from the White Activity deck.
- Discard one card from the hand (the card is not shown to the other players) and draw two new cards from the White Activity deck.
- On April 11th (1st day of the battle) the Red player receives command points equal to the difference between the German and Red initiative dice (including modifiers). Subsequently the Red player receives command points equal to Red die result rolled for the initiative (including modifiers). The Red player can use these points to give orders shown in the Order Table.
Whites' initiative
When the White player wins the initiative the steps below are performed in this order:
- The White Activity marker is moved one square forward on the White Activity track.
- The White player gets command points (1-3) according to the White Activity track. The White player can use these points to give orders shown in the Order Table.
- At the end of the White players' initiative all players add their discard piles back to their respective decks and shuffle them.
Time
The passage of time in the game is recorded in the time track at the top of the map. During the day each step in the track is 15 minutes and during the night the steps are one hour each. Every time the German player uses a command point - except those in Division HQ or Tikkurila track - the time marker is moved one square forward (for each expended Command Point) at the beginning of the order. If a time marker moves to or through a night square (black background), the night rules are in effect.
Night
The following rules apply during night.
- -1 die roll modifier to the attacker's battle dice.
- -1 die roll modifier to deployment and recruitment rolls.
- Minor roads are not considered as roads for Germans.
After a German order during which the time marker is moved to or through 0:00 square the Red player must make an out of command test for each unit whose current status is out of command. If a unit passes the test it remains in its position. If a unit fails the test it is disordered and must roll another die according the disorder rules (retreat check is ignored) and check if it is destroyed or put back to the reserve.
Destruction of units at this point represents Reds who have no contact with their commanders during the night deciding to leave the war or just go home.
Unit Status
Each unit has one of the following statuses: in direct command, in command or out of command. The status is determined according to the unit's position with respect to its own HQ position. White squad markers are counted as HQs when determining White units' status.
In direct command (IDC)
A unit is considered to be "in direct command" if it is in the same hex as its own HQ, or its HQ is in the vertex of that hex.
When a move, battle or regroup order is given for an in command unit, all friendly units in the hex may perform the same order with the same command point.
In command (IC)
A unit is considered to be "in command" if it is in a hex which contains a road (inc. minor road) or a railway which leads to a hex which contains or the vertex of which contains its own HQ. For unit status determination all city hexes are considered to be road hexes and to have a road to each edge of the hex. This means that adjacent city hexes have road connections between them.
The route cannot be drawn through the following hexes:
- A hex containing an enemy unit.
- A hex adjacent to an enemy unit unless the hex contains a friendly unit or the HQ is in the vertex of the hex.
- Only Germans: A city hex unless that hex contains a friendly unit.
Out of command (OOC)
Those units which are not "in direct command" nor "in command" are considered to be "out of command". When an OOC unit is ordered to move, battle or regroup the player must make an "out of command test" after the player has made the decision to spend the command point for that order.
Out of command test
The player rolls a die. If the result is higher than the number of hexes from the unit to the closest hex where the unit would have "in command" status (but not in a hex containing opponent unit), then the test is passed and the unit can perform the order.
If the test is failed, then the command point is lost and the order is not performed. The player may still attempt to give the same order again if there are command points left. The path between the OOC unit and IC hex cannot go through a hex containing enemy units (but can go through or to adjacent hexes). A die result of 6 always passes the out of command test.
Reds' Orders
The Red player can perform the following orders on the Reds' initiative. The orders and their effects are shown in the Red's order table on the game map. Each order costs one command point and the player can give the same order more than once during the same initiative. A unit can be given any number of orders during the same initiative.
Morale
Increase the morale of Red side by inspiring men (and women) to fight for the Revolution and against "the White butchers" (a term used by the Reds for Whites).
The Red player rolls a die, adds the die roll modifiers (for Tikkurila and flags) and applies the result shown in the Order table on the map (the morale marker is moved upwards in the morale track). The morale marker cannot be moved to a square containing a Red casualty.
Recruitment
The Reds recruit and force people to arms to defend the capital of the Red revolution.
Recruitment orders can be given only if there are units in the Red reserve box. The Red player rolls a die and adds the modifiers (from Tikkurila). The results of recruitment are shown in the Order table on the map. Either no new unit is formed, a new unit is formed in a direct command position or a new unit is formed in any hex where it will be in command. IDC or IC status must be fulfilled only after the unit is placed. The new unit is moved from the Reserve onto the game map. A recruited unit cannot be placed directly into combat.
Movement
To give a movement order the player must first declare which unit (or units if in direct command) is ordered to move.
If the status of the ordered unit is "in direct command" all units in the hex can be moved with a single order. These units can even be moved into different directions as long as none of them are entering battle.
If the status is "in command" the unit can be moved by using one command point per moving unit.
If the status is "out of command" then the player must make an out of command test to move the unit.
Movement is handled according to the movement rules.
The player can use multiple points simultaneously for a single hex to move multiple IC or OOC units at the same time (for example to a battle).
Battle
A battle order can be given to units which are already in the same hex with enemy units. The player can use multiple points to simultaneously order multiple IC or OOC units to battle in the same hex at the same time. For "in direct command" units a single battle order can be used to cause any or all of the units to battle in the same hex.
If the battle order is given to a hex in which units are "out of command" the player must first choose which units take part in the battle and spend the command points and after that make an out of command test for each of these units to see which units actually will perform the battle order.
Arrest Whites
The Red player may try to arrest White squads on the map. If a Red unit is in a hex the vertex of which contains a White squad marker the Red player can give an arrest order. The Red player announces which squad marker will be the target of the arresting attempt and rolls a die. The modifier from the White Activity track is added to the die value. The outcome of the arrest action is shown on the Order table on the game map. If the Red player manages to arrest a White unit it is put into the arrested Whites box and the White Activity marker is moved one square leftwards on the track. The White player cannot use the arrested squads any more in the game.
Whites' Orders
The White player can perform the following orders on the Whites' initiative. The orders and their effects are shown in the Whites' order table on the game map. Each order costs one command point and the player can give the same order more than once during the same initiative. A unit can be given any number of orders during the same initiative.
Organise a squad
Paramilitary members of White Guards try to gather in secret in an apartment to form a squad.
The player chooses a city hex vertex which contains a yellow or blue symbol. The player rolls a die and reduces one from the result if a Red unit exists in a hex touching that vertex. The game map contains a chart which shows the outcome (either a White squad marker is placed in that vertex, in an adjacent vertex or the attempt is failed). The attempt is also failed if the vertex already contains a squad marker or the position of the squad marker is shifted to a vertex which does not contain a yellow or blue symbol. No new squads can be organized if there are no squad markers left in the White's Reserve box.
Form a unit
White squads try to come to streets and form a unit.
The player chooses a hex which does not contain any Red unit and rolls a die. If the die result equals or is lower than the number of White squad markers touching that hex, a White unit is placed in the hex. No new units can be formed if there are no units left in the Whites' Reserve box.
Movement
The White player uses the same rules for movement orders as the Red player.
Battle
The White player uses the same rules for battle orders as the Red player.
Germans' Orders
The German player can perform the following orders during the German initiative. The orders and their effects are shown in the Germans' order table on the game map. Each order costs one command point and the player can give the same order more than once during the same initiative. A unit can be given any number of orders during the same initiative.
Draw a support card
The German player draws a card from the support card deck. If there are no cards left in the deck, the player cannot draw a card.
Deployment
The German player can deploy units from the reserve box onto the game map. To deploy a unit the player rolls a die and adds the modifier shown in the Reserve box's rightmost column containing a unit. The result of the deployment order is shown in the order table on the map. Either no new unit manages to deploy, a new unit can be deployed from the reserve to "in direct command" position (next to a HQ), or a new unit can be deployed to "in command" position. A deployed unit cannot be placed in a battle, but can be placed in a hex which will fulfill IDC or IC rules after the unit is set up. The new unit is always taken from the rightmost column of the Reserve box.
Only HQs which have a road or railway connection from the hex the HQ is touching to the west edge of the map can be used in deployment to fulfill IDC and IC status. The same rule applies for the route as when determining the road connection between HQ and IC unit.
Regroup
The German player can regroup units on the battlefield back into the Reserves box (to be again available for deployment later in the game). The ordered unit is removed from the map and put back into the German Reserves box in the leftmost column which has a free square available.
A regroup order can be given to IDC, IC and OOC units on the battlefield (not in the Tikkurila or Meurer box), but not in a battle. If the order is given for an IDC unit all the other units in the same hex can be moved to the Reserves box at the same time using just that one order.
Movement
The German player uses the same rules for movement orders as the Red player.
Battle
The German player uses the same rules for battle orders as the Red player.
Movement
Unit movement
When a unit is given a movement order it can move a certain number of hexes (from a hex to an adjacent hex). Each terrain type has a movement value shown on the Terrain table. That value is the maximum number of hexes the unit can move after a movement order when moving through or into that type of terrain. If a unit moves through or into several different terrain types the lowest movement value is used.
The terrain type of the hex where the movement begins is not taken into account.
HQ movement
Only German HQ-markers can move. If a HQ is ordered to move, no other units or HQ can be moved with the same order.
The ordered HQ is first shifted from the vertex into one of the three hexes touching that vertex. Then the HQ is moved according to the unit movement rules. The HQ can never move into a hex containing enemy units. When the movement is finished the HQ is then shifted into one of the vertexes of the hex, but not into a vertex of a hex containing only opponent units.
An HQ can never move into a vertex which is in water.
Water
A unit cannot move from a hex to another hex if the edge between these hexes is fully in water (marked with blue dots) unless there is a bridge (a road connection) between these hexes. Rivers/streams inside the hexes have no effect for the game.
Road movement
If a unit starts the movement in a hex containing a road (or a railway) and moves its whole movement along that road, then the road movement value is used instead of the terrain movement value. Road movement cannot be used in city hexes except if the movement begins in a city hex, but all other hexes are non-city hexes.
City hexes
Germans and Whites have a movement value of 1 in city hexes, but it is increased to 2 if the first move is through a hex which contains a friendly unit.
Stacking limit
Each hex can contain up to three friendly units. HQs are not counted for stacking limits. German and White units in a same hex are counted for the same stacking limit.
A vertex can contain only one German HQ-marker or one White squad marker.
Moving into a hex containing opponent units
If a unit/units are moved into a hex containing opponent units, but not friendly units, the movement is finished and a battle occurs immediately. The opponent units in the hex are turned to face the hex edge from where the attacking units arrived. The moved units are aligned in the same hex facing towards the opponent units. After the facing is set up the attacking units must immediately battle against the defenders in the hex. This battle roll is compulsory and does not expend command points. The facing of units in the hex will not be changed before either side leaves the hex.
Moving into an existing battle
A unit/units can be moved to reinforce an existing battle (a hex where there are units from two opposite sides). If they arrive from one of the three hexes behind the friendly unit facing they arrive as a reinforcement and do not generate a new battle roll. The facing of the existing units in the hex remains the same and the new unit(s) aligns with the same facing.
If the unit(s) arrives from one of the three hexes behind the enemy unit facing a battle roll occurs immediately as a flank attack with the following rules:
- The facing of existing units is not changed.
- The existing attacker units in the hex do not take part in the battle.
- The attacker gets +2 die roll modifier if the attack comes from directly behind the attacker's facing, otherwise +1.
- Retreat modifiers do not apply.
- A defender unit which must retreat is disordered instead of the retreat.
- After the battle resolution the attacking units move back to the hex from which they arrived into the battle.
Moving out of existing battle
A unit which starts its movement in a battle can move only one hex and the move must be into a hex into which the unit could retreat from the battle (see retreat rules in the battle section).
HQ alone in the same hex with opponent
If after movement or battle a Reds HQ marker is alone in a hex containing an opponent unit, the HQ marker is removed from the game.
If after movement or battle a German HQ marker is in a vertex of a hex containing only a Red unit then the HQ must immediately move into another vertex of the hexes it currently touches. If there are no vertex available to avoid a similar situation then the HQ is destroyed and removed from the game.
White squad markers remain in their position even if a Red unit is in the hex touching the vertex. These markers can be only removed by the Red's arrest order.
Fortifications
A unit adjacent to a fortification hex containing an opponent unit cannot move into another hex if that hex is also adjacent to a fortification hex containing an opponent unit unless attacking such a hex.
Battle
A battle (action) occurs either when a unit moves into a hex containing an opponent unit, when a player gives a battle order to continue an existing battle, or a player uses a card which initiates a battle. Battle is always resolved immediately when it occurs.
The player performing the battle order (or the movement order ending into a battle) is the attacker and the opponent is the defender.
Battle dice
Both players roll a certain number of battle dice. The defender always rolls one battle die. The attacker rolls a number of battle dice equal to the number of attacking units (1 to 3). The attacker keeps the highest die result and discards the others. The players add/reduce modifiers from their die value. There are three types of modifiers: retreat modifiers, flank attack modifiers and modifiers from any cards played for the battle.
Retreat modifiers
The three adjacent hexes behind a unit are referred to as retreat hexes. A player gets a -1 modifier for each of these hexes if the hex contains an enemy unit or is otherwise blocked for retreat (for example off map or the terrain cannot be moved into - for example water). In a battle which occurs at the end of a movement order the attacker does not suffer modifiers for blocked retreat areas.
Terrain defence value
Each terrain type has two types of defence values. These values are shown on the terrain table on the map. The first defence value (M) is used for a battle which occurs after the movement or if a battle action occurs as a card event. The second value (B) is used for an existing battle which is continued with a battle order. If a unit moves into a hex containing an existing battle, then the second value is used.
If the defender's die result after modifiers is lower than the terrain defence value, then the die result is increased to equal the terrain defence value.
Battle resolution
The player whose die result was lower than the opponent result loses the battle roll. The battle effects for the loser are determined according to the difference of the winner's and loser's final die results, see the battle effect table. The effects are determined using the centre column, unless the following modifications apply.
The effect is applied only to one unit unless otherwise noted (i.e. "retreat" affects a single unit, "retreat all" affects all units).
The German player may choose to spend one command point from the Division HQ track (also for Tikkurila) to shift battle effects one column to the left or right.
If the Red player lost a battle they can choose to expend a morale point (by moving the marker in the morale track one square downwards) to change the result by shifting one column to the right on the battle effects table. The Red player makes this decision after the German player.
Command and morale points cannot be used to change battle effect column if the player's unit in the battle is out of command.
If both sides retain at least one unit in the hex after the loser's effects are applied then the battle is not finished and is continued later when either side gives a battle order to the units in that hex.
Retreat
A retreating unit must move into one of the three adjacent hexes behind the unit (retreat hexes). It cannot retreat into a hex containing opponent units. If a unit cannot perform a retreat then it is destroyed. If a retreat is blocked because of the stacking limit all retreating units are disordered.
Disorder
A disordered unit must first perform a retreat (to check if it is destroyed) and then be removed from the battlefield and put to the Reserves box. A Red player must roll a die for a disordered unit. If the die result is higher than the Reds' morale value the unit is destroyed instead of being disordered (this simulates men unwilling to continue fighting).
Destroyed
Destroyed units are removed from the battlefield.
Destroyed Red units are put into the Reds' morale track filling it from top to bottom. If the Red morale marker is in the same square as the destroyed unit is placed then the morale is immediately moved one step down.
German destroyed units are placed on the time track, each taking up the space of three unoccupied time squares from the end of the track.
White destroyed units are just removed from the game.
Attack over a bridge
If the attacker used a bridge to move into a battle (at the other end of the bridge) and at least one opponent unit remains in that hex after the battle the attacking units must retreat back to the hex at their end of the bridge.
Combined defence
If the defence consists of both White and German units then the loser effects are first applied to a German unit.
Cards
Each card contains rules explaining when and in which situation the card can be played. After a card is played it is put into a discard pile face down (each player has their own discard pile) unless there is a rule which removes the card from the game.
If the card deck runs out of cards a player will be unable to draw new cards before the discard pile is shuffled back into the deck during the White's initiative.
Some cards can be played to improve the battle situation before the dice are thrown. The attacker plays their cards first and then the defender.
Some cards can be played after the battle roll. Such cards are played first by the defender.
The Battle of Tikkurila
The Tikkurila box contains three hexes separate from the main battlefield and represents the battles in the town of Tikkurila for the control of the railway connection to north of Helsinki.
The following rules apply for the Battle of Tikkurila.
- Destroyed units are put to the morale track and the time track according to the battle rules.
- At the beginning of the German initiative the German player can play command points from the Tikkurila track. The Germans cannot use other command points for orders in Tikkurila. The Germans can give move and battle orders in Tikkurila.
- The Reds can use their command points for Tikkurila during their initiative.
- Neither player can give orders in Tikkurila during night.
- All units have IC status in Tikkurila.
- No retreat modifiers are applied.
- Units retreating off map are destroyed.
- Any disorder result is changed into a retreat result, but Reds must still make the test for being destroyed.
- If only German units exist in the railway hex then Tikkurila is in German control.
- If only Red units exist in the railway hex, then Tikkurila is in Red control.
Abteilung Meurer
Abteilung Meurer represents the German naval task force which disembarked in Helsinki harbour.
After the arrival marker is moved off the arrival track square 0 then at the beginning of each German initiative the German player rolls a die for the arrival of the Abteilung. If the die result equals or is lower than the number in the square where the marker is, the naval forces disembark in Helsinki. Three units from the Meurer box are placed into the arrival hex (marked with an arrow) and the arrival track marker is placed as a fourth German HQ into one of the vertexes of the arrival hex. If the arrival hex contains Red units they are disordered. The German HQ can be placed into a vertex in water, but when first moved it must fulfil the movement rules and cannot anymore end up in water. After disembarkment Meurer's units can be ordered like other Germans in the battlefield.
The End of the Game
The game ends immediately if either of the following events occurs:
- The time marker is to be moved but it cannot be moved forward because the time track has ended or because the next square contains a destroyed German unit. In this case the attack has advanced too slowly and with too many casualties. The German commander decides to halt the attack and regroup. Reds Victory.
- The Germans and/or Whites control all the five hexes with the red flag symbol (i.e. there are no Red units in those hexes). Whites and Germans Victory.
Red Guards major victory
The Reds have units in at least two flag hexes and one HQ on the map.
The German attack has advanced too slowly and with too many casualties. The German commander decides to halt the attack and regroup. This will give time for Red Guards to plan their further actions (to either strengthen Helsinki or evacuate the remaining units).
Red Guards minor victory
The Reds have units in at least one flag hex.
The Red command is scattered, but during the following weeks in Helsinki is full of chaos and skirmish warfare. The Revolution is not going to last in Helsinki, but local Red guards have a better chance in peace negotiations.
White Guards minor victory - Germans major victory
The Germans have destroyed all three Red HQs.
The Germans have reached their original plan to take control of the capital city of Finland. They will have a good chance to turn Finland into a vassal state, but further events of the Great War will determine much of the future.
White Guards major victory - Germans minor victory
The Whites destroyed at least one Red HQ. In addition they have at least four units in three or more flag hexes or in hexes adjacent to them.
The Red Revolution is defeated by the Whites. They have reached their original objective to conquer the center of Helsinki with their own forces to improve their position for further political negotiations with Germans.
Germans and Whites share the victory
If neither Germans nor Whites fulfil the major victory then the victory is shared.
Editor's note: the printed rulebook carries a "Reserved for errata" box on its last page, and the credits block (designer, graphics, historical and playtest acknowledgements) is omitted here as attribution. The Order tables, Terrain table and Battle effect table are printed on the game map and are not reproduced in this rulebook.