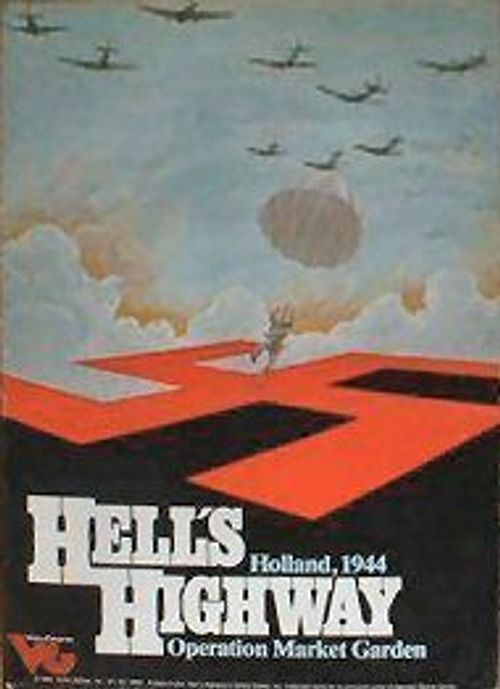
Hell's Highway: Operation Market Garden
Hell's Highway: Operation Market Garden Rulebook
Table of Contents
Table of Contents
- 1.0 The Game Map
- 2.0 The Playing Pieces
- 3.0 The Sequence Of Play
- [3.1] Weather Phase
- [3.2] Resupply Phase
- [3.3] The Allied Air Phase
- [3.4] Allied Command And Communications Phase
- [3.5] Allied Bridge Repair Phase
- [3.6] Allied Movement Phase
- [3.7] Allied Player Attack Phase
- [3.8] German "-1" and "-2" marker removal phase
- [3.9] German Air Phase
- [3.91] German Command And Communications Phase
- [3.92] German Bridge Destruction Phase
- 4.0 Controlling Hexes
- 5.0 Movement
- 6.0 Stacking
- 7.0 Combat
- 8.0 Artillery
- 9.0 Headquarters Units
- 10.0 Supply
- 11.0 Bridge Demolition And Repair
- 12.0 Airpower
- 13.0 German Reserves
- 14.0 Allied Reinforcements
- 15.0 The Game
1.0 The Game Map
The four maps together portray the area of German occupied Holland where the Market-Garden campaign occurred.
The game map is based on maps drawn in 1943 by the U.S. Army Map Service. Each hex represents an area 1250 meters across.
The four maps are arranged as follows (northwest to southeast): EIN, ARN (top row), AS, GR (bottom row).
A hexagonal grid is superimposed over the terrain features to aid the placement and movement of the playing pieces. Each hex has its own four-digit identity number.
[1.1] Terrain
The terrain symbology used on the map is as follows:
(a) woods - green (ARN V20) (b) rough - brown (ARN HH8) (c) broken - orange (ARN V18) (d) clear - white (ARN AA16-BB15) (e) river - blue hexside (ARN O17-O18) (f) canal - thick blue hexside with a thin black border (ARN Y16) (g) major road - thick red line (ARN X20) (h) minor road - thin black line (ARN AA16-BB17) (i) town - three small black cubes (ARN Z20) (j) city - large black shapes with a few small black cubes (ARN BB17) (k) bridge - any place where a road crosses a river or canal (ARN CC21-DD20) (l) ferry - thin black line with a small black ball at either end crossing a river hexside (ARN Z13-AA13) (m) hilltop - hex totally surrounded by brown hexsides (ARN EE16)
Certain hexes along the mapedge form German Entry Zones, each of which contains two to six Entry Hexes from which German units may enter or leave the map. Each Entry Zone has an identity code. Example: E12, N7 etc.
[1.2] Supply Tracks
There are a total of seven supply trracks, one for each command (except the British XXX Corps) in the game. These are used to record the current number of supply points each command has. The number of points allotted each command at the beginning of the game is indicated on each individual track.
[1.3] Game-Turn Track
The game-turn track is used to record the passage of game-turns. The track indicates the type of turn underway (AM, PM, or Night), whether it is a resupply turn, and lists historical dates. The AM and PM turns are also called daylight turns.
There are six hours per daylight turn; twelve hours per night turn. There are no special restrictions on what players may do during night game-turns, except no air operations are permitted during the night game-turns.
2.0 The Playing Pieces
The playing pieces are divided into two general types. Units represent the military forces that the players control. Markers are placed on units, tracks, or on the map to denote specific information.
The German player controls all the German units. The Allied player controls all British, American, and Polish units. The Allied units are used by one or both players, as noted in rule 2.2.
[2.1] How To Read The Units
Each unit is a distinct combat force, usually a battalion in size.
Command - each unit counter is colour coded to indicate the command to which it belongs. A unit's command determines which supply source the unit uses (see rule 11.1), the area in which the unit enters play, which artillery units the unit may use, and - if German -which reserve hexes the unit may enter.
There are a total of eight commands represented in the game:
British XXX Corps - yellow units British 1st Airborne Division - red units Polish 1st Brigade - orange units U.S. 82nd Airborne Division - dark green units U.S. 101st Airborne Division - light green units German 1st Parachute Army - dark blue units German 15th Army - gray units German 2nd SS Panzer Corps - light blue units
Note: each of the Allied airborne commands is also a "formation".
Designation - Each unit has a historical identity number of the unit, which denotes the unit as part of a formation (usually a division). If a unit has no historical designation, then that unit is independant.
There are a total of 13 formations:
(1) German 10th SS Panzer Division (2) German 9th SS Panzer Division (3) German 59th Infantry Division (4) German 84th Infantry Division (5) German 85th Infantry Division (6) German 180th Infantry Division (7) German 7th Parachute Division (8) British Guards Armoured Division (9) British 43rd Infantry Division (10) British 1st Airborne Division (11) U.S. 82nd Airborne Division (12) U.S. 101st Airborne Division (13) Polish 1st Airborne Brigade
Attack Strength - a quantification of the unit's relative firepower, used when a unit conducts any type of attack.
Defense Strength - a quantification of the unit's ability to withstand losses. It is also a relative measure of the unit's morale.
Formation - each unit with designation is part of a formation. All other units are independant. Units in a formation have access to the capabilities represented by the HQ unit of that formation (see HQ capability, below), and may use the artillery units in the formation. All formations represent historical divisions, except for the Polish 1st Airborne Brigade.
Formation Commanded - the division that the HQ unit commands. All units in the same formation may use the HQ's capabilities.
Game-Turn Available - the game-turn in which the unit is first available to enter play. Certain units have a four-digit hex number and mapboard designation instead; these are placed on the map at the start of play. A German unit or an Allied XXX Corps unit may enter on its listed game-turn or any one thereafter. An Allied airborne unit may enter play on or after its listed game-turn if the Allied player has an airlanding point available (see rule 15.3).
HQ Capability - An HQ may possess any of the following special attributes: E (combat engineer); B (bridge engineer); F (flak). These capabilities may be "lent" to any unit in the HQ's formation that is within the hex range listed for that capability (see rule 10.1).
Number of Steps - A quantification of the unit's size and morale. A unit has from one to five steps at the start of play. Steps affect its ability to stack with other units and its ability to withstand enemy fire.
Range - The maximum number of hexes that may lie between a hex occupied by an artillery unit conducting fire (exclusive) and the hex it is firing into (inclusive). Example: an artillery unit with a range of 3, situated in hex GR-PP30 may fire into hex GR-PP27, but not into hex GR-PP26. The tracing of range is not affected by the presence of friendly or enemy units, or by terrain. Exception: an artillery unit's range is increased by one when it occupies a hilltop hex.
Sample Infantry Unit, Sample Artillery Unit, and Sample Headquarters Unit diagrams show the layout of a unit counter: Command (noted by colour) in the top corner; Formation in the center top; Attack/Defense Strength and Movement printed along the bottom edge, with Steps shown as tick marks below. The Artillery and Headquarters unit diagrams additionally show Range in the top corner in place of Attack Strength.
3.0 The Sequence Of Play
Each game-turn is composed of a number of phases, some of which are ordered into an Allied and a German player-turn. During his turn, each player moves and attacks with his units following the structure outlined below. A player is called the phasing player during his player-turn, and the non-phasing player during his opponent's player-turn. The completion of this sequence constitutes one game-turn and is repeated until the game is over as indicated on the turn record chart.
[3.1] Weather Phase
The German player rolls the die and consults the weather table to determine the type of weather prevalent for the duration of the game-turn: Clear, Cloudy, or Overcast. The weather type affects the number of tactical air points both players receive and the number of airlanding points the Allied player receives. There is no die roll for weather during a night game-turn.
[3.2] Resupply Phase
If the game-turn track indicates that this is a resupply turn, each player adjusts the markers on his supply tracks to indicate the receipt of new supply points. The German player receives supply points as noted on his three supply tracks. The Allied player uses the air resupply table to determine how many supply points each of his airborne commands receives.
[3.3] The Allied Air Phase
Expend available tac air points and airlanding points. Each tac air point is used to conduct one airstrike against a German unit within ten hexes of any XXX Corps Command HQ or one interdiction on a specific hex located within twenty hexes of any XXX Corps Command HQ. Each airlanding point is used to enter one airborne reinforcement unit into play. After all such reinforcements are placed in eligible drop zone hexes on the map, use the airlanding table to determine how each unit is affected by the drop.
[3.4] Allied Command And Communications Phase
Check all Allied lines of communication to determine which Allied units are in supply, out of supply, or isolated.
[3.5] Allied Bridge Repair Phase
The Allied player may attempt to repair bridges with any friendly HQ's that qualify as per rule 12.0.
[3.6] Allied Movement Phase
Move any or all Allied units, one unit at a time. Up to six ground reinforcement units may enter play per turn.
[3.7] Allied Player Attack Phase
Each German unit or stack that is adjacent to or with range of any Allied units may be attacked by those Allied units. Each attack is resolved seperately as follows:
(a) declare which German unit or stack is being attacked and which Allied units are attacking it. Declare use of available HQ capabilities. (b) German player declares any defensive artillery and any use of HQ capabilities. (c) resolve each attack seperately using all modifiers listed on the Target Modifiers Chart.
[3.8] German "-1" and "-2" marker removal phase
[3.9] German Air Phase
If a tac air point is received this turn, expend it to conduct one airstrike against any Allied unit more than 10 hexes from an Allied XXX Corps HQ.
[3.91] German Command And Communications Phase
Check all German lines of communication to determine which German units are in supply, out of supply, or isolated.
[3.92] German Bridge Destruction Phase
Any eligible German HQ's attempt to destroy bridges as per rule 12.0.
[3.93] German Movement Phase
Move any or all German units, one unit at a time. German reserve units may enter play from the appropriate Reserve Hex.
[3.94] German Player Attack Phase
Each Allied unit or stack that is adjacent to or within range of any German units may be attacked by those German units. Each attack is resolved seperately as follows:
(a) declare which Allied unit or stack is being attacked and which German units are attacking it. Declare use of available HQ capabilities. (b) Allied player declares any defensive artillery and any use of HQ capabilities. (c) resolve each attack seperately using all modifiers listed on the Target Modifiers Chart.
One game-turn is now complete and another is begun. Advance the game-turn marker one space along the game-turn track. If this is the last game-turn of the game, assess victory.
4.0 Controlling Hexes
Most units exert control into the six hexes adjacent to the hex each occupies. A hex within a unit's control is considered controlled by that unit during all phases of the game-turn. Thus, a hex may be in friendly control (if adjacent to a unit owned by the player), in enemy control (if adjacent to a unit owned by the enemy player), or in both enemy and friendly control (if adjacent to opposing units). There is no additional effect when more than one unit controls a hex. A unit controls even a hex that it is prohibited, by terrain, from entering. Enemy movement in a hex in friendly control is inhibited or prohibited.
[4.1] Zones Of Control (ZOC)
A ZOC is exerted into the six hexes adjacent to a combat unit.
ZOC extends into all types of terrain. Exceptions: ZOC does not extend into a city hex and/or across a river or canal hexside (regardless of crossings), except across an intact bridge hexside.
A unit must cease its movement for the turn upon entering a hex in enemy ZOC. A unit may move out of such a hex at a cost of three additional movement points (10 for motorized units), but only if the unit has not yet expended any movement points this turn and does not move directly into a hex under any type of enemy control.
[4.2] No Control
The following unit types exert no control:
(a) artillery (self-propelled artillery DOES exert control) (b) garrison (c) HQ's (d) units with zero or one step (e) units covered with a "-1" or "-2" marker.
5.0 Movement
During his movement phase, each player may move any number of his units that are in play. Each unit move one at a time, hex-by-hex, in any direction that the player wishes. As a unit enters a hex, it expends a certain number of movement points, depending on the terrain in the hex and other variables. When a unit has expended a number of movement points up to its movement point allowance, the unit must stop moving for the turn. When the player has moved all the units he wishes to or can in the turn, his movement phase ends.
[5.1] Movement Costs
The basic cost to enter a hex is one movement point. The cost to enter some terrain hexes is higher (or lower), while other terrain hexes may not be entered at all by certain units. The terrain effects chart lists the costs to enter each type of hex, depending on the type of unit moving.
Movement costs listed for a road are used only if the moving unit actually begins its movement on a road hex and moves along that road for its entire movement phase. Exception: units using road movement may not enter an enemy ZOC.
Example of road movement for an armored unit: the unit starts in hex ARN CC23 expending 1/2 MP in hex CC22, 1/2 MP in hex CC21, 1/2 MP in DD20, 1/2 MP in DD19, 1 MP in hex DD18, 1 MP in hex DD17, 1 MP in hex DD16, 1 MP in hex CC16, 1/2 MP in hex CC15, 1/2 MP in hex CC14, 1/2 MP in hex CC13, 1/2 MP in hex BB12, 1/2 MP in hex BB11, 1/2 MP in hex AA11 and ending its move therein. The unit expended a total of 9 movement points.
Units may NOT combine road movement with regular movement in the same movement phase.
When a hexside (such as a bridge) has a "+" cost attached to it, that cost is in addition to the cost of entering the hex. A "0" indicates that the bridge may be crossed at no additional cost. The cost to cross a bridge hexside by road is indicated by the right modifier on the Terrain Effects Chart. To cross a bridge hexside using non-road movement, the modifier is listed to the left.
Example: a US parachute infantry unit is moving. It enters a clear hex (1MP), and a broken hex (2MP). It has spent 5 MP's and is adjacent to a clear hex and a broken hex. It does not have enough MP's remaining to enter the broken hex (2MP's), so it moves into the clear hex, expending the last MP of its 6 MP's.
[5.2] Movement Restrictions
A unit may not enter or pass through a hex containing an enemy unit.
A unit is never required to move, or to expend its entire MPA. However, a unit may not lend or accumulate unused movement points.
A unit may never exceed its MPA, even to move only one hex.
When a player has completed his moves for the turn, his units must meet the stacking restrictions (see rule 6.0).
Allied units may not move off the map. German units may move off the map from any entry hexes, but must then wait off-map for a variable number of turns depending on which entry zone the exiting unit wants to re-enter in.
[5.3] Non-Road Movement
A unit may move through any number of friendly units at no additional cost.
A unit must stop moving for the turn upon entering a hex in enemy ZOC.
A unit that begins the friendly movement phase in a hex in enemy control may move out of that hex at a cost of "3" (10 for motorized units) additional movement points. The first hex entered in this move may not be in any enemy ZOC.
[5.4] Road Movement
A unit using road movement expends movement points as per the road movement costs as noted on the terrain effects chart. A unit using road movement must begin its move in a road hex and then must move along that road for its entire movement phase. A unit moving by road may only enter a hex through a connecting road hexside.
A unit moving by road may NOT move adjacent to an enemy unit that exerts a ZOC. A unit moving by road can enter or move through a hex adjacent to an enemy unit that does not exert control.
A unit may not use road movement if it begins the movement phase in an enemy ZOC. If a unit begins the movement phase stacked with a friendly unit, it may only use road movement along major roads. It may not move along minor roads using road movement.
Any type of unit moving by road along a major road may enter or pass through hexes occupied by friendly units.
Any type of unit moving by road along a minor road may not enter a hex containing a friendly unit.
[5.5] Water Barriers And Bridges
A canal or river hexside may be crossed only by Allied airborne infantry units with the aid of the XXX Corps HQ, at a cost of 3 additional movement points. (Lake hexsides, such as GR UU22-VV21, have the same properties as river hexsides).
Any of these hexsides that is traversed by a bridge may be crossed by any type of unit, as noted on the terrain effects chart. A destroyed bridge cannot be used.
[5.6] Ferry Crossings
Certain ferry hexsides are crossed by ferries. A ferry may be used by a unit to cross the river at the ferry hexside at a very slow rate.
A unit may cross a river by ferry only if the following requirements are met throughout the move:
(a) neither hex adjoining the ferry is enemy occupied or in enemy ZOC. (b) the unit begins the movement phase in one of the two hexes joined by the ferry. (c) no other unit has used the given ferry for movement in the current game-turn.
A non-motorized infantry unit or any unit with only one step may cross a river by ferry as its entire move for the turn. The unit moves across the ferry hexside and may move no further that turn.
Any other type of unit must roll a single die prior to crossing. Use the following schedule to determine if the unit is successful:
2 steps = 1-4 successful, 5,6 unsuccessful 3 steps = 1,2,3 successful, 4,5,6 unsuccessful 4 steps = 1,2 successful, 3-6 unsuccessful 5 steps = 1 successful, 2-6 unsuccessful
A unit that rolls an unsuccessful result, does not cross the ferry hexside, but remains in its hex for the rest of the turn.
[5.7] Evacuation
A unit that is part of a formation may be evacuated during the friendly movement phase if the following requirements are met:
(a) the current game-turn is turn 23 or later. (b) the current game-turn is a night turn. (c) if the unit is Allied, it must be able to trace communication to any HQ of XXX Corps command that is in supply. The Allied XXX Corps HQ may allow a unit to trace communication across a river or canal for this purpose (see rule 10.3). (d) if the unit is German, it must be in supply. (e) the unit must be able to move at least one hex.
If all these requirements are met, the unit is evacuated simply by removing it from the map. An evacuated unit may not re-enter play, but is not considered eliminated for victory point purposes (see rule 16.4). Any number of eligible units may be evacuated in a single night game-turn. Independant units may NOT be evacuated.
6.0 Stacking
A hex may be occupied by one or two friendly units. However, the total number of steps in a hex may not exceed five. Example: two infantry battalions of the 82nd Airborne Division (3 steps each) cannot stack together. Units can stack together regardless of type or parent formation.
A unit may move through units in excess of stacking restrictions, but the stacking restrictions must be obeyed at all other times. Exception: a unit in moving along a road is sometimes prevented from moving through a unit (see rule 5.4).
If a stack of units is found to exceed the stacking limit, the excess units must be eliminated (owning player's choice).
A German garrison unit is eliminated whenever a German unit completes its move in the garrison unit's hex.
7.0 Combat
A friendly unit adjacent to an enemy unit during the friendly Attack Phase may initiate combat. Combat is affected by Combat Modifiers. They include defense strength modifiers based on terrain and attack strength modifiers based on terrain, command, and unit type. The defender may allocate any friendly artillery attack strength points to the modified defense strength of the unit(s) being attacked. The attacker may allocate friendly artillery and TAC air points to his attack.
[7.1] Procedure
The attacking player announces all attacks, indicating which friendly units are participating in that attack including any TAC air points and friendly artillery and which enemy unit or stack of units is the target of that attack.
After the phasing player has announced all his attacks, the non-phasing player may add friendly artillery attack strength points to any unit(s) or stacks of units under attack.
For each individual attack, total the number of attacking strength points being applied in a single combat against a given defender (including TAC air points and artillery attack strength points). Note that individual attack strengths may be modified under the Attack Combat Modifiers Table. The modified attack strength total is now compared to the defending hex's total defense strength (which may include any non-phasing artillery support). Note that the individual defense strengths may be modified by the Defending Combat Modifiers Table.
By comparing the total modified attack strength to the total modified defense strength, a basic odds ratio is formed (with any fractions being rounded off in favour of the defender).
A die is rolled on the appropriate column of the Combat Table and a result is obtained which is immediately implemented. Once the results of that combat have been implemented, the next combat is resolved.
[7.2] Restrictions
A unit may initiate attack only during the friendly Attack Phase. An attacking unit may attack any one adjacent hex containing enemy units.
Attacking is voluntary; units are never compelled to attack. Not every unit adjacent to an enemy unit need participate in an attack. A friendly unit not involved in an attack on an enemy unit is never affected by the result of that attack.
An enemy stack may be attacked by as many units as can be brought to bear against it by the attacking player from the six adjacent hexes.
Units may attack only once per Attack Phase. No enemy unit may be attacked more than once per Attack Phase.
The following units may not attack:
(a) a unit covered with a "-1" or a "-2" marker, (b) a headquarters unit
Artillery units providing support to either the attacker and/or the defender may only do so if the following conditions are met:
(a) it is within range of the target hex, (b) the target hex is spotted for ranged fire (not applicable if the target hex is adjacent).
A headquarters unit may give support (attacker and/or defender) if at least one of the friendly units involved in this particular combat is from the HQ's formation and is within the radius of that HQ.
No non-artillery unit can attack across a river/canal hexside, unless crossed by an intact bridge or the capabilities of the Allied XXX Corps HQ is utilized.
[7.3] Multiple Unit Combat
All units in a hex are attacked as an integral whole. Each unit in an attacked stack contributes its defense strength to the defense total. A defending player may not withhold units in an attacked stack from the defense.
Not all units in a stack containing attacking units need attack. Thus, when some units in a stack are attacking a given hex, other units in the stack could be attacking enemy units in other hexes, or not attacking at all.
A unit (or units attacking together) adjacent to more than one enemy-occupied hex may attack only the unit(s) in one of the enemy occupied hexes.
[7.4] Combat Modifier Restrictions
Modifiers that affect a unit defending behind a river/canal hexside only apply if the attackers (excluding artillery units) are all attacking across the river/canal hexside.
Attacking units that are from different commands are penalized by a -1 to their attack strengths. This applies to each and every attacking unit (including artillery) involved in that particular combat.
[7.5] Explanation Of Combat Results
When reading a combat result, the figures left of the "/" refer to the attacker and the figures right of the "/" refer to the defender. Numbers refer to total step losses and if accompanied by an "R", any surviving units must retreat. Note that supporting artillery is never affected by the combat results unless it was attached to the enemy unit(s) involved in that particular combat. The defender always applies the combat result to his affected units first. After he has done so, the attacker applies the combat result to his affected units.
[7.6] Step Losses
When step losses are called for, the affected player must attempt to eliminate units equal to that step loss. If that is not possible, a partial loss may be taken. Example: a 3 step unit is required to take one step loss.
When this happens, the affected unit must roll a die on the Partial Loss Table. The original step strength of the unit is cross-indexed with the step losses called for on the Combat Result Table. A number or a number span will result. This is the number required on a single die to eliminate that unit. If the number rolled is not within the span given, the affected unit is unaffected. Example: a 5 step unit is required to take a step loss of "3". Using the Partial Loss Table, one cross-indexes the original step strength of "5" with the loss called for (3). The resulting number span is 1-3. The player must roll a 4, 5, or 6 in order for that unit to survive. If a 1, 2, or 3 is rolled, the affected unit is eliminated.
Another example: a 1 step and a 4 step unit are required to take a loss of 2 steps. The player must eliminate the 1-step unit and take a partial loss of 1 step from the 4 step unit.
[7.7] Retreats
In certain cases units, because of their type, are exempt from being forced to retreat. The following units may not retreat:
(a) a unit with zero movement allowance (b) an artillery or flak unit
A retreat is not considered movement, but a unit may retreat only into a hex that it could enter if it were moving, regardless of the movement point cost. A unit may retreat into any adjacent hex as long as the following restrictions are followed (in the following priorities):
(a) a unit may not retreat into an enemy occupied hex or off the map. (b) a unit may not retreat into an enemy controlled hex, unless the hex is occupied by a friendly unit and stacking restrictions are not violated by the move. A unit that retreats into a hex occupied by another unit is eliminated if that other unit is attacked in the same combat phase and as a result suffers elimination. (c) a unit must retreat into a vacant hex, if possible. (d) a unit must retreat into a hex that does not cause the unit to be cut off from its supply source, if possible. (e) a unit must retreat into a hex that is not adjacent to any enemy unit, if possible.
All units unable to retreat because of their inability to comply to the above restrictions or because of unit type, are eliminated.
[7.8] Advance After Combat
When a hex is vacated by a defending unit that retreats or is eliminated, one or two attacking units that were adjacent to the target hex may immediately advance into the hex. This advance may be made regardless of enemy control, but stacking restrictions must be observed. A unit is not required to advance after combat, but the option to advance must be taken immediately after the attack is resolved, before conducting another attack.
Artillery, units with a movement allowance of zero, and Garrison units may never advance after combat. Defending units may never advance after combat.
8.0 Artillery
An artillery unit differs from other units in the following major ways:
(a) it exerts no ZOC (b) it may conduct ranged fire
[8.1] Artillery Fire Requirements
These rules apply for artillery support given in either the attack or the defense.
An artillery unit may fire if the target is within range.
An artillery unit must also fullfill at least ONE of the following requirements at the moment of fire:
(a) the artillery unit itself can spot the target. (b) the artillery unit is in communication with a unit of the same command that can spot the target and both units are in supply.
[8.2] Spotting
A unit that can spot another unit if it is adjacent to the unit it wishes to spot or occupies a hilltop hex within two hexes of the unit it wishes to spot. A unit that is spotting is not required to participate in combat.
[8.3] Artillery Communication
Definition: a communication path of any length traced between an artillery unit and a unit that is spotting the artillery's target. As with all communication paths in the game, the path may not be traced over unbridged canal or river hexsides, nor may the path contain enemy controlled or occupied hexes. Friendly units negate enemy control in the hex it occupies for this purpose.
[8.4] Self-Propelled Artillery
SP artillery has the attributes or regular artillery when it conducts fire from a hex not adjacent to its target. That is, its target must be spotted. For all other purposes, SP artillery is treated as armour.
9.0 Headquarters Units
An HQ unit represents the communication center of its formation. There are 13 formations, each with an HQ:
(1) German 10th SS Panzer Division (2) German 9th SS Panzer Division (3) German 59th Infantry Division (4) German 84th Infantry Division (5) German 85th Infantry Division (6) German 180th Infantry Division (7) German 7th Parachute Division (8) British Guards Armoured Division (9) British 43rd Infantry Division (10) British 1st Airborne Division (11) U.S. 101st Airborne Division (12) U.S. 82nd Airborne Division (13) Polish 1st Airborne Brigade
An HQ unit may aid the units in its formation with its HQ capabilities. Other than the loss of these functions, the absence of an HQ does not adversely affect the units of its formation. The Allied player also has a special XXX Corps HQ with the ability to allow units to cross or attack across an unbridged river/canal hexside.
An HQ differs from other units in these major ways:
(a) it exerts no control (b) the loss of an HQ immediately affects its command by subtracting 3 supply points from its supply track.
[9.1] Divisional And Brigade HQ Capabilities
An HQ's capabilities may not be used at all if the HQ is out of supply and/or isolated or in an enemy ZOC (unless the HQ is stacked with a friendly unit that exerts control). Range for a capability may not be traced through an enemy occupied or enemy controlled hex (unless the hex is friendly occupied).
Unless specified otherwise, an HQ may use or lend its capabilities any number of times during a game turn.
Capabilities:
(1) Friendly units of the same formation within the HQ's radius receive a +1 to their individual attack strengths. The cost is one supply point per HQ. (2) Friendly units of the same formation within the HQ's radius that are the subject of an enemy attack get a +1 to their individual defense strengths. The cost is one supply point per HQ. (3) Repair Bridges (Allied HQ's only). (4) Destroy Bridges (German HQ's only). (5) Flak (German HQ's only). (6) The Allied XXX Corps HQ may allow one or two friendly infantry, parachute, and/or glider unit to move or attack (not both) across unbridged river/canal hexsides. Only units which began the turn within the HQ's radius may perform this special function. There is no cost for this function since XXX Corps has no supply point track. The cost for these units to cross an unbridged river/canal hexside is +3 MP. Use of this function does not allow a unit to trace supply across the river or canal hexside it crosses; unless the unit can trace supply normally, it will be isolated at the end of the Allied player turn.
[9.2] Cross-River Or Cross-Canal Evacuation
Declared during the command phase. This function is not restricted by formation or command. An HQ that does not move during the Allied movement phase may allow the Allied player to trace communication across an unbridged river or canal hexside within range of the HQ's bridge engineers for purposes of evacuating units (see rule 6.8).
[9.3] German HQ Flak
German HQ units possess flak, which may be used to hamper the use of Allied tactical air points, airlandings, and air resupply. The "HQ" projects a number of flak points equal to its radius into every hex within its radius, regardless of the presence of enemy units. An Allied airstrike or airlanding that occurs in such a hex is affected as noted on the airstrike table, the airlanding table, or the air resupply table, respectively. Use of HQ flak does not require the expenditure of a supply point, but the HQ must be in supply in order to use its flak.
10.0 Supply
A unit is in supply if it can trace communication to a valid supply source hex, and that source has at least one supply point. A unit that cannot trace communication to a valid supply source is "isolated". A unit that can only trace communication to a valid supply source that has no supply points is "out of supply". This status may change any time as the unit's situation changes.
A German unit or any Allied airborne unit can trace communication to a supply source through a path of connected hexes of any length. A communication path traced by any Allied unit of XXX Corps command may be any length, as long as the path's distance no more than 4 hexes.
An HQ unit may not use any of its capabilities if isolated and/or out of supply at the moment of intended use.
[10.1] Supply Sources
An Allied airborne unit must use the supply head of its command as a supply source.
An Allied unit in XXX Corps command may use any road hex or any road hex directly connected to it as a supply source. A road hex is directly connected to hex AS A26 if an uninterrupted path of major or minor road connects the two hexes. Neither end hex nor any hex in the path may be enemy-occupied or enemy controlled. With the exception of the two minor roads in Belgium (around hex AS C31, any road hex on the map could conceivably be a XXX Corps supply source. Allied units do NOT negate enemy control for this purpose. The path may not be traced across a river or canal hexside, unless crossed by a bridge with an intact bridge.
A German unit may use any Access Area hex as a supply source hex as long as the hex is a valid entry hex for the unit's command and is not enemy-occupied or enemy controlled (a friendly unit negates enemy control in the hex it occupies for this purpose). Hex ARN W24 may also be used as a German supply source. Exceptions: hexes in areas N1, N2, W9, and W10 cannot be used as supply sources.
[10.2] Supply Points
At the beginning of play, the seven command supply markers are each placed in the specially marked space of the appropriate supply track to indicate the number of supply points each command starts with the game. Note: XXX Corps has no command supply track. During the game, each command expends supply points when an HQ in the command uses certain capabilities and when a "6" is rolled during the resolution of fire conducted by units in the command.
Each command gains supply points during the resupply phase of each AM game-turn. Each German command receives the number of points indicated on its supply track. Each Allied airborne command receives a variable number of supply points through air resupply (see rule 11.7).
A command may not possess more supply points than the highest number shown on its track. If a command is scheduled to receive more supply points than its maximum, the excess points are ignored.
[10.3] Spending Supply Points For Fire
Each time a player rolls an unmodified "6" when he conducts any type of attack, he must spend supply points from the command to which the attacking unit(s) belongs. The number of supply points spent is calculated by counting one for each non-artillery unit that actually attacks and one for each artillery STEP that actually attacks. Defending artillery units that support a defending hex are not required to expend points. The calculated total is spent by moving the appropriate supply marker down its track that number of spaces. Example: two motorized infantry units, one armour unit and one artillery unit (with 2 steps) of 2nd SS Panzer Corps are attacking and the German player rolls a 6. After the combat result is implemented, he moves the supply marker down 5 spaces on the 2nd SS Panzer Corps supply track.
If a command with at least one supply point is required to spend more supply points than it has available in one attack resolution, the excess expenditure is ignored and the supply point marker is placed on the "zero" space on the supply point track.
[10.4] Supply Effects
| Effect | Movement Allowance | Attack Strength | Defense Strength |
|---|---|---|---|
| Supplied | Full | Full | Full |
| Isolated | 1/2 | 1/2 | Full |
| Out of Supply | 1/2 | Zero | Full |
| Isolated AND Out of Supply | 1/2 | Zero | Full |
[10.5] Isolated Forces
During his communication phase, the phasing player checks all his units in play to see if any are isolated. The units in an isolated force exert ZOC normally, may move at half movement value and attack half strength.
[10.6] XXX Corps Supply
The British XXX Corps has unlimited supply; it is never assigned supply points and does not expend supply points and is never out of supply.
If the Allied player rolls a 6 when conducting fire, participating units in XXX Corps do not expend supply points.
When an HQ in XXX Corps uses a capability that normally costs a supply point, it is not expended, however, the HQ must still be in supply in order to use its capabilities.
[10.7] Air Resupply
The Allied player determines how many supply points each of his airborne commands receives during the resupply phase (AM game-turns only) by using the Air Resupply Table. For each command, he rolls one die and adds the applicable modifiers listed with the table to the die result. (Many of the modifiers listed on the table depend on the proximity of German units to the airborne command's supply head. The modified total is then applied to the table to determine how many supply points the command receives. There are two ways that an airborne command will receive no supply points during a resupply phase: if the Allied player is moving the supply head, or a German unit occupies the supply head's hex.
If this condition applies, the air resupply table is not used for that command.
The Allied player may move any of his airborne supply heads instead of receiving supply points for that command. (A supply head marker can be placed in any clear or broken terrain, with or without a town, that contains or is adjacent to a unit in the same command.) To do so, he picks up the supply head marker and places it in a different hex. A supply head may only be moved during the resupply phase of an AM game-turn.
The Polish 1st Parachute Brigade does not receive any supply points through air resupply until after its HQ has been airlanded. When using the air resupply table for the Poles, halve the number of supply points received (rounding up).
If communication can be traced from an airborne supply head to a XXX Corps supply source hex during the resupply phase, the command served by the supply head automatically receives 6 supply points; the air resupply table is not used for the command. Exception: the Polish First Parachute Brigade would receive 3 supply points in this case.
11.0 Bridge Demolition And Repair
Every crossing (bridge or ferry) on the map begins the game intact. During play, the German player may attempt to destroy certain crossings. The Allied player may repair certain bridges that the German player has destroyed.
[11.1] Bridge Demolition
During the German command phase, each German HQ on the map may attempt to destroy a number of bridges equal to its HQ radius. In order to destroy a bridge, both hexes connected by the bridge hexside must be clear of enemy control and there must be a line of communications no longer than 8 hexes from the HQ attempting demolition to both hexes connected by the bridge hexside. The line of communication is the same as in rule 9.3. Also, in order to destroy a bridge, there must be an Allied unit within 6 hexes of either hex connected by the bridge hexside.
Each bridge may only be attempted once per turn.
The die rolls required to destroy bridges are listed on the Bridge Demolition Summary.
Out of supply and/or isolated HQ's may NOT attempt to destroy bridges.
The chance of demolition is not affected by the presence or absence of German units.
A destroyed crossing may not be used for any game purpose until repaired by the Allied player. Use a bridge destroyed marker to indicate that a crossing has been destroyed.
Note: the German player may NOT destroy the following bridges: ARN Q20-R19 and ARN BB17-CC18.
[11.2] Bridge Repair
A destroyed canal or river bridge may be repaired only by an Allied HQ. A destroyed ferry may not be repaired at all.
During his command phase, the Allied player attempts repair of a destroyed bridge by indicating which HQ is attempting to repair the following requirements must be met:
(a) there must be a line of communication no longer than the HQ's radius to hexes connected by the bridge hexside. (b) the HQ must be in supply (c) the HQ may not perform any other function, such as lending support for combat etc. (including repairing another bridge). (d) the HQ is free of enemy ZOC and both hexes bordering the bridge hexside must be free of enemy units.
Spend one supply point from the HQ's command and roll a die. If the result is equal to or less than the HQ's radius, the bridge is repaired. If the result is greater than the HQ's radius, the "bridge destroyed" marker remains in place.
12.0 Airpower
Airpower is represented by two types of air points: Tac air points and airlanding points. A variable number of air points are available each daylight game-turn, depending on the weather. No points are available during night game-turns.
A player may use his air points during his air phase in the game-turn they are received only. Any air points not used during the air phase are lost. Tac air points are used to conduct airstrikes against enemy units. The Allied player may also use Tac air points to interdict hexes. Airlanding points are used to bring Allied airborne reinforcements into play (see rule 15.0).
The weather table lists how many air points each player receives each daylight turn according to the current weather.
[12.1] Air Strikes
During his air phase, a player may spend Tac air points to conduct airstrikes. Each Tac air point allows one airstrike against an enemy unit or two enemy units in the same hex.
The Allied player may airstrike any German unit that is within 10 hexes of any XXX Corps command. If no such HQ is on the map, any German unit within 10 hexes of the south mapedge may be attacked by airstrike.
The German player may airstrike any Allied unit that is not within 10 hexes of any XXX Corps command HQ.
A unit need not be spotted to be the target of an airstrike.
A unit may be attacked by no more than one Tac air point per game-turn. Notes: an HQ may not be attacked by an airstrike.
To resolve an airstrike, roll one die and modify the result as if an attack were conducted (see rule 7.3 and the target modifier chart). The modifiers for an airstrike are:
-1 for each German Flak point within range of the target hex. +1 if the target unit(s) have four or more total steps.
Locate the modified result on the airstrike table to find how the target is affected. The target may have a "-1" or a "-2" marker placed on it as a result of the strike. The target does not retreat. If two units in the same hex are the target for an airstrike, both units are affected at once and any result incurred is applied to both.
Special: a German unit that has a "-1" marker placed on it by airstrike during game-turn 1, is affected by a "-2" marker instead. A German unit has a "-2" marker placed on it by an airstrike during game-turn 1, remains affected by the "-2" marker as per normal.
[12.2] Flak
German flak units and HQ's with flak capability may hinder Allied airstrikes, airlandings, and air resupply. Whenever the Allied player conducts one of these functions, the total number of German flak points exerted into the target hex modifies the die result as noted on the airstrike table, the airlanding table, or the air resupply table, as appropriate.
Each flak unit exerts a number of flak points equal to its fire strength. An HQ that is isolated and/or out of supply exerts no flak points. Flak has no effect on Allied interdiction.
Flak range: A flak unit exerts its flak points into every hex within two hexes of the hex it occupies. A German HQ with flak capability exerts its flak points as described in rule 10.5.
[12.3] Interdiction
During his air phase, the Allied player may spend Tac air points to conduct interdiction. Each Tac air point allows one hex to be interdicted. Any hex within 20 hexes of any HQ of XXX Corps command may be interdicted. Simply place an interdiction marker on the hex.
An interdicted hex costs three additional movement points for a German unit to EXIT. An interdicted hex may not be entered or exited by a German unit using road movement at all. The German player may not trace communication through an interdicted hex. An interdicted hex has no effect on Allied movement or communication.
The effects of interdiction on a hex are removed during the German "-1" and "-2" marker removal Phase in the same game-turn that the hex becomes interdicted.
13.0 German Reserves
All German units that are not placed on the map at the start of play are called reserves and enter the game via the German entry zones. Once a reserve unit enters the map, it is subject to all rules of in-play German units. German units on the map may exit and become reserves.
During his command phase, the German player inspects his units not yet in play and places each of his units that become available in the current game-turn (listed on each counter) in a hex corresponding to the appropriate entry zone. Entry Zones are listed on the German Order of Battle Card. Units not wishing to enter at their designated Entry Zone may enter at another German Entry Zone as long as the new Entry Zone belongs to the same Army.
The cost in turns of delay is determined by the difference of Entry Zones and the type of unit. A motorized unit (24 MP) the delay is one turn per zone. For non-motorized units (6 MP) the delay is 3 turns per zone.
Example: an armored unit is due to arrive in N5 on turn 2. The German player wishes the unit to arrive in Entry Zone N9 instead. The new turn of entry is Turn 6. Also, an infantry unit is due to arrive in Entry Zone E10 on turn 2. The German player wishes the unit to arrive in Entry Zone E2 instead. The new turn of arrival is Turn 26.
2nd SS Panzer Corps Entry Zones: N1 through N10 1st Para Army Entry Zones : E1 through E12 15th Army Entry Zones : W1 through W10
[13.1] Reserve Movement
During his movement phase, the German player may move any of his reserve units as follows:
From Off-Map:
(a) a unit may enter the map in any hex of the Entry Zone which it is designated to enter. A unit cannot enter the map in a hex with prohibitive terrain. The unit moves normally, paying terrain cost for the first hex entered. A unit may enter the map in an enemy ZOC , but not an enemy occupied hex.
[13.2] Restrictions
A unit may never exit from an Entry Zone in one command and re-enter in another command Entry Zone. The same holds true in reverse.
Entry Zones E1 through E7, W1 and W2 become closed during the game:
E1 and E2 close on game-turn 3. E3, E4 and E5 close on game-turn 15. E6 and E7 close on game-turn 21. W1 and W2 close on game-turn 18.
No unit may enter any of these Entry Zones during and after the game-turn listed in each Zone. A German unit may not enter or exit the map in a closed Entry Zone. Hexes in a closed Entry Zone may not be used as a German supply source.
[13.3] Exiting The Map
A German unit may move off the hexfield from an Entry Zone. (A unit cannot retreat off the map.) Any German unit that begins its move in a hex that is part of a German Entry Zone or moves into such a hex may move from that hex off the map. In order to do so, the unit must be able to spend one movement point and, if using road movement, must be in a hex that contains a road leading off the map. A unit's move stops when it moves off the map.
A German unit may exit the map from an enemy controlled hex, as long as it can spend the additional movement points required. Exception: if every hex adjacent to a German unit is enemy occupied or in an enemy ZOC, the unit cannot exit the map.
A unit may exit the map from an Entry Zone that is part of a different command. However, a unit that does so may NOT re-enter play at all (it is not considered eliminated for victory purposes).
Example: a non-motorized unit in 15th Army that exits the map from Entry Zone W1 on game-turn 2 can re-enter play in Entry Zone W8 on game-turn 9. A unit can spend its entire movement point allowance on the turn it enters play.
14.0 Allied Reinforcements
With the exception of units of XXX Corps command that the Allied player places in the XXX Corps bridgehead (see rule 16.2), all Allied units enter play as ground reinforcements or airborne reinforcements. All units of XXX Corps command are considered ground reinforcements and enter the game from the south edge. All other Allied units are considered airborne reinforcements and enter play by airlanding.
[14.1] Allied Ground Reinforcements
A ground reinforcement is available on and after its listed game-turn once all ground reinforcements with an earlier game-turn of availability have entered play.
Up to SIX available ground reinforcement units may be brought into play during the Allied movement phase each game-turn. Every ground reinforcement must enter the map in hex AS-A26. This hex may be entered if in an enemy ZOC, but not if enemy occupied. The movement of on-map units and reinforcements units may be sequenced as the Allied player sees fit (however, each unit's move must be completed before another's is begun). An Allied ground reinforcement may enter by road or regular movement, decided at the moment of entry. An Allied ground reinforcement using road movement, cannot use a minor road on the turn it enters play.
[14.2] Initial Allied Airlandings
During his air phase of game-turn 1, the Allied player places his three supply head markers (1, 82, and 101) on the map and enters 30 airborne reinforcement units into play via airlanding. Each supply head must be placed in the hex listed on the Allied order of battle card. Each of the 30 airborne reinforcement units to be airlanded has a hex number listed on the Allied order of battle card. This hex is the unit's drop zone. The Allied player places each unit in its drop zone hex or any adjacent hex in accordance with the airlanding procedure (see rule 15.4). Note: airlanding points are not used on game-turn 1.
[14.3] Allied Airlandings During Play
Beginning with game-turn 3, the Allied player enters airborne reinforcements into play with his available airlanding points during his air phase. Each point allows him to airland one available airborne reinforcement unit.
Airlandings may be conducted only once per day, during an AM or PM turn in which the weather is clear or cloudy (never at night). If the Allied player receives airlanding points in an AM turn and uses any of them to enter units into play, he receives no airlanding points in the PM turn that day, regardless of the weather. If he receives no airlanding points in the AM turn or receives points but does not use them, he may receive airlanding points in the PM turn weather.
An airborne reinforcement is available for airlanding on and after the game-turn listed on the Allied order of battle card, once all airborne reinforcements that become available on earlier game-turns have entered play. The Allied player may choose which units to airland if he has more available than as airlanding points.
Each airborne reinforcement must be airlanded on or within one hex of its supply head marker. If the supply head is occupied by enemy units, airborne reinforcements for that formation cannot land. Also, airborne reinforcements cannot land on a turn in which the supply head was moved.
All Polish units are assigned to drop zone hex ARN-DD11. They may airland only on a clear weather turn The Polish supply head marker MUST land in hex ARN-AA17. If that hex is enemy occupied, then the Polish supply head marker must be placed within 4 hexes of hex ARN-AA17 south of the Neder Rijn River. The rest of the Polish Brigade then lands normally using its supply head marker as its drop zone hex.
Once the Allied player has placed all the airborne reinforcement units he will enter in the current air phase, the airlanding procedure is conducted.
[14.4] Airlanding Procedure
Place every unit that is airlanding this air phase in its supply head hex or in an adjacent hex, within the following restrictions:
(a) a glider unit may be placed in any clear terrain hex. (b) a non-glider unit may be placed in any clear or broken terrain hex. Note that for cases (a) and (b) the presence of a town in a hex does not affect airlandings there. (c) stacking restrictions must be adhered to during airlanding. (d) a unit may be placed in an enemy ZOC, but not in an enemy occupied hex. (e) if a drop zone is adjacent to a river or canal, a unit assigned to that zone may not be placed across the river or canal.
Check every airlanding unit separately to see how it is affected by the drop. For each airlanding unit, roll one die and add any applicable modifiers listed on the airlanding table to the die roll. Locate the modified result on the airlanding table to find out if the unit is eliminated or not as a result of the airlanding.
Once all units airlanding in the turn have been rolled for, they are considered in play and may move and fire normally during the player-turn in which they airland. Exception: an artillery unit cannot use road movement during the game-turn in which it airlands.
15.0 The Game
To start play, place the supply point markers in the space of their supply tracks indicated as the start space for the game. Place the game-turn marker in the 1 space of the game-turn track.
[15.1] German Initial Set-Up
Every German unit listed on the order of battle card with a hex number is placed on the map.
[15.2] Allied Initial Set-Up
The Allied player places units of XXX Corps command in the XXX Corps bridgehead area before play. The 6 hexes surrounded by the Allied start line against the south map edge over the Meuse L'Escaut Canal. Any units of XXX Corps command that are available on game-turn 1 may be placed in the bridgehead. Any number of units may be placed in the bridgehead as long as stacking restrictions are not exceeded and units are not placed in prohibited terrain. On the Allied order of battle card are 5 units of XXX Corps that must begin in the bridgehead area.
[15.3] Special Game-Turn One Rules
The weather is clear on game-turn 1; the weather table is not consulted.
No German unit may use road movement during game-turn 1. Any German unit that receives a "-1" marker result by an Allied airstrike, has a "-2" marker placed on it instead.
Allied units may not become isolated throughout game-turn 1.
[15.4] Victory Points
When the game is completed, the winner is determined by the number of VP's each player has gained. The Allied player earns VP's for getting units of XXX Corps command across various geographical objectives as follows:
(a) 1 VP for each unit of XXX Corps command that is north of the Waal River and in supply at the end of the game. (b) 1 VP for each step in every unit of XXX Corps command that is north of the Neder Rijn River and in supply at the end of the game.
Each player also earns VP's for eliminating enemy units as follows:
(a) each player receives one VP for each step in every eliminated unit.
At the end of game-turn 26, each player adds up his VP's. The German total is subtracted from the Allied total to determine the winner and the level of victory he has achieved:
76 or more: Allied Strategic Victory 61 to 75: Allied Operational Victory 46 to 60: Allied Tactical Victory 31 to 45: German Tactical Victory 16 to 30: German Operational Victory 15 or less: German Strategic Victory