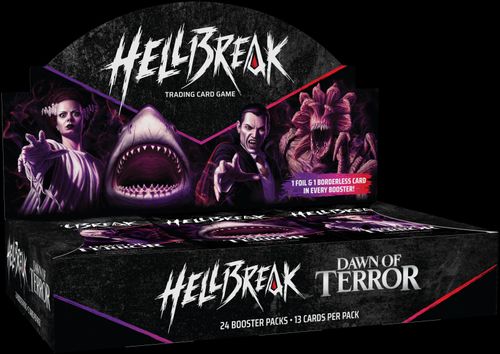
Hellbreak
Hellbreak Rulebook
Table of Contents
Table of Contents
Overview
HELLBREAK is the ultimate monster melee, a trading card game where you play as an iconic villain from horror history. Round by round, you'll gain resources, play cards, and unleash your monster's wrath.
To win the game, you must kill the opposing monster!
Components
The HELLBREAK starter set includes two decks: Dracula and Jaws. Each deck contains several different types of cards: monster, minion, asset, event, and location. In addition to cards, HELLBREAK uses a few different counters.
Counters:
- Blood
- Malice
- Damage
Setup
To set up the game, each player follows these steps:
-
Assign Initiative: For your first game, the Dracula player starts with initiative and places the initiative marker in front of that player.
For future games, randomly assign initiative to one player.
-
Prepare Monster: Place your double-sided monster in the center of your play area, "lurking" side face up.
-
Choose Location: For your first game, Dracula uses Carfax Abbey and Jaws uses North Beach (remove the other two locations from the game). Each player puts their location face up to the right of their monster, with its text facing its owner.
For future games, both players will secretly choose one of their two locations. After both players have chosen, simultaneously reveal them and remove the other locations from the game. Each player places their location in front of them as usual.
-
Draw Starting Hand: Shuffle your deck and place it on the right side of your play area. Then, draw a hand of four cards.
-
Take Mulligan (optional): If you don't like your hand, you may place any number of cards from your hand on the bottom of your deck in any order, then draw until you have four cards in hand.
-
Create Health Stack: Take the top eight cards of your deck (half the number of your monster's health value). On the left side of your play area, horizontally deal them face down one after another, starting nearest you and overlapping them.
-
Create the Supply: Place blood, malice, and damage counters within easy reach of both players.
The phrase "in initiative order" means the player with initiative acts first, followed by their opponent.
Card Anatomy
Card labels, as printed on the Quick Start Guide's card diagram:
- Name
- Unique Symbol (see Unique Cards)
- Cost (in blood)
- Card Type
- Subtitle
- Loyalty (the aspect icon(s) below the cost)
- Scheme Bar
- Combat
- Abilities
- Health
- Traits
- Resource Bar
Ready and Exhausted
All monsters, minions, and assets in play exist in one of two states: ready and exhausted.
Locations
The play area is split into two sections. A player's monster is placed between these sections, dividing them.
Each section has a location card, and players control each location facing them. Minions can only ever be at one location at a time, but monsters are considered to be at both locations.
The word "here" is shorthand for "at this location." If an ability says "here," it affects cards only at this location. If an ability does not specify "here," then it can affect cards at any location.
Round Sequence
A game of HELLBREAK is played over several rounds, and each round consists of three phases:
A. Feeding Phase B. Horror Phase C. Refresh Phase
Feeding Phase
The Feeding Phase has two steps:
- Collect resources
- Bid for initiative
Step 1: Collect Resources
Each player collects resources equal to all the resource icons (blood, malice, and card icons) shown in their vault (the resource bars on their monster and all other cards beneath their monster). At the start of the game, the only card in a player's vault is their monster.
Players keep their resource counters in a pool in front of them.
Collect Resources example: The Dracula player collects all the resources shown in their vault (5 blood, 1 malice, 2 cards). They take 5 blood and 1 malice from the supply and add them to their resource pool. They also draw 2 cards from their deck, adding them to their hand.
Step 2: Bid for Initiative
Each player may choose one card from their hand and place it face down in front of them as a bid. Then, the chosen cards are revealed simultaneously.
Compare the blood cost of each revealed card. The player with the highest value wins initiative and chooses which player takes the initiative marker. If the values are equal, the player without initiative wins initiative. Each player that chooses not to bid a card is considered to have a value of 0.
Then, add each revealed card to its owner's vault by sliding it beneath their monster card so that its resource bar (along the bottom edge) is visible.
Horror Phase
The Horror Phase is the main phase of the game. In initiative order, players go back and forth taking one action at a time, until both players consecutively pass.
Actions
The actions available to each player are:
- Play a card
- Attack with a character
- Scheme with a character
- Use an "Action" ability
- Slumber
- Pass
Play a Card
To play a card, you must meet the card's loyalty (see below). If you do meet its loyalty, then pay the card's cost (in blood).
Aspects and Loyalty
Every card in your deck belongs to one of five different aspects: Cursed, Deranged, Feral, Revenant, and Void.
Additionally, each card has loyalty, indicated by the small aspect icon(s) just below its cost. To play a card, you must have aspect icons in your vault equal to or greater than the card's loyalty.
Playing a Minion
When you play a minion, choose one of the two locations, then place that minion in your play area below that location, exhausted. Then, you may immediately pay 1 malice from your pool to ready that minion.
If the minion has a PLAYED ability, use it now.
Playing an Asset
When you play an asset, place it in your play area in front of you, ready. Assets do not occupy any location.
Playing an Event
When you play an event, resolve its ability, then place it in your crypt (discard pile). An event with LURKING ACTION or UNLEASHED ACTION can only be played if your monster's unleashed or lurking side is face up, respectively.
Editor's note: the printed sentence pairs the two icons with "unleashed or lurking … respectively," which reads in reverse to the Action-ability rule below (a Lurking Action requires the lurking side face up). It is transcribed as printed; the Action-ability rule is the clearer statement.
Playing a Card Example
Threat From Below costs 5 blood and has 2 Feral loyalty. Jaws' vault currently has 2 Feral and 1 Deranged icons, which satisfies the loyalty on Threat From Below, so the card is able to be played.
Use an "Action" Ability
Some cards have action abilities on them. You can use an ACTION ability on a card you control. A LURKING ACTION can be used only if your monster's lurking side is face up. Also, some abilities cost malice, which must be paid from your pool in order to use the ability.
Attack with a Character
Making an attack involves the following steps:
Step 1: Declare Attacker. Choose one ready character (monster or minion) you control as the attacker and exhaust it. If the attacker has an ATTACK ability, use it now.
Step 2: Declare the Target. If your attacker is a minion, choose an opponent's character at that location to be the target. If your attacker is your monster (which is at both locations), first choose which location to attack through, then choose an opponent's character at that location to be the target.
Step 3: Declare Defender (Optional). Your opponent may choose one ready character they control at that location to be the defender and exhaust it. Note that the same character can be both the target and the defender.
Step 4: Resolve the Attack. If there is no defender, the attacker deals damage equal to its combat to the target. The target does not deal damage in return.
If there is a defender, the attacker and defender simultaneously deal damage to each other equal to their combat. When a monster attacks, it never receives combat damage from defenders.
A monster is at both locations, so it can attack or defend at either location.
Attack Example: The Jaws player exhausts Giant Octopus to attack Count Alucard. The Dracula player exhausts Mina Seward as the defender. The Octopus deals 5 damage to Mina; Mina deals 1 damage to the Octopus. Because Mina now has damage equal to or greater than her health, she is killed.
Scheme with a Character
To scheme, choose one ready character you control and exhaust it. If that character has a SCHEME ability, use it now.
Then, resolve its scheme icons from left to right. Each icon is paired with a number (its value), and its effects are described below.
- Prowl: Deal indirect damage to your opponent equal to the prowl value (see Other Key Rules for indirect damage).
- Foresee: Look at a number of cards from the top of your deck equal to the foresee value, then put them on either the top and/or bottom of your deck in any order.
- Haunt: Add malice (from the supply) equal to the haunt value to the malice row on your side of that character's location card. If the character is your monster, choose which location to haunt.
Scheme Example: The Dracula player exhausts Count Alucard to scheme. The Jaws player assigns 2 indirect damage to Giant Octopus. Then, the Dracula player adds 2 malice to Carfax Abbey; this gives the Dracula player 5 total malice in their malice row, which is enough to take control of Carfax Abbey. All malice is removed from both malice rows, and the location rotates to face the Dracula player. Finally, the Dracula player gains 1 blood and draws 1 card.
Taking Control of Locations
When you have malice in a location's malice row equal to or greater than the location's malice value, you immediately take control of that location by performing all of the following:
- Remove all malice from both of that location's malice rows.
- If the location's text is not facing you, rotate the card so it is facing you.
- Collect the resource icons shown on the location.
- If the location has a TAKE CONTROL ability, use it now.
Note: If you already control a location and have enough malice in its malice row to take control of it again, then perform all of the above.
Slumber
You gain 1 blood (from the supply) and must pass all your remaining actions for the rest of this phase. Only one player can take this action each round.
Pass
When you pass, you do nothing for this action, but you may still take actions later in the phase. If your opponent's next action is to pass or to slumber, the Horror Phase immediately ends.
Refresh Phase
Follow these steps:
- Ready cards
- Monsters may flip
- Check hand limit
Step 1: Ready Cards. Each player simultaneously readies all exhausted cards they control.
Step 2: Monsters May Flip. In initiative order, each player may choose to flip over their monster. Monsters can be flipped from lurking to unleashed, or vice versa.
Step 3: Check Hand Limit. Each player with more than six cards in hand must reduce their hand down to six cards, choosing which cards to discard to the crypt.
Finally, a new round begins with the Feeding Phase.
Other Key Rules
Allied and Enemy
Cards you control are referred to as "allied"; cards your opponent controls are referred to as "enemy."
Damage, Indirect Damage, and Kill
Damage is persistent and is tracked by placing damage counters on minions. If a minion has damage on it equal to or greater than its health, it is killed and put face up in its owner's crypt.
When a player is dealt indirect damage, they assign that damage (divided as they choose) among any number of characters they control. A minion cannot be assigned more indirect damage than its remaining health.
Health Stack
When a monster is dealt damage, apply the damage to the top card in its health stack. Each horizontal card counts as two health, and a vertical card counts as one health. There can only be one vertical card in a health stack.
Damage dealt to a monster is resolved one at a time. When a horizontal card takes one damage, rotate it vertical. When a vertical card takes one damage, reveal it to see if it has a JUMPSCARE ability. If it does, you may use that ability, paying any malice cost. Either way, discard it. Then, continue applying any further damage dealt to that monster to its health stack.
When a monster has no cards in its health stack, it's killed, and the game ends.
Unique Cards
Some characters and assets are unique and have a knife symbol before their card type. If a player ever controls two unique cards with the same name and subtitle, they must immediately kill one of them.
Traits
All cards have at least one trait, such as Shark or Vampire. Traits don't have rules, but some abilities refer to them.
Running Out of Cards
When a player has no cards left in their deck, they continue playing. If a player would draw a card from an empty deck, instead deal 2 damage to their monster.
What's Next?
For the full rules, organized play information, and more, visit hellbreakgame.com.