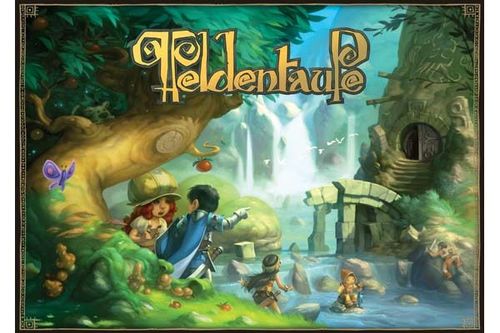
Heldentaufe
Heldentaufe Rulebook
Table of Contents
Table of Contents
- Heroes
- Components
- Setup
- The Hero Board
- Turn Sequence
- Move
- Decline Mission
- Food & Potions
- Mission Cards
- Mission Objectives
- The Treasure Die
- Game End
- Game Objective
- Let's Go
- A Portal Leads You Into the Underworld
- Do You Dare to Venture In?
- The 3rd Action: Fight
- The Monsters
- Defeating a Monster
- The Monsters Take Their Turn
- You Are Defeated
- Leaving the Underworld
- Rebuilding the Underworld
- Travel Guide
Heroes
Each hero is unique and has an advantage of its own:
- Erla (the alchemist) starts the game already at potion-recipe skill level 1, so she can brew the level-1 potion from the very beginning.
- Mathian (the knight) has 7 hit points instead of the normal 4.
- Luphius (the collector) has a backpack with 5 slots instead of the normal number.
- Corlof (the strongest hero) starts the game with combat skill 1 instead of the normal 0.
- Jupanila (the fastest hero) has 5 action points per turn instead of the normal 4.
Components
- 1 Treasure (chest)
- 5 hero figures
- 3 monster figures
- 1 monster boss marker
- 11 valuable monster teeth
- 5 hero boards
- 2 combat dice
- 1 treasure die
- 1 Underworld board
- 3 rulebooks (German/English/French)
- 20 brown potions
- 42 green food tokens
- 63 blue equipment tokens
- 33 mission cards
- 5 overview cards
- 35 hearts
- 38 small monster teeth
- 42 Upper World area tiles
- 5 danger tiles
Setup
Depending on player count, remove the following Upper World area tiles from the game before setup:
- 2 players: remove 9 forests, 1 apple tree, 1 mushroom ring, and 1 fish pond.
- 3 players: remove 6 forests, 1 apple tree, and 1 mushroom ring.
- 4 players: remove 3 forests and 1 apple tree.
- 5 players: use all tiles.
- Place the campfire in the middle of the table and put your figure on it. Form one or more face-down stacks with the remaining Upper World areas — the Upper World is built from these stacks during the game.
- Place the Underworld board a short distance from the campfire. Place the treasure chest on the space with the gold coins in the middle of the Underworld. Put the treasure die within easy reach.
- Shuffle the 5 dangers face down and place them on the areas marked with a skull. No player may know where the two traps are.
- Place the 3 monsters on their respective nests.
- Stack the valuable monster teeth (worth 5, 4, 3, 2 points) on the monster boards. Put a complete stack (5, 4, 3, 2, 1) on one monster of your choice. Give another monster only four teeth (5, 4, 3, 2), and the last monster starts with only three teeth (5, 4, 3).
- Place a heart on every grey, heart-shaped space on the monster board. Also place a heart on the monster tooth that shows a grey heart space. Each heart corresponds to one hit point.
- Set the monster boss marker aside, next to the monster boards.
- The remaining monster teeth and hearts, as well as all equipment, potions, and food, stay within reach of all players. These form the general supply.
- Each player receives one overview card. Shuffle the mission cards and deal each player 3 face-down hand cards. Then place the remaining cards as a single face-down draw pile.
- Take your hero board and fill every grey heart space with a heart. Each hero is unique and has an advantage of its own (see Heroes, above).
The Hero Board
The hero board gives you an overview of your hero's abilities, status, and equipment. It changes constantly as you make decisions during the game.
Each of the three abilities (movement boots, brewing ring, combat sword) can be influenced. You can collect equipment (boots, rings, swords) and place it in your inventory, where it increases the matching ability. Each ability can be increased by at most one piece of equipment. Additional boots, rings, and swords you collect can be stored in your backpack to use later at buildings or for missions.
- Boots show how many actions your hero may take per turn. Normally this is 4 actions at the start of the game (5 for Jupanila). You can increase the number of actions you may take by 1, 2, or 3 points with boots.
- Rings show which kind of potions you can brew. At the start you cannot brew any potions yet, unless you have chosen Erla as your hero. Depending on the ring you carry in your inventory, you can apply 1, 2, or 3 recipes.
- Swords are only needed in the Underworld. The higher this value, the more skilled you are in combat. At the start this value is 0 (1 for Corlof). You can improve your combat skill by 1, 2, or 3 points with swords.
In your backpack and potion rack you store the rest of the equipment, food, and potions that your hero carries around (Luphius's backpack even has 5 slots available). The hearts show your hero's hit points; here Mathian has a small advantage, since he has 7 hit points.
On your turn you may rearrange your tokens or return them to the general supply (give them up).
Equipment can be placed either 1. in the inventory in the matching slot, or 2. in the backpack.
Food (apple, fish, mushroom) can only be stored in the backpack. Potions can only be stored in the potion rack.
Turn Sequence
The player who woke up earliest starts. Each hero has 4 action points (5 for Jupanila) available. For each action point, they may take 1 action. When a player has used all their action points, their turn ends. The next player counter-clockwise then takes their turn. Players may also let action points go unused.
The Three Actions
(Only these 3 actions cost action points)
- Move
- Decline Mission
- Fight (Underworld only — see the Underworld section)
Move
(Place your hero figure on an adjacent area for 1 action point.)
At the start, only the campfire lies on the table as part of the Upper World. Since all heroes start on this area, the first player will necessarily push forward into unexplored territory and discover new areas. The Travel Guide (on the back of this rulebook) contains an overview of all Upper World areas.
Depending on the area type, you may continue your turn or must end it on that area. Once the last area has been revealed, the Upper World is completely explored.
Multiple hero figures may stand on the same area in the Upper World.
First choose the direction your hero will travel. Now, for 1 action point, take an area from a face-down stack and place it at the spot you chose in advance. Then move your hero figure onto the newly explored area.
You may also move your figure for 1 action point onto an already-explored, adjacent area.
Example: Jupanila reaches the fish pond in 3 steps via already-explored areas, so she would need to spend 3 action points. However, she decides to take a shortcut through unexplored territory, spending only 2 action points. However, there is a risk that she reveals a forest and her turn ends there.
Decline Mission
(Exchange a mission card for 1 action point.)
Spend 1 action point to discard 1 hand card and draw a new one.
Food & Potions
Apple, fish, and mushroom each equal 1 heart.
Food — Healing your Hero
On your turn you may give up 1 food to regain 1 lost heart. You may repeat this as often as you like on your turn, as long as your turn has not yet ended (even if you have already used all your action points).
Food — Brewing Potions
You can also use food to brew potions.
The recipes show an overview of the potions, their effects, and the ingredients needed. Your brewing-ring ability shows which of the three recipes are available to you.
Example: Brewing ability 3: you can brew all three potions.
You brew potions as shown on the recipe from 2 matching ingredients. The colored dots above the pictured food serve as a guide. You may brew as many potions as you like, as long as you can give up the required ingredients for them.
Example: Fish and apple together show 2 red dots. With these you brew the red healing potion from recipe 1.
Tip: If you chose Erla, who has brewing ability 1 from the start, you may apply the first recipe (for the healing potion) immediately.
Potions — The Effects
Use potions on your turn to make use of their effects.
Healing: Use this potion and regain all your hit points. Once you have refilled all your hearts on the hero board, give up the potion immediately.
Berserker: Use this potion and turn it over to gain a combat bonus of +2. As long as you are in the Underworld, it stays turned over on the potion rack. Give up a used Berserker potion immediately once your hero leaves the Underworld or no longer needs it.
Teleportation: Use this potion and turn it over. Move your hero to any space in the Upper World or Underworld that your figure could normally stand on. You may also teleport directly onto the treasure. A used (turned-over) teleportation potion blocks your potion rack for that turn. Give it up once your turn has ended.
Mission Cards
Mission cards assign your hero tasks, for which you receive coveted monster teeth, equipment, or an immediate effect as a reward.
The condition in the lower area explains what must be done to complete the mission. If an area is specified, your hero figure must be on that area to carry out the mission there.
If you can complete a mission, show the card to your fellow players and place it face up next to the mission-card draw pile. Use the effect, or take the earned reward (in the example, 1 monster tooth) from the general supply.
At the end of your turn, draw mission cards until you again hold 3 in hand. Once the last card has been drawn from the draw pile, the discarded mission cards are shuffled and placed as the new draw pile.
On your turn you may also complete multiple missions.
Mission Objectives
Porter (12x in the game): Your hero must be standing on the specified area to complete these missions. Give up the pictured tokens (in the example: a +1 sword) and take the reward. It's possible to complete several such missions at the same time. In that case you must give up the specified tokens for each individual mission card.
Thief (4x in the game): You may play this card when your hero is standing on the same area as another hero figure (only possible in the Upper World). You receive 1 small tooth from your opponent's supply. If they have no tooth in their possession, this mission has no effect.
Observer (3x in the game): End your turn on the specified area. These are the only missions where you may choose your own reward. (1 monster tooth or the specified equipment.)
Explorer (2x in the game): When your hero triggers a trap, play this card and take the reward of 2 monster teeth. The trap's effect still occurs (you lose 1 heart and all remaining action points). If you hold both "Explorer" missions in hand, you must find a trap for each mission.
Monster Hunter (6x in the game): Defeat the pictured monster and receive 2 monster teeth. These are the only missions you may also complete during the monster turn (if you are attacked by the corresponding monster and it loses its last heart in that attack).
Companion (6x in the game): If you feed the pictured companion the pictured food, it helps you briefly and once to increase one of your abilities (boots, ring, or sword). Activate the companion by giving up the required food (and discarding the card).
Boots +1: You immediately have +1 action point available (even if your regular action points are already used up).
Ring +1: You may also apply the next-higher recipe (you must still give up the food required for it).
Sword +2: Add +2 to your next combat die roll. (Activate the companion before the die roll.)
The companion's effect only works if the card is played immediately before the extra action, the potion brewing, or the combat, and it is forfeited if unused.
The Treasure Die
At certain locations you may roll the treasure die. Doing so, you can find the following treasures: boots (+1), ring (+1), sword (+1), 1 small monster tooth, or 2 small monster teeth.
The equipment you receive goes into your backpack, or you may place it directly in your inventory. If doing so increases an ability by one point, that effect takes place immediately (so if you receive boots, and had none before, and place them in your inventory immediately, you already have +1 additional action point available this turn).
Monster teeth are added to the monster teeth you have already collected next to your hero board.
Game End
The game ends immediately once a player with monster teeth worth 11/13/16/20 points (depending on player count) reaches the campfire. Each monster tooth is worth the number of victory points shown by the golden notches on it.
Every player's victory points must be visible to all players at all times.
Example: A valuable monster tooth with 3 notches is worth as many victory points as 3 small monster teeth.
Game Objective
- 5 players: 11 victory points
- 4 players: 13 victory points
- 3 players: 16 victory points
- 2 players: 20 victory points
Let's Go
The next double-page spread of the rulebook is needed only once a hero ventures into the Underworld. Open the Travel Guide (back of this rulebook) and wait for the starting player's first action. As soon as an area is explored that you don't yet know, read the matching section aloud.
Who dares to enter the Underworld first and claim the treasure?
A Portal Leads You Into the Underworld
Heroes reach the Underworld through portals that they discover while exploring the Upper World.
As soon as you enter the Underworld, place the monster boss marker between you and the next player on the table. It shows at which point the monsters take their turn. As long as heroes are in the Underworld, it remains in this position.
Do You Dare to Venture In?
You finish your turn in the Underworld and spend your remaining action points. As in the Upper World, you may move your hero figure onto any hexagonal area.
Unlike the Upper World, monsters and heroes block each other's path in the Underworld. Each Underworld area may therefore be occupied by at most one figure.
If you enter the treasure chest or a danger, reveal the tile and remove it from the Underworld map.
Treasure Chest: To determine which rewards you receive, roll the treasure die 3 times.
Danger: Your hero triggers a trap. Give up 1 heart, and your turn ends immediately. If no trap is shown, you may continue your turn as normal.
The 3rd Action: Fight
(For 1 action point, attack another hero figure once.)
If your hero figure is next to a monster or a hero, you may spend action points to fight.
The players involved each roll a combat die and add their combat-sword value to the roll. If your total is higher than your opponent's, the opponent is wounded and loses 1 heart. If the opponent's total is higher, you must give up 1 heart yourself. On a tie, the attacker wins.
Tip: Since several fights can take place in a single turn, you may be wounded more than once. Regenerate your hit points in time with food or healing potions so that you are not defeated.
The Monsters
The three monsters (Ulumu, Zibbler, and Wallrog) represent either a danger or easy prey, depending on the situation. You can read a monster's current state on its monster board.
Defeating a Monster
If a monster must give up its last heart, remove that monster figure from the Underworld board. As a reward you receive the topmost monster tooth from that monster's stack (worth 1 to 5 victory points).
With every tooth it loses, a monster grows stronger: either its combat-sword ability increases, or the monster gains an additional hit point.
If a monster has lost all its teeth before the game ends, it packs its things in frustration and never returns. Put the monster back in the box.
The Monsters Take Their Turn
Players whose hero figures are not in the Underworld command the monsters and play the role of the monster boss. The monsters have 4 action points together, which may be distributed among one or more monsters. The monsters may also move and fight against heroes (but not against other monsters). They may move onto portals and thereby block them, but they may never pass through them. Monsters do not trigger traps and, as long as the treasure remains on its space, may not enter the treasure space.
The players involved agree on how to spend these 4 action points. If they cannot agree, a die roll decides which player controls the monsters (control goes to the player with the highest roll). If all heroes are in the Underworld, you roll each monster turn to determine who controls the monsters.
You Are Defeated
If you lose your last heart, your hero is knocked out. You must either (A) give up tokens, or (B) exchange monster teeth:
A: You lost your last heart to a monster or a trap: Give up all equipment, food, and potions from your hero board to the general supply.
B: You lost your last heart in combat with a hero: Exchange all your monster teeth with the hero who defeated you, provided they have fewer victory points than you.
In both cases your turn ends immediately (if you were defeated on your own turn). Your hero is placed back in the Upper World, on the portal with the lowest number. Fill your hero board with a single heart again, and play on when it is next your turn.
Leaving the Underworld
You have 3 ways to leave the Underworld:
- You are defeated in combat,
- you use a teleportation potion, or
- you leave the way you came, through a portal.
If your hero is standing on a portal, you may spend a further move for 1 action point to leave the Underworld and place your hero figure on the matching portal in the Upper World (provided it has already been explored).
- If another hero figure is still in the Underworld, it continues as before. The monster boss marker stays where it is. Since you are back in the Upper World, you may still help decide what the monsters do during the monster turn.
- If no other hero remains in the Underworld, it is rebuilt. The monster boss marker is set aside to show that the monsters are now inactive.
Rebuilding the Underworld
- Place the treasure chest on its matching area.
- Shuffle the 5 dangers and place them face down on the marked areas.
- Put all 3 monsters back on their nests.
- Place all hearts back on the defeated monsters' boards. Wounded monsters that only lost individual hit points during the last visit to the Underworld remain as they are.
Once a hero enters the Underworld again, place the monster boss marker again as described on the "A Portal Leads You Into the Underworld" page above.
Travel Guide
Campfire
Starting and ending point of the adventure. If a hero enters this area holding the required number of monster teeth, the game ends immediately.
Meadow
Nothing exciting here. Continue your turn as long as you still have action points remaining.
Forest
If a hero explores a forest:
…their turn ends immediately.
…they roll once with the treasure die and take the reward. No treasures can be found on already-explored forest areas; instead the turn continues normally.
Food Sources
On these areas you collect as much food as you can carry.
Tip: Because you may use collected food immediately (to brew potions / heal heroes), you can regenerate all your hearts on these spaces at once.
Portal
The five portals are connections to the Underworld and count as adjacent to the matching Underworld portal. This means heroes can pass through portals with the "Move" action (spending 1 action point) and move their figure to the corresponding portal on the Underworld board.
…there are five portals.
Laboratory
End your turn here to improve the value of any one piece of equipment by +1.
Example: A +1 sword becomes a +2 sword, which becomes a +3 sword.
Blacksmith
Here you may give up two pieces of equipment of the same type to receive an improved version of that same equipment. The value of the new equipment may not be higher than the sum of the equipment given up, but may be lower. This may be done multiple times in a single turn.
Examples:
- Boots (+1) + Boots (+1) = Boots (+2)
- Sword (+1) + Sword (+2) = Sword (+3)
- Ring (+2) + Ring (+2) = Ring (+3)
Trader
Here you may exchange different equipment of equal value.
Note: Exchanged equipment may be used immediately.
Example: A hero owns a powerful sword (+3) and no boots. With their last action point they land on the trader area and can exchange the sword for boots, immediately gaining 3 more action points. Or: they exchange the sword for a ring (+3), with which they can immediately brew powerful potions…
However: Only 1 exchange is possible at the trader per turn.